
Subhead
Why the Earliest Sunset of the Year is NOT on the Solstice
ADVERTISEMENT
Comments
Add a Comment
ADVERTISEMENT

If you’ve ever wanted to see the Milky Way galaxy from Earth, late September through October is your window of opportunity! Right now, we’re aimed toward the most concentrated part of the Milky Way. Learn more to see the kind of inspirational, star-filled panorama experienced in planetariums!
If you live – or can visit friends – in a rural location away from city lights, October can be very special. It’s when amazing things hover straight overhead. Spread a blanket or set up a deck chair and gaze up anytime after dinner, say around 8 PM.
Lunar brightness won’t be around before midnight after October’s first week, and the sky will be totally moonless mid-month, making for a perfect 8 PM sky-session. Star-filled planetarium conditions will linger until the approach of the Hunter’s Moon near the end of the month.
So what’s straight up?
It’s the Milky Way, which splits the sky from north to south and crosses the heavens overhead! A century ago, it was widely believed to be the entire cosmos. Now we know that our Milky Way galaxy is just one of hundreds of billions that make up the universe.
Of course, the Milky Way is our home galaxy. It a “barred spiral” type of galaxy with giant spiral arms that make it look like a spinning pinwheel. It includes our solar system and Sun, which is located on a smaller spiral arm, about half the distance from the center of the galaxy to its outer edges. While we on Earth orbit the Sun, our solar system’s one-and-only star orbits the center of the Milky Way!
Why is it called the Milky Way? This describes our galaxy’s appearance from planet Earth: a hazy, milky band of light stretching across the night sky. No one knows where the name came from, though the ancient Greeks used the word “Galactos” to refer to milk; there is a Greek myth about the goddess Hera who sprayed milk across the sky. Ovid, a Roman poet, later wrote about the Milky Way in “The Metamorphoses” in 8 A.D.

It’s estimated that there are several billion stars in the Milky Way Galaxy. All the stars you see from Earth are part of our home galaxy. However, how many stars you can see from Earth depends on the time of year!
Right now, in late September through October, we’re facing the highest concentration of stars. The Milky Way neatly splits the sky and passes directly overhead. The Moon is absent, so rural places away from city lights provide perfectly dark conditions, while early fall’s ‘typical crisp, dry air affords the kind of transparency that allows the countless subtle details of the Milky Way to emerge in all its glory.
It’s a far cry from the spring, when the Milky Way is almost coincident with the horizon and invisible. Then, the sky offers only a smattering of stars to see. Ever noticed this?
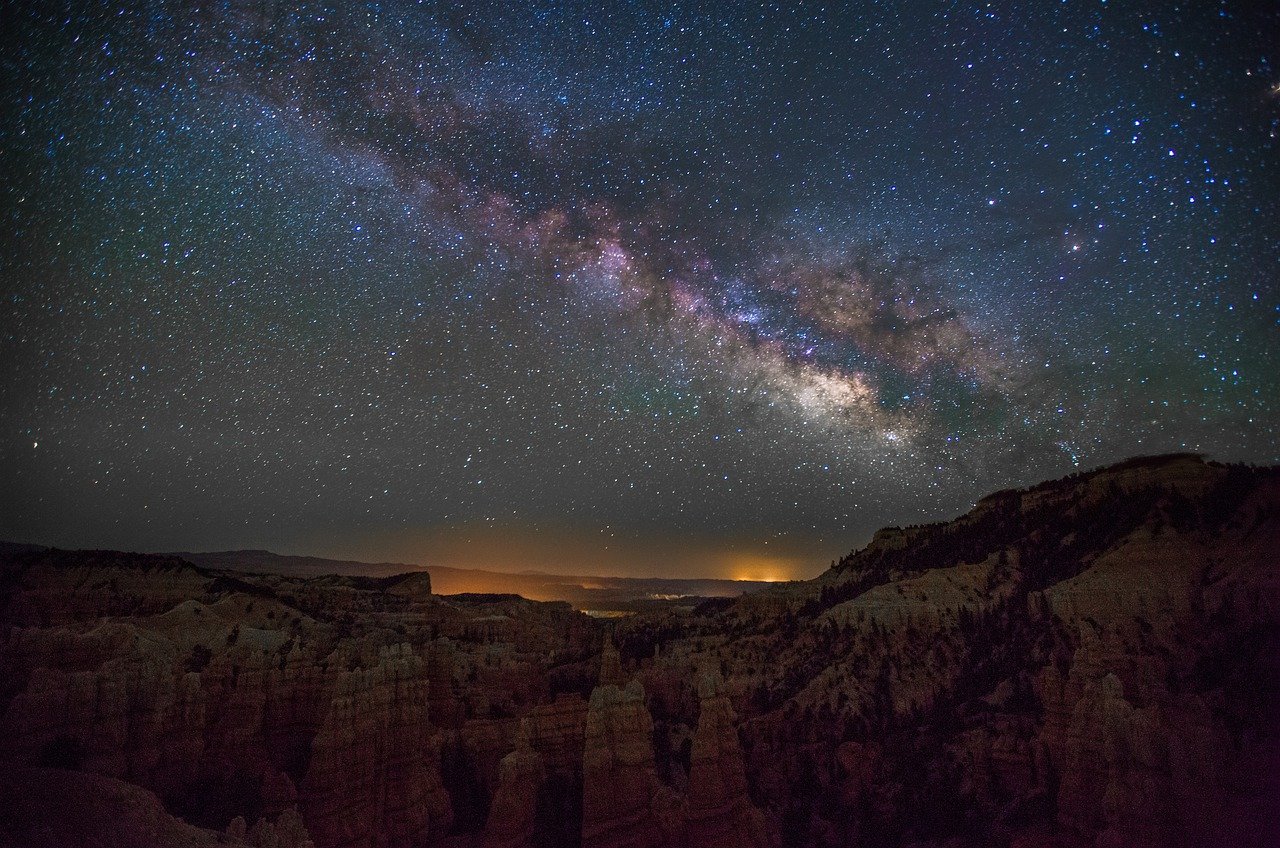
From September to October: The Milky Way is visible in the evening.
Look straight up! We’re aimed toward the most concentrated part of the Milky Way Galaxy.
When you do get to see the Milky Way on a dark, moonless night and in its full splendor, it’s very hard not to be in complete awe. It’s humbling and, for many, spiritual. It feels like stepping back to an ancient cosmos before lights existed.
Lately, wide-angle photos of nighttime landscapes with the Milky Way filling the sky keep appearing on the internet. It’s as if starry glow of our galaxy’s edgewise portion has suddenly been discovered after a long absence. In truth, long exposures made with expensive equipment, and taken in areas with an inspirational foreground like from Arches National Park, are indeed gorgeous.
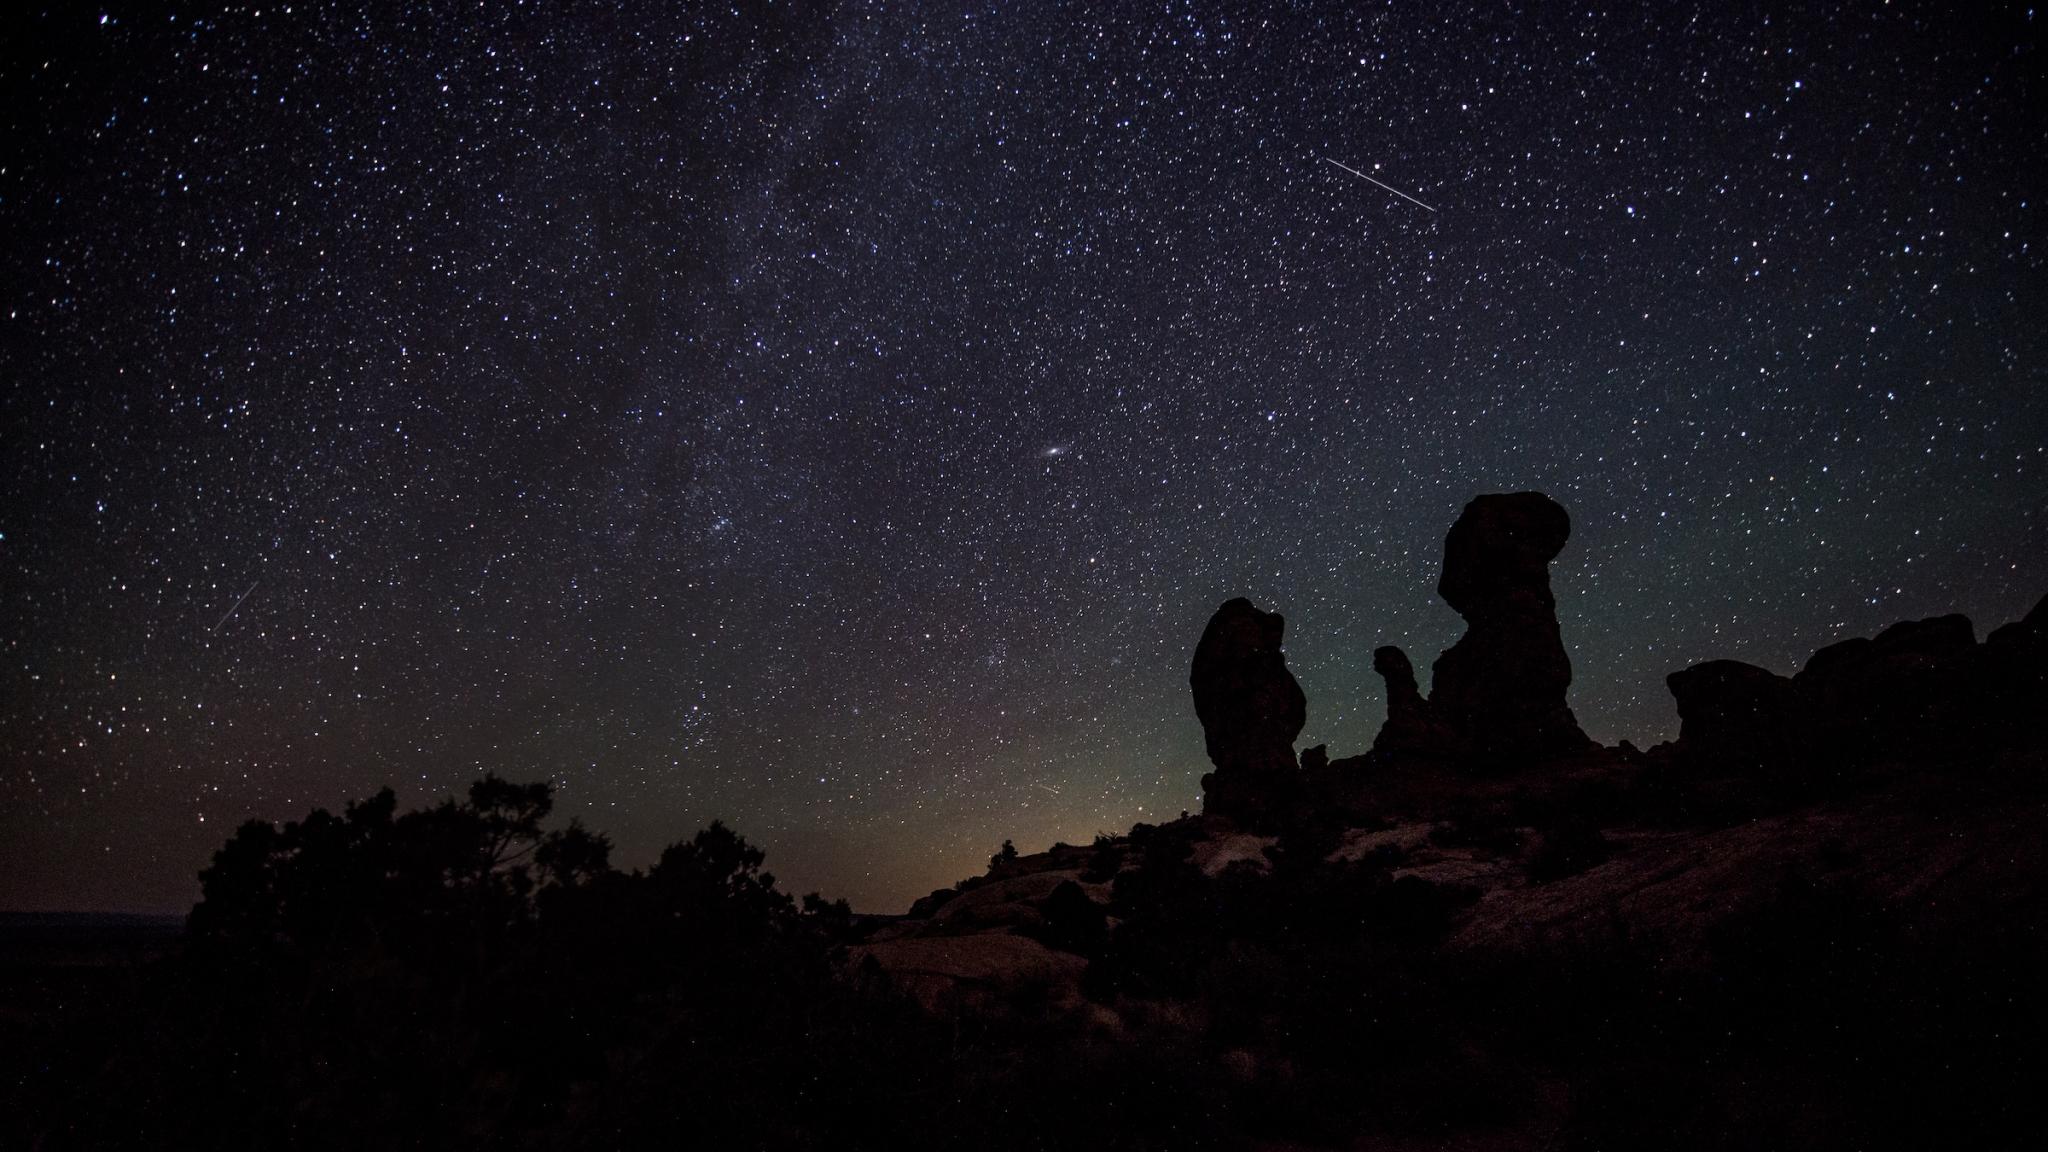
Image: Arches National Park. Credit: NPS/Chris Wonderly
However, some of us, like myself, whose house is in a state park where the nearest village has a population of 153, can get the experience by merely turning off the house lights and stepping into the backyard.
And now is the best time to do that.
In terms of place, you simply need dark skies! Drive out to the country one evening or on the weekend. With most of the world now living in cities, the full impact of the Milky Way often requires overnight camping at some very rural site. Usually, driving inland away from a city is your best bet. If you’re willing to travel, check out the best “Dark Sky” sites.
From a dark location, it takes about 20 minutes for human eyes to become fully sensitive to faint light. Away from the lights of town, lie on a blanket or lounge chair (reclining helps ease neck strain). You will witness the combined light of uncountable stars populating the dense, central hub of the Galaxy. These suns are so concentrated that you see billowing “clouds” of stars!
TIP: When you view the Milky Way, try looking through a camera which can accumulate light that the naked eye can not. Take a look at what the naked eye sees compared to the camera.
Looking toward the dark skies at the right time of year, the naked human eye should see a whitish glow stretching in a huge arc. This band has been visible in the heavens since Earth first formed. This glowing line of light is the center of our galaxy, as seen from one of its spiral arms where we are located. It’s because our eyes cannot distinguish the individual stars that make up the glowing band of light that it all appears “milky.”
Take fifteen minutes to let your eyes adjust to the darkness. Then explore the creamy glow of the Milky Way, punctuated by patches of fuzz that binoculars show to be star clusters and gas clouds in our Galaxy’s spiral arms.
Here, knowing the stars or constellations is as unnecessary as naming each trout in a stream. But if you’d like to name something, well, that brightest star overhead at nightfall is Vega. (But say and think “VEE-ga,” not “VAY-ga.”)
Buried in that glow straight up at 8 PM hovers Deneb. It’s not as brilliant as Vega, which is very high though not perfectly straight up.
But Deneb is special. It’s one of our galaxy’s most luminous stars, shining with the light of 60,000 Suns! Only its vast distance of 1,500 light-years keeps it from lighting up the countryside like a street lamp. And it happens to mark the direction toward which our entire solar system is zooming. (Read my post, “Where in Space Are We Headed?”)
Our own Sun, taking us along for the ride, will reach that area around Vega and Deneb, that straight overhead territory, in about a million years. But since those stars are moving away from us like horses ahead of us on a carousel, we’ll never actually catch them.
And low in the south where the Milky Way has a brightening and a bulge, that’s the center of our galaxy. It’s the amazing place around which every star, including our own Sun and its retinue of planets, revolve once every 225 million years.
To the ancient Peruvians and Mayans, the Milky Way was the center of the universe. And even in our Space Telescope age, it’s still the heart of ours—our resident galaxy, observed not from the outside but from our worms’-eye viewpoint within its pinwheel motif.
This video by the European Southern Observatory (ESO) starts with a broad view of the Milky Way. We then dive into the dusty central region to take a much closer look. There lurks a 4-million solar mass black hole, surrounded by a swarm of stars orbiting rapidly. We first see the stars in motion, thanks to 26 years of data from ESO’s telescopes. We then see an even closer view of one of the stars, known as S2, passing very close to the black hole in May 2018. The final part shows a simulation of the motions of the stars.
What else is up this month? See the October Night Sky Guide.
ADVERTISEMENT

This holiday once tied to farming and astronomy! It marked the end of the harvest season and the beginning of winter, or “darker half” of the year. Yes, Halloween has quite an ancient & “hallowed” history! Learn the origins of Halloween and how we celebrate this day.
Halloween, traditionally called “All Hallows’ Eve,” is celebrated on the evening before the Christian holy day of All Hallows’ Day or All Saints Day (November 1). Therefore, Halloween is always celebrated on October 31.
| Year | Day of Halloween |
|---|---|
| 2024 | Thursday, October 31 |
| 2025 | Friday, October 31 |
| 2026 | Saturday, October 31 |
| 2027 | Sunday, October 31 |
In England, saints or holy people were called “hallowed,” hence the name “All Hallows’ Day.” The evening—or “e’en”—before the feast became popularly known as “All Hallows’ Eve,” or, even shorter, “Hallowe’en.”

The origin of Halloween can be traced to an ancient festival called Samhain (pronounced sow-in, which rhymes with cow-in), meaning Summer’s End. This was a sacred festival celebrated by the ancient Celts and Druids in the British Isles. It marked the end of the harvest and the start of a new year!
The ancient Celts believed that the veil between the worlds of the living and the dead was at its thinnest during Samhain. This had positive benefits, as it was an ideal time to consider the dead, communicate with the deceased, and also to divine the future. Learn more about this ancient calendar’s ”Quarter Days and Cross-Quarter Days” and why we celebrate holidays the way we do!
Since Samhain was the death-night of the old year, it came to be associated with ghosts and graveyards. After midnight, the ghosts are said to go back to rest. (That day, November 1, later became All Saints’ Day.)
Following the Roman Empire’s rule over Celt-occupied lands in the 1st century A.D., the Romans incorporated many of the Celtic traditions, including Samhain, with their own. Eight hundred years later, the Roman Catholic Church further modified Samhain, designating November 1 as All Saints’ Day to honor all saints from Christian history.
This day was formerly known as All Hallows’ Day or Allhallowmas, hallow meaning to sanctify or make holy. The evening before October 31, is known as All Hallows’ Eve—or, more commonly, Halloween!
If All Saints brings out winter,
St. Martin brings out Indian summer.

Many of the customs and practices of Halloween are innocent fun, though some deal with reminders of death and concepts of good and evil.
Halloween was once known as “Nutcrack Night” in England—a time when the family gathered around the hearth to enjoy cider and nuts and apples.
The Irish used hollowed-out, candlelit turnips carved with a demon’s face to frighten away spirits. The name “Jack-O’-Lantern” comes from an Irish folktale about a man named Stingy Jack who invited the Devil to have a drink with him but wouldn’t pay. Jack tricked the devil and made a deal in which the devil couldn’t claim his soul but God didn’t want Jack in heaven either. Now Jack’s stuck roaming the Earth as an evil spirit with his lantern shining the way.
The Irish would carve scary faces into turnips or potatoes and place them near doors or windows during Halloween Eve to frighten away Stingy Jack and evil spirits. When Irish immigrants in the 1840s found few turnips in the United States, they used the more plentiful pumpkins instead. See more about the origins of popular Halloween traditions—from witches on broomsticks to bobbing apples.
Here are simply ways that you can celebrate Halloween.
Carving pumpkins is North America’s most popular custom. Every year, children enjoy scooping out the insides of the pumpkin with a spoon and carving their pumpkin with a little help from parents (often, a lot of help if they’re young!). See how to keep your carved pumpkin from rotting and make it last longer!

As carved pumpkins only last 3 to 7 days without rotting, it can be fun to paint your pumpkins, too. This is fun for all ages but especially good for schools, groups, and offices who want to have an early pumpkin decorating contest. See who comes up with the best design! Give awards for most creative, funny, and artistic pumpkins.


Credit: Biggs-Hansen Orthdontist staff
Of course, once you scoop out the pumpkin insides, you need to roast those pumpkin seeds! Careful, these salty and crispy snacks go fast! See our recipe for Roasted Pumpkin Seeds.
If you don’t like to eat seeds, you can also save those pumpkin seeds to make a colorful pumpkin seed necklace.

Everyone loves a chance to dress up in Halloween costumes. The traditional costumes are spooky or Halloween-related such as witches, zombies, ghosts, and vampires. However, in the United States, the costumes get silly, too, from giant bananas to superhero characters to whatever your imagination conjures!
You certainly do not need to buy a costume; the tradition was to make your costume from home. Toilet paper is all you need to become a mummy. An old white sheet can become a ghost. Add some facepaint to create a vampire. See ideas for Halloween Makeup and Fake Blood From the Pantry.

There are many fun Halloween activities and crafts. Here are some of our favorites from years past:
Discover our best Halloween crafts here!

Of course, you’ve all heard the saying, “Trick or Treat?” The “treats” are much preferred to the “tricks.” Here are some classic favorites before the days of packaged candy:
Discover our best Halloween recipes here!
Here are six more fun and family-friendly ideas for the young and young at heart!

If you have time, wrap the Tootsie Roll Lollipops in tissue and turn them into ghosts!

Wake up your walking dead with these Halloween poems! They are perfect to read in the evening or to add to a homemade card.
From “Spirits of the Dead”
By Edgar Allan Poe
“Be silent in that solitude,
Which is not loneliness—for then
The spirits of the dead, who stood
In life before thee, are again
In death around thee, and their will
Shall overshadow thee; be still.”
From “Song of the Witches” (Macbeth)
By William Shakespeare
“Double, double toil and trouble;
Fire burn and caldron bubble.
Fillet of a fenny snake,
In the caldron boil and bake;
Eye of newt and toe of frog,
Wool of bat and tongue of dog,
Adder’s fork and blind-worm’s sting,
Lizard’s leg and howlet’s wing,
For a charm of powerful trouble,
Like a hell-broth boil and bubble.”
From “All Soul’s Night, 1917”
by Hortense King Flexner
“You heap the logs and try to fill
The little room with words and cheer,
But silent feet are on the hill,
Across the window veiled eyes peer.
The hosts of lovers, young in death,
Go seeking down the world to-night,
Remembering faces, warmth and breath—
And they shall seek till it is light.
Then let the white-flaked logs burn low,
Lest those who drift before the storm
See gladness on our hearth and know
There is no flame can make them warm.”
From “Theme in Yellow”
By Carl Sandburg
“I spot the hills
With yellow balls in autumn
I light the prairie cornfields
Orange and tawny gold clusters
And I am called pumpkins.
On the last of October
When dusk is fallen
Children join hands
And circle round me
Singing ghost songs
And love to the harvest moon;
I am a jack-o’-lantern
With terrible teeth
And the children know I am fooling.”
From “Hallowe’en”
By Joel Benton
“Pixie, kobold, elf, and sprite
All are on their rounds to-night,—
In the wan moon’s silver ray
Thrives their helter-skelter play.
Don’t we all, of long ago
By the ruddy fireplace glow,
In the kitchen and the hall,
Those queer, coof-like pranks recall?
Every shadows were they then—
But to-night they come again;
Were we once more but sixteen
Precious would be Hallowe’en.”
What’s your favorite Halloween tradition? Let us know in the comments!
ADVERTISEMENT

ADVERTISEMENT

When is Hanukkah? In 2023, this eight-day “festival of lights” begins on Thursday, December 7, at sundown. Learn all about Hanukkah dates, customs such as the nightly menorah lighting, and special foods.
Hanukkah (also spelled “Chanukah”) is an eight-day winter “festival of lights,” which begins each year on the 25th day of the Jewish calendar month of Kislev.
Because the Hebrew calendar is based on the lunar cycle, the dates of Jewish holidays according to the Gregorian calendar change yearly. For this reason, the beginning of Hanukkah can range from late November to late December.
In short, Hanukkah commemorates the rededication of the Temple in Jerusalem after a group of Jewish warriors defeated the occupying Greek armies. The festival celebrates the triumph of light over darkness and spirituality over materiality. Read on to learn more about the history of Hanukkah.
In 2023, Hanukkah begins at sundown on Thursday, December 7, and continues through Friday, December 15. The first candle is lit on the Chanukiah (menorah) on the first night of Hanukkah.
Note: Hanukkah begins and ends at sundown on the dates listed below. See Sunrise and Sunset Times for your area.
| Year | Hanukkah Begins | Hanukkah Ends |
|---|---|---|
| 2023 | Thursday, December 7 | Friday, December 15 |
| 2024 | Wednesday, December 25 | Thursday, January 2, 2025 |
| 2025 | Sunday, December 14 | Monday, December 22 |
| 2026 | Friday, December 4 | Saturday, December 12 |
This festival commemorates events in Judea more than 2,000 years ago when the Syrian king Antiochus ordered the Jews to abandon the Torah and publicly worship the Greek gods.
This act provoked a rebellion led by Judas Maccabeus, climaxed by the retaking of the Temple in Jerusalem, which the Syrians had desecrated. The army of Jews won despite their small numbers.
In an eight-day celebration, the “Maccabees” (as the rebels came to be known) cleansed and rededicated the Temple.
According to the Talmud, there was only enough consecrated oil to re-light the candelabra for one day, yet, miraculously, it remained lit for eight days.
The word chanukah means “inauguration” or “dedication.” After the rebellion, the Temple was in ruin, including the altar. The Maccabees buried the stones of the altar and built a new one. Thus, Hanukkah celebrates the rededication of the Holy Temple and the altar.
How do you pronounce “Hanukkah”? The Hebrew word is actually pronounced with a guttural “kh” sound: kha-nu-kah, not tcha-new-kah.
The central feature of the observance is the nightly lighting of the Chanukiah or menorah, an eight-branched candelabra with a place for a ninth candle, the shammes, used to light the others.
One candle is lit on the first night of Hanukkah, and an additional candle is lit on each successive night until, on the eighth night, the Chanukiah is fully illuminated.
Hanukkah is also called the Feast of Lights or Festival of Lights due to the importance of the candle-lighting.

Traditional Hanukkah recipes include foods fried in oil to commemorate the original miracle of the oil. Dairy products are also popular during Hanukkah.
Some of the most popular foods include latkes (fried potato pancakes), applesauce, sufganiyot (deep-fried or jelly doughnuts), and rugelach pastries.
Many Hanukkah meals are eaten communally to bring friends and family together, especially if they need to reconcile.

Consumer gifts are not a custom; the menorah’s candles are meant to recall the miracle—and focus on this religious purpose. Traditionally, money was given to charity, with more each day as the candles were lit. This originated with the need for even the poor to have money for candles so they could go door-to-door without any shame.
It is also customary on Hanukkah to give money (called Hanukkah gelt) to children and to play games with the dreidel—a four-sided spinning top. The Hebrew letters printed on the sides of a dreidel are an acronym for the phrase Nes Gadol Hayah Sham, “a great miracle happened there”—a reference to the oil miracle.
Do you celebrate Hanukkah? If you do, please share your family’s traditions below!
Learn about other significant Jewish holidays, such as Rosh Hashanah, Yom Kippur, and Passover.
ADVERTISEMENT

Before you pour salt on your driveways to melt snow and ice, consider its impact on your plants, pets, pavement, and water quality. Explore seven less harmful ways to melt ice—as well as ways to use less salt!
Rock salt (sodium chloride) has been the conventional choice to melt ice on driveways and sidewalks as salt has a lower freezing point than water. Rock salt is effective to approximately 12°F but can damage soils, kill plants and grass, and cause driveway and car problems. It’s also toxic to animals when ingested. Plus, if you care about keeping local waters pristine, salt causes problems with the over-salinization of rivers and lakes.

The University of Wisconsin lists these signs of salt damage to be on the lookout for:
There’s no “perfect” ice-melt solution, but here are some solutions that are less damaging than 100% rock salt.

If you are running out the door or have guests coming and you can’t wait for ice to melt, toss kitty litter or sand or sawdust by hand over the ice! Make sure it’s plain non-clumping clay kitty litter (save the clumping perfumed stuff for inside the house). In general, it’s always a good idea to combine a de-icer with an abrasive to keep folks from slipping.
Learn anything new today? Whatever de-icer and abrasive you choose to use, keep the safety of people, pets, property and the planet in mind!
ADVERTISEMENT

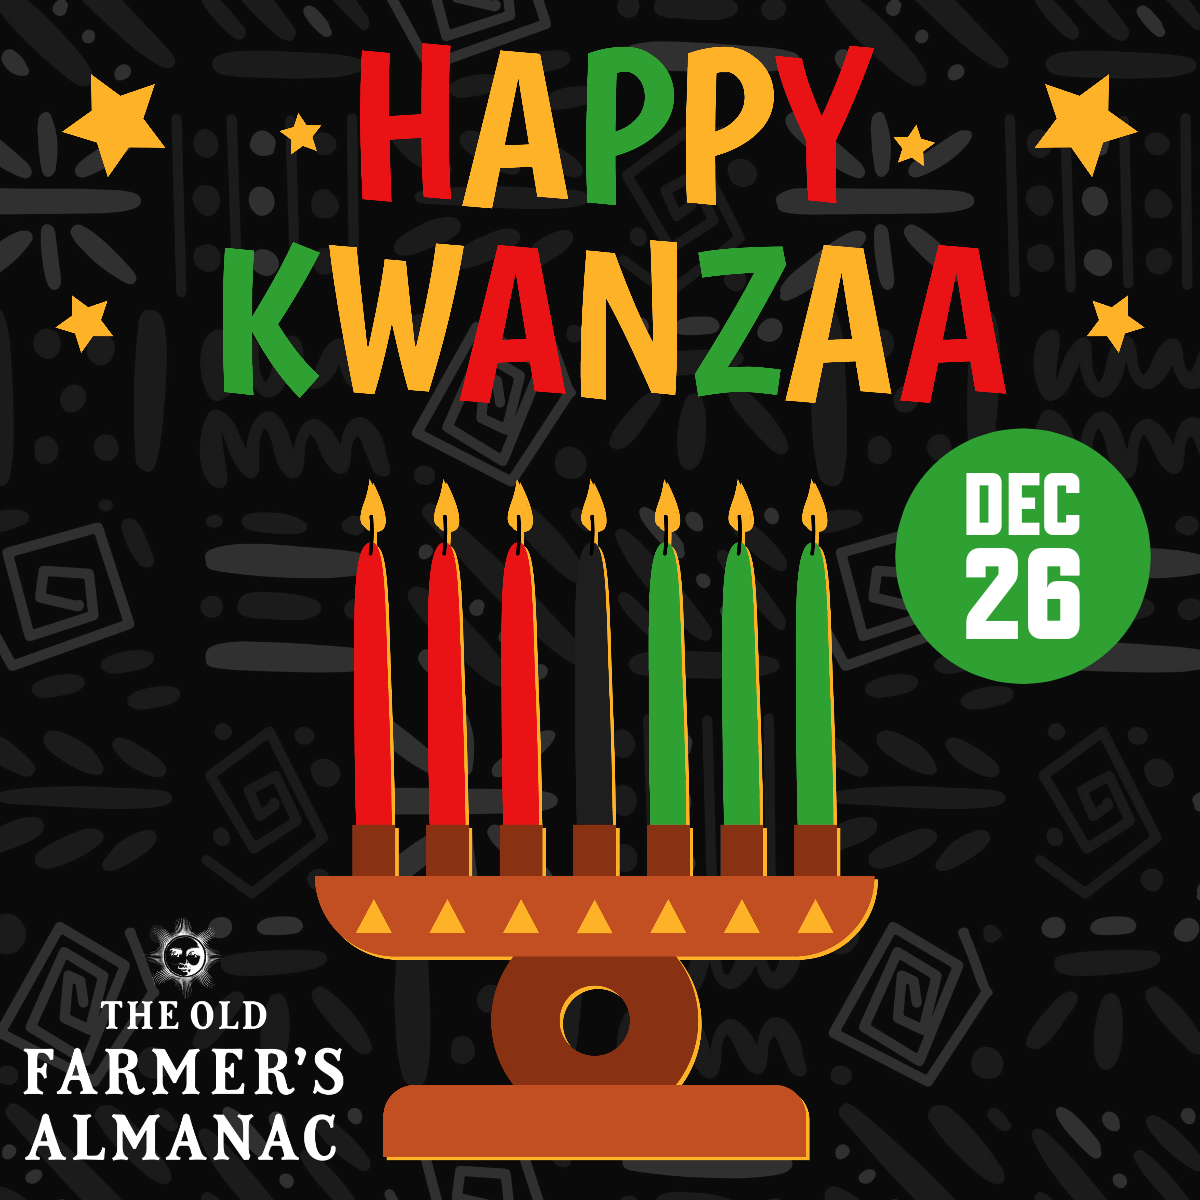
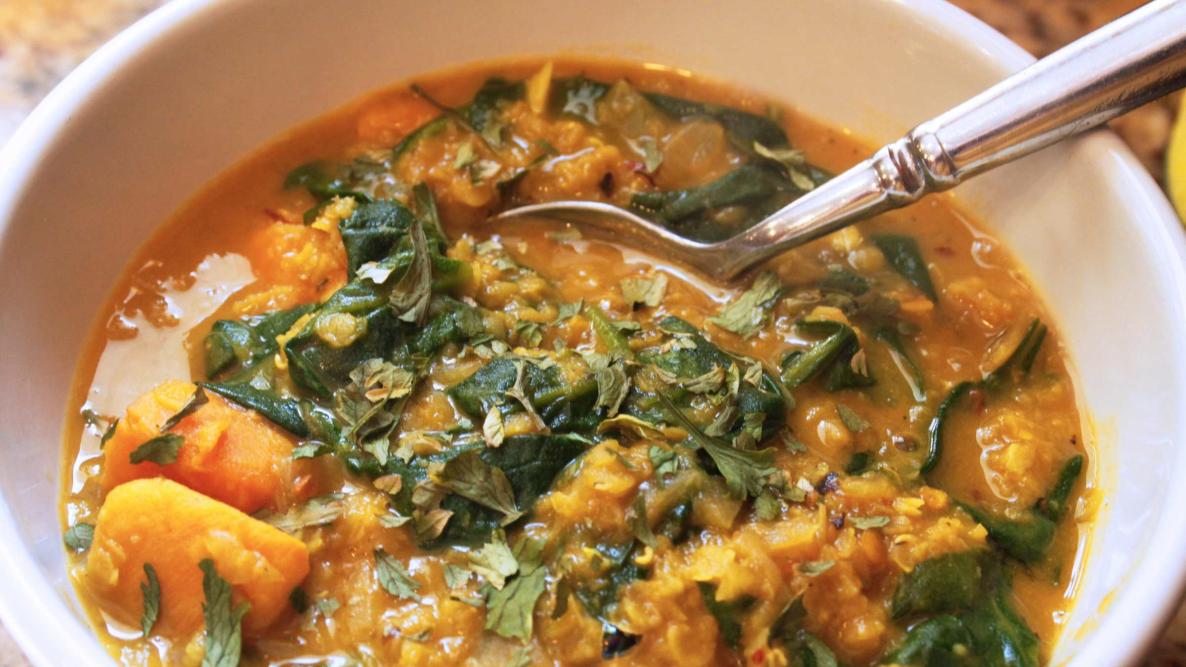
Kwanzaa—a celebration of family, community, and culture—begins on Thursday, December 26. Learn about the traditions of Kwanzaa, and try our delicious recipe for curred Kwanzaa stew!
Kwanzaa is a week-long holiday celebration of African-American culture held annually from December 26 to January 1, culminating in a communal feast.
This is not a religious holiday but a cultural celebration based on African harvest festival traditions and is a way to celebrate African heritage and legacy, much like other cultural celebrations.
Fundamentally, Kwanzaa celebrates family, culture, community, and the harvest during the dark days of winter. The word “Kwanzaa” itself comes from the Kiswahili phrase matunda ya kwanza, meaning “first fruits [of the harvest].”
The seven-day festival focuses on seven essential principles, known as the Nguzo Saba, each represented by one day of the seven-day celebration. These principles are:
Despite the fact that it is often thought of as a substitute for Christmas or Hanukkah, Kwanzaa is not a religious holiday, and families who celebrate Kwanzaa often celebrate it in addition to Christmas, Hanukkah, or another religious holiday.

You may be surprised to learn that the modern holiday of Kwanzaa is a relatively new creation, though it has its roots in traditions that go back generations.
First celebrated in 1966, Kwanzaa is the brainchild of Dr. Maulana Karenga—an African-American author, professor, and activist—to nurture the community and cultural spirit of African Americans.
While created with the traditional African harvest festivals in mind, Kwanzaa itself is uniquely North American, being celebrated mainly in the United States, Canada, and the Caribbean.
While the holiday is focused on the African-American community, all people are invited to celebrate and learn about the values of Kwanzaa and African-American culture.
Kwanzaa is an annual holiday that begins on December 26 and lasts through January 1.
| Year | First Day of Kwanzaa | Last Day of Kwanzaa |
|---|---|---|
| 2024 | Thursday, December 26 | Wednesday, January 1, 2025 |
| 2025 | Friday, December 26 | Thursday, January 1, 2026 |
| 2026 | Saturday, December 26 | Friday, January 1, 2027 |
| 2027 | Sunday, December 26 | Saturday, January 1, 2028 |
During Kwanzaa, people traditionally decorate their homes with straw mats, ears of corn, and a candleholder called a kinara, which is adorned with red, green, and black candles.
A candle is lit for each day of Kwanzaa, and celebrants may also exchange gifts.

The entire celebration is capped with a feast on December 31, which is usually held at a community center and features traditional music and dancing.
Do you plan to celebrate with a feast? Perhaps try including this curried Kwanzaa stew.
The Kiswahili phrase Habari gani—meaning “What is the news?”—is used as a greeting among family and friends. (The response to this phrase should be whichever of the seven principles is associated with the current day.)
If you observe Kwanzaa, please share your traditions below!
ADVERTISEMENT

Looking for a meal that says “celebration”? Look no further than Timpano. Learn all about this impressive Italian baked pasta dish—plus five tips to simplify the recipe for a fabulous feast.
Timpano is a baked pasta dish with a huge round dome of crust stuffed with delicious ingredients—pasta, meatballs, cheeses, salamis, and sauce. The word timpano means “drum” in Italian.
When my Italian-American grandparents, aunts, and uncles visited from out of town for a special family event, I wanted to think of a dish worthy of the occasion.
If you’ve ever seen the “foodie” movie Big Night, you’ll be familiar with Timpano. Take a look at the movie clip here.

Timpano is more of a recipe “activity” than a “let’s get dinner on the table” meal. It’s one crazy Italian dish that is meant for a gathering—and it really helps if you have some guests in the kitchen.
That said, the ingredients are not out of the ordinary: pasta, cheese, meatballs, eggs, salami, and so forth.
This recipe makes 16 servings using a 6-quart enamelware bowl. Yes, you may have leftovers!
You may make or buy your dough. The dough for timpano is rolled out like pizza, the diameter of which is determined by the pan you are baking it in. Add together the diameter of the bottom of the pan, the diameter of the top of the pan, and twice the height of the pan. The total will equal the approximate diameter needed. The dough may be kneaded in advance and set aside or refrigerated overnight. Return it to room temperature before rolling it out. Place the rolled dough in the timpano baking pan while the pasta cooks.
Ingredients:
Dough
4 cups all-purpose flour
4 large eggs
1 teaspoon kosher salt
3 tablespoons olive oil
1/2 cup water
Filling
2 cups 1/4 x 1/2-inch Genoa salami pieces
2 cups 1/4 x 1/2-inch sharp provolone cheese cubes
12 hard-boiled eggs, shelled, quartered lengthwise, and each quarter cut in half to create chunks
2 cups little meatballs: you can buy small-size meatballs or follow recipe below*
8 cups of Ragu sauce: You can buy or make homemade.
3 pounds ziti, cooked very al dente (about half the time recommended on the package) and drained (18 cups cooked)
2 tablespoons olive oil
2/3 cup finely grated pecorino Romano cheese
4 large eggs, beaten
*Meatballs
1 pound ground beef chunk
2 tablespoons chopped fresh parsley leaves
1 large egg, lightly beaten
5 tablespoons finely grated pecorino Romano cheese
1 cup fine bread crumbs
2 cloves garlic, finely chopped
Kosher salt and freshly ground black pepper
2 tablespoons olive oil
Combine all the meatball ingredients. In a large nonstick frying pan, warm olive oil. Roll the meat mixture into very small balls, using 1/2 tablespoon of meat for each. Then brown meatballs on all sides, about 8 minutes. If they stick to the pan, they are not ready. Set aside.
Directions:
No matter what recipe you use, there are a few tips for making a good Timpano, which I’ll share below. Plus, here are a couple of tricks on shortening the process, which won’t affect the result.
1. Use the right pan or bowl: It is very important to have the right-sized bowl to create that dome shape. Traditionally, Timpano is baked in a round enamelware bowl (literally, a wash basin), evenly distributing the heat. This type of bowl is wider on top than it is on the bottom. Here is an example of an enamelware bowl. Any enameled Dutch oven might be fine if it’s deep enough.
I borrowed my enamel bowl from a neighbor. The recipe calls for a 6-quart bowl to get that drum shape. Unfortunately, the closest size I could find was 4 quarts (yes, I had a lot of leftover ingredients!). You can see from my photos that my Tmpano is not very high (that said, it turned out of the bowl perfectly!).
Be sure to grease the bowl heavily with extra-virgin olive oil and butter, as the recipe states!
.jpg)
2. Call your pizza parlor: The trickiest part is to figure out the correct diameter needed for the dough (crust). The crust must hang over the pan’s edge and then completely over the filling so it’s all sealed in.
Making the dough yourself is possible, but rolling it into a consistently 1/8-inch thick sheet requires significant effort. I have a fantastic brick oven pizza parlor in town, and asked the owner if I could buy his dough for Timpano, and his guys helped me roll it out! Call your pizza parlor a few days in advance.
Most pizza parlors make a traditional 24-inch round, so you will need to ask them if they need to roll it out larger based on the size of your pan (see above directions). I was able to stretch the pizza round for my 4-quart bowl.

3. Prepare ingredients in advance: You can prep most everything in advance if you wish. I followed a tip to make the sauce, penne, and meatballs the night before and let them all sit together. They meld nicely and make a nice crust on the meatballs.
At my pizza parlor, I was told, “Next time, just ask us for our homemade sauce, and I’ll get the meatballs for you, too.” Two more time savers if you need them!
Also, I am more conservative when adding the sauce to the Timpano. I advise adding just enough so the pasta seems cohesive, not to make it wet or it will collapse. I added the extra sauce later on the side when serving the slices.

4. Create an assembly line: Before filling the Timpano, set out individual bowls with ALL of your chopped cheese, salami, and eggs (we omitted yolks due to a no-yolk guest), plus your pasta and sauce. I mean it! You must have everything ready to go pronto on the counter because you need to layer in all the ingredients before the dough dries out. All ingredients should be at room temperature.

As you layer the ingredients (not too thick!), feel free to shake the pan so that they settle; you want a firm Timpano. In the picture below, my husband is pressing down to make it sturdier and to make more room! Fill up the pan until the ingredients are even with the edge. Then, cover it with dough and seal it with a little olive oil.


5. Let it sit for AT LEAST 30 minutes after baking, maybe more, so the Timpano will stay together better. This is CRITICAL. Don’t lose your Timpano! Here is what you do:


Cut the Timpano into wedges and serve with a bit of red sauce. A big green salad and a nice bottle of red wine are all you need to add since Timpano is a meal unto itself. You’ll be stuffed!
.jpg)

The result? Bellissimo! The entire family was satiated—and is still talking about the meal.
Dessert? I kept it very light for those who like to end on a sweet note—biscotti, a scoop of gelato, and vin santo (dessert wine).

How does it look to you? And do you have your own “big” night dinner ideas? I would love to hear about your experiences with a new food adventure.
Buon appetito!
ADVERTISEMENT

The Landsdowne portrait of George Washington by Gilbert Stuart (National Portrait Gallery, Smithsonian Institution).
Hold on to your socks with this homemade old-school eggnog recipe from Mount Vernon, George Washington’s estate. There’s a good story to go with it, too.
Eggnog was certainly popular during colonial times. Brought over from Britain (and going back to medieval times), eggnog was a special-occasion drink due to its ingredients (milk, eggs, alcohol), which were quite expensive at the time.
According to kitchen records, George Washington served an eggnog-like drink loaded with alcohol to visitors at Mount Vernon. Below is his recipe, supposably penned in his own hand. We added ingredient amounts since folks tended to estimate back then.
“One-quart cream, one-quart milk, one dozen tablespoons sugar, one-pint brandy, ½ pint rye whiskey, ½ pint Jamaica rum, ¼ pint sherry – mix liquor first, then separate yolks and whites of 12 eggs, add sugar to beaten yolks, mix well.
Add milk and cream, slowly beating. Beat whites of eggs until stiff and fold slowly into mixture. Let set in cool place for several days. Taste frequently.”
So, is this Washington’s recipe in his own hand? Although widely circulated as being true, it isn’t very likely. We contacted Mount Vernon’s librarians, who said no eggnog recipe has been definitively linked to Washington. It did not come from George or Martha Washington’s papers. It was not in Martha’s cookbook (which she inherited from her first marriage), nor was it provided in her personal copy of The Art of Cookery by Hannah Glasse, the popular English cookbook in America at the time.
The recipe above is indeed a true vintage recipe. However, it’s believed to come from the 19th century, whereas George Washington lived in the 18th century.
We do have another homemade eggnog recipe kindly shared by Mount Vernon, as eggnog was indeed a popular drink in the latter half of the 18th century.
We’ve slightly adapted this recipe to make the ingredient amounts clear. We recommend preparing the mixture a day in advance so it’s well chilled. It’s well worth it! The grocery store stuff isn’t even the same animal.
Ingredients:
*Note: You can adjust the amount of alcohol in this recipe or omit it altogether. Or, use a different alcohol on hand; common choices include brandy, rum, bourbon, or whisky. One eggnog recipe we enjoy (from the 1950s) uses “1 cup bourbon and 1 cup Cognac” instead of the one-fifth bourbon.
Directions:

ADVERTISEMENT

Reindeer are magical creatures that can see in the dark. And, yes, Santa’s helpers are female (barring Rudolph). Learn more about Santa’s Leading Ladies—and five amazing reasons why reindeer are perfect for the job!
Reindeer thrive in the North Pole, where Santa lives! And that’s not all …
Here’s a fun fact from ye olde Almaanc archives …
As the story goes, eight reindeer adorned with full sets of antlers lead Santa’s sleigh on Christmas Eve. “Now, Dasher! Now, Dancer! Now, Prancer and Vixen! On, Comet! On Cupid! On, Donder and Blitzen!”
In the wild, of course, the only reindeer left with antlers at Christmastime are the females. Male reindeer (bulls) shed their fuzzy antlers before the beginning of winter (late November to mid-December).

That begs the question: What kind of sledder would hook up pregnant females to a sled? Not exactly good animal husbandry, Santa.
Hmmm. Perhaps Santa’s sleigh helpers are castrated males (called steers), who don’t lose their antlers until February or March. Sledders use steers because the bulls are too tired from rutting all the females and too lean to pull a sled through heavy snow.
Nonetheless, the prevailing theory is that Santa has an all-girl team, joined by young, red-nosed Rudolph. Yep, Santa’s Leading Ladies don’t mind stopping for directions.
All joking aside, we thought that you’d enjoy the wildlife trivia.
Check our Christmas Trivia page for more fun facts.
ADVERTISEMENT