Reviews by twister6

twister6

twister6 Reviews
Headphoneus Supremus
Pros: transparency and resolution, expanded soundstage, removable cable, easy to drive, durable construction, 5yr warranty.
Cons: some sound leakage, microphonics with a stock cable.

I would like to Thank Beyerdynamic US for providing me with a review sample in exchange for my honest opinion.
 
Manufacturer website: http://north-america.beyerdynamic.com/shop/hah/headphones-and-headsets/mobile-portable/t-5-p-2-gen.html
 
* click on images to expand.

 
While looking at all the headphones I’ve tested and reviewed in the last few years, you can see a rather uneven split with in-ear monitors dominating the list.  I have nothing against full size headphones, but do have a preference for a portable setup.  Often full size headphones don’t fulfill this requirement since a number of them are either too bulky, or have open back design, or not easy to drive from a portable source.  Furthermore, if you are in the market for a flagship full size headphones, many of them continue to rise in price and still require a pair up with a powerful source/amp to make them shine.  Almost feels like you have to spend a fortune in pursuit of audio perfection.
 
Two years ago when I had a chance to test the original T5p, I was impressed by its design and sound, and also remember a bit of a shock when I saw its premium $1.4k price.  Fast forward to today and we have “premium” releases from other manufacturers in $3k-$4k price range where they even offer budget versions with water down performance and build quality that still cost arm’n’leg.  I kept my eyes open for new Beyer announcements and was excited to hear about the release of T1 2nd gen (T1.2) followed by T5p 2nd gen (T5p.2), both with an improved sound signature, an updated design, and a reduced price.  Does this sound too good to be true?  Lets see what I found after taking the portable T5p.2 version of this Tesla roadster for a test drive!
 
Unboxing & Accessories.
 
My review unit arrived without an exterior packaging box, but from what I have seen on-line and my previous experience with other Beyer products, you can always count on a detailed cover image on the front and a complete list of accessories and technical specification on the back.  I also remember my unboxing reaction of the original T5p when I discovered a rectangular aluminum case inside of the box which I referred to as “Deal, or No Deal” case :)  It certainly looked great, but I didn’t find it practical enough for daily transportation.
 
I’m glad Beyer revisited this important accessory, and changed it for both T5p.2 and T1.2 models, turning it into a more practical and still luxurious hard shell case with a soft felt exterior finish and form fitted secure interior mold to accommodate T5p.2 even with cables attached.  Besides the point that some manufacturers don’t even include a carrying case or provide only a drawstring pouch, others do come with a case but require cable to be removed in order to close the top.  This usually puts extra wear'n'tear on the connector attachment.
 
Here you have plenty of room for T5p.2 with attached cable and no worries about cable bending around earcup attachment, also room to store the rest of the cable (either if you are using stock 1.4m or optional extended 3m), and even a small elastic pocket attached with velcro for 6.3mm adapter so you don’t lose it.  There are also two attached ribbons on each side to keep the case top from swinging all the way open.  Since you can’t fold or rotate earcups to store these headphones flat, the case is not very compact but still more portable than aluminum box.
 
I also received an optional 3m extended cable with a threaded adapter intended for a desktop use.  Beyer offers another optional cable with 4-pin XLR connector for a balanced connection with external dac/amp equipment.  Not necessary the accessory, but the included 5-year warranty certificate is something you don’t see everyday being offered with headphones.  This demonstrates a high level of German engineering confidence where Beyer putting their mouth where their money is.
 
beyer_t5p-2-01_zpsbwnvhfzw.jpg beyer_t5p-2-02_zpsbxtyfxbl.jpg
beyer_t5p-2-03_zpsmp3w5sta.jpg beyer_t5p-2-04_zpslyq32bld.jpg
 
Cables.
 
I usually reserve this section for IEMs with removable cables, but here I’m making an exception because it’s actually a big deal.  One of the new T5p.2 features, the same with T1.2, was the implementation of double-sided detachable cable going to each earcup with 3.5mm TRS connector in a slim housing.  Beyer chose to use OCC copper conductors, with 7N rated purity, dressed in a textile braided tight shielding.  This stock cable stands out with a premium look, a little on a thicker side but still flexible enough for a portable use.  The only issue here is some microphonics, probably due to a braided textile shield.  It’s more noticeable when music is idle and you are moving around, but not as much when you hit the play. 
 
With a main intention of portable use, the default cable is 1.4m in length and 3.5mm jack is not threaded with corresponding 6.3mm adapter that slides right in.  One thing I'm not too thrilled about is connector being a bit too thick to accommodate rugged phone cases - I had to push hard the headphone jack through my Note 4 case (a slimmer connector collar would fix that).  The extended 3m cable has a threaded jack with corresponding 6.3mm adapter for a more secure attachment.  All the connectors have metal housing and you will also find a small and sturdy plastic y-splitter combining L/R sides while keeping individual ground references separate 'til the headphone jack.  The connector plugs going into earcups are color coded with white rings on the Left side and red ones on the Right side, and with left housing strain relief having 3 bumps for a "blind" ID.  Due to an angled non-symmetric placement of Tesla drivers inside of earcups and a symmetric exterior design, such ID bumps are quite useful when putting T5p.2 on in the dark.
 
I know some people might wonder why two sided cable with headphones intended for a portable use on the go?  The answer is very simple – to keep Left/Right sides separated for an optional balanced wired connection and to increase reliability by eliminating wires going through the headband which usually required with a single earcup cable connection.  Yes, it’s not as convenient dealing with 2 earcup wires when you are walking around, but it’s a small price to pay considering these are audiophile quality headphones with an option for balanced cable connection.
 
beyer_t5p-2-05_zpslxos3vvf.jpg beyer_t5p-2-06_zpsraigglns.jpg
beyer_t5p-2-07_zpsu0nkr8dx.jpg beyer_t5p-2-08_zpshrurom8l.jpg
beyer_t5p-2-09_zps4utzzrpm.jpg beyer_t5p-2-10_zpsfrhvitmy.jpg
beyer_t5p-2-11_zpsye9izymi.jpg beyer_t5p-2-12_zpsnui5nks7.jpg
 
Being a fan of replacement cables, because I do hear the difference in sound when dealing with high end premium conductor material, having removable cables opened up the opportunity to test my TWag v3 Modular (pure silver) with T5p.2 in both single ended and balanced configurations.  Due to a modular nature of this particular cable, I didn't have to get a new one and just added a modular extension with a pair of slim 3.5mm connectors for my test purpose.  I can confirm that retrieval of details did scale up with TWag cable, and sound became a little brighter and more analytical while low end became more articulate and tighter.  But if you prefer a little smother and more organic tonality, especially at the top, then stay with a stock OCC copper cable.
 
The option of removable cable gives you a choice, and I assume that sound signature of T5p.2 was probably tuned around stock OCC copper cable to give a sound slightly warmer tonality with a smoother top end.  But if you want to push the retrieval of details further, pure silver or gold plated silver cables will do the trick.  Also I noticed a little improvement in soundstage expansion when switching between Single ended and Balanced ports of AK120ii (and switched TWag modular to 2.5mm TRRS balanced connector).  At the same time, single ended 3.5mm TRS output of PAW Gold yielded nearly the same wide soundstage as I have experienced with 2.5mm balanced from AK120ii.  Also keep in mind that you can get an optional cable with XLR balanced connection to pair up with external amp.
 
beyer_t5p-2-13_zpsmnqbi0tz.jpg beyer_t5p-2-14_zpsvztvt78a.jpg
 
Design.
 
In comparison to the original T5p, the exterior design of T5p.2 remained nearly the same, and overall it still has Beyer signature look with large round earcups and a wide steel yoke with "T5p" stamped out at the split of y-fork.  The earcups itself have a very elegant look with a premium laser etched aluminum cover plates on outside and soft touch hard plastic housing around it.  Facing back, each earcup has a single 5mm vent which I suspect is a culprit of sound leakage.  At the bottom of earcups you have angled 3.5mm ports which bring the cable forward over your shoulders instead of pointing straight down.
 
Earpads are soft, not very deep, filled with memory foam covered by a butter soft protein-coated synthetic leather material which doesn't absorb sweat and easy to clean with a moist cloth.  I spent hours wearing T5p.2 and my ears never got hot or sweaty.  The earpads look like they are removable which makes me curious to try replacement with either velour material or something deeper in design.  With Tesla driver placed asymmetrically angled back toward ear canal, there is plenty of room inside of earcup and my ears never touched the drivers.  Even so earcups are a bit on a large size in diameter, they don't stick out too much and actually have a very slick shape for a comfortable use on the go.
 
The steel yoke slides tight into headband and has a small degree of rotational adjustment, just enough for a comfortable fitment of earcups around your head.  The headband height adjustment has a precise soft click and round markers for a visual feedback.  I was a bit surprised that headband plastic end-caps where the yoke goes in didn't have assembly screws, perhaps being press fitted.  Also, in there you will find on a right side "Made in Germany" and on a left side a serial number with "L" label and 3 bumps for a touch "blind" ID, as I mentioned before - very important to put headphones on the correct away.
 
On the inside the headband has the same memory foam and butter soft synthetic leather material as found on earcups, and on the top there is a strip of felt material with "beyerdynamic" stamped name/logo.  The steel spring band inside of the headband is flexible where I can stretch it nearly flat or fold it looped, and it returns back to the original shape.  As a matter of fact, I folded it a few times just to tighten the clamping force.
 
T5p.2 has a very comfortable fitment and with 350g of balanced weight distribution you forget these are even on.  Clamping force is just perfect and along with soft earpads it creates a good seal with a noticeable sound isolation.  You will not get a dead silent isolation which in my opinion perfect for outside use to keep the awareness of surrounding environment.  My only gripe here is sound leakage which prevents using T5p.2 in places where you require to stay dead silent (like on a couch next to my wife :)).  It's not quite as bad as semi-open, but perhaps at "quarter-open" level where you can still hear some muffled sound 3-4 ft away.
 
beyer_t5p-2-15_zpsuc521fpv.jpg beyer_t5p-2-16_zps2wjkpet3.jpg
beyer_t5p-2-17_zpsvlksgxwd.jpg beyer_t5p-2-18_zpshfrfdpos.jpg
beyer_t5p-2-19_zpsvcudmcjw.jpg beyer_t5p-2-20_zpsibks85s5.jpg
beyer_t5p-2-21_zpsobgrefse.jpg beyer_t5p-2-22_zpso1g7daum.jpg
beyer_t5p-2-23_zps0z9fj7ii.jpg beyer_t5p-2-24_zpsmsdkpkhi.jpg
beyer_t5p-2-25_zpsqpjesz6k.jpg
 
Fitment
 
beyer_t5p-2-26_zpsneljouqp.jpg
 
Sound analysis.
 
After a proper 75hr burn in, I hear T5p.2 as having a balanced signature and a neutral tonality that has a slight tilt toward warm organic color.  It has a high level of transparency with a dynamic sound performance which remains coherent not only at my usual comfortable listening level but also as I went up and down in volume.  It remained consistent with all of my sources, either using summit-fi level PAW Gold or just a Galaxy Note 4 smartphone, where I actually found T5p.2 to be quite forgiving even with poorly recorded songs.
 
In more details, T5p.2 has a very resolving dynamic balanced sound with an excellent separation/layering and a neutral tonality.  Detail retrieval is close to a micro-detail level yet not grainy or analytically-harsh (I refer to this as smooth micro-detail level).  Low end extends deep down to sub-bass with a nice quality texture and a somewhat polite quantity, and a tight articulate mid-bass punch with a semi-fast attack, but not as much slam, while the decay gives it a more natural feeling.  Bass is well controlled, accurate, balanced, and with absolutely no spillage into lower mids.  Lower mids have a nice body which adds a touch of warmth to the sound.  Upper mids are leaning more toward smoother analytical level (the best of both worlds), not too bright or too harsh.  I was very impressed with clarity and details of vocals, both male and female, with an organic hint of smoothness.  There is absolutely no sibilance or metallic sheen.  Treble has a good extension, a nice detailed sparkle, crisp definition, no piercing frequencies or exaggerated brightness, and a polite level of airiness.  Definitely great for an extended non-fatigue listening.
 
Soundstage is 3D holographic, for a closed back headphones the expansion is way above average in all 3 directions (width/depth/height).  Imaging has a nearly 3D placement of instruments and vocals with an excellent separation and layering effect.  The angled Tesla drivers create a natural sound space, in no way does it sounds artificial, and when I close my eyes it felt like I was in a room listening to speakers rather than headphones.   The soundstage expansion came through shining especially when watching the movies where I felt like being right in the middle of the action.
 
In terms of a pair-up, 32 ohm T5p.2 is very efficient and easy to drive with authority from most of the sources - these are truly portable headphones that don't even require a powerful amp, though can certainly benefit if you have one.  It paired up great with PAW Gold and X7, having more analytical brighter sound.  Using L5 Pro and AK120ii - the sound is very detailed with a warmer low end and a little more bass slam, and actually 120ii AKT5p EQ preset did some interesting smoothing of the sound.  It performed great with both X5ii and X3ii, though the sound was a little less dynamic and soundstage shrunk a bit.  I also enjoyed how it paired up with my Galaxy Note 4, though sound was warmer and less resolving, but with Note 4 + HA-2 dac/amp (set to high gain) it scaled up with higher resolution and improved detail retrieval.  In general, unlike some other flagship demanding or high impedance cans, you can make T5p.2 shine even with mid-fi sources.
 
Comparison to other headphones.
 
All the testing was done using PAW Gold as a source.
 
T5p.2 vs EL-8L - EL has a thinner sound, sub-bass doesn't extend as deep, mid-bass is not as fast or tight and overall it has less bass quantity, lower mids are thinner, upper mids are similar in terms of retrieval of details and clarity, except T5p is a little smoother and more organic, while EL is brighter and has some metallic sheen.  Treble in EL is a little thinner and brighter.  Soundstage width is similar but T5p has more depth and height.  EL has much better isolation and nearly no sound leakage, its earcups rotate for flat storage but it's heavier for portable use.  T5p sound has more body, and it's more balanced, more organic, and sounds more natural.
 
T5p.2 vs PM-3 - Low end has a similar tonality, but T5p mid-bass is faster and tighter, and overall bass is more controlled with a better separation from mids.  Lower mids are similar, while upper mids in T5p are more detailed and have more clarity.  Also, T5p treble has a better extension and better definition.  PM3 is smoother, warmer, more organic, less detailed.  T5p is a lot more detailed, more dynamic, with a better layering.  PM3 soundstage has a similar width but in comparison to T5p it has less depth and height.  PM3 is more portable with rotating earcups and slim storage case, and it has better isolation and no sound leakage in comparison to T5p.
 
T5p.2 vs R70x - a lot of similarities in sub-bass extension and quantity of mid-bass, though T5p has a faster attack and bass is a little tighter, while R70x is more relaxed.  Very similar lower mids with a body that adds warmth to the sound, but the biggest difference is in upper mids where R70x is smooth, darker, more organic, and less detailed, while T5p shines with clarity and details.  Also, T5p has a slightly better treble extension and a little more sparkle.  Soundstage has a similar open sound (impressive for closed vs open back!), but I still feel that T5p edges it out due to a brighter and more detailed sound which enhances the perception of width and depth.
 
T5p.2 vs Momentum 2 (wireless in wired mode) - M2 has deeper sub-bass with more rumble, slower mid-bass, and overall bass performance is not as tight.  M2 lower mids are similar, upper mids are less detailed, not as bright and sound is a bit more artificial in comparison, while treble extension and upper frequency sound quality is similar.  M2 sound is more v-shaped and not as dynamic or layered, while T5p is more balanced, more neutral, more transparent, and with better retrieval of details.  Keep in mind, in this comparison I was using M2 Wireless in wired mode with a cable.
 
T5p vs T5p.2 - I wasn't able to compare them side by side and this is only by memory, but I recall 1st gen having a more anemic low end performance with rolled off sub-bass and less mid-bass quantity.  Upper mids of 1st gen were a little brighter and a bit more analytical, maybe even harsher.  Don't remember exactly the treble, but I think it was similar.  In terms of design difference, 1st gen didn't have removable cable, and had a real leather earpads and headband padding.
 
Conclusion.
 
Prior to this review, I was satisfied with my budget and mid-fi full size headphones for everyday basic listening needs, and left high-end listening experience to multi-BA IEMs/CIEMs.  It wasn't even my intention to embark on high-end full size headphone journey, but after taking T5p.2 Tesla roadster for a test drive I arrived to a conclusion that I could be looking at $1k Giant Killer (crazy I even mention "$1k" and "giant killer" in the sentence).  I'm very impressed with T5p.2 balanced sound signature and neutral tuning, with its low end extension and smooth (yet energetic) top end, with its great transparency and retrieval of details, open-back like soundstage expansion, and a solid 5-year warranty.  While sound leakage, especially at higher listening volume, and stock cable microphonics knocked a few points down from otherwise nearly perfect score, I was able to mitigate these issues with a replacement cable and by lowering my listening volume.  This is just my subjective opinion, and considering how many people use open-back and semi open back full size headphones, for others T5p.2 will probably feel "silent" in comparison.  I hope to continue with my full size flagship headphone journey, but for now have doubt that other flagship models at 3x-4x the cost will offer an improvement at the same rate.  Will see...
ShreyasMax
ShreyasMax
Good, well written, concise review. How do you think it compares to the Fidelio X2, or the Pandora Hope VI from Final Audio?
 
Thanks in advance, cheers.
Whitigir
Whitigir
Can this one be conparable to th900 or hd800 yet ?
earfonia
earfonia
Sounds like a winner closed back headphone! Impressive review, thanks!
Also thanks for comparison with ATH-R70x! Really helpful for me :wink:
  • Like
Reactions: gab840

twister6

twister6 Reviews
Headphoneus Supremus

final A8000

zilkhaw
Updated
Pros: durable build with a stainless-steel finish and elegant shell design, pure Beryllium dynamic driver, vivid micro-detailed sound tuning with a focus on speed, transparency, and clarity, holographic soundstage, quality cable and removal assist tool, nice selection of accessories.
Cons: tuning is on a brighter/colder side, not very forgiving with poorly recorded tracks, shells have some heft.


A Knight in Shining Armor!

The product was provided to me free of charge for the review purpose in exchange for my honest opinion. The review was originally posted on my review blog, and now I would like to share it with my readers on Head-fi.

Manufacturer website: Final Audio. Available for sale from Audio46.


Intro.

Pure beryllium driver IEMs were definitely a buzzword of CanJam NYC 2020 show which I recently attended. We often don’t realize that some manufacturers put more emphasis on “beryllium” than “coated” when referring to beryllium-coated drivers. Pure beryllium drivers are rarer, so when Final Audio announced their new flagship A8000 (A8k) IEM with Truly Pure Beryllium Diaphragm, it got attention of many audiophiles.

Since my recent review of Final Audio B-series IEMs, I was curious to spend more time with their new A-series flagship because 10-min audition at the show in a crowded environment was just not enough, and also it has been awhile since I reviewed a single DD monitor. After spending the last few weeks testing, comparing, and pairing A8k, here is what I found. Enjoy the read!

final_a8000-22.jpg

Unboxing and Accessories.

Final A8k (A-series) IEMs arrived in a compact white box, with a very similar packaging as in B-series. The unboxing experience is very “layered” with outer sleeve that has Final logo on the front and a detailed spec on the back. Then, a soft cardboard box with A-series label on top, and another cloth wrapping inside once you lift the cover, followed by more wrapping to unveil the travel case and eartips case. While I enjoyed the unboxing experience of A-series, I personally felt it should have been more premium to differentiate this flagship model from B-series.

final_a8000-01.jpg
final_a8000-07.jpg

Inside you will find a silicone/aluminum carrying case, a pair of small clear transparent earhooks with a lock mechanism, dust filter stickers, 5 pairs of Final E-Type silicone eartips (SS/S/M/L/LL) inside of a small travel box, and a clever mmcx assist removal tool. Eartips have a firm cap which makes a good seal with earcanal and comes with a ribbed color coded (Pink – right, Grey – left) inner stem with a tight grip around the nozzle and a smaller size bore opening.

final_a8000-09.jpg
final_a8000-12.jpg

Silicone/aluminum travel case is similar to the one included with B-series, except with an addition of aluminum protective top cover. It has a clever design with a top part of the case (silicone layer with aluminum shell) being roomy/deep enough to fit IEMs w/cables. And the bottom flexible silicone half of the case covering up IEM/cable when closed to keep it secure inside, preventing the content from sliding around.

final_a8000-15.jpg
final_a8000-17.jpg

Cable.

A8k comes with a quality silver plated copper (SPC) cable which I find to be non-microphonic, pliable, lightweight, and comfortable to wear while on the go. Though you do get removable earhooks, I personally found it to be more comfortable to wear the cable with these IEMs without it. And of course, since we are talking about the removable cable with universal mmcx connectors, you can use any of your favorite cables with it. I will cover various pair up examples with aftermarket cables after Sound analysis section.

And speaking of removable cable, Final Audio came up with something very simple yet brilliant – MMCX removal assist tool. While the cable is easy to attach, the removal requires a bit of force and the housing of the connectors is slippery. This little “yellow” plastic tool makes it very easy to disconnect mmcx connector, and it works not only with Final IEMs but other brands (tested and verified with Campfire audio, Westone, and iBasso).

final_a8000-21.jpg

SPC cable itself has 4 conductors, 2 on each side, twisted and in a clear flexible jacket, with each side twisted again after the y-split going down to a right angled 3.5mm plug. The plug has a nice clear strain relief, 2/3 of the housing is metal and the rest is clear transparent so you can see the connection of the wires. Y-split has a matching slim metal finish, and chin-slider is a clear small silicone piece. The earpiece connector housing with mmcx also has a matching finish and red/black color-coded rings to indicate Right/Left sides.

final_a8000-29.jpg
final_a8000-30.jpg
final_a8000-31.jpg
final_a8000-32.jpg

Design.

While A-series A8k uses a similar housing concept as Final MAKE and B-series models, the actual design of the shell is more elegant with a flat faceplate instead of busier multi-facet surface. The stainless-steel finish is a little shinier than B3 finish, but in general they are similar.

final_a8000-20.jpg

The inner part of the shell is rounded, fitting comfortably inside of my ear concha area, while the outer part has more angled edges, though still “soft” and comfortable, not as sharp as B-series. I noticed one pinhole vent at the bottom of the shell and another vent (with something like a mesh cover?) on the inside of the shell. The shells itself are average size, each one about 41g which is a bit hefty, have shorter nozzle with a lip for eartips grip, and 4-bore nozzle tip with a slightly recessed area to apply a screen filter.

final_a8000-23.jpg
final_a8000-24.jpg
final_a8000-25.jpg
final_a8000-26.jpg

In the heart of A8k design you will find a Pure Beryllium diaphragm made from ultra-thin Beryllium foil. This material is known to be super lightweight and to have properties of high sound propagation velocity. To optimize the operation of this Beryllium dynamic driver, Final came up with a stainless-steel chassis internally divided into 4 chambers, called Tetra-Chamber construction. Those were precisely calculated since the volume and the shape of these chambers and their placement around the driver will have a significant impact on the sound tuning because we are dealing with an ultra-thin beryllium dynamic driver.

final_a8000-37.jpg

The fit.

final_a8000-36.jpg

Sound Analysis.

I analyzed A8k sound performance paired up with LPGT and N6ii w/E01 (Class AB) while playing a variety of test tracks, such as Agnes Obel “The curse”, Sandro Cavazza “So much better” (Avicii remix), C-Bool “Never go away”, Ed Sheeran “Shape of you”, Alan Walker “Darkside”, Galantis “Hunter”, Iggy Azalea “Black widow”, Indila “Boite en argent”, Counting Crows “Big yellow taxi”, David Elias “Vision of her”, and Michael Jackson “Dirty Diana”.

As strongly recommended by manufacturer, I let A8k play for 200 hrs before starting my critical sound analysis. I did occasional sound checking throughout that time and noticed some changes with more rumble in bass and a little less harshness in treble, though it’s subjective. Also, I applied the included nozzle filter stickers, two filters on top of each other per side. And while I personally not too keen to share my FR captures since I have a hobby setup, I was actually able to capture (and to hear) a slight reduction in lower treble peaks after applying those filters.

The sound signature of A8k in different pair ups I tried is tilted toward being slightly mid-forward with extra emphasis on clarity of vocals and instruments, improved retrieval of details, and more vivid presentation of the sound with higher definition and resolution. The tonality is brighter, colder, crisper, very transparent, hardly any coloring. The retrieval of details and the level of clarity is quite high. Also, the sound has a super-fast speed with the transient response of note on/off being among the fastest and the cleanest I heard, in many ways reminding me of planar magnetic driver performance. Plus, when tried at higher than my usual listening volume level, I didn't hear any distortion at all.

The bass has a deep sub-bass extension, audible rumble which is closer to neutral in quantity, and fast articulate mid-bass punch, with an overall bass being nicely layered and a little north of neutral in quantity. Lower mids are neutral, clean, lean, without too much body, while upper mids are revealing on micro-detailed level, nicely layered, more analytical yet still very realistic, though in a colder way. Treble is crisp and airy, with a more revealing definition. In some pair ups treble can get a big splashy, but it never crossed a harsh sibilance threshold, though there is some accentuation on "s", especially in poorly recorded tracks. To my ears, treble sounded more natural in tracks with non-synthesized instruments, while a little exaggerated in some EDM tracks.

Soundstage is huge, holographic, nearly on 3D level across majority of DAP sources I tried. But even with being nearly holographic, it sounded realistic, not artificial, and with some tracks it even felt like I was listening to open back full-size headphones. Imaging has excellent placement of instruments and vocals with an accurate positioning of every element in 3D space which I found to be quite impressive.

Due to a nature of its tuning, A8k is not very forgiving, picks up every imperfection of poorly recorded tracks, without smoothing anything out. While listening to different music genres, I found A8k to pair up better with more natural instruments while synthesized instruments sounded a bit exaggerated in treble. That's where a pair up with a neutral or a warmer source will be more beneficial.

final_a8000-19.jpg

Comparison.

This comparison was done using A8k with a stock 3.5mm cable, and N6ii (E01, Class AB) and LPGT sources, volume matched in every comparison.

A8k vs Hifiman RE2000 Gold - soundstage width is the first big difference you will notice comparing holographic expansion of A8k vs a narrower soundstage of RE2k. Both have the bass which goes deep, but the quantity is more elevated in RE2k while A8k relative to RE2k has a closer to neutral quantity. The speed of the bass is also very different, especially when you focus on mid-bass where A8k is fast, articulate, layered, while RE2k bass is slower, more analog, sounding like a dynamic driver. Mids is where I hear difference as well with A8k lower mids being more neutral and upper mids brighter, more layered, and less colored, while RE2k has a thicker fuller body mids that sound more organic and less revealing. Treble is very similar between these two, bright and crisp, and a little splashy.

A8k vs Sennheiser IE800S - very similar experience as in comparison to RE2k. A8k soundstage is noticeably wider and more holographic, while IE800S soundstage sounds narrower in comparison. Both have the bass which goes deep, but IE800S bass is thicker, slower, less articulate, and more laidback, while A8k bass is fast, layered, articulate, and has less impact. A8k lower mids are more neutral while IE800S lower mids are thicker, and overall IE800S mid are more colored, more organic, and not as layered, while A8k has a lot more revealing, more neutral, brighter mids. Treble is very similar, crisp and airy, though A8k treble sounds a little less splashy in comparison.

A8k vs Beyerdynamic Xelento – the holographic soundstage expansion of Xelento is closer to A8k, but I still hear Final to be just a little bit wider. Bass in both goes deep, but as expected Xelento bass is more elevated and also sounds slower in comparison to faster and more articulate A8k bass. Lower mids are a lot leaner in A8k while Xelento is thicker and with more body, and upper mids are also warmer and less analytical in Xelento in comparison to more revealing layered mids of A8k. A8k treble has more air and better extension while Xelento treble is smoother and more natural in comparison. Overall, Xelento sounds smoother while A8k is more micro-detailed. On a side note, it has been awhile since I used Xelento, and its very shallow insertion was a good reminder of why.

A8k vs oBravo ERIB-1C - again, soundstage difference is quite noticeable with A8k being wider and more holographic in comparison to ERIB soundstage being narrower. A8k bass is faster, going deeper, having more sub-bass rumble and more articulate mid-bass punch, while ERIB bass is slower and a lot more neutral, more anemic in comparison. Mids is where you can hear more difference as well. Both have neutral lower mids, but upper mids are more transparent, more layered, and more natural in A8k while ERIB mids/vocals have a little more coloring, slower, with fuller body and more laidback flow. Treble is very similar, being brighter in both, though ERIB sounds a little splashier in comparison.

A8k vs DUNU Luna - Personally, I don't trust my ears doing comparison by memory, and at CanJam NYC show I wasn't able to do direct A/B comparison between these two IEMs. But based on my separate notes, they both impressed me with their speed (very fast transient response of note on/off) and a very low distortion at higher listening volume level. When it comes to soundstage, A8k has a more holographic expansion with a wider L/R spread. Luna had a very wide soundstage as well, but I recall it having more width then depth, creating a more oval-shaped staging. Also, relative to my separate notes, the tonality was different, with A8k being brighter and more transparent, while Luna being a little smoother and more natural, though both had retrieval of details on a similar micro-detailed level. If I get a chance to spend some time with Luna in a future, I will update this comparison with more details.

final_a8000-34.jpg

Pair up.

A8k has an average 16ohm impedance and a little lower 102dB sensitivity, but I still found it to be very efficient and easy to drive from any portable source I tried it with. Since I was using A8k with its stock cable, I only used single ended output in every source pair up.

Lotoo PAW Gold Touch LPGT - holographic soundstage, deep extended sub-bass rumble, fast mid-bass punch, a little north of neutral bass quantity, neutral, natural, layered mids, crisp airy bright treble. Upper frequencies are more revealing and brighter with a colder tonality. Great pair up to analyze micro-details of any recording. No hissing.

Lotoo PAW 6000 - holographic soundstage, deep extended sub-bass rumble, fast mid-bass punch, a little north of neutral bass quantity, fuller body lower mids with more organic upper mids/vocals tonality, crisp airy bright treble. Upper frequencies are more revealing and brighter with a slightly colder tonality. A little more natural tonality in comparison to LPGT. No hissing.

Hifiman R2R2000 - holographic soundstage, deep sub-bass rumble with fast mid-bass punch, bass has noticeably more impact in comparison to Lotoo DAPs. Mids are neutral, natural, layered, treble is crisp and airy yet sounds more natural, less splashy. Good pair up, except there is waterfall hissing, even in low gain.

iBasso DX160 - holographic soundstage, good sub-bass extension and fast mid-bass punch, overall bass is more neutral in this pair up, mids/vocals are also closer to neutral/natural in tonality, nicely layered and with great retrieval of details, treble is not harsh but it is bright, crisp, airy, more vivid. No hissing, but definitely more upper frequencies energy in this pair up.

Hiby R6 Pro - holographic soundstage, deep sub-bass rumble with fast mid-bass punch, and overall bass is a little more elevated in quantity, mids are more neutral, natural, layered, very detailed, treble is crisp and airy, brighter, more vivid. I hear a faint hint of waterfall hissing.

Hiby R5 - holographic soundstage, deep sub-bass rumble with fast mid-bass punch, overall bass is more elevated, mids have a little more natural body, still layered and very detailed, treble is crisp and airy, bright and revealing, and more natural in comparison to R6Pro pair up. Dead quiet, no hissing.

Cayin N6ii w/E01 - holographic soundstage, deep sub-bass rumble with fast mid-bass punch, bass has more impact and more analog weight, mids/vocals are more natural, a little warmer, with fuller body, but still layered and very detailed, treble is crisp and airy, and still more natural, not splashy. No hissing. Another one of my favorite pair ups. All this in Class AB mode, but when switching to Class A mode, the bass sounds a little slower and mids were thicker. I preferred AB.

final_a8000-38.jpg

FiiO M11 Pro - holographic soundstage, deep sub-bass rumble with fast mid-bass punch, bass is north of neutral, a little more elevated in quantity, mids/vocals have more natural body, sound more organic, still layered and detailed, treble is crisp and airy, bright and revealing, and not too splashy. No hissing.

Sony WM1Z - holographic soundstage, deep sub-bass rumble with fast mid-bass punch, bass has more impact and more articulation, mids are neutral-natural, layered, very detailed, definitely more organic, treble is crisp and airy, nicely extended, bright, but not harsh or splashy. Actually, among better pair ups when it comes to treble. No hissing. Tested with latest stock firmware.

A&K SP1000 SS - holographic soundstage, deep sub-bass rumble with fast mid-bass punch, bass has a little more impact in this pair up, mids/vocals are neutral, natural, layered, more revealing, treble is crisp and airy, brighter and splashier, even with some traces of sibilance. No hissing. Not the best pair up due to a little too much energy in treble.

Dethonray DTR1 - holographic soundstage, deep sub-bass rumble with fast mid-bass punch, bass has more impact, very layered and fast, mids are more neutral, revealing, micro-detailed, a little colder, treble is crisp and airy, bright but not harsh, though a little splashy. In low gain I don't hear any hissing.

Shanling M0 - holographic soundstage, deep sub-bass rumble with fast mid-bass punch, bass is north of neutral but doesn't have as much impact, mids are more neutral, revealing, brighter, treble is crisp and airy, bright, and a little harsher with a bit of a sibilance. No hissing.

Samsung Galaxy S9 - soundstage is wide and has a nice depth, but not as holographic as with dedicated DAPs. Bass goes deep with a nice sub-bass rumble and fast mid-bass punch, mids/vocals are neutral-natural, layered, revealing, treble is crisp and airy, bright, energetic, a little splashy, but not too harsh. No hissing.

final_a8000-35.jpg

Cable pairing.

I’m aware that some people don’t believe in cables and have very strong opinions about it. It's not my intention to trigger anybody, and instead I would like to share what I hear during my testing. What makes sense to me, a metal wire is a material with physical properties of resistivity, conductivity, purity, and unique geometry, all of which put together act as a filter between your source and headphones. Variations of these physical properties can affect the conductivity of analog signal, resulting in a sound change, from a subtle to a more noticeable level. If the talk about cables upsets you, please skip this section.
  • Stock SPC to ALO Super Litz - adds a little more sub-bass rumble, and accentuates lower treble a little more, especially around "s". Also, I perceive soundstage having a little more depth then width, taking away the feeling of 3D holographic effect.
  • Stock SPC to Linum SuperBaX - nearly identical to stock SPC cable.
  • Stock SPC to DITA Oslo - adds a little more sub-bass rumble, and pushes lower treble a little more forward, making it more vivid, but surprisingly doesn't make it harsher or splashier. The soundstage width is slightly reduced.
  • Stock SPC to ALO Ref8 - nearly identical to stock SPC cable.
  • Stock SPC to iBasso CB12s - nearly identical to stock SPC cable.

final_a8000-28.jpg

Conclusion.

One of the questions my readers often ask me is to recommend IEMs to complement what they already have. It’s not always an easy task because there is so much overlap in tuning of today’s flagships, making it hard to recommend something different and more original. A8000 vivid micro-detailed sound tuning with a focus on speed, transparency, and clarity, along with a holographic soundstage, makes them unique. Perhaps it’s not for everybody, especially if you prefer a more natural smoother tonality, but it has a very distinct and quite enjoyable tuning.

Typically, I listen to IEMs with a more natural smoother tonality, especially when it comes to treble. So, when I switch to A8000 after my usual selection of naturally tuned monitors, it takes me a few seconds to adjust my ears to A8k vivid micro-detailed presentation of the sound. But once I do, it becomes so addictive that I'm having a hard time switching back, and some of my other favorite IEMs start to sound congested and bloated in comparison. And that is exactly how I would summarize my experience with A8000, being super addictive!
Last edited:

twister6

twister6 Reviews
Headphoneus Supremus
True Sound, Wireless Performance!
Pros: balanced signature, natural detailed tonality, comfortable fit, touch controls for playback and volume, IPX4 rating, nice looking charging case.
Cons: case doesn’t support Qi wireless charging and has no exterior LED indicator when closed, SBC and AAC codec support only.


The product was provided to me free of charge for the review purpose in exchange for my honest opinion. The review was originally posted on my site, and now I would like to share it with my readers on Head-fi.

Manufacturer website: Hifiman.


Intro.

I was a bit surprised when Hifiman asked me if I’m interested to check out their upcoming TWS800 true wireless stereo earphone considering that I mostly focus on testing and reviewing higher end wired IEMs and DAPs. Besides, I wasn’t even familiar with their previous TWS600 model, but the more I thought about it, the more I became curios and decided to give it a shot! Once TWS800 arrived and I spent the last week with them “glued” to my ears, I decided to put together a write up because it wasn’t just another generic pair of consumer-grade TWS. As a matter of fact, TWS800 shares Topology Diaphragm advanced driver design similar to RE800, perhaps the reason why this wireless model number is also 800.

Now, without further ado, let’s take a closer look at this brand new TWS earphone from Hifiman.

hifiman-tws800-12.jpg

Unboxing and Accessories.

Prior to receiving TWS800 I tried to Google the spec, but only gathered bits and pieces since it was not officially listed yet (that was back in September, right before the official release). Thus, I was looking forward to see the packaging, in hope of reading the actual spec, but to my surprise it was quite vague as well. The cover of the compact box it arrived in had a clear picture of TWS800 and the case and mentioning of “amazing sound quality”, while the back had a few bullet points about functionality. This made me only more curious about it.

hifiman-tws800-01.jpghifiman-tws800-02.jpghifiman-tws800-03.jpg

Inside, you have a soft foam insert with cutouts for IEMs and the charging case. And I mean it when I say IEMs because they did look like higher end IEMs, even kind of reminding me of their RE1000 CIEMs. With foam insert out, you can see a number of included accessories, such as usb-c charging cable, a storage velour drawstring pouch that was big enough to fit charging case, a warranty card and a very detailed manual, and a ton of eartips. Hifiman mentions 8pairs, while I counted 9 which could have been due to one already on earpieces. Those were S/M/L black silicone, M wide bore black silicone, S/M/L double flange black silicone, L triple flange black silicone, and L deep single flange white silicone tips.

Keep in mind, manual is VERY important since TWS earphones have different controls, so make sure you don’t throw it away.

hifiman-tws800-04.jpg

Design.

As I already mentioned, the exterior design of the shells has a more “audiophile” look, typical of higher end IEMs rather than airpods clones or fancy consumer earpieces that fit entirely in the concha area of your ear. The faceplate has a stainless-steel finish, matching the charging case, with a Hifiman logo and multi-color LED indicator. The inner part of the shell has rubbery-plastic material that changes to SS finish toward the nozzle which has a lip (to secure eartips from sliding off) and a mesh cover at the tip. There were also 2 charging contacts toward the edge, and L/R marking. Obviously, this is not a heavy SS but rather some lightweight aluminum alloy or whatever the material is, just with SS finish.

The earpieces itself are pretty lightweight, only 6.9g each, and the size is just average, around 25.6 x 20.2 x 27.6 mm. What I found to be quite useful is the actual shape of the faceplate and the shell, allowing me to hold these earbuds with a secure grip without pressing the touch control on the faceplate. And the same goes when TWS800 were in my ears and I needed to tap the faceplate, being able to grip the shell with two fingers without accidentally touching the faceplate. I know, we don’t always think about this aspect of design ergonomics, but with some of the other TWS I tried in the past I always end up touching controls when pushing shells into my ears. Here, I didn’t have any problem at all, plus, they stayed securely in my ears even while moving around.

The charging case is a nice-looking clamshell with a matching SS exterior finish. Inside you have 2 cavities for earpieces, aligned with charging contacts, deep enough to accommodate TWS800 with different size/shape eartips, and with a strong enough magnet to hold them securely inside while charging. There was also 4-LED indicator to show the status of charging case battery. My complain with a case is about charging LED indicator being visible only when case cover is open. When it is closed, you don’t have access to see any LED indicators and don’t know if case is charging or already done. Plus, it would have been nice to have Qi wireless pad charging capability in addition to usb-c charging port. Neither of these are showstoppers, but at least LED indicator would have been nice to have.

hifiman-tws800-05.jpghifiman-tws800-06.jpg

Regarding what is “under the hood”. As I already mentioned, there is no full spec about actual drivers or wireless chipset, almost like Hifiman wanted to treat TWS800 as a “black box” so people would focus on the sound rather than components. But I was still able to find some info about the design. Don’t know how relevant this is, but TWS800 drivers actually have 150ohm impedance, more than double of RE800 IEMs 60ohm impedance. Of course, impedance doesn’t matter because you are not driving it from your DAP. But instead, these TWS use a built-in independent amplifier to drive TWS800 to its full potential as intended by Hifiman design.

One thing Hifiman did mention about drivers, they use Topology Diaphragm, similar to RE800/RE2000 design. I know RE models use 9.2mm DD, but I don’t want to speculate if TWS800 is the same. What makes these drivers unique is Nano particles coating (based on Dr Fang Bian Ph.D. thesis) applied in special geometric patterns. What Dr Fang discovered is by varying the surface pattern and using different Nano materials (each with its own unique property), you can control the acoustic performance of the driver. If you think about it, you literally micro-tuning the sound by applying a different Nano coating pattern. Plus, the structure of Topology diaphragm also reduces uncontrolled distortion typical of dynamic drivers.

And last, but not least, is the battery performance. At full charge earpieces will last about 4.5 hours of playback, and the charging case (with its 800mAh battery) will give you another 27 hours. Basically, you can get close to 6 full charges from the case. The total charging time of earpieces with a case is up to 2hrs, and you also get 120 hours of standby time.

hifiman-tws800-08.jpghifiman-tws800-09.jpghifiman-tws800-10.jpg

The fit.

hifiman-tws800-16.jpg hifiman-tws800-17.jpg

Functionality.

I wasn’t able to find what exact wireless chipset TWS800 is using, but I do know it supports Bluetooth 5.0, Class 2, and also 2 codecs: SBC and AAC. I don’t know if this is a limitation of the chipset, but it would have been nice to see support of aptX like in other TWS. Actually, to my surprise, even AAC yielded pretty good sound performance which I going to cover in the next section of the review.

Regarding pair up itself, it was effortless. With TWS, once you take them out of the case, they go automatically into pair up mode and you can easily discover and connect with any and every source I tried. Plus, I was able to have a solid connection about 30ft away from the source in the open space. And it also worked through the wall when I went into another room, around the corner from where the source was sitting.

hifiman-tws800-13.jpghifiman-tws800-14.jpg

I used TWS800 with apps playing local audio files, streaming Qobuz and Amazon Music HD, watching YT, Netflix, etc. The audio and video were always in perfect sync, and in most of the cases I was able to control playback and adjust volume remotely without a problem. I will cover that also in more details later in my review.

And speaking of controls, I was pleased that TWS800 offers playback (play/pause/skip) and volume controls. Volume adjustment seems to be rare with TWS. Also, while reading the manual, it says that triple tap on R side skips Next, while I found the opposite which is less logical but still not a showstopper.

During phone calls, which, btw, have just an average quality with TWS800:
  • L/R – single tap to Accept/End the call, press and hold to Reject the call.
  • L/R – press and hold for 2 sec to activate phone’s voice control.
During audio playback:
  • L - single tap Play/Pause, double tap Vol-, triple tap Next track
  • R - single tap Play/Pause, double tap Vol+, triple tap Prev track
hifiman-tws800-07.jpg

Sound Analysis.

I analyzed TWS800 sound performance paired up with my Galaxy S9, Hiby R3 Pro, and A&K SR25 while playing a variety of test tracks, such as Agnes Obel “The curse”, Sandro Cavazza “So much better” (Avicii remix), C-Bool “Never go away”, Ed Sheeran “Shape of you”, Alan Walker “Darkside”, Galantis “Hunter”, Iggy Azalea “Black widow”, Indila “Boite en argent”, Dua Lipa “Love again”, Counting Crows “Big yellow taxi”, David Elias “Vision of her”, and Michael Jackson “Dirty Diana”. From my experience with RE800, their dynamic driver needed at least a few days of continuous burn in, so I didn’t jump to any conclusion until a few days of listening. And as I continued to listen more, I noticed the soundstage opening up and the sound becoming more transparent.

Like with many other universal IEMs, eartips selection is crucial not just for comfort and secure fit, but because of sound variation due to seal and insertion depth. Thus, please pay close attention to select the right pair of eartips. Personally, I found eartips with a narrower bore opening to yield more clarity and better retrieval of details.

hifiman-tws800-18.jpg

TWS800 tuning has a balanced sound signature with a clear and natural tonality and a rather good retrieval of details for this type of tuning. Not exactly analytical or micro-detailed, but natural organic details. Nothing stands out as exaggerated, you will not hear elevated bass or recessed mids or extra treble spikes, typical of other TWS or similarly priced IEMs. I’m hearing just a nicely done non-fatigue natural detailed tonality which I was able to enjoy during extended listening sessions.

The technical performance is not bad either. Though the layering of instruments and vocals is average since treble airiness is a bit reserved, the overall clarity and resolution was decent for TWS wireless pair of IEMs. Also, soundstage is wide, for sure above average, opening up even more after burn in, though I found it to have more depth than width. Nothing is congested and instruments and vocals have a relatively accurate positioning.

In more details, I hear bass to be articulate with a good sub-bass extension and deep rumble which comes out to play when called upon (like Iggy’s Black Widow). Mid-bass is fast and punchy with a good control and without spilling into mids (works great with any genre). Lower mids have above neutral body, giving the sound its natural tonality (vocals sound natural and soulful). Upper mids/vocals are transparent, natural, detailed - not too smooth or warm, and at the same time not too cold or analytical. Treble is well defined, natural, detailed, without any offensive peaks or harshness. Perhaps, treble is not too airy or super extended at the top end, but still well balanced with mids.

Comparison.

Since I don’t have too many TWS iems, it is hard to think of the best comparison. I have tried a number of TWS before, especially back when I attended CanJam NYC early this year, but I’m not a fan of A/B comparison by memory. What made sense to me is to compare TWS800 to its wired sibling RE800 gold/silver since they share the same driver tech.

TWS bass is a happy medium between RE800 gold and silver, more mid-bass punch and deeper sub-bass rumble than Gold, but not as elevated and with a better control and articulation than Silver. TWS mids have more body and sound more natural, not as lean and cold as Gold/Silver mids & vocals. Plus, TWS mids are not as distant and out of your head like in Gold/Silver, instead they bring you closer to the music, closer to the singer/performer. TWS treble has a good definition, though not as crisp and resolving as Silver and definitely more natural and less fatigue than Gold treble. The main difference is that Silver has a more V-shaped sound signature while Gold is more mid-forward due to its neutral bass. In contrast, TWS600 has a perfectly balanced W-shaped sound sig with even emphasis on lows, mids, and highs.

hifiman-tws800-15.jpg

Source pair up.

When it comes to wireless earphones and headphones, and especially TWS, many often forget that it doesn’t matter what DAC or amp your source has. None of this matter because your source will digitally encode and transmit the sound and TWS earphones will decode and drive the transducer inside the shell. Here, what important is the codec being used and protocols being supported. And relative to TWS800, built-in amplifier Hifiman implemented. In theory, everything should work the same, but I did find some variations with sources I tested. Here is a run-down.

The following sources have been tested and verified to be able to control remotely the playback (Plays/Pause/Skip) and the volume (raise up/down). Plus, they all yielded a similar sound with a wide soundstage and relatively transparent detailed tonality while paired up using AAC codec (the highest supported by TWS800):
  • Samsung Galaxy S9
  • Hiby R8
  • Hiby R3 Pro
  • Cayin N6ii
  • Cayin N3 Pro
  • A&K SP2000 SS
  • A&K SR25
  • Shanling M0
The sources below don’t support AAC (but do support aptX and LDAC), so I was only able to pair up using SBC codec. In each of these pair ups, I was still able to hear a wide soundstage, but the sound was a little less transparent, even a little warmer, but still relatively detailed. Playback and volume were supported and worked without a problem as well.
  • Sony WM1Z
  • Lotoo LPGT
  • Lotoo PAW6k
  • Hidizs AP80 Pro
One surprise was iBasso DAPs, MAX and DX160, both paired up using AAC codec with MAX having wide soundstage and transparent detailed sound while DX160 having a narrower soundstage and warmer sound. The actual surprise was me being able to control volume remotely, but I couldn’t control their Play/Pause/Skip functionality, like that protocol wasn’t even supported.

hifiman-tws800-11.jpg

Conclusion.

I’m not going to pretend to be TWS expert, but I have tested a handful of true wireless stereo earphones and found manufacturers trying too hard to appeal more to consumer crowd by either pushing a bloated bass, or having a v-shaped tuning with enhanced bass and treble, and not paying as much attention to tonality balance or overall resolution. Some manufacturers “enhance” their TWS releases with higher end drivers, but they are driving it directly from Bluetooth chipset, not using amplifier, thus limiting audio tuning capability.

What impressed me with TWS800 is that Hifiman put in effort to make it look and sound like an audiophile quality IEM, not another consumer TWS to use while exercising or binge-watching shows on your phone. This TWS has a balanced signature with a good level of natural clarity and smooth retrieval of details without too much coloring. For its asking price (MSRP $299) it is a rather good sounding IEM to begin with, and TWS is just a cherry on top.
Last edited:

twister6

twister6 Reviews
Headphoneus Supremus
Analog waves.
Pros: R-2R discrete DAC, Class A and Class AB amp modes, NOS/OS modes, hi-res 5.46” display, updated fast user interface, 2.5mm/3.5mm/4.4mm PO/LO, MQA, DSD256, LDAC Bluetooth (both Tx and Rx), 256GB internal storage, hi-res analog sound with smooth detailed tuning.
Cons: price, case not included.


The product was loaned to me for the review purpose in exchange for my honest opinion. The review was originally posted on my site, and now I would like to share it with my readers on Head-fi.

Manufacturer website: Astell & Kern. Available for sale directly or from on-line retailers like Bloom Audio and Musicteck.


Intro.

When it comes to Astell & Kern, their A&ultima (SP series) flagship releases are often considered to be early adopters of the latest AKM DACs, such as SP1000 and AK4497, SP2000 and AK4499, and SP3000 with AK4499EX/4191EQ. Then, their more budget-oriented A&norma (SR series) are optimized for portability and exceptional battery life while on the go. But it’s their A&futura (SE series) where you are going to find all the cool new features, like a dual independent DACs design in SE200 or a modular design in SE180. Thus, it came as no surprise when A&K announced their first discrete all resistor DAC design to be featured in SE300.

In addition to an all-discrete R-2R DAC, Class A and Class AB selectable amp modes, and NOS and OS oversampling modes, SE300 also features the same new digital platform as in their flagship SP3000 which includes faster processor and newly updated and more responsive interface. This all-new A&K DAP is going to make its debut at the upcoming High End Audio show in Munich. Luckily, I got a chance to spend almost a week with it, and now would like to share what I found. Originally, it was supposed to be just a First Look short review, but as I started testing, I ended up with a full write up of A&K SE300.

ak-se300-01.jpg

Unboxing and Accessories.

Since I received SE300 without the official packaging, I’m not able to share unboxing pictures, but was told the experience should be like their previous A&futura SE-series DAP releases. Thus, we should probably expect a more compact storage box along with additional accessories like screen protectors and quality USB-C high speed cable for charging, data transfer, and USB DAC functionality. I’m sure, a quick start guide, and a warranty card will be included as well.

One thing to note, SE series usually comes without a leather case. These DAPs are beautiful to look at and I hate putting them in a case, but I find it necessary to enhance the grip for a more secure handling, especially on the go.

Design.

With its dimensions of 139.5mm x 76.5mm x 17.6mm, SE300 is very close in size to its big brother, flagship SP3k, though it is lighter at about 317g vs 494g (SP3k). I wasn’t surprised here since they used the same size display and needed extra room for discrete resistors. The weight is probably lighter due to chassis material, which is a mix of aluminum and stainless steel, unlike SP3k which uses Stainless Steel 904L. At the time of the release, the only available color is platinum silver.

The focus of the design is still around a large 5.46" HD touch screen occupying the front view. This time, the front view of the DAP is more symmetric since only the right side has a slightly bulging-out area with a sculptured wavy design, just a bit recessed around the volume wheel. And just like in SE180, there is a separate power button at the top in the right corner, with a typical long press to turn the power on/off followed by confirmation to shut down or a short press to turn the screen on/off, though personally I like a double tap to wake up the screen. After using SP3k, I often forget and try to push the volume wheel, forgetting that SE300 has a separate power button.

The volume wheel is easy to turn using a thumb, though it's not loose and has some resistance with a click action felt with every rotation turn of 150 volume steps. Implemented here is also a multi-function LED behind the wheel to indicate charging status or bit depth depending on the source file (16bit – red, 24bit – green, 32bit – blue, DSD – purple). LED light could be disabled in Settings, and you can also enable/disable LED indicator light intensity as you adjust the volume. The design of the volume wheel has a unique crown pattern with a copper center, a design reminiscent of a wristwatch.

ak-se300-09.jpg

On the left side you have Play/Pause and Skip controls, three identical small rectangular buttons located in the upper part of the left side in the slightly recessed area. They do have a nice tactile response and spaced evenly with just enough room in between to avoid pressing an adjacent button by mistake, unless you have “fat” fingers. The top of the DAP has access to 3.5mm phone output port which also used for Line Out and Optical out. Next to it, you have 4.4mm and 2.5mm balanced phone ports that could also be configured for corresponding Line Out. All the way to the right you will find a power button.

At the bottom to the left, you will find a spring-loaded microSD card slot. In the middle, there is USB-C port, used for charging (including Fast Charging), data transfer, USB DAC connection, and USB OTG external device connection for digital audio out. The back of the DAP has a symmetric design with a carbon fiber back panel. Overall, the shape of SE300 is rectangular and the exterior design has less aggressive lines, not as flashy as their other DAPs.

ak-se300-02.jpg
ak-se300-03.jpg
ak-se300-04.jpg
ak-se300-05.jpg
ak-se300-06.jpg
ak-se300-07.jpg
ak-se300-08.jpg


Under the hood.

Unlike the traditional Delta-Sigma DACs from AKM, ESS, TI/PCM, or CS, SE300 uses R-2R Ladder DAC which is made of discrete matching resistors. There are different implementations of this design, and A&K settled on a fully discrete 24bit R-2R precision DAC which requires 48 pieces of resistors per channel, a total of 96 ultra-precision resistors. And these are not some generic off the shelf components, but rather matching parts with a high accuracy tolerance of +/-0.01%.

In addition to R-2R discrete DAC, A&K also implemented new dual amp architecture with a selectable Class A and Class AB amp modes. Plus, they utilized a selectable Over-Sampling (OS) and Non-Over Sampling (NOS) modes which have different sound processing implementation and reproduction. Furthermore, I was pleased to see 2 gain settings, Normal (NG) and High (HG), which could be useful when dealing with some sensitive IEMs. I will go over how I hear sound differences of these different options in the Sound Analysis section of the review.

Keeping up with their 2.5mm balanced “legacy”, just like SP3k flagship, SE300 includes all 3 headphones outputs, 2.5mm, 3.5mm, and 4.4mm. The single ended 3.5mm PO has output impedance of 1.3ohm and 2Vrms (NG) and 3Vrms (HG) and balanced 2.5mm and 4.4mm POs have output impedance of 1.3ohm and 4Vrms (NG) and 6Vrms (HG), with Vrms measurements based on unloaded condition. Each port can be switched to Line Out, and 3.5mm also has Optical SPDIF output.

The touch display is 5.46” HD with1920x1080 resolution, the same as in SP3k. The interface is very fast, like just in SP3k, noticeably faster than in other A&K DAPs. I didn’t see in the spec if this is the same Snapdragon 665 SoC as in SP3k, but I suspect it could be due to the same interface speed. This is still closed Android so it is hard to compare to other open Android DAPs since I can’t run 3D benchmark test app. There is plenty of processing power to do flawless audio decoding while supporting all the popular lossy and lossless formats, such as WAV, FLAC, WMA, MP3, OGG, APE, AAC, ALAC, AIFF, DFF, and DSF, with PCM rates up to 32bit/384kHz and DSD rates up to DSD256. Also, MQA playback support, covering Tidal Masters, Local files, External USB, and MQA-CD (ripped).

The internal storage is 256GB just like SP3k, and you also get microSD external memory expansion up to the latest largest capacity card (A&K tested with 1TB). I guess it doesn’t matter as much today since many people are streaming and high-capacity microSD cards are relatively cheap. Furthermore, USB-C OTG supports external hard drive storage or usb stick expansion. It even uses the same high capacity 5,050mAh (3.8V LiPo battery) and supports fast charging (QC3.0) to give you a full charge in about 3.5hrs (under 9V, 1.67A charging condition). I did run a battery test, and from 4.4mm bal output in High Gain with Class AB and NOS selected while playing hi-res flac files in the loop, I was getting about 11.5hrs of playback time with occasional screen usage to check battery status.

To support fast charging and to speed up data transfer, SE300 uses USB 3.0 Type-C interface for charging, data transfer, and USB DAC functionality. WiFi is dual band, supporting both 2.4GHz and 5GHz. Along with that you have OTA firmware update support and of course streaming of many popular apps. Furthermore, Bluetooth is up to 5.0 with a wireless support of not only aptX HD but also LDAC protocols for 24-bit playback over Bluetooth, plus both Bluetooth Rx and Tx.

ak-se300-34.png

GUI.

When it comes to A&K DAPs user interface, once you are familiar with one, you will feel like at home using the rest because they share the same interface, down to their smaller display SR25 model. There have been small updates here and there, like a Floating Back button on a screen or playback controls when you swipe down notification bar while running apps. A few other Android related features were added in the past, but SE300 together with SP3k flagship takes it to the next level with a newly updated 4th generation interface that has improved ergonomics.

When you start the player, the greeting screen has a carousel where you can swipe through and access your songs in alphabetical order. It’s a fun way to view the song’s artwork along with other info, and it is very fast as you swipe through it. As you swipe right->left above or below the artwork of the song, you have Media Category Browser screen to view your Playlist, Folders, Songs, Albums, Artists, Genres, Favorite, MQS/DSD, CD Library, and then Settings and Category change to rearrange the order of the categories above as well as being able to disable Home screen carousel. Btw, when enabled, the Home button at the bottom of the screen takes you to this Home screen carousel, and every time you touch the Home button, it randomly brings up another song. I wish there would be a way to assign a different screen to Home button, but if you disable Home-carousel view and rearrange Media Categories, touching Home button will always bring you to the first selection in that list. I know, it is probably hard to visualize it by just reading this, but it is a lot of fun playing with it, especially since GUI is relatively fast.

ak-se300-13.jpg

All the way at the bottom of the screen you have 3 shortcuts buttons, Services (for easy access to all the apps), Home button which I already talked about before, and Back button, which is no longer floating while covering the screen, it is dedicated and always visible button at the bottom of the screen. Above it in the Main Home screen, you have a Playback control strip with a name of the currently playing song/artist and Play/Pause and Skip controls. Tapping on it brings up a familiar Playback screen window where the embedded artwork occupies top half of the screen and tapping on it expands the view and shows lyrics if one is available. Swiping this window down brings you back to the main Home screen. Below it you get a summary of song format (bit depth, sampling rate, file type) and a shortcut to tag the song as Favorite or another 3-dot shortcut with additional functions. Then, you have song artist/title and a scrub bar to advance through the song. Playback touch controls are underneath of that along with Play mode controls.

ak-se300-16.jpgak-se300-17.jpg

Swiping down notification bar gives you access to shortcuts to access various controls which you can toggle on/off or long press to get to their corresponding Settings screen. Here you have Wifi, Bluetooth, NOS/OS, AMP (Class A/AB), EQ, Car Mode, Line Out, Gapless, Wheel Lock, and Settings. At the bottom of open notification bar, you also have Brightness control. The full Settings window has more controls, partitioned in sections. Other controls you can find here are to select Bluetooth Codec, AK Connect and File Drop, L/R balance, Playback setting. Other usual controls for A&K CD Ripper, USB Mode and Audio output format, S/PDIF Conversion, Car Mode, setting Volume limit, enabling Double-Tap Screen to wake, LED indication options. And the typical date/time change, language and keyboard selection, timer settings, FW update, System info, and System Reset.

ak-se300-18.jpg
ak-se300-19.jpg
ak-se300-20.jpg
ak-se300-21.jpg


EQ is a big deal for some audiophiles, and here it hasn’t been changed. You still have one blank EQ preset and no other genre specific presets, and you can add many custom EQ presets. EQ interface has two modes: Main and Advance. In the Main you have standard Paragraphic EQ sliders for 20 bands (30, 45, 60, 90, 120, 180, 250, 380, 500, 750, 1k, 1.5k, 2k, 3k, 4k, 6k, 8k, 12k, 14k, and 18k) where you can either slide the bar or use a precise 0.1 adjustment, as well as scrolling through available frequencies. As you adjust, it gets reflected in the lower right corner, showing the overall shape of EQ. Switching to Advance, turns EQ adjustment into Semi-Parametric EQ with a full GUI view of EQ shape where underneath you have FREQ band selection (a choice of 20), Gain selection in 0.1 and 0.01 steps, and Q bandwidth. Since bands frequency is fixed, I consider this to be semi-Parametric EQ.

ak-se300-25.jpg

Sound Analysis.

The sound analysis of SE300 was done using Aroma Jewel, playing a selection of test tracks, such as Agnes Obel “The curse”, Sandro Cavazza “So much better” (Avicii remix), C-Bool “Never go away”, Ed Sheeran “Shape of you”, Alan Walker “Darkside”, Galantis “Hunter”, Iggy Azalea “Black widow”, Indila “Boite en argent”, Dua Lipa “Love again”, Counting Crows “Big yellow taxi”, David Elias “Vision of her”, and Michael Jackson “Dirty Diana”. I had about 100hrs of burn in time before I started analyzing SE300.

I prefer to describe the DAP sound based on the comparison to other DAPs and pair ups with different IEMs/headphones since the DAP by itself doesn’t have a “sound”. What we hear is how it sounds through connected IEMs/headphones or the difference in sound relative to source comparison using the same pair of IEMs/headphones. This is my subjective opinion, describing how I hear it while analyzing the sound of SE300, and you will get a bigger picture about this DAP’s sound in the follow up sections of Comparison and Pair up.

In a summary, SE300 has a smooth natural tonality with an analog texture that adds a bit of warm coloring to the sound. It has a wide soundstage expansion, though not too wide or holographic, bringing the listener closer to the music, giving you a more intimate feeling, like you are a few rows away from the stage and the performer. The smoother analog tonality also yields a more natural layering and separation of the sounds, and by that, I mean not too much "air" between the layers. Despite smoother nature of the tuning, the retrieval of details is still very good, with the sound being quite resolving though not exactly micro-detailed.

With many IEMs I tested, the sound tuning does stand out with an excellent rendition of bass, enhancing its impact, weight, and texture. It doesn't just boost the lower end, but enhances its performance, especially when dealing with DD drivers. Also, I noticed with many IEMs the mids had a fuller body and a distinct analog texture. And the same with treble, sounding more natural, and a bit smoother to my ears. Furthermore, while I wouldn’t say the background was super black like in SP3k with details popping out of the blackness, it was dead quiet with sensitive IEMs even in high gain setting.

4.4mm/2.5mm vs 3.5mm – When comparing balanced versus single ended outputs, the sound tonality is identical. The only difference I hear is in soundstage expansion where the perception of 4.4mm and 2.5mm balanced outputs is wider than 3.5mm. As expected, 4.4mm and 2.5mm are the same. And another obvious difference is SE being less powerful, requiring me about 10 more clicks to match the volume of BAL output.

NOS vs OS - NOS gives the sound a smoother and more analog flavor. I went a dozen of times back and forth, and even in a blind test it is not hard to distinguish how NOS takes a digital edge off the sound, giving it a smoother tonality with a little more analog texture.

Class A vs Class AB - I hear a noticeable change in tonality and "speed" of the sound. Class A has a fuller body mids and more laidback sound with a slower attack, slower pace of the rhythm. When you switch to Class AB, the mids are a bit more revealing and the overall sound has faster attack, faster toe-tapping pace. I preferred Class AB with EDM, Pop/Rock, and any Top40 songs. For acoustic, instrumental, or classical music I like Class A setting. It will also depend on earphones and headphones and their pair up synergy with either A or AB.

Normal vs High Gain - the difference in volume is about 8 clicks. The sound change associated with a gain setting will depend on your earphones and headphones. With most of the multi-BAs or BA/EST hybrids it didn't make much difference. With some hybrids that included DD/BA/EST, high gain had a slight improvement in texture, though it could be related to an artifact of higher volume of listening. On the other hand, 470ohm ATH-R70x came alive with improved dynamics and tighter bass when switched to high gain.

ak-se300-23.jpg

Comparison.

In every comparison I used Aroma Jewel, volume matched while listening to the same test tracks between DAPs. Also, in this comparison I mostly focusing on the difference in sound as I hear it.

SE300 vs SP3000 - 3000 not going to be 10x better than 300 :), but there are differences between the SP flagship and SE model. SP3k tonality is more neutral, the background is blacker, and the soundstage is wider. In comparison, SE has more analog coloring, not warmer by a margin, but smoother in comparison to SP. And the same goes for the background where SP is pitch black, while relative to SP the SE background is not exactly. SE soundstage is wide but not on the same level of width as SP. SE is more like a smoother and more analog tuned version of SP with a little more intimate presentation of the sound. Also, both share the same updated fast interface.

SE300 vs SE180 w/ESS board (SEM1) - Right away noticed a difference in soundstage presentation where 300 has more width and brings sound closer to you, while 180 has a narrower soundstage and extends the sound further out of your head. 300 tonality is smoother, more analog, more textured, while 180 is brighter, more revealing, and more digital in comparison. One thing that stood out was the punch and the extension of Jewel's bass with SE300 while with SE180 the bass was more relaxed, slower, and not as layered. I used SEM1 with ESS dac due to its smoother tonality in comparison to another SEM2 (w/AKM), but still, SE300 felt more analog and smoother in comparison. Not to mention that SE180 is built on an older SE platform with a slower processor and older interface, making SE300 operation a lot of faster and smoother, like SP3000.

ak-se300-27.jpg

SE300 vs Cayin N6ii w/R01 - A few differences in this comparison. While the soundstage expansion is not too far off, SE was just a touch wider in comparison with R01. Tonality of SE is a little warmer and smoother in comparison to R01. I also can hear a little blacker background with R01, but all these intimate comparison details will depend on the sound sig of your IEMs or headphones. For example, it was easier to pick up differences with Jewel, and not so much with RN6.

SE300 vs L&P P6 Pro - relative to testing and comparing with Jewel, their tonality is not too far off. P6 Pro is just a little bit smoother, but you can get close when switching SE300 from Class AB to Class A. Also, P6 Pro soundstage is a bit wider, and I did find P6 Pro to have a blacker background. And of course, even with its closed Android system, SE300 still has more functionality in comparison to audio playback only P6 Pro which has a more limited interface.

SE300 vs Hiby RS6 - Another R-2R comparison some might be interested in. From a soundstage perspective, I thought SE300 was just a touch wider. Other than that, they both have a similar technical performance, including a similar level of vertical sound dynamics expansion and the level of background blackness. But their tonality is different. RS6 is brighter, more revealing, while SE300 is smoother, with more analog texture, and warmer coloring.

SE300 vs Hiby RS8 - Decided to compare this one as well. Relative to Jewel, SE300 soundstage width is very similar, maybe with SE being even a touch wider than RS8. RS8 tonality is more revealing in comparison to smoother more analog tonality of SE300. I also noticed RS8 to have some improvement in vertical dynamics and layering of the sounds, but SE yields a much better bass impact, stronger and more articulate punch in comparison to RS8 having a little slower and more laidback presentation of the bass.

ak-se300-29.jpg

Pair up.

Here is how SE300 pairs up with some IEMs and headphones. In each pair up I noted my preference of gain setting and amp mode setting. All were connected using 4.4mm BAL.

IEMs.

FirAudio RN6 - High gain boosted the bass impact, pushing it more toward L-shaped sound sig. Then, Class A made lower mids thicker in tonality, taking away clarity from the mids. Thus, I preferred to switch to Normal gain and Class AB which made the sound sig more balanced, improving bass control (decay), and giving mids more clarity and better retrieval of details.

Aroma Jewel - Here, I preferred high gain over normal because it gave its DD bass more texture, tighter control, and better articulation. With amp modes, I thought that Class A sounded better due to more revealing nature of Jewel's tuning, but Class A took a step back in terms of resolution and made mids a bit smoother for my liking, so I switched back to Class AB for higher resolution and more precise layering.

EE Odin - This one was a bit of a surprise because I thought Odin's DD bass will be a perfect fit with High gain, but it made upper frequencies a bit piercing to my ears, so I switched to Normal gain which made upper mids and lower treble sound more natural in tonality. With Class A vs AB, it wasn't even a question, A added more warmth to the mids, giving the sound more organic tonality without compromising the resolution, so Normal gain with Class A hit the sweet spot with Odin to my ears.

UM Mentor Multiverse - here, either Normal or High gain made no difference in tonality, aside from me just adjusting the volume. So, either one is fine with MM. But Class A vs AB did make a noticeable difference, giving the sound a more laidback tonality with A vs "sharpening" the details and improving layering and separation of the sounds with AB. Also, with Class AB I can hear a bit more air in treble. For MM, I enjoyed Normal gain and Class AB.

ak-se300-30.jpg

Headphones.


Audio-Technica ATH-R70x - As I already mentioned, R70x came alive when switching to High gain. I heard improvements in sound dynamics, with more vertical expansion vs being a bit more compressed in Normal gain. Also, bass sounds tighter, faster, more precise in High gain. With amp mode selection, Class AB complemented nicely the High gain setting, improving the layering and separation of the sound. In comparison, Class A made mids a bit duller, losing some of the nuances in sound and having lower level of detail retrieval.

Meze Audio Empyrean - When it comes to full size and planar magnetic, you would assume that high gain will be better, but turned out that here it made no difference with either High or Normal gain, just had to adjust the volume to compensate for lower gain. But it made a noticeable difference switching Class A vs Class AB. Class A made mids a bit muffled and took away from clarity in vocals. Switching to Class AB improved the retrieval of details and "cleaned up" lower mids to give vocals better clarity.

ak-se300-31.jpg

Wired and wireless connections.

Besides being a portable DAP, you can expand SE300 functionality as a transport to drive external DAC/amp, to use external AMP, or to turn the DAP into wired/wireless usb DAC. And of course, you don’t have to be limited to wired headphones, and can take advantage of Wireless Bluetooth connection. Here is what I tested.

WiFi Streaming.

As I already mentioned, while SE300 has a closed Android system, you have a whitelist of available popular streaming apps to install. These are full app versions that look and function the same as if you would be running it on your Android smartphone or Android DAPs. Also, you no longer need to rely on a floating “back” button since this one is fixed at the bottom. Furthermore, while running streaming apps, you can swipe down the notification bar to see app’s playback controls.

ak-se300-15.jpg

Wireless/Bluetooth.

I tested SE300 BT Tx with Final ZE8000 TWS and Hiby WH2, confirmed operation within 25ft, including full remote control. 25ft operation in open space was OK and the sound was the same as when connected to my S22, except I get close to 50ft when using it with my smartphone.

SE300 also has Bluetooth Sink Mode (BT Receiver) which sets the DAP as a wireless DAC/amp. Under Bluetooth setting of SE300, turn on Sink Mode and then scan for BT devices from your phone to pair up with SE300. Once connected, under the paired-up device on your smartphone click settings and turn on LDAC for SE300. The volume can be adjusted from both your smartphone and DAP, and SE300 will display the song/artists name, and I was able to control the playback (play, pause, skip) straight from the DAP.

USB Audio Out.

I tested and verified this one with various popular USB DAC dongles, such as Cayin RU6, Lotoo S2, and L&P W2, and found it to work flawless, just plug and go. Once connected, volume on SE300 is fixed at max 150, thus it is helpful to use external USB DAC dongles with their own volume control. The sound quality was no different than when connected to my Galaxy S22 phone.

USB DAC.

Tested this one with my ThinkPad T480s under Win10. Once connected, by default USB mode is set to MTP so you can view the storage. In settings of the DAP, go to USB Mode and select DAC Input which going to activate USB DAC mode. Within seconds SE300 was recognized as AK USB DAC output in Windows sound settings, and I was able to control the volume from both, the laptop and SE300. The sound using DAP by itself vs USB DAC connected to the laptop was the same.

Optical Out.

Was using iFi micro iDSD BL for this testing, nothing needs to be selected or enabled, just connect optical cable to 3.5mm port and start playing. Optical output was detected automatically, SE300 volume was set to max 150, and I was controlling the output from micro iDSD. Other than that, no surprises using SE300 as a transport to drive the external DAC/amp where I’m hearing a typical micro iDSD tonality.

Line Out.

I tested LO with Cayin C9 amp. Just connect either SE or BAL outputs, select Line Out from Notification bar shortcut or go to Settings, and under Line Out option select the output voltage level where you have 4 choices of unbal/bal: 0.7V/1.4V, 1V/2V, 1.25V/2.5V, or 2V/4V. Then, as you turn the volume wheel, you activate Line Out by switching it to a fixed voltage output. The volume was adjustable from C9 amp.

ak-se300-32.jpg

Conclusion.

As I already mentioned in my other DAP reviews, we are at the point where it is hard to come up with groundbreaking innovations, and there is no longer a huge gap between mid-fi, upper mid-fi, and summit-fi audio performance. When it comes to Astell & Kern and their flagship A&ultima (SP) releases, their focus is more on fine tuning improvements rather than drastic changes in sound or the design. On the other hand, their A&futura (SE) series became a platform for cool new features you won’t find in A&ultima. This was the first one for A&K, stepping away from a traditional design with Delta Sigma DACs, and switching to an all-discrete resistor ladder design of R-2R DAC, complemented with Class A and Class AB amp modes, and even NOS to bypass the oversampling.

It's not the first DAP to implement these features or R-2R discrete resistor DAC design, but it’s one of the first A&K DAPs with such a plethora of sound tuning options that was truly a fun to play around with as I was switching between Gain settings, Amp modes, Oversampling and Non-Oversampling to find a sweet spot while fine-tuning the natural analog tonality of this hi-res DAP in search of the best pair-up synergy with my earphones and headphones. SE300 will appeal not just to diehard fans of A&K DAPs, but also to many other audiophiles looking to complement their one-trick pony sources with something different and more fun. I think even SP3000 owners will find SE300 quite appealing.h
R
royiko
Any comparison with N7?
twister6
twister6
@royiko when I had SE300 with me, N7 was on loan to another reviewer, and I had to send SE300 back before N7 was returned to me. So, I didn't have a chance to do a direct A/B comparison.
  • Like
Reactions: royiko
vikinguy
vikinguy
Does anyone have any idea about an SR35 sound comparison?

twister6

twister6 Reviews
Headphoneus Supremus
Pros: solid build, high res full body neutral sound sig, leather case, responsive touch screen, balanced output.
Cons: price, fw is still work in progress, single uSD (though w/128GB of internal storage).

The product was provided to me free of charge for the review purpose in exchange for my honest opinion.  The review was originally posted on my blog, and now I would like to share it with all of my readers on Head-fi.
 
Manufacturer website: theBit, for Sale on MusicTeck and Amazon.
 
* click on images on expand.

 
Intro.
 
When it comes to audio gear reviews, depending on my schedule I typically have a final write up ready within month or two after receiving a sample.  Opus#2 turned out to be an exception.  My initial impression was posted almost 4 months ago, and afterwards I continued to feature Opus#2 in all of my reviews as a pair up source or in comparison to other DAPs.  I still rank it high, among some of my favorite sources at the current moment, but I never got to a full review until now.  This is very unlike me, but I have a reasonable explanation about this delay.  Also, I would like to mention that I already covered in depth about theBit, a company behind Opus audio products, in my Opus#1 review, so there is no need to repeat it.
 
The delay was due to me waiting for the firmware update which suppose to unlock Opus#2 full Android potentials.  I believe this feature is still in the works, thus I will update my review later when streaming becomes available.  Another reason was due to its little brother (Opus#1) which is still an excellent value considering recent v2 fw update which puts both Opus DAPs on nearly the same level of functionality with an identical GUI, while at the same time widening the gap in pricing after the recent Opus#1 sale, though not sure if it's temporary.  When it comes to the latest DAPs, price is no longer an indicator of the product ranking.  It's not uncommon for people to accept the idea of diminishing returns where you might end up paying a noticeable premium to get the absolute best in sound and build quality.  Of course, the “absolute best” is a subjective opinion based on a personal preference and willingness to pay for it.
 
I think based on the above reasons, Opus#1 got more attention while Opus#2 with its superior performance got lost in a shadow of its sibling.  I hope my review of Opus#2 can bring back the attention this audio player deserves because I definitely consider it to be among the top performers in my current DAP review collection.  Every day I still reach for it to use in headphone testing and evaluation or just for listening pleasure.  So without further ado, let me share with you what I found after spending the last 4 months with Opus#2.
 
Unboxing.
 
Arrived in a plain looking, but still elegant, all white box, the presentation of the packaging has a typical "smartphone" minimalistic appeal with a model name on the front and a detailed spec on the back.  There is not even a hint how the product looks on the exterior of the box which builds the anticipation of what awaits you inside, especially considering quite an impressive spec.
 
With a top sleeve off and the cover lifted, you will find Opus#2 securely wedged inside of a foam cutout.  You can't help but notice a large touch screen display dominating the view, and at the same time a few design details which clearly put this DAP above a typical smartphone outline.  With Opus#2 out, underneath you will find accessory boxes with a leather case and usb cable.
 
Overall, first impression out of the box was definitely positive, especially when I felt the heft of a solid aluminum construction in my hand.
 
opus2-01.jpg opus2-02.jpg
opus2-03.jpg opus2-04.jpg
opus2-06.jpg opus2-07.jpg
opus2-08.jpg
 
Accessories.
 
Besides already applied screen protector and a quality micro-USB cable for charging and data transfer, the only other accessory I was looking forward to was a leather case.  Looks like theBit guys decided to continue their collaboration with Dignis, and this time a premium genuine custom leather case was included as a standard accessory.
 
Even so all metal body of Opus#2 feels nice in your hand, the 252g of weight and larger than an average DAP footprint (124mm x 76mm x 18.3mm) would benefit greatly from grip enhancement which exactly what this leather case provides.  In addition to improved and more secure grip, it also protects the surface from scratches when placing the dap on the table or glass top.
 
The dark navy leather case wraps Opus#2 tight with a solid back panel which has extra thickness to absorb the shock when placing the dap down.  The top of the case is completely open, exposing both headphone ports and a power button.  Left side is covered, including transport control buttons, though for my personal preference I wish there would be a cutout because sometimes I have to slide my finger across stamped button shapes to find the Play/Pause in the middle.  From my experience of using other cases, exposed rather than covered playback control buttons are easier to feel for navigation.
 
Bottom of the case has a generous opening for mico-USB port which accommodates even bulky cable connectors.  Also, the uSD port is covered by the case.  The right side also has a generous cutout in the upper right corner to accommodate the analog volume knob and the guards on both sides of it.  Once inside the case, Opus#2 is not easy to take out.  To remove it, I usually push it out with an eraser side of the pencil through micro-USB port opening.  That's a good thing because you don't want the case to be loose.
 
Overall, I really like this leather case and think it compliments Opus#2 very well without hiding the design details.
 
opus2-09.jpg opus2-10.jpg
 
The case.
 
opus2-11.jpg opus2-12.jpg
opus2-13.jpg opus2-14.jpg
 
Design.
 
I already covered quite a few design details while talking about the leather case.  The main focus of this DAP is a large 4” TFT touch screen display with IPS panel (great viewing angles) and a decent resolution of 480x800 pixels.  Right now I can only judge graphics by looking at the GUI elements and music cover art, but that is enough to draw a conclusion about the quality of the display.  Perhaps it’s not as high res as my smartphone, but it’s definitely on par or better in comparison to my other touch screen DAPs.
 
The display itself is centered in the middle of the front panel, surrounded by a raised bevel of the metal frame.  This is a full metal design, and it feels very solid in my hand.  A large display opening could add flex to the device, but I found no such issues with Opus#2.  Furthermore, the look of a large display on the front can add a resemblance to a smartphone, while Opus#2 offers plenty of design details to make it stand out as a DAP.  The analog volume knob on the right size surrounded by the guards above and below it is definitely a nice touch, though they obviously didn’t reinvent the "wheel" here.
 
What’s interesting about this volume knob is that it has a little bit of loose play, but if you brush against it or while putting it in your pocket, you don’t have to worry about the volume being bumped by accident.  The wheel is not tight and easy to turn with a thumb, and the volume will not change until you hear a click.  On the left side, opposite of volume pot, you have 3 hardware transport buttons with Play/Pause in the middle and Skip Next/Prev above and below it.  The buttons are metal, round, with a good spacing in between for a finger not to press adjacent buttons by mistake, and with a nice tactile click action.  These buttons are easy to feel with you finger, leading to my only gripe with a leather case covering them up.
 
Besides playback transport buttons (on the left) and volume knob (on the right), the sides have nice metal ridges that enhance the grip of the device if you choose to keep it naked, though I personally prefer a leather case which enhances the grip and adds more security.  The bottom of the DAP has microSD slot which theBit specs to support up to 200GB, but I would be surprised if the latest 256GB won’t work (though I don’t have one with me to test it).  MicroUSB port is right in the middle, and it can charge the internal 4000 mAh LiPo battery to full from empty using 5V charger in a little under 4hrs.  With a mix of 320kbps mp3s and FLACs and some occasional DSDs thrown in the mix, on average I was able to get close to 9hrs of a playback time with wifi and BT off.
 
Obviously, the same microUSB port is used for data transfer from computer when configured in MTP media device connection mode, just like you would with your Android smartphone.  The same port is used for your USB DAC connection (as an external USB sound card connected to your laptop/PC) or OTG USB DAC.  I was successfully able to connect Opus#2 to my Galaxy Note 4 with OTG microUSB to microUSB cable to use Opus as an external USB DAC to my phone.  Unfortunately, even after installation of provided Windows drivers, I didn’t have success with my Windows 7 laptop due to driver issues with my Windows, but I have read from a few other people who had success with their newer versions of Windows, and also no issues with MAC where drivers are not even required.
 
Top of the DAP has a metal power button in the upper right corner, nice tactile response as expected, and with a typical functionality of long press to turn power on/off and short press for screen on/off which also wakes Opus#2 up from a deep sleep power saving mode.  Next to it you have 2.5mm TRRS balanced headphone port with a common A&K wiring.  In the upper left corner, you have multi-function 3.5mm headphone port which not only serves as Single Ended TRS jack, but also has Optical output to drive s/pdif digital data into the external DAC/amp.  Furthermore, 3.5mm port also turns into Line Out when selected from within DAP, and this is not just cranking the volume up to the max, but actually working as a clean Line Out output from the internal DAC to bypass the internal Amp for external sound processing.  Unlike Opus#1, 2.5mm Balanced output here doesn't need to be enabled, it's always on in parallel with 3.5mm SE output.
 
I was definitely pleased with a design since lately I have been favoring touch screen navigation over clicking buttons or mechanical wheels, but overall Opus#2 doesn’t have the most compact footprint especially for those with smaller hands.  For me personally, I usually hold it in my right hand with thumb controlling the volume knob while I touch swipe with left hand.  For Opus#1 owners, Opus#2 is just a little bit wider and longer, and you will feel right at home going from one to the other, especially since after fw 2.0 update the Opus#1 GUI looks identical to Opus#2.  The bottom line, this is a VERY solid design with a well laid out ports and external controls.
 
opus2-15.jpg opus2-16.jpg
opus2-17.jpg opus2-18.jpg
opus2-19.jpg opus2-20.jpg
opus2-21.jpg opus2-22.jpg
opus2-23.jpg opus2-24.jpg
opus2-25.jpg
 
Under the hood.
 
When it comes to hardware specs of popular DAPs with touch screen interface, many are Android based and as powerful as smartphones from a few years ago.  Opus#2 is no exception running the Lollipop on its ARM Cortex-A9 1.4GHz quad-core CPU with 1GB of DDR3 RAM.  As of right now the Android OS is locked, and on the surface you will find Opus own native optimized audio app.  Also, both WiFi and Bluetooth v4.0 are supported, where you can receive OTA (over the air) FW updates, sync the time, and use your wireless BT headphones (though, no apt-X codec support).  theBit promises in a future to unlock Android in order to allow the use of popular streaming services such as Spotify and Tidal, but it’s still work in progress.
 
From my experience of testing other DAPs supporting these streaming services, it’s not as trivial as some might think because now you are dealing with a modified Android OS which requires customized audio drivers.  It’s definitely a challenge, especially if you decide to open a door to Google Play market where people going to install 3rd party untested apps that have a high potential to crash DAP's OS.  I assume that once theBit feels confident in having a solid solution, we are going to see an update, but for now to stream with Opus#2 – just pair it up with your smartphone using OTG microUSB cable.
 
Regardless of the streaming support, the focus of this DAP is still to provide a superior audio performance fueled by two ESS9018K2M DACs with up to 32bit/384kHz true bit-to-bit decoding.  This gives you a power to support most of the lossy and lossless audio formats such as WAV, FLAC, ALAC, AIFF, WMA, MP3, OGG, AAC, APE, and native DSD decoding (supporting DFF and DSF).  With Native DSD decoding, even though the spec says up to DSD128, I was able to test it without a problem using DSD256 files with 1bit 11.2MHz sampling rate.  Opus#2 crunched through them without a problem or buffering stutter.  And I was also able to verify seamless Gapless playback.
 
The internal architecture of the device takes full advantage of the Dual DAC configuration to process separately Left and Right channels with an efficient utilization of both unbalanced and balanced outputs.  But don't expect the balanced output to have double voltage swing in comparison to a single ended port.  I assume this was done to preserve battery life, and as a result the unbalanced SE output is 2.3Vrms (w/2ohm output impedance) while Balanced output is 2.5Vrms (w/1ohm output impedance).  Also, as part of a careful design implementation of balanced and unbalanced outputs, balanced has an improved performance of signal to noise ratio (116dB vs 115dB) and crosstalk (135dB vs 130dB).
 
opus2-05.jpg
 
GUI.
 
Since full Android support is not enabled yet, for now you are using theBit native audio app on top of the Android OS running in the background.  The app itself is very intuitive with a logical layout and easy navigation which looks great on Opus#2 4” display.
 
Starting at the top with notification bar, in the upper left corner you will have Playback icon status and loopback selection.  Then, moving to the middle you have volume icon with a step value (150 steps maximum), and in the upper right corner you have a battery indicator icon and a system clock.
 
Typical of Lollipop Android OS, you can swipe down the notification bar to reveal plethora of other controls.  When swiped down, the notification area has a time with day and date, battery indicator with an exact percentage, and Setup icon.  Below it you have a Brightness adjustment bar, Wi-Fi enable icon with drop-down box to get into wi-fi specific menu, Bluetooth enable icon with wireless Bluetooth menu access, Line Out (to enable line out output), Equalizer enable (which enables the currently selected Preset), Sleep mode enable, Repeat selection (one full repeat cycle, continues repeat cycled, single song repeat), and Shuffle enable.  The pull down bar is very convenient because of the smartphone familiarity and also for a quick access to a commonly used functions.
 
The main screen has upper half of the display dedicated to showing song’s artwork and if none is embedded – theBit includes a collection of music related images which are displayed randomly as song’s artwork.  Tapping on the area of the artwork brings up file info with Genres/Composer/Pathname and file type and file size.  Second tap brings up lyrics if it’s embedded into the song.  Also, with either first or second tap you get in the upper right corner a Star icon to tag the file as favorite and another icon to add it to a playlist which you can create and name on the fly.
 
In the upper left corner of that display you have an icon which takes you to file browser where you can sort by Folders, Favorites, Playlist as well as more common sorting by Songs, Albums, Artists, and Genres based on metadata of your audio file.  In the same menu you can also switch between internal memory and uSD card.
 
Back to the main Playback screen, underneath of the artwork area you have a playback bar where you can fast forward through the song by dragging a pointer while noting the current time marker position and total song duration.  Above this bar you have a counter of how many songs are in the current playback folder and also basic info about the file such as bit depth and sampling rate.  Below playback progress bar you have a full song/artist name and also Skip Next/Prev and Play/Pause touch controls.
 
From drop down notification bar you can get into Settings where you have a typical smartphone selection of controls, such as Wi-Fi and Bluetooth, and Screen setting with Brightness adjustment and Auto display Off timeout setting.  In Audio setting you can enable Equalizer and select one of the 3 available custom presets which you can customized individually (10 Bands with 31.5Hz, 63Hz, 125Hz, 250Hz, 500Hz, 1kHz, 2kHz, 4kHz, 8kHz, 16kHz) with an adjustment of audio playback in real time.  Audio setting also has Gapless enable control.
 
Output setting has Line Out enable, Balance (L/R) control, DSP mode selection (Auto, 32bit X-MOS, or 24bit I2S).  Gain control let you switch between Low, Middle, High to fine tune your output to accommodate everything from high sensitivity to more demanding earphones and headphones.  There is also a Sleep enable with Sleep time setting, but I’m not sure if it’s even necessary since Opus#2 by default goes into Super Power Saving mode.  My only BIG gripe in here is that I wish there would be a time to set a delay for Power Saving mode since it kicks in too soon.  When your screen is off during playback, and power saving mode starts, you no longer can control playback with hw transport control buttons.
 
Another setting is USB which selects Connect mode as either MTP (for file transfer) or Charging only connection.  And USB DAC mode which starts that mode when you connect Opus#2 to your PC/MAC or a smartphone.  Then, similar to smartphones, you have Language and Input selection, Date & Time setting, Storage info to show capacity of internal and external memory, initialize settings (database initialize, settings initialize, and Factory reset), Update (manual system update or to check for OTA update), and Info about the device.
 
Overall, the main playback screen is very easy to navigate, all the common controls are conveniently located by swiping down notification bar, and the main Settings are clear and self-explanatory.  The touch screen swiping interface is very fluid and highly responsive.  Also, once you start turning the volume knob, you get a brief screen with a volume bar and corresponding value setting where you can quickly swipe it up or down for a faster adjustment.
 
opus2-39.jpg opus2-40.jpg
opus2-41.jpg opus2-42.jpg
opus2-43.jpg opus2-44.jpg
opus2-45.jpg opus2-46.jpg
opus2-47.jpg opus2-48.jpg
opus2-49.jpg
 
Sound analysis.
 
As I mentioned in the past, sound description of the DAP is not an easy task because in reality we describe what we hear from headphones and their synergy with DAP output power, impedance, DAC, and other components in a signal path.  But nevertheless, I will try my best to describe what I hear while switching between a few of my IEMs I’m intimately familiar with (while volume matching by ear) and comparing to other DAPs I have access to.
 
In my opinion, Opus#2 is a prime example of a balanced neutral reference sound signature with a full body natural tonality.  Based on the initial listening with early fw release, I noticed right away that 3.5mm output was a touch smoother while in comparison the balanced 2.5mm output had a slightly faster/sharper transient response with a cleaner on/off transition of the notes.  But overall the sound is very transparent, layered, and with an expanded dynamic range.  Typically, a full body sound is associated with a warmth which smoothes out some of the details and makes layering and separation of instruments and vocals to be not as distinct.  Here, with 32bit DSP mode selected, you have a perfect separation of every note and a sharper transient response where the details just pop out of the background with more clarity.  And yet, the sound is not too lean or analytical/bright. 
 
I was very careful in my analysis to make sure I don't mistake signature of headphones and earphones with the signature of the source.  Since I mostly use C/IEMs, I was pleased with Opus#2 performance and synergy with multi-BA driver monitors, especially from BAL output.  When I tested some of my full size cans, I found better synergy in high gain, and I also noticed that big dynamic and planar magnetic transducers had a little smoother and more musical full body tonality in comparison to a more neutral transparent sound with multi-BA C/IEMs.
 
After 1.00.03 fw update, to my ears both 3.5mm and 2.5mm ports started to sound nearly the same, with an exception of balanced port having higher output power and a little wider soundstage expansion.  Not sure if it was due to a burn in of the caps or my brain burn in or some other placebo effect, but I clearly remember that after the update single ended output caught up with a balanced one.
 
opus2-34.jpg
 
External connections.
 
While Opus#2 is a very capable standalone summit-fi DAP, it’s still flexible enough to drive external AMP, or to be used as a digital transport to drive external DAC/AMP, or to be used as USB DAC.  Sometimes I feel it’s an overkill, but then I realize that many audiophiles have capable desktop setups to enjoy their hard to drive headphones at home and can still use Opus#2 in the heart of it.  And on the move, you can use Opus#2 without any external help and still enjoy high quality sound.
 
As I mentioned before, 3.5mm HO output is shared with Optical out, and I found its pair up with Micro iDSD to be very clean and transparent, making it a very capable digital transport.  Of course, optical s/pdif signal has its bandwidth limitation so don’t expect the highest bit rate/depth, but still I found this particular pair up with Micro to work quite well.
 
When it comes to Line Out (LO) testing, I was a bit skeptical since there is no dedicated LO port.  I thought maybe theBit guys set volume to the max, but when doing a/b comparison with LO enabled vs setting the volume to the max, I can hear a difference where LO mode is clean while the volume output set to the max (150) had a bit of distortion.  I tested it using E12A portable amp which I consider to be neutral and relatively transparent, so there is no coloration added.
 
USB DAC testing wasn’t as successful using my Win7 laptop since I got an error message that drivers (provided by theBit) didn’t pass some signature test.  I have read impressions where others didn’t have this problem, so I need to investigate it further why my laptop has an issue.  I also read that MAC users don’t even need to install drivers.
 
When I got to test it with my aging Galaxy Note 4 smartphone, I actually had a lot more success where I was able to connect Opus#2 without any problem using USB OTG cable.  Pair up was fast and Opus#2 was recognized by my phone right away. I was able to control the volume from the phone and the DAP, and used it with different apps.  While waiting for streaming capability to be unlocked, this is one of the possible solutions, using Opus#2 as USB OTG DAC.  But I found the sound quality in this config to be a bit underwhelming with lower resolution and less transparency when compared to listening to the same track straight from Opus#2.
 
Bluetooth connection is another way to enjoy your Opus#2 with wireless headphones.  Even so aptX codec is not supported, lately I noticed that it makes only a difference with cheap budget IEMs, while high end headphones (my current favorite is P7 Wireless) show very little difference even driven from non-aptX sources.
 
opus2-36.jpg opus2-37.jpg
opus2-38.jpg opus2-50.jpg
 
Pair up.
 
In the following pair up test I will mention the unique design feature of the particular pair of headphones/iems under the test, as well as will indicate MG (middle gain) or HG (high gain) in addition to Volume level.
 
R70x (470ohm, open back) - HG, V120 - 3D holographic staging, deep extended textured sub-bass with an articulate mid-bass punch, full body organic natural mids, very transparent and detailed, extended smooth treble with a great articulation, not as much sparkle but more on a natural smoother side.
 
PM3 (planar magnetic) - MG, V120 - average soundstage width with more depth, deep sub-bass with a moderate quantity, a bit slower mid-bass punch with some spillage into lower mids, full body warm lower mids and warm smooth upper mids, smooth treble which is lacking some sparkle.  Overall the sound has a very analog dynamic driver type of characteristics, very smooth, warm, a little congested.
 
EL8C (planar magnetic) - HG, V104 - above average soundstage width with plenty of depth, quality sub-bass texture with a fast punch mid-bass, lean lower mids, bright revealing upper mids reach analytical level of detail retrieval, crisp airy extended treble.  No hint of metallic sheen which I usually hear in other EL8C pair ups.
 
T5p2 w/alpha pads (tesla driver) - MG, V115 - wide/deep soundstage, extended sub-bass with a nice deep rumble, average speed mid-bass punch, warm full body lower mids, detailed natural upper mids, smooth well defined treble.  Overall sound is very detailed but not as transparent.
 
Zen (320ohm, earbuds) - HG, V109, expanded soundstage with an average depth, nice sub-bass rumble, punchy mid-bass, full body lower mids, clear smooth detailed upper mids, well defined smooth treble.
 
S-EM9 (121dB sensitivity) - MG, V100, no hissing, holographic staging; deep extended sub-bass rumble, punchy mid-bass slam, neutral lower mids, smooth detailed revealing upper mids, crisp airy well defined treble.  The sound is very spacious, layered, detailed, and still smooth and natural.
 
K10UA (115dB sens) - MG, V88, very faint hissing, expanded soundstage, deep extended sub-bass rumble, fast punchy mid-bass, leaner lower mids, revealing detailed upper mids, crisp airy extended treble.  The sound is very crisp, detailed, revealing.
 
Andromeda (115dB sens) - MG, V70, some hissing, holographic soundstage; deep extended textured sub-bass rumble, fast articulate mid-bass punch, slightly leaner lower mids, crisp revealing upper mids with an excellent retrieval of details, crisp airy extended treble.  Punchy revealing crisp sound.
 
U12 w/B1 (115dB sens) - MG, V88, no hissing, above average soundstage width/depth, warm analog bass with a deep slightly elevated sub-bass extension and slower mid-bass punch, warm full body lower mids, smooth laid back detailed upper mids, smooth well defined treble.  The sound is smooth and laidback.
 
UERR (100dB sens) - MG, V101, no hissing, holographic soundstage, extended quality sub-bass (not as much quantity), punchy mid-bass, neutral lower mids, detailed transparent upper mids, crisp well defined treble.  The sound is very transparent detailed and layered.
 
Zeus XRA w/G1 and PWA 1960 (119dB sens) – MG, V75, some hissing, expanded open soundstage, nice deep sub-bass rumble and punchy mid-bass (bass is above neutral with 1960, but still not too aggressive), close to neutral lower mids and very transparent detailed upper mids, and airy well defined treble with a nice sparkle.
 
opus2-35.jpg
 
Comparison.
 
While switching between UERR, S-EM9, and ES60 c/iems, and volume matching by ear when going between two sources, here is how I hear Opus#2 (#2) in comparison to other DAPs.
 
#2 vs #1 - both have a very similar signature, while #2 stands out with wider and deeper soundstage, a faster transient response of notes (transition between on/off state of notes), and slightly better dynamics.  #1 has a little smoother tonality while #2 sounds a little sharper, with better defined details.  The difference is not exactly night'n'day, and #2 is more of a high res refinement of #1.  Both have the same level of hissing with sensitive IEMs.
 
#2 vs LPG - the sound quality is very close, down to a similar level of transparency, detail retrieval, and soundstage expansion.  In terms of tonality #2 is just a little smoother while LPG has a deeper black background which is more noticeable with less sensitive IEMs (cleaner edges around notes, sharper contrast between notes on/off).  But with sensitive IEMs, LPG has higher level of hissing which ruins that dark clean background.  Also, LPG has a little more impact in mid-bass.
 
#2 vs AK120ii - similar signature where AK tonality is a little warmer and smoother, while #2 is more revealing and more dynamic.  I also find #2 to have better separation and layering while the smoothness of AK makes it a little congested in comparison.  #2 soundstage is wider, while depth is the same. Also, #2 has higher level of hissing in comparison to AK with sensitive IEMs.
 
#2 vs PM2 - #2 sound is more revealing and transparent, while PM2 is a little smoother and slightly less resolving.  #2 has better layering and separation of instruments while PM2 sounds a little congested in comparison.  #2 soundstage is wider, while both have the same depth.  PM2 has a little less hissing with sensitive IEMs, though you can hear it with both.
 
#2 vs X7 w/AM2 - very similar resolution and layering/separation of the sound, and similar retrieval of details, but the tonality of X7 is leaner and a little brighter while in comparison #2 has more body and sounds a little more neutral with a deeper sub-bass extension.  Also, #2 has a wider soundstage.  #2 hissing is more noticeable with sensitive IEMs while X7 is almost down to a minimum.
 
Opus#2 next to Opus#1
 
opus2-26.jpg opus2-27.jpg
opus2-28.jpg
 
Conclusion.
 
In my opinion, Opus#2 would have received a lot more attention if that was theBit’s first DAP.  Despite being in business for a long time, this company came out of nowhere and surprised everyone with Opus#1 release.  And to top it off, they had a very impressive fw update and a temporary price cut which is still in effect.  As a result, when Opus#2 was released, the focus shifted from its flagship summit-fi sound quality to a price difference where people trying to justify the delta.  In reality, Opus#1 and Opus#2 are just like two multi-BA IEMs from the same manufacturer where you have mid-tier model priced lower and flagship TOTL at the top of the price food chain.  You can get a regular Opus#1 which is currently discounted down to $399 from the original $599, or get a metal Opus#1 which is available for $899 and uses CNC all metal body and different high end opamps, or you can go for the TOTL experience with Opus#2 for $1599 which not only has a superior build, more resolving sound, and higher end dual DAC architecture, but also expected to receive a fw update with a support of wi-fi streaming. 
 
I know that many people go for the best price/performance ratio, and it will be hard to beat Opus#1 in that perspective.  But if you are looking for TOTL performance at a reasonable price in comparison to other popular flagship DAPs that cost more, Opus#2 deserves a serious consideration.  And again, I can’t help but to be curious what else theBit is going to come up with.  This company surely knows how to design a well build and a great sounding product, and I think if they can bring it closer to $1k price mark – their next DAP release will reach a lot more audio enthusiasts and audiophiles.

twister6

twister6 Reviews
Headphoneus Supremus
Pros: improved sound quality, excellent build quality, Modular cable is amazing!!!
Cons: needs at least 100 hrs of burn in (don't judge out of the box), a bit pricey
This is a combined Review of Whiplash Audio headphone cables, TWag v3 Litz and Modular Cable System.  http://www.whiplashaudio.com/ .  I would like to Thank Craig of Whiplash Audio for providing me with review samples of his cables in exchange for my honest opinion.  The review was originally featured in a separate post: http://www.head-fi.org/t/757815/review-of-whiplash-audio-twag-v3-litz-and-modular-cable-system-a-true-forward-thinking-in-custom-cable-design-with-a-lot-of-close-up-pics so if anybody has additional questions, we can continue a discussion in that thread.
 
==============================================
 
Discussion about removable headphone cables is often a hot topic with polarized opinion across different audio communities.  As I mentioned in a number of my previous reviews, a headphone cable is a wire that bridges a gap between your source and a driver and also a bottleneck that will affect a sound based on the properties of the wire material.  It’s not a voodoo magic and definitely not a “snake oil” as some refer to it – it’s a basic property of electrical signal traveling through a conductive material.  Copper is a very common and the most cost effective material, and everybody is familiar with OFC (oxygen free copper) headphone wires.  Nothing is wrong with OFC wires, except they don’t yield the best audio results.  You can argue that “the best” is a relative comparison where a lot of people won’t even notice a difference.  Sure, it all depends on a quality of your hardware source and a quality of audio files, architecture of headphone design, and also our hearing sensitivity which changes as we age.  But I’ve also noticed another factor related to people’s expectations thinking that $300-$400 cable should make your headphone sound by that much better.  The truth is that a cable, especially when you start looking into a pricey Pure Copper, Pure Silver, or mix of Silver/Gold, will fall into a category of diminishing returns.  But if you already invested into $500-$1k IEMs and want to squeeze every bit of performance out these headphones – tip rolling will not give you the same level of refinement as you will get from a quality cable.
 
In the past I have looked into budget silver-plated replacement cables for convenience of marginal sound improvement, better fitment (eliminating memory wire), and more appealing look.  Relative to stock cables those did introduce sound changes, but the margin of this “improvement” went down as I start looking into higher quality multi-driver IEMs.  Now with more opportunities to test replacement headphone cables with different wire material, my eyes and ears really opened up to what I have been missing.  I quickly realized that it’s not just a cable by itself that makes a sound improvement, but also a synergy of how well it pairs up with headphones and the source after a proper burn in.  And believe me, these cables do require A LOT of burn in where it starts to pay off after 50-60hrs, though at least 100hrs is what recommended.  Unfortunately, it could be a matter of trial’n’error to find a perfect combination if you need a Pure Copper, Pure Silver, or perhaps a mix of Ag/Au.  That is a reason why sometimes it makes sense to update your stash with different types of cables so you have a choice to try which one works better with different headphones in your collection.  Another choice you have to think about is where to buy your cables.  Unlike your typical headphones, cables are custom made, and it all comes down to the experience of cable maker, his/her knowledge of different headphones and sources, and quality of workmanship.
 
Before I dive into details of Whiplash Audio cables, let me first mention why I decided to review these.  Obviously, I'm in no way associated with Whiplash Audio and have no gain or any hidden interest if you decide to use their service or to go with someone else.  I did talk to a number of different cable makers, some of which were honest with me, while others were pushing a sales pitch or badmouthing the competition.  Craig, who is behind Whiplash Audio, was very honest in his communication, showed a lot of knowledge about the subject, and I was impressed with his experience of being in business for almost a dozen of years including ownership of Whiplash Audio for the last 8 years.  But what impressed me the most was his forward thinking with innovative Modular Cable system, something I’ve never seen or heard of before.  It wasn’t even a part of my original review intention, but I’m so glad I got an opportunity to test it.  I think these cables deserve more attention, so I would like to share with you what I've found.
 
First, let me start with their TWag v3 Litz, Pure Silver cable.  In their 3rd iteration, this OCC silver cable has been beefed up with 55% more Litz wire strands to 24awg gauge.  From the first glance you can't help but notice how impressive this cable looks with its meaty 4-wire braided design perfectly matched with a high quality Oyaide Rhodium straight 3.5mm connector.  The cable has a transparent shielding so you can clearly see silver Litz strands of the wires.  Actually this transparent theme is common across different parts of the cable.  Starting with a connector itself, there is clear transparent tubing covering part of the housing to provide an enhanced grip and to extend into a strain relief.  The same type of the transparent tubing with Whiplash logo is used as y-splitter, separating braided part of the common wire side going up from 3.5mm connector and twisted pair side with L/R going to corresponding earpieces of IEM.  This y-splitter tubing is actually very effective to form a natural strain relief and to show a continuity of 4 individual wires from MMCX connectors all the way down to headphone connector.


Bringing twisted pairs of L/R sides together is a beautifully crafted Wenge wooden chocker that compliments a finish of silver cable with a nice contrast.  The L/R sides of the twisted cable gets terminated by a black plastic housing of mmcx connector with a decent strain relief.  The housing itself is small enough, but still has a comfortable grip and corresponding L/R marking.  The metal part of the connector is made out of Rhodium, a premium durable metal which is part of Platinum Group.  Here is something interesting, the cable does look hefty, but it’s not heavy and actually very flexible with a comfortable wire up fitment over the ear.  There is no need for earhooks, and a choker was of a great assistance in bringing wires together which also helps in reduction of microphonics down to a minimum.  I wouldn’t say this cable becomes invisible like Linum BAX, but it was very comfortable and hardly noticeable during extended listening sessions.


Of course as great as it looks, this is not a piece of jewelry but rather a high quality audio cable intended to be used with headphones.  Before diving into audio analysis, I would like to mention that you have a lot of different options before ordering this cable, and have flexibility to configure everything from a cable length and wire material to a specific type of headphone connector and source connector.  My primary target of testing with provided TWag v3 Litz cable were Westone UM Pro 50 and W40 IEMs, and with that in mind the cable I received was outfitted with a Westone low-profile mmcx connector.  FYI, you can use any universal mmcx connector with Westone IEMs, but a cable specific to their models with a low profile connector will not fit every other mmcx based IEM.  That’s where a beauty of Modular Cable system comes in to play, but more about it later.
 
Using UM Pro 50 and Cayin N6 DAP as my main test vehicle to compare Westone OEM Epic cable vs TWag v3 Litz, the difference was quite apparent and easily distinguishable even in a blind test.  First of all you hear a very noticeable improvement in retrieval of details, down to micro-detail level, and the sound itself became more transparent.  Furthermore, the soundstage improved with more width and depth, something I already found in UM Pro 50 vs Pro 30 as an improvement while TWag v3 took it to the next level.  Without sounding like a cliché, there were some new details I heard for the first time that wasn't as clear with Pure Copper or Linum BAX replacement cables in my previous testing.  It really took some time of going back’n’forth between Epic and TWag to figure out what I was missing, until I realized those were some panned echoes and other stereo positioned elements of the delay, chorus, and reverb effects.  Imaging and positioning was improved, and also sound was a bit louder.  I like how bass became more articulate and better textured, but not as boosted as with Linum BAX.  Mids gain a bit more depth, becoming more revealing and less veiled.  Also, treble was brighter in comparison to Epic cable, but still perceived to be very organic.
 
UM Pro 50 was the biggest mystery to me because it’s such a capable IEM, but I felt that included Epic cable was holding it back from revealing its true potentials.  TWag v3 Pure Silver cable opened up these hidden potentials, bringing it up to a spotlight.  But I still would consider one of the biggest differences is how Epic cable focuses more on details of the sound positioned closer to the center, while everything else to the extreme left/right gets attenuated.  With TWag v3 you hear vivid details of every sound in the mix with a precise positioning in space even at extreme stereo spread, something that was missing with Epic cable, Pure Copper cable, and Silver Plated cables.
 
When it comes to W40, I found TWag v3 to provide the same level of improvement as with Pro 50.  I was very pleased to hear more mid-bass punch, though accentuations of upper mids and treble were a bit harsh and peaky for my taste – it wasn’t as organic as Pro 50, I guess just a matter of my personal opinion.  Since W40 has a wider soundstage to begin with, the depth/width improvement wasn’t as drastic as with Pro 50, but I still enjoyed benefits of more accurate surround details.  Lows were still well controlled, and I definitely enjoyed improved sub-bass and mid-bass punch, though I do have to mention that for my taste Pure Copper cable is more appropriate match with W40, making upper mids/treble smoother and less splashy.


Though I was very excited to get my hands on TWag v3 and to test it with my favorite IEMs, the undeniable star of this review is Whiplash Audio Modular Cable System.  In this day and age, is it even possible to re-invent the wheel when it comes to headphone cables?  There are some new design ideas when it comes to full size headphones with planar magnetic drivers or variety of IEMs with multi-BA or multi-dynamic or hybrid dynamic/BA drivers.  But to come up with something new when we are talking about a wire connecting point A to point B?  I would expect a variation in the material of the wire or types of the connectors, but modular design never crossed my mind until I saw what Craig at Whiplash Audio cooked up in his lab.
 
The biggest limiting factor of expensive removable cables is their custom nature.  Let's say you invest $400 into a custom cable for your favorite pair of CIEM or TOTL universal IEMs.  But what happens when you go from a standard wired 3.5mm connector to a balanced wired 2.5mm A&K DAP?  Or if you invested into Westone low profile mmcx connector cable and can’t use it with other IEMs that have a standard mmcx connector?  Or if you expanded your collection with JH Audio IEMs utilizing 2pin connector or want to use this cable with your full size headphones?  Do you have to spend another $400-$500 to buy a different cable? The answer is NO, if you invest into Whiplash Audio new Modular Cable System that has a flexibility to interchange cable pieces without replacing the whole entire cable!
 
The idea behind this cable sounds simple enough, but implementation and workload associated with building of such cable is not that easy.  If you think about it, any headphone cable could be partitioned into 3 main segments: source connector part, common body part, and headphone connector part after y-splitter.  If you want to use your smartphone or DAP with a standard 3.5mm TRS audio jack – choose that connector, or if you need 2.5mm A&K balanced wired TRRS connector – select another one.  Do you have JH Audio or Westone or UE IEMs or a full size with 3.5mm earcup connector?  Not a problem, just select a correct source to y-split portion to accommodate any pair of headphones.  It’s like mix'n'match toys my kids have at home, except this is a toy for daddy!!!  All this is made possible by using quality 4pin small connector pairs.  You are still maintaining continuity of 4 wires (L/R and separate grounds), but now it’s interrupted by a male/female keyed connector with a relatively small cross section area and a shrink tubing strain relief.  At first I was a bit concerned thinking these connectors will get in the way of the cable or will stick out like a sore thumb.  But I found them to actually blend in very nicely!
 
You have a selection of a wide variety of wires you can request to build these cables with, but I was fortunate to receive a review sample of Modular Cable with Pure Silver Litz wires to compare against TWag v3 Litz.  Everything about this cable shows a high level of workmanship with attention to every little detail.  I even learned that Craig uses a custom silver solder for all the connections which is even more expensive than Mundorf silver solder.   The cable itself has the same hefty feel as TWag v3 cable, and the same consistent braiding of 4 wires all the way up to y-splitter, also made out of clear tubing with Whiplash logo.  Upon a closer examination of top connector part, I think it was a great idea to have a short piece of braided wire from the connector to y-splitter, and then continue with twisted L/R sides of the wires.  I’m also very pleased that Whiplash used a darker shielding for their cable so it blends in better with black connectors.  Similarly to TWag v3, wire is lightweight and very flexible with a comfortable fitment of wire up behind the ear.  Inter-connectors do contribute a bit to microphonics when rubbing against your cloth, but surprisingly I found it on the same level as "fixed" TWag v3 cable.


The biggest question in my mind was the effect of those connectors on sound performance of the cable.  I already knew what to expect from Pure Silver cable and had a reference of TWag v3  for sound comparison while using with UM Pro 50 and W40.  I spent quite some time going back’n’forth between TWag v3 and Modular Cable, and at first noticed a little bit of difference considering I started a burn in of these cables at the same time and had about 50hrs on both.  What I didn't realize that Modular Cable needs more burn in time due to extra connections and solder joints.  This is a real deal, and with additional 20hrs of burn in, the performance of both TWag v3 and Modular Cables came to be very close!  Also, when I switched from a shorter profile Westone mmcx cable to a standard universal mmcx cable, I had to run more burn in with a new cable patch.


I still found some difference with Modular Cable sounding a little bit warmer, but I have a feeling with more burn in time this gap will close and disappear where both cables going to sound on the same level.  Other than that, all of my sound improvement comments (over Epic cable) mentioned in TWag v3 section of the review are still applicable to Modular Cable performance with UM Pro 50 and W40.  As a matter of fact, due to a slightly warmer/smoother characteristics with a same level of improvement in detail retrieval and soundstage expansion - I actually found W40 to have a better synergy with Modular Cable vs TWag v3, though I expect this gap to close with more burn in time.
 
Now since I also had access to a regular MMCX connector patch, I was able to expand my testing to include UE900s and A83 IEMs.  With UE900s the comparison between stock braided audio cable and Modular Cable showed some improvement but it wasn't as significant as I found with Westone IEMs.  Bass texture was definitely improved, mids had more clarity, though upper mids/treble were a bit as harsh as before.  But to my surprise, soundstage improvement wasn't as significant.  Another UE900s improvement with Modular Cable was having an option to wear them wire up behind the ear or wire down for those who have glasses. 
 
With A83 3-way hybrid the improvements were more noticeable, even considering a high quality silver-plated stock cable provided by Fidue.  With Modular Cable I found the bass to go deeper and to become more textured, and I even heard some additional rumble details.  I also felt a benefit of Pure Silver Modular cable where upper mids/treble of A83 became a bit smoother and more organic.  Retrieval of micro-details went up a notch as well.  Soundstage opened up even more (and A83 is wide to begin with) with improved width and depth.  I always consider A83 to be among my top favorite IEMs, but a stock cable with its stiff memory wire prevented me from achieving a perfect in-ear fitment - no longer a problem with a soft over-ear fitment of Modular cable.


Overall, I did approach my review with expectations for sound improvement but wasn't 100% sure if these will be justifiable by a rather steep price of the cable that can reach a level of IEM price tag itself.  After 60-70hrs of combined burn in and listening I had no doubt in my mind these cables were worth every penny of their price tag, and I don't think they even reached their full level of potential!  Pure Silver cable is like a fine wine that gets better with aging, and I'm looking forward to continue monitoring their improvement.  Although it's a high price to pay for a wire, we are actually talking about a precious metal material, a Pure Silver Litz wire that is very expensive to begin with.  Is this something I would recommend as a definitive upgrade for your headphones?  Maybe not if we are talking about single or double driver Westone or Shure "entry" level models that cost half of the cable price.  But as you start going up in a category of quad and higher driver configuration or multi-driver hybrid design, if you already invested money into your IEM and happy with its sound signature - Pure Silver cable will definitely improve their sound quality, taking it to a whole new level, and keep in mind the key word in here is "refinement" and "improvement" rather than changing a sound signature.  Personally, I was VERY impressed with a sound improvement, a build quality, and innovative design of Whiplash Audio Modular Cable System and would definitely recommend you to check them out!
  • Like
Reactions: proedros

twister6

twister6 Reviews
Headphoneus Supremus
Pros: neutral revealing sound, durable build, nice case, and full set of Comply tips
Cons: cable is a little springy, L/R marking is not as clear, chin slider is hard to slide

Before I start my review, I would like to Thank SoundMagic for providing me with a review sample in exchange for my honest opinion.
 
If you live in US, they are currently available at a discounted price on http://www.miccastore.com/soundmagic-e80-noise-isolating-inear-headphones-p-138.html and for those outside of US on http://penonaudio.com/SoundMAGIC-E80. More info could be found on their original website in this reference: http://www.soundmagic.com.cn/cn/Upload/E80S_B.jpg
 
Also, want to bring to everyone's attention another great E80 review posted by Vince/Hisoundfi: http://www.head-fi.org/products/soundmagic-e80-in-ear-monitor-headphone/reviews/13331


When the original SoundMagic E10 was released almost 4 years ago, they shocked everybody with their incredible price/performance ratio.  Years later and with a number of rewards under their belt, they still hold their own in sound and build quality when compared to other more expensive IEMs.  It looks like guys at SoundMagic haven’t been sitting still and decided to expand their lineup of more fun-tuned IEMs with a new Reference Series.  I just had a chance to review their flagship E80 model from this collection, and here is what I found.
 
There are a lot of similarities in packaging with their original E10.  It arrived in the same compact box with a cover image of E80, brief but accurate summary of a sound description and a design bullet points, a detailed tech spec, and a clear display window on the back with headphones showing right through it – a very efficient presentation without any unnecessary magnetic flip cover or larger than needed box.
 
Unboxing.
 
soundmagic_e80-01_zpsruiigf1f.jpg
 
soundmagic_e80-02_zpsodqdk5ur.jpg
 
soundmagic_e80-03_zpsq4f4n8kd.jpg
 
soundmagic_e80-04_zpsrrhytocp.jpg
 
 
Without wasting a square inch of the space, SoundMagic packed the box very efficiently with a foam cutout piece holding E80 IEMs and a spacious hard case holding all the eartips.  Though nothing can beat Brainwavz IEM cases, I found SoundMagic square IEM case with pockets on each side to be my 2nd favorite.  As a matter of fact, it’s spacious enough to hold comfortably both E10 and E80 where I have both of them now, and red zipper accent makes it stand out with red design of E-series IEMs.  Keep in mind, other finish colors might be available soon, but hasn’t been released yet.
 
In addition to a cable clip, which you may or may not use and I do appreciate it being included separately rather than attached, there is also a plethora of included eartips.  You have 3 pairs of silicone S/M/L with narrow bore opening, 3 pairs of silicone S/M/L with wide bore opening, a pair of large double-flange tip, and 3 pairs of genuine Comply Foam eartips in S/M/L.  Though other silicone tips are generic, 3 pairs of Comply Foam tips have a $15 value you are getting along with a quality hard shell zippered cases.
 
Accessories.
 
soundmagic_e80-05_zpsyldtgzpm.jpg
 
soundmagic_e80-06_zpseneujctb.jpg
 
soundmagic_e80-07_zpsb9su9sks.jpg
 
soundmagic_e80-15_zpsmnahskgj.jpg
 
 
As you can see, I already mentioned a few times the value E80 brings to the table in terms of its pricing, accessories, and also a build quality with all metal construction.  Everything from slim metal housing of gold plated 270deg headphone plug with a nice rubbery strain relief, to a slim cylindrical metal y-splitter with a great strain relief and a tight rubber chin-slider, and going up to metal barrel shells with a molded cap piece on the back flowing into a strain relief – all this speaks highly of a durable build quality.
 
I like 270deg angled headphone connectors since they are perfect when used with a phone or a DAP in your pocket.  Cable is very similar to E10 with a twisted wire which is shrink-wrapped in a tight rubbery shielding.  Cable has some microphonics effect, also a little springy, and yet still soft enough for an easy storage management.  I have seen a lot worse stiff wires, so this one is not that bad in comparison.
 
Earpieces are relatively small with a smooth rounded short barrel shape and rather unique wire attachment on the back.  Though I’m more used to a traditional wire connection from the bottom of the shell, SoundMagic wire attachment felt confident.  There is a vent at the base of the nozzle, and L/R marking at the bottom of the shell.  A small font in white color with a circle around it makes it a bit hard to read which is important considering symmetrical design, so I would like to see a better ID, perhaps making a Left side dot-bump on a strain relief a little bit bigger.
 
Sound isolation is controlled by eartip selection, and you can get a decent level with a right seal.  Due to my wide and shallow inner ear, I found the best sound balance using UE900 eartips.  It seems that narrow boar stock tips and wide boar spiral dots didn’t provide a good enough balance between low end and treble, while using UE tips did the trick.
 
Design details.
 
soundmagic_e80-08_zps4c5n4qvk.jpg
 
soundmagic_e80-09_zps3rnkmtur.jpg
 
soundmagic_e80-10_zpse1lnoq6j.jpg
 
soundmagic_e80-11_zpslcrhahoi.jpg
 
soundmagic_e80-12_zpsr6mipaq5.jpg
 
soundmagic_e80-13_zpsg3owykko.jpg
 
soundmagic_e80-14_zpsfcv19lub.jpg
 
soundmagic_e80-16_zps7rhbx4mf.jpg
 
 
Considering this E80 model is part of a new SoundMagic Reference Series, I’m sure a lot of you are curious to find out how they sound.  E80 has a neutral revealing bright sound with a touch of mid-forward signature.  I found it to have an excellent low end and treble extension, where it's all about quality rather than quantity, and a nice airy soundstage with a good level of depth.  Imaging is not exactly 3D, but it still has a good positioning of instruments thanks to an excellent separation of sounds with a decent layering effect between instruments and vocals.
 
I find their low end to be a touch north of neutral, but it's not boosted or exaggerated.  Very natural balance between intelligent sub-bass rumble (only comes out to play when called upon) and a tight mid-bass punch.  There is no spillage into lower mids, bass is under control, and in perfect harmony with the rest of the spectrum.
 
Lower mids are not too thin or too thick, with a bit of warmth that gives sound a convincing natural body.  Upper mids are a bit forward, bright and detailed, and never crossing analytical threshold or becoming harsh.  Vocals sound bright and clear, a bit less organic in comparison to a slew of warm multi-BA driver IEMs I have been listening to lately, but it still smooth, never becoming harsh or grainy.
 
Treble has an excellent extension with a bright crisp sound.  I'm very cautious using “bright” in describing treble because it always leads to sibilance, but in here SoundMagic managed to tune their treble without crossing that sibilance threshold, while still remaining bright, crisp, and airy.
 
I thought at first RE400 and B3 Pro I would be an interesting comparison due to their neutral and warmish nature, but I felt that E80 was in slightly different category with its brighter signature.  Here are some of the comparisons.
 
E80 vs E10 - E10 mid-bass punch is stronger and a lot faster, mids a more recessed and not as smooth and organic as E80, treble is very similar and so does a soundstage.
 
E80 vs KC06A - KC has a little more exaggerate bass, elevated quantity of sub-bass and mid-bass, a very similar lower mids, while E80 upper mids are a little smoother, and also both have a similar treble.  It will probably sound closer to KC06, due to lower bass quantity, but I still find E80 to be smoother and more transparent.
 
E80 vs UE600 – both have a very similar low end, but 600 mids are more upfront, making their signature a bit more mid-centric vs E80 being more neutral and balanced, and also 600 treble doesn't have as good extension as E80.  E80 mids are a bit smoother, and also it has less background hissing.
 
E80 vs VSD3 - VSD3 has stronger mid-bass punch, more quantity for sure; upper mids are a bit more upfront being brighter and harsher, while E80 mids are more neutral and smoother in comparison.  Also, VSD3 treble is not as extended as E80.
 
E80 vs IM50 - IM50 has a stronger and faster mid-bass punch and deeper sub-bass, warmer mid, and having treble extension which doesn’t quite reaches E80 level.
 
Conclusion.
 
I typically stir away from neutral sound that is tuned toward bright signature because I’m “allergic” to analytical harsh sound.  Here I believe SoundMagic hit a sweet spot with E80 that "magically" draws you right into its "sound" filled with revealing details without any exaggerated peaks.  Sound is neutral, but it’s not flat-neutral, and actually very engaging.  To be honest, I was a big worried when I read “reference” series name, thinking it will have a bright analytical signature.  Instead, I was pleasantly surprised with a sound that is easy on your ears, gives you plenty of revealing details, even has a touch of a fun bass, and still great for an extended listening period without causing ear fatigue.  Definitely recommend this one!
twister6
twister6
@Paulus XII : T1 has a better defined bass, higher in quantity too, and a more v-shaped signature (dip around lower mids) which lifts the perception of upper mids more.  Upper mids are brighter/harsher.  Titanic driver produces (to my ears) a bit of a metallic sheen effect at higher volumes, while E80 is smoother and more natural, with a more even response across frequency range.  T1 also is almost like semi-open IEM (with a ton of holes in the shell) so their soundstage is wider, but sound isolation is not good and sound leakage is noticeable as well.  Bottom line E80 is more neutral revealing while Titans are more v-shaped, brighter and kind of reminding me of 2-way hybrids :)
seanwee
seanwee
FINALLY!!!!!  A comparison with the ostry KC06 !!!
 
SO i will be getting the soundmagic afterall!!!!
THX!!!!!!!
Jojaonthebeat
Jojaonthebeat
When it comes to detail, soundstage and instrument separation, is there a lot of difference compared to the e50 or is there only a slight difference? Can someone also please tell me the difference when it comes to bass between the two as well. I want soundstage with good bass because I listen to alternative, edm and electro music. I am a drummist too and prefer to get detail when it comes to the drum instruments.

twister6

twister6 Reviews
Headphoneus Supremus
Pros: supports Android (USB OTG), iOS (Lightning), PC (USB), sound improvement, tiny design
Cons: a bit pricy, on PC supports usb2.0 only
This is a Review of Cozoy Astrapi Hi-Res USB OTG dac/amp.  Currently available from http://penonaudio.com/COZOY-DAC-AMP ($129.90).  I received this unit as a review sample, it was not purchased.  Also, as I just learned, Shozy team (known for a famous Alien DAP) is behind Cozoy design.
 
Also, since Cozoy is still working on their official website, you can visit their FB page for the latest updates: https://www.facebook.com/pages/Cozoy/1531647370419283
 
In my recent review of FULLA usb dac/amp I was very clear about not being a fan of "jack of all trades" devices, but it did get a bit frustrating when that usb dongle turned out to be a "master" of only one trade connected to my laptop, and I wasn't able to get it to work with my smartphone.  The same story happened with E10k where you have to jump through hoops to connect it to your smartphone while using external power supply and splitter.  With E18, I found its sound to be less transparent and device itself to be too bulky for a pair up with smartphone.  When it comes to Beyerdynamic A200p (rebranded Astell & Kern AK10), it was getting down to a more manageable size with a true "jack of all trades" functionality, but sound was a bit on a cold digital side, footprint was not as friendly to attach to a smartphone, and proprietary cable connection to the unit was getting loose all the time.  Sooner or later we all come to a conclusion that nothing is perfect, but one company came out with the most elegant all-in-one solution I have ever seen.  In this review I would like to share with you about Cozoy Astrapi USB OTG dac/amp and how it performed in my testing.
 
Arrived in a small and very sturdy white carton box, it has a lot of "Apple" appeal from outside with a very minimalistic labeling of the company name on the top, model name on the side, and even Made for iPod/iPhone/iPad around it.  There is also a brief info with general instructions, basic spec, list of accessories, and vague drawing of a design on the back of the box.  There was no mentioning about internal components to shed a light about the type of DAC and amp used in the design, and no mentioning about USB OTG support for Android devices or USB support for use with PC/laptop.  Usually companies like to over-exaggerate functionality of their product with marketing hype.  Instead, here it was a very modest list where I had to figure out myself from clues of lightning connector (for Apple compatibility), micro-usb to micro-usb (USB OTG for your Android smartphone or tablet), and micro-usb to usb (connection to your laptop or PC).
 
From Penon store webpage, Astrapi Spec:
 
  1. Hi-resolution :24Bit-96khz 192khz
  2. Impedance :16-100ohm at 1khz loading
  3. Output vrms:1.5Vrms max
  4. THD+N:0.003% ,1khz 0dbfs
  5. SNR:105dB AT 3.3V power supply
  6. Resolution :24bit/192khz sampling
  7. System power current :10mA-70mA max
  8. Power input:1.8V-3.3V+-10%
  9. Output gain level step :3dB/step ;16 steps
  10. Headphone power output :10mW max
 
 
Unboxing.
 
cozoy_astrapi_dac_amp-01_zpsbthqbzyy.jpg
 
cozoy_astrapi_dac_amp-02_zpsc85fxybl.jpg
 
cozoy_astrapi_dac_amp-03_zpsv4vc8ct8.jpg
 
cozoy_astrapi_dac_amp-05_zps6excvx7j.jpg
 
 
Basically, these 3 cables are the only included accessories, but cables itself were of a high quality.  It was nice to see included micro-usb to usb cable, though in theory you can use any smartphone micro-usb cable for connection to your PC/laptop, while other cables had a unique design to accommodate smartphone connection.  I don't have any iDevices to test Cozoy connected to iPhone or iPad, but had no problem testing it with my Galaxy Note 4 and S5 where I assume the included micro-usb to micro-usb cable enables direct USB OTG functionality without a need for an adapter.  I was especially pleased with a solid connection of this cable to Cozoy Astrapi and my phone - nothing is more frustrating than a loose cable connection that going to affect digital audio stream.
 
Accessories.
 
cozoy_astrapi_dac_amp-06_zpshxeewp0a.jpg
 
cozoy_astrapi_dac_amp-07_zpsxd9zee0p.jpg
 
cozoy_astrapi_dac_amp-08_zpswuud6oa9.jpg
 
cozoy_astrapi_dac_amp-09_zpsqqgq1nsq.jpg
 
 
The moment you take Astrapi out of the foam cutout in the box, you will instantaneously fall in love with this tiny gadget.  I don't think I ever used a phrase "fall in love" in any of my previous reviews, but it's an absolutely truth when I was holding this feather light 8g stick with a dimensions of 52mm x 16mm x 6mm resembling a thumb drive.  With solid aluminum alloy housing, the design is very clean with just micro-usb port on one end and 3.5mm headphone jack on the other end.  Each end has 2 tiny screws with a rare 5-point star torx head.  The side of the body toward headphone jack has two indentations for an easy grip, very good idea since a slick aluminum finish can get a bit slippery.  Also, the back has a quality metal clip with a durable spring.  A bit puzzled at first with a purpose of that clip, I realized later how convenient it was to clip it inside of my jeans pocket with a smartphone connected to it in a pocket and with an easy access to headphone jack of Astrapi facing up.
 
Design.
 
cozoy_astrapi_dac_amp-10_zpsrdgqquuv.jpg
 
cozoy_astrapi_dac_amp-11_zpsbtn7e14q.jpg
 
cozoy_astrapi_dac_amp-12_zpsudndnuzi.jpg
 
cozoy_astrapi_dac_amp-13_zpsmufzfeoo.jpg
 
cozoy_astrapi_dac_amp-14_zpsfmmygetu.jpg
 
cozoy_astrapi_dac_amp-15_zpsuvfl1wyr.jpg
 
 
As I mentioned already, Cozoy Astrapi is truly a jack of all trades being able to support external USB connection to a laptop/PC, USB OTG connection to Android phones, and Lightning connection to iDevices.  Since I don't have any Apple devices, I'm just going to assume it will work as expected since I have verified it with two other connections where it worked flawlessly.
 
Starting with a connection to my laptop, there was a little hiccup until I realized that you can only use Astrapi with USB2.0 port.  I verified it on 3 different laptops running WinXP, Win7, and Win8, and it was consistent where Astrapi wasn't recognized connected to USB3.0 port but worked without a problem connected to USB2.0.  Also, due to internal DSP chip and some protocol handshaking (I assume), I experienced a 5 second plug'n'play delay once you connect the device.  Since I have on-screen volume bar indicator enabled in my Thinkpad laptop, it was easy to see when connection was established once a volume bar came up on the screen indicating a new volume scale.  The volume adjustment in Cozoy Astrapi is based on output gain level steps with 3dB/step for a total of 16 steps.  And to make it even more interesting, once you raise the volume to the max level, HO output of Astrapi turns into LO which indicates that internal amp was disabled in favor of pure DAC output.
 
Using my various full size and IEM headphones for testing, I was very impressed with a sound improvement over my noisy laptop HO output where Astrapi exhibited a black background and clean sound with no static interference.  I would consider sound signature to be nicely balanced with a great level of transparency.  But one enhancement that made it stand out the most was the improved width/depth of the soundstage.  The depth of staging was on the same level as E10k and FULLA, but Astrapi width was better than E10k though not as wide as FULLA.  The improvement in retrieval of details was on the same level as E10k and A200p, while FULLA was still a bit ahead of competition.  With Cozoy Astrapi you can also hear a sound gaining an extra layer of texture and improved layering/separation of instruments with some airiness effect.  Connected to my laptop, I was able to use Astrapi as an external sound card which came very handy on one of my laptops where I have a broken HO jack.  Even so I have other USB dac/amp devices, they are all too bulky while Astrapi felt like an extension to a cable.
 
Next was a pair up test with my Galaxy Note 4, something I was really looking forward to.  Similar to connection with laptop, there is a slight delay when you connect Astrapi to micro-usb port of your smartphone.  Right away it’s recognized with a notification message of “usb device connected”, but it takes about 15-20 seconds before it gets self configured and you hear a sound from Astrapi output.  In parallel, I was still being able to use HO output of my Note 4, very convenient while switching back’n’forth for headphone sound comparison.  Consistent with laptop performance, a sound opened up with a wider and deeper soundstage, a slightly better retrieval of details, and a more linear non-distorted performance as I raised volume to the max.  Now keep in mind, I'm comparing it to the current Galaxy flagship phone, Note 4, which has an excellent sound performance to begin with even from HO.  Thus a sound improvement, with an exception of staging, was only marginally better.  This will be probably common with other brands flagship phones, but for majority of other people who use basic cheaper Android models or who use their older Android phones as DAP for streaming - Astrapi will introduce a higher margin of sound improvement.  Even with Note 4 at the top of the volume level from HO a sound was getting distorted, but with Astrapi it was not an issue!
 
Where I found this DAC/amp to absolutely shine with a smartphone was when paired up with external amp.  Without a single doubt in my mind, a synergy of Cozoy Astrapi with either C5 or E12A was significantly greater than paired up directly from HO of the phone.  In addition to an improved and more 3D soundstage, the output power of external amp added more finesse to a sound, making it more balanced and enhanced across entire frequency range.  Also, it improved the tonality, making it more organic and smoother.  I didn't notice any difference when I raised phones volume to the max which supposed to put Astrapi in LO mode.  Either way, I found the performance to be equally great at any volume level.  Comparing to HiFimeDIY, which is Android only DAC, I found Astrapi sound performance with external amp to be on a similar level, though soundstage was better with Astrapi.  Also, I found Astrapi micro-usb cable connection to be less finicky, while HiFimeDIY always gave me issues with disconnects.
 
cozoy_astrapi_dac_amp-16_zpscgpkmqip.jpg
 
cozoy_astrapi_dac_amp-17_zpsze6t78bh.jpg
 
cozoy_astrapi_dac_amp-18_zps32urlhgf.jpg
 
cozoy_astrapi_dac_amp-19_zps3o1kvzqe.jpg
 
FULLA, E10k, Astrapi, and HiFimeDIY
 
cozoy_astrapi_dac_amp-20_zpso6jsfg8v.jpg
 
 
Overall, I was actually quite happy with a fact that Cozoy Astrapi turned out to be a jack of all trades.  The convenience of this super slim and lightweight aluminum stick being able to work with any smartphone, iOS or Android, as well as Windows laptop - was simply priceless!  There was no need to use any USB OTG adapters or splitters, no need to power it up with external battery, and no need to secure it with a rubber band to keep the micro-usb cable from moving or disconnecting - it was a simple plug'n'play, always recognized by my phone.  The same with my laptop, no need to install any drivers or to configure anything - as long as you use USB2.0 port it was a simple plug'n'play.  I have tested a number of usb dac/amp devices, and each one had its strength and weakness.  None of these devices have an identical set of features where you can just focus on sound quality for direct comparison.  Instead, some have analog volume controls while others gain switch and bass boost, some might have a dedicated LO while others support both USB and USB OTG, some might only work as USB dongle with laptop while others support both Android and iOS.  Cozoy Astrapi had to sacrifice a lot of extra functionality in favor of a super small size that only has micro-usb and 3.5mm ports, and lower output power in order to be compatible with USB OTG without draining too much of smartphone battery.  As a result, Cozoy was able to accomplish not just a "jack of all trades" device, but also a design which you can consider as a Swiss Army Knife of audio interface.  It is a bit pricy at $129, but you are paying for compatibility with every phone and PC/laptop, a proprietary DSP design, and a footprint of the smallest device with external audio interface!
edyeded
edyeded
Hi guys considering this to  pair with my iphone 6 and JH16s. the only thing is that I use spotify for my music. Anyone have any experience with it and spotify and would you recommend?
 
Thanks
BruceBanner
BruceBanner
How does the volume compare to smartphones HO? One of my main gripes of Android (of all the android devices I have tested) is that the volume is far too low (even on max). I have had to root phones, change mixer_path file and lift the volume limitations to get proper listening volumes (around the Sansa/Cowon levels that those DAPs can put out).
Does the Cozoy take volume higher than the HO can on your Note4 for example?
twister6
twister6
@BruceBanner : not significantly higher (Note 4 is damn loud to begin with), but it is higher.  The most important factor for me - at the top volume my N4 sound distorts while with Astrapi it's linear and clean all the way up.

twister6

twister6 Reviews
Headphoneus Supremus
Pros: neutral-bright tonality, balanced output, dual uSD card support, Bluetooth and WiFi support (w/Google Play installed), very compact solid design, battery life.
Cons: limited Android experience, custom digital out cable.


The product was provided to me free of charge for the review purpose in exchange for my honest opinion. The review was originally posted on my blog, and now I would like to share it with my readers on Head-fi.

Manufacturer website: Cayin, available from MusicTeck and Amazon.


Intro.

When I saw N5ii spec for the very first time, I was a little surprised to find it having more in common with i5 than original N5. After receiving my review unit and placing it next to N5 and i5, I thought of calling it "iN5ii" :) There is no other way for me to describe the new N5ii DAP from Cayin but to call it as a crossover between these two models, picking up a balanced output and dual uSD cards from N5 and a nearly identical Hiby GUI and customized Android 5.1 with a touch screen and a similar volume wheel from i5. Along with a sticker price of $369, Cayin packed N5ii with lots of goodies, pushing the envelope of its price/performance ratio even further.

This new release enters a space in mid-fi market which is currently the most saturated when it comes to DAPs. It's a space where audio enthusiasts want something small and compact on the go, but with more power and more features to set it apart from entry level models (like Cayin N3) and without high expectations of summit-fi performance, something which Cayin is overdue for (how about the next flagship model?).

I remember when Cayin told me about their original plan of keeping N-models as non-Android based, while i-models will be Android based. N5ii is a crossover between N5 and i5, which looks like a "hybrid" on paper. But does it perform like one? I spent the last month using N5ii DAP (w/2.1en firmware), and here is what I found.

cayin_n5ii-10.jpg

Unboxing.

Many companies put a lot of thought into packaging. I appreciate that, thus wanting to highlight it in my unboxing section. In case of N5ii, the outside sleeve is all black with a front featuring a glossy outline of the DAP with a focus on a volume wheel. Hi-Res Audio sticker in the lower left corner is the only touch of color in there. Flipping it on the back reveals detailed highlights of the design which is quite impressive.

The actual storage box underneath the sleeve is all black, with a company name and audio waveform logo in silver. Once a magnetic cover is lifted, you will find a user guide in the pocket under the cover, and the DAP wedged in a secure foam cutout, right next to the storage pocket with accessories.

cayin_n5ii-01.jpg cayin_n5ii-02.jpg cayin_n5ii-03.jpg cayin_n5ii-04.jpg cayin_n5ii-05.jpg cayin_n5ii-06.jpg

Accessories.

Already pre-installed, N5ii has a tempered glass screen protector which is always good to have when dealing with a touch screen DAP. While film screen protectors keep scratches away, tempered glass usually shatters on direct impact, offering a real protection of the glass display.

cayin_n5ii-07.jpg cayin_n5ii-08.jpg cayin_n5ii-09.jpg

You will also find a silicone protection case, a grey-ish rubbery semi-translucent case. It doesn't look too cheap or feels stretchable like some other dust/lint magnet silicone cases, and it does enhance the grip while keeping all the ports open. But it's not as premium looking as Cayin's optional "crocodile" pattern case you’ll find on Amazon or directly from MusicTeck. Yes, the case will set you back $30, but it fits like a glove, has a soft inner lining, distinct red stitching around the back, quality finish, and precise cutouts around the ports and volume wheel. Personally, I recommend upgrading to this case.

Stock case.

cayin_n5ii-11.jpg cayin_n5ii-12.jpg cayin_n5ii-13.jpg

Optional upgrade case.

cayin_n5ii-17.jpg cayin_n5ii-18.jpg cayin_n5ii-19.jpg cayin_n5ii-20.jpg cayin_n5ii-21.jpg

Another optional accessory is Cayin CS-30TCR usb-C to coax cable (to connect to external DAC/amp) and Cayin CS-40TC35 (intended for 3.5mm coax input DAC/amp like Chord Mojo or Hugo 2). The cables have a quality build and extra shielding to cut the interference. Since N5ii doesn't have S/PDIF direct output, these cables are necessary if you are planning to use this DAP as a transport to drive external DAC/amp. Both cables available directly from MusicTeck.

cayin_n5ii-14.jpg cayin_n5ii-15.jpg cayin_n5ii-16.jpg

You should also expect to find usb-C to usb cable for charging, data transfer, and usb-dac connection, though it was "apple" white, instead of a "traditional" black usb cable. Either way, this cable will be easy to spot among all your other usb-c and micro-usb cables, though the cable jacket felt not as solid. Also, included were 2 extra Hi-Res Audio stickers.

Design.

From my previous experience of reviewing N6, N5, i5, N3, and now N5ii, I find that Cayin always tries to come up with an original design which makes them stand out from the crowd of saturated DAP market. Of course, what’s under the hood should count the most, but as they say – you only get one chance to make a first impression. With non-Android DAPs you have more room and more freedom to customize controls and chassis. When you are dealing with Android based design and full touch screen interface, it leaves you with very little room for extra design elements, so you need to be more creative. In my opinion, with i5 the focus of the design was their threaded cylindrical volume knob, which is scaled down and carried over to N5ii.

According to Cayin, N5ii is 9% smaller and 24% lighter then i5, and indeed, with dimensions of 115mm x 57mm x 15.3mm and approximately 150g in weight – it’s a very compact and pocket friendly DAP. With a very thin bezel around side and bottom edges, majority of the front panel is occupied by 3.65” touch screen. The top of the chassis above the display extends with a volume wheel in the upper right corner, guarded around the corner by chassis frame, instead of being exposed like in i5. N5ii unit had a volume wheel with a noticeable resistance and a click-feedback as you turn it with every adjustment step. Though the resistance of the wheel wasn't too tight, I still found it more comfortable to turn with 2 fingers.

The metal part of the front chassis has a brushed aluminum anodized finish, while all the way around the sides and the top/bottom I found a sandblasted finish which gave CNC aluminum chassis an extra non-slip grip and a very pleasant to the touch feel. The back has a glass panel with a laser etched pattern underneath, which could be slippery especially when you place it on the surface, but when you hold N5ii naked in your hand, that slippery back is compensated by a non-slip sandblasted grip of side panels. But either way, using N5ii with a case is a good idea, and that optional “crocodile pattern” pleather case is pretty good and doesn’t hide the design elements of the DAP.

Starting from the left side, you have a small aluminum power button at the top with a corresponding etched symbol. On the right side, at the top you have transport control buttons with 3 evenly spaced small aluminum buttons where you have Play/Pause in the middle and Skip Next/Prev around it. Though buttons are small, they have plenty of distance in between to make sure your fingers don’t press two at a time. Down below the right side you have 2 spring-loaded uSD slots. The bottom has multi-functional USB-C port, used for charging, data transfer, USB DAC/amp input, and Digital Out output. The top, besides a volume wheel which is accessible from the front/back, also has 2.5mm BAL headphone out and 3.5mm SE headphone output which is also shared with Line Out port.

The front display panel also hosts a small charging LED in the upper right corner, and all the way at the bottom in the middle there is a touch “home” button which has a dual functionality of Go-Back with a single tap or Go-to-Home screen with a longer touch’n’hold.

cayin_n5ii-22.jpg cayin_n5ii-23.jpg cayin_n5ii-24.jpg cayin_n5ii-25.jpg cayin_n5ii-26.jpg cayin_n5ii-27.jpg cayin_n5ii-28.jpg cayin_n5ii-29.jpg

Under the hood.

N5ii packs quite a lot for a mid-fi DAP in its price range. Before looking “under the hood”, the first impression comes from its 3.65” TFT IPS touch screen display with 845x480 resolution. It’s an adequate capacitive touch screen display for navigation of N5ii GUI, viewing embedded artwork of your songs, and running various apps. Also, since it’s IPS based, it has pretty good viewing angles. Does the display crisp enough and has vibrant colors to watch a high res videos or to play demanding games? Not really. In my opinion, with its Rockchip RK3188 processor and 1G of DDR3 RMA it’s probably not a good idea to run anything too CPU/graphic intense. It has a very capable quad-core ARM Cortex A9 processor with a quad-core Mali-400MP4 GPU, but it’s not intended to perform on par with your latest smartphone.

Furthermore, in this design Cayin decided to implement ESS9018K2M DAC along with a selection of high grade TI SoundPlus Audio OpAmps, a pair of OPA1622 for Left/Right channel current to voltage conversion and 3 individual OPA1622 where one is used for single-ended amplification and other two used for balanced output amplification. The design uses separate OpAmp components to keep SE and BAL parts of the circuit isolated and optimized for the best performance. Also, to reduce the jitter when handling different sampling rates, Cayin implemented three separate precision oscillators, covering multiples of 44.1kHz, 48kHz, and DSD signals. Altogether, the hardware can handle majority of lossy or lossless formats from mp3, wma, aac, ogg, ape, alac, flac, aif, wave, and all the way to sacd-iso and decoding up to DSD256.

While running customized Android 5.1, you get a support of BT4.1 and WiFi, and Google Play comes pre-loaded already, so you don’t need to side-load apks of your desired apps. Along with internal 32GB of storage, some of which as expected will be allocated to Android OS, continuing with a tradition of the original N5 you will get 2x uSD cards, supporting up to 400GB each. So, in theory you can have up to 832GB of storage space. More can be added through OTG USB connection, but for a portable use 2 uSD cards can offer plenty of storage, especially if you have a collection of high res FLAC/DSD files.

Internal battery capacity is 3000mAh, which could be charged fully within 3+ hours when using 2A usb wall charger. Cayin is staying consistent with their other designs, continuing using usb-c connector. In terms of a battery performance, I was driving IE800S from BAL output at a regular listening volume level, with medium gain, and audio priority mode enabled, and the uninterrupted playback lasted 11.5 hrs. I consider this as a best-case scenario since I was playing mp3 track. Switching to high res files, at a higher gain, and with more demanding headphones will reduce the battery life, as expected.

In terms of the actual headphone outputs, N5ii packs a punch with SE 3.5mm output rated at 150mW (32ohm load) with <0.4 ohm impedance and BAL 2.5mm output rated at 250mW (32ohm load) with <0.6 ohm impedance. 3.5mm output can also be switched to Line Out with 2V output level. Both headphone outputs have SNR spec of about 116dB-117dB, with a decent dynamic range and a black noise floor, more about it in sound analysis and pair up sections of the review.

Last, but not least, I would like to mention Audio Priority Mode. Not exactly a hardware feature, but a very useful “shortcut” you select from Notification bar to maximize audio performance by disabling WiFi, Bluetooth, shutting down 3rd party apps, and optimizing Android OS by turning off some of the background processes. It’s almost like a hardware acceleration mode to boost audio performance of N5ii. The only concern here, selecting AP Mode also disables EQ which needs to be enabled in future fw updates.

cayin_n5ii_block_diagram.png

Wired/wireless connections.

Bluetooth/Wireless.

For this test I used N5ii and my aging Galaxy Note 4 phone with Senns Momentum over-ears M2 wireless headphones. With N5ii, I was able to listen to headphones without a problem 28ft away from N5ii, while 34ft away from my Note 4 phone. When comparing the wireless sound quality between N5ii and Note 4, I hear Note 4 to have a fuller body with more bass, while N5ii sounds a little thinner in comparison. Perhaps a difference is due to a lack of aptX encoding support in N5ii.

cayin_n5ii-50.jpg cayin_n5ii-51.jpg

Digital out.

Using optional CS-30TCR usb-C to coax cable, I had no issues connecting N5ii to SPDIF input of that Micro iDSD BL DAC/amp. You can only use volume control on Micro iDSD, and the sound was very transparent, a typical Micro iDSD sound signature, no distortion or interference noise. I found it to be a flawless pair up with N5ii as a digital transport source.

cayin_n5ii-39.jpg

Next, I tested digital out using usb-c to micro-usb cable (Shanling L2 cable), connecting N5ii to Oppo HA-2 DAC/amp. Once connected, HA-2 was recognized and the message popped up asking to allow Cayin Audio app to access USB device. Some of my cheap eBay cables didn't work, L2 is high quality and always works. And again, it was a flawless transparent pair up with N5ii as a digital transport source, and I was able to use volume control from HA-2 only.

cayin_n5ii-40.jpg cayin_n5ii-41.jpg

Analog out.

In this test I used N5ii Line Out to FiiO E12A (my transparent portable amp used for testing since Cayin's own C5 colors the sound a bit). When comparing N5ii PO vs LO+E12A, I hear the direct sound from N5ii to be a little brighter and more revealing vs N5ii+E12A to have a little smoother body and deeper sub-bass extension. This suggests that internal head-amp section of N5ii makes sound a little brighter and more revealing.

cayin_n5ii-42.jpg cayin_n5ii-43.jpg

USB DAC.

In this test I used ThinkPad T470 with Win10, and installed the latest Cayin USB Audio drivers v4.35.0. Driver install was headache free, N5ii was quickly recognized by my laptop, I found that I'm able to use a volume control from laptop and DAP, and also the sound quality was similar to standalone DAP performance.

cayin_n5ii-52.jpg

GUI.

With a modified Android 5.1 running in the background, the main interface of N5ii is Hiby audio app, thus once you boot up N5ii, it looks more like a DAP with a dedicated audio interface rather than a smartphone. You are greeted with a main page (top-most Music tab) and Folder view with options to access internal memory, micro-SD cards, or OTG storage. Next to the top Music tab, you have List with favorites, frequently and recently played songs, and playlist. Then, Private Cloud for LAN connection, and Search which brings up QERTY android keyboard (like in a smartphone). Under Music tab, you can also sort by Album, Artist, Genre, and Tracks.

I typically use folder view as my default because I have many loose songs and not too many albums (mostly compilations). Plus, not everything is properly tagged, but when I click on Album all of them show up as a separate thumb with corresponding embedded artwork and number of tracks in the album; while single songs show up as 1-track album, and the rest is under Unknown. Clicking on Artist brings up a list with every artist, and when you click on each, it shows separate songs and albums under that artist. Clicking on Genres, bring up thumbs with common genres (most of mine under pop and dance and classic). Clicking on Tracks brings all the songs in alphanumeric order.

Swiping notification bar down (typical Android feature), gives you a quick access to WiFi, Bluetooth, Gain setting, PO/LO (headphone vs line out for 3.5mm port), enabling Audio Priority mode, USB-C Mode (between USB, MTP, and DAC modes), Idle shutdown, and Scheduled power off. At the bottom, you can also adjust the brightness level of the screen and the screen time out, as well as being able to access the full Android Settings menu by clicking in the upper right corner Setting Icon, right next to battery indicator with an exact percentage of capacity. Those with Android phones will feel right at home, while iOS users will need to spend a little bit of time getting used to it.

Swiping the main screen to the right, reveals more Setting options for Music scan (scan all or the specified folder), a very detailed Music Settings (gain, digital filter, DSD gain compensation, SPDIF Out, Play through folder, Start up and max volume, channel balance, breakpoint resume, gapless, album art, and lyrics display), Equalizer (10band paragraphic EQ with 31/62/125/250/500/1k/2k/4k/8k/16k bands and a few genre-specific presets), Third-party applications (Google Play store and other installed apps), Smart Cleaning (to terminate running application), Download path/manager, Sleep Time/Scheduled Power off, and About section (useful to check your fw version).

As I mentioned already, this is not a typical open Android interface, but a Hiby audio player interface on top of Android which you need to access to get to the apps, including Google Play store. I have installed a handful of apps, such as Spotify and some games. Everything seems to be working, though I do want to note that download is not the fastest, thus I still prefer manual FW updates. I use free Spotify and found no issues with streaming, it was up and running in seconds. But as I mentioned before, we are dealing with only 1GB of RAM and not the fastest processor/GPU intended for more demanding apps. So, you got to have realistic expectations. But in general, it’s a relatively fast touch screen interface for an audio player, just don’t expect it to fly like your smartphone.

Another thing to note, with Android support, users are tapping into 3rd party apps which can slow down or crash Android OS, something which is not under control of Cayin or Hiby. Thus, it becomes a double edge sword. Customers are asking for streaming, so manufacturers build their OS on Android platform. But that also opens a can of worms with people installing various apps which are not under control of the manufacturer and when something doesn't work, manufacturer gets blamed.

cayin_n5ii-30.jpg cayin_n5ii-31.jpg cayin_n5ii-35.jpg cayin_n5ii-36.jpg cayin_n5ii-37.jpg cayin_n5ii-38.jpg

But one of the thing they are in control of is the main DAP interface, especially in Audio Priority Mode where apps and many background processes are disabled to optimize the performance. The main Playback screen has a clear layout with upper top half of the screen independent of selected theme, where you can see a song artwork (if one is embedded) which could be switched to lyrics view (if available with a song) or a very elegant vertical Stereo VU Meter. Underneath you have selection of controls with different loop modes (single, repeat, random, etc.), access to EQ, view the list of songs in a current playback folder, and being able to add to favorites. Also, a display of a song/artist name and playback controls with Skip Next/Prev and Play/Pause. But the layout of all these controls will vary, depending on Theme selection, a little shirt icon in the lower left corner of the artwork screen of the display.

I do like the layout and graphics of Theme #1, the original theme from i5, but the fast-forward circular bar wasn’t as useful since my thumb covers it up without being able to see the time marker. Theme #2 is nice except that fast-forward scrub bar is right underneath of song artwork/lyrics/VU meter section where sometimes it's hard to see the actual bar. On a few occasions when fast-forwarding through a song, I end up swiping to the lyrics screen. I like Theme #3 the best except that I would like the graphics for Play and Skip buttons to be updated with something better defined because those buttons are not easy to see due to inner shadow. Of course, these are minor details, based on my personal preferences.

My only comment here, I wish Cayin/Hiby would have the main Playback screen as their default Home view. Everything else should be accessible by going into Settings or another Menu. Otherwise, it gets a little confusing when you are greeted with a Music/Folder view (with memory/card/OTG shortcuts) every time you start N5ii.

cayin_n5ii-32.jpg cayin_n5ii-33.jpg cayin_n5ii-34.jpg

Sound analysis.

I usually find a sound signature of the DAP is easier to describe when talking about its comparison to other sources or pair up with different headphones. But you can still come to a reasonable conclusion about individual sound performance of the DAP, derived from these comparisons.

N5ii tonality, though closer to neutral, leans more toward a brighter and a more revealing side. Don't expect a big bass impact or mids with a warmer fuller body. The sound is lean and a little on a colder side. It certainly is crisp and detailed with a wide soundstage, a nice dynamic expansion, and a sense of air between the layers of the sound. It pair ups great with neutral and warmer tuned headphones, and at the same time doesn't make brighter tuned one’s sound too harsh, though there were a few exceptions I mentioned in my pair-up analysis section of the review.

One interesting observation I found is between 3.5mm Single Ended vs 2.5mm Balanced outputs of N5ii. When comparing these outputs, though not necessary night'n'day difference, I do hear BAL output to be a little leaner in tonality, especially in lower mids, including a little less mid-bass impact and more sparkle in treble. This difference in tonality gives you an option to fine-tune the sound which comes in handy when dealing with different sound signature headphones and trying to find the best pair up synergy.

cayin_n5ii-44.jpg

Comparison.

In the following comparisons, I put N5ii against other DAPs in similar price/performance categories. While using different IEMs for my analysis, I always try to volume match between sources.

N5ii vs i5 - when comparing the soundstage, I hear N5ii SE to be very close to i5, but when you switch to N5ii BAL, the soundstage has a wider expansion. When comparing sound tonality, need to take SE vs BAL into consideration as well. N5ii BAL is more neutral in tonality with a leaner low end and lower mids and more revealing upper mids and airier sparkly treble when compared to a fuller body i5 with a smoother upper mids/treble where you also have a little stronger mid-bass impact. But when you compare N5ii SE to i5, N5ii is closer in tonality because it has a little more body in lower mids and a touch stronger bass impact, through it's still more revealing in upper mids and has a little more sparkle in treble. Also, N5ii background is blacker with a minimum hissing when it comes to sensitive IEMs, while i5 has more hissing. Both have identical GUI interface, touch screen, support of BT and WiFi, and access to Google Play store and apps. From hw perspective, N5ii has 2x uSD cards (vs one in i5) and a balanced output (vs only SE in i5). N5ii also has smaller footprint.

N5ii vs N5 - based on comparison of BAL outputs, ii has a wider soundstage expansion and overall sound is more transparent, more layered, and with better dynamics. Also, ii blacker background with nearly zero hissing is a big step up from the original N5 where noise floor with sensitive iems was always an issue. In terms of overall tonality, N5ii has a more neutral leaner sound while N5 has more body and sounds smoother in tonality, also with a little less airiness in sound. While tonality improvement is a subjective thing, perhaps if you want a stronger bass impact and a smoother fuller body sound, you might prefer the original N5, but in terms of the design there is no question that N5ii is head'n'shoulders above its original predecessor where instead of small screen and all physical button and wheel navigation now you have a responsive touchscreen with external hw playback controls, a physical volume wheel, BT with wireless headphones support and WiFi with access to Google Play and various streaming apps. The footprint of N5ii is smaller and you also have 32GB of internal memory in addition to 2x uSD, while N5 only has dual uSD cards.

cayin_n5ii-47.jpg cayin_n5ii-48.jpg

N5ii vs Opus#1S - 1S soundstage is just a tiny bit wider in comparison to N5ii; both are hiss-free and have a solid black background with a low noise floor; 1S tonality is even more neutral while N5ii has a little more body in comparison; in terms of a dynamic expansion, I hear 1S just a tiny bit better, but it's a very small gap. Both have the same internal 32GB storage and external dual uSD, and both have a balanced 2.5mm. While the sound quality is close, the biggest difference is N5ii having Bluetooth (wireless headphones connection) and WiFi with access to Play store and streaming apps. The gap between N5ii and the original Opus#1 is a lot bigger, while #1S closed the gap in sound quality, but still behind in features where N5ii has an edge.

N5ii vs X5iii - N5ii soundstage is a little bit wider, but the first thing you notice right away is a black hiss-free background in comparison to a rather noisy and hissing background of X5iii when testing with sensitive iems. There are also differences in tonality with N5ii being more neutral, more transparent, more layered, and having a better dynamics expansion in comparison to a smoother, fuller body, more musical, and slightly more compressed in dynamics sound of X5iii. Both have the same internal storage and dual uSD expansion, volume wheel and hw playback controls, as well as support of BT/wireless and WiFi with Google Play support. Besides sound quality difference where N5ii has an upper hand, another big difference is FiiO offering a full open Android experience with a bigger higher quality display and a typical Android-smartphone type of navigation, while N5ii still has Android experience that feels as an add-on, "hidden" out of sight.

N5ii vs M3S - Here the gap in sound quality is not too far off. While testing and comparing BAL outputs, I hear N5ii to have just slightly wider soundstage and a little better dynamic expansion. In terms of tonality, N5ii is just a little leaner while M3S has a bit fuller body, but in general they are very close. With sensitive IEMs, I hear a bit more hissing with M3S, but it's not too bad. While M3S only has one external uSD card, N5ii offers internal memory and 2 uSD cards. Both have BAL output and external hw playback controls as well as a physical volume wheel. Also, both have Bluetooth for pair up with wireless headphones, plus M3S has access to HibyLink. One big difference is N5ii having a touch screen while M3S doesn’t. Plus, N5ii supports WiFi and Android along with Google Play store which gives you access to apps, including streaming apps while M3S can only "stream" music by means of HibyLink connection to a smartphone.

N5ii vs DX80 - It has been awhile since I used DX80, figured will be an interesting comparison with N5ii. Here, I hear N5ii having a little wider soundstage expansion and a more neutral tonality while DX80 has a little fuller body, north of neutral, with a little smoother tonality, though both have a similar presentation of sparkly airy treble. Also, N5ii has a little better dynamic expansion. With sensitive iems, there is a lot more hissing when it comes to DX80, while N5ii has a blacker background. While DX80 has a touch screen, physical playback buttons, and a dual uSD card, N5ii adds an internal memory, volume wheel, BT/wireless support, BAL out, and WiFi with Android and app support.

N5ii vs R6 - I have been asked by a few people about this comparison, so why not. Obviously, the big difference here is output impedance where the sound will be affected if you are using some multi-BA IEMs, like, for example, U18t I was using in my sound test. It's not a showstopper since an impedance adapter, such as iEMatch, does a great job to “correct” R6, and that's what I have been using in this comparison. When you even out the output impedance ground, it makes an interesting comparison where I found tonality to be similar, including a very similar soundstage expansion and black hiss-free background. Of course, there will be some variations depending on pair up with different iems and full-size headphones, but if you add iEMatch into the equation, I found a lot of similarities in tonality and sound presentation, though R6 has a little edge in layering, separation, and transparency of the sound. Besides output impedance, the biggest difference here is Android interface where R6 feels like a smartphone with a higher quality display and a very snappy Android performance. In contrast, N5ii presents itself as DAP first and Android device with Google Play and streaming capability second, like an add-on. Also, N5ii has an advantage of a dual uSD versus a single card in R6.

cayin_n5ii-49.jpg

Pair up.

In this test I only used a medium gain setting, and noted Volume level. In the below write up, please pay attention to SE (3.5mm) vs BAL (2.5mm) since BAL has a higher gain, thus a lower volume.

Audio-Technica ATH-R70x (open back, 470 ohm), SE v81 - very crisp detailed sound with an expanded soundstage. It took me by surprise, since I'm used to hearing a smoother sound when it comes to R70x. Here is was faster, righter, sharper, crisper. I did notice a little less sub-bass, and faster attack of mid-bass, neutral revealing mids, crisp airy treble.

Audeze EL8C (planar magnetic), SE v70 - no metallic sheen!!! that's the first thing I look for when pairing up EL8C, the sound is crisp but there is no metallic sheen, sub-bass extends deep with a moderate rumble quantity, mid-bass is fast, lower mids are neutral, upper mids are revealing yet sound natural, and treble is crisp (a little too crisp) but not sibilant and with a good airy extension.

Beyerdynamic T5p 2nd gen (full size tesla drivers), BAL v45 - very detailed tight fast sound with a wide/deep soundstage. Nice sub-bass rumble extension, fast mid-bass attack, well controlled articulate bass, neutral lower mids, revealing upper mids approaching micro-detailed level, crisp airy well-defined treble.

Oppo PM3 (planar magnetic), BAL v53 - smooth detailed balanced sound with a wide soundstage expansion. Well controlled laidback bass with a nice sub-bass rumble (not too much) and slower mid-bass punch. In many pair ups, PM3 bass spills into lower mids, here it had a good control, though lower mids are still full bodied and north of neutral. Upper mids are detailed, smooth organic. Treble is well defined, not too crisp or too airy, these cans don't have the best upper end extension, but it wasn't too prematurely rolled off either. Actually, pretty good pair up since PM3s are picky.

VE ZEN earbuds (320 ohm), SE v67 - wide/deep soundstage expansion, very balanced tuning with a sound signature that is more revealing than I'm used to with Zen. Overall sound is faster, tighter, more detailed, bass is leaner and faster, more articulate, mids are neutral, detailed, natural, treble is very well defined, crisp and airy. Overall sound is more neutral and revealing than usual.

64 Audio U18t, BAL v33 - revealing transparent sound with a wide soundstage expansion, deep sub-bass expansion with moderate quantity rumble, fast mid-bass punch, overall a tight articulate bass, micro-detailed natural tonality mids, crisp well defined airy treble.

64 Audio Fourte, BAL v33 - very crisp revealing sound on analytical level of detail retrieval, deep sub-bass rumble, average speed mid-bass, lean lower mids, micro-detailed upper mids, very crisp airy treble, sizzling with crunch, a bit too much in this pair up. Wide/deep soundstage.

Sennheiser IE800S, BAL v41 - a more balanced (W-shaped) detailed sound with a deep sub-bass rumble, slower laid back mid-bass, neutral lower mids, natural detailed upper mids, crisp airy treble. Upper frequencies are a little brighter, but not harsh or sibilant. Wide soundstage with more out of your head stage expansion.

HiFiMAN RE2000, BAL v46 - very revealing bright sound with a good soundstage width and depth. Bass has a good extension and a fast speed, but a little more neutral quantity. The same with lower mids, being very lean. Upper mids are thin and analytical, on micro-detail level. Treble is very bright and crisp and very airy. Upper mids/treble are thinner and more artificial in this pair up, sounds a little harsh.

Campfire Audio VEGA, BAL v32 - a v-shaped sound signature with a wide soundstage expansion. Bass is very powerfully, deep, tubey, loose, not very well defined or controlled, spilling into lower mids. Upper mids are clear and detailed, pushed more back, have natural tonality. Treble is crisp, bright, a little sibilant. Not the best pair up.

Ultimate Ears UERR, SE v42 - very neutral more revealing tonality with a wide (but not very wide) soundstage expansion. It's brighter than other pair ups. Neutral extended bass, here we are talking about quality rather than quantity, average speed, good control. Neutral lower mids, very natural detailed upper mids with improved retrieval of details, well defined clear treble, moderate amount of crisp airiness, not too much. Overall sound it a little more mid-forward, bass is more neutral than other pair ups, sub-bass rumble is rolled off here.

Beyerdynamic Xelento, SE v36 - very balanced sound signature with a wide expanded soundstage. Bass is north of neutral, still with a nice slam and textured sub-bass rumble, but quantity is reduced in comparison to some other pair ups. Bass is very articulate, well controlled. Lower mids are neutral, upper mids/vocals are very detailed and natural. Treble is crisp and airy, with a nice natural definition.

cayin_n5ii-45.jpg cayin_n5ii-46.jpg

Conclusion.

I get a lot of questions from my readers, often asking what is the best DAP. And my reply is always the same with a follow up question about their budget. Once you know your budget, the next step is to figure out your requirements, do you need touch screen or not, do you want to stream audio or OK with a playback from internal storage, how much internal storage do you need, do you care about Bluetooth pair up, what headphones are you planning to use and how much output power do you need, etc. Unlike headphones where the sound signature has a higher priority, DAP search often starts with a price and a list of features to narrow down the available choices, and then to figure out the sound and pair up synergy. That's why you hear more often about headphones recommendations, rather than DAPs, when trying to upgrade the sound quality.

When it comes to N5ii, Cayin clearly did their homework when they introduced this $369 DAP with every feature you can imagine. I usually don't focus too much on the price of the DAP, but here it represents an impressive price/performance ratio. Touch screen - check! Internal storage and two uSD cards - check! Balanced output - check! Mechanical wheel and external hw controls - check! Compact size and decent batter life - check! Bluetooth - check! WiFi with Google Play and app support - double check! The sound quality is pretty good for a mid-fi DAP, a little more on a leaner brighter side, but it pairs up well with many iems and full size headphones.

I know its fw is still work in progress with some bug fixes and further optimization, and Cayin is about to release their 2nd major fw update (actually, fw3.1 became available as I was finalizing this review). I'm not exactly a power user who spends many hours a day every day with a single DAP. Instead, I'm a power reviewer who multitasks with many DAPs on daily basis, and I haven't encounter any fw showstopper issues preventing me from enjoying N5ii playback. N5ii is a very versatile compact DAP to enjoy your music on the go, and it does represent and combines the best of N5 and i5 designs.

twister6

twister6 Reviews
Headphoneus Supremus
Pros: very natural tonality, coherent tuning, tiny ceramic shells with 7mm XWB dynamic drivers, modular cable design with 2.5mm, 3.5mm, and 4.4mm terminations.
Cons: cable is not detachable, microphonics wearing cable down (but not up), short nozzle with custom eartips (though, standard Comply supported)


The product was provided to me free of charge for the review purpose in exchange for my honest opinion. The review was originally posted on my blog, and now I would like to share it with all my readers on head-fi.

Manufacturer website: IE800S.


Intro.

After so many multi-BA and hybrid IEM reviews, I found this year (2017) to be quite eventful for single Dynamic Driver flagship discoveries. I also found that after every DD IEM review, I received many requests with a question how it compares to IE800. Coincidentally, back when I used to review full size headphones, I also had many requests asking me to compare to Senns HD-series cans. IE800 and HD600/650/800 have a huge fan base where it seems that many audio enthusiast own at least one pair of either ones, which leads to many requests for comparison using Sennheiser headphones as a reference.

Now, 5 years after its original release, Senns is ready with a refreshed IE800S version, and I finally got the opportunity to test this update. I won't be able to compare it to the original IE800 since I don't have access to it, but so far I heard a number of impressions where many refer to IE800S as a refined version of IE800. Don't want to speculate about the changes, and instead will focus on what I hear, how it compares to competition, and how it pairs up with different sources. So, let's find out what this new single DD flagship from Sennheiser brings to the table.

*** edit *** I was able to get IE800 loaner sample after the review, and updated Comparison section with my findings.

Unboxing.

Unboxing experience of IE800S was very straight forward with a colorful packaging sleeve over a giftbox-quality all black storage box. I do like the soft texture finish of this storage box, makes it more premium to the touch. The packaging sleeve has a very similar picture angle of IE800S dual-chamber shell as I have seen in IE800 packaging, but here Senns made sure to differentiate the design with a focus on the new cable and red (right side) strain relief.

Inside the box, you have a secure soft foam lining with a cutout for IE800S shells, storage case, and other accessories, including a little plastic back plate with all eartips sorted on display.

senns_ie800s_01.jpg
senns_ie800s_02.jpg
senns_ie800s_03.jpg
senns_ie800s_04.jpg

Accessories.

The accessories include 3 sets of detachable extension cables (2.5mm, 3.5mm, 4.4mm), 3 pairs (S/M/L) of genuine Comply Comfort eartips with a wax guard, 3 pairs (S/M/L) of silicone eartips with a built-in nozzle extension and a mesh guard, a shirt clip, a storage travel case, and a manual.

Eartips.

Carried over from the original IE800 design, S version has the same very short nozzle design with silicone eartips that latch on to the lip of the nozzle. These eartips have a built-in nozzle extension with a metal mesh and the silicone eartip over it. The latch connection is relatively secure, and as long as you are not disconnecting it daily, in theory shouldn't wear off too soon. Just make sure you choose the correct eartip size for a tight seal with your earcanal - that will yield a decent sound isolation, something I was worried about due to 2 large vents in the back of the shell. I'm very satisfied with a sound isolation wearing IE800S with a wire up over my ears using the largest silicone tips.

Comply tips are the standard ones, with a typical thick inner rubber core, going over a short nozzle stub of IE800S and staying secure without a problem. This gives a hope that you can find other silicone tips with a stiff inner core and a small enough diameter to stay secure. Personally, I prefer the silicone tips over Comply because, in case of IE800S, these foamies do boost low end (which is ok with me) and also attenuate treble (not ok since it kills the treble sparkle). Some might find this useful for fine tuning of the sound, but not for me since I wanted more top end sparkle.

senns_ie800s_05.jpg
senns_ie800s_06.jpg
senns_ie800s_07.jpg
senns_ie800s_08.jpg
senns_ie800s_09.jpg
senns_ie800s_10.jpg
senns_ie800s_11.jpg

The case.

The included case feels like a real leather material with a fine textured finish. On the inside of the cover flap, there is a personalized metal plate with S/N. Inside, you have a rectangular foam spool with a cutout for IE800S monitors and for the cable to wrap around the spool. While this looks practical for shells with its attached cable down to y-splitter, when you also have a removable part of the cable connected - it becomes a little tricky.

The main part of the cable has a short wire with a straight 2.5mm modular connector termination, thus not an issue wrapping it around the spool. The removable part of the cable has L-shaped connector where the only way to get it right is to make sure the cable wraps VERY tight around the spool. It took me a few tries to get the connector around the corner, putting some strain on the wire. It's definitely doable, but time consuming, thus not as practical.

senns_ie800s_22.jpg
senns_ie800s_23.jpg
senns_ie800s_24.jpg
senns_ie800s_25.jpg
senns_ie800s_26.jpg

Cable.

This is not going to be my typical cable review section because I don't know much about the wire material of the included cable and can't use the replacement cables from my review collection. I can speculate that IE800S cable uses higher purity copper wires, instead of some cheap OFC, but I don't know for sure.

The cable itself is very soft, thin, flexible, no memory effect, and with a rubbery all black jacket. At the shell joint, there is a durable but short color-coded strain relief, with red on the right side and black on the left side. You will also find imprinted R/L letters on each strain relief piece, as well as a little bump on the left side for a blind ID, though I would have liked for this bump to be bigger.

The cable design is modular where above the y-splitter with a chin slider you have about 10" of wires, and below the y-splitter you have about 39" extension. The upper part of the cable above y-splitter has 2.5mm balanced termination, and the lower part of the cable extension has female 2.5mm balanced socket on one side and right angled connector with either 2.5mm TRRS (BAL), 3.5mm TRS (Single Ended), or 4.4mm TRRRS (BAL) terminations. In all 3 extensions, the right angled headphone connector has a rubbery housing with a nice grip and a decent strain relief. A good grip is especially important when dealing with a tighter fit of 4.4mm jack.

The y-splitter modular 2.5mm interconnect, which is about 2" in combined length, has a very tight and secure fit, looks slim, and doesn't weight down the cable. So, either if you wear the cable wire up or wire down, it works just fine. The only issue, wearing wire down introduces a lot of microphonics. You can use included shirt clip to help with this problem, but the best way is to wear IE800S with the wire up over your ears. I have an average size head, and found the wire above y-splitter to be long enough for over ears fit, even with about an inch of margin for chin slider. But at the same time, wire up can put more strain on the cable at the shell joint.

I don't know the exact reasoning behind the design decision of why IE800/IE800S cables are not detachable. In theory, you can add mmcx connector, but that could affect the size of the ceramic shell and offset the acoustic balance of its dual chamber absorber system.

senns_ie800s_12.jpg
senns_ie800s_13.jpg
senns_ie800s_14.jpg
senns_ie800s_15.jpg
senns_ie800s_16.jpg
senns_ie800s_17.jpg
senns_ie800s_18.jpg
senns_ie800s_19.jpg
senns_ie800s_20.jpg

The fit.

senns_ie800s_37.jpg

senns_ie800s_38.jpg

Design.

Based on all the pictures and info I read about the IE800 model, seems that IE800S kept a lot of the original design elements, from a proprietary 7mm Extra Wide Band (XWB) dynamic driver to a dampened dual-chamber absorber (D2CA) system which utilizes a unique tapered shell design with 2 vents in the back. According to Sennheiser, D2CA will neutralize the so-called "masking effect" of overlapping high/low frequencies at different volume levels by removing unwanted peaks from any masking resonance.

Original IE800 design.

ie800x.png

To some people, the description above will sound like a mouthful of marketing hype you put on a product brochure. But once you start listening to IE800S, you will quickly realize that Sennheiser is putting their money where their mouth is. I will go into more sound analysis details and comparison in the follow up sections of the review, but do want to mention that to my ears I found IE800S to have a very impressive natural resolving tuning without any distortion or artificial peaks.

Going back to the design, the shells are very small, approximate 8g of weight (without a cable). Despite a small size, these won't be comfortable to go to sleep with you ear on the pillow, though they do nearly disappear in your ears. The finish of the shell is matte black with a premium scratch-resistant ceramic housing, an upgrade from the original IE800. And as it was mentioned before, the cable is still not removable. Considering how much effort Sennheiser put into the design of every single element, I'm sure the wires of the cable were hand picked for the best audio performance. But my concern remains about the cable joint at the shell which I consider as a single point of failure in the design, since the cable can't be replaced.

senns_ie800s_28.jpg
senns_ie800s_29.jpg
senns_ie800s_30.jpg
senns_ie800s_31.jpg
senns_ie800s_32.jpg
senns_ie800s_33.jpg
senns_ie800s_34.jpg
senns_ie800s_35.jpg

Sound Analysis.

IE800S has an impressive coherent tuning with a very natural and smooth tonality that has a mildly v-shaped sound signature and a bit laidback presentation where mids are just slightly pulled back. What strikes me the most about the tuning is the combination of transparency and resolution while still being smooth and natural in tonality with a nice body to the sound that gives it a touch of a pleasant organic warmth.

Another interesting observation, the overall sound is not necessary very airy or super transparent, but it never gets veiled or congested. As a result, the layering of sounds is just average, yet separation of instruments and vocals is very distinct. The dynamics of the sound goes along with its layering which results in more laidback presentation and less dynamic expansion of peaks.

Soundstage feels holographic with a remarkable width and a little more intimate depth, stretching in elliptical shape around you. Soundstage does expand nicely in depth, but not too far out of your head which gives the sound more intimacy. As a result of this more stretched holographic expansion, the imaging is very good with an accurate placement of instruments and vocals, and relatively accurate position of the sounds that surround you.

In more details, starting with low end, sub-bass goes deep with a smooth textured rumble that adds some weight to the bottom end, but not overwhelming. Mid-bass has a nice, slightly elevated punch, definitely above the neutral level. It's not too fast when it comes to the speed, and has a more natural decay, yet still being well controlled without spilling into lower mids. The bass is relatively articulate, well controlled, not super tight; it's just a good example of a less aggressive dynamic driver performance.

Lower mids are neutral, maybe a little north of it with a nice body they give to the sound, but the sound itself never gets congested or bloated. Upper mids are oozing with natural tonality, being very organic and at the same time having natural transparency and resolution. Don't expect micro-detailed analytical sound, but the combination of naturalness and retrieval of details is very good. Both, male and female vocals sounded very realistic, very emotional.

Treble has an excellent extension, but at the same time a moderate airiness. Treble has a nice sparkle, well defined, and has a nice level of non-fatigue crunch. I actually noticed that out of the box the 10k peak was a little more aggressive, but after 100hrs of burn in, the peak got attenuated, and I'm not talking about the brain burn-in because I had IE800S set aside, playing standalone for over a week.

senns_ie800s_21.jpg

Comparison.

For this test, I used various DAPs and different music genres to derive a common performance difference between IEMs under comparison, where each pair was volume matched.

*** edit *** IE800 vs IE800S Comparison:

When it comes to a soundstage expansion, both models are nearly identical in width and depth, which still continues to impress me considering these are single DD "closed back" in ear monitors. I didn't notice too much of a big difference in positioning/imaging of the sounds, though IE800S brings vocals a little more forward. Also, you can expect a similar layering, separation, and dynamic expansion of the sound in both IE800 and IE800S.

Sound signature does vary, where the original IE800 has a more pronounced v-shaped tuning, while IE800S is less pronounced, being mildly v-shaped, closer to balanced.

Starting with sub-bass and mid-bass, I find it to be nearly the same between IE800 and IE800S. And that's where all the similarities end. Between my FR measurements, full frequency sweep, and extensive listening analysis, I found the mids region of IE800 between 400Hz and 5kHz to be more attenuated down, not by a lot, but noticeable. As a result, the lower mids of IE800 are more neutral with less body and less warmth, and upper mids are a little thinner and brighter in comparison to IE800S where mids have more body and sound a little warmer and smoother. With IE800 mids being scooped out more, there is a perception of a stronger mid-bass impact, though in reality mid-bass quantity is nearly the same between these two. When it comes to lower treble, it's the opposite, where the original IE800 has a little more energy with more sparkle and sharper definition in comparison to a little smoother IE800S which still sounds crisp and airy, but scaled back in comparison.

Overall, IE800S doesn't stir too far off the original tuning of IE800, but you can definitely hear the difference. It's not exactly an upgrade or a side-grade, but more of a sound refinement with a smoother and fuller mids body and a more natural treble tonality.

sennheiser_ie800_vs_ie800s-01.jpg
sennheiser_ie800_vs_ie800s-02.jpg
sennheiser_ie800_vs_ie800s-03.jpg
sennheiser_ie800_vs_ie800s-04.jpg
sennheiser_ie800_vs_ie800s-05.jpg
sennheiser_ie800_vs_ie800s-06.jpg

IE800S vs Campfire Audio Vega - IE soundstage is wider while Vega has a little more depth; IE sound is more balanced while Vega is more L-shape (actually, reversed J-shaped) in comparison. Vega has a higher quantity sub-bass with a more pounding mid-bass while IE bass, though a little elevated, more balanced, more linear, and with a better control, especially when it comes to a cleaner separation with lower mids. Vega mids have a little more body vs more neutral lower mids and more resolving/transparent upper mids in IE. Both have a crisp treble, but Vega could get a little harsher with poorly recorder tracks (due to 7k peak). Overall, Vega is tuned warmer, less resolving, and with a bigger bass slam, while IE is more resolving, more transparent and more balanced in comparison.

IE800S vs 64 Audio TIA Fourte - both have a very similar soundstage expansion width, while Fourte projects further with more out-of-your head depth; IE is more balanced in tuning while Fourte edging more toward the J-shaped signature with more emphasis on upper mids/lower treble. Both have a very similar bass quality and quantity, though Fourte has a faster and tighter mid-bass. Lower mids are very similar, tuned more neutral, while upper mids in Fourte have more forward presentation in comparison to IE upper mids which are slightly pulled back. Here, another difference is in tonality where Fourte is brighter, more analytical, a little colder, while IE is smoother, more natural, and with more warmth. Both have excellent resolution and transparency, but Fourte has more separation and better layering. Treble in Fourte is more aggressive, crisper, brighter, while IE is also crisp and well defined but sounds less fatigue, smoother, and more natural.

IE800S vs HiFiMAN RE2000 - both have a very similar soundstage width, while RE has a little more depth; in terms of a sound, RE2k is more v-shaped in comparison to mildly v-shaped IE where mids are slightly more forward. RE2k has a deeper sub-bass with a little more rumble, while both have a similar tighter well controlled mid bass. Both also have similar lower mids, while upper mids and treble is where they differ. IE upper mids, besides being a little more forward, are warmer, more natural, with a little more body while in comparison, RE2k is thinner, colder, brighter, and more analytical. And you can also hear a better separation with more air between the layers in RE2k, while IE is smoother. Similar to Fourte comparison, IE is crisp and well defined with a moderate airiness, while RE2k is crisper, brighter, thinner, and more airy. As a result, IE is less fatigue and more natural in tonality.

IE800S vs Beyerdynamic Xelento - in this comparison, I hear IE having a wider soundstage, while Xelento has a little more depth with a farther extension. They have similar signature, with a slightly v-shaped sound, but Xelento has more tilt toward the low end. They both have a tight, well controlled, articulate bass, but Xelento has more sub-bass rumble and stronger mid-bass impact. But from there, both lower and upper mids are nearly identical, being natural, resolving, not as layered. Treble is also very similar, being crisp and well defined, though IE has just a touch more sparkle, giving the sound a little more airiness.

IE800S vs Ultimate Ears UERR - Soundstage width and depth are very similar. In terms of an overall sound, UE has mids which are a little more forward in comparison, making its sound sig more balanced, vs IE having mids a little pulled back. IE has an advantage of bass going deeper with more sub-bass rumble and more weight in mid-bass punch, while UE has a more neutral bass in comparison. Both have close to neutral lower mids, but IE has a little more body while UE being slightly south of neutral. Uppers mids in UE are slightly more revealing while IE is a little warmer and smoother in comparison, while treble is very similar. Overall, I'm hearing IE as having a little more body in sound when compared to UE.

IE800S vs Westone ES80 - IE has a wider soundstage while ES is a little narrower but with more depth. Both have a neutral sound signature, though IE has more body in lower mids and being a little warmer in overall tonality. With bass, IE has more sub-bass rumble in comparison to ES having low end extension more neutral in quantity, both have articulate well controlled mid-bass where IE has a little more quantity in comparison to a more neutral and faster ES mid-bass punch. With lower mids, ES is a little south of neutral while IE has more body, being a little north of neutral. Upper mids are strikingly similar, maybe with ES being a touch more forward. Treble also has a lot of similarities in terms of extension and definition and moderate airiness (not too much), while IE has just a little more sparkle.

IE800S vs IE80S - I thought some might enjoy this comparison, even though there is quite a noticeable gap in sound tuning. IE800S has a lot wider soundstage in comparison to IE80S, while depth is similar. When it comes to sound sig, IE80S is a lot more v-shaped in comparison to a mildly v-shaped sig of IE800s. There is also a very noticeable difference in sub-/mid-bass, where even at a minimum setting, IE80S has more sub-bass rumble and a lot stronger mid-bass slam which is more bloated in comparison. Lower mids have more body in IE80S, while 800S is more neutral. Both have natural smooth upper mids, where IE800S is a lot more transparent and resolving in comparison to IE80S which is more congested and smoother, including a more pronounced 6k peak. IE800S also has a better treble definition. Overall, IE80S is more fun-tuned iem intended for bass lovers and non-audiophiles who want to enjoy their music on the go, while IE800S is more balanced tuned (in a relative comparison) for audiophiles who want to analyze their music in more details while enjoying it on the go.

senns_ie800s_27.jpg

Pair up.

With its 16 ohm impedance and average sensitivity, IE800S is very easy to drive from any source.

Cowon Plenue 2 - very wide soundstage with a nice depth, mildly v-shaped signature, being closer to balanced. Nice sub-bass rumble, articulate mid-bass with a moderate speed and nice control, neutral lower mids, very transparent, natural, resolving upper mids, crisp well defined treble, moderate level of airiness.

Sony WM1Z - very wide soundstage with a nice depth, mildly v-shaped signature, being closer to balanced. Great sub-bass extension with textured rumble, faster bass with an articulate well controlled mid-bass, neutral lower mids, a transparent, natural, resolving upper mids with improved layering, crisp well defined treble which has a little more airiness and more sparkle.

iBasso DX200 w/amp4 - very wide soundstage with a nice depth, more balanced sound, closer to W-shaped since I hear upper mids being a little more forward. Great sub-bass extension with a textured rumble, average speed (not too fast or too slow), articulate, well controlled mid-bass, neutral lower mids, a little more forward, very transparent, resolving upper mids with improved layering, crisp well defined treble, a little more airiness and more sparkle. Very similar sound to WM1Z, except upper mids being a little more forward in DX200, while the overall sound being a little smoother with 1Z.

Lotoo LPG - wide soundstage with a nice depth, more balanced sound, closer to W-shaped. Good sub-bass extension, punchy, articulate, well controlled mid-bass, neutral lower mids, resolving, transparent, natural, smooth upper mids which have a more forward presentation and good layering (not on the same level as 1Z or DX200, though). Treble is crisp and well defined with a moderate airiness.

FiiO X7ii - wide soundstage with a nice depth, mildly v-shaped signature, closer to balanced, Nice sub-bass rumble, articulate mid-bass with a moderate speed and nice control, neutral lower mids, transparent, natural, resolving upper mids, crisp well defined treble, moderate airiness. Very similar sound to P2, just with a touch more sparkle in treble.

theBit Opus#2 - wide soundstage with a nice depth, more W-shaped signature, with a little more sub-bass rumble, similar to other DAPs, tight, articulate mid-bass, neutral lower mids, and upper mids being a little more forward, still transparent, resolving, a little more layered. Treble has more sparkle and airiness, a little brighter in comparison to other DAPs.

Samsung Note 4 (smartphone) - wide soundstage with a nice depth, mild v-shaped sound, being closer to balanced, nice sub-bass rumble, and punchy well controlled bass, a little less articulate in comparison to dedicated DAPs, but still impressive. Neutral lower mids, natural, resolving upper mids, with a nice transparency but not on the same level as DAPs, a little smoother and less layered in comparison. Treble is crisp and well defined, with extra sparkle. This pair up was definitely a surprise to me.

senns_ie800s_36.jpg

Conclusion.

I can't speak for the original IE800 model or how it compares to the new IE800S, but I can say how impressed I was listening to what Sennheiser accomplished using just a single 7mm dynamic driver. Of course, it's not a generic off-the-shelf transducer, but rather a custom Extra Wide Band driver coupled with a dual-chamber absorber system used to shape the sound. But nevertheless, it's the kind of a sound I would expect from fine-tuned multi-BA IEM, not a single driver unit.

In theory, a single driver tuning should be coherent, yet, some other single DD flagships I tested before felt like I'm listening to a hybrid IEM with a DD bass and BA mids/treble. Here, even with a mildly v-shaped tuning, the sound is still linear, expanded, flows smoothly without too much emphasis on lows and highs, very natural, detailed, transparent, and just relaxed and non-fatigued. Once you start listening, you forget that you have a pair of tiny ceramic shells in your ears because it sounds like a pair of full size headphones.

So, is IE800S a total perfection? That will depend on your sound preference, of course. If you want the sound with more bass impact or a more aggressive treble, these might not be for you. But one thing for sure, IE800S stands out with a unique tuning that doesn't overlap but rather compliment many of my other flagship IEMs. The only concern I have is the cable with its permanent attachment to the shell. To minimize microphonics, I prefer to wear IE800S with wire up over the ears which can put a little more strain on the cable joint. But, at least Senns 2-year warranty should give you a peace of mind. And another important factor to mention that while many of today's flagship IEMs are priced around $2k, Sennheiser still delivers TOTL flagship performance for under $1k.

twister6

twister6 Reviews
Headphoneus Supremus
Pros: Compact universal design, isolation, natural revealing tonality, expanded soundstage.
Cons: Short nozzle, needs a set of regular single flange eartips.

The product was provided to me free of charge for the review purpose in exchange for my honest opinion.
 
Manufacturer website: Earsonics, available for sale on Amazon and directly from Musicteck.
 
*click on images to expand.

 
Intro.
 
Sometimes I wonder why majority of IEM manufacturers are either from US or Asia, while many well known full size headphone companies are from EU.  I can’t imagine the demand for either one being different depending on the geographic location or cultural differences, and perhaps there is some logical explanation to this phenomenon though I haven’t discovered one yet.  So when opportunity knocked on my door, or actually landed in my Inbox, to review another “rare” European IEM manufacturer (Earsonics from France), I accepted it with a wide open arms of curiosity and was greeted with a pleasant surprise when S-EM9 showed up at my doorsteps.
 
It all started when Frank Lopez, a musician and a producer, took his sound engineering passion to the next level and founded Earsonics.  But it wasn’t until 2011 when they released their first flagship SM3 model which put them on the map.  In the following 4 years Earsonics product line grew with Classic, Custom, Signature, and Music series, including their S-EM9 flagship introduced a year ago.  Just recently their Music line got expanded further with two new ES2 and ES3 models, but these are more on a budget side with a scaled down performance while S-EM9 still remains their top flagship which I would like to share with you about in my review.
 
Unboxing.
 
As many of you know, I pay close attention to unboxing experience because I enjoy surprises.  After all, unboxing is like a box of chocolates, you never know what awaits you inside.  And speaking of a box of chocolates, that’s exactly how it felt holding S-EM9 in a medium size flat rectangular box with a large bold image of IEMs that looked like they were going to pop out of the cover sleeve.  The image looked delicious and even the shell of S-EM9 under the light had a dark chocolate shade of color.
 
With a sleeve off, you are looking at the main product box with a soft to the touch cardboard cover and ES logo printed on the top of it.  When the cover is lifted, you get a “Merci” greeting card and the presentation of the top layer with a cutout for a carrying case and S-EM9 shells.  Another foam cover layer off, and now you can see the “candies” in their full glory.  There is nothing revolutionary about the packaging, but still it was a nice arrangement showing how much pride Earsonics took to present their product in the best spotlight.  Every accessory piece, including IEMs itself, was sitting in their own individual cutout pocket, preventing them from shifting around inside of the box and ensuring a secure delivery of the product to the customer.
 
earsonics_sem9-01.jpg earsonics_sem9-02.jpg
earsonics_sem9-03.jpg earsonics_sem9-04.jpg
 
Accessories.


The accessories include a slim rectangular carrying case, not a generic type but uniquely shaped and large enough to transport S-EM9 even with an aftermarket cable.  The case is a little shallow, so I would suggest wrapping the cable neatly before stuffing your IEMs inside to prevent the extra pressure on the nozzle w/eartips.  Inside the case there was a sealed pack of what I assume to be disinfecting wipes.  The only other time I’ve seen wipes being a part of the accessories was with another EU manufacturer I recently reviewed.  Is this a coincidence?  Perhaps not and maybe it goes along with a “conspiracy” why EU headphone market is leaning more toward full size cans where you don’t need to stick anything deep in your ear canal, but when you do – better disinfect it!
 
Next, you have 1/4” adapter which I usually consider a filler accessory for IEMs, but perhaps the message here is that S-EM9 intended for use with both portable DAPs and mixing studio consoles.  The cleaning tool was also included and definitely a necessity considering nozzle has 3 separate open bores which require periodic cleaning.  One interesting observation, the cleaning tool had a little magnet on the side so you can attach it to a metal surface when not in use.  I have seen other cleaning tools with a built in magnet, but this one looked a little different.  I’m a sucker for unique accessories.
 
Last, but not least, are the eartips.  My opinion about eartips is obviously very subjective because it depends on a personal ear anatomy.  You do get 2 pairs of double flange silicone tips in what appears to be S/M size (and one extra gray set was already included on IEM).  You also get 2 pairs of genuine Comply standard tips in M/L sizes.  And then you get a set of funky looking single flange silicone “umbrella” tips.  Could be just my ears with a wide earcanal opening, though I have seen similar comments from others, but I wish Earsonics would have included S/M/L set of regular standard single flange eartips because none of the included ones worked for me.
 
Without a proper seal, even the best tuned IEM will sound awful if you don’t have the right eartips selection.  The nozzle of S-EM9, and other Earsonics universal IEMs is not very wide, most likely T200 size, which is not the most common replacement eartip size.  Even when you find the replacement, the nozzle is also shorter in size and some people might require a longer eartip stem to extend it.  This probably explains why Earsonics choose to include double flange tips because they seal and extend the nozzle if your ear anatomy can accommodate it.  Since it didn’t work for me, I ended up with my own mod by finding a pair of old foam eartips where I removed the plastic core to use as an adaptor and another pair of silicone eartips with a wider bore opening to fit it.
 
This mod extended the nozzle by 1-2mm, and I experienced one of the best isolations from universal pair of IEMs, though it was mostly due to a large cap of the eartip which formed a perfect seal with my ear canal.  Obviously, for many this is not going to be a showstopper, but just keep in mind that you might have to spend a little bit of time with eartip rolling to find the right pair.  Furthermore, I think there is a light at the end of this tunnel since Earsonics sent me a separate pair of regular single flange tips which had a perfect fit.  I really hope they can make these tips to be a permanent set of their accessories.
 
earsonics_sem9-05.jpg earsonics_sem9-06.jpg
earsonics_sem9-07.jpg earsonics_sem9-08.jpg
earsonics_sem9-09.jpg
 
Eartip mod:
 
 
earsonics_sem9-22.jpg earsonics_sem9-23.jpg
 
Cables.


Typical of many IEMs/CIEMs, even of a flagship status, don’t expect to find any fancy after market cables here.  The included one is a standard OFC wire with 3.5mm TRS headphone connector in a rubbery compact housing with a decent strain relief, a plastic y-splitter mold with a good strain relief on every side, and a sliding clear plastic tube piece used as a chin-slider.  The pairs of wires from each earpiece get combined at y-splitter where the ground becomes common with 3-wires going down to the connector.  Going up to the earpieces, you have a standard 2pin connector with a plastic housing and a shape compatible with surface mounted and recessed sockets, red/blue dots indicating corresponding Right/Left sides, and a flexible memory wire wrapped in a clear plastic tube forming a comfortable adjustable earhook.  I didn't notice any microphonics using stock cable with S-EM9.
 
earsonics_sem9-10.jpg earsonics_sem9-11.jpg
earsonics_sem9-12.jpg earsonics_sem9-13.jpg
earsonics_sem9-14.jpg earsonics_sem9-15.jpg
 
In my opinion the stock S-EM9 cable doesn’t do it justice, and to realize the full potential of S-EM9 tuning you need to play around with different cables.  I know that some people are not cable believers, but with a careful level matching and going back’n’forth between the stock cable and a handful of aftermarket replacements, I found some interesting results based on how I hear the change.
 
Stock OFC vs Linum BaX (Litz SPC) – I hardly hear any changes in sound, just a very slight bump in mid-bass.
 
Stock OFC vs Plussound X series tri-metal (blend of copper, silver, and small amount of gold) - sound is a little more balanced, with more sub-bass rumble and a little stronger mid-bass punch, upper mids are becoming more revealing, and I hear more sparkle in treble.
 
Stock OFC vs Whiplash TWau Reference (gold plated pure silver) - sound is more balanced, the bass is tighter and more articulate, more textured sub-bass rumble and a faster mid-bass punch, mids are more revealing and detailed, more resolving with a better transparency, and treble has more sparkle and airiness.
 
Stock OFC vs Effect Audio Thor Silver II+ (pure silver) - sound is more balanced, the bass is tighter and more articulate, more textured sub-bass rumble and faster and tighter mid-bass punch, mids are more revealing and detailed, I hear sound having a higher resolution, more transparency, better layering; treble has more sparkle and more airiness.
 
Thor II+ vs TWau – TWau has a little stronger mid-bass while Thor II+ adds a little more sub-bass texture.  Thor II+ upper mids are a bit brighter, more revealing while TWau is a touch smoother.  Thor II+ has a little more sparkle in treble.
 
Both TWau and Thor II+ paired up great with S-EM9 and offered a noticeable sound quality refinement without a drastic change of the sound signature.  If you are on a budget, you can get a similar result with X series, but not the same level of refinement as the other two.  Given a choice, I would probably go for Thor II+ as having the best synergy with S-EM9, though TWau was right behind it.
 
Clockwise: TWau, BaX, X series, Thor II+:
 
earsonics_sem9-21.jpg
 
Design.
 
Considering 9 driver design, thus S-EM9 model name, I was very surprised to find the size of the shell to be on par with many of my other 3 driver universal IEMs.  Earsonics definitely found a clever way to pack their 1x low, 4x mids, and 4x highs BA drivers into one super compact shell with 3-way asymmetrical sound channels to manage optimal phase alignment thanks to a custom cannula (thin sound tubes) profile.  The result of this coherent tuning speaks louder than words, and I will discuss it further in my Sound analysis section.
 
The shell is not just ergonomically shaped to fit comfortably inside of Concha Cavum of even smaller size ears, but it also has a rather low profile.  Don't expect to be able to put your head comfortably on a pillow with your ear down, but at the same time the shell wasn't sticking out too far either.  Exterior of the shell has ES white letters on the right faceplate and a white R next to the 2pin connector socket, and a red 9 on the left faceplate with a red L next to its 2pin connector socket.  Left shell also has a serial number etched on the inside of the shell.
 
I know it's just an editorial nitpicking comment, and I completely understand that Red 9 is part of S-EM9 model logo, but every IEM/CIEM I have tested in the past had Red labeling (not artwork but labeling) on the Right side and blue or other colors on the Left side.  It's impossible to mix up L/R sides because shells are not symmetrical and you have L/R letter marking on each shell.  But I have to admit that considering I switch daily between many different IEMs/CIEMs, on a few occasions I had to stop and think for a second while looking at Red 9 before putting it in my Left ear.  Not a showstopper, but just a force of habit in my case.
 
The nozzle has 3 bores corresponding to a three way grouping of 9 BA drivers, and it’s aligned with cannula tubes going to each nozzle.  Considering the quality of S-EM9 bass performance, I still can't get over the fact they only allocated a single BA driver for lows, while other 8 drivers were split between quad mids and quad highs.  I already talked about the nozzle being a little too short and how I was able to mitigate that with my eartip mod.
 
earsonics_sem9-16.jpg earsonics_sem9-17.jpg
earsonics_sem9-18.jpg earsonics_sem9-19.jpg
earsonics_sem9-20.jpg
 
The fit.
 
earsonics_sem9-24.jpg
 
Sound analysis.
 
Even so I was itching to switch the cable, for sound analysis I went back to a stock OFC wires because that's how others will hear the sound out of the box.  Also, I put S-EM9 through about 100hrs of burn in, though I haven't noticed any changes in sound.  After extended listening using my trusted reference quality PAW Gold and Opus#2 sources, here is what I found.
 
I hear SEM9 as having a very natural revealing tonality with a balanced signature that has a slight lift in sub-bass and upper mids area.  Actually, SEM9 signature can slightly fluctuate depending on the selection of eartips and the cable.  With my eartip mod allowing me to use a large size long stem tips - I was getting an earplug like isolation with an amazing bass impact.  Going with a smaller eartip, one size down, relaxes the intensity of the bass and I get a little more airiness in the upper frequencies.  Switching to pure silver or gold plated silver wires lifted a bit of a veil off the smoothness and sharpened the details of a balanced signature which pushed the sound more toward W-shaped performance (more emphasis in all 3 frequency ranges).  But regardless of these changes, the sound remained very clear and detailed, smooth, natural, and very coherent. 
 
In more details, I hear a deep sub-bass extension with a velvety smooth textured sub-bass rumble.  The sub-bass is slightly elevated, giving more weight to mid-bass punch which has an average attack speed and decay, making it sound less like a BA driver and more like a performance signature of a dynamic driver.  It’s quite amazing considering that low end is covered by a single BA which sounds more like a dynamic driver, and still is well controlled without spilling into lower mids and quite articulate with smoother analog level of details.
 
Lower mids are not too thin or too thick, yet they have a nice smooth neutral body which in comparison to slightly lifted upper mids creates a nice separation from a bass.  Again, playing with different eartips and especially the cable (Thor II+ pure silver and TWau Reference), turned upper mids from smooth detailed into more resolving with an improved retrieval of details.  It doesn't reach analytical performance level and still remains very natural, though the cable upgrade did lift the veil off upper frequencies and enhanced the clarity, especially in vocals.
 
Treble is well extended, with enough clarity and crunch, well controlled airiness, and a great definition of details.  With a stock cable the treble is smoother while with an upgrade the level of airiness goes up, which in turn improves the layering and separation of instruments, giving the sound more crisp definition.  I didn’t hear even a hint of sibilance, but you should be aware there is a peak around 7k (also confirmed by my measurements) which improves the clarity of the sound without harshness or graininess.
 
Regardless of the cable selection, soundstage is very wide but in a natural way without feeling artificial.  The depth of the sound is pushed a little outward, giving it a more holographic out of your head feeling, but not too much.  With such width/depth of soundstage and a decent level of transparency, you also get an excellent layering and separation of instruments and vocals.  Even with a stock cable which makes sound smoother, it never gets congested.  But switching to silver or gold-plated silver cable scales this performance to another level.  To be fair, I did all my sound analysis using a stock cable, but I'm definitely switching to an upgraded cable afterwards because stock cable doesn't do a justice to a sound quality of SEM9.
 
Sound comparison.
 
Each pair of the following IEMs/CIEMs were tested and compared using their corresponding stock cable, and I matched the sound level by ear.  Opus#2 single ended output was used as my reference source.
 
SEM9 vs U12 w/B1 - 9 has a wider soundstage with a more hollow depth where I hear mids/vocals being more out of my head while 12 width is slightly narrower and the vocals are closer and more intimate. 12 upper mids/lower treble are a little smoother and more organic, while 9 upper mids/lower treble are more transparent and revealing, and treble has a little more sparkle. That also contributes to an edge in better layering and separation of instruments, but at the same time U12 upper mids sound just a little more organic.  The low end, from sub-bass extension to mid-bass punch, and the lower mids smooth full body are very similar. Interestingly enough, the shells have a similar shape and size, except U12 nozzle is longer.
 
SEM9 vs Andromeda - Andro has more hissing, the soundstage width here is very similar but I hear 9 having a little more depth with mids/vocals being a little more out there.  When it comes to low end, Andro has a little deeper sub-bass extension and a little more mid-bass punch, while 9 bass is a little more polite in comparison.  Lower mids are similar but upper mids in 9 are smoother, a little more relaxed and natural, not as intense and a little more forward.  Andro treble is crisper, has more sparkle and more airiness, while 9 is smoother and more relaxed.
 
SEM9 vs ES60 - Soundstage width is similar, maybe with 9 being a touch wider, but the depth is more holographic in 9. ES has a little more sub-bass and a noticeably stronger mid-bass punch.  9 lower mids are a little more neutral in comparison to ES which has slightly more body.  9 upper mids are a little brighter and slightly more revealing and transparent, while ES is a little smoother and more organic in comparison. Treble is very similar, though I hear ES having a touch more sparkle.
 
SEM9 vs K10UA - 9 has a wider soundstage, while the depth is very similar including that slight out of your head holographic expansion, though 9 pushes it a little further. With low end, K10UA has a little more sub-bass rumble and a little stronger mid-bass punch. Lower mids are very similar in tonality and the same with upper mids and vocals, though I hear 9 being a touch more forward and a little smoother and more organic.  K10UA treble is a little more crisp and has a touch more sparkle.
 
SEM9 vs Harmony 8.2 - 9 has a little wider soundstage, while the depth is very similar though 9 still has a little more out of your head holographic expansion.  Sub-bass is very similar while H8.2 has a stronger mid-bass punch.  Lower mids are similar as well, while upper mids in 9 are a little smoother and more organic in comparison.  Treble extension and tonality is very similar between these both.
 
Pair up.
 
The pair up test was done using S-EM9 with its stock ofc cable.  Considering 121 dB sensitivity and 38.5 ohm impedance, I was expecting to hear a strong hissing with many of my sources.  To my very pleasant surprise, S-EM9 has hissing down to a minimum!
 
theBit Opus#2 - smooth, revealing, slightly mid-forward signature with a little polite bass (north of neutral but not elevated), neutral lower mids (not too much body and not too thin), slightly pushed forward clear detailed mids, crisp, well defined treble.  Wide soundstage.
 
Lotoo PAW Gold - more revealing and balanced signature, mid-bass has a stronger punch, neutral lower mids, clear detailed upper mids which are not as pushed forward as Opus#2, a little more analytical upper mids, bright, crisp, detailed treble.  Wide soundstage.
 
Plenue M2 - revealing, slightly mid-forward signature, more rumble in sub-bass, neutral mids, revealing detailed upper mids, crisp extended treble.  Soundstage is wide, but mids have a slightly holographic depth, pushed more out of my head.
 
FiiO X7 w/AM2 - smooth, revealing, more balanced sound signature, with a nice sub-bass rumble and strong mid-bass punch - bass is tight and articulate.  Lower mids are neutral, while upper mids are revealing, detailed, with lots of clarity; treble is bright, crisp, detailed.  Wide soundstage with slightly distant upper mids/vocals pushed out of my head.
 
A&K AK120ii - smooth, detailed, balanced sound signature, with a tight articulate bass that has a nice fast punch, neutral lower mids, and clear detailed upper mids which sound very natural; treble is crisp and detailed.  Soundstage is wide, while depth is more natural and less holographic.
 
Cayin i5 - smooth, detailed, balanced sound signature, excellent bass with a deep sub-bass rumble and fast punchy mid-bass, slightly more body in lower mids, and bright detailed smooth upper mids, treble is bright and crisp, but a touch less airiness.  Soundstage is wide, and depth is more intimate (not too much out of your head).
 
Galaxy Note 4 - smooth, detailed, very balanced signature, bass is hard hitting with some impressive authority, but upper mids/lower treble are a little less revealing and smoother/warmer. Also, soundstage width is good but not as wide as with some DAPs.  Not bad for a smartphone pair up.
 
With Opus#2:
 
earsonics_sem9-25.jpg
 
Conclusion.


The intent of my earphone reviews, especially when it comes to pricier flagship models, is to help my readers in their journey to narrow down available choices based on their sound preference.  Lately, this task has been not easy to carry out because there are so many great IEMs/CIEMs where you can’t just pick one as the top performer.  But S-EM9 managed to come close, even challenging some of my previous favorites.  Its natural revealing spacious sound works great with every genre of the music, regardless if it's a vocal performance or instrumental rendition or a slamming EDM track, and you can listen for hours without fatigue.  Also it has a very comfortable and lightweight design where with a right set of eartips I have been using them even as earplugs at my work.  Don't expect exaggerated bass slam or a revealing analytical performance.  Instead you will find a masterfully tuned signature that will hit a sweet spot and will appeal to many audiophiles and audio enthusiasts who want a happy medium without compromises.
Audiowood
Audiowood
Thank you so much for the comparison between Andromeda. You have cleared up so much assumption in my effort to paint a pic of SEM9. Wonderful review.
Hisoundfi
Hisoundfi
Great review Alex, I agree with everything you said.
Hawaiibadboy
Hawaiibadboy
Great review as usual!

twister6

twister6 Reviews
Headphoneus Supremus
Pros: solid build, reference quality sound tuning, balanced output, fast android performance, beautiful display.
Cons: high output impedance (needs iEMatch in some pair ups), firmware is almost there.


The product was provided to me free of charge for the review purpose in exchange for my honest opinion. The review was originally posted on my blog, and now I would like to share it with my readers on Head-fi.

Manufacturer website: Hiby.


hiby_r6-22.jpg
Intro.

It probably sounds cliché, but you have to be living under a rock if you never heard of Hiby. Maybe not as well known yet for their hardware, Hiby has been behind many DAP releases (FiiO, Cayin, Shanling, Hidizs, Questyle, and others) with their custom firmware, as well as their own popular music app for smartphones. And thanks to their Android OS software workaround, many of these DAPs are free of Sample Rate Conversion (SRC) limitation which down-samples the audio. I guess it was only a matter of time before they decided to release their own DAP – Hiby R6. Considering the accumulated experience while working with other DAP manufacturers, Hiby did their homework to come up with an impressive hardware spec to boost the Android performance, something you would expect from higher end smartphones.

In their debut release, Hiby decided to introduce R6 DAP through Indiegogo crowdfunding campaign, giving the project more exposure with a help of social media. The campaign was successful, over 575% funded, but a real surprise came later when they announced the shipment of the first batch of aluminum alloy R6 ahead of the proposed schedule - very rare for any crowdfunding campaign. Of course, nothing is perfect, and Hiby design decision of high output impedance did raise questions in audiophile community. But I found it to be not the end of the world, if you got iEMatch handy, and I will go into more details when discussing R6 pair up with numerous headphones in corresponding section of my write up. Now, let’s proceed to the review.

hiby_r6-53.jpg hiby_r6-54.jpg hiby_r6-55.jpg

Unboxing and Accessories.

Here, unboxing was straight forward, with a basic black compact sturdy box, and R6 under the cover in a secure foam cutout. All the included accessories and documentation was underneath, found at the bottom of the box once you take the foam tray out. The back of the box had detailed highlights of the features with a graphic thumbnail illustration of each one.

hiby_r6-01.jpg hiby_r6-02.jpg hiby_r6-03.jpg hiby_r6-04.jpg

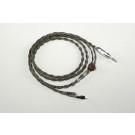
The included accessories are basic, yet useful. You get "Hiby" branded usb-c charging/data cable (decent quality), and line out coax cable to connect digital output to external DAC/amp coax input (longer cable with a durable shielding). 3.5mm to 3.5mm line out audio cable was not included, though would have been appropriate here. You also get extra high-res stickers and a screen protector, while a pair on the front and the back has been already applied to R6. Plus, included is a pin-tool required to open the concealed uSD door to take out the tray with a flash card.

hiby_r6-05.jpg hiby_r6-06.jpg hiby_r6-07.jpg hiby_r6-08.jpg hiby_r6-09.jpg

As part of Indiegogo stretch goals, a silicone case and tempered glass screen protector were also included. Silicone case is basic cheap case with covered buttons. It's actually not bad to enhance the grip and provide friction when placed on the surface, but it's not as "glamorous" as a leather case. Tempered glass has an advantage over a regular protection film in case if you have a direct impact which absorbs the shock, shattering only the tempered glass instead of the display.

hiby_r6-10.jpg hiby_r6-11.jpg hiby_r6-12.jpg hiby_r6-13.jpg

The leather case is optional and cost $24 when ordered from IGG page. It has a dark blue color which from a distance almost looks black, and made of full-grain leather with felt inner lining to protect R6 metal finish from scratches. It has a slide-in design from the top, keeping the top fully open, and has generous cutouts around the buttons on both sides to allow direct access while keeping buttons recessed and safe from accidental pressing. It also has a generous opening at the bottom for usb-c port access. I like this case.

hiby_r6-14.jpg hiby_r6-15.jpg hiby_r6-16.jpg hiby_r6-17.jpg hiby_r6-18.jpg

I was also told that MITER is working on a case for R6, and I will update the review once I get my hands on a sample. Traditionally, MITER cases use a soft leather and feature their signature kickstand to allow propping R6 up when watching video/movies.

But, the #1 Recommended accessory for R6 is iFi Audio iEMatch, a very compact durable pigtail dongle which reduces the output impedance and nearly eliminates the issue of R6 high OI. It’s available in 3.5mm and 2.5mm variants, where you can also get a cut-down 3.5mm Ear Buddy version with a similar functionality.

hiby_r6-69.jpg

Design.

To make their DAP pocket friendly, Hiby kept design very straight forward and slick. You have a typical "smartphone" rectangular bar shape, 116 x 66 x 15 mm in size with 190g (aluminum alloy) or 275g (stainless steel) in weight, and 4.2" touch screen display occupying the front and glass panel on the back. While all the internal design/components are the same, you have a choice of either aluminum alloy or stainless steel (316L high-impact) chassis. Unlike some other DAPs, Hiby doesn't claim any sound difference between these two.

While the general shape of the DAP is rectangular, the top and the bottom has this slight recessed arc shape to give it a more unique look. The sides have a little rounded shape for a more comfortable grip, though I still prefer to keep it in the case to make it less slippery, especially with a glass back. Using a case enhances the grip and prevents it from sliding across a flat surface.

Left upper side of the DAP has Volume up/down (+/-) nice concave-in buttons with a tactile response. Keep in mind, once you press the button to change the volume, you also get on-screen volume touch control which you can slide up/down for a faster adjustment. Toward the lower corner of the left side, you have a concealed micro-SD card slot which opens with an included accessory pin. It's a small tray which is flush with chassis, keeping the card secure and dust free, similar to smartphone mechanism.

Right side has Power button at the top with a multi-color LED which indicates charging, playback, and different types of playback hi-res formats. Below it is 3 playback control buttons with a larger Play/Pause in the middle and smaller Skip Next/Previous above and below it. All the buttons have concave-in shape, etched with a corresponding functionality (except for Power button), rattle free, and have a very tactile click response. I like how they vary in size for an easier ID as you slide your finger, and I also appreciate the ergonomics of asymmetrical layout.

The bottom of R6 has usb-c port which becoming more popular with DAPs and allows high speed/current QC charging and faster data transfer. Plus, this port is used not only for charging, but also data transfer, USB DAC input functionality, and Digital Output transport control. The top of R6 has 3.5mm port which doubles as Line Out (LO) and Coax outputs (selected from audio settings menu). Next to it you have 3.5mm single ended (SE) headphone output and 2.5mm balanced (BAL) headphone output. Btw, I didn't find any screws accessible from the surface.

hiby_r6-23.jpg hiby_r6-24.jpg hiby_r6-25.jpg hiby_r6-26.jpg hiby_r6-27.jpg hiby_r6-28.jpg hiby_r6-29.jpg hiby_r6-30.jpg hiby_r6-31.jpg hiby_r6-32.jpg

Under the hood.

As I mentioned in the intro, Hiby did their homework and picked top performance components. To ensure the Android 6.0 OS runs smoothly, Hiby stepped it up with Snapdragon 425 SoC Processor and 3GB of DDR3 RAM. While some other DAPs use 1GB RAM just to make sure you can run a streaming app, or 2GB of RAM to be able to run other apps, 3GB of RAM doesn't just enable you to run all apps, but to run it as efficient and as responsive like you would have with your smartphone. Internal storage is limited to 32GB, that's a pity, but you have uSD expansion to support the latest max capacity card. Plus, wifi streaming and LAN support expands the playback variety.

Audio processing is under control of dual ESS ES9028Q2M DAC, SoundPlus OPA1612 audio opamp (2x used as Low Pass filter), and TPA6120a (2x hi-fi stereo headphone amp) driving both single ended 3.5mm HO (120mW @ 32ohm, 118dB SNR) and balanced 2.5mm HO (300mW @ 32ohm, 120dB SNR). That's quite an impressive and powerful spec, though output impedance here is on a high side at 10 ohms. With a spec like this, you can play majority of hi-res lossless formats, such as FLAC, APE, WMA, WAV, ALAC, Apple LOSSLESS, DSF, DSDIFF where you have native support/decoding of DSD 128/256 and PCM up to 32bit/384kHz, as well as support of ISO DSD. Plus, support of lossy formats, such as MP3, AAC, WMA, OGG. Keep in mind, Hiby mentions to be able to bypass Android sample-rate conversion to ensure bit-perfect output from any app.

Its 4.2-inch touch screen IPS display is high-density 300 dpi, with an impressive resolution of 768x1280, supporting 16 million colors, and wide viewing angle. I know, these are just spec numbers, but when you look at the display, especially that color-splash wallpaper with its deep/rich colors, you will understand and appreciate the meaning of this spec. Furthermore, for a wireless connection, you have dual-band (2.4G and 5G) WiFi radio, and Bluetooth 4.x with aptX codec support.

The provided battery has 4000 mAh capacity and supports quick charging (QC 3.0) standard (140min to full charge), where you can use either DC 5V/2.5A or 9V/1.5A. While Hiby mentioned about 12hrs battery life which is impressive for high performance touch screen Android DAP, I actually found this number to be a little on a conservative side where in my best- case scenario I was able to get even more out of battery.

Before timing the battery performance, I let R6 run a few charge/discharge cycles to make sure battery is fully calibrated. I started with U18t and single ended cable, low gain, playing MP3 (320kbps, 44.1k/16bit) in a loop at a reasonable volume level with a display off, only occasionally turning it on to check the battery percentage. During this test, I got 12.5 hours of play time with 3% battery juice remaining. Later, I realized that I never turned the WiFi off, which I’m sure contributed to additional battery drain, thus making me believe that a best-case scenario would have been closer to 13hrs of total playback time.

Next, I switched to CFA Vega with a balanced cable, in high gain, WiFi radio on, pushing volume higher to drive these lower sensitivity IEMs harder while playing hi-res FLAC file in a loop. The result was 7hrs and 45min of playback time. Still not bad for this relatively worst-case scenario, though I’m sure with DSD files it would have been even lower, as expected. Btw, having LED indicator built into a Power button is quite convenient to get “visual” confirmation if you are playing a hi-res file without turning the DAP on.

hiby_r6-57.jpg hiby_r6-58.jpg hiby_r6-59.jpg

Wired and wireless connections.

Thanks to a dedicated LO/Coax and multi-functional digital usb-c port, Hiby R6 has flexibility of many various wired connections to enable its use as a transport or to pair up with an external dac/amp. Here are some of the examples of my testing.

R6 vs R6/HA-2 – Using Shanling usb-c to micro-usb interconnect digital cable, I seamlessly paired up R6 with Oppo HA-2 portable dac/amp, using it as a digital transport. In comparison to a direct R6 connection, I found the sound with HA-2 to have a little more bass impact, but other than that it was very similar. Also, with external connection, your HO impedance changes according to the spec of a paired up device.

hiby_r6-60.jpg hiby_r6-61.jpg

Micro iDSD BL – While trying to stay portable using DAPs, Micro iDSD is one of the few transportable DAC/amp exceptions I still use due to its sound quality and flexibility supporting various connections. Using a budget eBay digital cable with usb-c to full size usb, I had no issues connecting to iDSD and found the sound to be very clear and detailed with a punchy bass.

hiby_r6-62.jpg

In comparison, I switched to use Coax output of R6 (needs to be selected in audio settings from pull down menu), where in this pair up I found the sound to be a little smoother and with a noisier background in comparison to digital connection above.

hiby_r6-63.jpg

R6 vs R6/E12A – To take advantage of R6 dual DACs while bypassing its internal amp section, I switched to LO (the same menu option where I selected SPDIF above) to test R6 with FiiO E12A portable amp (my neutral amp reference) where I found the sound to be a little bit smoother and the background not as dark. Based on what I’m hearing, it sounds like R6 amps have a blacker background and a brighter tonality, leading to a more resolving sound.

hiby_r6-64.jpg

While I’m not a big fan of using portable DAP as USB DAC, this “wired” feature is available with R6 and convenient on the go when you are traveling with your laptop and want to enhance the sound of its stock chipset. Here, after installing Hiby provided drivers, my Win7 laptop recognized R6 without a problem, connected as usb DAC, and it even displayed the sampling/bit rate of the song. The sound quality was the same as listening to R6 standalone.

hiby_r6-67.jpg hiby_r6-68.jpg

For Wireless Bluetooth test, I used Sennheiser Momentum Over-ear wireless and B&W P7 Wireless full-size headphones. I tested their performance paired up with R6 vs my aging Note 4, though in both cases it should support aptX codec. I found that I could push headphone volume louder with R6 in comparison to my Note 4, not sure if there is some volume limitation for safety reason with my phone.

In more details, Senns Momentum are picky in some pair ups, but I found no issues with R6. I was able to walk across 50ft of open space, before the sound started to cut off. Comparing the performance of R6 vs Note 4, it sounded nearly identical, crisp, revealing, and with an articulate bass. With P7W, the transmission was clear across 55ft of open space, the sound was balanced and I enjoyed P7W deep bass impact. As a matter of fact, I’m hearing an even deeper sub-bass rumble when paired up with R6 over Note 4.

hiby_r6-65.jpg

No wireless discussion could be complete without WiFi and Streaming performance. I had R6 connected to my ASUS RT-N66R router (oldy but goody), 5GHz band. While I was streaming Spotify, had R6 aluminum in a leather case placed in the front pocket of my shorts. Walked to the other end of the 1st floor, an open space of a little over 60ft, and had no issues with streaming, though I was down to 1 bar.

In general, I found R6 to perform like a decent smartphone (not exactly the latest TOTL, but an average smartphone), and with Google Play pre-installed you have access to many different apps, including streaming. I don’t stream too much using apps or from in-house server, but occasionally use either Spotify or DI.fm apps. I know many asked me about Tidal, but unfortunately, I have no account thus wasn’t able to test it. I’m aware that Hiby is working directly with Tidal to fix some minor compatibility issue and hopefully will be able to resolve it soon.

hiby_r6-52.jpg

GUI.

While many Android DAPs feature a common interface found in smartphones and tablets, not many of them perform on the same level when it comes to GUI response and app compatibility. Here, thanks to Snapdragon 425 SoC and 3GB of DDR3 RAM, playing music, browsing internet, or streaming audio is a breeze. Plus, Google Play Store already pre-installed so you can start downloading apps without a need to side-load apks or installing custom ROMs.

Interestingly enough, while Notification bar has a familiar volume icon with a volume level, Bluetooth icon (when enabled), WiFi icon (when it's on), battery icon with remaining %, and a time, once you pull Notification bar down, unlike some other DAPs, you will find a very minimalistic set of short-cut controls: down to brightness adjustment, WiFi and Bluetooth controls, and Audio Settings. There is no general Android Settings icon, instead it's a separate shortcut on the main Android screen, also found in apps drawer.

Under Audio Settings in Notification menu, you will find Low Pass filter selection for ESS DACs which includes: Minimum phase, fast roll-off, and slow roll-off options; Multifunction Output selection between Lineout or SPDIF; Gain with Low and High settings; L/R channel balance slider; and Tonality (harmonics) selection of Reference, Warm, and Tube Amp. The Settings shortcut on the main screen takes you to a regular Android settings section with typical system settings of WLAN, Bluetooth, Data usage, Display, Apps, Storage, Battery, and others. Perhaps Hiby wanted to keep Notification bar less crowded, but I would have love to see Settings shortcut in the upper right corner where it could be accessible from any screen, instead of searching for the shortcut on the main Android screen.

Of course, you are free to run any audio app of your choice which going to have its own custom GUI, but since we are on a subject of Hiby DAP which comes already with its Premium Hiby Music v3 app, I didn't bother to use anything else, especially after I learned of MageSound 8-ball DSP effects. Hiby Music app is very user friendly and feature-rich, and its navigation on R6 is very fast, especially since its interface is very logical to navigate.

The main screen at the start has top bar with Music listing where you can navigate by a song Title with the ability to play all in Shuffle mode or to select individual tracks to add to Queue or to Playlist or to Delete. You can also navigate by Folder or sort by Album, Artist, Genre (depending on ID tag of your songs), or Private Cloud (DLNA/LAN or Baidu?). There is a separate tab for Favorites, Recently played, or Playlist. Also, there is an option to enable HibyLink to connect to your smartphone. Last, but not least, a Search menu. While going through these choices above, at the bottom you always have a visible playback bar with a currently selected song with navigation controls.

hiby_r6-33.jpg hiby_r6-34.jpg hiby_r6-35.jpg hiby_r6-36.jpg hiby_r6-37.jpg hiby_r6-38.jpg

Tapping on that playback bar brings up the main playback screen, also with a clear layout. At the top you see a song/artist name with 3-dot setting menu next to it (add to playlist, share, EQ, show album info, and properties display). Below it, the top half of the display shows embedded artwork (if available), and you can swipe to the left to see if there is embedded lyrics, and one more swipe for a detailed info about the song. And speaking of detailed info, once playback starts, the sampling rate of the song is displayed in the notification bar, something I haven't seen with any other DAP yet.

In the lower left corner of artwork screen, you can tap to select playback mode: loop all, loop one, straight play through, or random playback. The lower right corner has a link to open current playback queue, based on either a folder where you are playing from or an album or playlist. Lower part of the screen has playback controls with Skip Next/Prev on the sides, and a large circle with Play/Pause in the middle and Fast Forward/Back navigation to scrub through the song. While I personally prefer a straight horizontal bar to touch-forward through the song, this Circle navigation bar became a signature control of Hiby app, and it's large enough for a precise control.

Also, I liked the EQ interface which you can access from the playback screen. First of all, unlike many other DAPs where enabling EQ drops the output by at least 3dB to avoid clipping, here the volume doesn't change but you have +/-12dB amp gain adjustment. Then, you have 10-band EQ (31,62,125,250,500,1k,2k,4k,8k,16k) with each band having +/-12dB adjustment. These 10 bands sliders spread across 2 screens, but the top of the EQ has a common graphics screen with a visual of all 10 bands so you can see the final EQ curve. Furthermore, in addition to a custom preset, you also have 8 genre specific EQ presets which you can modify further.

hiby_r6-39.jpg hiby_r6-40.jpg hiby_r6-41.jpg hiby_r6-42.jpg hiby_r6-43.jpg

Hiby Music app comes with its own comprehensive Settings menu which can be accessed by swiping to the right from the main screen of the app. Here you can access Music Scan (scanning all or specific folder, with a number of scan options), Download manager (assuming, for songs?), Equalizer (as described above), MageSound 8-ball (Hiby own special effects), Plugin (available plug ins, currently with Parametric EQ and Joe's Sound Filed Enhancement plugin), Sleep timer, Settings (a very comprehensive set of music app settings), Quick guide, and About section.

I'm sure more plugins will be available soon, and I hope PEQ will get its own GUI since for now it's very low level basic interface. MageSound 8-ball is what many will be interested in. It’s a very comprehensive set of very useful effects that can really shape the sound with quite natural results. You can adjust the "temperature" by going from cooler/brighter to warmer/darker signature, adjust bass extension (from light to deep), bass texture (from fast to thumpy), note thickness (from crisp to thick), vocals (from recessed/crisp to more forward/smoother), female overtone, LF/HF sibilance level, impulse response (from slow/music to fast/hard) and level of air. At first, I assumed it will be more like an EQ adjustment, but the more you use it, the more you realize it's like DSP effect processing, reminding me of BBE/JetEffect in some way.

hiby_r6-44.jpg hiby_r6-45.jpg hiby_r6-46.jpg hiby_r6-47.jpg hiby_r6-48.jpg hiby_r6-49.jpg hiby_r6-50.jpg hiby_r6-51.jpg

Bottom line, no matter what app I was using, everything was very responsive and super fast.

Sound analysis.

Usually, I like to get at least 100hrs of playback before any DAP sound evaluation, so after I received R6, it spent a week on a burn in, just playing random music in the loop while I switched between SE and BAL, making sure HO were loaded. As my usual disclaimer, DAP sound description is very tricky because you are describing the synergy of the DAP with headphones you are listening to. It’s easy to fall in a trap of describing the headphone signature, thus I usually go through a number of headphones, from neutral to more revealing, to find common sound characteristics relative to the source, rather than headphones.

In general, I found R6 to be a neutral DAP with a little tilt toward a brighter more revealing side. It has a rather wide soundstage expansion, both in width and in depth. It also stands out with decent dynamics, where, regardless of headphone pair up, the sound was always vertically expanded, never felt compressed. The background is black and hiss free even with most sensitive low impedance iems. Also, the transient response of notes on/off transition is clean and sharp, which makes details pop out faster. Though in the settings there is Tonality selection with Reference/Warm/Tube amp, all three sounded on a reference level to me. MageSound 8-Ball effect is where I was able to tweak tonality with a more noticeable effect. And, especially when paired up with more revealing analytical earphones/headphones, you can appreciate the level of layering, transparency, and separation between the sounds.

But there is one variable when it comes to a tonality since R6 has a higher than usual output impedance, 10 ohms, while today's typical DAPs have around 1 ohm or less. So, what does that mean? With majority of full size dynamic driver headphones and single driver IEMs or higher impedance headphones/iems, a pair up with R6 will have a minimum effect on a change of the original tonality as intended by headphone manufacturers. But a handful of low impedance multi-BA and hybrid IEMs will be affected to the point where the bass gets attenuated and the treble is a little boosted. The degree of this effect will vary, and I have examples in pair up section of this review. You can't ignore it, but it's also not the end of the world since you can use iEMatch (http://amzn.to/2tVhc1W) from iFi (either 3.5mm or 2.5mm version) to "restore" the sound.

hiby_r6-56.jpg hiby_r6-66.jpg

Comparison.

In this comparison I used a few different IEMs, all volume matched, to compare how R6 stacks up against some other DAPs.

R6 vs FiiO X5iii - R6 has a more neutral revealing sound while in comparison X5iii is smoother, warmer and less resolving. With R6, bass is more articulate and better controlled, and there is more sparkle in treble. Two things that stand out for me, R6 has a blacker background (very noticeable) and a wider soundstage. X5iii has quite a noticeable hissing. Also, from a technical performance, R6 sound has more layering, better separation, better dynamic expansion. R6 sound is just cleaner and more detailed. And the same with Android performance, R6 is faster, more responsive, and more capable as a standalone Android device. X5ii does have dual uSD, more storage, and it has low OI, but in terms of sound quality and Android performance, there is a big gap between these two.

R6 vs Cayin N5ii - There are a lot of similarities in sound when comparing these two. Both have a similar soundstage expansion, though I noticed with some IEMs R6 sounds a little wider, not sure if OI and/or using iEMatch has anything to do with it. For example, I noticed this difference with U18t, while with IE800s connected directly - it was nearly identical in both soundstage and tonality. So, lots of similarities in terms of being neutral and with a more revealing tonality, though in some cases where I had to use iEMatch, the bass was a little more neutral and treble had a touch more sparkle. Both have a nice dynamic expansion of the sound and a black background. In terms of a technical performance, R6 has a little edge in layering, separation, and transparency of the sound. Besides output impedance, the biggest difference here is Android interface where R6 feels like a smartphone with a higher quality display and a very snappy Android performance. In contrast, N5ii presents itself as DAP first and Android device with Google Play and streaming capability second, like an add-on. Also, N5ii has an advantage of a dual uSD versus a single card in R6.

R6 vs FiiO X7ii - Similar soundstage expansion, though R6 is just a little wider. Also, R6 has a blacker background. Both have a very similar neutral revealing tonality with excellent retrieval of details, punchy extended bass, layered detailed mids, and well defined airy treble, though in some pairs up with R6, I hear treble being more extended. Besides the sound, there are also many feature similarities with both being a full Android DAP. But while they both support Bluetooth and wifi, and have open Android OS with pre-installed Google Play Store, the actual navigation and Android OS experience is on a much higher level with R6, while X7ii is slower and not as responsive as R6. Both have the same internal and external storage, but X7ii also has an advantage of replaceable amp modules.

R6 vs theBit Opus#3 - While I hear R6 soundstage to be a little wider, in terms of the sound signature these two are very close with a brighter revealing neutral tonality where in a blind test it's hard to even tell them apart. Even their technical performance, in terms of layering and separation of the sounds is very similar. They both have a more neutral, yet rather articulate and punchy bass, and a little brighter upper mids and crisp airy lower treble. Both have a similar black background. What sets them apart are the physical features. While #3 has 64GB of internal memory vs 32GB of R6, they both have one uSD. Also, both support Bluetooth and Wifi, but #3 has Android running in the background and it's closed, to the point where you have to side-load apps. R6 has a full open Android support with access to Google Play where you can easily install any app. So, while tonality and overall sound performance might be similar, if you want a true powerful android DAP, R6 is the way to go. Plus, 8-Ball sound shaping effects of R6 are a huge plus.

R6 vs Cowon Plenue R - Both have a very similar soundstage expansion, in width and depth. The difference here in R6 being more revealing and a little brighter while PR sound is smoother and a touch warmer in comparison. Both have a similar bass emphasis, though the tonality of PR gives it a little deeper perception. I'm also hearing R6 mids to be more layered with a little better separation of sounds. Both have a nice extended airy treble. While R6 has its MageSound 8-ball, Plenue has its advanced JetEffect. Both have Bluetooth to pair up with wireless headphones or speakers. That’s about it for PR, while R6 is a full android dap with Google Play store support to load any app, including streaming ones. In terms of storage, PR 128GB of internal storage and uSD card are superior to 32GB of R6 w/uSD. Also, PR has better battery life.

hiby_r6-21.jpg

Pair up.

This is probably the most important section of my review because it covers how R6 pairs up with different full-size headphones and IEMs. There was no need to even consider iEMatch until I switched to IEMs.

Audio-Technica ATH-R70x (open back, full size dynamic) - wide airy soundstage expansion, a very balanced sound signature with more emphasis on mids, not necessary being mid-forward but just making them standout with a more natural tonality and effortless retrieval of details. Bass is very neutral, extends deep with a nice rumble, but a very neutral quantity, and the same with mid-bass, with an overall bass being articulate and layered. Treble has a nice neutral sparkle as well, not too harsh or rolled off, just a perfect amount for a natural definition of the sound.

Oppo PM3 (planar magnetic) - above average soundstage width with more depth. The sound is brighter in tonality in comparison to other pair ups, PM3 sound can get easily congested with some DAPs, here the sound was closer to neutral with a more revealing tonality, still smooth and a little laid back, not very layered or with improved separation. Warm sub-bass extension with a slightly elevated mid-bass - bass is typical of PM3, being slower, not as articulate, but it has a better control in comparison to pair ups with other DAPs where bass usually spills into lower mids. Here, lower mids do have full body, but they are not muddy or congested. Upper mids are smooth and detailed, while treble has a nice well-defined sparkle.

Audeze EL8C (planar magnetic) - wide/deep soundstage and a very fast sound, typical of planar magnetic driver performance. Bass is very neutral, being all about quality rather than quantity when it comes to sub-bass extension and mid-bass punch. Lower mids are lean, and the big emphasis here is on upper mids and treble. Mids are detailed, actually down to micro-detailed level, but they are also cold and more analytical. And the treble is a little too piercing, making the sound too revealing and less natural. It wasn't my cup of tea, but I'm glad to report there wasn't metallic sheen in the sound, like I find in some other pair ups.

Beyerdynamic T5p 2nd (Tesla, full size dynamic) - wide/deep soundstage, almost on a holographic level, and the overall sound is very balanced, with a natural neutral-revealing tonality. Sub-bass has a nice deep extension, but the quantity of the rumble is a little north of neutral. Mid-bass has a nice fast punch, with an overall bass being very articulate, layered and well controlled. This leads to a more neutral lower mids and micro-detailed upper mids, but with a more natural detailed tonality. Treble is crisp and airy, gives a very good definition to a sound.

VE ZEN (320 ohms earbuds) - above average soundstage width with more depth. The overall tonality is a little brighter and more revealing in comparison to how Zen pairs up with some other DAPs where it usually sounds a little smoother and more organic. The sound is actually faster and a little leaner. Bass goes down to a deep sub-bass extension with a very nice rumble. Mids bass has a fast punch, this is probably the "fastest" I heard Zen bass, being very articulate and well controlled. Lower mids are a little leaner, and upper mids are natural, transparent, with an improved retrieval of details. Treble has a nice sparkle, not too bright or too crisp, with a good extension.

Next, I tested a lot of IEMs where I made a note about pair up with and without iEMatch.

Sennheiser IE800S (DD) - the sound is balanced with a nice deep sub-bass extension, great mid-bass impact, very natural detailed mids, and a nice crisp airy treble. iEMatch reduces some of the treble definition, taking away a bit of sparkle and airiness. Wide soundstage. I prefer a direct pair up here.

Beyerdynamic Xelento (tesla DD) - very expanded soundstage, tastefully done v-shaped sound with upper mids pushing just a little bit back. Bass goes deep with a healthy sub-bass rumble and fast punchy mid-bass, lower mids are neutral while upper mids are natural and detailed, nice organic tonality, and treble has a nice controlled sparkle. With iEMatch mids are pushed more back. Direct pair up is preferred.

Campfire Audio Vega (DD) - nice soundstage expansion, a typical expected L-shaped sound sig, perhaps more like a reversed J-shaped since I can also hear a nice treble sparkle. Bass goes deep with lots of sub-bass and slower mid-bass, overpowering mids which are smooth and warm, and pushed back in their presentation, and a nice crisp treble. With and without iEMatch the sound is the same.

Campfire Audio Andromeda (5BA) - here, iEMatch is definitely a must-have because without it the sound has a very neutral bass with a rather forward upper mids and splashy treble and a very noticeable sibilance, which you usually don't hear from Andro. Once iEMatch added, it transforms into the sound I'm used to while listening with other sources - you get a fast mid-bass and a nice sub-bass extension which shines more with quality rather than quantity, neutral mids, detailed upper mids with a little brighter and more revealing tonality and crisp airy treble. iEMatch definitely brings Andro back to its fun signature.

iBasso IT01 (DD) - another example where iEMatch is not necessary, and it actually reduces the quality of the sound. Here with a direct connection you get a fun v-shaped signature with a deep and powerful sub-bass rumble and elevated mid-bass punch, neutral clear lower mids and revealing brighter upper mids, and crisp airy treble with a nice extension. iEMatch reduces the sparkle of the treble, turning v-shaped fun into a more L-shaped sound. I definitely prefer a direct pair up here.

iBasso IT03 (DD/2BA hybrid) - here, using iEMatch is actually a big plus. Directly connected, sub-bass and mid-bass becomes very neutral with upper mids and treble pushed more forward, and even some emphasis on sibilance. Once you connect iEMatch the sound change is back to expected tonality with a nice sub-bass rumble, faster mids-bass punch, a little pushed back but still detailed and brighter mids, and well-defined and controlled crisp treble.

Westone W80 (8BA) - low impedance multi-BA, you can safely guess iEMatch will be a welcome addition here. Direct connection gives you a slightly mid-forward signature since bass is more neutral and upper mids/treble are elevated. With iEMatch, the sound is balanced with a nice sub-bass rumble and punchy well controlled mid-bass, not too fast or too slow, neutral lower mids, natural detailed upper mids, and a crisp and well controlled treble. Very enjoyable pair-up, as long as you keep iEMatch handy.

Ultimate Ears UERR (3BA) - didn't expect this one, but with or without iEMatch the sound is nearly identical. I hear a very neutral natural tonality with a decent sub-bass rumble, polite mid-bass much, neutral lower mids and natural detailed upper mids, and well-defined treble with a controlled sparkle. Actually, a very good pair up.

Noble K10UA (10BA) - another surprise where the sound is the same with and without iEMatch. You get a very well-balanced sound signature with a good sub-bass rumble, elevated fast mid-bass punch, neutral lower mids, revealing brighter upper mids, and crisp airy treble. Plug these in directly and you are good to go.

HiFiMAN RE2000 (DD) - with a single dynamic driver I was expecting that iEMatch is not necessary, and found it connected directly to sound nearly the same as other sources, but adding iEMatch actually took down a layer of brightness from the upper mids and lower treble, making the sound more pleasant and less harsh. You still get a great dynamic driver quality sub-bass extension and surprisingly articulate overall bass performance, mids are more analytical and on a brighter side, while treble is crisp and airy, but upper frequencies are smoother in comparison to direct connection. This is just a matter of personal preference.

64 Audio U12 (12BA) - this is how the original U12 was intended to sound! It's not a secret that this IEM was tuned using higher OI source for performing stage musicians who use higher impedance wireless packs. The difference between R6 and any other DAP is around bass where with R6 bass is no longer bloated and overwhelming, you get a textured sub-bass rumble with a punchy mid-bass; with bass being well controlled without spilling into lower mids, and lower mids being north of neutral with a nice body but not muddy or congested, while upper mids are smooth and natural and still detailed, treble is well defined but not as crisp or airy. Adding iEMatch makes sound a little congested around lower mids, so direct connection is desired here.

64 Audio U12t (12BA) - learning a lesson from the original U12, U12t now features LID tech where the sound should be identical from any OI source. And indeed, when compared between R6 and other low OI daps - the signature is the same with a balanced sound sig where you have a nice bass impact, not too overwhelming and well controlled, neutral lower mids with a more natural-revealing tonality of upper mids, and crisp airy treble thanks to TIA driver. Adding iEMatch in series doesn't affect much the bass or the lower mids, but it does make upper mids and lower treble a shade smoother if you want to tone down the TIA sparkle.

64 Audio Fourte (DD/3BA hybrid) - this is the one pair up so far where the synergy between a dap and iem wasn't there, regardless of iEMatch or not. Adding this adapter does takes an edge off the upper mids/treble which could be a little too vivid for some, and regardless of the adapter the bass was still very accurate and with a nice sub-bass rumble and mid-bass punch, though both rather polite in quantity. But the main problem here were the mids which sounded a bit muffled to my ears, not the same as other DAPs. For me personally, this is not a good pair up.

64 Audio U18t (18BA) - talking about night'n'day difference, that's how I can describe the sound of these iems with and without iEMatch. Without, you have a very mid-forward bright signature with a neutral flat bass. Once iEMatch added in series, U18t transforms with a deep textured sub-bass rumble and fast mid-bass punch with a slightly boosted quantity, neutral lower mids, natural micro-detailed upper mids, and crisp airy extended treble. This is not even a question, if you want to use U/A18t with R6, iEMatch is a necessity.

Empire Ears Legend X (2DD/5BA hybrid) - the clever crossover design of this hybrid reassures there is no need to worry about iEMatch because with or without it the sound is the same. You get a powerful L-shaped signature with a deep impactful sub-bass rumble and elevated mid-bass slam, with bass being well controlled despite being a force of nature that you feel in your chest. Mids are very natural and detailed, not really pushed back, but being more in a background due to elevated bass, and the same with a treble which is well defined and with a polite crisp and airiness. This is a basshead audiophile iem and it hits hard with a bass. Actually, even harder in comparison to other dap pair ups.

hiby_r6-19.jpg hiby_r6-20.jpg

Conclusion.

When you are entering a competitive market of today's mid-fi DAPs, you need to be able to stand out from the crowd. Many manufacturers respond to this challenge by offering unique looking designs or adding extra features or cutting corners to lower the price. Unless you have budget and resources of Sony or A&K proportions, smaller manufacturers focus on finalizing the hardware before the release, and then hoping to catch up with fw updates to fix remaining issues. Hiby is in a unique position where they are the one who help others to "fix" their fw issues, and as a result they are one step ahead of competition when it comes to fw/sw. And with that power, they're also in a position to cherry pick their own hw because they know how to optimize its performance.

That's exactly what happened in the debut release of Hiby R6 DAP. They picked a higher end SoC processor, the most RAM in comparison to other Android DAPs, top quality display, two premium ESS DACs, and also premium LPF and headphone amplifier opamp components. We are not just talking about another Android DAP release, but Android 6.0 with DTA (direct transport audio) architecture to ensure bit-perfect output (bypassing Android SRC). And this is not another ES9018 dual dac release, but they actually used higher end 9028 dac. And not a gimmicky balanced output, but actually BAL output with more than double the power of SE. And not just usb-c port because it's a new popular standard, but actually with a support of QC3.0.

It would have been nearly perfect, except for high output impedance which could be an issue with some IEMs. I intentionally put extra effort in pair up testing with many different IEMs/headphones to describe the effect of OI. And as you can see, it's not really the end of the world, and could be resolved with iEMatch. I'm not making excuses for Hiby, they learned their lesson and the upcoming R3 release already has lower output impedance. Also, I don't want people to get an impression that R6 is only about fast Android performance. It also has a very impressive sound performance, along with a collection of MageSound 8-Ball effects to further fine tune the sound to perfection. Yes, you might have to invest into iEMatch, but it's a small price to pay when you are looking for a top Android performance high-res DAP.
gemmoglock
gemmoglock
Hi @twister6, did you remove the factory screen protector before installing the tempered glass, or you stuck it on top? Thank you for the review :)
twister6
twister6
@gemmoglock : I didn't install tempered glass yet, was waiting for Miter leather case (just received it) to make sure it fits without a problem with a glass. But when I do, film screen protector has to come off!!!
A
androidjedi
would it be possible to share your "best" tonal settings?
  • Like
Reactions: ateeq

twister6

twister6 Reviews
Headphoneus Supremus
Pros: 7-speaker design, 45W of power, aptX support, fantastic remote app, Surround and Turbo sound modes
Cons: more appropriate for indoor use, no NFC or transport controls

Before I start my review, I would like to Thank RIVA Audio team for a review sample of Turbo X provided to me in exchange for my honest opinion.

 
### UPDATE 5-4-15 - scroll to the bottom of the review to read about RIVA Turbo X carry bag ###
 
Thanks to the original Jambox, going back a few years, wireless speakers used to be a popular “accessory” for your smartphone and tablet.  Consumer electronics market was flooded with all these cute and colorful speakers with a tiny sound, only a fraction louder than a phone itself.  But just like with any new trend, the infatuation doesn’t last for too long and the product either evolves or slowly fades away from a spotlight.  As expected, for a number of companies it faded away because they decided to scale up their mini speakers into bigger and louder versions without realizing that sound quality remained the same, only a few dBs louder.  At the same time, a few premium audio quality wireless speakers have emerged with a performance approaching some of the wired setups.  One thing these premium speakers had in common was companies behind them with deep roots in pro audio design and manufacturing, not just someone who decided to add speakers to their lineup of accessories or used celebrity endorsements for credibility.
 
One of such star-quality products I just had a chance to review came from a company you probably never heard of before, but after testing their latest Turbo X Bluetooth wireless speaker – I can tell you with certainty they have a potential of becoming the next household name.  RIVA Audio was launched only a year ago, as a lifestyle brand of Audio Design Experts (ADX) headed by none other than a legendary “star” himself – Rikki Farr.  With 45 years of experience in building and designing audio products and over 30 Platinum and Gold certified studio record awards while working with some of the top legendary bands – you can rest assured that a chairman and CCO of ADX knows a thing or two about music!!!  But were they [RIVA/ADX] able to encapsulate a wealth of this knowledge and experience into their new compact Bluetooth wireless speaker?  Let’s see what I found.
 
Even so I usually start my review with a description of the packaging, I wanted to mention how much I was impressed with the actual shipping box and thick pieces of styrofoam used inside to make sure packaging box would arrive undamaged.  Packaging box itself was made out of high quality thick carton and had a detailed description of key features, included accessories, technical spec, and even a picture of their Ground Control app.  The list of key features really sets a tone to make you realize about dealing with a serious audio product.  Of course, the focal point of the exterior packaging is a picture of the speaker on the front and the view of inner design on the back.  You can clearly see how much pride RIVA takes in their product by showcasing their design, inside out!  With a top of the packaging box off, you'll find a small rectangular speaker sitting on a pedestal of inner base, including more protection inside to prevent RIVA Turbo X from any damage.  I do have to admit, it's not a lightweight product, and I was impressed with the amount of thought that went into packaging of it to make sure Turbo X arrives at your doorstep intact.
 
Unboxing.
 
riva_turbox-01_zpsepielqkp.jpg
 
riva_turbox-02_zpsna2xws82.jpg
 
riva_turbox-03_zpsmhgoc1t5.jpg
 
riva_turbox-04_zpskgd0zfha.jpg
 
 
After removing a speaker from the box, you gain access to all the included accessories stored in the base underneath.  Here you will find AC power supply, 70" 3.5mm to RCA connector (to connect Turbo X to your external audio source with RCA output port), 48" 3.5mm male-to-male audio cable (to connect Turbo X to any non-bluetooth 3.5mm audio port), and a very comprehensive manual.  There is also a special Phono Mode you can activate by holding "+" and "-" buttons together so you can use Turbo X with a turntable that has a low audio output.  Although not being able to use a common micro-usb cable for charging, I completely understand why RIVA went with AC power supply (impressive 19V/3.42A output) for a faster charging of its internal massive battery.  Even so I didn't see anywhere mentioning of the actual mAh capacity, a mere fact of 26+ hours of battery life (with Surround and Turbo off, and at 75dB of volume level) and capability to charge other devices makes you realize you are dealing with a high capacity rechargeable battery.
 
Another included accessory is I/O splash cover - a very clever way to cover the exposed usb, audio, and power ports on the back.  What makes it unique is how you can store this I/O cover plugged on the bottom of the speaker so you don't loose it.  When in need to cover up open ports - it goes right in with a secure fit, and still providing an access to power button.
 
Accessories.
 
riva_turbox-05_zpssejoe3dg.jpg
 
riva_turbox-06_zpshaw0rhpz.jpg
 
riva_turbox-07_zps8bdo0yy2.jpg
 
riva_turbox-08_zps3hdsoc2j.jpg
 
riva_turbox-11_zpsafvofubh.jpg
 
riva_turbox-14_zpsluldfpyu.jpg
 
 
So how does Turbo X looks once out of the box?  There is nothing "cute" or "colorful" about it, instead you are looking at a very elegant design in a shape of a straight forward brick.  Surrounded by a mesh grill around front/back and sides, it doesn't scream "look at me", and as I later found out - it grabs your attention with its sound rather than flashy looks.  The bottom of the speaker has two rubber feet for an excellent non-slip grip with a surface as well as some dampening of the weight pressure.  That is something you will feel right away with a weight of over 3lbs and dimensions of 9" x 4" x 3.5".  Unlike other audio products, when it comes to speakers - having "extra" weight is actually a good thing knowing you're dealing with quality drivers and amp inside of it.
 
Moving on to the top, you have a plethora of illuminated capacitive touch buttons with a proximity sensor that triggers all buttons to lit up as you hover your hand over it - excellent idea when you are in the dark.  You can also lock these keys by pressing Mute and "-" buttons together.  Of course, all the functionality is duplicated on the remote app for your phone, but more about it later.  Here we have a Power, Bluetooth pair-up, Volume up/down/mute (3 separate buttons), and S (to activate Trillium Surround) and T (to activate TURBO) buttons.  One thing I wish would have been included or somehow implemented is a transport control in order to play/pause and skip songs from within a speaker, though this functionality is already mirrored in a remote app.  Plus, it’s understandable that every button (or combination of buttons) has multiple functionality, so it's a challenge to add more controls. 
 
Also, at the top you have a dual noise and echo canceling mics for Speakerphone functionality.  This speakerphone functionality is a great bonus, but to be honest I never really used it with any of my wireless speakers, and consider it to be just a nice "bonus", no more or less.  For a speakerphone functionality, you can Accept or Reject the call right from the speaker by using T and S buttons.   Last, but not least, the top of the speaker is plastic with a glossy piano finish which somewhat a fingerprint magnet.
 
At the bottom on the back of the speaker you have a selection of different ports, which as I mentioned before can also be protected with removable I/O cover.  In there you will find 3.5mm auxiliary input, a micro-usb data input for a future firmware upgrades (a very important feature), a physical power button (another brilliant idea to make sure touch buttons on the top are disabled and battery is not wasted when not in use), USB charge out port (though labeled as iPad/iPhone it designed to charge any device), 19V DC Power adapter input (to connect AC/DC power supply), and a battery capacity indicator (depending on the color you can determine 0-30, 30-60, and 60-100 remaining capacity).  Battery indicator is very important, and you can access the actual battery reading from Ground Control app, down to 1% accuracy.
 
Design.
 
riva_turbox-09_zpsbouyixon.jpg
 
riva_turbox-10_zps015x8o1c.jpg
 
riva_turbox-12_zpsxv16ob39.jpg
 
riva_turbox-13_zpseuyemifi.jpg
 
riva_turbox-15_zps95fa2bjh.jpg
 
 
Pair up with audio source was effortless, and I had no issues with either my Note 4 phone or AK120ii DAP.  At first I thought that NFC would have been a good option, but later after discussion with RIVA I realized that due to a small footprint and proximity sensor on the top - NFC implementation wouldn't have been feasible.  Once paired up, I had no issues with wireless connection across an open space of 40+ feet.  Sound quality was very impressive and deserves a separate section in my review since we are talking about a true audiophile quality performance.  And it's not just because it supports some of the popular SBC, AAC, and aptX audio wireless codecs, but actually because of its top notch audio hardware design.  Since I'm Android based, aptX codec support is very important to me, but a transparency of the transmitted digital audio is meaningless without a quality amplifier and drivers to deliver their audio interpretation to your ears.
 
Pair up.
 
riva_turbox-16_zpshm4glotj.jpg
 
riva_turbox-17_zps9vnfkz0d.jpg
 
riva_turbox-18_zpss5bkimuh.jpg
 
 
Before I go into a deeper audio analysis, let me talk a little bit about RIVA's remote control app which they call "Ground Control" app.
 
There are a few other premium speakers that come with their companion setup apps, but those are usually limited to mostly "setup" functionality.  Here, you are dealing with a control app that covers everything!  Usually I prefer to leave my phone/source alone and control music directly from a speaker's transport controls (if it's available).  Part of it has to do with me using more rugged speakers outside while keeping my phone out of sight.  Since I found RIVA Turbo X to be more appropriate for indoor use, the roles reversed and now I was looking for any opportunity to fire up that Ground Control app.  You get everything from a precise battery reading to every touch button “access”, including a large volume wheel and even a playback control with play/pause and track skip (though only when using native audio playback app, no 3rd party support yet).  And if you want more customization, you can go into settings to change speaker "name", app background control, and my favorite - switch audio prompts between voice and tones.  The only thing that can make it better is to add a "no sound" audio prompt option.
 
Ground Control app.
 
riva_turbox-19_zpsanrnhapl.jpg      riva_turbox-20_zpsacqh5fdk.jpg
 
 
Finally, I’m getting to the actual sound!  I have reviewed a lot of different wireless speakers, including a number of those which I consider to be smartphone accessories.  With an exception of a few, a more detailed audio analysis was simply not necessary for those other speakers since there was nothing special about their sound.  With RIVA Turbo X, even before getting to sound analysis, you have to look closer into the actual internal design to appreciate how much this speaker has to offer.
 
Unlike other speakers that use off-the-shelf generic or headphone drivers, RIVA packs 7 ADX speakers!  Starting with three ADX 60mm full range proprietary drivers, it looks like they cleverly placed one in the front middle and two on the sides.  Complimenting that, you also have four ADX custom dual piston bass radiators, with two facing front and two facing back.  Pretty much, you have speakers and bass radiators all the way around RIVA’s compact footprint.  But speakers itself is only a part of this equation.  Driving power to these speakers is proprietary ADX 3-channel amplifier with 45 watts of RMS power under control of advanced DSP.  This amount of power is higher than I have ever seen from any other Bluetooth wireless speaker in the same category.  Keep in mind, more power doesn't necessary mean a louder sound, but actually corresponds to having enough juice to drive speakers to their full “undistorted” potential.
 
And if that wasn't enough, RIVA includes two "override" modes with Trillium Surround which enhances separation of the sound with 3D imaging and TURBO with EQ mode boost of up to 100dB in loudness level.  Surround enhancement is very noticeable and sounds rather natural, not a gimmicky DSP effect.  This mode is perfect for watching movies or playing video games, though I also enjoyed it while playing music where a lot of the sound details got a new 3D placement in space.  TURBO takes a sound into overdrive.  It definitely is useful when you are at the max of the volume and need to squeeze out a few more dBs.  RIVA does that with an extra 9dB kick without any distortion (thanks to its smart compressor).  This Turbo effect might not be necessary at lower volume, especially since it drains battery quite significantly, but when you want to fill a bigger room with a more powerful sound – activate this TURBO overdrive for uninterrupted 6+ hours of sound bliss!!!  Unfortunately, you will take a hefty battery penalty, so if possible – keep it plugged in.
 
Sound analysis.
 
I found RIVA Turbo X to have an impressive audiophile quality performance with a full body smooth balanced sound.  Just like with any pro speaker, sound quality benefits greatly from a speaker placement to take advantage of the natural acoustics of the room.  As a matter of fact, RIVA even includes suggestions with a speaker placement to maximize its performance.
 
After a closer listening, I found Turbo X to have an articulate low end with a fast mid-bass punch and a deep sub-bass texture.  Bass is clear and detailed, well controlled with just a minimum spillage into lower mids.  Mids are overall warm and clear.  They are thicker in sound, especially lower mids, and it helps in building a foundation for a full body sound.  Upper mids are clear and detailed, but not too bright or analytical.  Vocals have a very powerful and organic delivery.  Treble is smooth, warm, doesn't extend too far, but still captures enough details.
 
Soundstage is good, and with Surround Trillium mode you expand staging to a new 3D width/depth dimension.  Layering and separation is typical for a speaker, which is not necessary the best and even a bit congested when you are standing too close.  But once you take a few steps back - sound opens up and fills the room with a more detailed presentation.  I think it's a very important factor in order to appreciate this speaker – the quality of its sound perception goes up as you take a few steps back, just like with a regular full size wired speaker.
 
Another interesting thing about RIVA Audio, they actually encourage you to compare Turbo X speaker against their competition.  You know, such encouragement can only come when you have confidence in your product.  And to tell the truth – they have every right to brag about it.  I have tested a number of other HD speakers, and I feel that when it comes to sound quality and features – RIVA Turbo X stands ahead of its competition.
 
For example, Braven 855s HD sound is more colored, with a muddy bass, also loud and powerful but not the same level of clarity; heavier in weight, less battery endurance, but with an advantage of a more rugged design.   UE Boom is still among my favorites, but it’s not in the same “power” class and when it comes to a sound it has a nice mid-bass punch but no sub-bass support, and sound is thinner where it can’t fill the whole room; battery with only 15hr (though a crazy standby when powered off, lasting months), limited app, though a better splash proof design.  B&W T7 impressed me with a build quality, but sound was more colored with a greater level of distortion, and you have to be facing the speaker, otherwise sound gets muffled – not even a matter of which corner in the room you place it, but rather at what height level.  Bose SoundLink III is another good candidate for comparison, though I find its bass to be deeper and more on a muddy side, not to mention more spillage into lower mids; in comparison it sounds warmer and lacks the same level of detail retrieval.  Didn’t have a chance to test BeoPlay A2 yet, so that one will be an interesting comparison as well.
 
Summary.
 
Overall, I was very impressed with a performance of RIVA Turbo X and an audiophile quality design behind it.  7 speakers (3 active and 4 passive) inside of one compact enclosure, 45W 3-channel amp with DSP processing, Surround sound mode, TURBO boost mode, 26+ hours of battery life, aptX support, firmware upgradeable, charge out port to charge other devices, touch control buttons with proximity sensing LED indicators, and a very polished Ground Control remote app – that is a mouthful for a Bluetooth wireless speaker under $350.  Is this an absolute perfection?  Maybe if the exterior design would have been a little more rugged and there was a way to implement transport controls from a speaker itself.  Aside from that, this speaker could be considered a perfection as long as you keep it indoors and careful in handling it.  Actually, lack of transport controls no longer bothers me because Ground Control app is truly a fun to use!  But the most important thing, once you pair it up with your source and hit Play – you’re no longer hearing the music, but actually feeling it!  I don’t think I can say the same about any other Bluetooth wireless speaker I have tested so far.


This is a mini-review of RIVA Turbo X carry bag.  http://shop.rivaaudio.com/dp/B00VMSXRWW#.VUeog5Oy4bs
 
In a conclusion of my RIVA Turbo X review I made a following statement: "... this speaker could be considered a perfection as long as you keep it indoors and careful in handling it."  I still consider Turbo X to be the best BT wireless speaker I have tested to date, but the truth of the matter - its design is not rugged enough to carry outside.  It has a splash protection cover for the ports on the back, so you can definitely keep it outside for outdoor entertainment, and believe me, it's loud enough!  I just wasn't sure about the best way of handling it to take outside.
 
Well, lo and behold, RIVA guys came up with a solution for that as well - Turbo X carry bag.  You might ask, what is a big deal?  When you are dealing with a 3+ lb brick shaped slippery speaker, you can't just toss it in any bag or your back pack or wrap it around in a sweatshirt.  I wouldn't call Turbo X to be fragile, but at the same time with a metal grill all around it and touch buttons on the top, you want to protect it from bumps and drops or sliding around in the bag.  What RIVA came up with is a very nice form-fitting bag with an easy zipper access, a soft velvet padded interior, and a tough nylon exterior.  It also has an outside zippered pocket for accessories, cables, or your wireless source (DAP or smartphone), and a stitched "RIVA" logo.  It also has a nice handle with nylon exterior and soft interior, I mean these guys thought of every detail!  This carry bag looks good and serves a great functionality to protect your RIVA Turbo X when on the go!
 
Here is how it looks:
 
riva_turbox_bag-01_zpsylrr3gae.jpg
 
riva_turbox_bag-02_zpskktsjnvi.jpg
 
riva_turbox_bag-03_zps2q66srnh.jpg
 
riva_turbox_bag-04_zpsgcothcxh.jpg
 
riva_turbox_bag-05_zpshbhocued.jpg
cel4145
cel4145
Thanks for the good reviews. I was curious about the Riva. Now I feel like I know

BTW: It's really not a 7 speaker design. It's one speaker with three drivers and four passive radiators. Passive radiators are an alternative to a port reflex tube, so not a driver either.
DaddyMojo
DaddyMojo
I might have missed it, why do you call it an inside speaker?  By the way, very nice review. 
twister6
twister6
@DaddyMojo : that is one old review from a year ago :)  I referred to it as being inside speaker because it's not rugged enough to take outside.  Too slick and fancy looking.  Plus, sound acoustics will benefit from an enclosed area, even if it's a big room.  I mean, you can take anything outside, but personally I worry to drop it or for my kids to hit it with a ball when we are outside on the porch.  But with a case, it makes it easy to transport it, and of course you can take it anywhere with you outside.

twister6

twister6 Reviews
Headphoneus Supremus
Pros: touch screen, hw playback controls, top level sound quality, balanced output, optical output, up to 432GB of combined storage, impressive battery.
Cons: fw is almost there, usb DAC not enabled yet, EQ is not in real time.

I would like to Thank theBit/Audio-Opus and Extreme Audio for providing me with a review sample of Opus#1 in exchange for my honest opinion.
 
Manufacturer website:  http://www.audio-opus.com/?page_id=15881, available on Amazon.
 
* Click on images to expand.

 
Are too many choices a bad thing?  Maybe not if we are talking about selection of headphones because we all have a different sound preference and it takes awhile to find a pair of monitors or full size cans to match our personal taste.  But lately with saturation of DAP market, I get overwhelmed with all the new DAP releases.  The idea here is to find a single best source you can afford to pair up with your different portable and not-so-portable headphones, and perhaps to be able to use it on the go without a need for additional amp stack up.  Another problem, a few years back there was a clear separation between mid-fi and summit-fi DAPs, not just in price but also in sound quality and supported features, while now these lines are blurred and higher price doesn’t mean a better product.
 
With so many DAP choices, I can only imagine how frustrating it's for consumers trying to decide which one to buy.  You can no longer differentiate one being better than the other based on the DAC or opamp selection, and quite often have to start with a priority list of what you value the most.  Do you want a smartphone style touch screen interface?  Do you have a lot of DSD files in your collection requiring extra storage capacity?  Do you need streaming or internal storage only?  How about balanced output or maybe a coax/optical to use your source as a transport to drive another dac/amp?  Don’t forget the sound quality which should always be at the top of your priority list, though lately I have seen many manufacturers upping their game where the sound difference ends up being marginal.
 
Now, here comes theBit (the Best Internet Technology) – a Korean manufacturer who has been in business for over a decade and had a successful line of portable MP3 and Media Players sold at Best Buy, as well as recent releases of Personal Navigation devices and E-learning tablets.  Maybe these guys are newcomers to the world of Hi-Res DAPs, but they are definitely not freshmen when it comes to manufacturing of personal audio products.  I never really heard of theBit Opus#1 until being asked by their US distributor, Extreme Audio, if I’m interested to test it.  I almost turned down this review opportunity, but after using Opus for the last 3 weeks I found it growing on me, to the point where it reached the top of my dynamic food chain of favorite DAPs.  Here is more about it.
 
Unboxing and accessories.
 
Arrived in a compact black box, you are greeted with a plain “Opus#1, Hi-Res AUDIO Ver. 1.0” at the top and “the bit” at the bottom.  I noticed that original www.thebir.co.kr website hasn’t been updated since the last year, and all the effort is focused now on their new www.audio-opus.com domain, which makes me wonder if they are trying to distant themselves from “the Best Internet Technology” to “the best audio technology” with Audio-Opus rebranding, something that would make more sense.  Also, when you visit their website you will find a mentioning of 6 additional products, all labeled as Opus# with different index number.  Looks like Opus will be their new hi-res audio platform for various Android based DAPs, dacs/amps, and even a car audio unit.
 
On the back of the box you will find a detailed General Specification and Audio Performance list which paints a rather impressive picture, though you will not find the picture of the actual DAP on the packaging.  Continuing with a mystery, there is not much to find once you slide the exterior packaging sleeve to get to the packaging box with another “Opus#1” print.  Not until you take the box cover off, you will unravel the mystery and will be looking at a small rectangular DAP with a large touch screen dominating its top surface.
 
After removing the DAP, the only included accessories you will find are the usb to micro-usb quality charging/data cable and a screen protector, while if I’m not mistaken the glass back of the DAP already has a protector applied to it.  When it comes to DAPs, I don’t expect too many accessories, but one must-have accessory was missing in the packaging box.
 
thebit_opus1-30_zpsd2z3ntde.jpg thebit_opus1-31_zpsyb4drtfz.jpg
thebit_opus1-32_zpsxk9v8fi1.jpg thebit_opus1-33_zpsqivh44rd.jpg
thebit_opus1-34_zpssel6ljiq.jpg thebit_opus1-35_zpssxpreqcz.jpg
 
The leather case.
 
I don’t recall ever dedicating a separate section in any of my DAP reviews to a single accessory, such as the case, but in this “case” I decided to make an exception.  Along with the DAP I also received another Audio-Opus branded box which contained a leather case for Opus#1.  I was told that this leather case will be sold as a separate $50 accessory.  To my surprise, when I look at Opus#1 listing on Amazon – it mentions the DAP being sold together with a leather case, included in $599 price.  I'm not sure if this is for a limited time only as part of a new product introduction, but I really hope that moving forward they will continue to include it together with Opus#1.
 
So what is so special about this case?  For starters and even though it has Opus branding inside and outside, this is a genuine leather case by Dignis.  Perhaps sharing the same country of origin, they decided to collaborate with Dignis who makes some of the best genuine Italian leather cases for many popular DAPs.  While dealing with ABS solid plastic body and tempered glass back panel, as well as slightly wider than average footprint, grip enhancement is important and that’s exactly what this case offers without masking the details of the design.
 
The case has a full opening at the top where the DAP slides in, allowing full access to the power button and both headphone ports.  At the bottom you get an access to a generous opening around micro-usb port, and you will also notice that bottom corners hug the shape of the DAP with a few openings on each side.  The micro-SD access will be permanently covered and protected, and you will have to remove the case to replace these cards.  Btw, for easy removal of the DAP, I recommend using a pencil with an eraser tip pushing up through micro-usb port opening at the bottom.  The volume and transport control buttons on each side are completely covered.
 
In their usual Dignis fashion, the shapes of these buttons are imprinted and perfectly aligned with physical buttons, and very easy to press.  The functionality print of these buttons is stamped on the leather, but due to their small size a bit hard to see.  As a matter of fact, due to a very small size of the buttons, the imprint of their round shape on the leather is not very easy to feel when you slide your finger across without looking.  It’s a little easier with volume buttons since you are dealing with only two and can blindly figure out which one is up or down, but it becomes a bit of a hassle when dealing with 3 transport buttons without looking at them up close.  I still appreciate the fact that I don’t need to turn on the display every time I want to pause or skip a song, but here it would have made more sense to offer a cutout for buttons instead of covering them up.
 
thebit_opus1-22_zpsohykb44z.jpg thebit_opus1-23_zpsaos4sltj.jpg
thebit_opus1-24_zpsduodfdoq.jpg thebit_opus1-25_zpsmbbomskr.jpg
thebit_opus1-26_zps3gizig9g.jpg
 
Design.
 
When it comes to a design, I found it to be very straight forward and clean.  The main focus of this 112mm x 72mm x 18mm DAP is a large 4” TFT touch screen display with 480x800 resolution.  All the edges around the sides are beveled, creating a more unique look with a slight resemblance to A&K DAPs, especially the asymmetric design with a wider edge on the right side.  Don’t be surprised, there will be more A&K references in my review since it looks like that theBit drew some external and internal design inspiration from their Astell & Kern neighbor.  With a front covered by a tempered glass touch screen, there is no other visible controls until you turn the unit to look around the sides.  The back of the DAP also has a tempered glass plate.
 
On the right at the top you will find 3 transport control buttons, rather small, not rotating (to make sure printed label functionality icon stays aligned), and nearly flush with a surface with maybe less than a mil which sticks out just enough to feel the tactile response when you push it.  Also keep in mind, the button arrangement also follows A&K with Play/Pause in the middle and Skip next/prev around it.  Not everybody follows the same arrangement, and often I get a bit confused when switch to L&P DAPs where Plays/Pause is at the top.  But nevertheless, those familiar with A&K DAPs will feel right at home. 
 
On the left side at the top you have Vol+/- buttons, exactly the same size and shape as transport buttons.  Down at the bottom on the left side you have a tight cover over dual micro SD stacked slots, similar to those used in DX80 to save the room so you don’t have to use 2 separate card slots side by side.  Each micro SD slot works fine with 200GB flash card, where along with internal 32GB of flash storage, you can have up to 432GB of space to store your music files.
 
Bottom of the DAP has a standard micro-USB connector for charging and data transfer, and the top has a Power button (a typical long press power-on or power-off with onscreen confirmation), 2.5mm TRRS balanced HO (A&K wired), and 3.5mm TRS single ended HO shared with optical mini-toslink output.  3.5mm HO shared with optical output is also exactly the same as used in A&K DAPs.  You don’t have coax SPDIF output, but can drive any external DAC/amp (like iBasso D14 or Micro iDSD) with optical output which I often find superior in sound quality to coax cable output.
 
Under the hood you will find a dual CS4398 DAC along with filters and amps which hasn’t been disclosed by manufacturer.  Opus#1 is a prime example of a design where selection of internal DAC components doesn’t mean it will sound exactly the same as AK120ii or DX80, both of which use the same dual DAC config.  Unique amp section architecture and other fine tunings will make it stand out from other designs.  Considering Android OS running in the background, I was also not surprised they used ARM Cortex-A9 1.4GHz quad-core CPU with 1GB of DDR3 – plenty of power for smooth responsive touch screen operation and native DSD support where I tested up to DSD256 without a single hiccup.
 
opus1_diagram_zps5ol70avx.png
 
Of course, you can also look into SNR, THD, and Crosstalk specs, but what I typically care about is output power and impedance.  Opus guys didn’t go into too many details, but did mention that Balanced 2.5mm 4-pole output is rated at 1 ohm output impedance and 2.3Vrms which translates into 330mW @ 16ohm.  For Single Ended 3.5mm TRS output the rating is 2 ohm output impedance and 2.1Vrms which translates roughly into 275mW @ 16ohm.  These are all decent output power numbers for most IEMs, efficient full size, and even some not so efficient high impedance and harder to drive cans – all of which I will cover in my Pair up section of the review.
 
The 2 ohm 3.5mm output is pushing it a bit when it comes to multi-BA driver IEMs, and perhaps it was just a placebo effect where I preferred a sound from 1 ohm 2.5mm balanced output (especially bass being a bit tighter).  I assume that Opus team tried to reach a design compromise in order to appeal to different types of headphones.  Spec numbers aside, I use my ears to judge the sound, and across a broad range of my different headphone types I found the sound performance to be on par with a number of my others DAPs that use <1 ohm output impedance.  But I still prefer to use balanced vs single ended in case of Opus#1.
 
Another important factor is the battery, where Opus design team used 4000 mAh/3.7V li-polymer type.  When I first got this DAP and after upgrading the firmware to one of the earlier releases, I wasn’t able to get as much of a battery life as it was advertised.  After a handful of charge/discharge cycles as I was burning in both HO ports and the update to the most recent 1.10.23 fw, now I’m able to get a solid 10.5-11 hrs of continuous playback with most of my IEMs, regardless of balanced or single ended output.  Furthermore, it has an impressive deep sleep mode with an instant on feature where I could leave Opus#1 without shutting down for days, and I see a very slow battery drain.  I mean, it drains after awhile, but I didn’t expect that Android based OS will be optimized to such efficient level.
 
Overall, I was very pleased with a design.  It’s not 100% perfect, like for example volume and playback buttons could be bigger, and the DAP itself is a bit on a wider side in comparison to many of my other DAPs.  And there is also a question of using ABS plastic body versus metal.  With Dignis/leather case it really doesn’t matter, and the plastic itself is actually enhanced and has a high quality.  But plastic body will also result in a slightly inferior EMI isolation where right next to my phone I can hear an occasional interference, while 3-4 inches away everything was fine.  Opus#1 has great one-hand use ergonomics, solid build, and a feature packed design.  The performance was very smooth, regardless if you through at it lossy or lossless files, and as I mentioned before – it went right through DSD256 like a butter, handling DSD support without a single glitch while I was touch swiping through my 2GB files.
 
thebit_opus1-01_zpsjj1x7l5j.jpg thebit_opus1-02_zpswqzmwaw8.jpg
thebit_opus1-03_zpshuvcwn5e.jpg thebit_opus1-04_zpskiml4mmv.jpg
thebit_opus1-05_zpszafxmgzm.jpg thebit_opus1-06_zpscqovaiuf.jpg
thebit_opus1-07_zpsyukiriyp.jpg thebit_opus1-08_zpspug7den7.jpg
thebit_opus1-09_zpsjbr0qx3q.jpg ifi_idsd-26_zps0myld3as.jpg
 
GUI.
 
All the testing was done using 1.10.23 firmware.
 
I know it probably going to sound shallow because sound quality should be the highest priority, but after a few recent reviews of DAPs with touch screen interface I'm having a problem going back to navigation buttons and scrolling wheels.  Use of smartphone and tablet audio apps turned me into a creature of habit where I want instant gratification of flipping through dozens of songs, stopping on the one I want, and swiping through to fast forward to my favorite part.  For me personally, the user experience of DAP operation is very important, and Opus#1 definitely got a big check mark next to it!  Not everything is perfect yet, but I've already seen 3 firmware updates in less than a month since I received this DAP for review.
 
First of all, Opus OS is Android based, but you are not running full Android OS.  There is a custom Audio Player app/interface running on top of the Android OS which is in the background, and you don't have access to wifi or BT or being able to install any other apps.  So if you are looking to stream from Spotify or Tidal or want to pair up wireless headphones, you can stop reading this review because Opus#1 will not offer that.  Presumably, full Android support will be available in Opus#2 release.  If you are OK using only internal storage with a very responsive touch swipe interface, then you can proceed to find out more.
 
From the moment you press the power button, the current startup is a bit on a slower side, closer to 20-22sec where I feel like something is being indexed or perhaps some extra Android processes are being loaded in the background.  After a few latest firmware updates, this start up time is actually down from the original 30+ sec.  Hopefully, theBit will continue with further optimization of a start up; no complaints about a shutdown which only takes a few seconds.
 
Once you are in the Main Playback screen, you have a clear layout with artwork taking approximately half of the screen and other controls at the top in the notification area and Playback control in the lower part of the screen.  Notification area is semi transparent so you can still see the top of the song/album artwork, if one is embedded.  Up there all the way at the top you have a notification bar where you will find play/pause icon and repeat/shuffle mode indicators on the left, balanced on/off and volume level in the middle, and sleep and selected EQ and battery indication all the way to the right.  That area is for notifications only, nothing to pull down or to launch by tapping.
 
Right below it, you have touch icon for  File Browser (on the left), Current Directory Playlist with corresponding number of songs in the folder and which one is being played – in the middle, and Setup icon to enter Shortcuts menu on the right.  File Browser takes you to another screen where you can view/sort tracks by Songs, Albums, Artists, Genres, Folders (at the top you can select MicroSD 1, 2, or Internal source), and Favorite (from your favorite list of tagged songs).  Within those screens, tapping in the middle of the top below Notification bar takes you back to the currently playing song.  Current Directory Playlist index has a bit of inconsistent behavior where upon tapping it usually shows you a list of songs in the current sub-directory, but when you are playing songs from the main root directory (/Music/) – it shows every song including all your subdirectories (I treat all my albums as sub-directories).  Not sure if it’s intended "by design", but I hope it will be fixed in a future firmware release.
 
Clicking on Setup opens up a sub-menu with a few shortcuts, for EQ, Balanced Output selection, Sleep, Screen Brightness control, and another Tools icon in the upper right to enter the actual Settings menu.  Every DAP has their own implementation of menus and controls, and it just takes awhile to get used to it.  EQ just enables the eq with currently selected preset (there are 3 user customizable presets), Balanced Out toggles 2.5mm output on/off, and Sleep starts a sleep timer.  Screen Brightness slider just does what it says, adjusts the brightness of the screen.
 
Settings menu is rather simple.  You have EQ toggle switch (the same one you can access from the shortcuts menu), User Equalizer takes you to 3 separate User# settings where you can customize 10-band typical paragraphic EQ (or reset it – touch icon in upper right corner).  Current EQ implementation is useless because you can’t adjust bands in real time as you listening to the song.  The EQ change will only go in effect after you pause and re-start playing the music.  I personally don’t use EQ, but would be very frustrated with this implementation.  I also hope they will add genre specific presets for EQ since some people might find it useful.  Also when EQ is selected, it needs to show EQ preset# in the notification bar.
 
Next in the Settings menu you have Balanced Out toggle (the same as in shortcuts menu), Balance control to adjust L/R sound balance, Language selection, Screen brightness (the same as in shortcuts menu), Auto Display off timeout setting, Sleep toggle (the same as in shortcuts menu) with Sleep Time setting, System info indicating fw version, Internal and External storage capacity including being able to mount and to erase each SD card, and a link to Open Source licenses.  Update takes you to System Update to apply new firmware which you have to manually download and copy into the root directory – no OTA update is supported due to lack of wifi.  Last, but not least, is Initialization with DB initialize (this one re-inits the database with song index), Settings initialize (to reset settings), and Factory reset (resets device to factory state, including erasing all your songs stored in internal memory).
 
In the Main Playback screen, below artwork area, you have a touch swipe playback control where you can swipe to fast forward through a song, and you can see playback marker position in time, the song format, and the remaining time (no total song time can be displayed).  Below that you have Song/Album name info, and Play/Pause and Skip touch icons.  You can also skip between the songs by swiping the artwork area of the display left/right.  All the way at the bottom in the left corner you can select Repeat mode where you can either repeat a song in a loop, or you can repeat all (if you are playing all songs) or a folder (if you are inside of a folder) or an album (if you are playing an album).  All the way to the right is Shuffle selection.  Both Repeat and Shuffle could be selected at the same time, and corresponding icon will appear in notification bar next to the playback function icon on the left.  Favorite “star” icon is in the middle all the way at the bottom, and you simply tag the currently playing song to be added to your Favorite folder – very easy.
 
Every manufacturer has their own creative way of implementing GUI and the way how they partition and organize the functionality within it.  There is always a learning curve when you get a new “toy” and it’s no different with Opus#1.  I got used to this interface very quickly, and everything now makes perfect sense to me, especially since I have been using this DAP exclusively for the last 2-3 weeks.  I still hope EQ will be implemented properly, and I can copy my “loose” tracks into the root /Music/ directory where I can navigate and skip through those specific songs instead of the list of All song including sub-folders.  For now, I just created /Music/Various/ folder where I have compilation of my various tracks I moved from the root /Music/ directory.
 
Here are a few other random observations about the interface and the playback.  Gapless seems to be nearly perfect, at least with my “gapless” split DJ mix directory I use for testing.  I also had no problem reading CUE file and could fast forward through it, but wasn’t able to skip through the tracks embedded in there.  Hitting Play/Pause has a slight delay and that is probably due to a deep sleep mode which Opus#1 enters when you pause it, the same when sometimes I have a screen off and play/pause hw button doesn’t always respond until I turn the screen on.  But I still find it remarkable how I can pause the song, and come back to this DAP a few days later to find hardly any dent in battery life.  USB DAC is not currently enabled, but on their to-do list.
 
Overall, the interface is very responsive, like dealing with your typical smartphone touch screen.  The resolution is just perfect to display artwork, if embedded with a song.  If not, it will display a default image, though I also found a bug where artwork embedded with one of my songs showed up across half a dozen of other songs without embedded artwork.  This is an example of another firmware quirk which should be easy to fix.  I would also like to see a battery capacity indicator so I don’t have to guess remaining battery time based on 4 segments of the icon.  Definitely, more work needs to be done, but none of this is critical or a showstopper.
 
thebit_opus1-10_zpspopgnguo.jpg thebit_opus1-11_zpslzunf7sh.jpg
thebit_opus1-12_zpsyyvwno0v.jpg thebit_opus1-13_zpsvoxw6ehv.jpg
thebit_opus1-14_zps9jrd8xe8.jpg thebit_opus1-15_zpsnevt9lmu.jpg
thebit_opus1-16_zps07qbfadj.jpg thebit_opus1-17_zpskymofim6.jpg
thebit_opus1-18_zpscydcesqi.jpg thebit_opus1-19_zpshaqhhjbk.jpg
thebit_opus1-20_zpsonluci4r.jpg thebit_opus1-21_zpszhuzumfk.jpg
 
Sound Analysis.
 
When I received Opus for review, I put it through burn in for a few days, switching between 3.5mm and 2.5mm outputs while I was spot checking the sound.  During these few days, I quickly realized that brief spot checking wasn’t enough for me because I really started to like what I'm hearing.  As a result, I ended up doing half of the burn in while actually listening to Opus#1 at home or during my lunch break at work.
 
Starting with the low end, I hear a nicely textured and deeply extended sub-bass rumble, adding a nice warm analog flavor to the sound.  Moving to the mid-bass - I found it to be not as aggressive as I hear it with other DAPs where you have more speed and faster attack.  Here it was a bit laid back and slightly relaxed, though at the same time still very articulate and with a noticeable impact.  Moving to the mids, lower mids have a nice body and never add muddiness to any of my headphones beyond their own sound signature characteristics, while upper mids region is very resolving, very detailed, with an excellent transparency, and still sounding organic and natural. Treble is very detailed and highly resolving as well, adding nice degree of airiness to many of my headphones.  At the same time I hear it being slightly rolled off at the top where even my harsh/grainy headphones sound pleasant to my ears.  I was quite impressed how some of my borderline sibilant IEMs and full size headphones (with a typical metallic sheen) never lost their level of micro-detail retrieval yet they were smooth and resolving at the same time.
 
The soundstage is wide, and it improves even further when you switch to balanced output where it gets even a little bit wider and deeper, resulting in a more holographic staging.  The layering and separation is very good, even when I use my warmer headphones which could sound congested with some sources.  But one thing that impressed me the most was how transparent and dynamic Opus#1 sounds.  You don't realize this until you do a/b comparison with other DAPs, and you suddenly start to hear how the sound opens up and becomes uncompressed and expanded.
 
Overall, I found Opus#1 to have a very unique, open, musical, highly resolving, transparent sound with a smooth natural tonality.  It's hard to just classify it as being on a warmer side based on its low end performance, or the brighter side based on its upper mids/treble performance.  It has a very interesting blend of a revealing highly resolving sound with an analog musical smoothness.  Like a hybrid, it kind of combines both worlds of analog smoothness and digital precision without too much coloring.
 
thebit_opus1-27_zpsbwpphnzu.jpg
 
Pair up.
 
While going through pair up test using different headphones in my collection, I noted next to each one a volume level to give a better idea for relative comparison.  Opus#1 volume scale goes up 150 steps, but when you reach 120 clicks, you get a warning about volume being too high.  It’s always good to have a warning, but I wish it could be disabled.
 
DN2kJ (79) - very faint hissing, sounds a little mid-forward, bass is not as articulate and slightly pushed back, mids are very vivid, clean, and detailed, a little bright but not harsh at all, treble is crisp and airy; nice soundstage expansion.
 
ZEN v1 (110) - nicely balanced smooth detailed sound, drives ZENs with authority from a nice low end deep  textured extension to full body mids, and clean well defined treble.  Soundstage was pleasantly wide.
 
ZEN v2 (105) - well balanced smooth detailed sound, definitely a good pair up, bass is a little laid back, not as punchy, mids have full body, smooth, very organic, treble is well defined. Nice soundstage expansion.
 
K10UA (75) - a little hissing, nicely balanced and very detailed sound, deep low end extension with punchy fast mid-bass, lower mids have a nice body (not too thin or too thick), upper mids are very detailed, not harsh or grainy, vocals sounds organic and very detailed, crisp airy treble extension.  Good soundstage expansion, not holographic but wide enough.
 
Savant (84) – dead silent, very smooth balanced detailed sound, excellent bass extension down to textured sub-bass (Opus actually brought up bass in Savant), punchy mid-bass, lower mids have a nice body (not too thin or too thick), upper mids are organic, natural, detailed, excellent rendition of vocals.  Treble is detailed, airy, under control without being too crisp.  Soundstage is relatively wide.  Excellent pair up!
 
U12 (75) – dead silent, very smooth detailed sound, powerful low end impact with deep sub-bass extension, punchy mid-bass (but not too fast or aggressive), nice balanced mids, lower mids add nice body to the sound (maybe a bit on a thicker side, but never muddy), upper mids are smooth, organic, lush and at the same time very detailed.  Treble is well defined, detailed, and not too crisp, with some airiness.  Staging is wide.  LOVE this pair up very much, though keep in mind I’m using U12 with TWau cable and B1 filter.
 
ES60 (65) - a little hissing, reference quality smooth detailed neutral sound, nice low end extension with a punchy fast mid-bass, smooth lower mids, a bit on a leaner side but still with some nice body, clear detailed  upper mids, very organic detailed vocals performance, clear detailed crisp airy treble. Soundstage expansion is excellent.  A very impressive pair up, especially when I use ES60 with Super BaX balanced cable.
 
T5p.2 (98) - detailed revealing sound with a punchy fast mid-bass, slightly rolled off sub-bass (which I can get back by switching to Alpha pads), lean lower mids, crisp detailed slightly recessed upper mids - revealing analytical quality which can get a bit harsh, but never crosses sibilance threshold, and switching to Alpha pads it becomes smoother and still very detailed.  Treble is very crisp, airy, extended.  Overall sound lacks a little bit of warmth until you switch to Alpha pads. Soundstage is very well expanded.  Did I mention Alpha pads?!?
 
A2000Z (98) - very detailed revealing balanced sound, a little rolled off sub-bass (more quality than quantity), punchy fast mid-bass, nicely balanced lower mids (not too lean or too full), very detailed revealing upper mids, never gets harsh or grainy, crisp, airy, extended treble.  Perfectly balanced sound sig, and expanded soundstage.  Excellent pair up!
 
R70x (124) - very natural detailed balanced sound, I enjoyed everything from a textured sub-bass to a punchy tight mid-bass, lower mids with some nice body (not too thick or too lean) and smooth detailed organic upper mids with a perfect delivery of vocals, and detailed crisp airy extended treble.  Soundstage expansion of these open backs was excellent.  Definitely among best pair ups to drive these 470 ohm open back cans to perfection without a need for an external amp.
 
EL-8C (107) - bright revealing balanced sound, rolled off sub-bass (another example of quality over quantity), nice punchy mid-bass, leaner lower mids, bright revealing upper mids - NO metallic harshness at all, crisp detailed, airy extended treble, and a very good soundstage expansion.  Yes, you read it correctly, NO metallic harshness!!!
 
PM-3 (104) - smooth balanced detailed sound, excellent low end extension with a deep sub-bass, punchy fast mid-bass, full body lower mids (not too thick or muddy), smooth organic detailed upper mids, detailed airy treble with a nice definition.  It has a great soundstage expansion as well.  PM-3 pair up could be tricky, perhaps due to planar magnetic nature of the drivers and their smooth signature.  But with Opus#1 the sound was open and detailed.
 
Comparison to other DAPs.
 
While comparing Opus#1 performance to other DAPs, I used ES60 for this test since I consider these CIEMs to have a more reference quality sound, and their high sensitivity makes a good test for hissing.
 
Opus vs AK120ii - Opus has a bit of hissing, while AK is dead quiet.  Both have a very similar sound signature and tonality, but AK is a bit smoother which adds more analog warmth and loses some micro details.  Opus is a little better in layering and separation and also a bit more transparent, in comparison to smoother AK.  One thing that kind of bothered me a bit is Opus being wider.  Don’t get me wrong, it fits comfortably in my hand, but when you compare it to AK120ii, you notice the physical width.
 
Opus vs Gold – both have a little bit of hissing.  They both have a similar retrieval of details on micro-detail level, and very similar layering and separation of the sound, though Gold is a touch better.  Gold has a little better transparency and slightly better dynamic performance.  Gold has a tighter bass with a stronger mid-bass punch, while Opus is more neutral in comparison when it comes to bass quantity.  Both have a very similar soundstage expansion, maybe with Gold being a touch wider.  LPG is still among top dogs, but when it comes to retrieval of details and sound transparency, Opus#1 comes closer than any other DAPs I have tested before.  Factor in fluid touch screen interface and standard micro-usb charging, and you can see why lately I spent more time with Opus#1 over LPG.
 
Opus vs L5Pro – both exhibit slight hissing.  Similar sound signature, while L5Pro is slightly warmer due to treble being a touch rolled off in comparison.  L5Pro has a stronger and a bit deeper sub-bass and more aggressive mid-bass punch, while Opus sub-bass is a little softer and mid-bass is not as fast, a little less aggressive.  Opus soundstage is a little wider.  Opus sound is more dynamic, and it has a slightly better transparency, including a little better separation of sounds and a little better retrieval of details.  L5 Pro is no slouch, and once L&P implements touch swiping – its functional value should go up.
 
Opus vs X7 - X7 has a darker background.  X7 sound is a little leaner.  X7 sub-bass doesn’t extend as deep as Opus, mid-bass is similar, though Opus mids have more body and sound is more organic.  Both have a very similar dynamic performance, and layering/separation.  Overall, X7 sounds a little more digital in comparison while Opus sounds more analog and smoother. Both have similar retrieval of details.  Also, Opus soundstage width is a touch wider.
 
Opus vs DX80 - DX has slightly less hissing.  Both have similar sub-bass extension, but DX bass is tighter and punchier, while Opus is softer and slower.  Opus has a slight edge in having a more transparent and better layered sound, but definitely not on a level of night'n'day difference.  One thing is noticeable, Opus sounds a little more dynamic, while DX80 sounds a bit more compressed in comparison.  Keep in mind, this is a relative comparison.  Soundstage expansion is close enough.
 
Opus vs N5 - similar level of slight hissing during playback.  N5 has similarly deep sub-bass but faster mid-bass punch.  Opus sound is a little more transparent and with slightly better dynamics, but layering and separation is similar.  Soundstage width is a little wider in Opus.  Comparing Opus to N5 really puts a contrast on touch screen vs button/wheel controlled interface, but with i5 around the corner this should change.
 
thebit_opus1-28_zpsykr88inh.jpg thebit_opus1-29_zpsnqvh2zkj.jpg
 
Conclusion.
 
I discovered Opus#1 by accident, without even realizing that it will get catapulted to the top of my DAP list.  It's still work in progress since USB DAC functionality needs to be enabled, not even something I would use on a daily basis, but still a nice feature to complete the package.  Plus, a few other minor fw fixes and optimizations would be nice, including EQ fix, but nothing which I consider to be a showstopper.  Priced to be somewhere between other mid-fi and summit-fi DAPs, Opus#1 definitely offers a summit-fi sound quality with an open, musical, highly resolving, transparent sound wrapped in a smooth natural tonality.  Add to that a great battery life of 10-11hrs (headphone dependent), storage capacity of up to 432GB, full touch screen interface with external hardware transport control buttons, single ended and balanced outputs, digital optical output – and you see not only summit-fi sound quality but also summit-fi list of features.  With a current bonus offer of a custom Dignis leather case, still included under Amazon listing, you have a complete DAP package with a very impressive price/performance ratio.
BartSimpson1976
BartSimpson1976
I auditioned again today against DX80 and Lotoo Paw 5000. Found the Opus the clear winner. As mentioned in the review it sounds (for me) much more dynamic than the DX80. I was turned off by the Paw 5000's UI although Bluetooth can be a plus sometimes... Find it now highly likely that the Opus #1 could be my next DAP, but still waiting for the Cayin i5 and need direct A/B against the Sony NW-ZX100... 
BartSimpson1976
BartSimpson1976
I am tied between the Opus and the Sony ZX100...Opus SQ is 1% better for me...But flawless UI, battery and bluetooth are pro Sony..
As per their website Opus had already plans for the #2 and #3 (full metal body with WiFi and Bluetooth) but it has disappeared from their site.
San Man
San Man
Great review as always twister!

twister6

twister6 Reviews
Headphoneus Supremus
Pros: high level of transparency and resolution, bulletproof build quality, Parametric EQ and pro DSP effects, full size SD card, high power output.
Cons: price, AC/DC power adapter (not a traditional micro-usb), a little on a heavy side, not as much accessories.

Before I start my review, I would like to Thank Lotoo for providing me with a review sample of PAW Gold in exchange for my honest opinion.
 
Manufacturer product link: http://www.lotoo.cn/page/default_en.asp?pageID=97


In my recent review of Lotoo PAW 5000 (PAW5k), I made quite a few references to its price relative to their flagship Lotoo PAW Gold (LPG).  As part of our human nature, we often look at the price trying to justify if it’s worth it.  For many, justification is based on the comparison to other products in the same category to see how they stack up against each other.  Just like in all of my reviews, I will definitely get to that before I reach my conclusion, but I have to warn you ahead of time with absolutely zero hype – LPG is the most neutral and the most detailed DAP I had a chance to listen to so far.  Regardless of how much I enjoy and hold in high regards other DAPs (I have quite a few favorites), to my ears LPG is in a class of its own.  Is it worth $2k asking price?  I would be able to answer this question if I would have another DAP that cost less and sounds the same.  Is it justified to be called “reference” quality?  Absolutely, because in my opinion it reached the perfection of neutral sound quality, a benchmark reference for other DAPs comparison.  I usually don’t start my review with so many praises, but I decided to go ahead here in order to set a tone for my write up.  Now, let’s take a closer look at Lotoo PAW Gold.
 
Unboxing and Accessories.
 
When so many budget DAPs get a treatment of a unique premium packaging, where does this leave a real premium DAP?  The bar has been raised, and Lotoo answered the "packaging" challenge with a rather original solution.  From outside, you have a shiny silver box, very minimalistic in looks and with a basic outline print of LPG.  The surprise comes when you unwrap this fortune cookie to discover inside of it a sturdy thick gift box with an "open here" invitation.  When you flip open the magnetic thick cardboard cover with a nice soft protection foam lining, you reveal the jewelry of this gift box - LPG inside of a form fitted top tray, shinning with its gold-plated treasure wheel.
 
At this point, after taking LPG out of the box (its aluminum housing and 280g of heft felt very solid in my hand), I was a bit puzzled what to do next since the box had plenty of height to it and I've only "scratched" the surface when revealed a top shallow tray with LPG.  Like a caveman I was shaking it, pulling on the sides, and even tried "open sesame" which didn't help, until I pulled the front of the box out toward me to reveal a three tier box design with two additional trays underneath of the top one.  They swung open revealing included accessories and documentation.  I was glad I exercised my patience which paid off with a rewarding unboxing experience.
 
lotoo_paw_gold-01_zpszvdogdru.jpg lotoo_paw_gold-02_zpstskm4fw0.jpg
lotoo_paw_gold-03_zpsochnjvfo.jpg lotoo_paw_gold-04_zpsas6edk6l.jpg
lotoo_paw_gold-05_zpsguyk5v2o.jpg
 
Inside of these trays, I found a high quality flat USB3.0 cable (with an extended micro-usb connector, though LPG is also backward compatible to use a regular 2.0 micro-usb cable), a draw-string felt pouch (nice soft quality), a very detailed quick start and user guide (among the most comprehensive English manuals I've ever seen), and AC adapter with a selection of international power plugs.  I was a little disappointed to see a dedicated AC adapter instead of a typical usb connector.  LPG design requires 12V/1A charging, and you will need to carry with you a separate AC adapter when away on a trip, though the good news this is not a proprietary charger.  It uses a common DC tip, and I would recommend getting a spare charger (from eBay or Amazon) to keep one at home and another one when away.  I did confirm that USB3.0 connector is for data transfer only, not charging.
 
Also I was a bit surprised a screen protector was not included, until I touched the glass of the display to realize how thick and solid it felt, and later learned Lotoo used a hardened sapphire glass!  Another comment is about draw string pouch.  It's great for scratch protection, but not a substitute for a real case.  At the price of LPG, I would have expected Lotoo to provide a form fitted leather case and maybe even a carry case.  The design of LPG is not slippery and has fantastic ergonomics to fit comfortably in your hand, not too mention that cold aluminum feels damn good!  But I do have some expectations when looking at a premium product and felt that LPG falls a bit short in this regard [of accessories].
 
lotoo_paw_gold-06_zpsenzqvard.jpg lotoo_paw_gold-07_zps9azgntvj.jpg
lotoo_paw_gold-08_zps3bmuoekp.jpg lotoo_paw_gold-09_zpsatvezf9r.jpg
 
Design.
 
I already brought up a reference to PAW5k, and want to mention it again in relationship to LPG design.  A lot of manufacturers recently introduced a scaled down versions of their popular flagship DAPs, often noticeably smaller in size.  When I received PAW5k, I was very surprised by its compact footprint, but didn't expect LPG to be just a little bigger.  Measuring 104mm x 60mm x 25.4mm, LPG is a little bit wider and taller (especially due to a volume knob) and about 1/3 thicker, and of course weight difference is noticeable, but overall it felt very similar in my hand, even down to controls layout relative to the display.  I actually find this to be very impressive considering LPG has a more advanced amp section with more discrete filtering components, as well as stepping up from uSD to full size SD card support.
 
lotoo_paw_gold-32_zpsxhlxby2d.jpg lotoo_paw_gold-33_zpssw2a7rgc.jpg
 
According to Lotoo website, the chassis of LPG is machined from a solid piece of aircraft grade duralumin, which is an alloy of aluminum and copper with magnesium to improve the strength of the metal.  You can definitely feel the quality of the material in your hand, no flex what so ever.  Non-slippery sandblasted finish with appropriate side grooves also makes a handling of LPG feel secure, though I would still prefer a leather case for an extra enhancement of the grip due to its weight.
 
The front of the DAP has 1.8" Color OLED display at the top half (under a sapphire glass panel), 5 plastic control buttons (high quality solid material, no rattling, and a nice tactile response), a gold plated power button with optional "glow" light ring around it, and the centerpiece of the front panel - a gold plated D-Pad control with another control button in the center.  Unlike PAW5k where the control is a plastic scroll wheel, here it's a directional control pad with Plays/Pause at the top, Stop at the bottom, and Skip Next/Prev and fast forward/back on the right/left.  The middle button is Enter/Select key (in the Setup menu) while in the main Playback screen can be customized to function as either Play/Pause or Screen mode switch.
 
The right side has a reset pinhole at the bottom, the left side has USB3.0 connector for high speed data transfer (not charging), also backward compatible with any regular micro-usb cable.  Below that is 12V/1A DC port for a power adapter to charge LPG.  At the bottom you will find a full size SD card with a tight plastic dust cover - excellent idea since it allows access to a higher capacity and cheaper full size SD cards.  The top of the DAP features a separate Headphone and Line Out ports, and from what I gathered there is no SPDIF or optical outputs.  Coincidentally, due to a lower quality DAC/amp section, PAW5k offers both SPDIF and optical output for a connection to an external DAC/amp.  With LPG, Lotoo had enough confidence to omit that.
 
Above HO and LO, you can find a Gain (high/low) switch and a hold (to prevent accidental button push) switch.  Switches itself are not easy to slide which is good to prevent an accidental gain change, but also when headphone jack is in - it makes access to a gain switch a bit harder due to a close proximity to the headphone port.  It wasn't a show stopper for me because I kept it permanently in low gain even with my most demanding headphones - LPG got a lot of power.  Analog Volume knob is gold platted and protected from the left/right/top sides, leaving it only exposed on the front and the back for a quick access to adjust volume with a thumb only (or index finger from the back).    Volume knob has an acceptable resistance, not too loose or too tight, and you can feel adjustment with a very subtle click as you turn it.  Also, as part of a custom configuration, you can change volume adjustment to be either clockwise or counter-clockwise.  I ended up selecting a volume knob adjustment direction to align visually with a horizontal on-screen adjustment - counter-clockwise to increase the volume.
 
Overall, the design is a bit minimalistic but also straight forward and efficient for one handed operation.  I don't have big hands, thus the ergonomics of using a DAP by only moving my thumb without readjusting the hand is very important to me.  The layout of controls is efficient and works perfectly for either left or right hand operation where my thumb can easily reach D-pad control and other buttons surrounding it, while my index finger has a clear access to volume knob from the back.  I'm sure a lot of people might have a question which control is better, the wheel of PAW5k or the D-pad of LPG?  It might come as a surprise, but I actually found D-pad to give me a better control of using just a thumb without moving to other buttons.  LPG D-pad has a nice tactile response with a good feedback and a large round surface for a thumb to comfortably glide around.  One thing to keep in mind, if you are dealing with a big list of songs or folders, scrolling wheel has an advantage.  I personally don't have a large organized library of songs, thus usually deal with a smaller list of test tracks partitioned in directories.
 
At the same time, 280g of weight packed in a small brick is not going to be exactly pocket friendly for everybody.  YMMV, but I would probably prefer to use it at home or in the office at work rather than carrying it with me in the pocket while walking or using public transportation or while exercising (though you can exercise with it as an add-on weight :wink:).  Don't get me wrong, despite its extra weight - LPG compact size is very easy to grip.  Also, you can probably get one of these compact camera cases you clip on your belt if you choose to carry it with you on the go.
 
The only gripe I have is the same one as with PAW5k, where with a screen off there is no way to control playback until you turn the screen back on.  Actually, with PAW5k you are able to skip tracks by holding down volume up/down buttons, but play/pause wasn't available either.  Here, LPG has no way to skip or play/pause when screen is off.  To preserve a battery life, even considering a phenomenal 11+ hrs of endurance I was getting with such a powerful DAP, you still want to keep your screen off.  Volume control is already easily accessible, but in order to Skip to the next/prev track or simply to pause playback you have to turn the unit on first (power button is also screen on/off with a short press) and then proceed to playback control.  If there is a concern about pressing buttons accidentally while in your pocket, you already have Hold button to prevent this. I really hope that Lotoo in their future fw updates will consider allowing the use of D-pad or maybe combination of other buttons to enable playback control with a screen off.
 
lotoo_paw_gold-10_zpsp6vmja7l.jpg lotoo_paw_gold-11_zpsozfua620.jpg
lotoo_paw_gold-12_zpsimelskd3.jpg lotoo_paw_gold-13_zpsyqgrhmqx.jpg
lotoo_paw_gold-14_zpsp9p5ivnp.jpg lotoo_paw_gold-15_zpsm5jl4rsh.jpg
lotoo_paw_gold-16_zpsqnidaayu.jpg lotoo_paw_gold-17_zpsvcbjrawo.jpg
 
Under the hood.
 
Similar to PAW5k, the heart of LPG is a powerful ADI Blackfin 514 DSP which handles different audio formats and processes digital audio to condition it for DAC input.  Here you get a support of most lossy and lossless formats, including native DSD and SACD ISO support, covering everything from ISO, DFF, DSF, FLAC, WAV, MP3, ALAC, OGG, CUE, APE and M4A, and sample rates 8kHz-384kHz (PCM) and 2.8MHz/5.6MHz (DSD).
 
With so many manufacturers jumping on the latest DAC bandwagon, here we find a good old PCM1792 DAC paired up with a powerful LME49600 headphones amp driver, not necessary the latest but still highly regarded.  In reality it doesn't matter what's inside of the "black box", and this is another example which demonstrates that it all comes down to how you implement the design and not necessary the latest "buzz" component selection.  It's all about design architecture, proper layout, isolation of digital and analog domains, and power filtering.  At the end, I only care about the sound, regardless of what's inside of the box.  Here, sound results speak louder (500mW @ 32ohm per channel loud!) than any marketing hype.
 
What's "under the hood" can definitely give you a performance boost, but not necessary guarantee to make your ride as enjoyable.  So, let's take a closer look at the GUI, Setup, and the whole Interface.
 
GUI and Setup.
 
From the moment you power LPG up (very fast start up, thanks to a custom optimized OS) you are greeted by an efficient all-in-one color display layout with everything on a single screen.  Starting with a status bar, you get a repeat mode icon in the left corner and battery icon in the right corner with either % or the remaining time indicator (customized in the setup).  Bellow that you can see which DSP effect or PMEQ preset is being applied and a horizontal bar graph with L/R channel level, assuming it's calibrated by Red Book standards from -50dB to 0dB.  You also get song’s time duration and current play position, a file info with a file number within a folder, and a file format with an exact sampling rate. 
 
Below that you can see a scrolling file name.  While playing you can fast forward or skip the song with corresponding D-pad click, and you can do the same in Pause or Stop.  I'm so used to Play/Pause only, it was refreshing to see a Stop button (the bottom of D-pad).  The center button of D-pad could be customized to either function as Play/Pause (always easy to access it), or to switch between display views to show a dynamic Spectrum Analyzer of currently played track and with another click to show an album art.  Not every album artwork was displayed, so I assume the firmware is a little picky about embedded artwork, and the one it did display was rather pixilated.  With low 160x128 resolution of the display, I had no high expectation for it, and for me personally artwork display is not the highest priority anyway, just a bonus.
 
Above the D-pad, you have File and List buttons to help you view, select, and manage your songs.  Pressing File button brings up a folder view of your files on a flash card.  This is usually my preferred way of browsing since I have a few album folders and the rest are various tracks in the root directory.  Keep in mind, when you have a lot of albums and files - partitioning into folders will be the best way to speed up browsing since you don't have a scrolling wheel for a faster navigation.  Pressing and holding up/down D-pad will enable a faster scrolling through the list.  And speaking of the List, the button next to File, in there you will find a Play List selection that will list all the files within a current folder or if you are in the root.  Next, you have 3 custom List1/2/3 playlists where you can easily add files by tagging any song when browsing (click the D-pad right and select which custom playlist you want to add the song to).  The last choice in the List is "ALL" which lists every single song on your flash card, probably the best place to scroll through when you are tagging files for custom playlists.
 
Setup button is in the corner, and provides you the access to Play settings, System settings, and Custom settings.  Play settings allows you to select Repeat mode (sequence, single repeat, repeat all, and random), Time display (current playback back time or the remaining song time), DSD gain (in increments of 6dB from -12dB to +12dB), Lineout level switch (to adjust or keep fixed LO level, think of it as an adjustable pre-amp gain), and Channel Balance (L/R balance adjustment).  Custom setting is a unique way to customize some of the settings.  You get a chance to assign a specific functionality to FN key (a button located above Power), I usually assign it to Mute.  Also, customize Center key (inside of D-pad) for either Plays/Pause or screen change, as I mentioned before.  Furthermore, you can change Volume knob direction between CW and CCW, and Lock volume enable when "hold" is activated.
 
In System setting under Setup you get Power off time (w/timer switch and power off timer), Auto power off (time), Language selection, Display extinction (timeout), Breathing LED (light ring around power button, enable/disable to save power), Battery display (choice between remaining time or percent indicator), Brightness level (low, mid, high), Battery info (battery level in % and remaining time), Database update (refreshing song list), SD info (showing total capacity, and free and used space), SD speed test (pass/fail to make sure flash card meets 3Mbps requirement), Format (for Fat32 format of flash card), Factory settings (to reset to factory defaults), System info (fw, hw, loader, and boot version, and S/N), and Firmware update option.
 
lotoo_paw_gold-18_zpsd4sqnilb.jpg lotoo_paw_gold-19_zpsepciw2if.jpg
lotoo_paw_gold-20_zpsre7aorce.jpg lotoo_paw_gold-21_zpsep38mph2.jpg
lotoo_paw_gold-22_zpshmvgq3ye.jpg lotoo_paw_gold-23_zpst1ig38tu.jpg
lotoo_paw_gold-24_zpsnimkfujt.jpg lotoo_paw_gold-25_zps661arlgc.jpg
lotoo_paw_gold-26_zps6pyzy20r.jpg
 
Just like with PAW5k, before I get into sound analysis of LPG, there are two more important features I would like to discuss - Parametric EQ (PMEQ) and Acoustic Timbre Embellisher (ATE), accessible from a dedicated ATE/PMEQ button located between Setup and FN. 
 
I have tested a lot of DAPs, some without any EQ and others with Graphic EQ where you have certain amount of bands each at a fixed center frequency and fixed bandwidth.  With a graphic EQ you get a nice "graphic" representation with a visual feedback of which band you are adjusting and the amount of the adjustment, but you have no control over selection of a specific frequency or the bandwidth of that frequency.  Parametric EQ gives you all these controls where you can customize F0 (center frequency), Gain (level adjustment), Type (Low Shelf, High Shelf, or Band Pass filter), and Q (bandwidth of the filter band).  I'm glad that Lotoo recognized importance of PMEQ where you get 8 quality presets covering different music styles and 6 Custom User presets where you can dial in your own settings.  Each custom setting gives you an access to modify F0, Gain, Type, and Q, and you can also export and import PMEQ presets to share with others.
 
Also under the same menu selection, in addition to PMEQ you have ATE digital effects giving you a selection of 7 distinct DSP effects to customize your sound.  I actually found some of these ATE effects to be quite usable, especially "Brighter" which works great with warm/dark headphones and "Sweet" to warm up a sound of bright headphones.  One thing to note, you can only select one specific ATE effect or one PMEQ preset, but not both at the same time.  Depending on your ATE or PMEQ selection, the main playback screen will display the choice right below status bar.
 
lotoo_paw_gold-27_zpso4feynau.jpg lotoo_paw_gold-28_zpsa1qdbqiz.jpg
lotoo_paw_gold-29_zpsxqukxbsi.jpg lotoo_paw_gold-30_zpsabxyssf5.jpg
lotoo_paw_gold-31_zpsmxmtq2n5.jpg
 
Sound analysis.
 
I started my review with a very bold statement of LPG being the most neutral and detailed DAP I heard so far, and this is an honest truth.  LPG has a very neutral and transparent sound with a high resolution where you get an excellent retrieval of details and smoother reference tonality (very revealing but not harsh or grainy).  The sound has a great layering effect with an excellent separation of instruments.  Also, it has a great soundstage with nearly holographic effect with above the average width, depth, and height expansion.
 
In more details, Low end performance brings up the best in bass with a nicely layered sub-bass texture and fast mid-bass punch where low end is tight and well controlled.  Lower mids are clean and on a leaner side, still with plenty of body but not as much warmth.  Upper mids are very detailed, revealing, more of analytical quality but not grainy.  Vocals sound great, but missing a little bit of the natural organic smoothness.  Treble is crisp, extended, well defined, and airy, but not harsh or fatigue.
 
Lotoo calls it a Reference Audio Player, and that's exactly how I hear it with a perfect combination of digital reference quality and analog smoothness.  Though LPG is among the most neutral DAPs I heard to date, it could go both ways when it comes to headphones pair up.  It pairs up great with warmer and neutral sig headphones, allowing them to improve in detail retrieval without making sound bright or harsh, and even with some bright headphones it pushes detail retrieval and analytical quality to the next level.  But it could also raise the energy of upper mids and treble to the level where it's overwhelming and crosses sibilance threshold, thus making headphones not as enjoyable during extended listening period.
 
lotoo_paw_gold-36_zpsqam9dxig.jpg
 
Here how it pairs up with some of my headphones.
 
ES60 - very transparent expanded sound, with a great low end punch and a nice sub-bass layer extension, clear detailed smooth mids, and crisp airy treble.  Excellent 3D soundstage.
 
W60 - smooth lush sound with a deep sub-bass and punchy mids-bass, thicker warm lower mids, and detailed smooth upper mids, smooth well defined treble.
 
UM Pro 50 - great punchy sound, excellent balance of sub-bass and fast mid-bass, smooth detailed mids which also have plenty of brightness to balance out smoothness, treble has a nice sparkle and airiness.  Soundstage has above average width, almost on a level of W60/ES60, and a more intimate average depth.
 
Savant - amazing pair up, sound is very transparent, fast and detailed, closer to analytical quality, yet still smooth enough without crossing sibilance threshold. Bass is tight and punchy, sub-bass quantity is lagging just a bit, but quality is on high level.  Mids are lean, detailed, a little more on a brighter side, but without any harshness.  Treble is airy, crisp, and with a nice extension.
 
ZEN - plenty of power to drive these 320 ohm earbuds with authority, though closer to max level of low gain.  Sound is very tight, transparent, but I felt like it lost a little bit of musicality, though gained a whole new level if detail retrieval.  Low end is tight and well controlled, mids are clean, detailed, with a perfect mix of brightness and smoothness, treble is bright, well defined, with a little bit of airiness.
 
PM-3 - drives them with super authority! Punchy bass with a nice sub-bass crunch, bass is well controlled, no spillage into lower mids, lower mids have a nice tight body, upper mids are detailed and smooth, the best retrieval of details from PM-3 I heard so far, treble is crisp, airy, detailed, but not sibilant or harsh.  PM-3 is more on a warmer smoother side and can get congested with some sources, but not here.  Pair up with LPG is Epic!
 
EL-8C - great pair up, sound is bright and transparent, nice tight bass, lean bright analytical quality mids, but absolutely no metallic sheen or grainy texture, crisp/airy bright treble without a hint of sibilance. EL-8C is sensitive to bright sources, while here sound sig is still bright but well controlled.
 
R70x - drives these 470 ohm open back cans with authority but closer to max level of volume in low gain, very transparent and detailed sound, never heard these with so much details before.  Nice tight textured bass, smooth detailed musical mids, crisp airy treble, and 3D soundstage.
 
With plenty of power to drive even demanding headphones, I don't see a need for any external amp (unless you want to change the tonality), though I did try it with a few of my portable amps connected to LO.  I found DAC output to be very clean and to pair up nicely with E12A and C5 portable amps.  But it also demonstrated a more analytical reference quality of LPG internal amp, since with other amps sound lost some of the details and became a little smoother.  In my opinion, if you want to warm up the sound, instead of using external amp, try ATE effects or Parametric EQ presets.
 
Comparison to other DAPs.
 
Considering a summit-fi status of LPG, I was curious to see how it stacks up against other higher end DAPs I have in my review collection (LP5 Gold, L5 Pro, AK120ii, and QA360).
 
lotoo_paw_gold-35_zps8sbg1ddj.jpg lotoo_paw_gold-34_zps8imneufh.jpg
 
LPG vs LP5G - very similar tonality with LPG being slightly more transparent and neutral, while LP5G being a little smoother and having slightly more body, LPG has a little more staging width while LP5G has a little more depth, but overall soundstage expansion is very similar.  Low end has a similar extension with a very similar sub-bass texture, and mid-bass quantity, though LPG is a little tighter.  LPG lower mids have slightly leaner more neutral body, upper mids are very similar, and the same with treble.
 
LPG vs L5Pro - same as with LP5G, LPG tonality is more transparent and neutral, while L5Pro is smoother and a little warmer, similar retrieval of details, soundstage of LPG is slightly wider, while the depth/height is similar, LPG low end is tighter and has a little more control. L5Pro mids are a little smoother and warmer, while LPG mids have a slightly better retrieval of details and upper mids are a touch brighter.  Treble is very similar, but LPG has a little more airiness.
 
LPG vs AK120ii - similar tonality with a similar transparency, but a slightly different retrieval of details (LPG advantage), also AK is smoother while LPG is a little crispier.  LPG low end is a little tighter and sub-bass texture is more layered.  Lower mids have a similar body, and upper mids in LPG have a slightly better retrieval of details while AK is a little smoother.  Treble in LPG has a little more airiness.
 
LPG vs QA360 - LPG has a more neutral tonality with more transparency and a little crispier sound in comparison to smooth and warmer QA.  Both have a similar sub-bass texture and similar mid-bass punch, but LPG bass feels tighter.  LPG lower mids are a little leaner and upper mids are more analytical, while QA mids are smoother and more musical.  LPG treble has more airiness and a little more crispy, while QA is smoother.
 
Next, comparison of PAW Gold vs PAW 5000 is just for the reference to see how they stack up against each other.
 
Gold vs 5k - 5k has a warmer tonality with a sound being flatter in comparison to a more neutral, transparent, and dynamic sound of Gold.  Gold soundstage is wider while 5k is a little deeper.  Gold bass is tighter and better controlled, while 5k is looser.  Gold lower mids are leaner and upper mids have a better retrieval of details while 5k lower mids are thicker and upper mids are smoother.  Also, Gold has more airiness and better definition in treble where 5k is smoother while still having a decent definition.
 
Conclusion.
 
In my opinion, any evaluation of a sound is based heavily on a relative comparison.  What we hear as a warm, bright, or neutral should be relative to some baseline sound.  But how do we know for sure the headphones sound warm and it's not the boosted lows of your source, or the other way around where headphones have too much treble energy which could be contributed by a thin bright source?  Lotoo PAW Gold takes all this uncertainty out of the equation by providing what I hear as a perfect neutral reference quality source with a high level of transparency and resolution and enough power to drive even demanding headphones.  So is this the end-game TOTL DAP?  I'm sure it could be for a lot of people, but not for everybody.  If you have a collection of bright analytical headphones, the revealing "truth" of LPG can push it over the limit, or if you take a pride in a large collection of songs and albums accumulated over the years - scrolling through a sizeable list of songs could be frustrating where you might prefer a touch screen or some other mechanical scrolling interface.  And of course, if you have a large collection of your songs stored in the cloud or a frequent user of streaming services - this won't cut it for you either.  But if you fancy the reference quality neutral sound with the top notch transparency and retrieval of details, with an efficient minimalistic all in one display, with top quality DSP effects and access to professional Parametric EQ, a very impressive 11+ hrs battery performance even with high power output, customizable keys, and the bulletproof build quality (aircraft grade duralumin, sapphire glass, gold plated components) - this DAP is definitely Golden and in my opinion worth every penny!
musicday
musicday
Twister6, can you please tell me what cable is on the Oppo PM3?
Thank you.
twister6
twister6
@musicday : that is a beta version of Linum 3.5mm cable.  I have no idea when they are going to turn it into the official product, but so far it's the best PM-3 cable I've tried.
 
@punit : sorry, I don't have HM-901S.
AeroSatan
AeroSatan
One of the heaviest, most clunky designed DAPs I've ever tried, then again I did not expect much better from a Chinese Manufacturer, Design and Quality still eludes them for the most part. The SQ is not bad, but the whole point of a DAP is to be sound good as well as being portable something that the LPG isn't, it weighs a ton and is not pocket friendly at all. No USB, poor controls with the screen off and a clunky UI wouldn't warrant more than $1000 IMHO. SQ isn't much better than my Plenue P1 or even the ZX2 both of which sounds great and put the design of the LPG to shame.

twister6

twister6 Reviews
Headphoneus Supremus
Pros: 30h playback time, great sound performance (in high gain), lots of quality accessories, pairs up with Android (using specific apps), solid build
Cons: labels associated with switches are hard to see, need specific apps to work in Android

Before I start my review, I would like to Thank FiiO for providing me with a review sample in exchange for my honest opinion.
 
Product page: http://www.fiio.net/en/products/44

 
FiiO never ceases to… surprise me!  Some of their upcoming products, like flagship android based X7 dap and Q5 dac/amp, has been well known ahead of the release, while others like Q1 popped out of nowhere.  One thing for sure, their product portfolio is constantly expanding and they always compliment their flagship models with entree level budget offerings.  And that’s where I figured Q1 going to fit right in, but ended up being pleasantly surprised once I got it in my hands.  FiiO is constantly pushing the “budget” envelope, so let’s find out what you can get for under $70 to satisfy your broad audio needs.
 
Arrived in a flat square box, common with their other portable amps and the size of a few stacked CD jewel cases, you are greeted with a high res glossy image of Q1 flask-top inside of a "vinyl record" circle.  If you think E11k resembled a flask shape, Q1 almost looks like one!  Out of the box you will find a quality packaging with secure foam lining that does a good job protecting Q1 from every side while also surrounded by a separate box and an envelope with accessories.
 
Unboxing.
 
fiio_q1-01_zpslaxsjeev.jpg fiio_q1-02_zpsqoxvc9ta.jpg
fiio_q1-03_zpsizx7ezoc.jpg
 
I guess first surprise was when I got this little guy in my hands.  Measuring only 97 mm x 56 mm x 13 mm it was a size of a slim deck of cards, very similar to a footprint of E11k (now renamed to A3) and X3ii (though the dap is a little bit thicker), and it felt very solid yet lightweight at only 100g (which btw includes internal battery).  I guess I shouldn’t be surprised with accessories since FiiO usually includes plenty, but they managed to raise my eyebrows this time.  Yes, you are getting a detailed manual, a high quality usb to micro-usb charging cable, and a pair of rubber bands to secure Q1 to your DAP or a smartphone.  In addition to that they also introduced two new accessories, or at least something I haven't seen with any other FiiO product I reviewed in the past.

 
fiio_q1-04_zpstr7gg9vv.jpg
 
First one is a new 3.5mm short audio interconnect, a typical 3.5mm to 3.5mm audio cable to connect to HO or LO of your source, but this one was only 1.5” in length and with right angle connectors.  I wasn’t totally shocked about it since I already have JDS Labs short interconnect of a similar length, but the one from FiiO had a better quality.  The problem with JDS labs interconnect is a bit flimsy cable while here you have a beefy flexible short noodle cable with a decent strain relief.  Now you don’t need to have an extra wire loop sticking out if you choose to use Q1 as your portable amp.  I hope FiiO can sell these separately as an accessory; this little cable is really that good.
 
fiio_q1-05_zpseggss6k6.jpg fiio_q1-19_zpsxkap6ll8.jpg
 
Next, I found two semi-transparent grippy (not sticky) frosted finish silicone pads with a stamped FiiO logo name.  Again, for those who are familiar with E11k slightly convex body surface (and Q1 has the same) or know the "rubbing" pain when stacking up a metal surface of the DAP on top of a metal surface of the Amp – it's uneven and you either need to use stick-on rubber feet or to keep the DAP in a silicone skin for some padding in between.  Here, you just slide in one of these little pads and problem is solved.  It’s a very simple and effective solution.

 
fiio_q1-06_zpszvqdwqu2.jpg fiio_q1-07_zpssmjfyvtt.jpg
fiio_q1-18_zps1hd9v10i.jpg
 
Now, on to a “flask” design.  With a slightly convex rounded body surface and a volume knob on the top in the middle surrounded by a guard - Q1 closely resembles a small flask.  The body of this dac/amp has a solid aluminum shell, very sturdy, no flex, and a great EMI isolation.  The top and the bottom looks like a brushed aluminum, but it feels like plastic which I'm pretty sure it is.
 
Starting from the top, you have 3.5mm HO gold plated port, LED indicator (blue - power on and running off battery, red - charging, green - charging complete, blinking red - low battery, purple - charging with power on when used as usb dac), Volume knob (smooth operation with good resistance and numbered position), and Bass boost switch.  You turn the power on by twisting the volume knob from 0 position thus don't have to worry about blowing off your ears because of the volume setting from a previous pair of headphones if you have to deal with a separate power switch.  The only problem here, Bass boost switch has on/off label inside of a small switch cavity which is very hard to read.
 
At the bottom, you have 2 small philips screws at the corners holding assembly together, Charge switch (to allow charging option while connected to laptop), micro-usb port for charging and usb DAC data input, Gain switch for Low/High, Line In/Out 3.5mm gold plated port.  When used as a portable amp, this port is Line In, but when used as usb dac - this port becomes Line Out.  Unfortunately, Gain and Charge slider switches also have their values stamped inside of the switch cavity which is hard to read.  I just wish Bass (on/off), Charge (on/off), and Gain (high/low) had a more clear marking, maybe stamped outside.
 
Design.
 
fiio_q1-08_zpspwsqa1x3.jpg fiio_q1-09_zpstrnzrmjg.jpg
fiio_q1-10_zpshvbn2egq.jpg fiio_q1-11_zps2q8brrkv.jpg
fiio_q1-12_zpsiwk43fwu.jpg fiio_q1-13_zpskhnqyxd4.jpg
fiio_q1-14_zpsnbvblvvq.jpg fiio_q1-15_zpsqimwme3c.jpg
fiio_q1-16_zpsevmqcys3.jpg
 
I usually don't spend too much time on Spec numbers, but when you read >30h of playtime from its 1400 mAh battery - that will get your attention right away!  30h is noted as the best case scenario at a "normal" volume level which is valid for both low and high gains!!!  I do need to verify and to compare battery life when used as amp vs dac/amp, but so far I only charged Q1 once and still using it for a week.  FiiO suggests that when used as USB DAC, you should expect at least 15h of playback which is fantastic, and I will update my review with final measurement numbers after more charge cycles.
 
The max power rating of Q1 is >190 mW at 32 ohms which is pretty good for a little Amp, but I noticed right away in low gain output was really underpowered.  Once FiiO released the official Q1 spec, I quickly realized the reason.  Gain AUX In: -7dB/4.5dB, and USB In: -3.5dB/8dB.  Basically in low gain when you use Q1 as pure amp (AUX In) or DAC (USB In) it's more appropriate for sensitive IEMs where you want to keep the power low.  With most of my IEMs, I found low gain setting to be useless, but once switched to high gain you get a significant improvement!
 
After hours of listening, I found Q1 to have a neutral-warmish signature with a good transparency, a nice layering/separation, and a smooth organic tonality with a decent retrieval of details.  It's not going to blow your socks off, but it was surprisingly good, down to a black background.  As a matter of fact, I found Q1 to be more neutral and a touch more detailed in comparison to E11k which sounds a little bit warmer to my ears.  Going up to E12A, you will find Q1 amp section slightly inferior where E12A is a little more transparent and more detailed, but Q1 has an obvious advantage of additional DAC functionality.  One particular pair up I found to be quite good was with X3ii (from LO) - besides a perfect footprint match, I found an improvement in retrieval of details, like a very faint veil was lifted off, and as a bonus you get to extend X3ii battery life by using an external amp with a built-in power supply.
 
fiio_q1-17_zpslwvglf6r.jpg fiio_q1-22_zps8neafiau.jpg
 
Paired up with a lot of my headphones, I found the best synergy with those that have bright sound signature since Q1 was able to smooth out harsh peaks and in some cases a bass boost added more body to a sound.  In more brief details, I found Q1 to drive everything I threw at it with a convincing authority, especially in high gain.  There was an excellent pair up with Audeze EL-8C (adds a nice body with a bass boost) and PM-3 sounds smooth and detailed, MSR7 has no harsh peaks and sounds smooth over the treble range, and even R70x (470 ohm impedance) is driven with plenty of power but I had to push Q1 nearly to the max of volume on high gain, while VE ZEN (300 ohm) had no issues and still had some headroom left.  I found no hissing with sensitive CIEMs, like Inearz P650 – yielding a very detailed sound, W60 had an excellent drive (powerful, no hissing, great level of details), and the same with DN2kJ with no hissing, excellent detailed sound which scaled up with more organic body when I switched bass boost on.
 
Besides being able to use it as a portable headphone amplifier with analog input, Q1 has a DAC to accept digital input for USB DAC functionality.  Used as USB DAC connected to my laptop, it functions as an external usb sound card and has a rather impressive sound improvement over my laptop built in HO output.  In addition to a sound improvement, I was also able to drive all of my headphones with authority (regardless of their drive type), and I was able to charge Q1 while using it connected to my laptop.  Actually charging is optional since you can turn it off with CHG switch, this way there are no discrepancies when using USB OTG cable with your smartphone.
 
fiio_q1-23_zpswmsmpeql.jpg
 
Of course, I saved the Best for last - pair up with a smartphone!  As most of you are aware, Android has a very poor support of usb audio interface, and even with Android 5.0 not all the devices are supported.  Luckily, there are a few audio apps that implement their own usb audio drivers to allow access to most of the USB DACs, including Q1.  One of these applications is USB Audio Player Pro, a paid app ($7.99, with a limited free demo), while the other one is a totally free app with an equal functionality - HibyMusic (highly recommend it!).  Of course, the disadvantage is that you can't run your native audio/video streaming apps or some other 3rd party apps that don't support usb audio driver to access Q1, but for a pure audio playback of your lossless audio files HibyMusic is all that you need with Q1.
 
Pair up with my Note 4 was Epic!  Typically, portable amplifiers have an added value of supporting higher impedance inefficient headphones, but you have to deal with a double amping issue of amplifying noisy HO of your smartphone due to lack of Line Out.  With USB DAC you are bypassing internal amp and sending a digital stream to process audio externally with Q1 DAC which doesn't drain your phones battery.  There are not too many quality self-powered USB DACs under $100, while here you have one for under $70.  And a sound improvement was noticeable with a better layering and separation of instruments and vocals, tighter bass, and overall cleaner, more detailed and dynamic presentation.
 
Pair up with Note 4 (using HibyMusic app and Oppo PM-3 headphones w/Linum cable, and USB OTG micro-usb to micro-usb right angled cable from eBay)
 
fiio_q1-20_zpsylbz0fdv.jpg fiio_q1-21_zpsysnyzhie.jpg
 
Conclusion.
 
I started my review with a statement of "FiiO never ceases to surprise me", and Q1 is not an exception in this respect.  While there are plenty of portable headphone amplifier, once you start narrowing it down to sub $100 range, not too many choices are left with such a complete multi-functionality that could be used as standalone amp or usb dac with your laptop/PC, and even usb dac with your smartphone.  It looks fantastic with a nice build quality and a compact “flask” design, it comes with a set of excellent accessories, it has plenty of power in High gain to drive up to 300 ohm with authority, it has a convincing bass boost that adds body to analytical/bright headphones, and you get up to 30 hours of playback so you can extend battery life of devices you pair it up with.  But the discovery of Android compatibility, using specific apps that support usb audio driver, just raised its value to a whole new level.  For the reason that you have to use special apps, FiiO doesn't advertise this functionality like it has with E18 and doesn’t even include USB OTG cable, but I confirmed it in my testing and it's a pleasure to use with my Note 4 without draining my phone's battery.  For under $70 this one is no-brainer!
twister6
twister6
@yawg : probably a good idea to post this question in the official Q1 thread: http://www.head-fi.org/t/780726/fiios-new-q1-portable-dac-amp-lets-drink-to-happy-listening - people just read a review, but nobody scrolls down 40+ comments.  Sorry, I have written hundreds of reviews on head-fi and try to answer some comments after the reviews, but it's hard to keep up with everything, so better off posting in the official product thread where it will get immediate attention of many people :wink:
yawg
yawg
Thank you for the link Twister. Appreciate it as FiiO don't answer.
divineatma
divineatma
Can someone who has both comment on any differences between Q1 and E18k sound quality wise

twister6

twister6 Reviews
Headphoneus Supremus
iR2Resistible!
Pros: R-2R discrete resistor DAC design (and at the time of writing, the first R-2R Android DAP), natural analog detailed tonality, breathes new life into N6ii.
Cons: add-on price of the module, lack of Line out.


The product was provided to me free of charge for the review purpose in exchange for my honest opinion. The review was originally posted on my site, and now I would like to share it with my readers on Head-fi.

Manufacturer website: Cayin. Available for sale on MusicTeck.


Intro.

I often say in my reviews that non-Android DAPs have a greater longevity because they are independent of Android OS and don’t rely on trending SoC. With Android DAPs the shelf life is shorter because as time passes by, they can’t keep up with all the latest OS releases and faster processors to support it, and become dated sooner. So, in today’s competitive market where many audiophiles obsessed with upgraditis, a 2-year-old Android DAP doesn’t make the news, even if it has a modular design. Yet, Cayin managed to get N6ii back into the spotlight.

cayin-n6ii-r01-06.jpg

It was a smart move for Cayin to go with N6ii modular design when it was introduced. After the releases of A01 (AKM), T01 (TI/Burr-Brown), and E01/02 (ESS) motherboards, the A02 (AKM Line Out only) card was supposed to be their last module. But they left the door open, just a small crack, when they said “… unless a very innovative and feasible idea comes up down the road…” Nobody expected it, but this idea became a reality when Cayin announced R01 module with an all-discrete resistor R-2R Ladder DAC.

It was unexpected and did breathe a new life into their 2-year-old N6ii DAP, making it the first R-2R Android DAP. And apparently, Cayin was so proud of the design that to commemorate it they also released a limited edition N6ii Ti version with a stock R01 card in a matching Ti finish and a full backward compatibility with previous audio motherboards. Now, after spending almost a month with R01, I would like to share what I found.

cayin-n6ii-r01-05.jpg

Unboxing and Accessories.

The unboxing experience of R01 will be identical to all the previous modules.

The module arrived in a compact black box with a foam cutout to keep R01 secure during the shipment. When you remove the module, keep in mind there is a protective rubber cover over the connector, and you will need to remove it before inserting R01 into N6ii. And just like with E02, I was happy to see that a black protective tape sticker was removed from inner side of the module. I mentioned in my previous module reviews, the sticker made the fit very tight, and functionally this tape sticker wasn’t even necessary. Surprisingly, that sticker was still included in the box by itself.

cayin-n6ii-r01-01.jpgcayin-n6ii-r01-02.jpgcayin-n6ii-r01-03.jpg

Furthermore, included were 4 extra screws inside of a small plastic capsule similar to the one included with E01 and E02. Personally, I went through dozens of times with module replacement, and still using original screws without a problem. A premium colorful screwdriver with Torx T5 bit was provided as well. I don’t think everybody has Torx bits, so it is a good idea to include one as part of the accessories, and also a manual with detailed instructions how to remove and replace the module.

cayin-n6ii-r01-04.jpgcayin-n6ii-r01-12.jpg

Design.

As it was already mentioned, in N6ii audio motherboard cards E0x stands for ESS DAC, just like A0x corresponds to AKM DAC and T0x name goes along with PCM DAC from TI. R01 name reference came from R-2R Ladder DAC. In R01 design there are no DAC chips, like popular AKM, ESS, TI/PCM, or CS DACs. Here, the discrete R-2R Ladder DAC is made of discrete matching resistors. Cayin decision was to design 24bit discrete R-2R precision DAC which requires 48 pieces of resistors per channel, a total of 96 resistors for both Left/Right channels. And we are not talking about some generic off the shelf resistor. They all have to be matching and with a high accuracy tolerance of +/-0.01% (corresponding to +/- 1/10,000).

cayin-n6ii-r01-23-resistors.jpg

But R-2R Ladder DAC implementation also comes at a cost where there is not going to be enough room on the audio motherboard to implement both headphone and line out outputs. And using PO as pseudo LO is not ideal either since usually R-2R background noise goes up at high volume. Ironically, the previous A02 module was Line Out only, while R01 is headphone output only. To understand better what is “under the hood” of R01 module design, I will refer to a very detailed explanation Andy Kong/Cayin posted during the R01 launch.

The R01 audio motherboard consists of digital and analog sections with R-2R Ladder DAC bridging them. On a digital side of the design you have 4 main functional blocks: 1) Digital Audio Bridge – where you receive audio files in all supported formats from the main N6ii FPGA, 2) Oversampling Interpolation Filter – where you convert the digital data into left and right channel 24bit/768kH serial audio data, 3) Serial to Parallel Shift Register – where you convert serial data to parallel bits that going to control gates of R-2R DAC, and 4) 24bit Discrete R-2R precision DAC where you actually convert that parallel digital data to analog as it goes through resistive ladder of 48 resistors per channel. For a greater accuracy and less jitter, instead of using the master clock from the main board, a local reference clock (24.576MHz) was provided for blocks 1 & 2 above.

cayin-n6ii-r01-19-pcba-1.jpgcayin-n6ii-r01-20-pcba-2.jpg

When we talk about DAC chips, we often refer to each one having its own sound signature. When it comes to Resistive R-2R Ladder DAC implementation, you are dealing with discrete components and the choice of Resistors will be the one affecting the sound signature. Apparently, Cayin went through months of trial, testing different Resistor values until they settled on R=5.1ohm and 2R=10.2ohm resistors from a brand name manufacturer (Viking), all ultra precision, low tolerance, and low TCR (temperature coefficient resistance) thin film resistors.

cayin-n6ii-r01-21-block_diag.jpg

As many are probably aware, the final sound is shaped by the amplifier section of the circuit that follows the DAC. In R01, Cayin implemented the same head-amp design as they did in A01 and T01 cards with single ended and fully differential amplifier outputs. And similar to A01 and T01, they used a set of four opamps to increase the output current and to lower the output impedance which translates into a Spec of 4.4mm BAL output with 430mW power and 0.68ohm output impedance, and 3.5mm SE output with 240mW power and 0.45ohm output impedance. Furthermore, I was able to verify 10hrs 50min battery life using 4.4mm BAL output with med gain while playing FLAC files at normal listening volume.

cayin-n6ii-r01-22-spec.jpg

The modular design and the handling of the audio motherboard modules is very straight forward.

cayin-n6ii-r01-08.jpgcayin-n6ii-r01-09.jpgcayin-n6ii-r01-10.jpgcayin-n6ii-r01-11.jpg

Sound Analysis.

Before doing any critical sound analysis, I had R01 w/N6ii on burn-in for about 4-5 days playing various tracks in the loop. Afterwards, for a critical listening I used Oriolus Traillii to analyze the sound using my usual test tracks, such as Agnes Obel “The curse”, Sandro Cavazza “So much better” (Avicii remix), C-Bool “Never go away”, Ed Sheeran “Shape of you”, Alan Walker “Darkside”, Galantis “Hunter”, Iggy Azalea “Black widow”, Indila “Boite en argent”, Counting Crows “Big yellow taxi”, David Elias “Vision of her”, and Michael Jackson “Dirty Diana”.

cayin-n6ii-r01-14.jpg

In my opinion, the best way to understand and to describe the tonality of N6ii modules is by comparison of one to the others. And while it is convenient to have access to two DAPs for a true A/B comparison, I was actually able to do a module hot-swap. Cayin doesn’t recommend swapping modules while powered up, but it works without a problem and the DAP even remembers the last volume setting for that specific module. It took me literally a second or two to swap between modules when doing the comparison. But as a DISCLAIMER, do it at your own risk.

R01 vs E02

E02 has been my favorite N6ii module, so I was very curios how it will compare to a new R01. The first thing you notice is a more analog tonality, with the sound being noticeably smoother. I never found E02 to sound 'digital', but when you compare these two side by side, I find R01 to sound smoother and more natural. This is not the type of smoothness where you lose resolution or retrieval of details, and you shouldn't expect the sound to become warm and colored. The signature and the technical performance are on the same level as E02 with its Class AB amp, but the tonality of R01 is more analog, more natural, and smoother.

A closer listening shows E02 bass to have more impact, hitting stronger, and treble to be crisper, while the decay of notes being faster, making the sound tighter and the background blacker. In contrast, R01 sound is more relaxed, more natural and smoother due to a decay of notes fading into the background instead of being sharply cutoff. R01 bass has more weight, still an impressive impact quantity, but a little less than in E02. And the same goes for treble, R01 is a little smoother in upper frequencies, nothing rolled off, just taking the edge off the crisper treble I hear with E02. The soundstage expansion and imaging are very similar.

Another difference when comparing to E02, R01 background is quieter with sensitive IEMs. And in R01 when comparing 4.4mm to 3.5mm outputs, balanced output has a wider soundstage and a blacker background which is quite noticeable. But when looking for background hissing, while using CFA Solaris ‘20 and switching between E02 and R01, the background "waterfall" hissing is more noticeable with E02. Another thing to keep in mind, while lacking LO in comparison to E01/02, it was more convenient to have both SE and BAL output in R01 card.

cayin-n6ii-r01-18.jpg

In my E02 review I covered comparison with all the previous audio motherboards. To make R01 review fully complete, I decided to include copy’n’paste of that section below.

E02 vs E01 (AB) - E02 soundstage is a touch wider, and while I was impressed with soundstage expansion of single ended E01 output, E02 spreads L/R a little bit further apart. Bass (E02) has a bit more impact and more rumble with a velvety texture, mids have a little more body especially in lower mids while E01 mids sound more transparent and E01 treble is just a little bit smoother, making E02 signature more organic, placing E02 performance between E01 (A) and E01 (AB), though being closer to E01 (AB). But in general, E02 is not too far off from E01. Also, despite a rated difference in output power, regardless of IEMs or headphones, I hear a difference of about 5-6 volume clicks.

E02 vs T01 - T01 soundstage is a little bit wider, perhaps due to a brighter tonality with airier treble. T01 bass is faster and tighter, with shorter decay, mids are brighter, more revealing and micro-detailed while E02 mids are more natural and smoother, and have more body. The treble of T01 is crisper and brighter. The preference here will depend on the signature of IEMs/headphones and how it pairs up with either of the modules.

E02 vs A01 - E02 soundstage is a little wider. Overall tonality is similar, but there are some differences I’m picking up. E02 bass has more rumble and more analog texture. Mids are similarly smooth, but E02 has more organic layered natural texture. I went back and forth many times comparing these, focusing specifically on mids, and that texture and better layering and separation is what makes E02 stand out, especially when it comes to vocals. Also, E02 treble has a little more sparkle and airiness. Overall, E02 sounds like it has more analog texture, better layering, and improved sound dynamics in this comparison.

cayin-n6ii-r01-07.jpg

Comparison.

In every comparison I used Oriolus Traillii, volume matched while listening to the same test tracks between DAPs. Furthermore, I mostly focusing on the difference in sound as I hear it without going too deep into the design and functionality differences.

N6ii w/R01 vs A&K SE180 ESS – In my recent SE180 review I compared their ESS module against N6ii with E02, and found tonality to be very close. Moving up to R01 from E02, the tonality is not too far off either, though I do find R01 to be more analog, more natural, and with a tighter bass punch. But those are all fine-tuning details. What really does stand out and quite noticeable is a wider soundstage of R01 with a more realistic imaging in comparison to SE180/ESS which has more depth and less width relative to R01. Another difference was a blacker background of R01, giving overall sound a better definition. I also find fully open Android OS with access to Google Play in N6ii to be an advantage over A&K limited side-loading of apps.

N6ii w/R01 vs Lotoo LPGT - This was another interesting comparison because I use LPGT quite often in my testing due to its relatively neutral transparent sound quality. Comparing it with R01 demonstrated that R01 analog smoothness is not a result of extra warmth or additional coloring. It is due to a technical performance enhancement rather than changes in tonality. This comparison also shows that, unlike E02 with its slightly elevated bass impact and treble sparkle, R01 is more balanced in tuning and its smooth analog textured sound is still neutral and natural like LPGT. Last, but not least, have to keep in mind that N6ii is Android DAP while LPGT is audio playback only.

N6ii w/R01 vs L&P P6 Pro - If we talk about discrete resistor R-2R ladder DAC, you can't avoid the comparison with P6 Pro which also features R-2R discrete resistors DAC. To my surprise, these had a few interesting differences. They both share the same natural analog tonality, but while R01 has a slightly more laidback presentation of the sound with a little longer decay of notes, P6 Pro sound is tighter, faster, and with a blacker background. Another interesting observation was with vocals, where using Traillii I heard vocals being pushed slightly back with P6 Pro, and brought a little forward with more focus with R01. You do have to keep in mind P6 Pro cost 2x more and audio playback only non-Android player.

N6ii w/R01 vs Hifiman R2R2k (red) - Both have a similar wide soundstage expansion and imaging. The tonality difference is the first thing I noticed, with R01 being smoother, more laidback, while Red being more revealing, still natural but not as smooth, even a bit more digital when you do a close A/B comparison. One difference that really stood out for me was a high level of hissing of many IEMs with Red in comparison to R01 that handle it a lot better. Even with something like Traillii, zero hiss with R01 while it was quite noticeable with Red even in Low gain. I’m not even going to touch functionality comparison since R2R2k is very limited and primitive.

cayin-n6ii-r01-17.jpg

Pair up.

For consistency, all earphones and headphones were tested in Med gain (MG) unless noted differently. Volume level is noted with “V”, and please keep in mind that max volume is at 100.

IEMs.

Oriolus Traillii (BAL, MG, V34) – holographic soundstage expansion with 3D imaging. The sound sig is very balanced with a natural detailed tonality, deep sub-bass rumble, tight articulate mid-bass punch, natural, layered, detailed, revealing vocals, and natural well defined crisp treble. Traillii shines in every pair up, and here with R01 it demonstrated a natural detailed tonality, maybe just with a touch more revealing upper mids shine. No hissing.

Empire Ears Odin (BAL, MG, V31) – holographic 3D soundstage expansion and imaging. Deep and slightly elevated sub-bass with a tight mid-bass punch, above neutral quantity. Bass it tight and articulate, with a great sub-bass extension. Mids are very detailed, layered, more revealing, with a bit thinner lower mids and more focus on upper mids. Treble is also crisp and natural. I was very impressed with extra depth of sub-bass rumble and smoothness of EST treble. With hissing, I can't hear it in either of the gains. Often, I hear some waterfall hissing with Odin and other DAPs, but not here.

Cayin Fantasy (SE, MG, V38) - holographic soundstage expansion with nearly 3D imaging. The sound sig is close to J-shaped where you will find a neutral bass which extends and goes down to sub-bass level and has a fast mid-bass punch, but the quantity is neutrally flat. Lower mids are neutral as well, there is not an ounce of coloring to add to the thickness or warmth of the sound body. Where this pair up shines is in upper mids and treble, being micro-detailed, layered, very revealing, and with treble being crisp and airy. The benefit of R01 here is that upper mids/treble tonality is less sterile and a little more natural. It is analytical, no question about it, but R01 takes the edge off the digital coldness of the sound. No hissing, even with my "The curse" test track.

cayin-n6ii-r01-13.jpg

Vision Ears Elysium (BAL, MG, V43) – soundstage width is above average with a good height and depth, I typically complain about stock cable contributing to narrower soundstage, but here even with a stock cable it was surprisingly wide. Sound sig is balanced, even a bit u-shaped due to deeper bass extension and natural crisp treble energy which puts its detailed organic vocals slightly behind, relative to lows/highs. But vocals still come through as a shining star of this pair up. Also, Ely's treble can get hot, especially at higher volumes, but it was quite natural and non-fatigue here. No hissing.

Empire Ears Legend X (BAL, MG, V36) – wide soundstage with an imaging slightly out of your head. L-shaped sound signature with a hefty bass slam that extends down to an elevated sub-bass, stronger mid-bass punch, north of neutral lower mids, clear natural vocals, and natural clear treble sparkle. Bass is big, bold, heavy, speaker-like. But even with this level of bass, you can still keep a clear focus on mids. No hissing.

CFA Solaris 20 (BAL, MG, V22) – wide soundstage with a matching height/depth and close to holographic imaging. The sound sig is balanced with a little more emphasis on mids/vocals. Bass has a decent extension, goes deep and with a noticeable mid-bass impact, but it is scaled down, definitely above neutral but not as elevated. Mids/vocals are truly exceptional here, being clear, detailed, natural, layered. Treble is clear, crisp, and airy but not as bright as in some other pair ups, sounding more natural here. With hissing, if you are playing instrumental or vocal tracks with minimalistic instrument arrangement, you will hear some waterfall type of hissing. To reduce it, switching to Low gain helps.

R01 paired up great with every IEM I threw at it without any exceptions. But the one that truly stood out for me was EE Odin and how their pair up with R01 enhanced its sub-bass rumble and added a smoother touch to its EST treble. Along with a hiss-free performance, it stood out over a number of other DAPs.

cayin-n6ii-r01-15.jpg

Full Size headphones.

Meze Empyrean (BAL, MG, V52) - I was able to reach the optimal volume output without a need to push it harder. I noticed right away the expanded width/depth of the soundstage where the sound was more out of my head. The overall tuning was balanced, smooth, leaning more toward the warmer side, but still with a lot of clarity in mids/vocals. Bass was softer and more laidback, treble was clear, natural, rather smooth in tonality. Upper mids is where it was shining with more clarity and transparency, bringing vocals more forward.

Audio-Technica ATH-R70x (SE, MG, V65) - This is my most demanding 470ohm open back headphones, and R01 was driving them loud enough and to their full potential with surprisingly good transparency. As expected, the sound is very open and expanded, but with many other sources R70x sounds warmer and smoother. Here, the mids/vocals are more transparent and less colored, bringing more clarity and higher resolution. And as result of mids transparency, the bass has more focus and better articulation. The biggest surprise here was the clarity of mids.

Beyerdynamic T5p 2nd (BAL, MG, V42) - I hear soundstage with a good width and even better depth/height. I have heard T5p2 with a wider soundstage in other pair ups; here the width was a bit shy, but still above the average. The sound is very clean and detailed. Not bright, just very transparent, detailed, and layered in mids. Bass extends deep but the rumble and mid-bass are not as boosted, north of neutral but not too elevated, more polite and less aggressive. Mids/vocals sound natural, transparent, smooth and detailed, and treble is smooth and airy. In this pair up I felt like mids had more focus and better definition in comparison to some other source pair ups with T5p2.

It is true that I don’t have a big collection of full-size headphones, but with the one I tested above I absolutely loved how in every pair up the mids/vocals sounded natural, transparent, and detailed in comparison to many other DAPs. That revealing transparency is what really stood out for me.

cayin-n6ii-r01-16.jpg

Conclusion.

One of the main ideas behind modular DAP design is being able to futureproof your investment. So, when new modules become available, you can upgrade the sound of the original audio player instead of buying a new one. But even a modular design has its limits, exactly how it felt after the last Cayin release of A02 Line Out only audio motherboard. The R01 with its R-2R discrete resistor ladder DAC was a big surprise, giving a two-year old N6ii Android DAP a second wind with a new level of natural sound finesse.

This natural smooth sound tonality didn’t compromise resolution or retrieval of details. Instead, it gave N6ii w/R01 a more natural analog tonality, and truly set it apart from previous N6ii modules. Every N6ii module, except for A02, has a unique DAC/amp combo which offers a different signature and tonality. But especially between E02 and R01, it felt like listening to two different DAPs, and I didn’t even care about losing LO because I gained 3.5mm output, something I actually missed in E02.

There is also another plus when it comes to R01. After the AKM factory fire and recent shortage of electronic components following the pandemic year, using a discrete resistor DAC design frees you from being tied up to DAC chips and their procurement. Of course, you still need to get a supply of resistors, but you have more flexibility to choose different values and no longer have to compete with other DAP manufacturers fighting over the same DAC chip. I hope more manufacturers will follow this route.
twister6
twister6
@abheybir : my suggestion, if you already have N6ii and other modules, R01 is a must have to breath in a new life into your DAP. But if you are only after that discrete R-2R dac sound and want a fast Android DAP, Hiby RS6 is just around the corner. From what I understand, it is like R6 2020 with a discrete R-2R resistive dac ladder.
Balamani
Balamani
Nice review...Thanks for the comparison to Hifiman R2R specially!
J
jwheat09
I always enjoy your reviews. This one was great. Always very practical and detailed.

twister6

twister6 Reviews
Headphoneus Supremus
Portable amp with everything but the kitchen sink!
Pros: dual Solid State and Vacuum Tubes timbre, Class A and AB amplification mode, dual LINE and Pre-AMP input modes, 3.5mm SE and 4.4mm BAL for input/output, removable rechargeable 18650 batteries, included interconnect cables.
Cons: price, hissing with some sensitive iems (just needs iematch).


The product was provided to me free of charge for the review purpose in exchange for my honest opinion. The review was originally posted on my site, and now I would like to share it with my readers on Head-fi.

Manufacturer website: Cayin. Available for sale from Musicteck.


Intro.

Some of you are probably going to find it a bit surprising that I’m reviewing an amplifier. I had to take a walk down the memory lane, trying to remember the last time I tested portable amps, just to realize it was 6 years ago, and coincidentally one of them was Cayin C5. Back then DAPs were not as powerful, their internal amp sections were more basic, and battery life was subpar, thus using external amp was beneficial to boost output power and to extend battery life of your portable source. But you also had to compromise the portability of your setup.

Then, DAPs evolved, becoming more powerful and more advanced, with some of the manufacturers offering modular design solutions with interchangeable amp modules or more advance interchangeable DAC/amp cards like in N6ii. It all comes down to having more choices and being able to use your favorite source with different sound-shaping options. And speaking of more options, another example would be N3Pro and N8 from Cayin where you don’t even have to replace the module, just switch from Solid State to Tube.

So, what is next for Cayin after DAPs with Solid State and Tube timbre or DAC/amp cards with Class A/AB amp modes? The announcement of A02 module for N6ii with Line Out only output was a big clue. At first some were confused about release of LO only card without headphone output, just to realize later that A02 was a preamble to the upcoming C9 portable amplifier. I was skeptical at first, thinking why do I need external amp, regardless of its advanced design. But this skepticism turned into a bit of an obsession in the last few weeks. Here is more about it.

cayin-c9-07.jpg

Unboxing and Accessories.

The unboxing experience of C9 reminded me of the premium IEM packaging. The giftbox quality packaging box had a magnetic top cover to reveal a non-removable foam insert with a secure cutout for C9 and another magnetic side door for a sliding tray with accessories. I know, some will say, what is a big deal. But I found it to be very convenient to access the accessories without digging through and removing layers inside of the storage box.

cayin-c9-02.jpg

In addition to the main attraction, C9 with its battery module already mounted inside, other accessories include pure copper single ended (3.5mm to 3.5mm, CS-35C35) and balanced (4.4mm to 4.4mm, CS-44C44) interconnect short cables, usb type-c charging cable, a capsule with 4 spare screws for a battery module and T6 screwdriver. Plus, you will find a user manual and rear panel glass protector.

cayin-c9-03.jpgcayin-c9-04.jpg

Design.

The overall dimensions of C9 are 160x80x28mm with a weight of 550g. It’s a rectangular box, borderline on being portable/transportable due to its weight and considering it has to be stacked with a source (if you go with a DAP). A big part of its weight and the size is due to internal battery module and 4x included Sony VTC6 18650 batteries (3000mAh, 3.7V). The battery module tray alone has a weight of 282g and extends 82mm in length. Thus, half of the length and the weight of C9 is due to its 4x rechargeable 18650 premium batteries inside of a module tray.

cayin-c9-16.jpgcayin-c9-18.jpg

The back of C9 has usb type-c connector for charging of batteries, and it supports anything from a standard 5V/2A charger to a higher voltage fast PD or QC3.0 chargers which cut down the charging time by almost a half from 6hrs to 3hrs. Also, next to usb connector you have 4 battery status LEDs to indicate charging status and remaining battery capacity. The unit is fully charged when all 4 LEDs are solid and stop blinking. Both, usb connector and LEDs, are part of the removable charging battery tray which you can use standalone for charging. Of course, you can buy your own battery charger, but Cayin will be offering spare charging tray for sale soon which should make it very convenient to be able to charge another set of batteries outside of C9 and then just slide in and out a new tray.

cayin-c9-20.jpg

The bottom of the C9 has a glass surface with a protective film that was already applied on my review unit. I would have loved to see included some stick-on rubber feet to make sure the amp doesn’t slide across the surface. The top of C9 was crafted with two glass oval shaped “eye” openings to reveal a pair of Korg NuTube directly heated triode vacuum tubes when in use. The right side doesn’t have anything, and the left side has a Pre-Amp activation button, used as a safety measure in addition to Line/Pre-Amp switch. You will have to press and hold this button for 3sec until the blue led indicator next to it lit up, letting you know that Pre-Amp input mode is activated.

cayin-c9-10.jpgcayin-c9-11.jpgcayin-c9-12.jpgcayin-c9-13.jpg

The front of the C9 is where you will find all the ports and switches placed around the volume wheel in the middle. The volume wheel, which controls 4-channel ALPS potentiometer, is 15mm in diameter and rotates clockwise to raise the volume and counterclockwise to lower it. The knob of the wheel is flush with the front of the C9 to prevent accidental turning, and easily accessible from the top through a generous cutout to be able to turn its diamond-cut wheel knob. The rotation of the wheel has a fluid motion and a nice resistance, just enough so you don’t turn the wheel by accident, and still easy to operate with a thumb.

Looking closer at the front of C9, you will find at the top left corner Line (controls output with volume wheel) and Pre-Amp (output is set to fixed level and you control the input to C9 from the source) input mode switch, H/L gain switch (6dB boost), Solid Stage (quad set of Toshiba 25K209 JFETs) or Tube (Korg NuTube 6P1 vacuum tubes) timbre switch, and Class A and AB (dual amplification operation – DAO) mode switch. In the lower left corner, you have Input ports, 3.5mm SE and 4.4mm BAL, and in the right corner you have Output ports, 3.5mm SE and 4.4mm BAL with a design allowing you to mix SE to SE, BAL to BAL, SE to BAL, and BAL to SE. In the middle of the front under the volume wheel you will find a power button with a status LED that blinks for a few seconds when you turn C9 on when controller initializes the device, and also when you switch between Solid State and Tube timbre.

cayin-c9-09.jpgcayin-c9-08.jpg

Under the hood.

You can already get a good idea of what to expect under the hood from the Design section of the review. Cayin been in business of audio electronics for almost 3 decades, especially with a focus on personal audio products in the last 7+ years. C9 amplifier looks like a combination of their best design elements combined together in one package. And speaking of the design in general, some already asked on Head-fi “why amplifier only?” and if “Cayin planning to release DAC/amp version of C9?” The response from Cayin was clear, due to DAC and sw/fw dependency, DAC/amps get outdated faster than a pure amplifier that can stay relevant for a much longer time and be used with many different sources. And here is what you will find under the hood of C9.

First of all, you have a dual Input mode where you either select Line Input with the incoming signal from the source being fixed and you vary the amplifier output using C9 volume wheel, a more traditional headphone amplifier operation. Or you switch to Pre-Amp Input where C9 functions as a power amp with a fixed max gain level and you adjust its output by varying the input from the source. Some DAPs offer LO with an adjustable output controlled by a volume wheel, thus a name of “Pre-Amp” since you are adjusting the amp volume in pre-amplifier input stage. And because Pre-Amp output will set C9 to max gain level, as a safety precaution in addition to a switch you also have to press and hold pre-amp activator button on the side of C9.

After the initial input stage, signal gets timbre treatment depending on a selection of either Solid State (2SK209 JFETs) or Vacuum Tube (Korg NuTube 6P1). Yes, C9 is Solid State/Tube amplifier, but that part of the circuit is responsible for “coloring” of the sound prior to the actual headphone amplifier section. And as I already mentioned, this sound “coloring” will be applied to either SE or BAL inputs and C9 has a clever design to process audio directly through single ended or balanced path, as well as being able to switch from BAL to SE and SE to BA, considering amplifier offers both of these inputs and outputs.

The amplifier gain control is done in two stages. Primary Gain control is between Low (0dB) and High (6dB boost) gain selectable from the front panel switch. Secondary Gain control uses 4-channel ALPs potentiometer (volume wheel) with a pair of MUSES Series low noise, low distortion resistance ladder electronic volume (MUSES72320). Especially when using sensitive IEMs while keeping the volume low, I never experienced L/R imbalance with C9 volume control.

And last, but not least, the fully discrete headphone amplifier section with a selectable (by a switch) Class A or Class AB dual amp operation (DAO) mode. Many are probably going to remember that Cayin featured Class A and Class AB in their E01 card for N6ii. With E02 there was not enough room to have fully balanced circuit and both A/AB, thus E02 only featured Class AB. Here, C9 will give you both Class A and Class AB.

So, how does C9 amplification translate into the actual output power? C9 is rated at 700mW (@ 32ohm) from 3.5mm SE and 2,600mW (@ 32ohm) from 4.4mm BAL output jack. Of course, depending on headphones, with higher impedance the rated output power will scale down accordingly since it is inversely proportional. Considering this is a portable battery-operated amplifier, the power output parameters are quite impressive. And speaking of battery, the rating it from 5.5hrs to 15hrs and will depend on a mode of operation. Vacuum Tubes consume more current and will drain battery faster in comparison to Solid State. And you should expect to drain more battery in power hungry Class A or when using Balanced connection.

Thus, you can expect to go from Balanced Tubes and Class A with 5.5hrs to Single Ended and Solid State Class AB with 15hrs of battery life. And don’t forget, we are talking about components that generate a lot of heat, especially combination of discrete Class A and Tubes that make C9 feel quite warm. That is a reason why Cayin paid close attention to component layout to improve the air flow, even attaching PBS (pyrolytic graphic sheets) to those parts generating more heat. But overall, my typical C9 use was Balanced, Tubes, and Class AB where I was getting a little over 9hrs of playback time.

I have talked about Korg NuTube 6P1 (a dual channel triode vacuum tube) back in my N8 review. Just as a recap, while NuTube operates exactly like a triode vacuum tube, the tech behind it is based on a vacuum fluorescent display technology, like LED. These NuTube modules require less power than a traditional vacuum tube, smaller in size, have a much higher reliability with 30,000 hours of continuous life expectancy, all that while still providing a sound characteristics of vacuum tube sound. And just like with a vacuum tube, there is a warm up period, thus when you switch to tubes there is a short “warm up” delay. And similar to N8, to eliminated microphonics associated with these tube modules, Cayin designed a custom-built shock-absorption silicone housing and a spring-loaded suspension system.

cayin-c9-32.jpg

Sound Analysis.

I analyzed C9 sound with Oriolus Traillii and Audio-Technica ATH-R70x while playing a variety of my favorite test tracks, such as Agnes Obel “The curse”, Sandro Cavazza “So much better” (Avicii remix), C-Bool “Never go away”, Ed Sheeran “Shape of you”, Alan Walker “Darkside”, Galantis “Hunter”, Iggy Azalea “Black widow”, Indila “Boite en argent”, Dua Lipa “Love again”, Counting Crows “Big yellow taxi”, David Elias “Vision of her”, and Michael Jackson “Dirty Diana”. I let C9 burn in for about 150hrs before starting my sound analysis.

Similar to my DAP reviews, I prefer to describe amplifier sound based on comparisons and pair ups, but not in the same way as DAPs. People buy amplifiers to replace internal amp stage of their DAPs with an external one through Line Out connection. In the follow up sections I will bring up a lot of brief pair up examples with various IEMs and headphones, as well as different examples of DAP comparisons with and without C9.

This sound analysis section usually serves as a summary of my findings in the follow up sections. And across all my comparisons I found a common improvement of soundstage being more expanded, both in stereo separation and improved 3D imaging. Also, as expected, overall tonality changed with a more natural fuller body sound, thanks to vacuum tubes, though solid stage amp also adds some organic coloring, though not to the same extent as tubes. Furthermore, while some might expect sound coloring with vacuum tubes to make the sound thicker and more saturated, to my surprise I actually found improvements in micro-dynamics with layers of sounds being more separated and less compressed (improvement in vertical dynamics).

cayin-c9-26.jpg

The flexibility of C9 design gives you many different sound shaping options, like going between Class A and Class AB and of course, Solid State and Vacuum Tubes (Korg NuTube). I’m already familiar with Class A vs AB from E01 card, and quite familiar with AB from E02 card. In C9, you can clearly hear the difference when switching between Class A and Class AB where AB sounds tighter and faster with notes having cleaner edges, while A is smoother, more relaxed, with notes having longer decay. It is up to a personal preference, and I preferred AB since I like a punchier sound.

When switching between SS and Tube, the difference in tonality reminded me of switching between Class AB and Class A. SS timbre gives you a faster and tighter sound, with shorter and faster attack of the notes, while Tube timbre gives you a smoother and more analog tonality, also slightly laidback and less aggressive. The sound with Tube timbre still packs the punch, especially when you use it in combination with Class AB. That is a beauty of C9, you have lots of different options to customize your sound.

I’m sure some will be wondering about 3.5mm vs 4.4mm comparison. Here, I found tonality to be the same under consideration of using either SS or Tube, or Class A or Class AB. But 2 noticeable differences were the soundstage width, with BAL output sounding wider and more expanded, and the other one with BAL output having a blacker background which is also quite noticeable, most likely due to grounding of 4.4mm BAL TRRRS jack.

Also, I saw a discussion on Head-fi about different rechargeable 1860 batteries. Cayin already includes premium Sony batteries, and for comparison I “borrowed” 18650 batteries from Broadway S, “rolling” between stock Sony VTC6 3000mAh and replacement Panasonic NCR 18650B 3400mAh. I did hear with Panasonic the sound to be a little smoother and more laidback, while with Sony the pace of the sound was faster and the sound was a little more revealing. Of course, there is a little delay when you have to slide out the tray and replace the battery, but it was relatively quick for a “non-blind” A/B comparison.

As I was writing this review, a few people asked me if Interconnect Cables (IC) make a difference. Cayin includes a rather nice pure copper short ICs, both 4.4mm and 3.5mm, so I wanted to test it with a few other ICs I have on hand.

IC comparison:

Cayin stock copper IC (CS-44C44), DHC silver IC (Clone 22awg OCC Silver Litz x4, coaxial cable with 2 conductors and rhodium Eidolic plug), Romi Audio encryption series Sensation IC (pure silver core with silver-plated copper shielding), and Eletech Iliad 6W IC (24awg, 6wire with a full TRRRS connection including GND, Monocrystal Silver & Palladium Plated Silver & Gold-Silver alloy). I know, it is just a short piece of wire, but nevertheless, there is some difference in sound that I hear, maybe not night’n’day, but I do hear it.

Cayin to DHC - DHC IC sounds a little dense and warmer, giving the sound a thicker tonality while Cayin original cable has a little more air between the sound layers, giving it a little brighter tonality.

Cayin to Romi Audio - the improvement is quite noticeable here, and I actually had to lower the volume a bit since it was louder, most likely due to lower impedance of Sensation IC. The soundstage is a little wider, the sound has more air and sparkle, bass is a little deeper, and it also felt like I’m hearing further improvements in vertical dynamics.

Cayin to Eletech Iliad 6W – the improvement is also noticeable with sound having more air and sparkle, bass deeper, but overall tonality was still natural and organic. One interesting observation which I confirmed multiple times is that in addition to improvement in width I also hear some improvement in depth. This is the only interconnect cable I have with a proper wiring that has both signal pairs and GND connected between the plugs.

cayin-c9-35.jpg

Comparison.

I know for some the comparison to other amps using demanding headphones will be very important. Unfortunately, I don’t have too many demanding headphones, or too many portable amps for comparison. But I was using ATH-R70x (open back, 99dB sensitivity, 470ohm impedance, 3.5mm SE termination) which is my hardest to drive pair of cans. Also, I used N6ii w/E02 as my source while switching between C9 ($1,999), Romi Audio BX2 ($850), and XI Audio Broadway S ($1,599) amps. With C9 and BX2 I was using stock 4.4mm interconnect to N6ii, while with Broadway S which has RCA inputs, I was using Audioquest RCA to 3.5mm cable and DDHiFi single ended to 4.4mm adapter (the one which uses only L+/R+/GND side) to connect to E02.

All three, C9, BX2, and Broadway S were able to drive R70x without a problem with enough volume headroom. I had all three amps in low gain and approximated the volume % by looking at the volume knob. Under all these conditions and with ATH-R70x volume matched, BX2 was at about 20%, C9 was at about 50%, and Broadways S was at about 75% of volume setting. BX2 has too much power for IEMs and optimized better for demanding headphones, while Broadway S (Single ended) was optimized for IEMs. This puts C9 to be somewhere in the middle, optimized for both IEMs and headphones.

cayin-c9-14.jpg

Using R70x and a few other IEMs, I found BX2 to be more transparent, clean, uncolored, and maybe even a little colder while C9 (SS timbre) and Broadway S were being warmer, richer and more analog in tonality and also having a fuller body sound. When I switched C9 to Tube, the sound became even more analog and smoother, pushing farther ahead of Broadway S. Of course, these types of sound changes will depend on your IEMs and headphones, their sound signature and power requirements, and their pair up synergy with these amps. For me personally, it was a clear choice. BX2 has too much power and Broadway S only one “coloring” option. C9 was versatile to use with either IEMs or headphones and it gave me different options of coloring the sound, using either SS or Tubes and Class A or Class AB.

Another thing to keep in mind. Something like Broadway S (I only have single ended version since it is more IEM friendly) is definitely not a portable amp, and also not in a category where you will carry it around. It will be transportable to move from one desk to another without interrupting the playback since you are not plugged into the wall. Romi Audio BX2 is a portable amp, though in comparison to C9 it is only solid state and Class A. And while BX2 is shorter than C9, it also 10mm wider and a little thicker which puts it in-between portable and transportable. For my own personal preference, the width of the stack up is one of the deciding factors between portable and transportable because it makes it easier to grip.

cayin-c9-24.jpg

Pair up – IEMs/Headphones.

When I was testing and taking notes of C9 pair up with various IEMs and headphones, I received a few questions from my readers asking about benefits of using C9 w/tubes vs N8 w/tubes. Thus, I thought it will be an interesting pair up comparison. Here, I was using N6ii w/E02 + C9 (Low Gain, Tubes, Class AB) 4.4mm BAL vs N8 (Low Gain, P+, Tubes) 3.5mm SE, volume matched in every example.

Also, the reason why I thought N6ii w/E02 + C9 vs N8 will be good in this pair up comparison because due to a similar pricing some might find adding C9 to N6ii to be a more cost-efficient upgrade than going to N8. The DAC choice is important, but from my personal experience I find the amplifier section of the source to make it or break it!

IEMs.

Here are some of my favorite IEM pair ups with C9.

Oriolus Traillii - Both C9 and N8 have a wide soundstage expansion and holographic imaging with Traillii, but the width spreads more L/R with C9, depth/height the same but stereo separation is wider. C9 tonality is a little warmer, with a fuller body, but it doesn't affect the resolution or retrieval of details. Another thing, while both have excellent macro-dynamics of vertical expansion, I hear better micro-dynamics with C9 when analyzing layering and separation of the sounds. When switching SE of C9, the soundstage is narrower in comparison to BAL, but it is still wider than N8 SE.

EE Legend X - Interesting comparison here. As expected, the soundstage is wider with C9 vs N8, while imaging is similar. Also, I hear a smoother and warmer tonality of mids in pair up with C9. But it wasn't just the tonality, being more analog and fuller body, but also the quantity of mids that came up, making the sound more balanced in comparison to N8 pair up where mids/vocals are pushed a bit back with bass being more forward. With C9 the signature of LX is more W-shaped than L-shaped. Also, in LX pair up with C9 the bass had more analog texture.

64 Audio U18t - In addition to C9 soundstage being wider in comparison to N8, C9 also improves the U18t imaging, making it more 3D holographic, positioning sounds not just wider but also with more 3D depth. Both C9 and N8 pair up well with U18t, give the sound more bass texture and even extra bass quantity, and they both give the mids/vocals more body and help treble with more natural tonality. Actually, C9 was a little bit smoother in this pair up, but to my big surprise, U18t had more clarity and better resolution with C9 than N8, despite being smoother. N8 is also quieter when it comes to hissing, C9 has a little more hissing with U18t, but I personally preferred a pair up with C9 here.

VE Elysium - Ely really does come alive with C9. Both have a similar 3D imaging on a holographic level, but there is something interesting about the soundstage. C9 is definitely wider than N8, but I hear more width in vocals. But the most noticeable difference is in tonality, with C9 mids being warmer and having a fuller body, while still being very detailed and layered. Ely strength is in the reproduction of vocals, and C9 scales up its quality relative to N8, giving vocals more analog vacuum-tube flavor. Also, adding more texture to the bass, especially to sub-bass rumble.

cayin-c9-27.jpg

Here are a few IEM surprises where I actually preferred N8 over C9, in most of the cases due to hissing. But if you use iFi iEMatch, hissing goes away, dead quiet!

DUNU Luna - I do hear a wider soundstage when comparing C9 to N8, and the soundstage was even wider when I switched to 3.5mm of C9. I actually preferred using 3.5mm of C9 because 4.4mm had a bit too much power for Luna and hissing level was higher. With 3.5mm of C9 the hissing is lower and when music is playing, it is not even noticeable. When it comes to tonality, C9 does add more body and makes Luna smoothers, but I wasn't 100% sure if I like that because it took away some speed, making sound more laidback. Between C9 and N8, I preferred more transparent and revealing pair up with N8.

VE Erlkonig – this is a more sensitive iem where I do hear some hissing with C9 and N8, a lot more with C9 (BAL). Both have a very similar wide soundstage expansion and close to holographic imaging; I was expecting to hear a bigger difference, but it wasn't too far off. The tonality of C9 is warmer, especially with fuller body and slightly more textured bass, while resolution and retrieval of details is the same. Unlike Traillii, here the vertical dynamic expansion of the sound is very similar as well. The main difference is in tonality with C9 being warmer. Switching to C9 SE only yielded a slightly narrower soundstage expansion, while tonality remained the same, and it was still hissing.

EE Odin - I had higher hopes for this pair up with C9, but it wasn't exactly the best match in comparison to N8. C9 soundstage is wider than N8, even when I tried both 4.4mm and 3.5mm C9 outputs. But I was expecting a warmer and smoother tonality with a fuller body when comparing C9 pair up to N8, but surprisingly found the opposite where N8 pair up was smoother. That was one of the reasons I switched Odin to 3.5mm output of C9, but it didn't help. And on top of that, Odin hissing with C9 was noticeably louder than with N8. I preferred Odin pair up directly from N8.

Campfire Audio Solaris – this one going to be short. If you have high sensitivity IEMs, there is no way around it even if you switch to low gain. The hissing is there and it is noticeable. Of course, you don’t need amplifier for high sensitivity IEMs, but if you are still considering it, I wouldn’t recommend it if you are into instrumental or classical music where a black background is a must. Otherwise, you will get all the benefits of expanded soundstage and more natural body in sound.

cayin-c9-25.jpg

Headphones.

The full-size headphones pair up coverage is not as extensive, since I’m mostly use IEMs, but you can get some idea how it pairs up with demanding high impedance (ATH-R70x), planar magnetic (Empyrean), and classic Tesla dynamic driver (T5p 2nd gen) headphones.

Audio Technica ATH-R70x - These are my hardest to drive headphones (470ohm impedance, 99dB sensitivity) so I was looking forward to this comparison. Right away I noticed soundstage being wider with C9, not just subtle difference, but quite noticeable, especially for open back headphones. Next, N8 in low gain wasn't driving R70x properly, and I had to switch to high gain and still raise the volume to 56 while C9 remained at low gain, though volume was at around 50%. Comparing the tonality, you can clearly hear N8 being a little brighter and less colored, while C9 added warmth and body to the mids without affecting its technical performance. As a result, pair up with N8 was more transparent and a little faster, while with C9 R70x sounded fuller, warmer, and slightly more laid back.

Meze Audio Empyrean - The soundstage expansion and imaging have a lot of similarities between C9 and N8, just a little bit wider in C9, especially when focusing on mids/vocals. Tonality had a bigger gap until I changed N8 gain to high, otherwise bass was very soft and mids were lacking clarity in low gain. But even in high gain, N8 doesn't reach the same level of sub-bass rumble as C9 which pushed Empyrean to have a better low end extension, which is noticeable. Still, with either C9 or N8 the Empyrean sounds smoother and more laidback, and C9 has a lot more headroom to drive these planar magnetic headphones more efficiently while N8 has to be pushed harder.

Beyerdynamic T5p 2nd - The soundstage width in this comparison is quite noticeable, stretching T5p2 width more to the right/left, giving the sound more holographic soundstage and imaging. Tonality didn't change as much, both C9 and N8 paired up with T5p2 give you a natural smooth balanced sound with extra velvety bass texture, natural organic mids/vocals, and just enough tremble sparkle to maintain natural clarity and resolution, but I hear improved micro-dynamics and a little more clarity with C9 and wondering if this could be due to improvement in soundstage width and imaging which gives vocals more room to breathe. It's not a night'n'day difference, but I did enjoy T5p2 more with C9.

cayin-c9-22.jpg

Pair Up - DAPs.

When I started to share my C9 impressions on Head-fi, quite a few people also pinged me with questions about what is the best source/DAP for pair up with C9. It’s not a simple question because C9 will be connected to LO of your source, so in theory you have to determine which DAC output you like better. Different DAPs will have different DACs, and it will be a matter of a personal preference with quite a few variables in that equation. So instead, I decided took at a number of my sources (N8 was borrowed) and to compare each one directly between headphones output vs connected to C9. For this test I was using Oriolus Traillii, volume matched in every pair up comparison. C9 was set to Low Gain (LG), used with Tubes timbre and Class AB amp. I know these are brief impressions, but it clearly shows how consistent the performance of C9 when it comes to enhancing the sound of every DAP I tried it with.

Let’s start first by looking at Cayin “family” since I’m sure many will be curious about their N8 tubes/solid state DAP comparison or N8 vs equally priced N6ii w/C9 stack up.

Cayin N8 (HG, P+, tube, SE) vs N8 + C9 - more holographic soundstage and imaging, in both width and depth, fuller body with more textured analog tonality, improved dynamics. One thing I was truly surprised here is the change in the tonality because in theory we are talking about going from a single NuTube to a dual NuTube, but the discrete Class A/AB amplification modes of C9 in combination with dual NuTube have a different effect on tonality when compared to N8. Plus, Cayin acknowledged that NuTube circuit in C9 was redesigned.

cayin-c9-29.jpg

Cayin N8 (HG, P+, tube, SE) vs N6ii w/E02 + C9 - after going back and forth, I can confirm that to my ears N6ii w/E02 + C9 (tubes, Class AB) is an improvement over N8 (tubes, P+) where I hear a wider soundstage, improvement in micro-dynamics, and a more analog textured tonality. The sound of C9 with a fuller body and warmer mids creates a perception of a more analog textured sound without losing resolution or retrieval of details.

cayin-c9-28.jpg

If streaming is important to you, here are a few pair up examples with Android DAPs, where R8 and DX300 are currently the fastest open Android performers and SP2000 SS can be side-loaded with popular streaming apps.

Hiby R8 (HG, BAL, Turbo) vs R8 (BAL LO) + C9 - soundstage width expansion was noticeable, not exactly night'n'day, but you can definitely hear the difference. Also, the tonality change was more subtle but the improvement in retrieval of details and layering and separations of the sounds was the first thing I noticed right away after switching to C9 connected to LO of R8. The sound was cleaner, tighter, more resolving, and with improved dynamics.

iBasso DX300 (HG, BAL) vs DX300 (BAL L0) + C9 - improvement in soundstage width is probably the first thing I noticed, and not just the soundstage but 3D imaging. Tonality change was there, not very drastic, but C9 does add more analog texture to the sound and a little more body. The biggest improvement was in dynamics which improved the layering of the sounds, literally felt like more air between the layers of the sound.

A&K SP2000 SS (BAL) vs SP2k (BAL LO) + C9 - while comparing direct HO output of SP2k vs paired up with C9, I hear the improvement in soundstage width, quite noticeable, and also tonality got more analog with a tube flavor when using C9 with NuTube output. SP2k by itself has a very clean precise sound, C9 adds a nice analog texture touch to it.

If you don’t care about running apps directly from your DAP and OK with Bluetooth/LDAC pair up to your smartphone, P6 Pro, LPGT, and WM1Z are some of the non-Android top choices which can also benefit from C9 stack up.

L&P P6 Pro (HG, BAL) vs P6 Pro (BAL LO) + C9 - in this comparison the change was more subtle. I do hear the improvement in soundstage width when paired up with C9, it is noticeable but not necessary night'n'day change. Also, with C9 one improvement I did notice was bass texture, impact, and articulation improvement. Connected directly to P6 Pro Traillii bass was a little softer while gaining more authority with C9.

Lotoo LPGT (HG, BAL) vs LPGT (BAL LO) + C9 - the improvement here was noticeable. Soundstage width expansion was definitely expected, with C9 the sound is more holographic. The tonality change was more subtle, but the technical performance improved with a noticeably better retrieval of details, improvement in layering and separation of the sounds, and also improved dynamics.

Sony WM1Z (HG, BAL, direct sound) vs WM1Z (BAL HO) + C9 - since WM1Z doesn't have analog LO, I had to use BAL headphone output, so we are talking about double amping here. Adding C9 to BAL HO did widen the soundstage and of course boosted the output power, but also improved the bass impact, giving it more authority with a little mid-bass boost, and adding more analog texture to the mids/vocals. I had all the effects off when comparing to direct WM1Z connection, and the effect of adding C9 reminded me of Vinyl Processor "standard" preset, just a little bit clear and more resolving. But the biggest surprise here came when I switched to Pre-amp, letting WM1Z volume control the output. I heard a similar improvement in soundstage and bass, but in additional to a more analog texture, the sound was also more resolving, cleaner, tighter, and with improved retrieval of details. In general, WM1Z and 1A are underpowered DAPs thus adding amp is no brainer. But I also found C9 to benefit 1Z more than some other DAPs, especially using Pre-Amp input.

cayin-c9-23.jpg

Conclusion.

I have a little confession to make: when I received C9 amp, at first, I wasn’t sure how to approach this review. As many are aware, I have a lot more experience with DAPs and IEMs, don’t have desktop or portable tube amps, and don’t use power hungry high impedance low sensitivity headphones. Yet, in the last few weeks while listening to music when working from home at my desk, I found C9 to be so addictive that I couldn’t stop swapping different DAPs to see how C9 enhances their performance with my favorite IEMs.

And then it dawned on me. While not exactly the same as cable rolling, it was a very similar experience of trying to improve the synergy between various DAPs and IEMs, except the variable here was the source. And instead of a subtle refinement, I was able to hear a more noticeable improvement with an expanded soundstage that pushed the sound to a more pronounced stereo separation and 3D imaging, a more natural fuller body detailed tonality colored by vacuum tubes, and improved micro-dynamics.

If you think about it, the two main audio building blocks of any DAP is the DAC and the amplifier section, and manufacturers have to deal with a limited board space which puts a constraint on the design of amp section. That is one of the reasons why audiophiles look into external amps to enhance their source. C9 offers many different options for such enhancement, from a solid state to a vacuum tube, Class A or Class AB, single ended or balanced, serious output power, and even replaceable batteries. With a price tag of $2k C9 does cost more, but also offers a lot more than any other portable amp. And while DAPs come and go, C9 should last you a while to enhance any source you pair it up with.
Marat Sar
Marat Sar
Jesus hell twister... is that an Iliad interconnect? INSANITY!
searchingtom
searchingtom
Great review. I will purchase a used one down the road for sure.
1
111MilesToGo
Thanks for another great review. How would you rate the final A8000 pair-up with C9, driven e.g. by Cayin N6ii + E01/E02/A02? Treble sensitivity being the main concern with A8000. Thx in advance.

twister6

twister6 Reviews
Headphoneus Supremus
A Leap Forward!
Pros: natural tonality with a finetuned higher resolution in upper frequencies (relative to M8), high output power, solid build, modular headphone sockets, large 6” screen with a small secondary display, fast performance of Android 10 and Snapdragon 665 SoC.
Cons: price, size, leather case is optional, hassle of dealing with modular sockets on the go.


The product was provided to me free of charge for the review purpose in exchange for my honest opinion. The review was originally posted on my site, and now I would like to share it with my readers on Head-fi.

Manufacturer website: Shanling. Available for sale from a number of authorized on-line retailers like Musicteck.


Intro.

After posting the review of Shanling M8, last year on Tw6, we continue to receive many questions about this audio player, clearly showing that popularity of this DAP remains strong. Today, many DAPs strive to achieve higher resolution, tilting the scale toward a more revealing side of tuning. Shanling house tuning does the opposite, going for a more organic natural tonality with a warmer analog sound. And it looks like it resonated quite well with many audiophiles. The only thing holding M8 back was a slower processor and older Android version which came up in many review comments and some Head-fi discussions.

Of course, Android performance is subjective, considering some audiophiles don’t even care about streaming and want just a pure audio playback. But you have to stay competitive in terms of hardware performance and considering that many other DAP releases already aligned themselves with Snapdragon 660 SoC and optimized Android 9. Shanling answered the challenge with M9, leapfrogging to 665 SoC and moving to Android 10. The release still features a dual AK4499 since Shanling had a reserve of these flagship AKM DACs, though there is a limit to how many units they can manufacturer until stock is depleted and M9 is refreshed.

After finishing my testing, I have been using M9 DAP for a few moths already, and it became a regular feature in many of my reviews, as part of the comparison and source pair up examples. Today, I’m ready to shine the spotlight on this latest Shanling flagship release with its own dedicated review.

shanling-m9-21.jpg

Unboxing and Accessories.

The unboxing experience of M9 is nearly identical to its M8 predecessor. The only difference I noticed is when you remove the top of the box, the bottom has cutouts on the sides for an easier extraction of the wooden storage box. I mean, in theory it should be easier, while in practice it was the opposite in comparison to what I saw in M8 unboxing pictures. Of course, all just minor details, and the wooden storage box is still the star of the unboxing experience. While the design of the box is identical to the one which comes with M8, the color of M9 wooden box is lighter, with a color shade somewhere between M8 box and SP2000 box.

shanling-m9-02.jpgshanling-m9-04.jpg

Inside this premium giftbox quality storage, you will find a foam tray with a precise cutout for M9 and a leather case for headphone interchangeable sockets. While I personally don’t use packaging boxes for long- or short-term DAP storage, this is something I wouldn’t mind keeping on my desk. Though, for storage in the box you would need to make extra room to fit M9 with its own case. Furthermore, since M9 also carried over interchangeable headphone socket design, previously introduced in M8, the included small leather case, sockets, and socket removal tool are identical, with the only exception of 3.5Pro (a rare 3.5mm TRRS balanced standard) having black plastic jack inlay instead of a red one like it was in M8. Other included accessories were a high quality usb-c cable with a braided jacket, and a plastic screen protector. My review unit already arrived with pre-installed tempered glass screen protector, or at least based on its thickness I assumed it was tempered glass.

shanling-m9-05.jpgshanling-m9-06.jpg

The only remaining question, what about the leather case? While not included in a stock packaging, the leather case is optional, but I noticed that from day one Musicteck offers it for free with every purchase of M9, though I can’t speak for other retailers. The case has a very interesting exoskeleton design, with a stiff shell and leather surface on the outside (smooth, aged) and inside (soft, suede) that wraps around the DAP, enhancing its grip rather than offering a drop-down protection. I personally like this design with a big M-cutout on the back and large cutouts on the sides, and full opening at the top and the bottom. I like it because it enhances the grip without hiding the details of the chassis design. Not too many other options are available, and I few I’ve seen add bulk and hide the sexy body of M9. The only nitpicking here is having too little clearance around the volume wheel. It works, but the wheel does rubs against the edge of the case.

shanling-m9-18.jpgshanling-m9-19.jpg

Design.

With dimensions of 152mm x 82mm x 22mm and the weight of 409g, there is no denial M9 is a big boy. But the slick design and the manageable thickness of the chassis keeps this DAP portable in my hand. For me personally, if I can easily wrap my hand around the DAP, I consider it to be portable, rather than transportable, though the length of M9 makes it no exactly pocket friendly.

Surrounded by aviation-grade aluminum body frame, the top of the DAP has edge-to-edge glass screen with a gorgeous 6” high resolution (2160 x 1080) display. With such a large display, it is always a challenge to come up with a more original design without looking like another phablet. I think Shanling done a great job to overcome this challenge, introducing rounded sides with a sculptured wave pattern exterior. At the same time, they kept a traditional 3-button transport control (play/pause and skip) on the left side and multi-function volume/power wheel on the right side.

M9 vs M8
shanling-m9-10.jpgshanling-m9-11.jpgshanling-m9-12.jpgshanling-m9-13.jpgshanling-m9-14.jpg

The volume wheel is a low profile and, in addition to controlling the volume with a precise click action as you turn in, also functions as push-button to control the power with a long press or turn the display on/off with a short press. Above the wheel you have a status led. At the bottom you have usb-c port in the middle and a spring-loaded micro-SD card opening with a dust cover to the left. The top features a clean design with a single modular headphone port, the same interchangeable port introduced in M8. As a matter of fact, these modules are backward compatible between M8 and M9 since they feature the same interconnect socket.

shanling-m9-07.jpgshanling-m9-08.jpg

I do like the idea of a modular headphone port design because I mostly use 4.4mm terminated IEMs. But I can also see it being a bit of a hassle for those who are on the go and need to switch between 4.4mm and 3.5mm jacks. But overall, it’s clever since some people still have 2.5mm cables, while others switched to 4.4mm. Some still use 3.5mm, especially with full size headphones, and maybe a few were curious about 3.5Pro balanced plug (a standard that went nowhere). Plus, Shanling mentioned they might look into the feasibility of XLR socket in the future. Anything modular allows you to futureproof your design, including being able to easily fix a malfunctioning headphone jack.

And speaking of another interesting engineering idea, Shanling raised the bar again in M9 design. They decided to introduce a secondary small OLED screen located in the notch of the screen at the top of the display, to show the time, charging status, volume, or sample rate. The secondary screen could be turned off or stay always on before M9 enters a standby mode. Or you can select to keep it synchronized when screen is on, or have it reversed when screen is off. I found this secondary screen to be very useful, especially when controlling the volume with a main display off while secondary one shows you the value as you adjusting it.

shanling-m9-22.jpg

Under the hood.

As I already mentioned, M9 features the same flagship dual AK4499EQ DACs as M8, supporting hi-res sound up to 32bit/768kHz as well as DSD512 and MQA16x unfolding. M9 also utilizes the same amplifier architecture as in M8, including OPA1612 and BUF634 opamps and ADA4610 precision amp. But despite of the same amp components, the output power scaled up, with SE going from 260mW@32ohm to 460mW@32ohm, and BAL being boosted from 840mW@32ohm to 920mW@32ohm, while still maintaining less than 1ohm output impedance. The sound tuning was updated as well, covered in the next sound analysis section.

While some could argue that sound improvement is subjective and a matter of a personal taste, there is no question about a huge step forward in Android performance of M9 by going from Android 7.1, Snapdragon 430, 4GB of RAM, and 64GB of internal storage (in M8) to Android 10, Snapdragon 665, 8GB of RAM, and 256GB of internal storage (in M9). Using both DAPs side by side gives you a clear picture of a noticeable improvement, which I also confirmed in my testing with 2.5x score improvement when running AnTuTu 3D Benchmark test. Carried over were 2-way Bluetooth 5.0 support with Rx (LDAC, SBC) and Tx (LDAC, LHDC, aptX HD, aptX, SBC), and dual band 2.4G/5G Wi-fi (featuring Qualcomm WCN3980 chip).

shanling-m9-24.jpg

As already mentioned, screen was upgraded from 5” 1080x1920 (M8) to 6” 2160x1080 (M9). The battery capacity was upgraded as well, going from 7000 mAh (M8) to 8350 mAh (M9) which results in the improvement of SE battery life going up to around 18hrs and BAL battery life going up to about 10hrs. You get a more noticeable improvement in battery life using SE port which is impressive considering SE output power almost doubled. And when it is time to recharge, you can take the advantage of a fast 18W (9V, 2A) charging speed using QC3.0 compatible chargers.

shanling-m9-23.jpgshanling-m9-25.jpg

The advantage of Android 10 and fast Snapdragon 665 SoC processor is not only in improvement of user interface performance, but also compatibility with many apps that were optimized to perform better using later Android OS and faster processor. Of course, you are still at the mercy of 3rd party app developers, just like when Tidal updated their app early this year which broke its compatibility with M9 until Shanling had to fix it. I have tested M9 with many different streaming apps, everything worked great. Plus, if you want to switch the default Shanling playback app to something else, Google Play store gives you access to all of that.

shanling-m9-27.jpg

Sound Analysis.

The sound analysis of M9 was done using Oriolus Traillii and Aroma Jewel, playing a selection of test tracks, such as Agnes Obel “The curse”, Sandro Cavazza “So much better” (Avicii remix), C-Bool “Never go away”, Ed Sheeran “Shape of you”, Alan Walker “Darkside”, Galantis “Hunter”, Iggy Azalea “Black widow”, Indila “Boite en argent”, Dua Lipa “Love again”, Counting Crows “Big yellow taxi”, David Elias “Vision of her”, and Michael Jackson “Dirty Diana”. I had about 200hrs of burn in time before I started analyzing M9.

shanling-m9-33.jpg

I prefer to describe the DAP sound based on the comparison to other DAPs and pair ups with different IEMs/headphones since the DAP by itself doesn’t have a “sound”. What we hear is how the sound characteristic of a source shapes the sound signature of connected IEMs/headphones or the difference in sound relative to other sources using the same pair of IEMs/headphones. As a result, this section of the review usually summarizes what I find in the follow up Comparison and Pair-up sections. Of course, this is my subjective opinion, describing how I hear it.

The original M8 set a high bar with its natural warmer analog tuning and more intimate soundstage presentation. Thus, I’m sure, many were wondering about the direction of M9 tuning considering implementation of the same pair of AK4499 DACs. But you have to keep the mind, DAC sets the baseline level of the sound, while the final tuning direction will be shaped by the amplifier section. In my analysis of M9 tuning, I found that M9 carried over the warmth in the lower side of the frequency range with more weight and texture in the bass, deeper rumble, fuller body lower mids. But it also counterweighted that with more transparency and revealing tonality of upper mids and airy controlled sparkle of the treble.

Every flagship release aims to swing the pendulum of tuning to the warmer or the brighter side of neutral reference. Here, the bass and the lower mids are focused on taking that “swing” toward the warmer side of tuning, while upper mids and treble counterbalance it with a more revealing “swing” to add higher resolution, a bit less density, and improved layering. M9 is not an improvement over M8 tuning, each one has their unique sound-personality, a different flavor of ice cream you might enjoy depending on your mood, or in this case, depending on pair up synergy with IEMs/headphones. The improvement took a big step forward in the hardware performance, but the sound gives you a different flavor of tuning.

The soundstage is definitely above the average, expanding more in depth and height, especially depth, by projecting sound further out of your head. It still keeps a bit of that intimacy found in M8, but it expands a bit wider relative to M8. And airier treble of M9 helps with layering and separation of the sounds, which also shows the improvement in vertical sound dynamics, making the sound more expanded and less compressed.

Android mode vs Prime mode.

Prime Mode is Shanling version of the pure audio mode where it kills a number of processes running in the background to optimize the performance of M9 for audio playback without streaming or access to other apps. You can’t even get to the screen with your apps, only have access to Shanling audio player app. The switch between Android and Prime modes is very fast, no need to reboot the DAP, also allowing you to go quickly back and forth to compare the sound. In this comparison I found everything to be nearly identical except for the soundstage being noticeably wider and imaging being more 3D in Prime mode.

4.4mm (BAL) vs 3.5mm (SE).

As expected, due to a difference in output power, I had to readjust the volume when going between BAL and SE sockets. But other than that, the tonality and the technical performance were identical.

Hissing test.

It Pass my hissing test without a problem. Actually, what I noticed, during a playback at a normal listening volume, background is pitch black and I don’t hear any hissing. But when I lowered the volume down to almost zero, I did hear a little bit of hissing with CFA Solaris. But like I said, at a normal listening volume I hear zero hissing and pitch-black background.

EMI/RFI interference.

Adding this test to my reviews since people often ask me if I hear any interference in sound when streaming with DAP next to my phone. With M9 streaming Tidal and my S22 phone next to it, I wasn’t picking up any interference.

shanling-m9-32.jpg

Comparison.

I was using Traillii and Jewel in this testing, volume matched in every comparison. Also, please keep in mind, I’m mostly focusing on a different in sound. Each DAP has its unique functionality with Pros and Cons. Also, for a faster and more accurate DAP comparison, I was using Oriolus RaoSound 4.4mm analog switch.

M9 vs Shanling M8 (high gain, sharp roll-off filter, M8 volume V28 and M9 volume V24) - very similar imaging, but after going multiple times back and forth, I hear M9 sound to spread wider left/right, though imaging is similar. The tonality between these two DAPs varies. M8 has more coloring, more warmth which is noticeable in lower and upper mids, especially when focusing on vocals, and a little more weight in the low end. In contrast, M9 is more transparent, more neutral, and less colored relative to M8. M9 still has a similar natural organic tonality, but it manages to achieve this level of musicality with less warmth and more transparency in upper frequencies. Also, M9 has some improvement in technical performance, having a higher resolution, thanks to airier treble, and more expanded vertical dynamics. Nothing is night'n'day, but I still find the improvement to be noticeable. The rest of the changes is related to the actual OS performance while running the later Android, using a faster processor, having a more polished and responsive user interface, and implementing a higher output power.

M9 vs A&K SP2000 SS - at initial listening, I had to do a double take because of how close they sound, especially considering AK4499 DAC similarity. I'm glad I was using a hardware switch so I can go quickly back and forth multiple times to focus on the differences. There are not as many, but a few stood out. Starting with the soundstage, it is nearly identical in every direction. But to my surprise, the imaging is different, being more holographic in M9, and more center focused in SP2k. Another noticeable difference was in treble, with SP2k being a little brighter and splashier in comparison to a slightly more natural tonality of treble in M9. Other than that, the rest of the tonality and the technical performance are very similar. Plus, you have to keep in mind fully open Android environment of M9 vs closed environment of SP2k. I actually think, for those who want to upgrade their SP2k without too much deviation from the original sound, and with technical and tonal improvements, M9 is a very good choice.

M9 vs iBasso DX300 MAX SS - another comparison of AK4499-dac DAPs. Starting with the soundstage and imaging, I found soundstage expansion to be nearly identical, but MAX imaging is a bit more holographic and multi-dimensional. Tonality is different in this comparison. M9 has a more neutral natural tonality while MAX has a more neutral revealing tonality. I do hear a little more weight and impact in Traillii paired up with M9, while with MAX the bass is a bit more neutral in comparison. Mids in M9 are more organic while MAX mids are brighter, more revealing, more micro-detailed, and slightly more forward. Of course, this comparison is being made relative to have I hear it with Traillii and Jewel. Treble also varies, with MAX treble being crisper and brighter, while M9 treble also being well defined, but smoother in overall tonality. Both of these DAPs have a fast Android performance, but the size and the weight of MAX makes it less portable and more transportable, while M9 is more portable and pocket friendlier.

M9 vs Sony WM1ZM2 – the new ZM2 golden brick is making its debut in my comparisons, and the tables have flipped here. First of all, let's start with soundstage and imaging. Imaging I found to be very similar, but soundstage is a bit wider in M9. Tonality is where ZM2 sounds more organic, smoother, a touch warmer, with an even stronger bass punch. M9 still sounds natural and detailed, but relative to ZM2, M9 has a bit less coloring in mids, giving the sound more transparency. In contrast, ZM2 gives the sound more musicality. Their technical performance is not too far off. Despite a difference in tonality, they both have a nicely layered sound with high level of resolution. But if you want a natural tonality with more transparency in mids, go with M9. While if you want a natural tonality with more organic warmer mids and more impact in bass, ZM2 is a good choice. They are both running on open Android, but faster processor of M9 makes interface snappier and more responsive.

M9 vs Cayin N8ii - With N8ii in SS output, the sound performance of M9 and N8ii is not too far off, from the technical performance of the soundstage expansion to layering and separation of the sounds. But with SS output, N8ii tonality is just a little more revealing in comparison to a slightly warmer tonality of M9, especially when analyzing mids/vocals. But once you switch N8ii to Tubes, and then play around with Class A vs AB amp mode, the N8ii now sounds smoother and with a bit fuller body in mids when compared to M9. Based on this, M9 tonality is somewhere between SS and Tubes of N8ii. Both have a fast Android performance, and both are on a large size with a bit more heft.

shanling-m9-28.jpg

Pair up.

In this section of my review, I will go over how various earphones and headphones pair up and sound with M9. In every pair up, volume is noted with “V”.

Pair up with Headphones.

Tested in “headphone” turbo mode on M9.

Audio-Technica ATH-R70x (V30) – The soundstage expansion is wide open with 3D holographic imaging. The sound signature is balanced, pushing just a bit mid-forward, and the tonality is natural, transparent, leaning more toward revealing side, and even being a bit cold. The bass performance is tight, with a good sub-bass extension, a polite rumble, and articulate mid-bass punch. The balance of the bass is shifted more toward the mid-bass in this pair up. Mids have natural transparent body, and sound clear, detailed, layered, not too much coloring. Treble is clear and detailed, airy, and with a little extra sparkle. M9 drove these 470ohm cans good, but not sure if it was to their full potential since bass performance was leaning closer to neutral.

MEZE Audio Empyrean (V23) - I hear a very wide-open soundstage with an excellent holographic imaging. Sound signature is balanced, and tonality is also natural, transparent, revealing. Bass has a deep extension with a polite textured rumble and a tight mid-bass punch. Again, more weight is shifted toward the mid-bass punch here. Lower mids have a good amount of neutral body, while upper mids have plenty of natural clarity, exhibiting an excellent retrieval of details. The sound has a great layering in mids. Treble is clear and detailed, has a little extra crunch but nothing harsh or splashy.

Beyerdynamic T5p 2nd (V19) - Another very good pair up with a great soundstage expansion and realistic 3D holographic imaging. The sound is balanced, just with a slightly mid-forward bias. Like in other pair ups, the bass here has a polite sub-bass rumble and tight articulate mid-bass punch. The overall weight of the bass shifts more toward mid-bass. Lower mids were slightly north of neutral, with a good amount of body, while upper mids have more clarity, transparency, and micro-details. Vocals sound clear, detailed, even a bit bright. Treble also has plenty of clarity, details, and natural sparkle with a good airy extension.

I was a bit surprised how in all of these headphone pair ups the focus of tuning was shifted more toward more revealing upper mids, while bass impact was rather polite.

shanling-m9-35.jpg

Pair up with IEMs.

Switched headphone turbo mode off, and selected high gain in M9.

Oriolus Traillii w/Chiron cable (V24) - Wide open soundstage with 3D imaging. Sound signature is perfectly balanced, overall tonality is natural and a bit more revealing. Bass goes deep, with elevated rumble and fast punchy mid-bass impact. Mids are natural in tonality, with above neutral amount of body in lower mids and organic detailed tonality in upper mids, quite resolving and revealing. Treble is clear and detailed, has extra sparkle and crunch in mid treble.

Aroma Jewel w/FT cable (V26) - The soundstage is wide open and expanded in all 3 directions with holographic imaging. Sound signature is balanced as well, while tonality is more neutral with a slightly more mid-forward revealing presentation of the sound. Bass goes deep, with a textured sub-bass rumble and a punchy and slightly hollow mid-bass; the bass is tight and articulate. Lower mids are leaner which gives upper mids more transparency, less coloring, making them more revealing but not too bright. Treble is crisp and detailed, not splashy or harsh. In this pair up, Jewel does have a little extra energy in treble, but the treble sill sounds natural.

EE Odin (V23) – I noticed right aware there is no hissing in this pair up. Pitch black background with zero hissing at any gain. Bass is well controlled, with a deep and tight sub-bass rumble and fast, punchy, and articulate mid-bass impact. Mids are leaner, more revealing, layered, micro-detailed, but not bright and not too forward, the overall sound signature is still well balanced, but also has a bit more focus on upper mids. Treble is crisp, clear, detailed, more revealing and yet, still well controlled and without any sign of harshness or splashiness. The soundstage is also big, expanded, holographic.

FiR Audio XE6 (V23) – Wide open soundstage expansion with a slightly out of your head depth and holographic imaging. A mildly U-shaped signature with a powerful speaker like analog bass, thanks to XE6 kinetic bass drivers, natural revealing mids and vocals which are a bit recessed, and a crisp detailed treble. The XE6 kinetic bass punches right though the mix. Also, zero hiss, regardless of the gain. The neutral revealing nature of M9 extracts more details from the mids of XE6.

Campfire Audio Solaris 2020 (V14) – Since this is Campfire Audio iem, the first question will always be about hissing. During playback, the background was black, and I didn’t hear any hiss at all. Interestingly, when I lowered the volume to zero and hit play, there is some waterfall type of hissing, but during the actual playback, I didn’t hear any. The soundstage is big, with an overall sound being holographic and quite expanded. Also, the sound sig is balanced, while the tonality is brighter and more revealing. Bass has a deep sub-bass rumble with a fast well controlled punch. Bass actually has some extra weight and texture. Mids are revealing, and a bit colder in tonality. Treble is still quite energetic, but not too elevated and not that fatigue. I was impressed with this pair up, especially bass performance.

VE EXT (V30) – EXT does need a bit of a power boost, but even in high gain the sound was great without a need to go into a turbo mode. Soundstage is very big in this pair up, expanding wide and deep, along with 3D holographic imaging. Sound sig is quite balanced and W-shaped with a bit extra emphasis on bass and treble. Bass is very powerful in this pair up, going deep with elevated rumble and hitting hard with a very strong punch. Mids have a good balance between lower mids natural body and upper mids clarity, resolution, and details. Mids do truly shine in this pair up. Treble is crisp and airy, clear and detailed. This was by far the best pair up with EXT I heard.

shanling-m9-34.jpg

Other Wired/Wireless connections.

In this section of the review, I will go over various wired and wireless connections I tested and verified with M9.

Line Out

Once connected to external amplifier and LO is selected from notification bar shortcuts, volume can't be controlled from M9, only from external amplifier (if it has volume control). I tested LO output with Cayin C9 and Romi Audio BX2. In either pair ups I didn’t hear any clipping or distortion. As expected, BX2 gave me more transparency, very clean sound delivering the tonality of AK4499 dac output without any coloration. C9 gave me more coloration and smoother tonality, though I found BX2 soundstage to be more expanded in width when compared to C9.

USB DAC

When connected to my Win10 laptop, in notification area of M9, once you swipe it down, I had to select USB Mode to be “usb dac”. M9 was recognized right away, and I was able to control volume from either laptop or M9. The sound using M9 as usb dac with my laptop was identical to listening with M9 standalone.

Bluetooth Wireless

You have 2 modes of Wireless Bluetooth operation, Tx and Rx.

BT Rx – You need to turn on Bluetooth and select Bluetooth Amp mode in the same setting screen, then search and pair up with M9 from your smartphone. Enable LDAC on a smartphone and start streaming from smartphone while using M9 as a wireless BT DAC. Volume was controlled from both, my S22 smartphone and M9. Also, correct protocol (LDAC) was shown on M9.

BT Tx – Paired up M9 with Hiby WH2 TWS earphones within seconds. Found it to work across 28ft of open space, full remote control from TWS earpieces. Within paired earphones setting on M9 there was no switch to enable LDAC, but when I went into Developer Options menu, I was able to confirm LDAC codec being used. Volume could be controlled from M9. The sound was as good as when being paired up with my S22, but the BT distance was shorter in comparison to my smartphone.

Digital usb-c out

I tested this interface using a new Shanling UA5 usb dac dongle which got recognized right away. I was using Shanling own music audio app, and set M9 volume to the max. This way, Volume was controlled only from UA5, but in theory you can control the volume from either M9 or UA5. Sampling rate was displayed correctly. One interesting observation here, when comparing UA5 sound connected to my S22 vs M9, with the same cable, playing the same song, and with the same pair of iems, M9/UA5 has a better layering and improved vertical dynamics. I have no idea how to explain this, but I went a dozen of times, back and forth, and always came back to the same conclusion.

shanling-m9-31.jpg

Conclusion.

Sometimes, audiophiles get so focused on hardware specs, they miss the big picture. When M9 was announced, I heard from some people they don’t see the point of this upgrade considering it has the same DAC and amplifier design as in M8. Perhaps, if you don’t care about Android experience with a faster user interface, this holds true. But in my opinion, Android 7.1 and older Snapdragon SoC was holding Shanling DAPs back. You can have the best tuned system in the world with a fully optimized OS, but you are still at the mercy of 3rd party app developers who constantly push updates optimized for the later OS and the faster hardware. M9 release is a BIG deal for Shanling because they finally took a BIG leap forward to introduce the next gen platform.

And it’s not just the next gen with Android 10 and Snapdragon 665, which btw is a good stepping stone for a future Android 11 upgrade if Shanling decides to, but also a lot of other noteworthy improvements. Having dual AK4499EQ and the same Amp architecture doesn’t mean the sound will remain the same. While M8 was well known for its warm analog sound, it had a bit of a limitation in pair up synergy with some IEMs. M9 addressed it by finetuning upper frequencies to bring higher resolution and to improve the retrieval of details, making its compatibility more universal across different IEMs/headphones. Then, doubling the power of SE output also improves its pair up compatibility with more demanding headphones so you don’t have to upgrade the cable to balanced, especially if cable is not removable.

There is a laundry list of other improvements, too many to list in the Conclusion. Basically, Shanling captured all the best of M8 and took it to the next level, literally, inside out. One thing I do have to note, this release of M9 came equipped with the original flagship AK4499 DACs, and once they use up the remaining stock of these discontinued DACs (everybody is familiar with AKM factory fire and the outcome of it), M9 will be refreshed with another DAC, turning this into a bittersweet release. But considering Shanling’s house tuning with a more natural organic tonality, I have no doubt the refresh will be heading in the same direction. At the same time, the original M9 is still available for sale, still going strong, and still one of the top available DAP performers.
D
Donpio
Hola, aunque el análisis es bueno, echo de menos los FiiO M11 Pro y siguientes FiiO en la comparativa de DAPs. En mi opinión no se puede obviar "los FiiO" cuando se valoran DAPs
Un saludo

twister6

twister6 Reviews
Headphoneus Supremus
Pros: balanced detailed sound, excellent resolution, soundstage expansion, lots of accessories.
Cons: needs a cable upgrade to make it shine, might be a shallow fitment for some.

I would like to Thank Unique Melody and their distributor MusicTeck for providing me with review samples of UM Miracle and UM Maestro in exchange for my honest opinion.
 
Manufacturer website: http://www.uniquemelody.co/, Distributor website: http://www.musicteck.com/#!unique-melody/cmn5
 
Unique Melody NEW Facebook page: https://www.facebook.com/UniqueMelodyInternational/
 
Even so this is a combined/comparative review of Miracle and Maestro, the focus is on UM's latest Maestro flagship release which is reflected in rating and pros/cons.
 
* click on images to expand.

 
I became aware of UM in-ear monitors awhile back when I came across an old thread on Head-fi where the members got together to crowd-fund purchase of UM Miracle for a legendary reviewer Joker.  This CIEM received a lot of high praises and still listed among the top rated custom IEMs on Head-fi, though majority of the reviews are dated back to 2013 which is probably around the peak of its release.  Over the years, competition stiffened up with more multi-BA driver releases and the race to pack more drivers in a single shell.  UM responded with a few updated designs, including the latest 12-driver Maestro.
 
Right away I noticed that UM likes to name most of their models starting with the letter "M", taking the craftsmanship of unique Melody to the level of 4-driver Mage, 5-driver Merlin, 6-driver Miracle, 10-driver Mentor, and 12-driver Maestro.  I'm also grateful that I got an opportunity not only to review their latest Maestro, but also to be able to compare it to Miracle.  The #1 question I get asked about multi-driver IEMs is if extra drivers worth the additional cost or if doubling the number of drivers will double the sound quality.  Hopefully being able to test and to compare 6xBA Miracle and 12xBA Maestro will answer this question.
 
Furthermore, considering both of the models I received for this review are universal, look nearly the same, and include identical accessories, I decided to structure my review by making unboxing, accessories, cables, and design sections common and then going into individual sound description and corresponding comparison.
 
Unboxing.
 
Arrived in a very elegant small all black 4"x4"x3" box, it had a glossy black print with a company name/logo on the top and "hand crafted with love" message on the bottom - a nice warm touch.  With a cardboard sleeve out, inside you will find another small box with accessories and underneath a foam cutout with all metal storage case.
 
I guess to keep the packaging compact, UM decided to stay away from a traditional Pelican style storage box, personalizing the unboxing experience with a custom storage case.  The only other thing on the box was a barcode label with a serial number.
 
um_miracle_maestro-01_zpsqvbpq2kj.jpg um_miracle_maestro-02_zpsrdfherdm.jpg
um_miracle_maestro-03_zpszox6bdo1.jpg um_miracle_maestro-04_zps5cduwigj.jpg
 
Accessories.
 
As I mentioned before, instead of a common Pelican storage case used with a number of other Custom IEMs, UM decided to go with something different by offering a metal (looks like machined from a solid aluminum piece) round storage case with a powder coated finish and threaded top.  The case itself is about 3" in diameter and 1.5" in height, has removable rubber lining, and enough storage room for a thicker custom cable without bending memory wires.  The only problem here, once you tighten the top - I had a hard time unscrewing it open.  Upon closer examination, I found the culprit to be a rubber lining in the top cover part which tightens the seal a bit too much (like a gasket) - removing that lining piece fixed the problem.
 
Other accessories included a small velvet drawstring pouch - good to have but it's too small to use with a cable attached, maybe to transport the shells by itself?  I mean, you can still stuff everything inside, but only with a thinner stock cable and by bending memory wire, a very tight fit and unpractical.  Other included accessories were a cleaning cloth - great to wipe the fingerprints off the shells, an airplane adapter (a filler, but some might find it useful), and an earwax cleaner (to clean the nozzle bores).  Due to universal fitment, you also get 2 sets of eartips, soft cap all silicone XS, S, M, L set and 4 sizes of soft memory foams (non-Comply).
 
I do like the metal case a lot, and it actually makes a cool paper weight with a neat "UM" logo on the top of it.  But at 126g alone, plus another 26g for shells w/cable, it's not exactly a pocket friendly storage, though makes a fine tabletop centerpiece or a secure storage on the shelf.  I prefer silicone eartips and actually found the included ones to work quite well.  At some point I did switch to Spiral Dots, but only due a personal preference since their cap is a bit stiffer and stem is longer.  Universal fit Miracle/Maestro have a rather shallow insertion and some might want to look into eartips with longer stem/core (like hybrids) to "extend" the fitment, or use foamies instead.
 
um_miracle_maestro-05_zps6rgnaaxh.jpg um_miracle_maestro-06_zpsmenvkbec.jpg
um_miracle_maestro-07_zpsdce9xw5a.jpg um_miracle_maestro-08_zpsnyyrtjtn.jpg
 
Cables.
 
Both universal Miracle and Maestro designs are identical, including a recessed standard 2-pin socket.  When it comes to Custom or Universal multi-driver IEMs, removable cable is a must to allow not only a replacement if it breaks, but also to give you an option for an upgrade.  But I always recommend to start with a stock cable first and get to know the sound before proceeding with any upgrades.
 
There are 2 separate twisted conductors from each earpiece with a memory wire piece adjacent to 2-pin connector, stamped with corresponding L/R designator.  The y-splitter is just a clear shrink wrapped tube and another loose clear tube piece used as a chin slider.  All 4 individual conductors have a tight black silicone shielding and are twisted down to a right angled jack with a nice strain relief and a unique flat shape which adds a custom touch to otherwise generic cable.  There is also a removable velcro piece to keep cable in a loop together when wrapped for storage.  I'm pretty sure the wires are regular OFC copper.  Overall, this is a generic looking cable, a bit stiff, but no microphonics effect.
 
um_miracle_maestro-10_zpsicbsqrf4.jpg um_miracle_maestro-11_zpsnkyifaqx.jpg
um_miracle_maestro-12_zpsjipso0of.jpg um_miracle_maestro-13_zps0ttxyoqo.jpg
um_miracle_maestro-14_zpsbwunebrv.jpg um_miracle_maestro-15_zpsdajem9fx.jpg
um_miracle_maestro-16_zpsdsgnhsza.jpg
 
Regardless if you are a cable believer or not, which as many of you know that I am, switching to a higher quality conductors actually had a rather noticeable effect in UM sound change.  The units I received had recessed sockets, so keep in mind that a replacement cable has to accommodate it, where for example I wasn't able to use Linum BaX cable.  Even after modifying the connector, there was hardly anything to grab on to remove it.  So I switched to Whiplash cables to try their latest TWag v3 and TWau with a new OM (over-mold) universal 2-pin connectors. 
 
The problem with some cables w/2-pin connectors is the straight wire attachment which doesn't have a comfortable fitment wearing cable over the ear.  Here, Whiplash designed their own angled (a little greater than 90deg) connector mold which fits over ear more comfortably, has a red/blue ID dot, and has a slimmed down collar for a perfect fitment with recessed sockets.  I switched cable a lot during my testing of these UM models, and got to appreciate this OM design since it made cable removal very easy and was still securely attached after at least a dozen of cable flips.
 
I will go into more details about sound improvement when switching from stock cable to replacement in Sound Analysis section, but for sure I did hear an improvement with TWag (silver conductor). When I switched to TWau (gold plated silver conductor), I didn't like the effect with these UM iems as much since I felt the sound became a little smoother and lost some of its energy.  In my opinion silver cable upgrade had the best synergy.
 
Bottom line, if you want sound refinement with either Miracle or Maestro, I do recommend looking into cable upgrade.  Doesn't have to be anything fancy or exotic costing you as much as the IEM itself, but silver conductors definitely improve the sound.  Just keep in mind recessed socket fitment.
 
Whiplash TWag v3 OM (over-mold) connector.
 
um_miracle_maestro-35_zpsmetitghn.jpg um_miracle_maestro-36_zpsftv4qehw.jpg
 
Design.
 
When it comes to UM design, the first thing you'll notice is that 6-driver Miracle is nearly identical in size and shape to 12-driver Maestro.  Both have universal fitment with a thicker body and a snort nozzle.  For me personally, since I have a wide shallow ear canal, the fitment worked out pretty good, but I can see that maybe some others will require to use double or triple flange eartips for a better insertion and seal.  That could also be a deciding factor between going with Universal or Custom fitment.
 
The finish of the shell looks and feels like a molded acrylic material (or maybe high quality plastic mold), very smooth, and with a perfect faceplate seal where you don't feel the edge.  Not sure if UM offers any other custom finish faceplate for this UIEM versions, but fiberglass one looks pretty good.  There were also silver letters spelling UM full name, but those were hard to read.  On the inside of the shell, you will find a model name and a serial number, printed in Red on the right side and in Blue on the left side.  It would have been great to see how the drivers are arranged, especially considering 6x vs 12x driver design, but the shells are non-transparent.
 
The shape of the shell fits perfectly inside of my Concha area, and I didn't experience any discomfort during extended listening.  Of course, YMMV since it all depends on your ear anatomy.  The shell does stick out of your ear and there is no way you can fall asleep wearing these in.  With a right selection of eartips, the largest one in my case, I had a perfect seal with the maximum isolation which I found to be pretty good.
 
The only visible difference in the design surfaces up when you take a closer look at the tip of the nozzle where Miracle looks to have 2-bore design, with a smaller bore in the middle toward the side leaving other opening exposed like a slice of the moon, and Maestro having 3-bore design, where it looks like a smiley face.  Again, this is just an external observation because the shell is non-transparent, and I'm sure the CIEM version with a custom transparent shell would be able to shed more light into the sound tubes and the driver placement.
 
Design - Miracle
 
um_miracle_maestro-09_zps5g9etll2.jpg um_miracle_maestro-17_zpsctruynck.jpg
um_miracle_maestro-18_zps9jz8qvif.jpg um_miracle_maestro-19_zpsibovmbcv.jpg
um_miracle_maestro-20_zpsxjlnfdml.jpg um_miracle_maestro-21_zpsmjtnh2rg.jpg
um_miracle_maestro-22_zpsnbqaj6ge.jpg
 
Design - Maestro
 
um_miracle_maestro-23_zpssbqgtlmu.jpg um_miracle_maestro-24_zpsloavvlja.jpg
um_miracle_maestro-25_zpsdknnyq7j.jpg um_miracle_maestro-26_zpshbdbmdvh.jpg
um_miracle_maestro-27_zpslaiix489.jpg um_miracle_maestro-28_zps5ffmswlv.jpg
um_miracle_maestro-29_zps7zbmsmlx.jpg um_miracle_maestro-32_zpsrodxxnbc.jpg
 
Fitment: Miracle & Maestro (identical)
 
um_miracle_maestro-34_zpscp6tfcid.jpg um_miracle_maestro-33_zps17eyvfeo.jpg 
 
Sound analysis.
 
Here is were Miracle and Maestro get their individual voices to show their strength and their weakness.  Obviously, there is a fundamental difference of Miracle having 6xBA design and 3-way crossover partitioning drivers into 2-lows, 2-mids, and 2-highs versus Maestro with 12xBA design and 4-way crossover partitioning drivers into 4-lows, 4-mids, 2-highs, and 2-super highs.  Despite of what some people might think, more drivers doesn't mean a better sound, it just gives you more flexibility to fine tune and to perfect the targeted sound signature.  Another obvious difference before you even proceed to sound analysis is Sensitivity of Miracle being 114 dB vs Maestro with 109 dB.  Based on that you will have an idea that switching between two will require setting volume a little bit higher with Maestro and in theory less sensitivity makes it less prone to background hissing, though I have to admit that neither Miracle nor Maestro hissed with any of my powerful sources.
 
And now, on to a more detailed individual sound analysis which was done using PAW Gold as my source after each pair of IEMs received 75hrs of burn in.
 
Miracle (w/stock cable):
 
The signature is pretty much balanced, though mids do feel a little forward.  Overall tonality is neutral but leaning a little more toward bright side due to energy of mids and treble. The sound is clear and detailed, not exactly on micro-detail level but with plenty of details without being harsh or grainy.
 
Starting with a low end you get a decent sub-bass extension with a nicely textured rumble and a punchy mid-bass with a fast attack and an average decay typical of BA drivers.  Bass is tight, warm, and with a nice control and clean separation from lower mids.  Lower mids have plenty of body but not necessary too warm or veiled.  Upper mids are clear and detailed, but missing a bit of refinement which I was craving especially with vocals, though this is obviously a subjective opinion.  Treble is really good, with a perfect balance of moderate crunch and definition, no hint of sibilance.  It has a good extension to add some airiness, though not whole lot.
 
I found Miracle to sound dynamic, but layering and separation of the sound was just good, not necessary great.  It wasn't too congested, though in some busy song passages it can get close to, but combination of just an average soundstage and not the highest level of airiness gave me a perception of just an OK layering effect.  On to staging, I found soundstage width to be average, while depth and height to be above the average.  The imaging of these headphones has convincing placement of instruments and vocals, but I didn't find it to be on a 3D level like in some other monitors.  I would say it's accurate but not super accurate in that regard.
 
- With upgraded cable (Whiplash TWag)
 
The bass gets tighter and the quantity of mid-bass gets slightly lower to make it more balanced, also tightens the mids and brings upper mids slightly more forward which makes the sound a bit more mid-centric, improves treble extension by adding a little more airiness.  Also, slightly improves width of the sound.
 
Maestro (w/stock cable):
 
Maestro has a balanced sound signature with a brighter more revealing tonality, thanks to the energy of upper mids and treble brightness.  The sound is clear and detailed, closer to micro-detail level but without being grainy or analytical, though in some bright tracks you can hear the effect of 6k spike.  Not necessary sibilant, but during an extended listening session it could get closer to a threshold of my comfort level, though this is purely subjective.
 
Maestro has a great sub-bass extension with a textured rumble and a punchy mid-bass that has a decent speed and an average decay to give bass a more rounded analog feeling.  Bass is tight, well controlled and precisely separated from lower mids.  Lower mids have plenty of body without being too warm or veiled.  Upper mids are clear and detailed, getting closer to a more analytical level which can get a bit harsh with some songs, depending on your ear sensitivity.  With vocals, I found them to sound a little more on a brighter, more revealing, and less organic side.  Treble is bright, crisp, with high definition, great extension and plenty of airiness.
 
I found Maestro to sound dynamic, and with improved airiness there was better layering and separation effect.  Soundstage was expanded in all 3 directions of width, depth, and height.  Imaging definitely had a more convincing placement of instruments and vocals, but wasn't on a 3D level.  It was accurate, but didn't feel 3D accurate.
 
- With upgraded cable (Whiplash TWag)
 
The bass got tighter, mid-bass attack got a little faster, and the low end got a little more slam.  Furthermore, the mids got tighter and the harshness of upper mids/treble (6k peak) I heard with a stock cable got nearly eliminated.  I also heard a subtle refinement in layering, separation, and transparency.  Soundstage width improved slightly as well.
 
Comparison between Miracle and Maestro.
 
While looking nearly identical from outside, they have their own sound personality on the inside.
 
um_miracle_maestro-30_zpsbjw4qfoq.jpg um_miracle_maestro-31_zpstui07at7.jpg
 
Miracle vs Maestro (w/stock cable) - Maestro sounds more crisp, lows are more balanced with a similar sub-bass rumble and texture but mid-bass being a little slower and having less impact.  Lower mids are a touch leaner, upper mids are brighter and more detailed, treble is more crisp and more extended with more airiness.  Upper Mids in Maestro are brighter and a little harsher.  Maestro has slightly better layering and separation in comparison to Miracle.  Overall, Maestro stands out as having a more refined sound but the biggest difference is in upper mids and treble where 6k peak can get a little hot in Maestro while smoother and more under control with Miracle.  Miracle has a deeper low end impact with slightly more slam, mids sound a little more forward, and treble is smoother in comparison.  Maybe it has a little less airiness but I would prefer Miracle for extended laidback listening sessions over Maestro which is better for a more critical listening. Maestro has slightly wider staging while depth/height are the same between both.  But once you upgrade the cable - all the bets are off, and I would choose Maestro ANY DAY of the week!!!
 
Comparison to other IEMs/CIEMs.
 
Miracle/Maestro vs W60 - W60 has more sub-bass, slower mid-bass, low end is not as tight or has as much control being separated from lower mids, W60 lower mids are a little thicker and upper mids are a lot smoother and more organic, W60 treble has a similar extension but it's not as crisp or not as bright.  Soundstage width is a little bigger with W60 in comparison to Miracle and closer to Maestro, but otherwise W60 has a little less depth and height.
 
Miracle/Maestro vs UM Pro 50 - UM Pro 50 has a bigger low end quantity, from more sub-bass to a bigger mid-bass slam, lower mids are similar, while upper mids in UM Pro 50 are more organic, not as bright, and pushed back in comparison, treble is also a little less bright in comparison.  Soundstage of UM Pro 50 is wider (vs Miracle, and closer to Maestro), but depth/height are the same.  The biggest difference here is UM Pro having a bigger and more powerful bass impact, while UM has more detailed upper mids and better treble extension.
 
Miracle/Maestro vs Savant - Savant sub-bass and mid-bass are as tight though more neutral in quantity and not as fast, lower mids are a little leaner, upper mids are brighter and more detailed than Miracle and smoother than Maestro, also treble has a better extension and more airiness than Miracle, but smoother peaks than Maestro.  Savant soundstage is more expanded in all 3 directions.  Here, if you prefer a more transparent detailed balanced sound, Savant would suite you better, while if you want a better low end impact and smoother upper frequencies - go with Miracle and for low end impact and more analytical upper frequencies - Maestro.
 
Miracle/Maestro vs ES60 - ES60 sound is more balanced, the same tight low end but less impact, closer to neutral level, mids are a lot more detailed with a better layering and separation and overall sound is more transparent and dynamic, treble has a better extension and more controlled airiness.  ES60 has more reference quality, while Miracle/Maestro have more fun signature.
 
At the moment of writing this review, I didn't have a chance yet to compare Maestro to A12, and there is also possibility to compare to K10U.  I will definitely update my write up with more comparison examples if/when they become available.
 
Conclusion.
 
To be honest, when I started this review, my opinion was flip-flopping regarding which UM I prefer the best - Miracle or Maestro.  Only after I upgraded the cable (replacing stock with TWag), the choice became more clear where Maestro performance scaled up to a true TOTL level with a clear advantage of a more balanced sound signature, smoother tonality, better layering and separation, and improved staging.  But the fact that I was opting between 6-driver and 12-driver config with a stock cable speaks volumes that a number of drivers is not the deciding factor of what is better, but rather how it's being used to tune the sound.  And even with an upgraded cable and comparison to other 6-/8-/10-/12-driver IEMs and CIEMs - it's still not about which one is better or worse, but rather which one fits your sound preference and also your budget.  And if you're worrying which one going to fit your ears better - Maestro comes in either Universal or Custom fit.
proedros
proedros
great review , i have the UM Miracle so any comparisons with higher TOTL iems is more than welcome
 
cheers
Fred-svv
Fred-svv
Now Unique Melody are launching new versions of the Maestro and Mentor. The Mentor/Maestro will came with two new cables (You can choose wich one to use, because will came with two). The engineer technolgy will change, making a better depth and instrument separation. They will come with the same technology of the freqPhase of JH Audio.
Fred-svv
Fred-svv
Now Unique Melody are launching new versions of the Maestro and Mentor. The Mentor/Maestro will come with two new cables (You can choose wich one to use, because will came with two). The engineer technology will change, making a better depth and instrument separation. They will come with the same technology of the freqPhase of JH Audio.
launching the new version. Someone made an purchase or had the opportunity to teste the V2?
Back
Top