

Introduction: Beauty and the Beast Feather Duster


In this instructable, I will show you how to make two different versions of the feather duster from Beauty and the Beast that can be used for cleaning.
You might be wondering why I am not using her name in the title. The problem is that she wasn't given a name in the original Disney movie. She is called Marie (in the comics), Babette (in the musical and House of Mouse), Plumette (in the 2017 live-action remake), and Fifi (in the midquel film Beauty and the Beast: Belle's Magical World). Even though the prequel is nowhere near as good as the original movie, we are going to call her Fifi in this instructable. Mainly because (in contrast to the other adaptions) she looks the same as in the original movie.
After watching Beauty and the Beast for the about hundredth time I felt really inspired and wanted to bring her to life. I absolutely do not like cleaning and never thought that a cleaning utensil could bring me so much joy, but I absolutely love it and hope you do, too.
So let's get started.

Supplies
Materials
- Filament
- Swiffer (I used this one) or a smaller ostrich feather duster (like this* one)
- Optional (for smoothing): Filler primer (e.g. this* one) and wet sandpaper (e.g. this* one)
- Primer (I used this* one)
- Paint (white, black, gold, or brass (i used this* one), red (for the lips), grey, and brown)
- Glue
- 2 mm thread (at least 16 cm long)
- Finish (+ optional an anti-shine spray paint. I am using this* one)
- Masking tape, when you are going with the feather one
Tools
- 3D printer
- Paintbrushes and optional an airbrush
- Utility knife
- Saw (If you are going to use ostrich feather duster)
* Affiliate link. I earn from qualifying purchases. Thanks a lot for the support!
Step 1: The Design


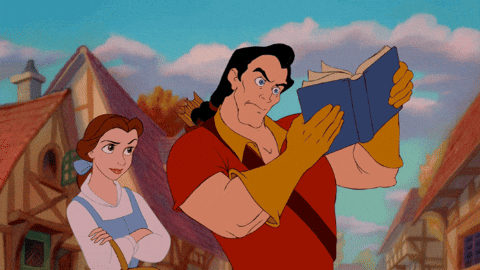
In case you don't know who Fifi is, she is a supporting character in Disney's 1991 animated feature film, Beauty and the Beast. She is Lumiere's (the candelabra) love interest and got turned into a feather duster by the enchantress.
This project was a nice excuse to rewatch the movie a few times (and take some screenshots as you can see in the first picture). Fun fact, throughout the whole movie, she only says five sentences: "A girl in the castle!", "Oh no, Oh no, Oh no, I've been burnt by you before!", "Isn't this amazing?", "Oh Lumiere, we must do something!", "He did what?"
Before I started, I tried to find a 3D model online. While there are many models of the different characters, I could only find one of her here by SummersideGuy (you can see it in the second picture). While it is a cute design, the long lashes aren't very practical for 3d printing and would certainly break during usage. I also wanted her to look a bit happier. After trying myself I quickly realized that I am lacking the skills of 3D modeling her head. Therefore, I went to Fiverr and found sohannanda943. He perfectly created her how I wanted him to. As you can see in the third picture, I asked him to design the brim of her mob cap slightly different from how it is depicted in the movie and to attach the eyelashes to her eyelid.
You can download his design here, but be aware, that it needs to be changed a bit in order to work. I will show you how to do these changes in the next steps.
Btw. did you know that the prince was only eleven years old when everyone got cursed (unless Lumiere was exaggerating about rusting for ten years)
“The rose she had offered was truly an enchanted rose, which would bloom until his twenty-first year. If he could learn to love another and earn her love in return by the time the last petal fell, then the spell would be broken. If not, he would be doomed to remain a beast for all time.”―Narrator
"Ten years we've been rusting - Needing so much more than dusting" - Be Our Guest
Step 2: Creating the Handle


I wanted the handle to look as much like the original as possible but had to keep in mind that the feathers or the Swiffer had to fit into it. I am giving you my final design; therefore you don't need to follow the next few steps, but I figured it may be interesting to some of you.
I went into Inkscape (it is a free program, you can find it here), added a picture from the movie and one from the head, and drew the outlines. I also scaled the pieces to a size that would fit the feathers and the Swiffer.
There are different programs you can use to turn the sketch into a 3D model. I usually use Fusion360. Simply go into the "Design" workspace, select "INSERT", "Insert SVG", "Insert from my computer", select the right file and then pick a plane. Sadly, usually, the part isn't scaled right.
The Autodesk help says: "SVG units are screen units, i.e. pixels. A 1:1 mapping of an SVG file into Fusion 360 will not be achieved unless the SVG translator supports mapping logical units (in, mm, cm, etc.) to screen units (pixel dimensions, which vary on the used OS and its version). Even with the units being set in the third-party software, the values will be converted into points by saving. The size of a point is device-dependent and application-dependent."
Luckily this can easily be fixed. Simply measure the imported part by selecting "INSPECT" and clicking on the top and bottom lines. As you can see in the second picture, in my case it is 32.444 mm. Since it is supposed to be about 123 mm, I must use a scaling factor of about 3.79 (123 mm / 32.444 mm).
Simply click on "FINISH SKETCH" (you can delete it later) and reimport the SVG file ("INSERT", "Insert SVG"). Then use the scaling factor in "Scale Plane XY" (it may be called differently depending on the plane you have selected), like I am showing in the second picture. Before finishing the sketch, you will have to add a line in the middle above the sketch and one that goes through the middle of the sketch.
Step 3: Finishing the Handle


Now you can click on "FINISH SKETCH" and pick "CREATE" and then "REVOLVE". Select one of the handle halves as the "Profile" and the line you drew above the profile as the "Axis".
The only thing left to do is to add the hole that is needed to fit the Swiffer. The handle for the feathered version is created the same way.
I have uploaded both versions to this step.
I have also uploaded a holder, which you can use to hold the head in place while spray painting it.


Step 4: Modifying the Mesh


As you can see in the first image there were a few things I had to change, before I was able to 3D print Sohan's design. My favorite free program to do so is Autodesk Meshmixer. You can download it here. You don't need to follow these steps since I am giving you the final design, but once again I thought it might be interesting in case you are planning on realizing something similar.
First, I had to scale the pieces. Simply select both and pick "Transform" and uniformly scale them to a height of 80 mm.
You can see that the head consists of multiple pieces (eyes, eyelids, neck...), even though it was just one part. Because of this, it can't be printed as is and must be turned into a solid first.
Select the part, then click on "Edit" and "Make Solid". The settings you should pick depend on the model and you will have to play around a bit (when you click "update" you can see how it is going to look). I highly suggest picking "Sharp Edge Preserve" under "Solid Type".
I asked Sohan to create the mob cap and the head as separate pieces, but the inside of the cap was overlapping with the head. Luckily this could easily be fixed.
First, I turned the mob cap into a solid, as we have done with the head. Then I made it hollow by clicking on "Edit" and then "Hollow". Next, I selected the cap and the head and picked "Boolean Difference" (make sure to uncheck "Auto-Reduce Result"). It should now look as shown in the third picture.
I specifically asked Sohan not to design the thread, since I didn't want to 3D print it. Therefore, I had to create two holes. This once again can be done in Meshmixer. Simply create two cylinders, move them to the correct position and turn them into holes, by once again using "Boolean Difference".
Attachments

Step 5: Finishing the Head


Now all that is left to do is to create the hole in the neck, where the handle is later glued into. Simply pull the STL file of the handle into Meshmixer and click on "Append".
Move the handle to the right position, select the head and afterward the handle, and once again select "Boolean Difference" (don't forget to uncheck "Auto-Reduce Result").
Now the head should look like the one in the second picture.
Attachments

Step 6: Preparing the Ostrich Feather Duster


To create the version with the feathers, we are simply going to use a commercially available ostrich feather duster. I was interested in how they are fabricated and therefore got two different versions. The ones with red handles are from a German company called Redecker and the other one is from China.
After removing the rubber cover, I realized that both were fabricated the same way. The main difference between the two is that the Chinese one was a lot cheaper but smelled like chemicals. The smell didn't go away even after leaving outside for quite some time. So, I decided to go with the German one.
For it to fit into the handle, you will have to shorten it. Simply use a saw and cut at about 2 cm above the cardboard. Afterwards, I cleaned up the edges of the cardboard and removed a bit of the wood, as you can see in the fourth image of this step.
Step 7: Printing and Smoothing the Head


Start by printing all the parts. I have written a whole instructables on how to smooth 3D prints. You can find it here. Smoothing is obviously optional and if you don't want to, you don't have to do it, but to me, the parts look a lot better once they are smoothed.
This time I used three layers of a filler primer and wet sanded* the piece. One of the layers was a bit too thick and therefore I had a few small holes in the surface (due to bubbles that formed). You can see them in the third picture (above the eye). Even though they weren't extremely visible, I decided to fix them with plastic putty. Once the putty was dry, I sanded the piece again and used another layer of primer filler, since there were still a few rough spots. Don't worry about the top of the head, since it is going to be covered with the mob cap. After a final sanding, the part was ready to be painted.
Try not to sand through the paint layers and make sure that your individual layers aren't too thick to prevent holes.
* In order to wet sand, you will have to get the right type of sanding paper. Simply soak it in water and go over the part with it. Make sure that your sanding paper stays moist and that dust doesn't start clogging up, by simply dipping it into the water from time to time. The water acts as a lubricant and helps to remove tiny particles so that the part doesn't get scratches.
Step 8: The Handle


Like I have written before I have designed two different versions of the handle. You can of course pick whichever one you would like.
This step is the same for both. Like with the head, I smoothed the print with filler primer and wet sanded it. Afterward, I primed and sanded it again. It makes sense to prime and sand the head, the handle, and the cap at the same time to save time.
I used the "skeleton bone" color primer from Army Painter and airbrushed the model. You can see how the primer looks (head) compared to the finished paint job (handle) in the last picture. I already had a Lumiere lamp and a Cogswoth clock and wanted Fifi to fit them. For my liking, the "skeleton bone" paint looked too pale and therefore I went with a slightly warmer paint job.
Step 9: Painting the Face


Next, we are going to paint on the face. Before picking the color for the eyeshadow and the neck I swapped all my golden tones and decided to go with "brass" by Model Color. You can of course choose any color you want.
Simply use a fine paintbrush and add the details. Fun fact, the beauty mark is mainly on her left side, but during the group dance scene in "Be Our Guest" it is on the right side of the feather dusters (you can see this in the screenshots that I posted in the first step). I decided to place it on her left side.
Step 10: Painting the Handle


If you look at the drawings of Fifi, you can see that there isn't any space for the quills of the feathers, which is needed in real life. I decided to paint the bottom of the handle black to hide that it needed to be way longer than in the movie.
Once I was done airbrushing it and placed it onto the feathers, I realized that black was too dark and didn't look good. So, I had to use masking tape again and went with a dark brown, as you can see in the third picture. I am happy I repainted it because it looked a lot better.
Don't forget to paint the golden rings.
You don't need to paint the bottom of the Swiffer handle, but the rings at the top and the bottom should be painted golden.
Step 11: Applying the Finish

Now it is time to apply the finish. In the picture, the head on the left was spray-painted with a gloss varnish, and the one on the right with a gloss varnish as well, and then with an anti-shine spray. I prefer the matte look, but it is obviously up to you.
You will have to apply the same finish to the handle.
Step 12: The Mob Cap


The mob cap is smoothed the same way as the other parts. You don't have to worry about its inside since it can't be seen later (As you can see, mine is still very rough).
Once it is smoothed, simply spray paint it white and paint the inside of the brim grey, as shown in the first picture.
In the second picture, you can (once again) see the difference between a finish without (left) and with (right) an anti-shine layer.
Once the finish is done, cut the 2 mm thread to a length of about 16 cm. Place it through the holes and tie a knot on the inside. Make sure that it can't come loose, since you won't be able to fix it later. I used a square knot.
Step 13: Glueing


Now all that is left to do is to glue everything together.
Start by gluing the mob cap to the head, but be careful since there is a direction and if you don't get it right, it won't be sitting on the head properly.
Next, we are going to glue the handle to the head. As you can see in the third picture, the top and the underside of the Swiffer look different. So, you will have to decide, which one you would like to show. I decided to use the underside as the front. Make sure you keep your decision in mind while gluing the pieces together.
As you can see, I used a lot of glue to glue the feathers to the handle. Make sure that there is enough contact between the glue and the 3D-printed part.
Congratulations you are done.


Second Prize in the
Fandom Contest


