Reference Manual - clv490.pdf - Machine Vision Components
Reference Manual - clv490.pdf - Machine Vision Components
Reference Manual - clv490.pdf - Machine Vision Components

You also want an ePaper? Increase the reach of your titles
YUMPU automatically turns print PDFs into web optimized ePapers that Google loves.
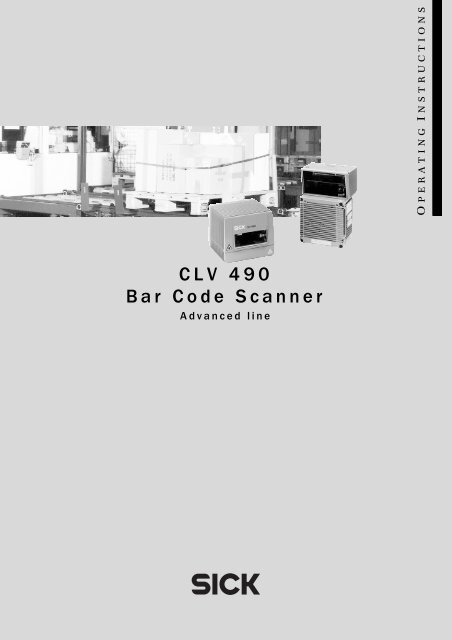
O PERATING I NSTRUCTIONS<br />
CLV 490<br />
Bar Code Scanner<br />
Advanced line
Software versions<br />
Operating Instructions<br />
CLV 490 Bar Code Scanner<br />
Software versions<br />
Software/Tool Function Version<br />
CLV 490-0010/-0011 Firmware From V 0.90 0000<br />
CLV 490-1010/-1011 Firmware From V 0.90 0000<br />
CLV 490-6010/-6011 Firmware From V 1.22 K609<br />
CLV 490-7010/-7011 Firmware From V 1.22 K609<br />
CLV 490-2010/-2011 Firmware From V 1.30 KA54<br />
CLV 490-3010/-3011 Firmware From V 1.30 KA54<br />
CLV-Setup User interface From V 2.70 J645<br />
CLV-Setup Help Online help (HTML) From V 1.1<br />
I-ViewPro TM HTML browser (offline) From V 2.38<br />
Windows 95 TM /98 TM , Windows NT TM , Windows XP TM and Internet Explorer TM are registered<br />
trademarks or trademarks of the Microsoft Corporation in the USA and other countries.<br />
Netscape Navigator TM is a registered trademark of the Netscape Communications Cooperation,<br />
USA. I-ViewPro TM is a registered trademark of EnReach Technology, Inc., USA.<br />
I-2 © SICK AG · Division Auto Ident · Germany · All rights reserved 8 008 796/0000/25-06-2002
Operating Instructions<br />
Quick Finder<br />
CLV 490 Bar Code Scanner<br />
CLV 490 Bar Code Scanner<br />
Quick Finder<br />
• What is delivered with the device<br />
– Chapter 3.1.1 Scope of delivery, Page 3-1<br />
• CAUTION!<br />
– Chapter 2 Safety information, Page 2-1<br />
• Mounting the device at the reading station<br />
– Chapter 4 Installation, Page 4-1<br />
• Connecting the device<br />
– Chapter 5 Electrical installation, Page 5-1<br />
• Overview of the device and its functions<br />
– Chapter 3 Product description, Page 3-1<br />
– Chapter 6.2 Default settings, Page 6-1<br />
– Chapter 6.5 Operating modes and outputing the reading result, Page 6-19<br />
– Chapter 9 Technical data, Page 9-1<br />
– Chapter 10.3 Installing and operating the external parameter memory, Page 10-34<br />
• Starting the device with the default settings<br />
– Chapter 6.3 Quick start, Page 6-3<br />
• Installing the "CLV-Setup" program<br />
– Chapter 10.6 Installing and operating the "CLV-Setup" program, Page 10-41<br />
• Adapting the device to the reading application<br />
– Chapter 6.4 Configuring (parameterization) the CLV, Page 6-5<br />
• Troubleshooting<br />
– Chapter 8 Troubleshooting, Page 8-1<br />
• Finding information<br />
– Table of contents, Page I-5<br />
– Index, Page 10-85<br />
8 008 796/0000/25-06-2002 © SICK AG · Division Auto Ident · Germany · All rights reserved I-3
Quick Finder<br />
Operating Instructions<br />
CLV 490 Bar Code Scanner<br />
Installation procedure (overview)<br />
Reading trigger via “Sensor“ switching input (default setting)<br />
1. Check the delivery to make sure that none of the components is missing.<br />
2. Mount the CLV at the reading station and align it with the object carrying the bar code.<br />
3. Mount the AMV/S 60 Connection Module.<br />
4. Connect the CLV to the AMV/S 60 Connection Module using the two cables<br />
no. 2 020 302.<br />
Alternatively, connect the device to the AMV/S 60 via the external parameter memory<br />
no. 2 020 307.<br />
5. Connect the reading pulse sensor to the "Sensor" switching input in the AMV/S 60.<br />
6. Connect the host to the host interface in the AMV/S 60.<br />
Adapt the AMV/S 60 to the host interface type of the CLV.<br />
7. Switch on the power supply to the AMV/S 60.<br />
The "Device Ready" LED lights up after the CLV has started.<br />
CLV with external parameter memory connected:<br />
The "Device Ready" LED and the "Read Result" LEDs blink after the CLV has started.<br />
The CLV is not ready to start reading. See step 11.<br />
Line scanner with oscillating mirror:<br />
In the default setting, the CLV deflects the scan line around the position CW = 50 with<br />
a frequency of 1 Hz and an oscillating amplitude of max. ±20° (±40 CW).<br />
8. Switch on your PC and start Windows TM (minimum requirement: Windows 95 TM ).<br />
9. Install the "CLV-Setup" software, online CLV-Setup Help and, if necessary, the<br />
I-ViewPro TM HTML browser from the CD on your PC.<br />
10. Connect the PC to the terminal interface of the CLV. To do so, connect the RS 232 data<br />
connection cable (e. g. no. 2 014 054) to the "Service plug" in the AMV/S 60.<br />
11. Start the "CLV-Setup" program.<br />
CLV-Setup establishes communication with the CLV and uploads the parameter set.<br />
The parameters are then displayed on the tabs.<br />
CLV with external parameter memory connected:<br />
First download the CLV parameter set to the external memory.<br />
Disconnect the AMV/S 60 briefly from the power supply to restart the CLV.<br />
12. Carry out a test read using test bar codes (clock the CLV accordingly).<br />
Display the reading result in the Terminal Emulator window of the "CLV-Setup" program.<br />
13. Configure the CLV for the application using the settings on the tabs in CLV-Setup.<br />
Copy (download) the modified parameter set to the CLV temporarily.<br />
Do not switch off the power to the AMV/S 60 (CLV)!<br />
14. Test the application under realistic conditions.<br />
15. Check whether the data is transmitted correctly between the CLV and host.<br />
16. If necessary, correct and optimize the parameter values.<br />
Copy (download) the parameter set permanently to the CLV.<br />
CLV with external parameter memory connected:<br />
Copy the modified parameter set to the external parameter memory.<br />
17. Save the parameter set as a configuration file "*.scl" in the "CLV-Setup" program.<br />
The CLV can then be operated with the application-specific settings.<br />
I-4 © SICK AG · Division Auto Ident · Germany · All rights reserved 8 008 796/0000/25-06-2002
Operating Instructions<br />
Contents<br />
CLV 490 Bar Code Scanner<br />
Table of contents<br />
1 Notes on this document............................................................................................ 1-1<br />
1.1 Purpose ....................................................................................................................................... 1-1<br />
1.2 Target audience........................................................................................................................ 1-1<br />
1.2.1 Mounting, electrical installation, maintenance and replacement.................... 1-1<br />
1.2.2 Startup, operation and configuration......................................................................... 1-1<br />
1.3 Information content................................................................................................................. 1-2<br />
1.4 Symbols....................................................................................................................................... 1-2<br />
2 Safety information....................................................................................................... 2-1<br />
2.1 Authorized users ...................................................................................................................... 2-1<br />
2.1.1 Mounting and maintenance .......................................................................................... 2-1<br />
2.1.2 Electrical installation and replacement ..................................................................... 2-1<br />
2.1.3 Startup, operation and configuration......................................................................... 2-1<br />
2.2 Intended use.............................................................................................................................. 2-1<br />
2.3 General safety instructions and protection measures .............................................. 2-1<br />
2.4 Quick stop and quick restart................................................................................................ 2-3<br />
2.4.1 Stopping the CLV............................................................................................................... 2-3<br />
2.4.2 Restarting the CLV ............................................................................................................ 2-3<br />
2.5 Environmental information....................................................................................................2-4<br />
2.5.1 Power requirements.........................................................................................................2-4<br />
2.5.2 Disposal after removal from service.......................................................................... 2-4<br />
3 Product description .................................................................................................... 3-1<br />
3.1 Design .......................................................................................................................................... 3-1<br />
3.1.1 Scope of delivery............................................................................................................... 3-1<br />
3.1.2 Variants ................................................................................................................................. 3-1<br />
3.1.3 System requirements ...................................................................................................... 3-2<br />
3.1.4 Design ................................................................................................................................... 3-4<br />
3.2 Method of operation............................................................................................................... 3-5<br />
3.2.1 Autofocus function............................................................................................................ 3-6<br />
3.2.2 Event-controlled dynamic focus control ................................................................... 3-7<br />
3.2.3 Scan procedure variants ................................................................................................ 3-7<br />
3.2.4 Additional components ................................................................................................... 3-8<br />
3.3 Indicators and control elements ........................................................................................ 3-8<br />
3.3.1 Control elements............................................................................................................... 3-8<br />
3.3.2 Function of the LEDs........................................................................................................ 3-8<br />
4 Installation..................................................................................................................... 4-1<br />
4.1 Installation sequence ............................................................................................................. 4-1<br />
4.2 Preparations............................................................................................................................... 4-1<br />
4.2.1 Required components..................................................................................................... 4-1<br />
4.2.2 Required accessories...................................................................................................... 4-1<br />
4.2.3 Required auxiliary parts .................................................................................................. 4-1<br />
4.2.4 Replacing the laser warning label ............................................................................... 4-2<br />
4.2.5 Selecting the mounting location .................................................................................. 4-2<br />
4.2.6 Mounting accessories ..................................................................................................... 4-3<br />
4.2.7 Distance between the CLV and the bar code........................................................ 4-4<br />
4.2.8 Count direction of the code position CP and code angle CW.......................... 4-6<br />
4.3 Mounting and adjusting the device................................................................................... 4-7<br />
4.3.1 Mounting the CLV.............................................................................................................. 4-7<br />
4.3.2 Adjusting the CLV .............................................................................................................. 4-8<br />
4.3.3 Adjusting mode .................................................................................................................. 4-9<br />
4.4 Mounting the external components................................................................................4-10<br />
4.4.1 Mounting the AMV/S 60 Connection Module......................................................4-10<br />
4.4.2 Mounting the external reading pulse sensor........................................................4-10<br />
4.4.3 Mounting the sensors for detecting the object distance.................................4-12<br />
4.5 Dismantling the device ........................................................................................................4-13<br />
5 Electrical installation ................................................................................................. 5-1<br />
8 008 876/0000/25-06-2002 © SICK AG · Division Auto Ident · Germany · All rights reserved I-5
Contents<br />
Operating Instructions<br />
CLV 490 Bar Code Scanner<br />
5.1 Installation sequence.............................................................................................................5-1<br />
5.1.1 SICK Connection Modules (overview)......................................................................5-1<br />
5.2 Electrical connections and cables .....................................................................................5-2<br />
5.2.1 Wire cross-sections ..........................................................................................................5-2<br />
5.2.2 Prefabricated cables (overview) ..................................................................................5-2<br />
5.2.3 Connections/cables for the AMV/S Connection Module ...................................5-3<br />
5.2.4 Connections/cables for the Bus Connection Modules<br />
BMV 10 and BMS 20 ......................................................................................................5-4<br />
5.2.5 Connections/cables for the external parameter memory<br />
(connection to AMV/S or BMV 10/BMS 20)..........................................................5-4<br />
5.2.6 Connections/cables for the IP 65 connector cover<br />
(connection to AMV 100/200 or BMV 10).............................................................5-5<br />
5.3 Connector pin assignment....................................................................................................5-6<br />
5.3.1 Terminals on the CLV.......................................................................................................5-6<br />
5.3.2 External parameter memory no. 2 020 307/2 021 689<br />
(optional accessory)<br />
connector cover no. 2 021 298 (optional accessory) .......................................5-7<br />
5.4 Preparations for electrical installation...............................................................................5-8<br />
5.4.1 Requirements for the host interface..........................................................................5-8<br />
5.4.2 Supply voltage ....................................................................................................................5-8<br />
5.4.3 Non-SICK Power supply unit/connections without the Connection Module5-9<br />
5.5 Electrical installation procedure.......................................................................................5-13<br />
5.5.1 Individual steps................................................................................................................ 5-13<br />
5.5.2 Tools.................................................................................................................................... 5-13<br />
5.5.3 Connecting the supply voltage ..................................................................................5-13<br />
5.5.4 Connecting the host interface ...................................................................................5-14<br />
5.5.5 Connecting the CAN interface ...................................................................................5-15<br />
5.5.6 Connecting the PC..........................................................................................................5-15<br />
5.5.7 Connecting the switching inputs ...............................................................................5-16<br />
5.5.8 Connecting the "Result 1 Result 4" switching outputs ....................................5-19<br />
6 Operation ....................................................................................................................... 6-1<br />
6.1 Overview of steps for starting up the CLV ......................................................................6-1<br />
6.2 Default settings .........................................................................................................................6-1<br />
6.2.1 Default settings of the line scanner CLV 490 (all variants)...............................6-2<br />
6.2.2 Default settings of the line scanner with oscillating mirror<br />
CLV 490 (all variants) ......................................................................................................6-2<br />
6.3 Quick start ...................................................................................................................................6-3<br />
6.3.1 Switching the CLV on for the first time with the factory default settings......6-3<br />
6.3.2 Switching the CLV with external parameter memory connected on<br />
for the first time with the factory default settings .................................................6-4<br />
6.4 Configuring (parameterization) the CLV...........................................................................6-5<br />
6.4.1 Configuring the CLV via the user interface of CLV-Setup...................................6-5<br />
6.4.2 Function of the tabs in CLV-Setup (overview) ........................................................6-6<br />
6.4.3 Parameterizing example .................................................................................................6-8<br />
6.4.4 Guide to parameterization menu.................................................................................6-8<br />
6.5 Operating modes and outputing the reading result .................................................6-19<br />
6.5.1 Reading mode (standard operating mode)..........................................................6-19<br />
6.5.2 Percentage evaluation..................................................................................................6-22<br />
6.5.3 Adjusting mode................................................................................................................ 6-24<br />
6.5.4 Background teach-in .....................................................................................................6-25<br />
6.5.5 Show CP-limits .................................................................................................................6-26<br />
6.5.6 Displaying and editing operating data ....................................................................6-28<br />
6.5.7 Reading diagnosis ..........................................................................................................6-28<br />
6.5.8 Monitor Host Interface..................................................................................................6-29<br />
6.5.9 Auxiliary input....................................................................................................................6-31<br />
6.5.10 Self-test ..............................................................................................................................6-31<br />
6.5.11 Executing CLV functions interactively......................................................................6-32<br />
I-6 © SICK AG · Division Auto Ident · Germany · All rights reserved 8 008 876/0000/25-06-2002
Operating Instructions<br />
Contents<br />
CLV 490 Bar Code Scanner<br />
6.6 CLV messages ........................................................................................................................6-33<br />
6.6.1 Displaying messages.....................................................................................................6-33<br />
6.6.2 System messages ..........................................................................................................6-33<br />
6.6.3 Warning messages.........................................................................................................6-33<br />
6.6.4 Error messages ...............................................................................................................6-33<br />
6.7 Switching off the CLV............................................................................................................6-34<br />
7 Maintenance................................................................................................................. 7-1<br />
7.1 Cleaning the CLV during operation.................................................................................... 7-1<br />
7.2 Maintenance.............................................................................................................................. 7-2<br />
7.3 Disposal....................................................................................................................................... 7-2<br />
8 Troubleshooting ........................................................................................................... 8-1<br />
8.1 Overview of the possible errors and malfunctions...................................................... 8-1<br />
8.1.1 Mounting errors ................................................................................................................. 8-1<br />
8.1.2 Electrical installation errors............................................................................................ 8-1<br />
8.1.3 Parameter errors............................................................................................................... 8-1<br />
8.1.4 Malfunctions........................................................................................................................ 8-1<br />
8.2 Monitoring error and malfunctions .................................................................................... 8-1<br />
8.3 Error messages ........................................................................................................................ 8-2<br />
8.3.1 CLV without external parameter memory................................................................ 8-2<br />
8.3.2 LED error messages for the external parameter memory................................ 8-5<br />
8.3.3 Messages for errors accessing the external parameter memory................. 8-7<br />
8.4 ST error status in the reading result of a bar code..................................................... 8-9<br />
8.5 Troubleshooting......................................................................................................................8-10<br />
8.5.1 General malfunctions: CLV not ready......................................................................8-10<br />
8.5.2 Malfunctions in Reading mode: reading trigger errors......................................8-11<br />
8.5.3 Malfunctions in Reading mode: result output errors.........................................8-12<br />
8.5.4 Malfunctions in Reading mode: errors in the result status output...............8-14<br />
8.5.5 Malfunctions in Reading mode: oscillating mirror errors..................................8-15<br />
8.6 SICK Support ...........................................................................................................................8-15<br />
9 Technical data.............................................................................................................. 9-1<br />
9.1 Data sheet CLV 490-0010/-2010/-6010 bar code scanner............................... 9-1<br />
9.2 Data sheet CLV 490-1010/-3010/-7010 bar code scanner............................... 9-2<br />
9.3 Data sheet CLV 490-0011 /-2011/-6011 bar code scanner.............................. 9-2<br />
9.4 Data sheet CLV 490-1011/-3011/-7011 bar code scanner............................... 9-3<br />
9.5 Dimensioned drawings – CLV............................................................................................. 9-3<br />
9.5.1 Line scanner (standard device) without /with heater ......................................... 9-3<br />
9.5.2 Line scanner with oscillating mirror (without/with heater)................................. 9-4<br />
10Appendix ..................................................................................................................... 10-1<br />
10.1 Overview....................................................................................................................................10-1<br />
10.2 Specification diagrams.........................................................................................................10-1<br />
10.2.1 Reading conditions for all diagrams.........................................................................10-1<br />
10.2.2 Overview of diagrams....................................................................................................10-2<br />
10.2.3 Standard density: Reading performance data of line scanner......................10-3<br />
10.2.4 Standard density: Reading performance data of line scanner<br />
with oscillating mirror .....................................................................................................10-9<br />
10.2.5 High density: Reading performance data of line scanner ............................10-16<br />
10.2.6 High density: Reading performance data line scanner with<br />
oscillating mirror............................................................................................................10-21<br />
10.2.7 Low density: Reading performance data of line scanner .............................10-27<br />
10.2.8 Low density: Reading performance data of line scanner with<br />
oscillating mirror............................................................................................................10-31<br />
10.3 Installing and operating the external parameter memory...................................10-34<br />
10.3.1 Function ...........................................................................................................................10-34<br />
10.3.2 Installation and electrical connection ...................................................................10-35<br />
10.3.3 Operation.........................................................................................................................10-35<br />
10.3.4 Switching on the device for the first time ...........................................................10-36<br />
10.3.5 Adjusting the parameter set in the external parameter memory<br />
8 008 876/0000/25-06-2002 © SICK AG · Division Auto Ident · Germany · All rights reserved I-7
Contents<br />
Operating Instructions<br />
CLV 490 Bar Code Scanner<br />
after it has been downloaded to the CLV .......................................................... 10-36<br />
10.3.6 Meaning of the LEDs.................................................................................................. 10-37<br />
10.3.7 Error messages............................................................................................................10-37<br />
10.3.8 Replacing a CLV ...........................................................................................................10-37<br />
10.4 Optional heating.................................................................................................................. 10-38<br />
10.4.1 Features.......................................................................................................................... 10-38<br />
10.4.2 Design.............................................................................................................................. 10-38<br />
10.4.3 Function........................................................................................................................... 10-38<br />
10.4.4 Electrical installation ...................................................................................................10-39<br />
10.4.5 Outdoor applications .................................................................................................. 10-39<br />
10.5 System messages .............................................................................................................10-40<br />
10.5.1 CLV without external parameter memory.......................................................... 10-40<br />
10.5.2 CLV with external parameter memory connected.......................................... 10-40<br />
10.6 Installing and operating the "CLV-Setup" program................................................ 10-41<br />
10.6.1 Preparations .................................................................................................................. 10-41<br />
10.6.2 Installing the software................................................................................................ 10-41<br />
10.6.3 Starting CLV-Setup...................................................................................................... 10-43<br />
10.6.4 User interface................................................................................................................ 10-45<br />
10.6.5 Functions ........................................................................................................................ 10-46<br />
10.6.6 CLV-Setup Help ............................................................................................................10-46<br />
10.6.7 Transferring parameter sets between CLV-Setup and the CLV ................ 10-47<br />
10.6.8 Unknown parameters................................................................................................. 10-47<br />
10.6.9 Log file in the Terminal Emulator ........................................................................... 10-48<br />
10.6.10 Starting CLV-Setup with an "INI file" as an argument.................................... 10-48<br />
10.6.11 The CLV Assistant........................................................................................................10-48<br />
10.7 Configuring a CLV with command strings.................................................................. 10-49<br />
10.8 Calculating parameter values for setting the CLV.................................................. 10-51<br />
10.8.1 Calculating the number of scans (for standard decoders).......................... 10-51<br />
10.8.2 Calculating the start position and mirror speed for the forward<br />
and return phase of the One-Shot function ...................................................... 10-53<br />
10.8.3 Calculating the necessary bar code distance if several bar<br />
codes are read on each object.............................................................................. 10-54<br />
10.9 Tables ..................................................................................................................................... 10-55<br />
10.9.1 Calculating the code length of a bar code......................................................... 10-55<br />
10.10 Discussion of a parameterization example.............................................................. 10-56<br />
10.10.1 Application Conditions ............................................................................................... 10-56<br />
10.10.2 Purpose of this discussion....................................................................................... 10-56<br />
10.10.3 Instructions for solution – step by step .............................................................. 10-56<br />
10.10.4 Important clarifications .............................................................................................. 10-57<br />
10.10.5 Mounting and electrical connection ..................................................................... 10-57<br />
10.10.6 Parameterize the CLV with the "CLV-Setup" program .................................. 10-58<br />
10.10.7 Testing the application .............................................................................................. 10-64<br />
10.11 Special applications and procedures ......................................................................... 10-65<br />
10.11.1 Auxiliary input................................................................................................................. 10-65<br />
10.11.2 Daisy-chain configuration<br />
(data forwarding or master/slave arrangement)............................................. 10-68<br />
10.11.3 SICK network (RS 485)............................................................................................. 10-68<br />
10.11.4 Connection to Profibus DP....................................................................................... 10-68<br />
10.11.5 Connection to the DeviceNet.................................................................................. 10-68<br />
10.11.6 Connection to Interbus-S.......................................................................................... 10-68<br />
10.11.7 Connection to Ethernet ............................................................................................. 10-68<br />
10.11.8 Building a CAN scanner network ........................................................................... 10-68<br />
10.11.9 Integration in an OPS reading system ................................................................. 10-68<br />
10.12 Replacing a CLV (copying the parameter set)......................................................... 10-69<br />
10.12.1 Downloading the parameter set............................................................................ 10-69<br />
10.12.2 Importing the parameter set from the external memory............................. 10-70<br />
10.13 Accessories .......................................................................................................................... 10-71<br />
I-8 © SICK AG · Division Auto Ident · Germany · All rights reserved 8 008 876/0000/25-06-2002
Operating Instructions<br />
Contents<br />
CLV 490 Bar Code Scanner<br />
10.13.1 Mounting accessories ................................................................................................10-71<br />
10.13.2 Connection modules...................................................................................................10-71<br />
10.13.3 Bus connection modules ..........................................................................................10-71<br />
10.13.4 Cables, external parameter memories and plug cover.................................10-73<br />
10.13.5 Plug-in connections .....................................................................................................10-74<br />
10.13.6 Reading pulse generators.........................................................................................10-74<br />
10.13.7 Network controller .......................................................................................................10-74<br />
10.14 Dimensioned drawings of the accessories...............................................................10-75<br />
10.14.1 Angle bracket, single no. 2 013 824 ...................................................................10-75<br />
10.14.2 Articulated bracket No. 2 018 435 ......................................................................10-75<br />
10.14.3 Quick clamping device No. 2 016 110 ...............................................................10-75<br />
10.15 Supplementary documentation.....................................................................................10-76<br />
10.16 Glossary..................................................................................................................................10-77<br />
10.17 Copy of the EC Declaration of Conformity.................................................................10-85<br />
10.18 Index ........................................................................................................................................10-87<br />
10.19 Bar code example ..............................................................................................................10-91<br />
8 008 876/0000/25-06-2002 © SICK AG · Division Auto Ident · Germany · All rights reserved I-9
Figures and tables<br />
Operating Instructions<br />
CLV 490 Bar Code Scanner<br />
AMV/S<br />
BMV/S<br />
CAN<br />
CLV<br />
DC<br />
DOF<br />
EEPROM<br />
HD<br />
HTML<br />
LED<br />
PLC<br />
RAM<br />
ROM<br />
RTF<br />
SMART<br />
Abbreviations<br />
Connection Module with signal distribution/with additional power supply pack<br />
Bus Connection module with signal distribution/with additional power supply<br />
Controller Area Network (standard field bus system with message-orientated data exchange<br />
protocol)<br />
Code-Leser V-Prinzip.<br />
The CLV 490 bar code scanners are abbreviated to "CLV" in this documentation, exept where<br />
a distinction is necessary<br />
Distance Configuration<br />
Depth Of Field<br />
Electrically Erasable Programmable Read Only Memory<br />
High Density<br />
Hyper Text Markup Language (page-description language on the internet)<br />
Light Emitting Diode<br />
Programmable Logic Controller<br />
Ramdom Acces Memory<br />
Read Only Memory<br />
Rich Text Format (standard document format with format descriptions)<br />
SICK Modular Advanced Recognition Technology<br />
Tables<br />
Table 3-1: CLV variants ........................................................................................................................ 3-1<br />
Table 3-2: Meaning of LEDs: CLV without external parameter memory........................... 3-9<br />
Table 3-3: Meaning of LEDs: CLV with external parameter memory................................3-10<br />
Table 4-1: Permissible reading angles between the scan line and bar code ................. 4-5<br />
Table 5-1: Connection Modules for the CLV ................................................................................ 5-1<br />
Table 5-2: Cables for connecting the CLV..................................................................................... 5-2<br />
Table 5-3: Pin assignment of the 15-pin D Sub HD "Host/Term" plug ............................. 5-6<br />
Table 5-4: Pin assignment of the 15-pin D Sub HD "I/O" socket........................................ 5-6<br />
Table 5-5: Pin assignment of the 15-pin D Sub HD "Host/Term" cable plug ................. 5-7<br />
Table 5-6: Pin assignment of the 15-pin D Sub HD "I/O" cable socket............................ 5-7<br />
Table 5-7: Maximum cable lengths between the CLV and host........................................... 5-8<br />
Table 5-8: Power consumption of the CLV ................................................................................... 5-8<br />
Table 5-9: Power-up delay as a function of the device number GN................................... 5-8<br />
Table 5-10: Wire color assignment of the cable no. 2 020 303 .......................................... 5-9<br />
Table 5-11: Wire color assignment of the cable no. 2 020 264..........................................5-10<br />
Table 5-12: Wire color assignment of cable 1 for external parameter memory<br />
no. 2 020 981 .................................................................................................................5-11<br />
Table 5-13: Wire color assignment of cable 2 for external parameter memory<br />
no. 2 020 981 .................................................................................................................5-11<br />
Table 5-14: Wire color assignment cable 1 for connector cover no. 2 021 267..........5-12<br />
Table 5-15: Wire color assignment cable 2 for connector cover no. 2 021 267..........5-12<br />
Table 5-16: Communication parameters for the host interface (default setting)...........5-14<br />
Table 5-17: Characteristic data of the "Sensor" switching input ..........................................5-16<br />
Table 5-18: Pin and terminal assignment for "IN 0 ... IN 4" switching inputs...................5-17<br />
Table 5-19: Characteristic data of the "IN 0 ... N 4" switching inputs.................................5-18<br />
Table 5-20: Dynamic focus control: switching inputs/distance configuration<br />
assignment table.............................................................................................................5-18<br />
Table 5-21: Combination of the functions of the "IN 0 ... IN 4" switching inputs ...........5-19<br />
Table 5-22: Pin and terminal assignment for "Result 1 ... Result 4"<br />
I-10 © SICK AG · Division Auto Ident · Germany · All rights reserved 8 008 796/0000/25-06-2002
Operating Instructions<br />
Figures and tables<br />
CLV 490 Bar Code Scanner<br />
switching outputs............................................................................................................5-20<br />
Table 5-23: Characteristic data of the "Result 1 ... Result 4" switching outputs............5-20<br />
Table 6-1: Extract: Default parameter settings of the line scanner<br />
CLV 490-0010/-0011 ....................................................................................................6-2<br />
Table 6-2: Extract: Default parameter settings of the line scanner with<br />
oscillating mirror CLV 490..............................................................................................6-2<br />
Table 6-3: Reading distances for default settings......................................................................6-4<br />
Table 6-4: Guide: Parameterizing autofocus mode (Part 1)...................................................6-9<br />
Table 6-5: Guide: Parameterizing the autofocus function (Part 2)....................................6-10<br />
Table 6-6: Guide: Parameterizing the event-controlled focus control..............................6-11<br />
Table 6-7: Guide: Parameterizing oscillating mirror functions.............................................6-12<br />
Table 6-8: Guide: Parameterizing the reading trigger source .............................................6-16<br />
Table 6-9: Guide: Parameterizing the laser timeout ...............................................................6-16<br />
Table 6-10: Guide: Settings for evaluating identical bar codes ............................................6-17<br />
Table 6-11: "Monitor Host Interface" function.............................................................................6-29<br />
Table 6-12: Warning messages ........................................................................................................6-33<br />
Table 8-1: Error messages output on the terminal interface.................................................8-2<br />
Table 8-2: LED error messages for access to the external parameter memory...........8-5<br />
Table 8-3: Messages for problems accessing the external parameter memory...........8-7<br />
Table 8-4: Meaning of the ST error status in the reading result...........................................8-9<br />
Table 8-5: Troubleshooting: restoring operation (Reading mode) ....................................8-10<br />
Table 8-6: Troubleshooting: reading trigger errors in Reading mode ..............................8-11<br />
Table 8-7: Troubleshooting: result output errors in Reading mode..................................8-12<br />
Table 8-8: Troubleshooting: errors in the result status output in Reading mode........8-14<br />
Table 8-9: Troubleshooting: oscillating mirror errors in Reading mode...........................8-15<br />
Table 9-1: Technical specifications of the CLV 490-0010/-2010/-6010 .......................9-1<br />
Table 9-2: Technical specifications of the CLV 490-1010/-3010/-7010 .......................9-2<br />
Table 9-3: Technical specifications of the CLV 490-0011/-2011/-6011 .......................9-2<br />
Table 9-4: Technical specifications of the CLV 490-1011/-3011/-7011 .......................9-3<br />
Table 10-1: Reading conditions for specification diagrams....................................................10-1<br />
Table 10-2: Overview of specification diagrams for the line scanner.................................10-2<br />
Table 10-3: Overview of specification diagrams for the line scanner with<br />
oscillating mirror ..............................................................................................................10-2<br />
Table 10-4: External parameter memory................................................................................... 10-34<br />
Table 10-5: CLV system messages.............................................................................................. 10-40<br />
Table 10-6: Additional CLV system messages for the connected<br />
parameter memory..................................................................................................... 10-40<br />
Table 10-7: Default settings in CLV-Setup ................................................................................. 10-43<br />
Table 10-8: Formulas for calculating the code length of a bar code............................... 10-55<br />
Table 10-9: Communication parameters on the terminal/PC for the auxiliary input.. 10-67<br />
Table 10-10: Communication parameter settings for the ST 1100 decoder................. 10-67<br />
Table 10-11: Accessories: mounting accessories..................................................................... 10-71<br />
Table 10-12: Accessories: connection modules........................................................................ 10-71<br />
Table 10-13: Accessories: bus connection modules ............................................................... 10-71<br />
Table 10-14: Accessories: cables and connector covers for the CLV without heater 10-73<br />
Table 10-15: Accessories: cables and connector covers for the CLV with heater....... 10-74<br />
Table 10-16: Accessories: plug-in connections.......................................................................... 10-74<br />
Table 10-17: Accessories: network controller............................................................................. 10-74<br />
Table 10-18: Supplementary documentation in English language...................................... 10-76<br />
8 008 796/0000/25-06-2002 © SICK AG · Division Auto Ident · Germany · All rights reserved I-11
Figures and tables<br />
Operating Instructions<br />
Figures<br />
CLV 490 Bar Code Scanner<br />
Fig. 2-1: Laser warning labels on the CLV (applicable for Europe)..................................... 2-2<br />
Fig. 3-1: Design of the CLV 490....................................................................................................... 3-4<br />
Fig. 3-2: Block diagram: CLV functions .......................................................................................... 3-5<br />
Fig. 3-3: Optimization of the depth of field for the object....................................................... 3-6<br />
Fig. 3-4:<br />
Dynamic focus control: classification of the reading range in<br />
distance configurations ...................................................................................................... 3-7<br />
Fig. 3-5: LEDs .......................................................................................................................................... 3-8<br />
Fig. 4-1: Line scanner: replacing the laser warning labels ..................................................... 4-2<br />
Fig. 4-2: Line scanner: position of the securing threads on the CLV ................................. 4-3<br />
Fig. 4-3: Line scanner: Mounting possibilities of the CLV....................................................... 4-3<br />
Fig. 4-4: Scanning methods: alignment with bar code and conveyor direction ............. 4-4<br />
Fig. 4-5: Definition of the reading distance a and of the aperture angle a...................... 4-4<br />
Fig. 4-6: Line scanner: Reading angle between the scan line and the bar code .......... 4-5<br />
Fig. 4-7: Avoiding surface reflections: Angle between the emitted light and<br />
the bar code (tilted away from the vertical axis) ...................................................... 4-5<br />
Fig. 4-8: Count direction of the code position CP in the scan line and of the<br />
code angle CW for the oscillating mirror...................................................................... 4-6<br />
Fig. 4-9: Line scanner: scan line in Adjusting mode ................................................................. 4-9<br />
Fig. 4-10: Line scanner: mounting example for the external reading pulse sensor......4-10<br />
Fig. 4-11: Mounting example for object distance detection ..................................................4-12<br />
Fig. 5-1: Block diagram: Connection of the CLV to the AMV/S 60<br />
connection module .............................................................................................................. 5-3<br />
Fig. 5-2: Connecting the host interface .......................................................................................5-14<br />
Fig. 5-3: Connecting the terminal interface................................................................................5-15<br />
Fig. 5-4: Connections of the "Sensor" switching input ..........................................................5-16<br />
Fig. 5-5: Connections of the "IN 0 ... IN 4" switching inputs................................................5-17<br />
Fig. 5-6: Connections of the "Result 1 ... Result 4" switching outputs ............................5-20<br />
Fig. 6-1: Bar code pattern (Code 39; module width 0.35 mm; Print ratio 2:1)............. 6-3<br />
Fig. 6-2: Narrowing the visible range using limit values.........................................................6-10<br />
Fig. 6-3: Oscillating mirror: "Oscillating with fixed amplitude" mode.................................6-13<br />
Fig. 6-4: Oscillating mirror: "Oscillating with variable amplitude" mode ..........................6-14<br />
Fig. 6-5: One-Shot: Object tracking (bar code read from front) .........................................6-15<br />
Fig. 6-6: CLV-Setup: Displaying the reading result in the Terminal Emulator................6-20<br />
Fig. 6-7: Reading result of the terminal interface: structure for Good Read .................6-21<br />
Fig. 6-8: Reading result of the terminal interface: structure for No Read ......................6-21<br />
Fig. 6-9: CLV-Setup: Displaying the percentage evaluation in the<br />
Terminal Emulator ..............................................................................................................6-23<br />
Fig. 6-10: CLV-Setup: Dialog window for running the background teach-in.....................6-25<br />
Fig. 6-11: CLV-Setup: Display of th learned background ........................................................6-26<br />
Fig. 6-12: Appearance of scan line in the "Show CP-limits" mode......................................6-27<br />
Fig. 6-13: CLV-Setup: "Operating Data" dialog box...................................................................6-28<br />
Fig. 6-14: CLV-Setup: Displaying the reading result of the host interface in<br />
the Terminal Emulator with direction identifier at the beginning<br />
(in this case: O = Output)................................................................................................6-30<br />
Fig. 6-15: CLV-Setup: Displaying the self-test result in the Terminal Emulator...............6-31<br />
Fig. 6-16: CLV-Setup: Dialog box for executing Show limits...................................................6-32<br />
Fig. 7-1: Cleaning the reading window ........................................................................................... 7-1<br />
Fig. 7-2: Cleaning the external optical sensors (reading pulse generator,<br />
object-height detector)....................................................................................................... 7-2<br />
Fig. 9-1: Dimensions of the CLV 490 line scanner, front reading window....................... 9-3<br />
Fig. 9-2:<br />
Fig. 10-1:<br />
Fig. 10-2:<br />
Dimensions of the CLV 490: line scanner with oscillating mirror,<br />
side reading window............................................................................................................ 9-4<br />
CLV 490-0010/-0011 (Standard density): Reading field height as<br />
a function of the reading distance and resolution................................................10-3<br />
CLV 490-0010/-0011 (Standard density): Min. and Max. reading<br />
distance (measured radially) as a function of the focus position at a<br />
resolution of 0.35 mm and an aperture angle of α =40° ................................10-4<br />
I-12 © SICK AG · Division Auto Ident · Germany · All rights reserved 8 008 796/0000/25-06-2002
Operating Instructions<br />
Figures and tables<br />
CLV 490 Bar Code Scanner<br />
Fig. 10-3: CLV 490-0010/-0011 (Standard density): Min. and Max. reading<br />
distance (measured radially) as a function of the focus position at a<br />
resolution of 0.35 mm and an aperture angle of α =56°................................10-5<br />
Fig. 10-4: CLV 490-0010/-0011 (Standard density): Min. and Max. reading<br />
distance (measured radially) as a function of the focus position at a<br />
resolution of 0.50 mm and an aperture angle of α =40°................................10-6<br />
Fig. 10-5: CLV 490-0010/-0011 (Standard density): Min. and Max. reading<br />
distance (measured radially) as a function of the focus position at a<br />
resolution of 0.50 mm and an aperture angle of α =56°................................10-7<br />
Fig. 10-6: Characteristics field CLV 490-0010/-0011: Scanning frequency as a<br />
function of the reading distance and resolution ....................................................10-8<br />
Fig. 10-7: CLV 490-1010/-1011 (Standard density): Reading field height as a<br />
function of the reading distance and resolution ....................................................10-9<br />
Fig. 10-8: CLV 490-1010/-1011 (Standard density): Min. and Max. reading<br />
distance (measured radially) as a function of the focus position at a<br />
resolution of 0.35 mm and an aperture angle of α =40°............................. 10-10<br />
Fig. 10-9:<br />
CLV 490-1010/-1011 (Standard density): Min. and Max. reading<br />
distance (measured radially) as a function of the focus position at a<br />
resolution of 0.35 mm and an aperture angle of α =50°............................. 10-11<br />
Fig. 10-10: CLV 490-1010/-1011 (Standard density): Min. and Max. reading<br />
distance (measured radially) as a function of the focus position at a<br />
resolution of 0.50 mm and an aperture angle of α =40°............................. 10-12<br />
Fig. 10-11: CLV 490-1010/-1011 (Standard density): Min. and Max. reading<br />
distance (measured radially) as a function of the focus position at a<br />
resolution of 0.50 mm and an aperture angle of α =50°............................. 10-13<br />
Fig. 10-12: Characteristics field CLV 490-1010/-1011: Scanning frequency as<br />
a function of the reading distance and resolution.............................................. 10-14<br />
Fig. 10-13: CLV 490-1010/-1011 (Standard density): deflection range as a<br />
function of reading distance, deflection angle and resolution....................... 10-15<br />
Fig. 10-14: CLV 490-2010/-2011 (High density): Reading field height as a<br />
function of the reading distance and resolution ................................................. 10-16<br />
Fig. 10-15: CLV 490-2010/-2011 (High density): Min. and Max. reading<br />
distance (measured radially) as a function of the focus position at a<br />
resolution of 0.25 mm and an aperture angle of α =40°............................. 10-17<br />
Fig. 10-16: CLV 490-2010/-2011 (High density): Min. and Max. reading<br />
distance (measured radially) as a function of the focus position at a<br />
resolution of 0.35 mm and an aperture angle of α =40°............................. 10-18<br />
Fig. 10-17: CLV 490-2010/-2011 (High density): Min. and Max. reading<br />
distance (measured radially) as a function of the focus position at a<br />
resolution of 0.35 mm and an aperture angle of α =56°............................. 10-19<br />
Fig. 10-18: Characteristics field CLV 490-2010/-2011: Scanning frequency as<br />
a function of the reading distance and resolution.............................................. 10-20<br />
Fig. 10-19: CLV 490-3010/-3011 (High density): Reading field height as a<br />
function of the reading distance and resolution ................................................. 10-21<br />
Fig. 10-20: CLV 490-3010/-3011: (High density) Min. and Max. reading<br />
distance (measured radially) as a function of the focus position at a<br />
resolution of 0.25 mm and an aperture angle of α =40°............................. 10-22<br />
Fig. 10-21: CLV 490-3010/-3011 (High density): Min. and Max. reading<br />
distance (measured radially) as a function of the focus position at a<br />
resolution of 0.35 mm and an aperture angle of α =40°............................. 10-23<br />
Fig. 10-22: CLV 490-3010/-3011 (High density): Min. and Max. reading<br />
distance (measured radially) as a function of the focus position at a<br />
resolution of 0.35 mm and an aperture angle of α =50°............................. 10-24<br />
Fig. 10-23: Characteristics field CLV 490-3010/-3011: Scanning frequency as<br />
a function of the reading distance and resolution.............................................. 10-25<br />
Fig. 10-24: CLV 490-3010/-3011: Deflection range as a function of reading<br />
distance, deflection angle and resolution.............................................................. 10-26<br />
8 008 796/0000/25-06-2002 © SICK AG · Division Auto Ident · Germany · All rights reserved I-13
Figures and tables<br />
Operating Instructions<br />
CLV 490 Bar Code Scanner<br />
Fig. 10-25: CLV 490-6010/-6011 (Low density): Reading field height as a<br />
function of the reading distance and the tilt at a resolution of 0.5 mm.....10-27<br />
Fig. 10-26: CLV 490-6010/-6011 (Low density): Min. and Max. reading<br />
distance (measured radially) as a function of the focus position at a<br />
resolution of 0.5 mm and an aperture angle of α =40°................................10-28<br />
Fig. 10-27: CLV 490-6010/-6011 (Low density): Min. and Max. reading<br />
distance (measured radially) as a function of the focus position at a<br />
resolution of 0.5 mm and an aperture angle of α =60°................................10-29<br />
Fig. 10-28: Characteristics field CLV 490-6010/-6011: Scanning frequency as<br />
a function of the reading distance and resolution ..............................................10-30<br />
Fig. 10-29: CLV 490-7010/-7011 (Low density): Reading field height as a<br />
function of the reading distance and tilt at a resolution of 0.5 mm.............10-31<br />
Fig. 10-30: Characteristics field CLV 490-7010/-7011: Scanning frequency<br />
as a function of the reading distance and resolution ........................................10-32<br />
Fig. 10-31: CLV 490-7010/-7011: Deflection range as a function of reading<br />
distance, deflection angle and tilt at a resolution of 0.5 mm .........................10-33<br />
Fig. 10-32: External parameter memory, installed on the CLV.............................................10-34<br />
Fig. 10-33: CLV-Setup: "Device configuration" tab with the CLV start options ..............10-35<br />
Fig. 10-34: CLV-Setup: dialog box for adjusting the external parameter memory........10-36<br />
Fig. 10-35: CLV with heater: temperature curve inside the housing ..................................10-38<br />
Fig. 10-36: CLV-Setup: Result display of the AutoBaud Detect function ..........................10-44<br />
Fig. 10-37: User interface of the "CLV-Setup" software .........................................................10-45<br />
Fig. 10-38: CLV-Setup: entering commands in the Terminal Emulator .............................10-49<br />
Fig. 10-39: Line scanner: calculating the number of scans for ladder-type bar<br />
code arrangements ........................................................................................................10-51<br />
Fig. 10-40: Line scanner: calculating the number of scans for fence-type bar<br />
code arrangements ........................................................................................................10-51<br />
Fig. 10-41: Line scanner with oscillating mirror: calculating the number of scans<br />
for fence-type bar code positioning .........................................................................10-52<br />
Fig. 10-42: One-Shot: Line scanner with oscillating mirror: calculating the number<br />
of scans for fence-type bar code positioning.......................................................10-53<br />
Fig. 10-43: Required distance between the bar codes on an object.................................10-54<br />
Fig. 10-44: Parameterization example: prepare a sketch of the reading situation.......10-57<br />
Fig. 10-45: Parameterization example: settings on the "Reading Configuration" tab..10-58<br />
Fig. 10-46: Parameterization example: "Edit Auto Focus/Adjustments"<br />
dialog window....................................................................................................................10-59<br />
Fig. 10-47: Parameterization example: "Edit Auto Focus/Limits" dialog window ..........10-59<br />
Fig. 10-48: Parameterization example: "Edit Auto Focus/Optimizations"<br />
dialog window....................................................................................................................10-60<br />
Fig. 10-49: Parameterization example: Buttons on the "Device Configuration" tab ....10-60<br />
Fig. 10-50: Parameterization example: "Edit Scanner Position/Angles"<br />
dialog window....................................................................................................................10-61<br />
Fig. 10-51: Parameterization example: "Edit Scanner Position/Coordinates"<br />
dialog window....................................................................................................................10-62<br />
Fig. 10-52: Parameterization example: Settings on the "Device Configuration" tab....10-62<br />
Fig. 10-53: Parameterization example: settings on the "Code Configuration" tab .......10-63<br />
Fig. 10-54: Parameterization example: "2/5 Interleaved" tab..............................................10-63<br />
Fig. 10-55: Parameterization example: "Host interface" tab (base setting)....................10-64<br />
Fig. 10-56: Parameterization example: "Data Strings" tab (basic setting).......................10-64<br />
Fig. 10-57: Auxiliary input via the terminal interface of the CLV ...........................................10-65<br />
Fig. 10-58: CLV-Setup: auxiliary input on the Terminal Emulator.........................................10-66<br />
Fig. 10-59: Dimensions of the angle bracket, single No. 2 013 824................................10-75<br />
Fig. 10-60: Dimensions of the articulated bracket No. 2 018 435....................................10-75<br />
Fig. 10-61: Front view of quick clamping device No. 2 016 110 with angle<br />
braket No. 2 0130824.................................................................................................10-75<br />
Fig. 10-62: Reproduction of the declaration of conformity (Page 1, reduced in size).10-85<br />
Fig. 10-63: Reproduction of the declaration of conformity (Page 2, reduced in size).10-86<br />
Fig. 10-64: Scannable bar codes with various module widths (print ratio 2:1) .............10-91<br />
I-14 © SICK AG · Division Auto Ident · Germany · All rights reserved 8 008 796/0000/25-06-2002
Operating Instructions Chapter 1<br />
CLV 490 Bar Code Scanner<br />
Notes on this document<br />
1 Notes on this document<br />
1.1 Purpose<br />
This document is a guide to the operation of the barcode scanner<br />
• CLV 490 with auto-focus<br />
in the following variations:<br />
• Line scanner<br />
– CLV 490-2010, resolution from 0.20 mm (high density)<br />
– CLV 490-2011, resolution from 0.20 mm (high density), with heater<br />
– CLV 490-0010, resolution from 0.30 mm (standard density)<br />
– CLV 490-0011, resolution from 0.30 mm (standard density), with heater<br />
– CLV 490-6010, resolution from 0.40 mm (low density)<br />
– CLV 490-6011, resolution from 0.40 mm (low density), with heater<br />
• Line scanner with oscillating mirror<br />
– CLV 490-3010, resolution from 0.20 mm (high density)<br />
– CLV 490-3011, resolution from 0.20 mm (high density), with heater<br />
– CLV 490-1010, resolution from 0.30 mm (standard density)<br />
– CLV 490-1011, resolution from 0.30 mm (standard density), with heater<br />
– CLV 490-7010, resolution from 0.40 mm (low density)<br />
– CLV 490-7011, resolution from 0.40 mm (low density), with heater<br />
This document provides information on<br />
• Mounting and connecting the device<br />
• Startup<br />
• Operating and configuring (parametrizing) the device<br />
• Maintenance<br />
• Exchanging the device without losing the parameter set<br />
• Special applications and procedures<br />
The bar code scanner with all its variants will in this manual be referred to as the "CLV",<br />
except where a distinction is necessary.<br />
1.2 Target audience<br />
This document is intended for persons who are responsible for the following activities:<br />
1.2.1 Mounting, electrical installation, maintenance and replacement<br />
Electricians and service technicians.<br />
1.2.2 Startup, operation and configuration<br />
Technicians and engineers.<br />
8 008 796/0000/25-06-2002 © SICK AG · Division Auto Ident · Germany · All rights reserved 1-1
Chapter 1<br />
Notes on this document<br />
Operating Instructions<br />
CLV 490 Bar Code Scanner<br />
1.3 Information content<br />
This document contains all the information required to mount, install, and start up the CLV<br />
with the factory settings.<br />
A series of step-by-step instructions is provided for each of these activities.<br />
Configuration of the CLV for the application-specific reading situations is carried out with<br />
the Windows-oriented PC software "CLV-Setup". Further assistance is also available in the<br />
form of the online help system CLV-Setup Help. The procedure for installing and operating<br />
the software is described in the appendix.<br />
For further information on the design of the bar code scanner or on bar code technology in<br />
general, please contact the Division Auto Ident at SICK AG.<br />
1.4 Symbols<br />
Some of the information in this document is marked specially so that you can access it<br />
quickly:<br />
Warning!<br />
Warnings are provided to prevent injury to operating personal or serious damage to the bar<br />
code scanners.<br />
¾ Always read warnings carefully and observe them at all times.<br />
Note<br />
Explanation<br />
Recommendation<br />
Tip<br />
Default<br />
SCANNING FREQUENCY<br />
"Host receive fault"<br />
Indicates special features or characteristics.<br />
Explanations provide background information on technical features.<br />
Recommendations help you carry out certain procedures more effectively.<br />
Tips explain settings in the user interface of the "CLV-Setup" program.<br />
Marks a section containing the factory defaults.<br />
This typeface is used to refer to a term in the "CLV-Setup" program.<br />
Icons refer to buttons in the "CLV-Setup" program.<br />
This typeface is used for messages output via the terminal interface of the CLV.<br />
This symbol is used to mark sections that describe steps carried out with the "CLV-Setup"<br />
program.<br />
This symbol refers to additional technical documentation.<br />
¾<br />
Ö<br />
Here you have to do something. This symbol characterizes single-step operating<br />
instructions. Multiple-step operating instructions are characterized by sequential numbers.<br />
Here you select a function of the "CLV-Setup" user interface.<br />
1-2 © SICK AG · Division Auto Ident · Germany · All rights reserved 8 008 796/0000/25-06-2002
Operating Instructions Chapter 2<br />
CLV 490 Bar Code Scanner<br />
Safety information<br />
2 Safety information<br />
2.1 Authorized users<br />
For the CLV to function correctly and safely, it must be mounted and operated by sufficiently<br />
qualified personnel.<br />
The following qualifications are required for the various tasks involved:<br />
2.1.1 Mounting and maintenance<br />
• General technical training<br />
• Knowledge of the standard guidelines relating to safety at the workplace<br />
2.1.2 Electrical installation and replacement<br />
• Practical training in electrical engineering<br />
• Knowledge of the standard safety guidelines relating to electrical engineering<br />
• Experience operating the devices in the relevant application (e. g. conveyor belt)<br />
2.1.3 Startup, operation and configuration<br />
• Experience operating the devices in the relevant application (e. g. conveyor belt)<br />
• Knowledge of the hardware and software environment of the relevant application<br />
(e. g. conveyor belt)<br />
• Basic understanding of Windows 95 TM /98 TM , Windows NT TM or Windows XP TM<br />
• Ability to use an HTML browser (e. g. Netscape Navigator TM )<br />
• Basic understanding of data transfer methods<br />
• Basic understanding of bar code technology<br />
2.2 Intended use<br />
The CLV is designed to detect and decode bar codes automatically. It is mounted in a<br />
reading station and reads bar codes on objects positioned on a conveyor belt, for example.<br />
The CLV transfers the data content of the decoded bar codes via its host interface to a host<br />
for further processing.<br />
Any warranty claims vis-à-vis SICK AG will be rendered invalid if the device is used for any<br />
other purpose or if changes are made to the device, also as part of the mounting and<br />
electrical installation procedures.<br />
2.3 General safety instructions and protection measures<br />
¾<br />
Always read the general safety instructions carefully and observe them at all times.<br />
Please also observe the warnings in front of the operating instructions in each chapter<br />
of this document.<br />
8 008 796/0000/25-06-2002 © SICK AG · Division Auto Ident · Germany · All rights reserved 2-1
Chapter 2<br />
Safety information<br />
Operating Instructions<br />
CLV 490 Bar Code Scanner<br />
Shock hazard!<br />
Depending on the type of device, the AMS 60 Connection Module (accessory) for the CLV<br />
is connected to a mains voltage of 230 V AC 50 Hz or 115 V AC 50/60 Hz.<br />
¾ When working with electrical equipment, always follow the relevant safety specifications.<br />
Laser beam can cause blindness!<br />
The CLV uses a class 2 red-light laser. Looking directly at the laser beam can seriously<br />
damage your eyesight.<br />
¾<br />
¾<br />
¾<br />
¾<br />
¾<br />
Never look directly into the path of the beam (similar to sunlight).<br />
Do not direct the laser beam at other persons.<br />
When mounting and aligning the CLV, avoid reflections caused by reflective surfaces.<br />
Do not open the housing.<br />
(Opening the housing does not deactivate the laser diode.)<br />
Observe the most recent laser specifications (DIN EN 60825-1, latest version).<br />
Laser power<br />
The laser operates at a wave length of λ = 650 nm (visible red light). The power output at<br />
the reading window is max. 2.8 mW.<br />
The emitted radiation is not dangerous to human skin.<br />
Laser warnings<br />
The laser warning symbols applicable for Europe (Fig. 2-1) can be found on the CLV at the<br />
following locations:<br />
• The laser warning symbol on line scanners is positioned beside the reading window on<br />
the front side of the device. The GB/US laser warning is located on the side containing<br />
the electrical connections (see Fig. 3-1, Page 3-4.)<br />
• The laser warning symbol on line scanners with oscillating mirror is located above the<br />
reading window, on the cover of the mirror. The GB/US laser warning is located on the<br />
side containing the electrical connections.<br />
Max. output radiation:<br />
Pulse duration:<br />
Emitted wavelength:<br />
2,8<br />
111<br />
650<br />
mW<br />
s<br />
nm<br />
EN 60825-1: 1994 + A11 : 1996<br />
CLASS II LASER PRODUCT<br />
Max. Output:<br />
Pulse duration:<br />
Wavelength:<br />
2,8<br />
56<br />
650<br />
mW<br />
us<br />
nm<br />
Compiles with 21 CFR 1040.10<br />
Fig. 2-1:<br />
Laser warning labels on the CLV (applicable for Europe)<br />
2-2 © SICK AG · Division Auto Ident · Germany · All rights reserved 8 008 796/0000/25-06-2002
Operating Instructions Chapter 2<br />
CLV 490 Bar Code Scanner<br />
Safety information<br />
Note<br />
A set of laser warnings in German/US English and French/US English is included in the<br />
delivery scope. The GB English/US English warnings can be pasted over with these if<br />
necessary.<br />
If the CLV is installed in a machine/panel with the result that the laser warning labels<br />
are no longer visible, additional warnings (not included in the scope of delivery) must<br />
be provided on the machine beside the emergence aperture of the laser beam.<br />
Internal protective circuits<br />
The CLV is equipped with monitoring circuits that deactivate the laser diode in the event of<br />
a malfunction.<br />
Activation and deactivation of the laser diode is controlled by the reading pulse trigger.<br />
A timer (laser timeout) automatically deactivates the laser diode in Reading mode ("Sensor<br />
input" and "Serial interface" trigger mode) if the reading interval has not ended after<br />
10 minutes (default setting). However, it does not end the reading interval. In this case, the<br />
CLV outputs the message:<br />
"Laser safety timeout"<br />
on the terminal interface. The reading interval must be terminated by resetting the trigger<br />
signal. The laser diode is activated again by the next reading trigger.<br />
In the Percentage Evaluation mode, Adjusting mode and Show CP-limits as well as in<br />
the Free-running Reading mode the laser diode is constantly activated.<br />
Note<br />
In the Reading mode, the CLV carries out a distance measurement referencing at regular<br />
intervals. During referencing, it turns the laser diode on for a maximum of 10 seconds.<br />
2.4 Quick stop and quick restart<br />
2.4.1 Stopping the CLV<br />
¾<br />
Switch off the power supply.<br />
This can result in loss of the following (at the most):<br />
• The application-specific parameter set, if it was stored temporarily in the CLV<br />
• The last reading result<br />
• Daily operating data<br />
(operating hours counter, number of reading intervals, Good Read count, maximum<br />
duration trigger, minimum duration trigger, average identification quality)<br />
2.4.2 Restarting the CLV<br />
¾<br />
Switch on the power supply.<br />
The CLV resumes operation with the parameter set that was last stored permanently<br />
and reset the daily operating data.<br />
8 008 796/0000/25-06-2002 © SICK AG · Division Auto Ident · Germany · All rights reserved 2-3
Chapter 2<br />
Safety information<br />
Operating Instructions<br />
CLV 490 Bar Code Scanner<br />
2.5 Environmental information<br />
The CLV is designed to cause minimum impact on the environment. It does not contain any<br />
silicone-based materials and, therefore, does not represent any problems for paint sprayers<br />
in paint shops, for example.<br />
2.5.1 Power requirements<br />
The power requirements depend on the variants:<br />
• The line scanner has a typical power consumption of 9 W and max. 16 W<br />
• The line scanner with oscillating mirror has a typical power consumption of 9 W and<br />
max. 18 W<br />
• The line scanner equipped with an integrated heater has a typical power consumption<br />
of 75 W and max. 90 W<br />
• The line scanner with oscillating mirror equipped with an integrated heater has a typical<br />
power consumption of 75 W and max. 100 W<br />
The values are given for devices with disconnected switching outputs.<br />
2.5.2 Disposal after removal from service<br />
Always dispose irreparable devices in a manner that is not harmful to the environment and<br />
in accordance with the applicable national waste disposal regulations. The CLV can be separated<br />
into recyclable secondary raw materials and special-category waste (electronic<br />
scrap).<br />
See also Chapter 7.3 Disposal, Page 7-2.<br />
SICK AG currently does not accept delivery of unusable or irreparable devices.<br />
2-4 © SICK AG · Division Auto Ident · Germany · All rights reserved 8 008 796/0000/25-06-2002
Operating Instructions Chapter 3<br />
CLV 490 Bar Code Scanner<br />
Product description<br />
3 Product description<br />
3.1 Design<br />
3.1.1 Scope of delivery<br />
The CLV is supplied with the following in the packing:<br />
• An information sheet (notes on device) with terminal diagram and Quick Start instructions<br />
• An additional set of Class 2 laser warning labels (self-adhesive) in German/US English<br />
and French/US English<br />
Depending on the number of devices ordered, one or more sets of technical documentation<br />
comprising:<br />
• These CLV 490 Operating Instructions in English and German<br />
• A CD-ROM containing the "CLV-Setup" program for Windows TM , the CLV-Setup Help online<br />
help system, and the I-ViewPro TM HTML browser<br />
Chapter 10.13 Accessories, Page 10-71 contains an overview of the available accessories,<br />
connection modules, cables, and connectors, as well as sensors for generating the reading<br />
pulse.<br />
3.1.2 Variants<br />
The CLV is currently available in the following variants:<br />
High density<br />
Standard<br />
Low density<br />
Type (red light) Part. no. Scanning method Resolution Reading window Heater<br />
CLV 490-2010 1 019 311 Line scanner From 0.2 mm End No<br />
CLV 490-3010 1 019 313 Line scanner with oscillating mirror From 0.2 mm Side No<br />
CLV 490-2011 1 019 312 Line scanner From 0.2 mm End Yes<br />
CLV 490-3011 1 019 314 Line scanner with oscillating mirror From 0.2 mm Side Yes<br />
CLV 490-0010 1 016 958 Line scanner From 0.3 mm End No<br />
CLV 490-1010 1 016 959 Line scanner with oscillating mirror From 0.3 mm Side Yo<br />
CLV 490-0011 1 016 960 Line scanner From 0,3 mm End Yes<br />
CLV 490-1011 1 016 961 Line scanner with oscillating mirror From 0.3 mm Side Yes<br />
CLV 490-6010 1 018 872 Line scanner From 0.4 mm End No<br />
CLV 490-7010 1 019 094 Line scanner with oscillating mirror From 0.4 mm Side No<br />
CLV 490-6011 1 019 095 Line scanner From 0.4 mm End Yes<br />
CLV 490-7011 1 019 096 Line scanner with oscillating mirror From 0.4 mm Side Yes<br />
Table 3-1: CLV variants<br />
8 008 796/0000/25-06-2002 © SICK AG · Division Auto Ident · Germany · All rights reserved 3-1
Chapter 3<br />
Product description<br />
Operating Instructions<br />
CLV 490 Bar Code Scanner<br />
3.1.3 System requirements<br />
CLV without heater<br />
The following are required to start up and operate the CLV without heater:<br />
1. A SICK Connection Module to provide the power supply and connect the data and<br />
function interfaces.<br />
Available types:<br />
–For connecting one CLV:<br />
AMV 60-011 (no. 1 017 134) for 18 ... 30 V DC, enclosure rating max. IP 54<br />
AMS 60-013 (no. 1 017 139) for 230 V AC 50 Hz/24 V DC,<br />
enclosure rating max. IP 54<br />
AMS 60-012 (no. 1 017 140) for 115 V AC 50/60 Hz/24 V DC,<br />
enclosure rating max. IP 54<br />
AMS 100-011 (no. 6 021 105) for 18 ... 30 V DC, enclosure rating max. IP 65<br />
–For connecting two CLVs:<br />
AMV 30-071 (no. 1 017 391) for 18 ... 30 V DC, enclosure rating max. IP 54<br />
AMV 200-011 (no. 6 021 106) for 18 ... 30 V DC, enclosure rating max. IP 65<br />
– or –<br />
Alternatively, a non-SICK Power pack with a voltage output of 18 ... 30 V DC pursuant<br />
to IEC 742 (functional extra-low voltage) and a minimum power output of 20 W.<br />
Cable no. 2 020 264 (3 m) with 15-pin D Sub HD connector and one open end for<br />
connecting the CLV to the non-SICK Power pack (supply voltage).<br />
2. The following operating voltages/power output values:<br />
– AMV 60-011: 18 ... 30 V DC (to IEC 742), min. 20 W<br />
– AMV 30-071: 18 ... 30 V DC (to IEC 742), min. 40 W<br />
– AMV 100-011: 18 ... 30 V DC (to IEC 742), min. 20 W<br />
– AMV 200-011: 18 ... 30 V DC (to IEC 742), min. 40 W<br />
– AMS 60-013: 230 V AC ±10 % 50 Hz<br />
– AMS 60-012: 115 V AC ±10 % 50/60 Hz<br />
3. Fitting cables see Chapter 5.2.2 Prefabricated cables (overview), Page 5-2.<br />
4. With external clock pulse supply via the "Sensor" switching input: a suitable reading pulse<br />
sensor for signaling an object with a bar code, e.g. a photoelectric reflex switch.<br />
5. With object distance detection via the "IN 0 ... IN 4" switching inputs: suitable sensors<br />
for multi-stage dynamic focus control, e. g. photoelectric reflex switches.<br />
6. A PC (min. 80486, 66 MHz, 16 MB RAM, CD drive, a serial port (COM x), mouse (recommended))<br />
with Windows 95 TM /98 TM , Windows NT TM or Windows XP TM .<br />
7. An RS 232 data connection cable with two 9-pin D Sub sockets for connecting the PC<br />
to the terminal interface of the CLV in the Connection Module, e. g. no. 2 014 054.<br />
Pin 2 (RxD) and Pin 3 (TxD) are crossed.<br />
8. An HTML browser, e. g. Netscape Navigator TM , or the I-ViewPro TM browser supplied with<br />
the device (see Chapter 3.1.1 Scope of delivery, Page 3-1) for using the online help system<br />
CLV-Setup Help.<br />
9. The appropriate bus connection module BMV/BMH 10 (available on request) for connecting<br />
the CLV to the Interbus-S, Profibus DP, the Device Net or to Ethernet.<br />
10. For connection of the CLV to the CAN Scanner Network: the Operating Instructions<br />
“Application of the CAN interface“ (no. 8 009 180, English edition).<br />
3-2 © SICK AG · Division Auto Ident · Germany · All rights reserved 8 008 796/0000/25-06-2002
Operating Instructions Chapter 3<br />
CLV 490 Bar Code Scanner<br />
Product description<br />
CLV with heater<br />
The following are required to start up and operate the CLV with heater:<br />
1. A SICK Connection Module from the AMV 100 or AMV 200 series to provide the power<br />
supply and connect the data and function interfaces.<br />
Available types:<br />
– For connecting one CLV: AMV 100-011 (no. 6 021 105) for 24 V DC, max. IP 65<br />
– For connecting two CLVs: AMV 200-011 (no. 6 021 106) for 24 V DC, max. IP 65<br />
– or –<br />
Alternatively, a non-SICK Power pack with a voltage output of 24 V DC +20 %/–10 %<br />
to IEC 742 (functional extra-low voltage) and a minimum power output of 100 W.<br />
Cable no. 2 020 264 (3 m) with 15-pin D Sub HD connector and one open end for<br />
connecting the CLV to the non-SICK Power pack (supply voltage).<br />
2. The following operating voltages/power output values:<br />
– AMV 100-011: 24 V DC +20 %/–10 % (pursuant to IEC 742), min. 100 W<br />
– AMV 200-011: 24 V DC +20 %/–10 % (pursuant to IEC 742), min. 200 W<br />
3. See pos. 3 under CLV without heater<br />
8 008 796/0000/25-06-2002 © SICK AG · Division Auto Ident · Germany · All rights reserved 3-3
Chapter 3<br />
Product description<br />
Operating Instructions<br />
CLV 490 Bar Code Scanner<br />
3.1.4 Design<br />
➋<br />
➋<br />
➋<br />
Line scanner<br />
(front-end reading window)<br />
Line scanner with oscillating mirror<br />
(side reading window)<br />
➋<br />
➊<br />
➌<br />
➍<br />
➏<br />
➎<br />
➐<br />
➑<br />
Legend<br />
➊ Drilled hole, Ø 3.6 mm,<br />
6 mm deep<br />
➋ Laser warning labels<br />
➌ Blind hole thread M 6, 7 mm deep,<br />
for securing the device<br />
Fig. 3-1: Design of the CLV 490<br />
➒<br />
➍ Blind hole thread M 4,<br />
10 mm deep, for the connector<br />
cover<br />
➎ "Host/Term" connector<br />
15-pin D Sub HD plug<br />
➏ "I/O" connector,<br />
15-pin D Sub HD socket<br />
➐ LEDs (status indicators)<br />
➑ Reading window<br />
➒ Mark for count direction of the code<br />
position (deflection direction of the<br />
laser beam)<br />
3-4 © SICK AG · Division Auto Ident · Germany · All rights reserved 8 008 796/0000/25-06-2002
Operating Instructions Chapter 3<br />
CLV 490 Bar Code Scanner<br />
Product description<br />
3.2 Method of operation<br />
The CLV first scans the bar code with a scan line and then decodes it. The data is forwarded<br />
via the main data interface (serial host interface) to a host/PC for further processing. An<br />
overview of the CLV functions is provided in Fig. 3-2.<br />
CLV 490<br />
Photoelectric<br />
switch<br />
Reading pulse<br />
"Sensor"<br />
Scanner<br />
Decoder<br />
Interface<br />
"Terminal"<br />
"Host"<br />
PC<br />
Operation<br />
Parameterization,<br />
etc.<br />
HOST<br />
Further processing<br />
of the reading result<br />
Signal 1)<br />
Focal control<br />
Trigger One-Shot<br />
Conveyer increment<br />
1) if required<br />
"IN 0"<br />
"IN 1"<br />
"IN 2"<br />
"IN 3"<br />
"IN 4"<br />
V S<br />
"Result 1"<br />
"Result 2"<br />
"Result 3"<br />
"Result 4"<br />
Status display<br />
e. g. Device Ready<br />
e. g. Good Read<br />
e. g. No Read<br />
e. g. Match 1<br />
Fig. 3-2:<br />
Block diagram: CLV functions<br />
The CLV is equipped with two decoders:<br />
• The SMART decoder (SICK Modular Advanced Recognition Technology) for decoding<br />
bar codes with small code height, bar codes that are dirty or damaged, as well as bar<br />
codes that are tilted excessively (azimuth angle)<br />
• The tried-and-tested standard decoder of the CLV series<br />
The CLV derives useful diagnosis data from the reading process and can transfer it to also<br />
the host. It also records operating data that can be interrogated at any time. The quality of<br />
the read can be checked in percentage evaluation mode.<br />
To start the reading process when an object is located in the reading field, the CLV requires<br />
a suitable trigger. This opens an internal time window ("reading interval") in the CLV. In the<br />
default configuration, this trigger is supplied by an external reading pulse sensor. Alternative<br />
trigger sources include Free-running mode or a command via the host interface (for more<br />
complex applications: OTC trigger).<br />
The current operating status is indicated by four LEDs.<br />
If the trigger is supplied externally, the "Sensor" switching input instructs the CLV to start the<br />
reading process. The five "IN 0 ... IN 4" switching inputs switch the focus position in<br />
response to certain events, as an alternative to the autofocus function. The "IN 3" and<br />
"IN 4” inputs can also be assigned special functions. The four "Result 1 ... Result 4" switching<br />
outputs can be assigned to different functions for displaying the result status and also<br />
control external devices, such as a PLC.<br />
The CLV is operated and configured via the auxiliary interface (serial terminal interface) using<br />
the "CLV-Setup" software or via the host interface/terminal interface using command<br />
strings.<br />
System, warning, and error messages help you to configure the device and to locate the<br />
source of errors during startup and reading mode.<br />
8 008 796/0000/25-06-2002 © SICK AG · Division Auto Ident · Germany · All rights reserved 3-5
Chapter 3<br />
Product description<br />
Operating Instructions<br />
CLV 490 Bar Code Scanner<br />
3.2.1 Autofocus function<br />
The autofocus function enables the CLV to detect the distance of an object during the reading<br />
process, without the need for external sensors, and then adjusts the focus position automatically<br />
to the reading plane of the bar code. In order to do so, the CLV measures the<br />
object distance each time in its reading field in front of the reading window and internally<br />
creates a distance profile. Following this, it positions the focus on the object.<br />
3 operating modes are provided for various applications:<br />
• Minimum distance: the CLV focuses on the minimum distance in the distance profile<br />
and ignores the background in the reading field. Application: with unobstructed view of<br />
the object without any surrounding objects protruding into the reading plane. One object<br />
with bar code(s) only is inside the reading field during one reading pulse.<br />
• Differential background: the distance profile of the reading field background is programmed<br />
(teach-in) in the CLV without any objects present. During the reading process,<br />
the CLV then focuses on the object which it recognizes by comparing it to the distance<br />
profile of the background. Application: with unobstructed view of the object restricted<br />
by other objects that protrude into the reading plane. One object with barcode(s) only<br />
is inside the reading field during one reading pulse.<br />
• Differential background and tracking: if several objects with different distances are<br />
positioned in the reading field at the same time (distance conflict), the CLV focuses on<br />
the object that is nearest to but has not exceed its internal focus switchover point.<br />
Application: in OTS operation (applications with tracking by the Omni Tracking Controller<br />
OTC 400).<br />
The distance profile of the background can also be displayed in the "CLV-Setup" program.<br />
The reading field is defined by the autofocus range, the aperture angle, and (in the case of<br />
line scanners with oscillating mirror) also by the angle of deflection. The park setting of the<br />
focus position, from which the device focuses for each read, can be specified in addition to<br />
a time and/or position-related delay (timeout or hysteresis). If necessary, an offset can be<br />
defined for the focus position to be set by the measurement. The depth of field, which radiates<br />
in the direction of the scan lines and is caused by the V-principle of the beam deflection,<br />
is optimized as a result (Fig. 3-3).<br />
Measured distance<br />
Optimum focus position:<br />
measured distance plus offset for maximum<br />
Depth of field (DOF)<br />
Fig. 3-3:<br />
Optimization of the depth of field for the object<br />
3-6 © SICK AG · Division Auto Ident · Germany · All rights reserved 8 008 796/0000/25-06-2002
Operating Instructions Chapter 3<br />
CLV 490 Bar Code Scanner<br />
Product description<br />
3.2.2 Event-controlled dynamic focus control<br />
As an alternative to the autofocus function, the CLV can switch its focus position in response<br />
to certain events and thus dynamically cover a large reading range. A maximum of eight reading<br />
ranges can be defined as distance configurations for this purpose and approached<br />
consecutively in reading mode (see Fig. 3-4).<br />
Reading<br />
field height<br />
1 2 3 4 5 6 7 8<br />
Focus position<br />
Reading distance<br />
Focus<br />
position<br />
DC 5<br />
DC 4<br />
DC 3<br />
DC 2<br />
DC 1<br />
DC 6 DC 7 DC 8<br />
Fig. 3-4:<br />
DC = Distance Configuration<br />
Reading distance<br />
Dynamic focus control: classification of the reading range in distance configurations<br />
The switch over takes place in response to changes in the object distance (with reads from<br />
above: object height detection). The trigger source for the switchover is a signal combination<br />
at the "IN 0 ... IN 4" switching inputs, a command on the host interface/terminal interface or<br />
the integrated timer (e. g. for search mode). Additional in the case of the line scanner with<br />
oscillating mirror also the oscillating mirror reversal points. The distance configurations are<br />
assigned to the switchover sequence by means of a programmable assignment table. The<br />
distance measurement of the autofocus function can be additionally used to define the distance<br />
configurations.<br />
3.2.3 Scan procedure variants<br />
Line scanner (standard device)<br />
Generates a scan line; due to the V-principle of the beam generation, the reading field height<br />
(the useful length of the scan line for evaluation purposes) is dependent on the reading<br />
distance.<br />
Line scanner with oscillating mirror<br />
The oscillating mirror also deflects the scan line perpendicularly to the scan direction at both<br />
sides around the neutral position with a low oscillating frequency. As a result, the CLV can<br />
also scan larger areas for bar codes. Due to the V-principle of beam generation, the reading<br />
field height is dependent on the reading distance.<br />
In addition to parking (fixed position) and simple deflection with maximum amplitude, optimized<br />
oscillating mirror functions are also available:<br />
• Oscillating with variable deflection amplitude per distance configuration<br />
• One-Shot: one-off, defined deflection per reading pulse (forward and return phase)<br />
8 008 796/0000/25-06-2002 © SICK AG · Division Auto Ident · Germany · All rights reserved 3-7
Chapter 3<br />
Product description<br />
Operating Instructions<br />
CLV 490 Bar Code Scanner<br />
3.2.4 Additional components<br />
Heater<br />
The CLV can be permanently equipped with a heater for applications involving temperatures<br />
up to max. –35 °C (e. g. in a freezer).<br />
The design, technical data, and power-up behavior of the CLV are described in Chapter 10.4<br />
Optional heating, Page 10-38.<br />
External parameter memory<br />
The external parameter memory is located in a connector cover which, when mounted,<br />
covers the two electrical terminals on the CLV (IP 65). The parameter memory saves you<br />
time when a CLV is replaced locally by providing a copy of the current parameter set. In other<br />
words, you do not have to configure the new device.<br />
For information on applications and operating procedures, see Chapter 10.3 Installing and<br />
operating the external parameter memory, Page 10-34.<br />
3.3 Indicators and control elements<br />
3.3.1 Control elements<br />
The CLV is operated and configured via the terminal interface (auxiliary interface) using the<br />
"CLV-Setup" program or using command strings sent via the host interface/terminal interface.<br />
A variety of parameter options allow you to adapt the device to a wide range of applications.<br />
The following can be defined:<br />
• The configuration of the code types<br />
• The read, evaluation, and output properties<br />
• The communication parameters of the host interface<br />
• The structure of the data output string for "Good Read" and "No Read" on the host interface<br />
• The function of the terminal interface<br />
Chapter 10.6 Installing and operating the "CLV-Setup" program, Page 10-41 describes the<br />
procedure for installing the "CLV-Setup" program and explains how to use it. The parameterization<br />
(configuration) procedure is explained in Chapter 6.4 Configuring (parameterization)<br />
the CLV, Page 6-5.<br />
3.3.2 Function of the LEDs<br />
Four LEDs indicate the operating status, activity of the laser diode, reading result status, and<br />
data transfer on the host interface. The LEDs are located on the rear of the device (Fig. 3-5).<br />
If the optional external parameter memory is connected, the LEDs also indicate whether the<br />
memory was successfully accessed.<br />
Device Ready<br />
Sensor<br />
Read Result<br />
Data<br />
Fig. 3-5:<br />
LEDs<br />
3-8 © SICK AG · Division Auto Ident · Germany · All rights reserved 8 008 796/0000/25-06-2002
Operating Instructions Chapter 3<br />
CLV 490 Bar Code Scanner<br />
Product description<br />
The meaning of the LEDs in the various operating modes/functions is shown in Table 3-2<br />
and Table 3-3.<br />
CLV without external parameter memory<br />
Operating mode LED Display Function<br />
Start Device Ready Green • Lights up after power-up if the self-test was successful<br />
Subsequent behavior depends on selected start option<br />
Start option: START WITH EXTERNAL PARAMETERS (DEFAULT)<br />
• Lights up constantly (CLV has loaded internal parameter set)<br />
Start option: START WITH INTERNAL PARAMETERS:<br />
• Lights up constantly (CLV has loaded internal parameter set)<br />
Start option: START WITH COPY INTERN -> EXTERN:<br />
• Blinks constantly together with the "Read Result" LED 1)<br />
(CLV has loaded internal parameter set)<br />
Read Result Green Start option: START WITH COPY INTERN -> EXTERN:<br />
• Blinks constantly together with the "Device Ready" LED 1)<br />
Reading mode Device Ready Green • Lights up constantly<br />
• Extinguishes with new operating mode/function<br />
Sensor Green • Lights up if reading diode is active<br />
(The laser diode is activated/deactivated by reading pulse)<br />
• Lights up constantly in Free-running mode, since laser diode is always active<br />
Read Result Green LED is linked to the "Result 2" switching output and indicates the selected result<br />
status for the defined pulse duration of the output.<br />
• Lights up after a successful read (default: Good Read)<br />
• Lights up if the match code comparison is active, the bar code read matches the<br />
specified match code(s) and the corresponding result status output is selected<br />
for the "Result 2" output<br />
Data Yellow • Flickers when the CLV transfers data to the host on the host interface<br />
Percentage Sensor Green • Lights up constantly, as Free-running mode is active<br />
evaluation Read Result Green Behavior depends on the reading quality:<br />
• Extinguishes if reading rate < 30 %<br />
• Blinks twice a second if reading rate 30 % ... 70 %<br />
• Blinks five times a second if reading rate 70 % ... 90 %<br />
• Lights up constantly if reading rate > 90 %<br />
Adjusting mode Sensor Green • Lights up constantly, as Free-running mode is active<br />
Show CP-limits Sensor Green • Blinks bright/dark alternately, in the frequency with which the scan line is (partially)<br />
masked out<br />
1) Set the start option to START WITH THE INTERNAL PARAMETERS on the DEVICE CONFIGURATION tab in the "CLV-Setup" program. Download to CLV!<br />
Table 3-2: Meaning of LEDs: CLV without external parameter memory<br />
8 008 796/0000/25-06-2002 © SICK AG · Division Auto Ident · Germany · All rights reserved 3-9
Chapter 3<br />
Product description<br />
Operating Instructions<br />
CLV 490 Bar Code Scanner<br />
CLV with external parameter memory connected<br />
Operating mode LED Display Function<br />
Start Device Ready Green • Lights up after power-up if the self-test was successful<br />
Subsequent behavior depends on selected start option:<br />
Start option: START WITH EXTERNAL PARAMETERS (default):<br />
• Blinks for approx. 10 s before lighting up constantly<br />
(CLV has loaded the parameter set from the external parameter<br />
memory and starts reading mode straight away)<br />
• Blinks for approx. 10 s together with the "Read Result" LED, then lights up<br />
constantly.<br />
(CLV has loaded the parameter set from the external parameter memory with<br />
tolerated errors 1) and starts reading mode straight away)<br />
• Lights up constantly<br />
(CLV could not find an external parameter memory and loads the internal parameter<br />
set instead)<br />
• Blinks constantly together with the "Read Result" LED 2)<br />
(The external parameter memory is either empty, contains the parameter set for<br />
a different CLV type, or is corrupt.<br />
CLV has loaded the internal parameter set. It starts Reading mode but does not<br />
output data over the host interface.)<br />
Start option: START WITH INTERNAL PARAMETERS:<br />
• Lights up constantly (CLV has loaded internal parameter set)<br />
Start option: START WITH COPY INTERN -> EXTERN:<br />
• Blinks alternately with the "Read Result" LED for approx. 10s before lighting<br />
up constantly<br />
(CLV has successfully copied the internal parameter set to the external memory<br />
and has reset the start option to START WITH EXTERNAL PARAMETERS).<br />
CLV has loaded the internal parameter set.<br />
• Blinks constantly together with the "Read Result" LED 2)<br />
(The external parameter memory is either not connected or corrupt, or the<br />
parameter set is too large to be copied). CLV has loaded the internal parameter<br />
set.<br />
Read Result Green Start option: START WITH EXTERNAL PARAMETERS (default):<br />
• Blinks for approx. 10 s together with "Device Ready" LED 1) (see above) or<br />
• Blinks constantly together with the "Device Ready" LED 2) (see above)<br />
Start option: START WITH COPY INTERN -> EXTERN:<br />
• Blinks alternately with "Device Ready" LED for approx. 10 s (see above) or<br />
• Blinks constantly together with the "Device Ready" LED 2) (see above)<br />
Reading mode Device Ready Green • Lights up constantly<br />
• Extinguishes with new operating mode/function<br />
Sensor Green • Lights up if reading diode active<br />
(The laser diode is activated/deactivated by the reading pulse)<br />
• Lights up constantly in Free-running mode, since the laser diode is constantly<br />
active<br />
Read Result Green LED is linked to the "Result 2" output and indicates the selected result status for the<br />
defined pulse duration of the output.<br />
• Lights up after a successful read (Good Read)<br />
• Lights up if the match code comparison is active, the bar code read matches the<br />
specified match code(s) and the corresponding result output is selected for the<br />
"Result 2" output<br />
1) We recommend that you check the parameter set manually, e. g. by printing out the entire configuration. For troubleshooting, see also Chapter 8.3.2 LED error messages<br />
for the external parameter memory, Page 8-5<br />
2) Stops blinking when you switch from Reading mode to Parameterization mode<br />
Table 3-3: Meaning of LEDs: CLV with external parameter memory<br />
3-10 © SICK AG · Division Auto Ident · Germany · All rights reserved 8 008 796/0000/25-06-2002
Operating Instructions Chapter 3<br />
CLV 490 Bar Code Scanner<br />
Product description<br />
Operating mode LED Display Function<br />
Reading mode<br />
(contd.)<br />
Data Yellow • Flickers when the CLV transmits data to the host over the host interface<br />
Percentage Sensor Green • Lights up constantly, since Free-running mode is active<br />
evaluation Read Result Green Behavior dependent on the reading quality:<br />
• Extinguishes if reading rate < 30 %<br />
• Blinks twice a second if reading rate 30 % ... 70 %<br />
• Blinks five times a second if reading rate 70 % ... 90 %<br />
• Lights up constantly if reading rate > 90 %<br />
Adjusting mode Sensor Green • Lights up constantly, since Free-running mode is active<br />
Show CP-limits Sensor Green • Blinks bright/dark alternately, in the frequency with which the scan line is (partially)<br />
masked out<br />
Table 3-3: Meaning of LEDs: CLV with external parameter memory<br />
8 008 796/0000/25-06-2002 © SICK AG · Division Auto Ident · Germany · All rights reserved 3-11
Chapter 3<br />
Product description<br />
Operating Instructions<br />
CLV 490 Bar Code Scanner<br />
Notes<br />
3-12 © SICK AG · Division Auto Ident · Germany · All rights reserved 8 008 796/0000/25-06-2002
Operating Instructions Chapter 4<br />
CLV 490 Bar Code Scanner<br />
4 Installation<br />
Installation<br />
4.1 Installation sequence<br />
• Change the language version of the laser warning label (if necessary)<br />
• Select the mounting location for the CLV<br />
• Align the CLV with the bar code<br />
• Mount the CLV<br />
• Mount the AMV/S 60 Connection Module<br />
• Connect the CLV to the AMV/S 60 Connection Module<br />
• Adjust the CLV so that it is in line with the bar code<br />
• Mount the reading pulse sensor for external triggering the reading pulse<br />
• Option with event-controlled dynamic focus control:<br />
mount the sensors for detecting the object distance<br />
4.2 Preparations<br />
4.2.1 Required components<br />
• CLV Bar Code Scanner<br />
4.2.2 Required accessories<br />
• SICK mounting bracket for the CLV:<br />
depending on the order, angle bracket no. 2 013 824, articulated bracket<br />
no. 2 018 435, or quick-clamping device no. 2 016 110 with securing material for<br />
the CLV<br />
– or –<br />
Alternatively, if the bracket is supplied by the user<br />
– Stable mounting device that allows the alignment of the CLV to be varied in the x and<br />
y axes. The weight of the CLV (line scanner) is 1.5 kg and 2.2 kg as a line scanner<br />
with oscillating mirror.<br />
– 2 screws M 6 for the CLV. The screw length depends on the wall thickness of the<br />
bracket used. Depth of engagement in CLV max. 7 mm from housing surface.<br />
• AMV/S 60 Connection Module (not included in the scope of supply of the CLV)<br />
• Reading pulse sensor for external reading pulse triggering, e. g. photoelectric reflex<br />
switch/ photoelectric proximity switch (not included in the scope of supply of the CLV)<br />
• Option with event-controlled dynamic focus control: sensors for detecting the object<br />
distance, e. g. photoelectric reflex switches/photoelectric proximity switches (not<br />
included in the scope of supply of the CLV)<br />
4.2.3 Required auxiliary parts<br />
• 2 screws M 6 for securing the SICK mounting bracket to the base. The screw length<br />
depends on the wall thickness of the base.<br />
• Set of laser warning labels (if necessary)<br />
• Tool<br />
• Measuring tape (up to 3 000 mm)<br />
• Protractor<br />
8 008 796/0000/25-06-2002 © SICK AG · Division Auto Ident · Germany · All rights reserved 4-1
Chapter 4<br />
Installation<br />
Operating Instructions<br />
CLV 490 Bar Code Scanner<br />
4.2.4 Replacing the laser warning label<br />
If necessary, replace the GB/US laser warning label with the required language (Fig. 4-1).<br />
The device is delivered with a set of laser warnings in:<br />
• German/US laser warning and<br />
• French/US laser warning<br />
See also Chapter 2.3 General safety instructions and protection measures, Page 2-1.<br />
Supplied laser warnings:<br />
RAYONNEMENT NE PAS REGARDER DANS LE FAISCEAU<br />
APPAREIL A LASER DE CLASSE 2<br />
Puissance max. du rayonnement: 2,8 mW<br />
Durée d'impulse : 111 s<br />
Longueur d'onde émis : 650 nm<br />
EN 60825-1:1994 + A11:1996<br />
C A U T I O N<br />
LASER LIGHT DO NOT STARE INTO BEAM<br />
CLASS II LASER PRODUCT<br />
Max. output: 2.8 mW<br />
Pulse duration: 56 s<br />
Wavelength: 650 nm<br />
Compiles with 21CFR 1040.10<br />
LASERSTRAHLUNG NICHT IN DENSTRAHL BLICKEN<br />
LASER KLASSE 2<br />
Max. Leistung: 2,8 mW<br />
Impulsdauer: 111 s<br />
Wellenlänge: 650 nm<br />
EN 60825-1:1994 + A11:1996<br />
C A U T I O N<br />
LASER LIGHT DO NOT STARE INTO BEAM<br />
CLASS II LASER PRODUCT<br />
Max. output: 2.8 mW<br />
Pulse duration: 56 s<br />
Wavelength: 650 nm<br />
Compiles with 21CFR 1040.10<br />
Fig. 4-1:<br />
Line scanner: replacing the laser warning labels<br />
4.2.5 Selecting the mounting location<br />
When you select the mounting location, the distance between the CLV and the host and<br />
between the CLV and the bar code are extremely important.<br />
Distance between the CLV and the host<br />
The CLV can be mounted at a maximum distance of 1 200 m from the host without a<br />
connection to the SICK network or a bus. In practice, however, the distance depends on the<br />
physical configuration of the host interface and the data transfer rate (see Table 5-7,<br />
Page 5-8).<br />
Distance between the CLV and the AMV/S 60 Connection Module<br />
The AMV/S 60 Connection Module should not be located further than 10 m from the CLV,<br />
since the "CLV-Setup" program on the PC accesses the terminal interface (RS 232) of the<br />
CLV via this module.<br />
4-2 © SICK AG · Division Auto Ident · Germany · All rights reserved 8 008 796/0000/25-06-2002
Operating Instructions Chapter 4<br />
CLV 490 Bar Code Scanner<br />
Installation<br />
4.2.6 Mounting accessories<br />
The CLV is secured in position using the two tapped blind holes (M 6) above the electrial<br />
connections. Fig. 4-2 shows the location of the threads near the line scanner.<br />
The dimensions of the CLV housing are shown in Fig. 9-1 to Fig. 9-2, Page 9-4.<br />
Drilled hole, ∅ 3.6 mm,<br />
6 mm deep<br />
Blind hole thread, M 6,<br />
7 mm deep<br />
Max. output radiation:<br />
Pulse duration:<br />
Emitted wavelength:<br />
2,8<br />
111<br />
650<br />
mW<br />
us<br />
nm<br />
EN 60825-1: 1994 + A11 : 1996<br />
CLASS II LASER PRODUCT<br />
Max. Output: 2,8 mW<br />
Pulse duration: 56 us<br />
Wavelength: 650 nm<br />
Compiles with 21 CFR 1040.10<br />
38.5<br />
10 10 10<br />
33.4<br />
78<br />
43.3<br />
56<br />
21<br />
12<br />
Fig. 4-2:<br />
Line scanner: position of the securing threads on the CLV<br />
The CLV can be mounted using the SICK bracket:<br />
• Mounting bracket, single no. 2 013 824<br />
• Articulated bracket (2 x mounting bracket, single) no. 2 018 435<br />
• Quick-clamping device no. 2 016 110<br />
The brackets are designed to support a variety of mounting positions and alignments in two<br />
planes. Fig. 4-3 shows two mounting examples.<br />
The elongated holes in the mounting bracket no. 2 013 824 and in the articulated bracket<br />
no. 2 018 435 allow the CLV to be adjusted with a freedom of rotation of ±15°.<br />
Quick-clamping<br />
device<br />
Mounting<br />
bracket<br />
Fig. 4-3:<br />
Line scanner: Mounting possibilities of the CLV<br />
The dimensions of the mounting brackets are shown in Chapter 10.14 Dimensioned drawings<br />
of the accessories, Page 10-75<br />
8 008 796/0000/25-06-2002 © SICK AG · Division Auto Ident · Germany · All rights reserved 4-3
Chapter 4<br />
Installation<br />
Operating Instructions<br />
CLV 490 Bar Code Scanner<br />
4.2.7 Distance between the CLV and the bar code<br />
Basic alignment between the CLV and the bar code<br />
Depending on the application, the line scanner or line scanner with oscillating mirror versions<br />
of the CLV is used. Fig. 4-4 shows how the device is aligned with the bar code on the object<br />
for each of the two scanning methods.<br />
Line scanner<br />
Line scanner with<br />
oscillating mirror<br />
Fig. 4-4:<br />
Scanning methods: alignment with bar code and conveyor direction<br />
Reading distance from the bar code and aperture angle α<br />
The distance between the reading window of the CLV and the bar code must not exceed<br />
the technical limits. The height of the reading field is shown as a function of the reading<br />
distance for various resolutions (module widths) depending on the CLV type in Chapter 10.2<br />
Specification diagrams, Page 10-1.<br />
Fig. 4-5 shows the definition of the reading distance a from the reading window and of the<br />
aperture angle α each of the two scanning methods.<br />
Line scanner<br />
Line scanner with oscillating mirror<br />
α<br />
α<br />
Reading distance a<br />
Reading distance a<br />
105°<br />
Fig. 4-5:<br />
Definition of the reading distance a and of the aperture angle α<br />
The useful aperture angle is typically 56° for the line scanner and max. 50° for the line scanner<br />
with oscillating mirror. Due to the V-principle of beam deflection, the reading field height<br />
(for evaluating the useful length of the scan line) depends on the readling distance.<br />
4-4 © SICK AG · Division Auto Ident · Germany · All rights reserved 8 008 796/0000/25-06-2002
Operating Instructions Chapter 4<br />
CLV 490 Bar Code Scanner<br />
Installation<br />
Angular alignment of the CLV<br />
The alignment of the CLV is optimum when the scan line travels over the bar code lines<br />
almost at a right angle (90°) (Fig. 4-4). All possible reading angles that can occur between<br />
the scan line and the bar code must be taken into consideration (Fig. 4-6 and Table 4-1).<br />
Reading<br />
range<br />
α: Azimuth angle (tilt)<br />
β: Angle of inclination (pitch)<br />
γ: Angle of rotation (skew)<br />
CLV<br />
Reading<br />
distance<br />
Fig. 4-6:<br />
Line scanner: Reading angle between the scan line and the bar code<br />
Angle Limit value<br />
Tilt α (azimuth) max. 45°<br />
Pitch β max. 45°<br />
Skew γ max. 45°<br />
Table 4-1: Permissible reading angles between the scan line and bar code<br />
Avoiding surface reflection<br />
If the light from the scan line strikes the surface of the bar code vertically, interference may<br />
be caused by reflections when the returned light is received. To avoid surface reflection, the<br />
CLV must be mounted in such a way that the emitted light is tilted slightly with respect to the<br />
vertical axis (Fig. 4-7).<br />
Line scanner<br />
Line scanner with oscillating mirror<br />
15°<br />
15°<br />
105°<br />
(Top view)<br />
(Side view)<br />
Fig. 4-7:<br />
Avoiding surface reflections: Angle between the emitted light and the bar code (tilted<br />
away from the vertical axis)<br />
In the case of the line scanner with oscillating mirror, the laser beam is emitted at an angle<br />
of 105° with respect to the housing as it passes through the neutral position (CW = 50) while<br />
oscillating. The device can only be flush-mounted with the conveyor belt with limited deflection<br />
ranges. Otherwise, the device must also be mounted at an angle of 15° to ensure<br />
that the deflection ranges are symmetric.<br />
8 008 796/0000/25-06-2002 © SICK AG · Division Auto Ident · Germany · All rights reserved 4-5
Chapter 4<br />
Installation<br />
Operating Instructions<br />
CLV 490 Bar Code Scanner<br />
Note<br />
In oscillating mode with variable amplitude, the scan line must always sweep the neutral<br />
position (CW = 50). This means that oscillation is not possible in the range 60 CW to 80 CW,<br />
for example, but is possible in the range 40 CW to 80 CW.<br />
4.2.8 Count direction of the code position CP and code angle CW<br />
Explanation<br />
The CLV can scan and decode several bar codes with each read. In doing so, it determines<br />
the specific local reading diagnosis data for each bar code:<br />
• The position (CP value) of the center of the bar code within the scan line<br />
• (Scanning method using the oscillating mirror) also the angle of deflection of the scan<br />
line (CW value) at which the center of the bar code is recorded<br />
Fig. 4-8 shows the count direction of the code position and code angle. In the case of the<br />
line scanner, the count direction of the code position is marked by a small triangle above<br />
the reading window.<br />
By determining this data, the device can separate identical bar codes (code type, code<br />
length, and data content identical) and assign the bar code data in the reading result to its<br />
position on the object.<br />
Line scanner<br />
Line scanner with<br />
oscillating mirror<br />
90<br />
100<br />
CP<br />
CW<br />
10<br />
0<br />
100<br />
CP<br />
0<br />
Scanning direction<br />
Aperture angle α (opening angle) in the scanning direction: 1° = 1.5 CP (56° = 90 CP)<br />
Deflection angle of the scan line crosswise to the scanning direction: 1° = 2 CW (20° = 40 CW)<br />
Fig. 4-8:<br />
Count direction of the code position CP in the scan line and of the code angle CW for the<br />
oscillating mirror<br />
Tip<br />
In the default setting, the CLV does not output the "CP" and "CW" values (line scanner with<br />
oscillating mirror only) in the reading result on the host interface. If this is required to<br />
evaluate the result in the host, the values can be included in the separator of the output<br />
string using the "CLV-Setup" program.<br />
4-6 © SICK AG · Division Auto Ident · Germany · All rights reserved 8 008 796/0000/25-06-2002
Operating Instructions Chapter 4<br />
CLV 490 Bar Code Scanner<br />
Installation<br />
Configuring the separator:<br />
1. Choose the DATA STRINGS tab.<br />
2. Click the SEPARATOR field.<br />
The EDIT PARAMETER TFS dialog box is displayed.<br />
3. In the list field, click the CP and/or CW parameters.<br />
CP and/or CW then appears in the top line.<br />
4. Confirm your selections with OK.<br />
5. Download the data to the CLV by clicking in the toolbar.<br />
The DOWNLOAD PARAMETERS dialog box is then displayed.<br />
6. Confirm the dialog box by choosing PERMANENT.<br />
The CLV outputs the CP value and the CW value on the host interface for each bar code<br />
in the reading result. The values are displayed as a 3-digit number in the associated separator.<br />
4.3 Mounting and adjusting the device<br />
4.3.1 Mounting the CLV<br />
1. Prepare the base for mounting the bracket as described in Chapter 4.2.2 Required accessories,<br />
Page 4-1.<br />
2. Place the object containing the bar code within the reading field of the CLV (in the position<br />
at which it is to be read) with the conveyor belt switched off.<br />
3. Align the CLV with the bar code (in accordance with the scanning method) in such a way<br />
that<br />
– with the line scanner the back of the device with the LEDs is almost parallel with the<br />
bar code surface,<br />
– with the line scanner with oscillating mirror, the broad side wall (back of the oscillating<br />
mirror) is almost parallel with the bar code surface<br />
All of the possible reading angles must be taken into consideration (see Fig. 4-6,<br />
Page 4-5).<br />
4. If it is relevant for the evaluation, note the count direction of the code position and code<br />
angle (see Fig. 4-8, Page 4-6).<br />
5. Mount the CLV bracket on the base.<br />
Risk of damage to the housing!<br />
The maximum depth of engagement of the two blind hole threads M 6 is 7 mm.<br />
Longer screws will damage the housing.<br />
¾ Use screws with the correct length.<br />
6. Screw the screws M 6 through the bracket into the blind hole threads of the CLV.<br />
7. Tighten the screws slightly.<br />
8. Adjust the CLV as described below.<br />
8 008 796/0000/25-06-2002 © SICK AG · Division Auto Ident · Germany · All rights reserved 4-7
Chapter 4<br />
Installation<br />
Operating Instructions<br />
CLV 490 Bar Code Scanner<br />
4.3.2 Adjusting the CLV<br />
The CLV can be adjusted in Percentage Evaluation mode. In this mode, the CLV displays the<br />
quality of the bar code reads that enter the CLV reading field statically (the object is not moved<br />
on the conveyor belt). The CLV performs 100 scans and evaluates the reading<br />
quality statistically. It then outputs the reading results every 2 s on the terminal interface.<br />
The behavior of the "Read Result" LED also indicates the reading quality:<br />
– The LED does not light up if the CLV cannot read the bar code (reading quality < 30 %).<br />
– If the CLV is having problems reading the bar code (reading quality 30 % ... 90 %), the<br />
LED blinks.<br />
– The CLV is aligned optimally when the LED lights up constantly (reading quality > 90 %).<br />
The scanning frequency in the default setting is 800 Hz.<br />
1. Connect the CLV to the AMV/S 60 Connection Module and switch on the power supply<br />
(see Chapter 5.5.3 Connecting the supply voltage, Page 5-13).<br />
After it has started, the CLV confirms that the self-test was successfuly and switches to<br />
reading mode ("Device Ready" LED lights up).<br />
2. Connect the PC to the terminal interface of CLV via the RS 232 line using the internal<br />
9-pin "Service" plug of the AMV/S 60 (see Chapter 5.5.5 Connecting the CAN interface,<br />
Page 5-15).<br />
3. Start Windows and the "CLV-Setup" program (see Chapter 10.6.3 Starting CLV-Setup,<br />
Page 10-43).<br />
Choosing the standard decoder:<br />
4. Choose the CODE CONFIGURATION tab.<br />
5. Click the STANDARD option in the DECODER section.<br />
6. Download the settings to the CLV by clicking on the toolbar.<br />
The DOWNLOAD PARAMETERS dialog box is then displayed.<br />
7. Confirm the dialog box by choosing TEMPORARY.<br />
The CLV then operates with the standard decoder.<br />
Activating Percentage Evaluation mode:<br />
8. From the VIEW menu, choose PERCENTAGE EVALUATION.<br />
The dialog box for entering the distance configuration appears.<br />
9. Click the relevant distance configuration for the reading distance:<br />
– with autofocus mode the distance configuration no. 1<br />
– with event-controlled dynamic focus control the distance configuration that matches<br />
the reading distance of the object (default: no. 1, focus position F = 1 200 mm).<br />
10. Confirm the dialog box with OK.<br />
The Terminal Emulator is launched and displays the reading result continuously (see<br />
Chapter 6.5.2 Percentage evaluation, Page 6-22).<br />
Monitor the reading quality (%) during each of the subsequent steps!<br />
Line scanner with oscillating mirror:<br />
In the "Percent Evaluation" mode, the CLV behaves in the following manner:<br />
– in "Oscillating" mode (default setting: oscillating with a fixed amplitude), the CLV shuts<br />
off oscillation and positions the scan line under the angle CW = 50 (corresponds to<br />
an angle of deflection of 105°). This position cannot be altered.<br />
– in "One-Shot" mode, the CLV also positions the scan line under the angle CW = 50<br />
– in "Set Position" mode, the scan line’s selected position remains unchanged.<br />
4-8 © SICK AG · Division Auto Ident · Germany · All rights reserved 8 008 796/0000/25-06-2002
Operating Instructions Chapter 4<br />
CLV 490 Bar Code Scanner<br />
Installation<br />
Performing fine adjustment:<br />
11. Align the CLV in such a way that the angle between the scan line and the bars on the<br />
bar code CLV is almost 90°. The oscillating mirror must be aligned in such a way that<br />
the scan line is located at the center of the bar code, perpendicular to the bar code lines,<br />
when it is in the neutral position (CW = 50).<br />
12. To avoid interfering reflections, tilt the line scanner away from the vertical axis so that<br />
the light strikes the bar code at an angle of approx. 105° (see Fig. 4-7, Page 4-5).<br />
13. If necessary, position the scan line exactly at the direct center of the bar code.<br />
Chapter 4.3.3 Adjusting mode below.<br />
14. Move objects carrying bar codes into the CLV reading field manually under realistic<br />
conditions and check the reading result. If the objects are aligned randomly, or if the bar<br />
code is located at different positions (angles), ensure that the limit values of the<br />
permissible reading angles are not exceeded.<br />
15. Adjust the CLV in such a way that the good read rate is between 70... 100%.<br />
With event-controlled dynamic focus control, for each defined reading range (distance<br />
configuration), check the selected focus position and correct the parameter settings if<br />
necessary (see Chapter 6.4.4 Guide to parameterization menu, Page 6-8).<br />
16. Tighten the screws on the CLV.<br />
The CLV is aligned with the bar code.<br />
4.3.3 Adjusting mode<br />
The "Adjusting mode" helps you to position the center of the scan line on the object. To do<br />
so, the CLV masks out one half of the scan line from the center (code position CP = 50 to<br />
CP = 100). This is irrespective of whether the CLV is operated in Autofocus mode or with<br />
distance configurations for event-driven dynamic focus control. Fig. 4-9 shows the resulting<br />
position of the scan line (line scanner).<br />
Adjusting mode<br />
Scan line<br />
CP = 100<br />
Range masked out<br />
CP = 50<br />
CP = 0<br />
Fig. 4-9:<br />
Line scanner: scan line in Adjusting mode<br />
Line scanner with oscillating mirror:<br />
In "Adjusting" mode, the oscillating mirror behaves in the same manner as within the ”Percent<br />
Evaluation” mode (see Page 4-8, ”Activating Percentage Evaluation mode”).<br />
1. Activate the operating mode as described in Chapter 6.5.3 Adjusting mode, Page 6-24.<br />
2. Position the CLV in such a way that the center of the scan line, indicated by the end of<br />
the scan line (code position CP = 50), is located at the center of the bar code, or at the<br />
center of the field for all codes if several bar codes are used.<br />
8 008 796/0000/25-06-2002 © SICK AG · Division Auto Ident · Germany · All rights reserved 4-9
Chapter 4<br />
Installation<br />
Operating Instructions<br />
CLV 490 Bar Code Scanner<br />
Show CP Limits<br />
The "Show CP Limits" operating mode allows you to test whether the desired effect was produced<br />
by narrowing the scan line’s active evaluation range. The CLV alternatively hides certain<br />
parts of the scan line in accordance with the selected min. and max. values of the code<br />
position.<br />
For activation of this operating mode and for checking, See Chapter 6.5.5 Show CP-limits,<br />
Page 6-26.<br />
4.4 Mounting the external components<br />
4.4.1 Mounting the AMV/S 60 Connection Module<br />
1. Mount the AMV/S 60 Connection Module near the CLV.<br />
The distance between the AMV/S 60 and CLV should not exceed max. 10 m.<br />
2. Mount the AMV/S 60 in such a way that accessed to the open device is always possible.<br />
The terminal interface of the CLV is accessed via the internal "Service" plug.<br />
Detailed information on the mounting and electrical installation procedures is provided in the<br />
Operating Instructions for the "AMV/S 60 Connection Module" (order no. 8 008 296).<br />
4.4.2 Mounting the external reading pulse sensor<br />
If the CLV is triggered by an external reading pulse sensor, the sensor must be mounted in<br />
the vicinity of the CLV. The "Sensor" switching input is selected as the default trigger source<br />
for this trigger type. The default debounce time of the input is 30 ms.<br />
Fig. 4-10 shows two examples of where a photoelectric reflex switch can be mounted. This<br />
depends on the distance a from the bar code to the front of the object. Depending on the<br />
application, you may need to mount the sensor in such a way that bar codes on objects of<br />
different sizes can be read completely during the reading interval.<br />
Bar code in the center or at the end of the object<br />
a<br />
(Top view)<br />
a<br />
b<br />
b < a<br />
b < a<br />
b<br />
Bar code at the start of the object<br />
aa<br />
(Top view)<br />
a<br />
b<br />
b < a<br />
b < a<br />
b<br />
Fig. 4-10:<br />
Line scanner: mounting example for the external reading pulse sensor<br />
4-10 © SICK AG · Division Auto Ident · Germany · All rights reserved 8 008 796/0000/25-06-2002
Operating Instructions Chapter 4<br />
CLV 490 Bar Code Scanner<br />
Installation<br />
1. Mount the reading pulse sensor.<br />
2. Connect the reading pulse sensor to the "Sensor" switching input of the CLV via the<br />
AMV/S 60 Connection Module (see Chapter 5.5.7 Connecting the switching inputs,<br />
Page 5-16).<br />
3. Connect the CLV to the AMV/S 60 Connection Module and switch on the power supply<br />
to the module (see Chapter 5.5.3 Connecting the supply voltage, Page 5-13).<br />
After it has started, the CLV confirms that the self-test was successfull and switches to<br />
Reading mode ("Device Ready" LED lights up).<br />
4. Connect the PC to the terminal interface of CLV via a RS 232 data connection cable<br />
using the internal 9-pin "Service" plug of the AMV/S 60 (see Chapter 5.5.5 Connecting<br />
the CAN interface, Page 5-15).<br />
5. Start Windows and the "CLV-Setup" program (see Chapter 10.6.3 Starting CLV-Setup,<br />
Page 10-43).<br />
6. From the VIEW menu, choose READING MODE.<br />
The Terminal Emulator is launched. The CLV is in Reading mode (default: SMART<br />
decoder).<br />
Monitor the reading result during each of the subsequent steps!<br />
Line scanner with oscillating mirror:<br />
In default setting, the CLV deflects the scan line (default setting) about the fixed position<br />
CW = 50 with a frequency of 1 Hz at a max. angle of ±20° (±40 CW).<br />
50 CW corresponds to an angle of emergence of 105°.<br />
7. Move objects with bar codes into the CLV reading field manually under realistic conditions<br />
and check whether the reading result and trigger pulse are correct.<br />
8. Repeat the procedure with the conveyor switched on. Check whether the reading<br />
procedure is synchronized with the objects.<br />
Parameterizing an external sensor as a trigger source:<br />
These settings are not required if the CLV is operated with the default configuration.<br />
1. Choose the DEVICE CONFIGURATION tab.<br />
2. In the READING TRIGGER MODE section click the option SENSOR INPUT (ACTIVE HIGH).<br />
3. Download the settings to the CLV by clicking in the toolbar.<br />
The DOWNLOAD PARAMETERS dialog box is then displayed.<br />
4. Confirm the dialog box by choosing PERMANENT.<br />
The CLV operates with the "Sensor" switching input as an external trigger source. The<br />
reading pulse starts when the input is energized (high).<br />
8 008 796/0000/25-06-2002 © SICK AG · Division Auto Ident · Germany · All rights reserved 4-11
Chapter 4<br />
Installation<br />
Operating Instructions<br />
CLV 490 Bar Code Scanner<br />
4.4.3 Mounting the sensors for detecting the object distance<br />
If the dynamic focus control function of the CLV is triggered by external sensors, suitable<br />
sensors must be mounted in the vicinity of the CLV. Fig. 4-11 shows an example of a read<br />
operation from above. The sensors must be arranged in such a way that all of the potential<br />
object heights are classified uniquely and overlapping reading ranges occur that can be formed<br />
with the depths of field of the CLV. A maximum of five switching inputs are available for<br />
this purpose. A max. of 32 switching states for 8 distance configurations (reading ranges)<br />
can be implemented using the internal assignment table (combinations). Photoelectric reflex<br />
switches, for example, can be used to detect the object distance. In the default setting, all<br />
five "IN 0 ... IN 4" switching inputs are selected for dynamic focus control.<br />
DC8<br />
LS7<br />
h7<br />
Object distance<br />
Reading distance<br />
DC2<br />
DC1<br />
LS2<br />
LS1<br />
h2<br />
h1<br />
Fig. 4-11:<br />
DC = Distance Configuration<br />
Mounting example for object distance detection<br />
1. The depths of field of the CLV for the bar code resolution in question is shown in the<br />
graphs in Chapter 10.2 Specification diagrams, Page 10-1 onwards. Find and note suitable<br />
focus positions for overlapping reading ranges.<br />
2. Mount distance sensors (e. g. photoelectric reflex switches) one above the other in a<br />
row at the mounting location to measure the object distance (see also assignment<br />
Table5-20, Page5-18). It is advisable to mount these distance sensors opposite the<br />
direction of motion of the conveyor belt at approx. 100 mm in front of the reading pulse<br />
sensor.<br />
3. Connect the distance sensors to the "IN 0 ... IN 4" switching inputs on the CLV via the<br />
AMV/S 60 Connection Module (see Chapter 5.5.7 Connecting the switching inputs,<br />
Page 5-16).<br />
4. Set the focus positions for the required reading ranges on the READING CONFIGURATION<br />
tab in the "CLV-Setup" program. To do so, click the DISTANCE CONFIGURATION/ASSIGNMENT<br />
TABLE button and edit the required entries in the dialog box that is then displayed.<br />
5. As described in Chapter 4.3.2 Adjusting the CLV, Page 4-8, choose the standard decoder<br />
and start Percentage Evaluation mode temporarily.<br />
6. Check the reading quality in all distance configurations while the conveyor belt stationary.<br />
7. Then check the distance detection function in Reading mode under realistic conditions.<br />
To do so, monitor the reading result in the Terminal Emulator as described in<br />
Chapter 4.4.2 Mounting the external reading pulse sensor, Page 4-10.<br />
Default: Focus position F 1 up to F 8 = 1 200 mm.<br />
4-12 © SICK AG · Division Auto Ident · Germany · All rights reserved 8 008 796/0000/25-06-2002
Operating Instructions Chapter 4<br />
CLV 490 Bar Code Scanner<br />
Installation<br />
Note<br />
The CLV can switch between a maximum of 8 distance ranges for slow search runs using<br />
the integrated timer or the oscillating mirror reversal points.<br />
The CLV can be switched between a maximum of 8 distance ranges synchronously to the<br />
reading process using command strings.<br />
4.5 Dismantling the device<br />
1. Switch off the power supply to the AMV/S 60 Connection Module.<br />
2. Undo the screws for the cable connections on the CLV and disconnect the cables.<br />
With mounted external parameter memory (optional):<br />
Undo both screws and remove the cover.<br />
3. Unscrew the CLV from the mounting device.<br />
When removing the device from service for the last time, please dispose of it in an<br />
environmentally-friendly manner, as described in Chapter 7.3 Disposal, Page 7-2.<br />
8 008 796/0000/25-06-2002 © SICK AG · Division Auto Ident · Germany · All rights reserved 4-13
Chapter 4<br />
Installation<br />
Operating Instructions<br />
CLV 490 Bar Code Scanner<br />
Notes<br />
4-14 © SICK AG · Division Auto Ident · Germany · All rights reserved 8 008 796/0000/25-06-2002
Operating Instructions Chapter 5<br />
CLV 490 Bar Code Scanner<br />
Electrical installation<br />
5 Electrical installation<br />
CLV Type<br />
Temperatur<br />
range<br />
5.1 Installation sequence<br />
• Connect the CLV to a SICK Connection Module from the series AMV/S, BMV/BMH 10<br />
or BMS 20, or using a customer-specific wiring configuration<br />
• Connect the data and function interfaces of the CLV in the module<br />
• Connect the PC to the Connection Module (at the terminal interface on the CLV)<br />
• Connect the power supply to the Connection Module<br />
5.1.1 SICK Connection Modules (overview)<br />
Connection<br />
module<br />
Purpose<br />
CLV without heater 0 ... +40 °C AMV 60 – Connecting one CLV<br />
– Operating voltage 18 ... 30 V DC<br />
– Enclosure rating IP 30, max. IP 54<br />
CLV with heater<br />
– Line scanner<br />
– Line scanner<br />
with oscillating<br />
mirror<br />
Table 5-1: Connection Modules for the CLV<br />
AMS 60<br />
AMV 100<br />
BMV/BMH 10<br />
Bus Connection<br />
Module<br />
BMS 20<br />
Interbus-S<br />
AMV 30-071<br />
AMV 200<br />
– Connecting one CLV<br />
– Operating voltage 230 V AC (115 V)/24 V DC<br />
– Enclosure rating IP 30, max. IP 54<br />
– Connecting one CLV<br />
– Operating voltage 18 ... 30 V DC<br />
– Enclosure rating IP 52,<br />
with connector cover max. IP 65<br />
– Connecting one CLV to the Profibus-DP, DeviceNet<br />
or Ethernet<br />
– Operating voltage 20 ... 30 V DC<br />
– Enclosure rating IP 52,<br />
with connector cover max. IP 65<br />
– Connecting one CLV to the Interbus-S<br />
– Operating voltage 24 V DC<br />
– Enclosure rating max. IP 54<br />
– Connecting two CLVs<br />
– Operating voltage 18 ... 30 V DC<br />
– Enclosure rating IP 30, max. IP 54<br />
– Connecting two CLVs<br />
– Operating voltage 18 ... 30 V DC<br />
– Enclosure rating IP 52,<br />
with connector cover max. IP 65<br />
see<br />
chapter<br />
AMV 100 – Connecting one CLV 5.2.5<br />
–35 ... +35 °C – Operating voltage 24 V DC +20%/–10%<br />
–35 ... +35 °C – Enclosure rating IP 52,<br />
with connector cover max. IP 65<br />
AMV 200<br />
– Connecting two CLVs<br />
– Operating voltage 24 V DC +20%/–10%<br />
– Enclosure rating IP 52,<br />
with connector cover max. IP 65<br />
5.2.3<br />
5.2.3<br />
5.2.3<br />
5.2.4<br />
5.2.4<br />
5.2.3<br />
5.2.3<br />
5.2.3<br />
8 008 796/0000/25-06-2002 © SICK AG · Division Auto Ident · Germany · All rights reserved 5-1
Chapter 5<br />
Electrical installation<br />
Operating Instructions<br />
CLV 490 Bar Code Scanner<br />
5.2 Electrical connections and cables<br />
CLV<br />
Type<br />
CLV<br />
without<br />
heater<br />
CLV with<br />
heater<br />
Temperature<br />
range<br />
The electrical connections on the CLV consist of two 15-pin D Sub HD connections on the<br />
housing, one plug, and one socket.<br />
These connections are used to route the following interfaces:<br />
• Three serial data interfaces (host interface, CAN interface and terminal interface)<br />
• Six switching inputs (external reading pulse and multifunctional inputs)<br />
• Four switching outputs (for result status function, for connecting to a PLC for example)<br />
• CAN bus (for OTS operation)<br />
• Power supply<br />
5.2.1 Wire cross-sections<br />
CLV without heater:<br />
¾<br />
All connections must be wired with copper cables with a minimum wire diameter of<br />
0.15 mm 2 !<br />
CLV with heater:<br />
¾<br />
Connect the power supply terminals (Pin 1/Pin 5) using copper wires with a minimum<br />
cross-section of 0.75 mm 2 at a maximum length of 10 m!<br />
5.2.2 Prefabricated cables (overview)<br />
Connection<br />
module<br />
Optional<br />
cables<br />
0 ... +40 °C AMV/S 60 2 x No. 2 020 302 or<br />
1 x No. 2 020 307<br />
BMV/BMH 10<br />
Bus Connection<br />
Module<br />
AMV 30-071<br />
BMS 20<br />
Interbus-S<br />
Non-Sick Power<br />
pack<br />
1 x No. 2 020 307 or<br />
1 x No. 2 021 298<br />
2 x No. 2 020 302 or<br />
1 x No. 2 020 307<br />
1 x No. 2 020 264 +<br />
1 x No. 2 020 265 or<br />
1 x No. 2 020 308<br />
1 x No. 2 020 303 +<br />
1 x No. 2 020 264 or<br />
1 x No. 2 020 981 or<br />
1 x No. 2 021 267<br />
– 35 ... +35 °C AMV 100 1 x No. 2 021 298 or<br />
1 x No. 2 021 689<br />
AMV 200<br />
2 x No. 2 021 298 or<br />
2 x No. 2 021 689<br />
Non-Sick Power<br />
pack<br />
Table 5-2: Cables for connecting the CLV<br />
Length<br />
3 m<br />
3 m<br />
3 m<br />
3 m<br />
3 m<br />
3 m<br />
3 m<br />
3m<br />
3m<br />
3 m<br />
3 m<br />
3 m<br />
3 m<br />
3 m<br />
3 m<br />
3 m<br />
3 m<br />
Type<br />
Connecting cable (plug/socket)<br />
Ext. parameter memory with 2 cables<br />
(plug/socket)<br />
Ext. parameter memory with 2 cables<br />
(plug/socket)<br />
Connector cover to connector cover<br />
Connecting cable (plug/socket)<br />
Ext. parameter memory with 2 cables<br />
(plug/socket)<br />
Connecting cable with plug/open end<br />
Connecting cable with plug/socket<br />
Ext. parameter memory with 2 cables<br />
(plug/open end)<br />
Connecting cable with socket/open end<br />
Connecting cable with plug/open end<br />
Ext. parameter memory with 2 cables<br />
(open ends)<br />
Connector cover with 2 cables (open ends)<br />
Connector cover to connector cover<br />
Ext. parameter memory to connector cover<br />
Connector cover to connector cover<br />
Ext. parameter memory to connector cover<br />
1 x No. 2 021 267 3 m Connector cover with 2 cables (open ends)<br />
For technical data on the cables, see Chapter 10.13.4 Cables, external parameter memories<br />
and plug cover, Page 10-73.<br />
5-2 © SICK AG · Division Auto Ident · Germany · All rights reserved 8 008 796/0000/25-06-2002
Operating Instructions Chapter 5<br />
CLV 490 Bar Code Scanner<br />
Electrical installation<br />
5.2.3 Connections/cables for the AMV/S Connection Module<br />
The AMV/S Connection Module is suitable for connecting the CLV to peripherals (distribution<br />
function) and the power supply. The module can be used to establish a connection to the<br />
host (point-to-point) or integrate the device in a SICK network or daisy-chain configuration<br />
(pass-through or master/slave configuration). The module is available in several variants<br />
(see Table 5-1, Page 5-1).<br />
Fig. 5-1 shows the connection principle of the AMV/S 60 for one CLV.<br />
CLV 490<br />
AMV/AMS 60<br />
connection module<br />
PC<br />
Photoelectric<br />
switch<br />
Reading pulse<br />
Photoelectric<br />
switch<br />
Focal position<br />
Trigger One-Shot<br />
Conveyor increment<br />
– – Cable if required (if necessary)<br />
HOST/PLC<br />
PLC<br />
18 ... 30 V DC (AMV 60-011)<br />
230 V AC 50 Hz (AMS 60-013)<br />
115 V AC 50/60 Hz (AMS 60-012)<br />
Fig. 5-1:<br />
Block diagram: Connection of the CLV to the AMV/S 60 connection module<br />
Connecting the CLV to the AMV/S<br />
Two cables no. 2 020 302 are required to connect the CLV to the AMV/S. Alternatively, the<br />
device can be connected via the external parameter memory no. 2 020 307.<br />
See Chapter 5.2.5 Connections/cables for the external parameter memory (connection to<br />
AMV/S or BMV 10/BMS 20), Page 5-4.<br />
a) CLV without heater:<br />
Connection modules: AMV/S 60 and AMV 30-071.<br />
The cables no. 2 020 302 can be extended to 10 m (terminal interface: RS 232!).<br />
Recommendation<br />
b) CLV with heater:<br />
Connection modules: AMV 100 and AMV 200.<br />
The cables no. 2 020 302 must not be extended!<br />
If longer cables are required, the entire power supply system (Pin 1/Pin 5) must be<br />
connected with a wire cross-section of at least 0.75 mm 2 with a maximum length of 10 m.<br />
Use the cable no. 2 021 298 (with two connector covers, length 3 m).<br />
The procedures for connecting and configuring the AMV/S Connection Modules are<br />
described in the following documentation:<br />
• Operating Instructions for the "AMV/S 60 Connection Module" (no. 8 008 296)<br />
• Operating Instructions for the "AMV 30-071 Connection Module" (no. 8 008 648)<br />
• Operating Instructions for the "AMV 100/200 Connection Module" (no. 8 008 879)<br />
8 008 796/0000/25-06-2002 © SICK AG · Division Auto Ident · Germany · All rights reserved 5-3
Chapter 5<br />
Electrical installation<br />
Operating Instructions<br />
CLV 490 Bar Code Scanner<br />
5.2.4 Connections/cables for the Bus Connection Modules<br />
BMV 10 and BMS 20<br />
The BMV 10 Bus Connection Module (depending on the model) is used to connect a CLV<br />
to the Profibus-DP, DeviceNet, or to the Ethernet for use in industrial applications.<br />
The BMS 20 Bus Connection Module enables the CLV to be integrated in the Interbus-S.<br />
Connecting the CLV to the BMV 10/BMS 20<br />
BMV 10: two cables no. 2 020 302 are required.<br />
BMS 20: the cables no. 2 020 265 and no. 2 020 264 are required.<br />
Alternatively, via external parameter memory no. 2 020 307 (see Chapter 5.2.5 Connections/cables<br />
for the external parameter memory (connection to AMV/S or BMV 10/<br />
BMS 20).<br />
a) CLV without heater:<br />
Connection modules: BMV 10 and BMS 20.<br />
The cables no. 2 020 302 can be extended to 10 m for CLVs without a heater (host and<br />
terminal interface: RS 232!).<br />
Recommendation<br />
b) CLV with heater:<br />
Connection module: BMV 10.<br />
The BMV 10 may only be used if it is mounted outside the refrigeration area (temperature<br />
range 0 ... +40 °C).<br />
The cables no. 2 020 302 must not be extended. If longer cables are required, the entire<br />
power supply system (Pin 1/Pin 5) must be connected with a wire cross-section of at least<br />
0.75 mm 2 at a maximum of 10 m.<br />
Use the cable no. 2 021 298 (with two connector covers, length 3 m).<br />
The BMS 20 is not suitable for powering CLVs with heater!<br />
The procedures for connecting and configuring the Bus Connection Modules are described<br />
in the following documentation:<br />
• Operating Instructions for the "BMV/BMH 10 for Profibus DP Bus Connection Module"<br />
(no. 8 008 825)<br />
• Operating Instructions for the "BMV/BMH 10 for DeviceNet Connection Module"<br />
(no. 8 008 972)<br />
• Operating Instructions for the "BMV/BMH 10 for Ethernet Connection Module"<br />
(no. 8 009 398)<br />
• Technical Information for the "BMS 20 for Interbus-S Bus Connection Module"<br />
(no. 8 007 546)<br />
5.2.5 Connections/cables for the external parameter memory<br />
(connection to AMV/S or BMV 10/BMS 20)<br />
The external parameter memory (external accessory) is located in a connector cover with<br />
15-pin D Sub HD plug connections. The cover covers the terminals on the CLV so that the<br />
enclosure rating IP 65 is achieved.<br />
The connector cover with the external parameter memory is prefabricated with two cables,<br />
each 3 m in length, and is available with four different cable ends:<br />
• With two 15-pin D Sub HD connections (pin assignment identical to that of the CLV<br />
terminals), no. 2 020 307<br />
• With a connector cover, no. 2 021 689<br />
5-4 © SICK AG · Division Auto Ident · Germany · All rights reserved 8 008 796/0000/25-06-2002
Operating Instructions Chapter 5<br />
CLV 490 Bar Code Scanner<br />
Electrical installation<br />
• With two open cable ends, no. 2 020 981<br />
• with one 9-pin D Sub cable connector and one open end, no. 2 020308<br />
Connecting the CLV with external parameter memory<br />
Recommendation<br />
a) CLV without heater:<br />
Connection Modules: AMV/S 60, AMV 30-071, BMV 10<br />
¾<br />
Cover the terminals on the CLV with the connector cover (parameter memory)<br />
no. 2 020 307. Connect the plug/socket on the cables ("Host/Term" and " I/O" connections)<br />
with the appropriate connections on the AMV/S or BMV 10.<br />
Connection Module: BMS 20.<br />
¾<br />
Cover the terminals on the CLVs with the connector cover (parameter memory)<br />
no. 2 020 308. Connect the 9-pin plug ("Host/Term" connection) to the socket on the<br />
BMS 20. Connect the wires of the free cable end ( "I/O" terminal) to the terminal strips<br />
in the BMS 20.<br />
Use the external parameter memory no. 2 020 981 (open cable ends) for connecting the<br />
device to non-Sick Power packs/wiring configurations.<br />
b) CLV with heater:<br />
Connection Module: AMV 100/200<br />
¾<br />
¾<br />
AMV 100: Cover the terminals on the CLV with the connector cover (parameter<br />
memory) no. 2 021 689, labeled "SCANNER". Connect the other connector covers,<br />
labeled "HOST", to the corresponding connections on the AMV 100.<br />
AMV 200: see AMV 100, proceed in the same way with the second CLV.<br />
5.2.6 Connections/cables for the IP 65 connector cover<br />
(connection to AMV 100/200 or BMV 10)<br />
The connector cover (optional accessory) with 15-pin D Sub HD plug connections is used<br />
to cover the terminals on the CLV so that the enclosure rating IP 65 is provided.<br />
The connector cover is prefabricated with two cables, each of 3 m in length, and is available<br />
with two different cable ends:<br />
• With one additional connector cover at the other end (pins assignment identical to that<br />
of the CLV terminals), no. 2 021 298<br />
• With two open cable ends, no. 2 021 267<br />
Recommendation<br />
CLV with heater:<br />
Both connector cover variants can be used with temperatures up to max. –50 °C if the CLV<br />
is stationary and the cables are not moved. If the cables are moved due to changes in the<br />
position of the CLV, the temperature must not drop below max. –40 °C.<br />
Use the external parameter memory no. 2 020 267 (open cable ends) for connecting the<br />
device to non-Sick Power packs/wiring configurations.<br />
8 008 796/0000/25-06-2002 © SICK AG · Division Auto Ident · Germany · All rights reserved 5-5
Chapter 5<br />
Electrical installation<br />
Operating Instructions<br />
CLV 490 Bar Code Scanner<br />
5.3 Connector pin assignment<br />
5.3.1 Terminals on the CLV<br />
Device plug: "Host/Term" connection<br />
6 1 5 10 Pin Signal Function<br />
1 1) V S Supply voltage<br />
2 RxD (RS 232), Terminal Terminal interface (receiver)<br />
11 15 3 TxD (RS 232), Terminal Terminal interface (transmitter)<br />
4 Term (RS 422/485) Termination host interface<br />
5 GND Ground<br />
6 RD+ (RS 422/485), Host Host interface (receiver+)<br />
7 RD– (RS 422/485), Host Host interface (receiver–)<br />
RxD (RS 232), Host<br />
8 TD+ (RS 422/485), Host Host interface (transmitter+)<br />
9 TD– (RS 422/485), Host Host interface (transmitter–)<br />
TxD (RS 232), Host<br />
10 CAN H CAN Bus (IN/OUT)<br />
11 Bus RT_485–<br />
12 Bus RT_485+<br />
13 Bus R_485–<br />
14 Bus R_485+<br />
15 CAN L CAN Bus (IN/OUT)<br />
Housing – Shield<br />
1) Pin 1 is jumpered with Pin 1 of the "I/O" connection in the CLV<br />
Table 5-3: Pin assignment of the 15-pin D Sub HD "Host/Term" plug<br />
Device socket: "I/O" connection<br />
L<br />
10<br />
5 1 6 Pin Signal Function<br />
15<br />
11<br />
1 1) V S Supply voltage<br />
2 IN 1 Switching input (trigger for focus control)<br />
3 Sensor Switching input (external reading pulse)<br />
4 Result 1 Switching output, variable function<br />
5 GND Ground<br />
6 IN 0 Switching input (trigger for focus control)<br />
7 IN 2 Switching input (trigger for focus control)<br />
8 Result 2 Switching output, variable function<br />
9 INGND Common ground for all inputs<br />
10 Result 3 Switching output, variable function<br />
11 IN 3 Switching input, variable function<br />
12 IN 4 Switching input, variable function<br />
13 I2C SDA I2C Bus (for external parameter memory)<br />
14 I2C SCL I2C Bus (for external parameter memory)<br />
15 Result 4 Switching output, variable function<br />
Housing – Shield<br />
1) Pin 1 is jumpered with Pin 1 of the "Host/Term" connection in the CLV<br />
Table 5-4: Pin assignment of the 15-pin D Sub HD "I/O" socket<br />
5-6 © SICK AG · Division Auto Ident · Germany · All rights reserved 8 008 796/0000/25-06-2002
Operating Instructions Chapter 5<br />
CLV 490 Bar Code Scanner<br />
Electrical installation<br />
5.3.2 External parameter memory no. 2 020 307/2 021 689 (optional accessory)<br />
connector cover no. 2 021 298 (optional accessory)<br />
Cable plug: "Host/Term" connection<br />
6 1 5 10 Pin Signal Function<br />
1 1) V S Supply voltage<br />
2 RxD (RS 232), Terminal Terminal interface (receiver)<br />
11 15 3 TxD (RS 232), Terminal Terminal interface (transmitter)<br />
4 Term (RS 422/485) Termination host interface<br />
5 GND Ground<br />
6 RD+ (RS 422/485), Host Host interface (receiver+)<br />
7 RD– (RS 422/485), Host Host interface (receiver–)<br />
RxD (RS 232), Host<br />
8 TD+ (RS 422/485), Host Host interface (transmitter+)<br />
9 TD– (RS 422/485), Host Host interface (transmitter–)<br />
TxD (RS 232), Host<br />
10 CAN H CAN bus (IN/OUT)<br />
11 Bus RT_485–<br />
12 Bus RT_485+<br />
13 Bus R_485–<br />
14 Bus R_485+<br />
15 CAN L CAN bus (IN/OUT)<br />
Housing – Shield<br />
1) Pin 1 is jumpered with Pin 1 of the "I/O" connection in the CLV<br />
Table 5-5: Pin assignment of the 15-pin D Sub HD "Host/Term" cable plug<br />
Cable socket: "I/O" connection<br />
10 5 1 6 Pin Signal Function<br />
1 1) V S Supply voltage<br />
2 IN 1 Switching input (trigger for focus control)<br />
15 11 3 Sensor Switching input (external reading pulse)<br />
4 Result 1 Switching output, variable function<br />
5 GND Ground<br />
6 IN 0 Switching input (trigger for focus control)<br />
7 IN 2 Switching input (trigger for focus control)<br />
8 Result 2 Switching output, variable function<br />
9 INGND Common ground for all inputs<br />
10 Result 3 Switching output, variable function<br />
11 IN 3 Switching input, variable function<br />
12 IN 4 Switching input, variable function<br />
13 I2C SDA I2C Bus (for external parameter memory)<br />
14 I2C SCL I2C Bus (for external parameter memory)<br />
15 Result 4 Switching output, variable function<br />
Housing – Shield<br />
1) Pin 1 is jumpered with Pin 1 of the Host/Term connection in the CLV<br />
Table 5-6: Pin assignment of the 15-pin D Sub HD "I/O" cable socket<br />
8 008 796/0000/25-06-2002 © SICK AG · Division Auto Ident · Germany · All rights reserved 5-7
Chapter 5<br />
Electrical installation<br />
Operating Instructions<br />
CLV 490 Bar Code Scanner<br />
5.4 Preparations for electrical installation<br />
5.4.1 Requirements for the host interface<br />
The host interface of the CLV can be operated as an RS 422/485 or an RS 232 interface.<br />
Table 5-7 shows the recommended maximum cable lengths as a function of the selected<br />
data transfer rate.<br />
Interface type Transfer rate Distance from host<br />
RS 232<br />
Up to 19 200 bit/s Max. 10 m<br />
38 400...57 600 bit/s Max. 3 m<br />
¾<br />
RS 422/485 1)<br />
1) with suitable line termination<br />
To prevent interference, do not lay the cables parallel with power supply and motor<br />
cables over long distances, e. g. in cable ducts.<br />
5.4.2 Supply voltage<br />
Max. 38 400 bit/s<br />
Max. 57 600 bit/s<br />
Max. 1 200 m<br />
Max. 500 m<br />
Table 5-7: Maximum cable lengths between the CLV and host<br />
The CLV requires a supply voltage of 18 ... 30 V DC for operation without a heater and<br />
24 V DC +20 %/–10 % for operation with a heater, to IEC 742 (functional extra-low<br />
voltage). The power consumption of the individual types is as follows:<br />
Type Voltage Scanning method Heater Power consumption 1) Connection<br />
module<br />
CLV 490-0010/-2010/-6010 18 ... 30 V DC Line scanner No 9 W (typ.)/max. 16 W AMV/S 60 or<br />
CLV 490-1010/-3010/-7010 18 ... 30 V DC Line scanner with<br />
oscillating mirror<br />
No 9 W (typ.)/max. 18 W AMV 30-071 or<br />
BMV/BMH 10 or<br />
BMS 20<br />
CLV 490-0011/-2011/-6011 24 V DC Line scanner Yes 75 W (typ.)/max. 90 W AMV 100/200<br />
CLV 490-1011/-3011/-7011 +20 %/–10 % Line scanner with Yes 75 W (typ.)/max. 100 W<br />
oscillating mirror<br />
1) switching outputs not connected<br />
Table 5-8: Power consumption of the CLV<br />
Power-up delay<br />
The selected device number (default: 1) affects the power-up delay of the device. This is<br />
useful if a large number of CLVs (e. g. in the SICK network) are to be supplied from one<br />
power source. Table 5-9 contains a list of the available intervals.<br />
Device number GN Power-up delay Device number GN Power-up delay<br />
1; 11; 21; 31 0 ms 6; 16; 26 2 000 ms<br />
2; 12; 22 400 ms 7; 17; 27 2 400 ms<br />
3; 13; 23 800 ms 8; 18; 28 2 800 ms<br />
4; 14; 24 1 200 ms 9; 19; 29 3 200 ms<br />
5; 15; 25 1 600 ms 10; 20; 30 3 600 ms<br />
Table 5-9: Power-up delay as a function of the device number GN<br />
Tip<br />
The device number can be selected on the DEVICE CONFIGURATION tab in the "CLV-Setup"<br />
program.<br />
5-8 © SICK AG · Division Auto Ident · Germany · All rights reserved 8 008 796/0000/25-06-2002
Operating Instructions Chapter 5<br />
CLV 490 Bar Code Scanner<br />
Electrical installation<br />
5.4.3 Non-SICK Power supply unit/connections without the Connection Module<br />
Power output<br />
If an non-Sick Power supply unit is used instead of the AMS 60, it must be capable of<br />
providing the following voltage and power values:<br />
• For CLV without heater: 18 ... 30 V DC, min. 20 W continuous power output<br />
• For CLV with heater: 24 V DC +20 %/–10 %, min. 100 W<br />
The non-Sick Power supply unit must comply with IEC 742 (functional extra-low voltage).<br />
The output circuit must be reliably electrically isolated from the input circuit pursuant<br />
to IEC 742 by means of double insulation and a safety isolating transformer.<br />
Wire cross-section<br />
The wire cross-section for the power supply (Pin 1/Pin 5) should be at least 0.15 mm 2 , or<br />
0.75 mm 2 for CLVs with heater, with a max. length of 10 m.<br />
a) Connecting the CLV without a connector cover/external parameter memory<br />
The two cables no. 2 020 303 and no. 2 020 264 with open cable end on one side are<br />
required to connect the CLV. The wire color assignments are shown in Table 5-10 and<br />
Table5-11, Page5-10. The cables must not be extended for CLVs with heater.<br />
Connection cable no. 2 020 203 ("Host/Term" connection)<br />
15-pin D Sub HD socket and open cable end<br />
Pin Signal Wire color<br />
1 1) V S Red<br />
2 RxD (RS 232), Terminal White<br />
3 TxD (RS 232), Terminal Brown<br />
4 Term (RS 422/485) Violet<br />
5 GND Blue<br />
6 RD+ (RS 422/485), Host Green<br />
7 RD– (RS 422/485), Host Yellow<br />
RxD (RS 232), Host<br />
8 TD+ (RS 422/485), Host Grey<br />
9 TD– (RS 422/485), Host Pink<br />
TxD (RS 232), Host<br />
10 CAN H –<br />
11 Bus RT_485– –<br />
12 Bus RT_485+ –<br />
13 Bus R_485– –<br />
14 Bus R_485+ –<br />
15 CAN L –<br />
– Shield Orange<br />
1) Pin 1 is jumpered with Pin 1 of the "I/O" connection in the CLV<br />
Table 5-10: Wire color assignment of the cable no. 2 020 303<br />
8 008 796/0000/25-06-2002 © SICK AG · Division Auto Ident · Germany · All rights reserved 5-9
Chapter 5<br />
Electrical installation<br />
Operating Instructions<br />
CLV 490 Bar Code Scanner<br />
Connection cable no. 2 020 264 ("I/0" connection)<br />
15-pin D Sub HD plug and open cable end<br />
Pin Signal Wire color<br />
1 1) V S Red<br />
2 IN 1 White<br />
3 Sensor Brown<br />
4 Result 1 Violet<br />
5 GND Blue<br />
6 IN 0 Green<br />
7 IN 2 Yellow<br />
8 Result 2 Grey<br />
9 INGND Black<br />
10 Result 3 Grey-pink<br />
11 IN 3 Red-blue<br />
12 IN 4 White-green<br />
13 I2C SDA Brown-green<br />
14 I2C SCL White-yellow<br />
15 Result 4 Yellow-brown<br />
– Shield Orange<br />
1) Pin 1 is jumpered with Pin 1 of the "Host/Term" connection in the CLV<br />
Table 5-11: Wire color assignment of the cable no. 2 020 264<br />
b) Connecting the CLV with external parameter memory no. 2 020 981<br />
CLV without heater:<br />
¾<br />
Cover the "Host/Term" and "I/O" connections on the CLV with the connector cover (parameter<br />
memory) no. 2 020 981. Connect the free cable ends accordingly. The wire<br />
color assignments are shown in Table 5-12 and Table 5-13.<br />
CLV with heater:<br />
Available on request.<br />
5-10 © SICK AG · Division Auto Ident · Germany · All rights reserved 8 008 796/0000/25-06-2002
Operating Instructions Chapter 5<br />
CLV 490 Bar Code Scanner<br />
Electrical installation<br />
Cable 1 ("Host/Term" connection)<br />
15-pin D Sub HD socket in the connector cover and open cable end<br />
Pin Signal Wire color<br />
1 1) V S Red and pink<br />
2 RxD (RS 232), Terminal White<br />
3 TxD (RS 232), Terminal Brown<br />
4 Term (RS 422/485) Violet<br />
5 GND Blue and grey-brown<br />
6 RD+ (RS 422/485), Host Green<br />
7 RD– (RS 422/485), Host Yellow<br />
RxD (RS 232), Host<br />
8 TD+ (RS 422/485), Host Grey<br />
9 TD (RS 422/485), Host Black<br />
TxD (RS 232), Host<br />
10 CAN H Grey-pink<br />
11 Bus RT_485– Red-blue<br />
12 Bus RT_485+ White-green<br />
13 Bus R_485– Brown-green<br />
14 Bus R_485+ White-yellow<br />
15 CAN L Yellow-brown<br />
– Shield Orange<br />
1) Pin 1 is jumpered with Pin 1 of the "I/O" connection in the CLV<br />
Table 5-12: Wire color assignment of cable 1 for external parameter memory no. 2 020 981<br />
Cable 2 ("I/O" connection)<br />
15-pin D Sub HD plug in the connector cover and open cable end<br />
Pin Signal Wire color<br />
1 1) V S Red and pink<br />
2 IN 1 White<br />
3 Sensor Brown<br />
4 Result 1 Violet<br />
5 GND Blue and grey-brown<br />
6 IN 0 Green<br />
7 IN 2 Yellow<br />
8 Result 2 Grey<br />
9 INGND Black<br />
10 Result 3 Grey-pink<br />
11 IN 3 Red-blue<br />
12 IN 4 White-green<br />
13 I2C SDA –<br />
14 I2C SCL –<br />
15 Result 4 Yellow-brown<br />
– Shield Orange<br />
1) Pin 1 is jumpered with Pin 1 of the "Host/Term" connection in the CLV<br />
Table 5-13: Wire color assignment of cable 2 for external parameter memory no. 2 020 981<br />
8 008 796/0000/25-06-2002 © SICK AG · Division Auto Ident · Germany · All rights reserved 5-11
Chapter 5<br />
Electrical installation<br />
Operating Instructions<br />
CLV 490 Bar Code Scanner<br />
c) Connections with connector cover no. 2 021 267<br />
¾<br />
Cover the "Host/Term" and "I/O" connections on the CLV with the connector cover<br />
no. 2 020 267 and connect the free cable ends accordingly. The wire color assignments<br />
are shown in Table 5-14 and Table 5-15.<br />
CLV with heater:<br />
The connector cover can be used with temperatures up to max. –50 °C if the CLV is stationary<br />
and the cables are not moved. If the cables are moved due to changes in the position<br />
of the CLV, the temperature must not drop below max. –40 °C.<br />
Cable 1 (power supply)<br />
15-pin D Sub HD socket in the connector cover and open cable end<br />
Pin Connector cover Signal Wire color<br />
1 Socket V S Red<br />
5 Socket GND Black<br />
Table 5-14: Wire color assignment cable 1 for connector cover no. 2 021 267<br />
Cable 2 (data and function interfaces)<br />
15-pin D Sub HD socket/plug in the connector cover and open cable end<br />
Pin Connector cover Signal Wire color<br />
2 Plug IN 1 White<br />
3 Plug Sensor Brown<br />
4 Plug Result 1 Green<br />
6 Plug IN 0 Yellow<br />
7 Plug IN 2 Grey<br />
8 Plug Result 2 Pink<br />
9 Plug INGND Blue<br />
10 Plug Result 3 Red<br />
11 Plug IN 3 Black<br />
12 Plug IN 4 Violet<br />
15 Plug Result 4 Grey-pink<br />
2 Socket RxD (RS 232), Terminal Red-blue<br />
3 Socket TxD (RS 232), Terminal White-green<br />
4 Socket Term (RS 422/485) Brown-green<br />
6 Socket RD+ (RS 422/485), Host White-yellow<br />
7 Socket RD– (RS 422/485), Host Yellow-brown<br />
RxD (RS 232), Host<br />
8 Socket TD+ (RS 422/485), Host White-grey<br />
9 Socket TD– (RS 422/485), Host Grey-brown<br />
TxD (RS 232), Host<br />
– – Shield Orange<br />
Table 5-15: Wire color assignment cable 2 for connector cover no. 2 021 267<br />
5-12 © SICK AG · Division Auto Ident · Germany · All rights reserved 8 008 796/0000/25-06-2002
Operating Instructions Chapter 5<br />
CLV 490 Bar Code Scanner<br />
Electrical installation<br />
5.5 Electrical installation procedure<br />
5.5.1 Individual steps<br />
• Connect the power supply<br />
• Connect the host interface<br />
• Connect the PC (connect the terminal interface)<br />
• Connect the "Sensor" and "IN 0 ... IN 4" switching inputs<br />
• Connect the "Result 1 ... Result 4" switching outputs<br />
5.5.2 Tools<br />
• Tool<br />
• Digital measuring device (current/voltage measurement)<br />
5.5.3 Connecting the supply voltage<br />
a) SICK AMV/S and BMV 10 Connection Modules<br />
If the CLV is powered via the SICK Connection Modules, the supply voltage does not have<br />
to be wired separately.<br />
Connecting the CLV without external parameter memory:<br />
1. Make sure that the power supply to the Connection Module is switched off.<br />
2. Connect the "Host/Term" and "I/O" connections on the CLV to the corresponding connections<br />
on the Connection Module using two cables no. 2 020 302 and secure them<br />
tightly on both sides.<br />
Connecting the CLV with external parameter memory:<br />
1. Mount the connector cover with the external parameter memory no. 2 020 307 on the<br />
"Host/Term" and "I/O" connections of the CLV and screw it tightly into position.<br />
2. Connect the two free plug connections on the cables to the corresponding connections<br />
on the Connection Module and secure them tightly.<br />
The data and function interfaces of the CLV are connected to the Connection Module.<br />
b) Power supply via non-SICK Power pack<br />
Connecting the CLV without external parameter memory:<br />
1. Connect the cable socket on cable no. 2 020 303 on the "Host/Term" connection and<br />
screw it tightly into position.<br />
2. Connect the cable plug on the cable no. 2 020 264 to the "I/O" connection and screw<br />
it tightly into position.<br />
3. Connect the power supply to the red wire (Pin 1, V S ) and blue wire (Pin 5, GND) on cable<br />
no. 2 020 303. See also Table5-10, Page5-9<br />
Connecting the CLV with external parameter memory:<br />
1. Connect the "Host/Term" and "I/O" connections on the CLV to the corresponding connections<br />
on the Connection Module using two cables no. 2 020 981 and secure them<br />
tightly on both sides.<br />
2. Connect the power supply to the red/pink wire (Pin 1, VS) and the blue/grey-brown wire<br />
(Pin 5, GND) of cable 1. See also Table5-12, Page5-11.<br />
The CLV is connected to the supply voltage.<br />
8 008 796/0000/25-06-2002 © SICK AG · Division Auto Ident · Germany · All rights reserved 5-13
Chapter 5<br />
Electrical installation<br />
Operating Instructions<br />
CLV 490 Bar Code Scanner<br />
5.5.4 Connecting the host interface<br />
AMV 60-011/AMS 60-012, -013<br />
Terminal assignment<br />
RS 232<br />
( )=9-pin Sub D<br />
plug ( )= 9-pin on PCD-Sub-<br />
connector at PC<br />
RS 422<br />
RS 485:<br />
CAN-Network:<br />
Connection diagram for SICK network available on request<br />
See Operating instructions "Using the CAN interface"<br />
Fig. 5-2:<br />
Connecting the host interface<br />
Risk of damage to the interface module!<br />
Electrical components in the CLV may be damaged if the host interface is connected<br />
incorrectly. This also applies when the host interface connections are changed in the<br />
Connection Modules (configuration).<br />
¾ Connect the host interface as shown in Fig. 5-2.<br />
¾ Check the connections carefully before you switch on the CLV.<br />
1. Connect the host interface on the CLV to the host using shielded cables (EMC requirements).<br />
Ensure that the maximum cable lengths are not exceeded (see Table 5-7,<br />
Page 5-8).<br />
Recommendation 2. Apply the shield on one side.<br />
Default<br />
In the default setting, the CLV communicates with the host via the host interface using the<br />
values shown in Table 5-16.<br />
Parameter Value<br />
Physical design RS 422/485<br />
Data transfer rate 9 600 bit/s<br />
Data bits 8<br />
Parity<br />
None<br />
Stop bits 1<br />
Protocol<br />
SICK (start character: STX, stop character: ETX, no request for repeat:<br />
none, timeout: 50 ms)<br />
Table 5-16: Communication parameters for the host interface (default setting)<br />
5-14 © SICK AG · Division Auto Ident · Germany · All rights reserved 8 008 796/0000/25-06-2002
Operating Instructions Chapter 5<br />
CLV 490 Bar Code Scanner<br />
Electrical installation<br />
For connecting the host interface via the AMV/S 60 Connection Module, see the Operating<br />
Instructions for the "AMV/S 60 Connection Module" (no. 8 008 296).<br />
Terminating the RS 422 interface<br />
The interface can be terminated in the Connection Module. See "Operating Instructions for<br />
the AMV/S 60, AMV 30.071, AMV 100/200", or "BMS 20 Connection Modules".<br />
Activating the RS 232 interface:<br />
Tip<br />
The RS 232 interface can be activated with the "CLV-Setup" program:<br />
1. Choose the HOST INTERFACE tab.<br />
2. Choose the RS 232 option from the HARDWARE drop-down list under DATA FORMAT.<br />
3. Download the data to the CLV by clicking in the toolbar.<br />
The DOWNLOAD PARAMETERS dialog box is displayed.<br />
4. Confirm the dialog box by choosing PERMANENT.<br />
The CLV uses the RS 232 version of the host interface.<br />
The communication parameters can be changed, if necessary, on the HOST INTERFACE tab.<br />
To do so, change the values under DATA FORMAT and INTERFACE PROTOCOL.<br />
5.5.5 Connecting the CAN interface<br />
Instructions for the connection and for configuration of the CLV to use the device in the<br />
SICK-specific CAN Scanner Network or in a CANopen network see the Operating Instructions<br />
“Application of the CAN interface“ (no. 8 009 180, English edition).<br />
5.5.6 Connecting the PC<br />
The CLV is operated and configured with the PC-based "CLV-Setup" program. In order to do<br />
so, you must connect the device to the PC via the terminal interface (auxiliary interface). Unlike<br />
the host interface, the terminal interface has a permanent data format and a fixed data<br />
transfer rate. Fig. 5-3 shows how the terminal interface is connected. The cable length<br />
should not be more than 10 m.<br />
AMV 60-011/AMS 60-012, -013<br />
Terminal assignment<br />
RS 232<br />
or 9-pin "Service"<br />
plug<br />
( ) = 9-pin Sub D<br />
plug at PC<br />
Fig. 5-3:<br />
Connecting the terminal interface<br />
1. Switch off the PC and power supply to the SICK Connection Module.<br />
2. Connect the PC to the internal, 9-pin "Service" plug on the Connection Module using an<br />
RS 232 connecting cable, e. g. no. 2 014 054 (RxD and TxD crossed).<br />
– or –<br />
Without the SICK Connection Module:<br />
Connect the PC as shown in Fig. 5-3.<br />
3. Switch on the PC and power supply to the SICK Connection Module.<br />
8 008 796/0000/25-06-2002 © SICK AG · Division Auto Ident · Germany · All rights reserved 5-15
Chapter 5<br />
Electrical installation<br />
Operating Instructions<br />
CLV 490 Bar Code Scanner<br />
4. Set the communication parameters (see Chapter 10.6.3 Starting CLV-Setup,<br />
Page 10-43).<br />
Tip<br />
In the default configuration, the terminal interface outputs the reading result in reading<br />
diagnosis mode.<br />
You can change the operating mode to MONITOR HOST INTERFACE, to MONITOR HOST INTERFACE 2<br />
or AUXILIARY INPUT on the AUXILARY INTERFACE tab in the "CLV-Setup" program.<br />
5.5.7 Connecting the switching inputs<br />
"Sensor" switching input<br />
If a reading procedure is to be triggered on the CLV by an external sensor, the reading pulse<br />
sensor must be connected to the "Sensor" switching input. This trigger type is selected in<br />
the default setting of the CLV. Fig. 5-4 shows the connections for the "Sensor" switching input.<br />
Table 5-17 contains the characteristic data for this input.<br />
PNP sensor<br />
Switch<br />
AMV 60-011/<br />
AMS 60-012, -013<br />
Terminal assignment<br />
V S<br />
V S<br />
2k6<br />
Sensor<br />
1<br />
3<br />
V S<br />
OUT<br />
V S<br />
1<br />
3<br />
V S / 24 V<br />
SENSOR<br />
T. 27<br />
T. 19<br />
CLV<br />
IN GND<br />
GND<br />
9<br />
5<br />
GND<br />
GND<br />
9<br />
5<br />
(IN) GND<br />
GND<br />
T. 20<br />
T. 36<br />
V S = +18 ... +30 V DC for CLV without heater, 24 V DC +20 % /–10 % for CLV with heater<br />
Fig. 5-4:<br />
Connections of the "Sensor" switching input<br />
¾ Connect the reading pulse sensor as shown in Fig. 5-4.<br />
Switching mode<br />
Current at the input starts the reading interval on the CLV.<br />
(default: active high, debouncing: max. 30 ms (standard))<br />
Properties – optodecoupled, non-interchangeable<br />
– can be connected to PNP output on a sensor<br />
Electrical values Low: –30 V ≤ V I ≤ +2 V High: +7 V ≤ V I ≤ +13 V<br />
Table 5-17: Characteristic data of the "Sensor" switching input<br />
Tip<br />
You can change the switching mode (polarity, debouncing, response for first pulse after power-up)<br />
of the "SENSOR" switching input on the DEVICE CONFIGURATION tab in the "CLV-Setup"<br />
program.<br />
¾<br />
Click the EDIT READING TRIGGER button.<br />
Enter the values in the dialog box displayed.<br />
For connecting the host interface via the AMV/S 60 Connection Module, see the Operating<br />
Instructions for the "AMV/S 60 Connection Module" (no. 8 008 296).<br />
Note<br />
An external pulse is not required for Percentage Evaluation mode.<br />
5-16 © SICK AG · Division Auto Ident · Germany · All rights reserved 8 008 796/0000/25-06-2002
Operating Instructions Chapter 5<br />
CLV 490 Bar Code Scanner<br />
Electrical installation<br />
"IN 0 ... IN 4" switching inputs<br />
If the Autofocus function is not used and the CLVs dynamic focus control function is to be<br />
triggered by external sensors, the sensors are connected to the five inputs "IN 0 ... IN 4".<br />
Together with the internal assignment table, these can be used to configure a maximum of<br />
32 switching states for up to 8 distance configurations. The dynamic focus control function<br />
is selected for all inputs by default.<br />
Additional function "IN 3":<br />
The "IN 3" input can also be used as a trigger source for the One-Shot function of the oscillating<br />
mirror.<br />
Additional function "IN 4":<br />
The input "IN 4" can also be used as a trigger source for the One-Shot function of the<br />
oscillating mirror or as an input for a belt increment signal. In this case, a maximum of<br />
16 switching statuses can be used for dynamic focus control.<br />
Fig. 5-5 shows the connections for the "IN 0 ... IN 4" switching inputs. Table 5-18 shows the<br />
pin assignment on the CLV and the terminal assignment in the AMV/S 60. Table 5-19,<br />
Page 5-18 contains the characteristic data for these inputs. Table5-20, Page5-18 shows<br />
the input combinations based on the distance configurations. The interaction of the switching<br />
input functions is shown in Table5-21, Page5-19<br />
PNP sensor<br />
Switch<br />
AMV 60-011<br />
AMS 60-012, -013<br />
Terminal assignment<br />
V S<br />
V S<br />
2k6<br />
IN X<br />
1<br />
Y<br />
V S<br />
OUT<br />
V S<br />
1<br />
Y<br />
V S / 24 V<br />
IN X<br />
T. 28<br />
Z<br />
CLV<br />
IN GND<br />
GND<br />
9<br />
5<br />
GND<br />
GND<br />
9<br />
5<br />
(IN) GND<br />
GND<br />
T. 20<br />
T. 37<br />
V S = +18 ... +30 V DC for CLV without heater, 24 V DC +20 % /–10 % for CLV with heater<br />
Pin and terminal assignment<br />
for IN X see Table 5-18<br />
Fig. 5-5:<br />
Connections of the "IN 0 ... IN 4" switching inputs<br />
Input<br />
"IN X"<br />
CLV "I/O" connection<br />
Pin Y<br />
AMV/S 60<br />
Terminal Z<br />
IN 0 Pin 6 T. 22<br />
IN 1 Pin 2 T. 23<br />
IN 2 Pin 7 T. 24<br />
IN 3 Pin 11 T. 25<br />
IN 4 Pin 12 T. 26<br />
Table 5-18: Pin and terminal assignment for "IN 0 ... IN 4" switching inputs<br />
¾ Connect the sensors as shown in Fig. 5-5.<br />
For connecting the host interface via the AMV/S 60 Connection Module, see the Operating<br />
Instructions for the "AMV/S 60 Connection Module" (no. 8 008 296).<br />
8 008 796/0000/25-06-2002 © SICK AG · Division Auto Ident · Germany · All rights reserved 5-17
Chapter 5<br />
Electrical installation<br />
Operating Instructions<br />
CLV 490 Bar Code Scanner<br />
Function<br />
Trigger source for dynamic focus control<br />
"IN 3" alternative: – trigger source for One Shot on oscillating mirror<br />
"IN 4" alternative: – trigger source for One Shot on oscillating mirror<br />
– belt increment input<br />
Default setting "IN 3" and "IN 4": dynamic focus control<br />
Switching mode Active when input energized (high)<br />
Properties<br />
– Optodecoupled, non-interchangeable<br />
– Can be connected to PNP output on a sensor<br />
Electrical values Low: –30 V ≤ V I ≤ +2 V High: +7 V ≤ V I ≤ +13 V<br />
Table 5-19: Characteristic data of the "IN 0 ... N 4" switching inputs<br />
Switching inputs Content Assignment Table Distance Config. 2)<br />
Logic state 1)<br />
"IN 4 ... IN 0"<br />
inputs<br />
Assignment<br />
table index<br />
Default setting<br />
0 0 0 0 0 N 1 DC 1 DC 6<br />
0 0 0 0 1 N 2 DC 2 DC 5<br />
0 0 0 1 0 N 3 DC 3 DC 4<br />
0 0 0 1 1 N 4 DC 4 DC 4<br />
0 0 1 0 0 N 5 DC 5 DC 3<br />
0 0 1 0 1 N 6 DC 6 DC 3<br />
0 0 1 1 0 N 7 DC 7 DC 3<br />
0 0 1 1 1 N 8 DC 8 DC 3<br />
0 1 0 0 0 N 9 DC 8 DC 2<br />
0 1 0 0 1 N 10 DC 8 DC 2<br />
0 1 0 1 0 N 11 DC 8 DC 2<br />
0 1 0 1 1 N 12 DC 8 DC 2<br />
0 1 1 0 0 N 13 DC 8 DC 2<br />
0 1 1 0 1 N 14 DC 8 DC 2<br />
0 1 1 1 0 N 15 DC 8 DC 2<br />
0 1 1 1 1 N 16 DC 8 DC 2<br />
1 0 0 0 0 N 17 DC 8 DC 1<br />
1 0 0 0 1 N 18 DC 8 DC 1<br />
1 0 0 1 0 N 19 DC 8 DC 1<br />
1 0 0 1 1 N 20 DC 8 DC 1<br />
1 0 1 0 0 N 21 DC 8 DC 1<br />
1 0 1 0 1 N 22 DC 8 DC 1<br />
1 0 1 1 0 N 23 DC 8 DC 1<br />
1 0 1 1 1 N 24 DC 8 DC 1<br />
1 1 0 0 0 N 25 DC 8 DC 1<br />
1 1 0 0 1 N 26 DC 8 DC 1<br />
1 1 0 1 0 N 27 DC 8 DC 1<br />
1 1 0 1 1 N 28 DC 8 DC 1<br />
1 1 1 0 0 N 29 DC 8 DC 1<br />
1 1 1 0 1 N 30 DC 8 DC 1<br />
1 1 1 1 0 N 31 DC 8 DC 1<br />
1 1 1 1 1 N 32 DC 8 DC 1<br />
1) 1 = energized (active); 0 = deenergized (inactive)<br />
2) Distance configuration (DC): data record for focus position<br />
Example:<br />
Photoelectric switches<br />
(bright switching)<br />
Table 5-20: Dynamic focus control: switching inputs/distance configuration assignment table<br />
5-18 © SICK AG · Division Auto Ident · Germany · All rights reserved 8 008 796/0000/25-06-2002
Operating Instructions Chapter 5<br />
CLV 490 Bar Code Scanner<br />
Electrical installation<br />
Parameter settings of switching inputs<br />
Effects<br />
"IN 3" "IN 4"<br />
Focus control 1) Focus control 1) "IN 3" switches the focus position in combination with "IN 0 ... IN 2" and "IN 4"<br />
Focus control 1) One shot "IN 4" triggers the one shot<br />
"IN 3" switches the focus position in combination with "IN 0 ... IN 2"<br />
Focus control 1) Increment<br />
counter<br />
"IN 4" receives increment signals<br />
"IN 3" switches the focus position in combination with "IN 0 ... IN 2"<br />
One shot Focus control 1) "IN 3" triggers the one shot<br />
"IN 0 ... IN 2" switch the focus position<br />
"IN 4" has no effect<br />
One shot One shot "IN 4" triggers the one shot<br />
"IN 0 ... IN 2" switch the focus position<br />
"IN 3" has no effect<br />
One shot<br />
1) depending on the assignment table<br />
Increment<br />
counter<br />
"IN 3" triggers the one shot<br />
"IN 4" receives increment signals<br />
"IN 0 ... IN 2" switch the focus position<br />
Table 5-21: Combination of the functions of the "IN 0 ... IN 4" switching inputs<br />
Tip<br />
The function assigned to the "IN 3" and "IN 4" input can be modified on the DEVICE CONFI-<br />
GURATION tab in the "CLV-Setup" program.<br />
¾<br />
Click the FUNCTION IN 3 and FUNCTION IN 4 drop-down list and choose the required<br />
function.<br />
5.5.8 Connecting the "Result 1 Result 4" switching outputs<br />
The four switching outputs can be assigned different functions for outputting result statuses<br />
independently of each other. If the assigned event occurs during the reading procedure, the<br />
corresponding switching output becomes live at the end of the reading pulse for the selected<br />
pulse duration. The pulse duration can be set individually for each output.<br />
The "Read Result" LED is linked to the "Result 2" output and lights up in Reading mode for the<br />
selected pulse duration and function of the result status display (default: Good Read, 100 ms).<br />
Fig. 5-6, Page 5-20 shows the connections for the "Result 1 ... Result 4" switching outputs.<br />
Table5-22, Page5-20 shows the pin assignment on the CLV and the terminal assignment<br />
in the AMV/S 60. Table5-23, Page5-20 contains the characteristic data for these outputs.<br />
The four outputs have the same characteristic data.<br />
8 008 796/0000/25-06-2002 © SICK AG · Division Auto Ident · Germany · All rights reserved 5-19
Chapter 5<br />
Electrical installation<br />
Operating Instructions<br />
CLV 490 Bar Code Scanner<br />
Fuse<br />
V S<br />
Logic<br />
Result X Y<br />
Temperature<br />
sensor GND 5<br />
R L<br />
AMV 60-011/<br />
AMS 60-012, -013<br />
Terminal assignment<br />
Result X<br />
GND<br />
Z<br />
T.35<br />
Pulse duration<br />
depending<br />
on setting:<br />
– 10 ms ... 900 ms<br />
– 100 ms ... 9 900 ms<br />
– 00: static<br />
(to the end of next<br />
reading pulse)<br />
V S = +18 ... +30 V DC for CLV without heater,<br />
24 V DC +20 %/–10 % for CLV with heater<br />
Pin and terminal assignment<br />
for "Result X" see Table 5-22<br />
Fig. 5-6:<br />
Connections of the "Result 1 ... Result 4" switching outputs<br />
Output<br />
"Result X"<br />
CLV "I/O" connection<br />
Pin Y<br />
AMV/S 60<br />
Terminal Z<br />
Result 1 Pin 4 T. 31<br />
Result 2 Pin 8 T. 32<br />
Result 3 Pin 10 T. 33<br />
Result 4 Pin 15 T. 34<br />
Table 5-22: Pin and terminal assignment for "Result 1 ... Result 4" switching outputs<br />
¾ Connect the outputs as shown in Fig. 5-6.<br />
"<br />
Switching mode<br />
Properties<br />
Function<br />
assignment<br />
(default)<br />
PNP-switching with respect to the supply voltage V S<br />
The current in the event of a short-circuit is limited to 0.7 A<br />
"Result 1": Device Ready (static), polarity: not inverted<br />
"Result 2": Good Ready, polarity: not inverted<br />
"Result 3": No Ready, polarity: not inverted<br />
"Result 4": Match 1, polarity: not inverted<br />
Pulse duration: 100 ms<br />
Electrical values 0 V ≤ V O ≤ 30 V Guaranteed: V O ≤ V S ≤ 1.3 V with I 0 ≤ 100 mA<br />
I 0 ≤ 100 mA<br />
Table 5-23: Characteristic data of the "Result 1 ... Result 4" switching outputs<br />
Note<br />
If the "Device Ready" function is chosen, the CLV outputs a static pulse in Reading mode.<br />
For connecting the host interface via the AMV/S 60 Connection Module, see the Operating<br />
Instructions for the "AMV/S 60 Connection Module" (no. 8 008 296).<br />
Tip<br />
The output function, pulse duration (timer), and polarity of the signals can be changed on<br />
the DEVICE CONFIGURATION tab in the "CLV-Setup" program.<br />
¾ Click the EDIT RESULT OUTPUTS button and enter the values in the dialog box displayed.<br />
Recommendation ¾ To check the switching functions using a high-impedance digital voltmeter, connect a<br />
load to the outputs to prevent incorrect voltage values/switching statuses from being<br />
displayed.<br />
5-20 © SICK AG · Division Auto Ident · Germany · All rights reserved 8 008 796/0000/25-06-2002
Operating Instructions Chapter 6<br />
CLV 490 Bar Code Scanner<br />
Operation<br />
6 Operation<br />
6.1 Overview of steps for starting up the CLV<br />
• Start up the CLV with the factory default settings (quick start).<br />
With this configuration, the CLV can be operated without being connected to a PC (this<br />
is, however, not the case the first time the CLV with external parameter memory is switched<br />
on).<br />
• Connect the PC (see Chapter 5.5.5 Connecting the CAN interface, Page 5-15) and install<br />
the "CLV-Setup" program (see Chapter 10.6 Installing and operating the "CLV-Setup"<br />
program, Page 10-41).<br />
• Configure (parameterize) the CLV for the desired application with CLV-Setup or command<br />
strings.<br />
6.2 Default settings<br />
Table 6-1 and Table 6-2, Page 6-2 contain an overview of the factory default settings for<br />
the CLV. The default parameters are such that the CLV can be put into operation either<br />
straight away or following a few minor adjustments. A PC does not need to be connected to<br />
start up the CLV with the default settings (this is, however, not the case the first time the CLV<br />
with external parameter memory is switched on).<br />
The default settings are stored permanently both in the ROM of the CLV and in the CLV-<br />
Setup database. They can be loaded to the RAM of the CLV at any time and displayed in the<br />
tabs of the "CLV-Setup" program.<br />
Displaying and printing out a complete set of default settings in CLV-Setup<br />
1. To save the current settings in the parameter set:<br />
Choose FILE and SAVE AS, and enter a file name in the dialog box that appears. CLV-<br />
Setup saves the current settings in a configuration file with the extension "*.scl".<br />
2. Click in the toolbar.<br />
CLV-Setup loads the default settings from its internal database and displays them in the<br />
tabs.<br />
3. Click in the toolbar.<br />
The PRINT FILE dialog box is displayed.<br />
4. If desired, a comment can be entered in the input field for the header of the printout.<br />
Confirm the entry with OK. The PRINT dialog box for configuring the printer then is<br />
displayed.<br />
5. Make the appropriate entries in the dialog box and confirm these with OK.<br />
CLV-Setup prints out the complete set of default settings in the form of a table. The header<br />
contains the company and user names that were entered during the CLV-Setup installation<br />
routine.<br />
8 008 796/0000/25-06-2002 © SICK AG · Division Auto Ident · Germany · All rights reserved 6-1
Chapter 6<br />
Operation<br />
Operating Instructions<br />
CLV 490 Bar Code Scanner<br />
6.2.1 Default settings of the line scanner CLV 490 (all variants)<br />
Parameter<br />
Default setting<br />
Decoder<br />
SMART/standard<br />
Active codes types Code 39, 2/5 Interleaved, Code 128<br />
Code length<br />
Freely assignable (2/5 Interleaved: interval 4 ... 50 characters)<br />
Start/stop ratio<br />
Automatic<br />
Min./max. code position 5/ 95 CP<br />
No. of multiple reads 3<br />
Min./max. no. codes 1<br />
Scanning frequency<br />
800 Hz<br />
Distance measurement Active<br />
Autofocus mode<br />
Min. distance<br />
Range<br />
400 ... 2 200 mm<br />
Scan angle –27°... +27°<br />
Focus control trigger Autofocus, switchover immediately (synchronously)<br />
Reading pulse source<br />
Start: "Sensor" switching input (active: high); end: "Sensor" switching input<br />
"IN 0... IN 4" switching inputs Focus position changeover (without meaning for autofocus function)<br />
"Sensor" switching input Start and end of reading pulse (level: active high), debouncing 20 ... 30 ms<br />
Switching outputs<br />
Not inverted; pulse duration: 100 ms<br />
Status output function Result 1: Device Ready (static); Result 2: Good Read; Result 3: No Read; Result 4: Match 1<br />
CLV arrangement<br />
Stand-alone<br />
Read result output<br />
Host interface<br />
Device number 1<br />
Start option<br />
Load the parameter set of the external parameter memory<br />
Host interface (type) RS 422/485<br />
Protocol<br />
NAK; start character: STX, stop character: ETX<br />
Transmission rate<br />
9 600 bit/s<br />
Data format<br />
8 data bits, no parity, 1 stop bit<br />
Output format<br />
Header: blank, Separator: ST, Terminator: CR LF; Error string: separator only<br />
Output sorting<br />
In accordance with code position<br />
Output time Read result: end of the read interval Separator: after code<br />
Test string<br />
Not activated<br />
Terminal interface<br />
RS 232, 9 600 bit/s, 8 data bits, no parity, 1 stop bit (values cannot be changed)<br />
Function<br />
Reading diagnosis<br />
Table 6-1: Extract: Default parameter settings of the line scanner CLV 490-0010/-0011<br />
6.2.2 Default settings of the line scanner with oscillating mirror<br />
CLV 490 (all variants)<br />
Default settings as for line scanner CLV 490, but with the following additional parameters:<br />
Parameter<br />
Default setting<br />
Oscillating amplitude ±40 CW (corresponds to an angle of deflection of –20° ... +20°)<br />
Operating mode<br />
Oscillating with fixed amplitude, mode independent of reading pulse trigger<br />
Oscillating frequency<br />
1 Hz<br />
Fixed position 50 CW (corresponds to an angle of deflection of 105°)<br />
Table 6-2: Extract: Default parameter settings of the line scanner with oscillating mirror CLV 490<br />
6-2 © SICK AG · Division Auto Ident · Germany · All rights reserved 8 008 796/0000/25-06-2002
Operating Instructions Chapter 6<br />
CLV 490 Bar Code Scanner<br />
Operation<br />
6.3 Quick start<br />
A PC does not need to be connected when the CLV is operated with the factory default<br />
settings (this is, however, not the case the first time the CLV with external parameter<br />
memory is switched on, see Chapter 6.3.2 Switching the CLV with external parameter memory<br />
connected on for the first time with the factory default settings, Page 6-4).<br />
6.3.1 Switching the CLV on for the first time with the factory default settings<br />
1. Connect the CLV to the AMV/S 60 Connection Module using the two cables no. 2 020 302.<br />
2. Connect the reading pulse sensor (e. g. photoelectric reflex switch) to the "Sensor"<br />
switching input of the CLV via the AMV/S 60 (see Chapter 5.5.7 Connecting the<br />
switching inputs, Page 5-16).<br />
3. Switch on the power supply of the AMV/S 60.<br />
The CLV starts. The "Device Ready" LED lights up. The "Result 1" ("Device Ready")<br />
output switches.<br />
CLV with external parameter memory connected:<br />
If an external parameter memory is connected to the CLV, the "Device Ready" LED<br />
blinks for 10 s when the device starts up correctly and then lights up constantly. If the<br />
"Device Ready" and "Read Result" LEDs both blink constantly, the memory is empty<br />
and the CLV is not ready for operation.<br />
In this case, proceed as described in Chapter 6.3.2 Switching the CLV with external parameter<br />
memory connected on for the first time with the factory default settings,<br />
Page 6-4.<br />
Line scanner with oscillating mirror:<br />
In the default setting, the CLV deflects the scan line around the position CW = 50 with<br />
a frequency of 1 Hz and an oscillating amplitude of ±20° (±40 CW). 50 CW correspond<br />
to a deflection angle below 105°.<br />
4. Start the reading pulse: block the light path of the photoelectric switch or close the<br />
switch. The "Laser On" LED lights up. The CLV switches the laser diode on and the scan<br />
line appears.<br />
5. Present the bar code pattern (Fig. 6-1) to the CLV at the reading distance specified in<br />
Table 6-3, Page 6-4.<br />
6. Align the bar code in such a way that the red scan line is almost at a 90 angle to the<br />
bars (line scanner) or that the red scan line sweeps the bars at a 90 angle when it is<br />
deflected (oscillating mirror).<br />
7. End the reading pulse: unblock the light path of the photoelectric switch or open the<br />
switch. The "Laser On" LED is extinguished. The CLV switches the laser diode off. The<br />
CLV confirms that the bar code was read successfully (the "Read Result" LED lights up<br />
for 100 ms). The "Result 2" ("Good Read") output is switched for a duration of 100 ms.<br />
The CLV can now be operated with the factory default settings. The device can be switched<br />
off without the configuration data being lost as no changes have been made to the parameter<br />
set.<br />
0 1 2 3 4 1 2 3 4 5<br />
Fig. 6-1: Bar code pattern (Code 39; module width 0.35 mm; Print ratio 2:1)<br />
8 008 796/0000/25-06-2002 © SICK AG · Division Auto Ident · Germany · All rights reserved 6-3
Chapter 6<br />
Operation<br />
Operating Instructions<br />
CLV 490 Bar Code Scanner<br />
Device type Scanning method Reading distance<br />
CLV 490 (all variants) Line scanner approx. 1 000 mm<br />
CLV 490 (all variants) Line scanner with oscillating mirror approx. 1 000 mm<br />
Table 6-3: Reading distances for default settings<br />
6.3.2 Switching the CLV with external parameter memory connected on for the<br />
first time with the factory default settings<br />
1. Connect the CLV to the SICK AMV/S 60 Connection Module via the external parameter<br />
memory no. 2 020 307 using the two cables.<br />
2. Connect the reading pulse sensor (e. g. photoelectric reflex switch) to the "Sensor" switching<br />
input of the CLV via the AMV/S 60 (see Chapter 5.5.7 Connecting the switching<br />
inputs, Page 5-16).<br />
3. Switch on the power supply of the AMV/S 60.<br />
The CLV starts. In the default setting, the start option is set to START WITH EXTERNAL PARA-<br />
METERS.<br />
Once the CLV has started, the "Device Ready" and "Read Result" LEDs blink continuously.<br />
This indicates that the CLV was able to address the external parameter memory<br />
but the memory is empty (default state).<br />
The CLV is then initialized with its internal parameter set but does not output data on its<br />
host interface. The CLV is not ready for operation!<br />
Line scanner with oscillating mirror:<br />
In the default setting, the CLV deflects the scan line around the position CW = 50 with<br />
a frequency of 1 Hz and an oscillating amplitude of ±20° (±40 CW). 50 CW corresponding<br />
to a deflection angle below 105°.<br />
4. Connect the PC to the terminal interface of the CLV. To do so, connect the RS 232 data<br />
connection cable (e. g. no. 2 014 054) to the "Service" plug in the AMV/S 60 (see<br />
Chapter 5.5.5 Connecting the CAN interface, Page 5-15).<br />
5. Start Windows and the "CLV-Setup" program (see Chapter 10.6.3 Starting CLV-Setup,<br />
Page 10-43).<br />
CLV-Setup attempts by default to communicate with the CLV via COM 1. If the communication<br />
parameters match, "CLV-Setup" uploads the current parameter set from the<br />
RAM of the CLV to the internal database and displays the values in the tabs (the parameter<br />
set contains the factory default settings when the scanner is switched on for the<br />
first time). If necessary, choose "CLV 490" in the DEVICE drop-down list in the top righthand<br />
corner in order to initiate communication and the upload manually.<br />
6. Choose the DEVICE CONFIGURATION tab.<br />
7. Click the COPY INTERN Ö EXTERN field in the START WITH box.<br />
CLV-Setup then instructs the CLV to copy the internal parameter set to the external parameter<br />
memory the next time it starts.<br />
8. Carry out a download to the CLV by clicking in the toolbar.<br />
CLV-Setup copies the parameter set with the new start option by downloading it to the<br />
CLV. The DOWNLOAD PARAMETERS dialog box is then displayed.<br />
9. Confirm the dialog box by choosing the PERMANENT storage option.<br />
10. Disconnect the AMV/S 60 briefly from the power supply to restart the CLV.<br />
Once the CLV has started, the "Device Ready" and "Read Result" LEDs blink alternately<br />
for approx. 10 s before the "Device Ready" LED lights up constantly.<br />
The "Result 1" ("Device Ready") output switches.<br />
The CLV has copied the parameter set to the external parameter memory and reset the<br />
start option automatically to START WITH EXTERNAL PARAMETERS.<br />
6-4 © SICK AG · Division Auto Ident · Germany · All rights reserved 8 008 796/0000/25-06-2002
Operating Instructions Chapter 6<br />
CLV 490 Bar Code Scanner<br />
Operation<br />
The CLV and external parameter memory are then ready for operation with the factory<br />
settings. The next time the device is started, the "Device Ready" LED blinks for approx.<br />
10 s and then lights up constantly.<br />
Continue the quick start as of Step 4 in Chapter 6.3.1 Switching the CLV on for the first time<br />
with the factory default settings, Page 6-3.<br />
6.4 Configuring (parameterization) the CLV<br />
The CLV adapts to the reading situation locally with the configuration. The read, evaluation<br />
and output characteristics can, therefore, be parameterized as required on the basis of the<br />
factory default settings or an application-specific CLV parameter set that has already been<br />
created.<br />
The CLV supports two different configuration methods:<br />
• Configuration via the "CLV-Setup" program<br />
(parameter values are set via the serial interface)<br />
• Configuration via command strings<br />
(parameter values are set via the serial interface).<br />
See Chapter 10.7 Configuring a CLV with command strings, Page 10-49.<br />
In the Parameterization mode, the CLV outputs no reading result.<br />
6.4.1 Configuring the CLV via the user interface of CLV-Setup<br />
To be able to use CLV-Setup, a PC has to be connected and the program installed on it. The<br />
procedure for connecting the PC to the CLV is described in Chapter 5.5.5 Connecting the<br />
CAN interface, Page 5-15. The procedures for installing and starting the "CLV-Setup" program<br />
and for starting and operating the user interface are described in the Appendix<br />
(Chapter 10.6 Installing and operating the "CLV-Setup" program, Page 10-41).<br />
Transferring a parameter set between CLV-Setup and the CLV<br />
When the CLV is being parameterized, CLV-Setup runs in the offline mode. To be able to<br />
modify the current parameter set of the CLV, this first has to be loaded to CLV-Setup from<br />
the CLV. This procedure is referred to as an upload ("upload from CLV") during which CLV-<br />
Setup always loads a complete copy of the current CLV parameter set. This parameter set<br />
remains unchanged until it is overwritten by CLV-Setup. With the help of the context menu<br />
(right mouse button), only the parameter just edited can be loaded ("upload parameter")<br />
from the CLV’s memory (RAM).<br />
Changes made to the current parameter set in CLV-Setup do not take effect until the parameter<br />
set has been transferred to the CLV. CLV-Setup always sends a copy of the complete<br />
parameter set to the CLV, i. e. all of the existing parameter values in the CLV are overwritten.<br />
The procedure for transferring and saving the parameter values in the CLV is referred to as<br />
a download ("download to CLV"). With the help of the context menu (right mouse button),<br />
only the parameter just edited will be temporarily loaded ("download parameter") into the<br />
CLV’s memory (RAM).<br />
Loading a complete CLV parameter set (upload)<br />
¾ Click in the toolbar.<br />
CLV-Setup loads the current CLV parameter set from the RAM of the CLV to its database<br />
and displays the values in the tabs.<br />
The "Device Ready" LED is extinguished during the upload.<br />
If the "CLV-Setup" program does not recognize parameters transferred during the upload, it<br />
outputs a warning message. Unknown parameters can be edited in the EXTRAS tab by<br />
8 008 796/0000/25-06-2002 © SICK AG · Division Auto Ident · Germany · All rights reserved 6-5
Chapter 6<br />
Operation<br />
Operating Instructions<br />
CLV 490 Bar Code Scanner<br />
following the conventions for command strings. When the parameter set is then saved, these<br />
parameters are also saved.<br />
Transferring and saving a complete CLV parameter set (download)<br />
1. Click in the toolbar.<br />
The "Device Ready" LED is extinguished.<br />
CLV-Setup copies the parameter set to the RAM of the CLV. The DOWNLOAD PARAMETERS<br />
dialog box with the storage options is then displayed.<br />
PERMANENT: CLV-Setup copies the parameter record to the RAM and to the EEPROM of<br />
the CLV.<br />
TEMPORARY: CLV-Setup copies the parameter record to the RAM only. The changes are<br />
lost when the CLV supply voltage is switched off.<br />
2. Confirm the dialog box with the desired storage option.<br />
The "Device Ready" LED lights up again.<br />
The new parameter set is stored in the CLV either permanently or temporarily.<br />
CLV with external parameter memory<br />
If the parameter set was downloaded and stored permanently, CLV-Setup opens a further<br />
dialog box for adjusting the parameter set in the external memory, if the start option is set<br />
to START WITH EXTERNAL PARAMETERS.<br />
¾<br />
Choose the COPY NOW INTERNAL PARAMETER SET TO EXTERNAL MEMORY option.<br />
CLV-Setup then instructs the CLV to copy the new parameter set to the external<br />
memory. The "Device Ready" LED lights up again.<br />
The internal and external parameter sets are now identical.<br />
See also Chapter 10.3.5 Adjusting the parameter set in the external parameter memory after<br />
it has been downloaded to the CLV, Page 10-36.<br />
Saving a parameter set in CLV-Setup<br />
1. To save the modified parameter set as a new configuration file in CLV-Setup, or to overwrite<br />
an existing file, choose FILE and SAVE AS.<br />
The CLV FILE SELECTOR dialog box is then displayed.<br />
2. Enter the file name in the dialog box (file name extension "*.scl") and confirm the entry.<br />
The new parameter set is now stored in CLV-Setup in the subdirectory "data".<br />
6.4.2 Function of the tabs in CLV-Setup (overview)<br />
Reading Configuration<br />
This tab and further dialog boxes are used to set the following:<br />
• Scanning frequency<br />
• Start/stop ratio<br />
• Autofocus mode (distance measurement, preference focus distance, delay of focus<br />
change, depth of field optimization, autofocus space, delimitations, extent of deflection)<br />
• Reading distance configuration for event-controlled focus control (focus position,<br />
evaluation range of the scan line, assignment table)<br />
• Trigger source for the focus control (if event-controlled)<br />
• Adjustment to bar code quality caracteristics and relative module width<br />
6-6 © SICK AG · Division Auto Ident · Germany · All rights reserved 8 008 796/0000/25-06-2002
Operating Instructions Chapter 6<br />
CLV 490 Bar Code Scanner<br />
Operation<br />
Device Configuration<br />
This tab and further dialog boxes are used to set the following:<br />
• Device number<br />
• Source of the Reading trigger mode<br />
• Laser timeout<br />
• Output time of the Reading result referred to the start of the reading interval<br />
• Scanner position parameters (the position of the CLV in the area)<br />
• Tracking parameters<br />
• Object polling parameters<br />
• Output filter of the reading result (host interface)<br />
• Physical arrangement for data output via the host interface<br />
(stand-alone, master/slave)<br />
• Functional assignment of the IN 3 and "IN 4" switching inputs<br />
• Functional assignments of the "Result 1 ... Result 4" switching outputs<br />
• Start option for accessing the parameter set<br />
• Code position comparison<br />
Recommendation<br />
Code Configuration<br />
This tab and further dialog boxes are used to set the following:<br />
• Type of active decoder (SMART or standard decoder)<br />
• Evaluation routines for individual code types<br />
• Number of identical reads (multiple reads)<br />
• Minimum and maximum number of bar codes to be read/output<br />
• Kind of Start/Stop recognition<br />
• Activation of the comparison of the code position for the separation of identical bar codes<br />
To enhance the reading reliability with fast applications, only activate those code types<br />
and code lengths that are actually relevant.<br />
Host Interface<br />
This tab and further dialog boxes are used to set the following:<br />
• Destination of the read result date strings (host interface or CAN interface)<br />
• Active physical interface (RS 422/485 or RS 232)<br />
• Data format and transmission rate<br />
• Data transmission protocol<br />
• Start and stop characters of the interface protocol<br />
Data Strings<br />
This tab and further dialog boxes are used to set the following:<br />
• Data output format of the host interface (telegram format)<br />
• Constants and reading diagnosis data in the header, separator and terminator<br />
• Arrangement of the separators in the data string<br />
• Output format for no reads and contents of the error string<br />
• Test string function<br />
• Output sequence and sort criteria for reading more than one bar code per reading pulse<br />
• Format mask and its structure<br />
8 008 796/0000/25-06-2002 © SICK AG · Division Auto Ident · Germany · All rights reserved 6-7
Chapter 6<br />
Operation<br />
Operating Instructions<br />
CLV 490 Bar Code Scanner<br />
Auxiliary Interface<br />
This tab and further dialog boxes are used to change the following:<br />
• Operating mode of the terminal interface<br />
CAN Interface<br />
This tab and the further dialog windows are used to change the following:<br />
• CAN interface operating mode<br />
• Data transfer rate<br />
• Type of logical data connection of the connected CLV<br />
• Usage of the switch inputs/outputs of the CLV as CANopen Digital I/O<br />
Oscillating Mirror<br />
This tab is used to set the following:<br />
• Operating mode of the oscillating mirror<br />
• Oscillating frequency<br />
• Angle of deflection (oscillating amplitude)<br />
• Start of oscillating mode<br />
• Trigger source for One-Shot<br />
Extras<br />
This tab is used to edit parameters that were not recognized by CLV-Setup after an upload.<br />
Note<br />
CLV-Setup Online Help contains a detailed description of the functions of the parameters and<br />
their valid entries (see Chapter 10.6.6 CLV-Setup Help, Page 10-46 for calling up Help).<br />
6.4.3 Parameterizing example<br />
For a simple application,Chapter 10.10 Discussion of a parameterization example,<br />
Page 10-56 in the appendix shows an example of the recommended procedure when parameterizing<br />
the CLV. Otherwise, the general guidelines in the next chapter provide orientation<br />
during adaptation to the individual reading situation.<br />
6.4.4 Guide to parameterization menu<br />
Overview of parameterization steps<br />
• Adjusting the optical read properties of the scanner<br />
• Configuring a read pulse timing<br />
• Adjusting the decoder’s evaluation properties<br />
• Adjusting the output properties (data, result status)<br />
• Specifying the terminal interface function (auxiliary interface)<br />
• Indicating the source of the parameter set for starting up (only with external parameter<br />
memory)<br />
6-8 © SICK AG · Division Auto Ident · Germany · All rights reserved 8 008 796/0000/25-06-2002
Operating Instructions Chapter 6<br />
CLV 490 Bar Code Scanner<br />
Operation<br />
When the CLV is switched on for the first time, it is started with the factory default settings.<br />
The following parameters must then be set:<br />
a) Adjusting the optical reading properties<br />
• Scanning frequency Ö READING CONFIGURATION tab Ö Reading Parameters<br />
• Blank zone Ö READING CONFIGURATION tab Ö Start/stop ratio<br />
• Poor quality bar code print Ö READING CONFIGURATION tab Ö Code label characteristics<br />
• Relative modul width Ö READING CONFIGURATION tab Ö Code label characteristics<br />
Parameterizing the autofocus mode (Part 1):<br />
Action Line scanner Line scanner with oscillating mirror<br />
1. Activate autofocus mode Ö READING CONFIGURATION tab<br />
FOCUS TRIGGER SOURCE<br />
Ö Autofocus<br />
2. Choose autofocus mode AUTOFOCUS Ö MODE<br />
– Minimum distance or<br />
– Differential background or<br />
– Differential background and tracking<br />
see Table 6-5, Page 6-10<br />
3. Configure CLV for distance<br />
measurement<br />
(define visible range)<br />
AUTOFOCUS Ö EDIT READING FIELD<br />
– Minimum Code Position CP<br />
– Maximum Code Position CP<br />
4. Set up autofocus mode AUTOFOCUS Ö EDIT AUTO FOCUS<br />
Ö ADJUSTMENTS<br />
– Preference focus distance<br />
– Focus relase<br />
Ö LIMITS<br />
– Auto focus limitation<br />
– Scan angle limitation<br />
– Auto focus space,<br />
see Table 6-5, Page 6-10<br />
Ö OPTIMIZATIONS<br />
– Delay of focus change<br />
– Depth of field optimization<br />
– Object height passing in OTS mode<br />
– Distance measurement Ö ACTIVE<br />
– Source of distance information<br />
5. Choose time of focusing<br />
(based on reading pulse)<br />
FOCUS TRIGGER SOURCE<br />
Ö Inputs/Serial/Autofocus<br />
– Immediate or Synchronous<br />
– Latched<br />
Table 6-4: Guide: Parameterizing autofocus mode (Part 1)<br />
Ö READING CONFIGURATION tab<br />
FOCUS TRIGGER SOURCE<br />
Ö •Autofocus<br />
AUTOFOCUS Ö MODE<br />
– Minimum distance or<br />
– Differential background or<br />
– Differential background and tracking<br />
see Table 6-5, Page 6-10<br />
AUTOFOCUS Ö EDIT READING FIELD<br />
– Minimum Code Position CP<br />
– Maximum Code Position CP<br />
– Oscillating mirror amplitude CW<br />
AUTOFOCUS Ö EDIT AUTO FOCUS<br />
Ö ADJUSTMENTS<br />
– Prefereence focus distance<br />
– Focus relase<br />
Ö LIMITS<br />
– Auto focus limitation<br />
– Scan angle limitation<br />
– Oscillating angle limitation<br />
– Auto focus space,<br />
see Table 6-5, Page 6-10<br />
Ö OPTIMIZATIONS<br />
– Delay of focus change<br />
– Depth of field optimization<br />
– Object height passing in OTS mode<br />
– Distance measurement Ö ACTIVE<br />
– Source of distance information<br />
FOCUS TRIGGER SOURCE<br />
Ö Inputs/Serial/Autofocus<br />
– Immediate or Synchronous<br />
– Latched<br />
Note<br />
The minimum and maximum values for the active evaluation range of the scan line (MIN. AND<br />
MAX. CODE POSITION) can be checked in the SHOW CP-LIMITS mode.<br />
See Chapter 6.5.5 Show CP-limits, Page 6-26.<br />
8 008 796/0000/25-06-2002 © SICK AG · Division Auto Ident · Germany · All rights reserved 6-9
Chapter 6<br />
Operation<br />
Operating Instructions<br />
CLV 490 Bar Code Scanner<br />
Parameterization autofocus function (Part 2):<br />
• Area parameters Ö tab DEVICE CONFIGURATION ÖEdit Scanner position and Edit Tracking<br />
Parameters (in OTS mode only)<br />
• Teach-in/show ambient background Ö TOOL menu Ö Device functions<br />
Parameter Minimum Distance Differential background Differential background<br />
and Tracking<br />
Condition<br />
1 object in reading field per<br />
reading interval<br />
1 object in reading field per<br />
reading interval<br />
1. Limits:<br />
✖ ❍ ❍<br />
autofocus limitation<br />
2. Limits:<br />
✖ ❍ ❍<br />
Scan angle limitation<br />
3. Limits:<br />
✖ ✖ ✖<br />
oscillation angle limitation 1)<br />
4. Limits:<br />
autofocus space<br />
– ❍ ❍<br />
5. Edit scanner position<br />
(angles):<br />
angle alpha, beta, gamma<br />
6. Edit scanner position<br />
(coordinates):<br />
Coordinates x, y, z<br />
7. Edit tracking parameter:<br />
focus release point<br />
– ✖ ✖<br />
– ✖ ✖<br />
– – ✖<br />
8. Teach-in background – ❍ ❍<br />
✖ : required ❍: optional 1) for line scanners with oscillating mirror<br />
Table 6-5: Guide: Parameterizing the autofocus function (Part 2)<br />
No. of objects in the reading<br />
field per reading interval: ≥ 1<br />
Fig. 6-2 shows a 2D example of how the visible range of the CLV is adjusted using the<br />
parameters "Limit values: scan angle limitation" and "Limit value: autofocus space".<br />
Scan angle<br />
limitation<br />
Autofocus space<br />
Fig. 6-2:<br />
Narrowing the visible range using limit values<br />
6-10 © SICK AG · Division Auto Ident · Germany · All rights reserved 8 008 796/0000/25-06-2002
Operating Instructions Chapter 6<br />
CLV 490 Bar Code Scanner<br />
Operation<br />
Parameterization the event-controlled focus control (alternative):<br />
Action Line scanner Line scanner with oscillating mirror<br />
1. Activate focus control function<br />
(choose trigger source)<br />
2. Choose focus switchover<br />
point (referred to reading<br />
pulse)<br />
Ö READING CONFIGURATION tab<br />
Ö FOCUS TRIGGER SOURCE<br />
– Inputs/Serial or<br />
– Timer ÖTIMER or<br />
– Static/No Trigger<br />
FOCUS TRIGGER SOURCE<br />
Ö Inputs/Serial/Autofocus<br />
– Immediate or Synchronous<br />
– Latched<br />
3. Set up focus control DISTANCE CONFIGURATION/ASSIGNMENT TABLE<br />
Ö Distance Configuration<br />
– Focus Position<br />
– Minimum Code Position CP<br />
– Maximum Code Position CP<br />
Ö Assignment Table<br />
– Index<br />
– Valid Configurations<br />
4. In INPUTS/SERIAL trigger<br />
source: choose function for<br />
"IN 3" and "IN 4" switching<br />
inputs<br />
Ö DEVICE CONFIGURATION tab<br />
Ö ASSIGNMENT IN 3<br />
– Focus Control<br />
Ö ASSIGNMENT IN 4<br />
– Focus Control<br />
Table 6-6: Guide: Parameterizing the event-controlled focus control<br />
Ö READING CONFIGURATION tab<br />
Ö FOCUS TRIGGER SOURCE<br />
– Inputs/Serial or<br />
– Timer or<br />
– Static/No Trigger<br />
– Oscillating mirror extrema<br />
FOCUS TRIGGER SOURCE<br />
Ö Inputs/Serial/Autofocus<br />
– Immediate or Synchronous<br />
– Latched<br />
DISTANCE CONFIGURATION/ASSIGNMENT TABLE<br />
Ö Distance Configuration<br />
– Focus Position<br />
– Minimum Code Position CP<br />
– Maximum Code Position CP<br />
– Oscillating mirror extrema<br />
Ö Assignment Table<br />
– Index<br />
– Valid Configurations<br />
Ö DEVICE CONFIGURATION tab<br />
Ö ASSIGNMENT IN 3<br />
– Focus Control<br />
Ö ASSIGNMENT IN 4<br />
– Focus Control<br />
Note<br />
The minimum and maximum values for the active evaluation range of the scan line (MIN. AND<br />
MAX. CODE POSITION) can be checked in the SHOW CP-LIMITS mode.<br />
See Chapter 6.5.5 Show CP-limits, Page 6-26.<br />
8 008 796/0000/25-06-2002 © SICK AG · Division Auto Ident · Germany · All rights reserved 6-11
Chapter 6<br />
Operation<br />
Operating Instructions<br />
CLV 490 Bar Code Scanner<br />
Parameterization oscillating mirror functions:<br />
Action Line scanner with oscillating mirror<br />
1. Choose "Oscillating with fixed amplitude"<br />
mode<br />
(identical amplitude for all distance configurations<br />
with event-controlled focus control)<br />
– or –<br />
2. Choose "Oscillating with variable amplitude"<br />
mode<br />
(amplitude can be chosen for each distance<br />
configuration with event-controlled focus<br />
control)<br />
– or –<br />
3. Choose "Fixed Position" mode<br />
– or –<br />
Ö OSCILLATING MIRROR tab<br />
Ö OSCILLATING MIRROR<br />
– Oscillating with fixed amplitude<br />
Ö OSCILLATING<br />
– Frequency<br />
Ö OSCILLATING MIRROR tab<br />
Ö OSCILLATING MIRROR<br />
– Oscillating with variable amplitude<br />
Ö OSCILLATING<br />
– Frequency<br />
Ö READING CONFIGURATION tab<br />
Ö EDIT AUTOFOCUS respectively<br />
Ö Distance Configurations<br />
– Oscillating Mirror Amplitude<br />
Ö OSCILLATING MIRROR tab<br />
Ö OSCILLATING MIRROR<br />
– Fixed Position<br />
Ö FIXED POSITION<br />
– Stationary Position (CW)<br />
4. Choose "One-Shot" mode Ö OSCILLATING MIRROR tab<br />
Ö OSCILLATING MIRROR<br />
– One-Shot<br />
Ö ONE-SHOT<br />
Ö PHASE 1<br />
– Mirror Speed<br />
– Start Position<br />
– Distance Configuration (no.)<br />
Ö PHASE 2<br />
– Mirror Speed<br />
– Start Position<br />
– DistanceConfiguration (no.)<br />
5. With One-Shot: choose trigger source Ö OSCILLATING MIRROR tab<br />
Ö ONE-SHOT<br />
Ö TRIGGER MODE<br />
– Reading Trigger Pulse or<br />
– "IN 3" switching input or<br />
– "IN 4" switching input or<br />
– Serial Interface<br />
6. With One-Shot and trigger source "IN 3" or<br />
"IN 4":<br />
Choose function for switching input "IN 3" or<br />
"IN 4"<br />
Ö DEVICE CONFIGURATION tab<br />
Ö ASSIGNMENT IN 3<br />
– One Shot or<br />
Ö ASSIGNMENT IN 4<br />
– One Shot<br />
see also Table5-21, Page5-19<br />
7. Choose activity of oscillating mode Ö OSCILLATING MIRROR tab<br />
Ö OSCILLATING MIRROR acitve<br />
– continuous<br />
– during reading interval<br />
Table 6-7: Guide: Parameterizing oscillating mirror functions<br />
6-12 © SICK AG · Division Auto Ident · Germany · All rights reserved 8 008 796/0000/25-06-2002
Operating Instructions Chapter 6<br />
CLV 490 Bar Code Scanner<br />
Operation<br />
Note<br />
The OSCILLATE WITH VARIABLE AMPILTUDE operating mode can only be selected from amplitudes<br />
of min. ±10 CW and an oscillating frequency of 0.4 Hz or higher.<br />
The scan line must always sweep the neutral position (CW = 50). This means that oscillation<br />
is not possible in the range 60 CW to 80 CW, for example, but is possible in the range 40<br />
CW to 80 CW.<br />
Explanation of oscillating mirror functions<br />
1. "Oscillating with fixed amplitude" mode<br />
The oscillating mirror deflects the scan line up to the maximum angle of deflection of<br />
±40 CW (corresponds to ±20°). Fig. 6-3 illustrates this mode when a bar code is read from<br />
above.<br />
Constant<br />
oscillating<br />
frequency<br />
0 0<br />
Scan line density depending on object height<br />
Fig. 6-3:<br />
Oscillating mirror: "Oscillating with fixed amplitude" mode<br />
2. "Oscillating with Variable Amplitude" mode<br />
The deflection range can be parameterized separately for each of the maximum of 8 distance<br />
configurations/focus positions. The minimum/maximum values that can be set for<br />
the deflection range for fast applications ensure that the scan line only sweeps areas that<br />
contain bar codes during the time available. This also ensures that the scan line density on<br />
the object is, for the most part, constant. Fig. 6-4, Page 6-14 illustrates this mode when a<br />
bar code is read from above.<br />
8 008 796/0000/25-06-2002 © SICK AG · Division Auto Ident · Germany · All rights reserved 6-13
Chapter 6<br />
Operation<br />
Operating Instructions<br />
CLV 490 Bar Code Scanner<br />
Constant<br />
0<br />
oscillating<br />
frequency<br />
0<br />
1<br />
Limitation of the<br />
deflection range<br />
(CW value)<br />
Fig. 6-4:<br />
Scan line density equal, independant of object height<br />
Oscillating mirror: "Oscillating with variable amplitude" mode<br />
3. "Fixed Position" mode<br />
The CLV parks the oscillating mirror at the desired position. 10 CW corresponds to –20°,<br />
and 90 CW to +20° (see Fig. 4-8, Page 4-6). In the default setting, the fixed position is set<br />
to 50 CW (corresponds to an angle of deflection below 105°). The Oscillating mode is switched<br />
off.<br />
4. "One-Shot" mode<br />
In the "One-Shot" mode, the oscillating mirror only performs one specific oscillating movement<br />
per reading interval. This movement consists of a forward phase and a return phase.<br />
The start position of the scan line, the mirror speed and the valid distance configuration can<br />
be parameterized separately for each phase. The end position of the one phase forms the<br />
start position of the other phase. Fig. 6-5, Page 6-15 illustrates this mode with object<br />
tracking. During the forward phase, the front of the object that moves towards the oscillating<br />
mirror is swept once by the scan line from top to bottom in accordance with the conveyor<br />
speed. Multiple focus position switchovers are not necessary as the required reading range<br />
(DOF) is much smaller than with the line scanner. Fig. 10-42, Page 10-53 explains how the<br />
start position and mirror speed are calculated for a given conveyor speed.<br />
Possible trigger sources for One-Shot:<br />
• "IN 3" or "IN 4" switching input<br />
• Command string (via serial interface)<br />
• Reading interval<br />
6-14 © SICK AG · Division Auto Ident · Germany · All rights reserved 8 008 796/0000/25-06-2002
Operating Instructions Chapter 6<br />
CLV 490 Bar Code Scanner<br />
Operation<br />
Conventionally required reading range<br />
t 0<br />
Reduced reading range through One-Shot function<br />
t 1<br />
Reading range<br />
Line scanner<br />
Line scanner with<br />
oscillating mirror<br />
Reading range<br />
Fig. 6-5:<br />
One-Shot: Object tracking (bar code read from front)<br />
8 008 796/0000/25-06-2002 © SICK AG · Division Auto Ident · Germany · All rights reserved 6-15
Chapter 6<br />
Operation<br />
Operating Instructions<br />
CLV 490 Bar Code Scanner<br />
b) Parameterizing the reading trigger source:<br />
Action Settings<br />
1. Reading trigger: choose source for start Ö DEVICE CONFIGURATION tab<br />
Ö •READING TRIGGER MODE<br />
– Sensor Input (Active High) or<br />
– Sensor Input (Active Low) or<br />
– Serial Interface or<br />
– Free Running with Timeout or<br />
– OPC-Trigger (special usage) or<br />
– OTS-Trigger (special usage)<br />
2. Trigger source "Sensor Input": Choose debouncing<br />
and response with first trigger<br />
3. Trigger source "Serial Interface":<br />
choose trigger character<br />
4. Trigger source "Free Running":<br />
choose timeout<br />
Ö EDIT READING TRIGGER<br />
Ö DEBOUNCING SENSOR<br />
– Standard or<br />
– Fast<br />
Ö FIRST TRIGGER SENSOR<br />
– Dynamic or<br />
– Static<br />
Ö EDIT READING TRIGGER<br />
Ö SERIAL INTERFACE<br />
– Standard Trigger or<br />
– Single Character<br />
Ö EDIT READING TRIGGER<br />
Ö END OF LABLE/FREE RUNNING<br />
– Timeout<br />
5. Reading trigger: choose source for end Ö EDIT READING TRIGGER<br />
Ö END OF READING INTERVAL<br />
– Generated by Trigger Source or<br />
– Timer or<br />
– Switching Input IN 4<br />
Table 6-8: Guide: Parameterizing the reading trigger source<br />
c) Parameterizing the laser timeout:<br />
Action<br />
1. Choose laser timeout duration<br />
– or –<br />
2. Deactivate laser timeout<br />
(The laser diode is always active, independent<br />
of the pulse duration)<br />
Table 6-9: Guide: Parameterizing the laser timeout<br />
Settings<br />
Ö DEVICE CONFIGURATION tab<br />
Ö EDIT READING TRIGGER<br />
Ö LASER TIMEOUT<br />
– Duration<br />
Ö LASER TIMEOUT<br />
– Click (deactivate) the control box INTERVAL<br />
ACTIVE<br />
6-16 © SICK AG · Division Auto Ident · Germany · All rights reserved 8 008 796/0000/25-06-2002
Operating Instructions Chapter 6<br />
CLV 490 Bar Code Scanner<br />
Operation<br />
d) Parameterizing the evaluation characteristics<br />
• Choose decoder type Ö CODE CONFIGURATION tab Ö Decoder<br />
• Activate code types for evaluation Ö CODE CONFIGURATION tab Ö Codes and Edit Codes<br />
• Activate code comparison Ö DEVICE CONFIGURATION tab Ö EDIT MATCH CODES<br />
• Define output time of reading result Ö CODE CONFIGURATION tab Ö Output on Good Read<br />
Number of bar codes per<br />
object<br />
Line scanner<br />
Stationary/moving conveyor<br />
object<br />
1. Number n = 1 Ö CODE CONFIGURATION tab<br />
Ö CODE POSITION<br />
– Deactivate "Compare"<br />
2. Number n > 1:<br />
– Same code type<br />
– Contents<br />
different or identical<br />
3. Number n > 1:<br />
– Code type<br />
different<br />
– Contents<br />
different or identical<br />
Ö CODE POSITION<br />
– Activate "Compare"<br />
Ö NUMBER OF CODES<br />
– Minimum<br />
– Maximum<br />
Ö CODE POSITION<br />
– Deactivate "Compare"<br />
Ö NUMBER OF CODES<br />
– Minimum<br />
– Maximum<br />
Table 6-10: Guide: Settings for evaluating identical bar codes<br />
Line scanner with oscillating mirror<br />
Stationary conveyor object<br />
Ö CODE CONFIGURATION tab<br />
Ö CODE POSITION<br />
– Deactivate "Compare"<br />
Ö CODE POSITION<br />
– Activate "Compare"<br />
Ö NUMBER OF CODES<br />
– Minimum<br />
– Maximum<br />
Ö CODE POSITION<br />
– Deactivate<br />
"Compare"<br />
Ö NUMBER OF CODES<br />
– Minimum<br />
– Maximum<br />
Moving conveyor object<br />
Ö CODE CONFIGURATION tab<br />
Ö CODE POSITION<br />
– Activate "Compare"<br />
Ö NUMBER OF CODES<br />
– Minimum<br />
– Maximum<br />
Ö DEVICE CONFIGURATION tab<br />
Ö EDIT TRACKING PARAMETERS<br />
– Assigment tolerance<br />
Note<br />
If the number n > 1, minimum clearances must be provided in the following cases:<br />
• The SMART decoder is to read bar codes that originate from the same code type and<br />
have identical or different data contents<br />
• The standard decoder is to read and distinguish bar codes with the same name (identical<br />
code type and data content)<br />
The necessary calculations are provided in Chapter 10.8.3 Calculating the necessary bar<br />
code distance if several bar codes are read on each object, Page 10-54.<br />
e) Parameterizing the output characteristics<br />
Result status: Switching outputs<br />
• Define function of result status output of "Result 1" ... "Result 4" switching outputs:<br />
DEVICE CONFIGURATION tab Ö Edit Result Outputs•<br />
Main Data Interface general<br />
• Filter reading result Ö DEVICE CONFIGURATION tab Ö Odette filter<br />
• Sort reading result Ö DATA STRINGS tab Ö Output Sequence Sort<br />
• Mask reading result Ö DATA STRINGS tab Ö Format Mask<br />
• Destination result data strings Ö HOST INTERFACE tab Ö destination of result data strings<br />
Host Interface:<br />
• Arrangement in data network Ö DEVICE CONFIGURATION tab Ö scanner arrangement<br />
• Physical interface Ö HOST INTERFACE tab Ö Data Format<br />
• Communication parameters Ö HOST INTERFACE tab Ö Data Format<br />
• Protocol Ö HOST INTERFACE tab Ö Interface Protocol<br />
8 008 796/0000/25-06-2002 © SICK AG · Division Auto Ident · Germany · All rights reserved 6-17
Chapter 6<br />
Operation<br />
Operating Instructions<br />
CLV 490 Bar Code Scanner<br />
Function of the CAN interface (alternative):<br />
See the operating instructions ”Application of the CAN interface” (no. 8 009 180)<br />
Data output string of host interface:<br />
• Choose contents of header, separator and terminator Ö DATA STRINGS tab<br />
Ö Output Format<br />
• Position of separator in data output string Ö DATA STRINGS tab<br />
Ö Separator Position<br />
• Set wrong read format Ö DATA STRINGS tab Ö Wrong read format, Character Count and<br />
Error String<br />
• If necessary, parameterize/activate test string Ö DATA STRINGS tab Ö Test String<br />
• Parameterize special functions Ö DATA STRINGS tab Ö Specials<br />
f) Parameterizing the auxiliary interface (terminal interface)<br />
• AUXILIARY INTERFACE tab<br />
g) Defining the start option for accessing the parameter set<br />
• On the DEVICE CONFIGURATION tab Ö choose START WITH<br />
6-18 © SICK AG · Division Auto Ident · Germany · All rights reserved 8 008 796/0000/25-06-2002
Operating Instructions Chapter 6<br />
CLV 490 Bar Code Scanner<br />
Operation<br />
6.5 Operating modes and outputing the reading result<br />
The following CLV operating modes/functions can be selected in CLV-Setup:<br />
Standard operating mode:<br />
• Reading mode<br />
For setup:<br />
• Percentage evaluation<br />
• Adjusting mode<br />
For adapting the device to the application at hand:<br />
• Configuring (parameterizing ) the CLV<br />
See Chapter 6.4.1 Configuring the CLV via the user interface of CLV-Setup, Page 6-5<br />
• Background teach-in<br />
• Show CP-limits<br />
For monitoring purposes/trouble shooting<br />
• Display and edit operating data<br />
• Reading diagnosis<br />
• Monitor host interface<br />
• Auxiliary input<br />
• Self-test<br />
6.5.1 Reading mode (standard operating mode)<br />
The CLV performs a self-test after it has been switched on. It switches to Reading mode<br />
("Device Ready" LED lights up). In the default setting the "Sensor" switching input is the (external)<br />
trigger source of the reading pulse. The reading result is output by the CLV at the end<br />
of the reading pulse via the host interface (default setting) and terminal interface.<br />
The reading result of the terminal interface can be displayed in the CLV-Setup Terminal<br />
Emulator. The CLV terminal interface must be set to the READING DIAGNOSIS mode for this purpose.<br />
This mode is selected for the default setting. The reading result of the terminal interface<br />
has a fixed, invariable format.<br />
The Reading mode can be called up by choosing VIEW in the menu bar or via the Terminal<br />
Emulator.<br />
Line scanner with oscillating mirror:<br />
In the Reading mode the CLV deflects (by default) the scan line about the position CW = 50<br />
at a frequency of 1 Hz and a maximum angle of ±20°. 50 CW corresponds to an angle of<br />
deflection of 105°.<br />
8 008 796/0000/25-06-2002 © SICK AG · Division Auto Ident · Germany · All rights reserved 6-19
Chapter 6<br />
Operation<br />
Operating Instructions<br />
CLV 490 Bar Code Scanner<br />
Displaying the reading result in the Terminal Emulator:<br />
1. Click in the toolbar.<br />
The Terminal Emulator window is then displayed.<br />
2. In the DEVICE MODE section, choose READING MODE.<br />
3. Present the bar code pattern from Fig. 6-1 to the CLV and activate the reading pulse.<br />
The "Sensor" LED lights up and the scan line appears. Also refer to Chapter 6.3.1 Switching<br />
the CLV on for the first time with the factory default settings, Page 6-3.<br />
4. Ending the reading pulse.<br />
The CLV displays the reading result in the output window of the Terminal Emulator.<br />
The "Read Result" LED lights up for a duration of 100 ms (default setting).<br />
Fig. 6-6 shows two examples of the output of a reading result: Good Read and No Read.<br />
The reading result comprises the data contents of the bar code(s) and the reading diagnosis<br />
data. Fig. 6-7 explains the structure and function of the reading diagnosis data for Good<br />
Read, and Fig. 6-8, Page 6-21 for No Read.<br />
Fig. 6-6:<br />
CLV-Setup: Displaying the reading result in the Terminal Emulator<br />
6-20 © SICK AG · Division Auto Ident · Germany · All rights reserved 8 008 796/0000/25-06-2002
Operating Instructions Chapter 6<br />
CLV 490 Bar Code Scanner<br />
Operation<br />
Good Read:<br />
TT=_ _130 ms MG=_65 % n=_1 AK=1<br />
0123412345<br />
C39 100% ST=0 CL=10 CP=_44 CD=_631 CS=_ _3 CA=_ _3 CK=_ _3 DI=F<br />
PO=–_43 OW=+_ _0 FC=_480 CX=_890 CY=_553 CZ=1481<br />
With:<br />
1st. line : TT = Duration of the reading interval<br />
MG = Temporal mean value of the identification quality<br />
n = Number of detected bar codes<br />
AK = No. of the used distance configuration 1)<br />
2nd. line: 0123412345 = Data contents of the bar code<br />
3rd. line: C39 = ID: Code type Code 39 along<br />
_99% = Identification quality<br />
ST = Read status (ST = 0: Good Read)<br />
CP = Code position<br />
CL = Code length (number of characters)<br />
CA = Scan effort<br />
CS = Code reliability<br />
CK = Code continuity<br />
DI = Decoding direction (F = in scanning direction, R = against<br />
scanning direction<br />
4th line PO = Exact code position (3-digit for tracking)<br />
OW = Exact oscillating angle (3-digit for tracking)<br />
FC = Current focus position (4-digit for tracking)<br />
CX = X-coordinate of bar code (for OTS in transport direction)<br />
CY = Y-coordinate of bar code (for OTS across to transport<br />
direction)<br />
CZ = Z-coordinate of bar code (for OTS from above directly)<br />
1) not relevant for autofocus function<br />
Fig. 6-7:<br />
Reading result of the terminal interface: structure for Good Read<br />
No Read:<br />
TT=_ _ 240 ms MG=_64 % n=_0 AK=1<br />
no code!<br />
1st. line : TT = Duration of the reading interval<br />
MG = Temporal mean value of the identification quality<br />
n = Number of codes detected<br />
AK = No. of the distance configuration used 1)<br />
2nd. line: no code! = No. bar codes found!<br />
Fig. 6-8:<br />
1) not relevant for autofocus function<br />
Reading result of the terminal interface: structure for No Read<br />
Note<br />
The CLV only outputs several bar codes in the reading result if the parameterized minimum<br />
and maximum number of bar codes is > 1, and several bar codes have been presented to<br />
it. The number of bar codes to be read/output for each reading interval can be selected in<br />
the CODE CONFIGURATION tab in the NUMBER OF CODES section.<br />
The reading result of the host interface can also be displayed. Chapter 6.5.8 Monitor Host<br />
Interface, Page 6-29 describes the procedure for this and the structure of the reading<br />
result in the default setting.<br />
8 008 796/0000/25-06-2002 © SICK AG · Division Auto Ident · Germany · All rights reserved 6-21
Chapter 6<br />
Operation<br />
Operating Instructions<br />
CLV 490 Bar Code Scanner<br />
Triggering the reading pulse via the Terminal Emulator<br />
In the default setting the "Sensor" switching input is the (external) trigger source of the reading<br />
pulse. The reading pulse can also be triggered directly via the Terminal Emulator of CLV-<br />
Setup for test purposes. To do so, a different trigger source must be selected temporarily<br />
in the CLV.<br />
1. Choose DEVICE CONFIGURATION tab.<br />
2. In the READING TRIGGER MODE section click the SERIAL INTERFACE option.<br />
3. Perform a download to the CLV by clicking in the toolbar.<br />
The DOWNLOAD PARAMETERS dialog box is then displayed.<br />
4. Confirm the dialog box by choosing the TEMPORARY storage option.<br />
The serial interface has been activated as the trigger source of the reading pulse and<br />
is ready to receive appropriate commands.<br />
5. Click in the toolbar.<br />
The Terminal Emulator window is then displayed.<br />
The CLV is in the Reading mode.<br />
6. Click the SW-TRIGGER ON button or press [F7].<br />
CLV-Setup sends a start command to the CLV.<br />
The "Sensor" LED lights up and the scan line appears.<br />
7. Present the bar code pattern from Fig. 6-1, Page 6-3 to the CLV.<br />
8. Click the SW-TRIGGER OFF button or press [F8].<br />
CLV-Setup sends a stop command to the CLV. The "Sensor" LED is extinguished. The<br />
CLV switches off the laser diode. The CLV displays the reading result in the output window<br />
of the Terminal Emulator. The "Read Result" LED lights up for a duration of 100 ms<br />
(default setting).<br />
6.5.2 Percentage evaluation<br />
In the Percentage evaluation mode, the quality of the reading function is assessed (no conveyor<br />
movement).<br />
The CLV performs 100 scans in the free running mode and evaluates the reading quality. It<br />
outputs the reading result continuously every 2 s via the terminal interface. The reading results<br />
can be displayed in the Terminal Emulator of CLV-Setup. The standard decoder has to<br />
be set temporarily for the percentage evaluation.<br />
The Percentage evaluation mode can be called up by choosing VIEW in the menu bar, as a<br />
device function via CLV 490 (interactively), or via the Terminal Emulator.<br />
Line scanner with oscillating mirror:<br />
In the Percent Evaluation mode, the CLV behaves in the following manner:<br />
– in "Oscillating" mode (basic setting: oscillating with a fixed amplitude), the CLV shuts off<br />
oscillation and positions the scan line under the angle CW = 50 (corresponds to a<br />
deflection angle below 105°). This position cannot be altered.<br />
– in "One-Shot" mode, the CLV positions the scan line under the angle CW = 50 as well.<br />
– in ”Fixed position” mode, however the scan line’s selected position remains unchanged.<br />
6-22 © SICK AG · Division Auto Ident · Germany · All rights reserved 8 008 796/0000/25-06-2002
Operating Instructions Chapter 6<br />
CLV 490 Bar Code Scanner<br />
Operation<br />
1. Choose the CODE CONFIGURATION tab.<br />
2. In the DECODER section, choose STANDARD.<br />
3. Perform a download to the CLV by clicking in the toolbar.<br />
The DOWNLOAD PARAMETERS dialog box is then displayed.<br />
4. Confirm the dialog box by choosing the TEMPORARY storage option.<br />
The CLV then uses the standard decoder.<br />
5. Click in the toolbar.<br />
The Terminal Emulator window is displayed. The CLV is in the Reading mode.<br />
6. In the DEVICE MODE section, choose PERCENTAGE EVALUATION<br />
The dialog box for choosing the distance configuration is then displayed.<br />
7. Choose the appropriate distance configuration for the reading distance:<br />
– with autofocus mode the distance configuration no. 1<br />
– with event-controlled focus control the distance configuration that corresponds to the<br />
reading distance of the object (default setting: no. 1, focus position F1 = 1 200 mm).<br />
8. Confirm the dialog box with OK.<br />
The ”Device Ready” LED is extinguished. The CLV initiates the percentage evaluation<br />
and outputs the reading results continuously.<br />
9. Present the bar code pattern from Fig. 6-1, Page 6-3 and monitor the reading results<br />
in the Terminal Emulator window. An example of this can be seen in Fig. 6-9.<br />
The ”Read Result” LED also provides information on the reading quality:<br />
– The LED is extinguished if reading quality is < 30 %<br />
– The LED blinks twice per second if the reading quality is 30 % ... 70 %<br />
– The LED blinks five times per second if the reading quality is 70 % ... 90 %<br />
– The LED is lit continuously if the reading quality is > 90 %<br />
Fig. 6-9:<br />
CLV-Setup: Displaying the percentage evaluation in the Terminal Emulator<br />
The output format of the reading result is the same as that of the Reading mode. Fig. 6-7,<br />
Page 6-21 explains the structure and function of the reading diagnosis data.<br />
8 008 796/0000/25-06-2002 © SICK AG · Division Auto Ident · Germany · All rights reserved 6-23
Chapter 6<br />
Operation<br />
Operating Instructions<br />
CLV 490 Bar Code Scanner<br />
6.5.3 Adjusting mode<br />
The Adjusting mode enables the center of the scan line to be optimally positioned on the<br />
bar code. Chapter 4.3.3 Adjusting mode, Page 4-9 describes the procedure for going about<br />
this after the Adjusting mode has been called up. The CLV does not output a reading result<br />
in this mode.<br />
The Adjusting mode can be called up by choosing VIEW in the menu bar, as a device<br />
function via CLV 490 (interactively), or via the Terminal Emulator.<br />
Line scanner with oscillating mirror:<br />
In the "Adjusting" mode, the CLV behaves in the following manner:<br />
– In "Oscillating" mode (default setting: oscillating with a fixed amplitude), the CLV shuts<br />
of oscillation and positions the scan line under the angle CW = 50 (corresponds to an<br />
angle of deflection below 105°). This position cannot be altered.<br />
– In "One-Shot" mode, the CLV positions the scan line under the angle CW = 50<br />
– In "Fixed Position" mode, the scan line’s selected position remains unchanged.<br />
1. Click in the toolbar.<br />
The Terminal Emulator window is then displayed. The CLV is in the Reading mode.<br />
2. In the DEVICE MODE section, choose ADJUSTING MODE.<br />
The "Device Ready" LED is extinguished. The CLV cancels the Reading mode and<br />
blanks the scan line as of position CP = 50 to position CP = 100.<br />
3. Choose READING MODE to exit the Adjusting mode.<br />
The CLV returns to the Reading mode and the "Device Ready" LED lights up.<br />
6-24 © SICK AG · Division Auto Ident · Germany · All rights reserved 8 008 796/0000/25-06-2002
Operating Instructions Chapter 6<br />
CLV 490 Bar Code Scanner<br />
Operation<br />
6.5.4 Background teach-in<br />
If the Autofocus function is used in the DIFFERENTIAL BACKGROUND or DIFFERENTIAL BACKGROUND<br />
WITH TRACKING mode, the CLV must first learn the ambient background in its reading field to<br />
narrow the reading field even further. When the internal distance profile is set, the reading<br />
field of the CLV must not contain any objects. In this mode, the CLV does not output any<br />
reading results.<br />
The Background teach-in function can be started as a device function via CLV 490 (interactively),<br />
or press the [F2] key.<br />
Line scanner with oscillating mirror:<br />
In the "Background teach-in" mode, the CLV behaves in the following manner:<br />
– in "Oscillating" mode (default setting: oscillating with a fixed amplitude), the CLV shuts<br />
off oscillation and positions the scan line under the angle CW = 50 (corresponds to an<br />
angle of deflection below 105°). This position cannot be altered.<br />
– in "One-Shot" mode, the CLV positions the scan line under the angle CW = 50.<br />
– in "Fixed Position" mode, the scan line’s selected position remains unchanged.<br />
1. Mount the CLV at the reading station and align it with an object containing a bar code.<br />
2. Remove the object so that the CLV has an unobstructed view of the background.<br />
3. Choose CLV 490, DEVICE FUNCTIONS, BACKGROUND, TEACH-IN<br />
– or –<br />
press the [F2] key.<br />
The EXECUTE DEVICE FUNCTIONS window opens.<br />
Choose BACKGROUND, TEACH-IN in the EXECUTE menue.<br />
The "Device Ready" LED extinguishes. The CLV then scans its background and learns<br />
the ambient background so that it can create a suitable distance profile.<br />
The CLV outputs a message once the teach-in procedure has been successfully completed<br />
(see Fig. 6-10).<br />
The CLV has then learned the ambient background.<br />
Fig. 6-10:<br />
CLV-Setup: Dialog window for running the background teach-in<br />
8 008 796/0000/25-06-2002 © SICK AG · Division Auto Ident · Germany · All rights reserved 6-25
Chapter 6<br />
Operation<br />
Operating Instructions<br />
CLV 490 Bar Code Scanner<br />
4. Choose CLOSE to close the window.<br />
If the parameters in the CLV were modified as a result of the teach-in procedure, CLV-<br />
Setup asks you whether you want to copy and display the modified parameter set by<br />
uploading it from the CLV.<br />
5. Confirm the query with YES.<br />
The dialog box closes automatically.<br />
The CLV resumes Reading mode and the "Device Ready" LED lights up.<br />
The new background distance profile can be uploaded and displayed in CLV-Setup.<br />
1. Choose the READING CONFIGURATION tab.<br />
2. In the AUTOFOCUS section, click the SHOW BACKGROUND button.<br />
The SHOW BACKGROUND dialog box appears.<br />
An example of a distance profile is shown in Fig. 6-11.<br />
Fig. 6-11:<br />
CLV-Setup: Display of th learned background<br />
6.5.5 Show CP-limits<br />
In this mode, the CLV blanks certain parts of the scan line so that any limit values defined<br />
for the active evaluation range of the scan line can be checked directly during parameterization.<br />
The restricted active evaluation range shortens the evaluation time for fast applications,<br />
for example, because the evaluation routine only has to take account of unblanked<br />
parts of the scan line. The range is restricted by entering appropriate values for MINIMUM<br />
CODE POSITION and MAXIMUM CODE POSITION in the EDIT DISTANCE CONFIGURATIONS dialog box in<br />
the READING CONFIGURATION tab.<br />
The CLV does not output a reading result in this mode.<br />
Show CP-limits enables you to check whether<br />
• The visible range of the CLV has been defined accordingly for the selected setting in<br />
Autofocus mode (restriction is independent of reading distance and always the same)<br />
• The restriction has been adapted for each active distance configuration in eventcontrolled<br />
dynamic focus control ("Christmas tree" effect)<br />
Show CP-limits can be called up via VIEW in the menu bar, as a device function via CLV 490<br />
(interactively), or via the Terminal Emulator.<br />
6-26 © SICK AG · Division Auto Ident · Germany · All rights reserved 8 008 796/0000/25-06-2002
Operating Instructions Chapter 6<br />
CLV 490 Bar Code Scanner<br />
Operation<br />
Line scanner with oscillating mirror:<br />
In "Show CP-limits" mode, the CLV behaves in the following manner:<br />
– in "Oscillating" mode (default setting: oscillating with a fixed amplitude), the CLV shuts<br />
off oscillation and positions the scan line under the angle CW = 50 (corresponds to an<br />
angle of deflection below 105°). This position cannot be altered.<br />
– in "One-Shot" mode, the CLV positions the scan line under the angle CW = 50.<br />
– in "Fixed Position" mode, the scan line’s selected position remains unchanged.<br />
The CLV blanks the scan line alternately as of the set value for CP min and as of the set value<br />
for CP max . Fig. 6-12 shows an example of this. The switchover is made continuously at intervals<br />
of 1 second. The part of the scan line that remains active for the reading procedure is<br />
the section between CP min and CP max .<br />
Example:<br />
Default setting: CP min = 5 to CP max = 95.<br />
The CLV blanks the line as of CP min = 5 (short scan line) and as of CP max = 95 (long line).<br />
Show CP limits<br />
Active range<br />
CP max<br />
CP min<br />
Scan line 2<br />
Scan line 1<br />
Fig. 6-12:<br />
Appearance of scan line in the "Show CP-limits" mode<br />
Proceed as follows to check the restricted evaluation range:<br />
1. Click in the toolbar.<br />
The Terminal Emulator window is then displayed. The CLV is in the Reading mode.<br />
2. In the DEVICE MODE section, choose SHOW CP-LIMITS.<br />
The dialog box for the distance configuration is then displayed.<br />
3. Click the distance configuration for which the active evaluation range of the scan line<br />
has been restricted (DC-specific). The "Device Ready" LED is extinguished. The CLV<br />
cancels the Reading mode and blanks the scan line alternately (as described above) as<br />
of CP min and CP max .<br />
4. Check Step 2 and 3 for each active distance configuration to determine whether the<br />
bar code is in the center of the range between the end of the shorter scan line (CP min )<br />
and the end of the longer scan line (CP max ) or, if there are several bar codes, to determine<br />
whether the center of the field of all the codes is within the range.<br />
5. If necessary, correct CP min and CP max accordingly. Perform a download to the CLV!<br />
6. Choose READING MODE to exit the Show CP-limits mode. The CLV returns to the Reading<br />
mode and the ”Device Ready” LED lights up.<br />
Note<br />
In the Reading mode, the CLV does not actually blank the scan line visually, but instead takes<br />
the values specified for the restricted evaluation range into account when the data contents<br />
are decoded.<br />
8 008 796/0000/25-06-2002 © SICK AG · Division Auto Ident · Germany · All rights reserved 6-27
Chapter 6<br />
Operation<br />
Operating Instructions<br />
CLV 490 Bar Code Scanner<br />
6.5.6 Displaying and editing operating data<br />
This function enables statistical operating data, which the CLV maintains in the form of counters<br />
during the reading procedure, to be displayed and reset.<br />
The CLV does not output a reading result in this mode.<br />
1. Click in the tool bar.<br />
The CLV cancels the Reading mode and the "Device Ready" LED is extinguished. The<br />
OPERATING DATA dialog box appears (Fig. 6-13).<br />
2. After checking/resetting the desired counters, click OK to confirm any changes made.<br />
The CLV then returns to the Reading mode and the "Device Ready" LED lights up.<br />
Fig. 6-13:<br />
CLV-Setup: "Operating Data" dialog box<br />
6.5.7 Reading diagnosis<br />
Function of the terminal interface. In this mode, the CLV outputs the data contents of all<br />
the bar codes that were read – including those that, according to the evaluation criteria,<br />
were not read properly and were thus incorrect – together with the associated reading<br />
diagnosis data via the terminal interface. The number of bar codes output can, therefore, be<br />
higher than the number of those that were sent via the host interface in the reading result.<br />
In the default setting, this mode is selected for the terminal interface.<br />
Fig. 6-7, Page 6-21 shows the output format of the terminal interface.<br />
In the default setting, the CLV only outputs the error status ST in the separator via the host<br />
interface.<br />
6-28 © SICK AG · Division Auto Ident · Germany · All rights reserved 8 008 796/0000/25-06-2002
Operating Instructions Chapter 6<br />
CLV 490 Bar Code Scanner<br />
Operation<br />
If the reading diagnosis is to remain inactive, this can be set via the AUXILIARY INTERFACE tab.<br />
1. In the AUXILIARY INTERFACE drop-down list, choose READ DIAGNOSTICS.<br />
2. Perform a download to the CLV by clicking in the toolbar.<br />
The DOWNLOAD PARAMETERS dialog box is then displayed.<br />
3. Choose the PERMANENT storage option in the dialog box.<br />
The terminal interface is now set to the "Read Diagnostics" mode.<br />
6.5.8 Monitor Host Interface<br />
Function of the terminal interface. In this mode, the CLV outputs the data traffic of its host<br />
interface via the terminal interface. Protocol driver handshakes and protocol-specific data,<br />
such as start and stop characters, are suppressed here. Each data string is displayed on a<br />
separate line on the screen. Two monitoring modes are available that differ with regard to<br />
the data output format (Table 6-11).<br />
Mode Direction of data Output format Representation on screen<br />
"Monitoring host interface" CLV receives from host I Data I Data<br />
CLV sends to host O Data O Data<br />
"Monitoring host interface 2"<br />
CLV receives from host<br />
CLV sends to host<br />
Table 6-11: "Monitor Host Interface" function<br />
Data <br />
Data <br />
Data<br />
Data<br />
The MONITOR HOST INTERFACE or MONITOR HOST INTERFACE 2 function is activated via the<br />
AUXILIARY INTERFACE tab.<br />
1. In the AUXILIARY INTERFACE drop-down list, choose MONITOR HOST INTERFACE or MONITOR<br />
HOST INTERFACE 2.<br />
2. Perform a download to the CLV by clicking in the toolbar.<br />
The DOWNLOAD PARAMETERS dialog box is then displayed.<br />
3. Choose the TEMPORARY storage option in the dialog box.<br />
The terminal interface is then set to the MONITOR HOST INTERFACE function until the CLV is switched<br />
off again.<br />
Displaying the data traffic of the host interface in the Terminal Emulator:<br />
The data traffic of the host interface can be displayed in the Terminal Emulator of CLV-Setup.<br />
Fig. 6-14, Page 6-30 shows an example of how the reading result can be output.<br />
1. Choose the serial interface as the external trigger source for the reading pulse.<br />
See Chapter 6.5.1 Reading mode (standard operating mode), Page 6-19, Triggering the<br />
reading pulse via the Terminal Emulator.<br />
2. Click in the toolbar.<br />
The Terminal Emulator window is then displayed. The CLV is in the Reading mode.<br />
3. Click on the SW-TRIGGER ON button or press [F7].<br />
The scan line then appears.<br />
4. Present the bar code pattern from Fig. 6-1, Page 6-3.<br />
5. Click the SW-TRIGGER OFF button or press [F8].<br />
CLV-Setup outputs the reading result in the Terminal Emulator.<br />
Example: "O 0123412345".<br />
8 008 796/0000/25-06-2002 © SICK AG · Division Auto Ident · Germany · All rights reserved 6-29
Chapter 6<br />
Operation<br />
Operating Instructions<br />
CLV 490 Bar Code Scanner<br />
Fig. 6-14:<br />
CLV-Setup: Displaying the reading result of the host interface in the Terminal Emulator<br />
with direction identifier at the beginning (in this case: O = Output)<br />
Note<br />
Tip<br />
If a large amount of data is being read in at high speed and with a high transmission rate,<br />
the host interface’s data trafficing may no longer be completely displayed on the terminal<br />
interface (display "..."). This is due to the slower transmission rate of the terminal interface<br />
(9 600 bit/s).<br />
In the default setting, the CLV sends the following in the data output string of the host interface:<br />
• Data contents of the bar codes<br />
• The ST error status in the separator<br />
• The control characters in the terminator <br />
The header is blank.<br />
The structure of the data output string of the host interface can be configured via the DATA<br />
STRINGS tab.<br />
Up to 10 elements, consisting of constants and/or reading diagnosis data, can be entered<br />
in the header, in the separator and in the terminator.<br />
1. Choose the DATA STRINGS tab.<br />
2. Click the HEADER field.<br />
The EDIT PARAMETER: TFH dialog box is then displayed.<br />
3. Click the desired constants or placeholders for the reading diagnosis data.<br />
The selected elements appear in the text box at the top of the dialog box in the<br />
sequence in which they were selected.<br />
4. Confirm the entries made by clicking OK.<br />
5. Repeat this procedure for the separator and terminator.<br />
6. Perform a download to the CLV by clicking in the toolbar.<br />
The DOWNLOAD PARAMETERS dialog box is then displayed.<br />
7. Choose the PERMANENT storage option in the dialog box.<br />
The CLV outputs the selected elements in the data output string of the host interface<br />
with the next reading result.<br />
6-30 © SICK AG · Division Auto Ident · Germany · All rights reserved 8 008 796/0000/25-06-2002
Operating Instructions Chapter 6<br />
CLV 490 Bar Code Scanner<br />
Operation<br />
6.5.9 Auxiliary input<br />
Function of the terminal interface. In this mode, the CLV accepts a bar code entered at the<br />
terminal interface (via the keyboard or handheld scanner with decoder). It sends the bar<br />
code to the host in a separate data string via its host interface. No reads can, therefore, be<br />
corrected by transmitting missing bar codes subsequently.<br />
Chapter 10.11.1 Auxiliary input, Page 10-65 describes this function and the associated procedure<br />
in greater detail.<br />
6.5.10Self-test<br />
After the CLV has been switched on, it performs a self-test before it is initialized with the<br />
parameter set. The test can be called up explicitly at any time via CLV-Setup. During the selftest,<br />
the CLV checks that its hardware components are functioning correctly. A final message<br />
via the terminal interface provides information on the test result. The CLV does not output<br />
a reading result during the test routine.<br />
1. Click in the toolbar.<br />
The Terminal Emulator window is then displayed. The CLV is in the Reading mode.<br />
2. In the DEVICE MODE section, choose SELF TEST.<br />
The "Device Ready" LED is extinguished. The CLV cancels the Reading mode and starts<br />
the test routine.<br />
After a few seconds, the CLV outputs the encoded test result in the form of a code<br />
number (Fig. 6-15).<br />
3. To return to the Reading mode, click READING MODE or close the Terminal Emulator.<br />
The CLV then returns to the Reading mode and the "Device Ready" LED lights up.<br />
Fig. 6-15:<br />
CLV-Setup: Displaying the self-test result in the Terminal Emulator<br />
The code number ”15000” means that the self-test was completed successfully and that<br />
no faults were diagnosed Chapter 8.3.1 CLV without external parameter memory, Page 8-2,<br />
lists the error keys together with the associated corrective measures.<br />
8 008 796/0000/25-06-2002 © SICK AG · Division Auto Ident · Germany · All rights reserved 6-31
Chapter 6<br />
Operation<br />
Operating Instructions<br />
CLV 490 Bar Code Scanner<br />
6.5.11 Executing CLV functions interactively<br />
CLV-Setup enables a number of CLV functions to be executed interactively. CLV-Setup<br />
prompts the user to carry out specific actions and provides information on the progress of<br />
the function being executed.<br />
The following functions are available:<br />
• Background teach-in/reset (to default)<br />
• Percentage evaluation<br />
• Show CP-limits<br />
• Adjustment mode<br />
• Copy parameter memory<br />
• Analyze scanner network<br />
¾<br />
Choose CLV 490, DEVICE FUNCTIONS and the desired function<br />
– or –<br />
press the [F2] key.<br />
The EXECUTE DEVICE FUNCTIONS dialog box is then displayed.<br />
Choose the desired function in the EXECUTE menu in the menu.<br />
CLV-Setup starts the function and, where appropriate, prompts the user to carry out the<br />
necessary actions.<br />
Fig. 6-16 shows an example of the dialog box that appears after Show CP-limits has been<br />
started.<br />
Fig. 6-16:<br />
CLV-Setup: Dialog box for executing Show limits<br />
6-32 © SICK AG · Division Auto Ident · Germany · All rights reserved 8 008 796/0000/25-06-2002
Operating Instructions Chapter 6<br />
CLV 490 Bar Code Scanner<br />
Operation<br />
6.6 CLV messages<br />
The CLV outputs system, warning and error messages in English in response to the actions<br />
carried out by the user. The messages are output in plain text via the terminal interface only.<br />
6.6.1 Displaying messages<br />
Proceed as follows in order to display messages on the screen of the PC in the "CLV-Setup"<br />
program:<br />
1. Click in the toolbar.<br />
The Terminal Emulator window is then displayed.<br />
2. In the TERMINAL MODE section, choose EXTENDED.<br />
The CLV then outputs messages in response to events that occur while the bar code is<br />
being read. The messages are only output in the extended mode of the Terminal Emulator!<br />
6.6.2 System messages<br />
System messages confirm that an action has been carried out successfully, e. g. changing<br />
the operating mode. The user is not required to carry out any further steps here.<br />
Chapter 10.5 System messages, Page 10-40 explains the contents of the messages.<br />
6.6.3 Warning messages<br />
Warning messages indicate that it was not possible to perform an action or that the values<br />
set for the parameters can cause an error while the bar code is being read.<br />
Table 6-12 lists the warning messages in alphabetical order together with the associated<br />
corrective measures.<br />
Message Meaning Remedy<br />
"Warning: Master Timeout" The selected master timeout is too short Optimize the master timeout using the DEVICE<br />
CONFIGURATION tab in the user interface of CLV-<br />
Setup. Perform a download to the CLV!<br />
Table 6-12: Warning messages<br />
See also Technical Information "Master/Slave<br />
with Bar Code Scanners", no. 8 007 675<br />
6.6.4 Error messages<br />
Error messages indicate the following types of error:<br />
• a device defect<br />
• incorrect parameter settings<br />
• errors during data transmission to the host<br />
Chapter 8.3.1 CLV without external parameter memory, Page 8-2 lists the messages in<br />
alphabetical order together with the associated corrective measures.<br />
8 008 796/0000/25-06-2002 © SICK AG · Division Auto Ident · Germany · All rights reserved 6-33
Chapter 6<br />
Operation<br />
Operating Instructions<br />
CLV 490 Bar Code Scanner<br />
6.7 Switching off the CLV<br />
1. If the parameter set was modified in CLV-Setup or was only stored temporarily in CLV<br />
via a download, the parameter set must be stored permanently in the CLV by choosing<br />
the PERMANENT storage option.<br />
2. Save the parameter set as a configuration file "*.scl" in CLV-Setup.<br />
3. Switch off the power supply of the AMV/S 60 or unplug both of the CLV’s connecting<br />
cables from the connection module.<br />
The last parameter set stored permanently in the CLV remains valid.<br />
We recommend that you print out the configuration file in order to archive the parameter set.<br />
1. Click in the toolbar.<br />
The PRINT FILE dialog box is then displayed.<br />
2. Enter a comment in the input field in order to assign the printout to the CLV.<br />
Confirm your entry with OK.<br />
The PRINT dialog box for configuring the printer is then displayed.<br />
3. Make the necessary entries in the dialog box and confirm these.<br />
CLV-Setup prints out the current configuration file in the form of a table.<br />
6-34 © SICK AG · Division Auto Ident · Germany · All rights reserved 8 008 796/0000/25-06-2002
Operating Instructions Chapter 7<br />
CLV 490 Bar Code Scanner<br />
7 Maintenance<br />
Maintenance<br />
7.1 Cleaning the CLV during operation<br />
To ensure optimum reading performance, the reading window of the CLV must be clean at<br />
all times. For this reason, we recommend that you check the reading window at regular<br />
intervals, particularly if the device is operated under extreme conditions (dust, abrasion,<br />
humidity, finger prints).<br />
Laser beam can cause blindness!<br />
The CLV uses a class 2 red-light laser. Looking directly at the laser beam can seriously<br />
damage your eyesight.<br />
¾<br />
¾<br />
¾<br />
Never look directly into the path of the beam (similar to sunlight).<br />
Never look directly into the reading window while the device is in operation.<br />
Switch off the device while it is being cleaned.<br />
Damage on the reading window!<br />
The reading window is made of glass. Scratches and streaks on the window will reduce the<br />
reading performance.<br />
¾<br />
¾<br />
Use a mild, non-scouring detergent.<br />
Never use scratching or scouring motions to clean the reading window.<br />
Cleaning the reading window:<br />
¾ Clean the reading window at regular intervals with a mild, non-scouring detergent, e. g.<br />
an antistatic glass cleaning fluid. Fig. 7-1 shows the areas that require cleaning. Use<br />
soft, lint-free cloth.<br />
¾ If necessary, clean the LEDs on the rear of the device.<br />
Clean here<br />
Front reading window<br />
Side reading window<br />
Fig. 7-1:<br />
Cleaning the reading window<br />
8 008 796/0000/25-06-2002 © SICK AG · Division Auto Ident · Germany · All rights reserved 7-1
Chapter 7<br />
Maintenance<br />
Operating Instructions<br />
CLV 490 Bar Code Scanner<br />
Cleaning other optical surfaces:<br />
¾<br />
If an external reading pulse generator and/or object-height detection sensors are used<br />
(e. g. photoelectric reflex switches), make sure to clean the relevant optical surfaces<br />
(Fig. 7-2). Contamination on these surfaces can cause switching errors.<br />
Fig. 7-2:<br />
Cleaning the external optical sensors (reading pulse generator, object-height detector)<br />
7.2 Maintenance<br />
The CLV does not require any maintenance. Its self-monitoring functions ensure fault-free<br />
operation over long periods of time.<br />
Any faults or malfunctions are displayed on the terminal interface. The messages can be<br />
displayed on the screen in the extended mode of the Terminal Emulator in the "CLV-Setup"<br />
program. See Chapter 8.3 Error messages, Page 8-2.<br />
7.3 Disposal<br />
Irreparable devices or devices that are no longer required must be disposed of in an<br />
environmentally-friendly manner:<br />
1. Always observe the applicable national waste disposal regulations.<br />
2. Remove the CLV housing.<br />
3. Remove the electronic modules.<br />
4. Remove the glass panel from the reading window and send it to be recycled.<br />
5. Send the chassis and cover (aluminium) to be recycled.<br />
6. Send the electronic modules for disposal as problem waste.<br />
At present, SICK AG does not accept any unusable or irreparable devices.<br />
7-2 © SICK AG · Division Auto Ident · Germany · All rights reserved 8 008 796/0000/25-06-2002
Operating Instructions Chapter 8<br />
CLV 490 Bar Code Scanner<br />
Troubleshooting<br />
8 Troubleshooting<br />
8.1 Overview of the possible errors and malfunctions<br />
8.1.1 Mounting errors<br />
• CLV aligned incorrectly with the object carrying the bar code (e. g. blanking)<br />
• Reading pulse sensor positioned incorrectly<br />
• With event-controlled focus control: sensors for object height detection positioned<br />
incorrectly<br />
8.1.2 Electrical installation errors<br />
• Interfaces on the CLV connected incorrectly (wiring error in AMV/S 60)<br />
• Host interface on AMV/S 60 configured incorrectly<br />
8.1.3 Parameter errors<br />
• Functions not adjusted to local conditions, e. g. communication parameters on the host<br />
interface are set incorrectly<br />
• Technical limits of the device exceeded, e. g. relationship between the scanning<br />
frequency and the reading distance<br />
8.1.4 Malfunctions<br />
• Laser timeout for incorrectly terminated reading pulse<br />
• Device error (hardware/software)<br />
8.2 Monitoring error and malfunctions<br />
The CLV is self-monitoring:<br />
• After the power supply has been switched on, the CLV automatically carries out a selftest,<br />
in which it checks important hardware components, before it is initialized<br />
(parameter set loaded and device functions initialized). The self-test can be repeated<br />
at any time by cancelling Reading mode. See Chapter 6.5.10 Self-test, Page 6-31.<br />
• If the CLV detects an error during the self-test or at any other time, it outputs the error<br />
status ST=3 on the host interface. Prerequisite: the error status is enabled for transmission.<br />
This is enabled by default. The CLV displays the diagnosed error as a numeric<br />
combination on the terminal interface (see Table 8-1).<br />
• While it is in operation, the CLV constantly monitors the laser diode and speed of the<br />
polygon mirror wheel. In addition, a watchdog circuit responds to error statuses. CLV<br />
carries out distance measurement referencing at regular cycles. To do so, the laser<br />
diode is switched on for max. 10 s.<br />
• A timer (laser timeout) automatically deactivates the laser diode in Reading mode<br />
("Sensor input" and "Serial interface trigger" mode) if the reading interval has not ended<br />
after 10 minutes (default setting). However, it does not end the reading interval. In this<br />
case, the CLV outputs the message: Laser safety timeout on the terminal interface. The<br />
reading interval must be terminated by resetting the trigger signal. The laser diode is<br />
activated again by the next reading trigger.<br />
8 008 796/0000/25-06-2002 © SICK AG · Division Auto Ident · Germany · All rights reserved 8-1
Chapter 8<br />
Troubleshooting<br />
Operating Instructions<br />
CLV 490 Bar Code Scanner<br />
8.3 Error messages<br />
The CLV outputs error message in English on the terminal interface only. Table 8-1 contains<br />
a list of the messages in alphabetical order.<br />
For warnings, see Chapter 6.6.3 Warning messages, Page 6-33.<br />
Displaying messages:<br />
To display the messages on the PC, proceed as follows:<br />
1. Click in the toolbar.<br />
The Terminal Emulator is launched.<br />
2. Click the EXTENTED option in the TERMINAL MODE section.<br />
8.3.1 CLV without external parameter memory<br />
Message Meaning Possible cause Remedy<br />
"CLV SYS-Failure: xxx" The CLV has diagnosed a<br />
system error.<br />
The "Device Ready" LED does<br />
not light up or extinguishes.<br />
The system is restarted.<br />
"EEPROM Check fault,<br />
default parameters loaded"<br />
"EEPROM - reading fault"<br />
"EEPROM - writing fault"<br />
"Focus table inconsistent:<br />
defaults loaded"<br />
The CLV has diagnosed an<br />
irregularity in the EEPROM and<br />
downloads the entire default<br />
settings to the RAM instead of<br />
the permanently stored<br />
application-specific parameters.<br />
The CLV cannot load the application-specific<br />
parameters, permanently<br />
stored in the EEPROM,<br />
into the RAM.<br />
The CLV cannot write the<br />
current parameters in the RAM<br />
to the EEPROM.<br />
The CLV has diagnosed an<br />
irregularity in the internal reference<br />
table for the focus positions<br />
selected by the user. It<br />
therefore loads the default setting<br />
of the distance configurations.<br />
Table 8-1: Error messages output on the terminal interface<br />
Error key: 1)<br />
011 Data error (RAM)<br />
012 Address error (RAM)<br />
013 RAM to small<br />
051 Speed out of tolerance<br />
(mirror wheel)<br />
061 Mirror interval out of<br />
tolerance<br />
071 Error: laser shutter<br />
091...095 Error: focus control<br />
101...118 Error: external parameter<br />
memory<br />
130 Amplifier error<br />
131 Background profile<br />
invalid<br />
132 Center position CP 50<br />
implausible<br />
133 Brightness overflow<br />
201...215 DSP error<br />
Device fault.<br />
Device fault.<br />
Device fault.<br />
Device fault.<br />
If the error occurs again after the<br />
CLV is restarted, contact the SICK<br />
Service department.<br />
1) Deactivate the CAN interface<br />
to suppress error numbers above<br />
300 (not relevant in stand-alone<br />
mode). To do so, upload the<br />
parameter set from the CLV using<br />
CLV-Setup, choose the CAN<br />
INTERFACE tab and deactivate the<br />
function in the CAN INTERFACE<br />
FUNCTION section.<br />
Download the parameter set to<br />
the CLV!<br />
Contact the SICK Service<br />
department.<br />
Contact the SICK Service<br />
department.<br />
Contact the SICK Service<br />
department.<br />
Contact the SICK Service<br />
department.<br />
8-2 © SICK AG · Division Auto Ident · Germany · All rights reserved 8 008 796/0000/25-06-2002
Operating Instructions Chapter 8<br />
CLV 490 Bar Code Scanner<br />
Troubleshooting<br />
Message Meaning Possible cause Remedy<br />
"Host – Receive fault"<br />
"Host - transfer to slow"<br />
"Host - transmit fault"<br />
"Master/slave - trigger too<br />
soon"<br />
"No polls"<br />
"Oscillating mirror faulty"<br />
The host has requested the<br />
data output string last sent by<br />
the CLV three times; NAK has<br />
been issued with each attempt.<br />
In the CLV, data is available for<br />
output faster than it is transmitted<br />
to the host.<br />
The CLV cannot correctly<br />
receive the data sent by the<br />
host.<br />
The new reading pulse for the<br />
master is received before its<br />
timeout has elapsed.<br />
Network operation: the CLV is<br />
waiting for polls by the CLX 200<br />
network controller.<br />
The CLV cannot operate the<br />
oscillating mirror or cannot initialize<br />
the mirror.<br />
Table 8-1: Error messages output on the terminal interface<br />
• Host receive set incorrectly<br />
• Data transmission interrupted<br />
e. g. by cable break<br />
• Baud rate too low<br />
• Incorrect protocol type selected<br />
• Protocol timeout too long for<br />
the reading pulse frequency<br />
• Host interface of the CLV configured<br />
incorrectly<br />
• Data transmission interrupted<br />
e. g. by cable break<br />
Timeout for the master is too long<br />
• Data connecting cable interrupted<br />
• CLX 200 not ready<br />
• Incorrect device number parameterized<br />
• Inadvertently parameterized for<br />
network operation<br />
Device fault.<br />
• Check the host<br />
• Check connecting cable and<br />
monitor data transfer of the<br />
host interface. To do so, select<br />
upload from the CLV by using<br />
the "CLV-Setup" progam,<br />
select the AUXILIARY INTERFACE<br />
tab and select MONITOR HOST<br />
INTERFACE in the drop down list.<br />
Download to the CLV!<br />
Start the Terminal Emulator.<br />
Check the configuration of<br />
the host interface.<br />
• Check the CLV and host.<br />
• Check connecting cable and<br />
monitor data transmission at<br />
the host interface. To do so,<br />
upload from the CLV using the<br />
"CLV-Setup" program, choose<br />
the AUXILIARY INTERFACE tab and<br />
select MONITOR HOST INTERFACE<br />
from the drop-down list.<br />
Download to the CLV!<br />
Start the Terminal Emulator.<br />
Check the coordination between<br />
reading pulse and timeout. To do<br />
so, upload from the CLV using the<br />
"CLV-Setup" program, choose the<br />
DEVICE CONFIGURATION tab and<br />
change the MASTER TIMEOUT in the<br />
SCANNER ARRANGEMENT section.<br />
Download the changes to the<br />
CLV!<br />
• Check cables.<br />
• Switch on CLX 200<br />
• Device number: 01 to 31<br />
• Check the configuration of the<br />
host interface.<br />
To do so, upload from the CLV<br />
using the "CLV-Setup" program,<br />
choose the HOST INTER-<br />
FACE tab and check the settings<br />
in the INTERFACE PROTOCOL section.<br />
Download the changes to the<br />
CLV!<br />
Contact the SICK Service department.<br />
8 008 796/0000/25-06-2002 © SICK AG · Division Auto Ident · Germany · All rights reserved 8-3
Chapter 8<br />
Troubleshooting<br />
Operating Instructions<br />
CLV 490 Bar Code Scanner<br />
Message Meaning Possible cause Remedy<br />
"Slave string faulty"<br />
"Wrong number of slaves"<br />
"Wrong parameters –<br />
master/slave"<br />
Data transmission error<br />
between a slave and the master.<br />
During the master timeout, the<br />
master receives more or fewer<br />
reading results from the slaves<br />
than expected from the number<br />
of slaves that the master<br />
has entered.<br />
After selection of the master/<br />
slave function, individual parameter<br />
values, which are not compatible<br />
with the automatic<br />
settings defined for this function<br />
by the CLV, were changed subsequently<br />
Table 8-1: Error messages output on the terminal interface<br />
Data connecting cable<br />
interrupted.<br />
• The parameterized number of<br />
slaves does not match the actual<br />
number of slaves connected<br />
• Timeout for the master is too<br />
short<br />
• The data connection between<br />
the slaves has been interrupted.<br />
Deviations from the following settings:<br />
• Test string: no (slaves)<br />
• Aux. input: no (slaves)<br />
• Triggermode: serial interface or<br />
switching input<br />
• RK 512: without reaction telegram<br />
If the error continues to occur,<br />
check the connecting cable<br />
between all devices.<br />
• Check the entered number of<br />
slaves.<br />
To do so, upload from the CLV<br />
using the "CLV-Setup" program,<br />
choose the DEVICE CONFI-<br />
GURATION tab and check the<br />
NUMBER OF SLAVES in the SCAN-<br />
NER ARRANGEMENT section.<br />
Download any changes to the<br />
CLV!<br />
• As above, but check the timeout<br />
defined for the master<br />
• Check the cables between the<br />
slaves<br />
Correct the settings on the<br />
DATA STRING,<br />
TERMINAL INTERFACE,<br />
DEVICE CONFIGURATION and<br />
HOST INTERFACE tabs in the "CLV-<br />
Setup" program.<br />
Download any changes to the<br />
CLV!<br />
8-4 © SICK AG · Division Auto Ident · Germany · All rights reserved 8 008 796/0000/25-06-2002
Operating Instructions Chapter 8<br />
CLV 490 Bar Code Scanner<br />
Troubleshooting<br />
8.3.2 LED error messages for the external parameter memory<br />
The CLV also reports errors accessing the external parameter memory by means of the "Device<br />
Ready" and "Read Result" LEDs.<br />
LED behavior Meaning Possible cause Remedy<br />
1. When the device is<br />
switched on, the "Device<br />
Ready" LED blinks for<br />
approx. 10 s and then<br />
lights up constantly.<br />
2. When the device is<br />
switched on, the Device<br />
Ready and "Read Result"<br />
LEDs blink for approx.<br />
10 s.<br />
The "Device Ready" LED<br />
then lights up constantly.<br />
3. The "Device Ready" LED<br />
lights up constantly when<br />
the device is switched on.<br />
4. When the device is<br />
switched on, the "Device<br />
Ready" LED and "Read<br />
Result" LEDs blink continuously<br />
2) .<br />
Start option: START WITH EXTER-<br />
NAL PARAMETERS.<br />
The CLV has successfully loaded<br />
the external parameter set to its<br />
RAM.<br />
Start option: START WITH EXTER-<br />
NAL PARAMETERS.<br />
The CLV has successfully<br />
loaded the external parameter<br />
set with tolerated errors 1) to its<br />
RAM<br />
• Start option: START WITH EX-<br />
TERNAL PARAMETERS.<br />
The CLV has not loaded external<br />
parameter set. Instead,<br />
it has loaded the internal parameter<br />
set to its RAM.<br />
• Start option: START WITH INTER-<br />
NAL PARAMETERS.<br />
The CLV has successfully<br />
loaded the internal parameter<br />
set to its RAM.<br />
• Start option: START WITH EX-<br />
TERNAL PARAMETERS.<br />
The CLV has not loaded the<br />
external parameter set. Instead,<br />
it has loaded the internal<br />
parameter set to its RAM.<br />
The CLV, however, does not<br />
output data on the host<br />
interface.<br />
– None<br />
Transfer ok, but different parameter<br />
versions in the external memory<br />
and CLV.<br />
• External parameter memory not<br />
connected.<br />
• Start ok.<br />
• External parameter memory<br />
empty.<br />
• External parameter memory not<br />
connected.<br />
• The parameter set in the external<br />
memory is not from a<br />
CLV 490.<br />
• External parameter memory is<br />
defective.<br />
Upload parameter set to CLV-<br />
Setup and check parameters 1) .<br />
• OK if the device is to be<br />
operated without an external<br />
parameter memory.<br />
• Check whether the external<br />
parameter memory is connected<br />
correctly (free wiring: check<br />
wire assignment).<br />
• None.<br />
• If the device is being used for<br />
the first time, data must first be<br />
loaded to the external<br />
parameter memory.<br />
See Chapter 6.3.2 Switching<br />
the CLV with external parameter<br />
memory connected on<br />
for the first time with the factory<br />
default settings, Page 6-4.<br />
• See 3 Remedy.<br />
• Use the correct external parameter<br />
memory or overwrite<br />
the current one. See<br />
4 Remedy, 1st pragraph.<br />
• Repeat the startup procedure.<br />
If the error is still present after<br />
following 4 Remedy, 2nd and<br />
3rd paragraph, contact the<br />
SICK Service department.<br />
1) The software of the parameter set in the CLV is older than that of the parameter set in the external memory: print out the parameter set using CLV-Setup. If necessary,<br />
display the ID of the unknown/errored command group(s) using the 8ERR command in the Terminal Emulator window of CLV-Setup. Decode the ID using<br />
the reference manual entitled Command Language of the CLV Bar Code Scanners and check the relevant parameter values in the tabs.<br />
The software of the parameter set in the CLV is newer than that of the parameter set in the external memory: all of the new parameters in the CLV are set to the default<br />
values. If these parameters are necessary, edit the values in the relevant tabs in CLV-Setup and download them to the CLV and the external memory.<br />
2) Flashing stops when the device switches from Reading mode to Parameter mode (e. g. during download from CLV-Setup).<br />
Table 8-2: LED error messages for access to the external parameter memory<br />
8 008 796/0000/25-06-2002 © SICK AG · Division Auto Ident · Germany · All rights reserved 8-5
Chapter 8<br />
Troubleshooting<br />
Operating Instructions<br />
CLV 490 Bar Code Scanner<br />
LED behavior Meaning Possible cause Remedy<br />
4. When the device is<br />
swiched on, the "Device<br />
Ready" LED and "Read<br />
Result" LEDs blink continuously<br />
2) .<br />
– continued –<br />
5. When the device is<br />
switched on, the "Device<br />
Ready" LED and "Read<br />
Result" LEDs blink<br />
alternately for approx.<br />
10 s. The "Device Ready"<br />
LED then lights up constantly.<br />
• Start option: START WITH COPY<br />
INTERN –> EXTERN.<br />
The CLV was not able to copy<br />
the internal parameter set to<br />
the external memory.<br />
It has loaded the internal parameter<br />
set to its RAM.<br />
Start option: START WITH COPY<br />
INTERN –> EXTERN.<br />
The CLV has successfully<br />
copied the internal parameter<br />
set to the external memory 3)<br />
and set the option for the next<br />
start to START WITH EXTERNAL<br />
PARAMETERS. It has loaded the<br />
internal parameter set to its<br />
RAM.<br />
• External parameter<br />
memory is not connected.<br />
• Data transmission error.<br />
• Internal parameter set too large<br />
to be copied to the external memory<br />
(memory is full).<br />
• The external parameter memory<br />
is defective.<br />
Transfer ok.<br />
• Ensure that the external parameter<br />
memory is connected<br />
correctly (free wiring: check<br />
wire assignment).<br />
• Repeat the startup procedure.<br />
If the error is still present after<br />
following 4 Remedy, 2nd and<br />
3rd paragraph, contact the<br />
SICK Service department.<br />
• Contact the SICK Service<br />
department.<br />
• See 4 Remedy, 4th paragraph<br />
Not applicable.<br />
2) Flashing stops when the device switches from Reading mode to Parameter mode (e. g. during download from CLV-Setup).<br />
3) The parameter set stored in the external memory is not checked automatically to determine whether it can be read. To check the parameter set, switch off the power<br />
supply to the CLV briefly and monitor the "Device Ready" LED as described under 1.<br />
Table 8-2: LED error messages for access to the external parameter memory<br />
8-6 © SICK AG · Division Auto Ident · Germany · All rights reserved 8 008 796/0000/25-06-2002
Operating Instructions Chapter 8<br />
CLV 490 Bar Code Scanner<br />
Troubleshooting<br />
8.3.3 Messages for errors accessing the external parameter memory<br />
The CLV outputs further error messages, in addition to the general error messages in<br />
Chapter 8.3.1 CLV without external parameter memory, Page 8-2, if problems arise when<br />
the external parameter memory is accessed.<br />
Message Meaning Possible cause Remedy<br />
1. "error: access to external<br />
parameters not successful,<br />
internal parameters<br />
loaded"<br />
(Error type: 104, 105,<br />
106, 111, 112,115)<br />
2. "error: external parameter<br />
memory empty,<br />
internal parameters<br />
loaded"<br />
(Error type: 103)<br />
3. "error: external parameter<br />
memory full,<br />
internal parameters<br />
loaded"<br />
(Error type: 108)<br />
4. "error: external parameters<br />
not valid for device,<br />
internal parameters<br />
loaded"<br />
(Error type: 116)<br />
5. "error: no external parameter<br />
memory connected,<br />
internal parameters<br />
loaded"<br />
(Error type: 102)<br />
• Start option: START WITH EX-<br />
TERNAL PARAMETERS.<br />
The CLV has not loaded the<br />
external parameter set. Instead,<br />
it has loaded the internal<br />
parameter set to its RAM.<br />
The CLV, however, does not<br />
output data on the host interface.<br />
• Start option: START WITH COPY<br />
INTERN –> EXTERN.<br />
The CLV was not able to copy<br />
the internal parameter memory.<br />
It has loaded the internal<br />
parameter set to its RAM.<br />
Start option: START WITH EXTER-<br />
NAL PARAMETERS.<br />
The CLV has not loaded the<br />
external parameter set. Instead,<br />
it has loaded the internal parameter<br />
set to its RAM.<br />
Start option: START WITH COPY<br />
INTERN –> EXTERN.<br />
The CLV was not able to copy<br />
the internal parameter memory.<br />
It has loaded the internal parameter<br />
set to its RAM.<br />
Start option: START WITH EXTER-<br />
NAL PARAMETERS.<br />
The CLV has not loaded the<br />
external parameter set. Instead,<br />
it has loaded the internal parameter<br />
set to its RAM. The<br />
CLV, however, does not output<br />
data on the host interface.<br />
• Start option: START WITH EX-<br />
TERNAL PARAMETERS.<br />
The CLV has not loaded the<br />
external parameter set. Instead,<br />
it has loaded the internal<br />
parameter set to its RAM.<br />
• Start option: START WITH COPY<br />
INTERN –> EXTERN.<br />
The CLV was not able to copy<br />
the internal parameter set to<br />
the external memory. It has<br />
loaded the internal parameter<br />
set to its RAM.<br />
Table 8-3: Messages for problems accessing the external parameter memory<br />
The external parameter memory is<br />
defective.<br />
The external parameter memory is<br />
empty.<br />
The internal parameter set is too<br />
large for the external memory<br />
(memory is full).<br />
The parameter set in the external<br />
memory is not from a CLV 490.<br />
• External parameter memory not<br />
connected.<br />
• External parameter memory not<br />
connected.<br />
Repeat the startup procedure. If<br />
the error is still present, contact<br />
the SICK Service department.<br />
If the device is being used for the<br />
first time, data must first be<br />
loaded to the external parameter<br />
memory. See Chapter 6.3.2<br />
Switching the CLV with external<br />
parameter memory connected on<br />
for the first time with the factory<br />
default settings, Page 6-4.<br />
Contact the SICK Service department.<br />
Use the correct external parameter<br />
memory or overwrite the<br />
current one.<br />
See 2 Remedy.<br />
• OK if the device is to be operated<br />
without an external parameter<br />
memory.<br />
• Check whether the memory is<br />
connected correctly (free<br />
wiring: check wire assignment).<br />
• See 5 Remedy 2nd paragraph<br />
8 008 796/0000/25-06-2002 © SICK AG · Division Auto Ident · Germany · All rights reserved 8-7
Chapter 8<br />
Troubleshooting<br />
Operating Instructions<br />
CLV 490 Bar Code Scanner<br />
Message Meaning Possible cause Remedy<br />
6. "error: writing parameters<br />
CLV -> EXT,<br />
internal parameters<br />
loaded"<br />
(Error type: 110, 111,<br />
112)<br />
7. "warning: additional<br />
unknown parameter(s),<br />
external parameters<br />
loaded"<br />
(Error type: 101, 114)<br />
Start option: START WITH COPY<br />
INTERN –> EXTERN.<br />
The CLV was not able to copy<br />
the internal parameter set to<br />
the external memory. It has<br />
loaded the internal parameter<br />
set to its RAM<br />
Start option: START WITH EXTER-<br />
NAL PARAMETERS.<br />
The CLV has successfully<br />
loaded the external parameter<br />
set with tolerated errors 1) to its<br />
RAM.<br />
Data transmission error.<br />
Table 8-3: Messages for problems accessing the external parameter memory<br />
Transfer ok but different parameter<br />
versions in the external<br />
memory and the CLV.<br />
Check whether the external parameter<br />
memory is connected correctly<br />
(free wiring: check wire<br />
assignment).<br />
Repeat the startup procedure. If<br />
the error is still present, contact<br />
the SICK Service department.<br />
Upload the parameter set to CLV-<br />
Setup and check the values 1) .<br />
1) see footnote 1) in Table 8-2,<br />
Page 8-5<br />
8-8 © SICK AG · Division Auto Ident · Germany · All rights reserved 8 008 796/0000/25-06-2002
Operating Instructions Chapter 8<br />
CLV 490 Bar Code Scanner<br />
Troubleshooting<br />
8.4 ST error status in the reading result of a bar code<br />
Value Meaning Possible cause Remedy<br />
0 Good Read. – None<br />
1 Incorrect check digit. The check digit calculated by the CLV<br />
during the reading process does not<br />
match that printed in the bar code.<br />
2 No bar code of the enabled code type<br />
found according to the evaluation<br />
criteria.<br />
• No bar code in the CLV‘s reading<br />
field during the reading pulse<br />
• Code type/length in the CLV not<br />
enabled for decoding<br />
• Reading window obstructed/dirty<br />
Check whether the check digits in<br />
the bar code and generated by the<br />
print process are correct.<br />
• Synchronize the pulse of the CLV with<br />
the entry of a bar code into the<br />
reading field.<br />
• Correct the code configuration parameters.<br />
• Check the reading window.<br />
3 Device fault. Device fault. Call up the self-test. See Chapter 6.5.10<br />
Self-test, Page 6-31.<br />
If result ≠ 15000: Contact the SICK Service<br />
department.<br />
5 Required number of successful multiple<br />
reads for the bar code not reached.<br />
6 Master:<br />
Number of slave reading results does<br />
not match the parameterized number of<br />
slaves.<br />
7 The source of the reading result is the<br />
auxiliary input via the terminal interface.<br />
9 The OUTPUT FILTER function is activated<br />
for the code comparison. The CLV has<br />
detected valid bar codes. However,<br />
these do not match the active match<br />
code(s).<br />
A<br />
D<br />
The CHECK MAX. NUMBER OF CODES<br />
function is active. The number of valid<br />
bar codes detected by the CLV in Reading<br />
mode exceeds that specified under<br />
NUMBER OF CODES: MAXIMUM .<br />
It repeatedly outputs the defined error<br />
string until the number specified under<br />
NUMBER OF CODES: MINIMUM is reached.<br />
The CODE 32 evaluation option is activated<br />
for Code 39. The CLV is<br />
attempting to interpret 6-digit C39 bar<br />
codes as C32 bar codes (output as 9-<br />
digit decimal values).<br />
Table 8-4: Meaning of the ST error status in the reading result<br />
• Conveyor speed of the object is too<br />
high<br />
• Scanning frequency is too low<br />
• Ladder-type arrangement for bar<br />
code relative to the conveyor direction:<br />
code height (bar length) too poor<br />
• Print quality too poor<br />
• The parameterized number of slaves<br />
does not match the actual number of<br />
slaves available<br />
• The master timeout is too short<br />
• The data connection between the<br />
slaves and/or the master has been<br />
interrupted<br />
The bar code was not detected by the<br />
reading function of the CLV, but was<br />
entered subsequently with the auxiliary<br />
function of the terminal interface and<br />
sent to the host in a separate data<br />
string.<br />
The scanned object does not have a bar<br />
code that matches the specified match<br />
code.<br />
One object in a set of objects with a<br />
constant number of bar codes, for<br />
example, contains more bar codes than<br />
defined in the application.<br />
The read 6-digit bar code is not a C32<br />
bar code. The CLV outputs the defined<br />
error string instead.<br />
• Check the conveyor speed.<br />
• Adjust the scanning frequency.<br />
• Check the code height.<br />
• Check the print quality.<br />
• Check the entered number of slaves.<br />
• Check the master timeout setting.<br />
• Check the cables between the slaves<br />
and the master.<br />
–<br />
–<br />
This message is used to indicate<br />
errors on the objects (e. g. check<br />
whether objects are homogeneous:<br />
mixed with incorrect objects).<br />
–<br />
8 008 796/0000/25-06-2002 © SICK AG · Division Auto Ident · Germany · All rights reserved 8-9
Chapter 8<br />
Troubleshooting<br />
Operating Instructions<br />
CLV 490 Bar Code Scanner<br />
8.5 Troubleshooting<br />
The following are required for troubleshooting purposes using the tables below:<br />
• These Operating Instructions<br />
• Tools<br />
• A tape measure (up to 3 000 mm)<br />
• A digital measuring device (current/voltage measurement)<br />
• A PC running CLV-Setup<br />
• RS 232 data connection cable (pins 2 and 3 crossed), e. g. no. 2 014 054<br />
8.5.1 General malfunctions: CLV not ready<br />
Malfunction Possible cause Remedy<br />
The "Device Ready" LED is not<br />
lit.<br />
The "Result 1" output is not outputting<br />
a pulse<br />
(default setting: Device Ready)<br />
After switching on the power<br />
supply:<br />
• The CLV has no power<br />
• The CLV has diagnosed a<br />
device error during the selftest<br />
During operation:<br />
• The CLV is not in "Reading"<br />
mode<br />
• The CLV has deactivated the<br />
laser diode 10 min. (default<br />
setting) after the start of the<br />
current reading pulse (trigger<br />
mode: sensor input/serial<br />
interface)<br />
Table 8-5: Troubleshooting: restoring operation (Reading mode)<br />
• Check wiring (power<br />
connector fitted<br />
securely to the AMV/S 60<br />
Connection Module).<br />
Measure voltage at pin 1 and<br />
pin 5.<br />
• Switch CLV off and on again.<br />
Does the LED light up If not,<br />
contact SICK Service department<br />
• Return to Reading mode<br />
using the "CLV-Setup" program.<br />
See Chapter 6.5.1<br />
Reading mode (standard<br />
operating mode), Page 6-19<br />
• Terminate reading pulse.<br />
Check the reading pulse<br />
function. Supply new pulse.<br />
See Table 6-9, Page 6-16,<br />
8-10 © SICK AG · Division Auto Ident · Germany · All rights reserved 8 008 796/0000/25-06-2002
Operating Instructions Chapter 8<br />
CLV 490 Bar Code Scanner<br />
Troubleshooting<br />
8.5.2 Malfunctions in Reading mode: reading trigger errors<br />
¾<br />
Check whether the "Device Ready" LED lights up.<br />
If the LED does not light, see Table 8-5, Page 8-10.<br />
Malfunction Possible cause Remedy<br />
1. Trigger mode:<br />
Sensor input (external sensor).<br />
The CLV cannot be clocked:<br />
– the "Sensor" LED does not<br />
light up<br />
– the scan lines don’t<br />
appear<br />
2. Trigger mode:<br />
Serial interface<br />
The CLV cannot be clocked:<br />
– the Sensor LED does not light up<br />
– the scan line does not appear<br />
3. CLV does not respond to an<br />
external signal that ends the reading<br />
pulse (sensor input, serial interface)<br />
• Sensor not connected or connected to<br />
incorrect switching input.<br />
• If sensor supplied by CLV: sensor not<br />
connected to ground potential<br />
• Incorrect reading pulse source parameterized<br />
in the CLV<br />
• Photoelectric switch not aligned with the<br />
reflector (photoelectric proximity switch/<br />
inductive sensor not dampened)<br />
• Incorrect reading pulse source parameterized<br />
on the CLV<br />
• The CLV is not receiving any command<br />
strings to start the reading interval on the<br />
data interface<br />
Incorrect end of reading pulse parameterized<br />
on the CLV<br />
• Connect sensor to "Sensor" switching<br />
input. Check sensor wiring (see Fig. 5-4,<br />
Page 5-16). Measure output signal on<br />
sensor.<br />
• Insert jumper between pin 5 and pin 15<br />
• In the "CLV-Setup" program: choose the<br />
DEVICE CONFIGURATION tab, READING TRIG-<br />
GER Mode section: Sensor input selected<br />
(active high: reading pulse starts<br />
when power applied)<br />
• Align sensor.<br />
Check functioning<br />
• In the "CLV-Setup" program: choose the<br />
DEVICE CONFIGURATION tab, READING TRIG-<br />
GER Mode section: is serial interface selected<br />
SERIAL INTERFACE section: is<br />
trigger type correct<br />
• Check data connection to host. In the<br />
"CLV-Setup" program: choose the HOST<br />
INTERFACE tab.<br />
In DATA FORMAT section: are the correct<br />
interface type (hardware) and data format<br />
selected<br />
INTERFACE PROTOCOL section: are the correct<br />
start and stop characters selected<br />
Use the "CLV-Setup" program to check<br />
the host command strings: choose<br />
AUXILIARY INTERFACE tab. Choose<br />
MONITOR HOST INTERFACE function.<br />
See Chapter 6.5.8 Monitor Host Interface,<br />
Page 6-29.<br />
Download temporarily to the CLV.<br />
In the "CLV-Setup" program:<br />
choose the DEVICE CONFIGURATION tab, click<br />
the EDIT READING TRIGGER button.<br />
END OF READING INTERVAL section: is generated<br />
by Trigger Source selected<br />
Table 8-6: Troubleshooting: reading trigger errors in Reading mode<br />
8 008 796/0000/25-06-2002 © SICK AG · Division Auto Ident · Germany · All rights reserved 8-11
Chapter 8<br />
Troubleshooting<br />
Operating Instructions<br />
CLV 490 Bar Code Scanner<br />
8.5.3 Malfunctions in Reading mode: result output errors<br />
¾<br />
Check whether the "Device Ready" LED lights up.<br />
If the LED does not light, see Table 8-5, Page 8-10.<br />
Here: number of bar codes to be read = 1<br />
Malfunction Possible cause Remedy<br />
1. The "Read Result" LED (default setting:<br />
Good Read) does not light up at the end<br />
of the reading pulse.<br />
– The "Result 2" switching output<br />
(default setting: Good Read) is not<br />
outputting a pulse<br />
– The CLV outputs status ST=2 in the<br />
reading result on the host interface<br />
• Read not successful, since there was no<br />
bar code in the reading field during the<br />
reading pulse<br />
• Scan line positioned incorrectly<br />
• Evaluation range of the scan line is<br />
limited unfavourable (CP values)<br />
• Bar code presented at incorrect reading<br />
distance<br />
• The presented bar code’s module width<br />
cannot be read by the CLV type being<br />
used<br />
• With event-controlled focus control:<br />
wrong focus position in Distance Configuration<br />
choosen.<br />
• With event-controlled focus control:<br />
trigger source parameterized incorrectly.<br />
• The bar code is tilted excessively with<br />
respect to the scan line<br />
• Synchronize read with presence of an<br />
object in reading field. See Chapter 8.5.2<br />
Malfunctions in Reading mode: reading<br />
trigger errors, Page 8-11<br />
• Align CLV. Is bar code at center of scan<br />
line Check the reading quality with the<br />
"CLV-Setup" software. Choose PERCEN-<br />
TAGE EVALUATION. See Chapter 6.5.2 Percentage<br />
evaluation, Page 6-22<br />
• In the "CLV-Setup" program: choose the<br />
READING CONFIGURATION tab, click the EDIT<br />
AUTOFOCUS respectively DISTANCE CONFI-<br />
GURATION/ASSIGMENT TABLE button. Are the<br />
min. and max. code position values correct<br />
Check with SHOW CP-LIMITS. See<br />
Chapter 6.5.5 Show CP-limits,<br />
Page 6-26<br />
• Check whether reading distance of bar<br />
code is in the specified reading range<br />
• Present a bar code with an acceptable<br />
module width. See Chapter 9 Technical<br />
data, Page 9-1<br />
• In the "CLV-Setup" program: choose the<br />
READING CONFIGURATION tab, click the DI-<br />
STANCE CONFIGURATION/ASSIGNMENT TABLE<br />
button. Does the focus position match<br />
the distance of the object<br />
• In the "CLV-Setup" program: choose the<br />
READING CONFIGURATION tab, in the<br />
FOCUS TRIGGER section.<br />
a) Trigger source "Switching input":<br />
Check functional assignment of IN 3 and<br />
IN 4 and connection of the sensors. See<br />
Fig. 5-5, Page 5-17<br />
b) Trigger source: "Serial interface":<br />
Check the data connection to the host.<br />
Use the "CLV-Setup" program to check<br />
the host command strings: choose AUXI-<br />
LIARY INTERFACE tab. Choose MONITOR<br />
HOST INTERFACE function. See<br />
Chapter 6.5.8 Monitor Host Interface,<br />
Page 6-29. Download temporarily to<br />
CLV!<br />
c)Trigger source: Timer:<br />
Check switchover time<br />
• In the "CLV-Setup" program: choose the<br />
CODE CONFIGURATION tab, DECODER section:<br />
choose SMART decoder.<br />
Download all changes to CLV!<br />
Table 8-7: Troubleshooting: result output errors in Reading mode<br />
8-12 © SICK AG · Division Auto Ident · Germany · All rights reserved 8 008 796/0000/25-06-2002
Operating Instructions Chapter 8<br />
CLV 490 Bar Code Scanner<br />
Troubleshooting<br />
Malfunction Possible cause Remedy<br />
1. The "Read Result" LED default setting:<br />
Good Read) does not light up at the end<br />
of the reading pulse:<br />
– continued –<br />
2. The CLV is not transferring any reading<br />
results to the host<br />
3. The CLV transfers the status ST=3 to the<br />
host in the reading result<br />
• The reading angles at which the bar code<br />
appears to the CLV are too large<br />
• Bar code in total reflection zone<br />
• Evaluation criteria for bar code incorrect<br />
• Bar code quality inadequate<br />
• Reading pulse is not functioning correctly<br />
• Wiring fault in data connection<br />
• Voltage level incorrect<br />
• Host interface in CLV parameterized<br />
incorrectly<br />
The CLV has diagnosed a device error in the<br />
selftest<br />
• In the "CLV-Setup" program: choose the<br />
CODE CONFIGURATION tab, DECODER section:<br />
choose Standard decoder. Download<br />
temporarily to CLV!<br />
Start PERCENTAGE EVALUATION, choose<br />
DISTANCE CONFIGURATION. Monitor reading<br />
quality (reading quality > 70 %!). If<br />
necessary, realign CLV and/or reconfigure<br />
distance configuration.<br />
If ok, choose SMART DECODER.<br />
Download to CLV.<br />
• Optimize CLV alignment (scan line should<br />
strike the bar code at a skew of approx.<br />
15°) Use the "CLV-Setup" program to<br />
check the quality of the read. Start PER-<br />
CENTAGE EVALUATION. See Chapter 6.5.2<br />
Percentage evaluation, Page 6-22<br />
• In "CLV-Setup" program: choose the<br />
READING CONFIGURATION tab, CODES<br />
section. Enable all code types (except<br />
Pharmacode), set code lengths to FREE.<br />
Download temporarily to CLV!<br />
Start PERCENTAGE EVALUATION. Code type<br />
and length are displayed in the reading<br />
result. Enable recorded code type in the<br />
CODES section and disable all other<br />
types. Enter the code length under FIXED<br />
on the code type tab. Download to CLV!<br />
• Check: sufficient blank zones present<br />
Print contrast adequate Specified print<br />
tolerances exceeded<br />
In the "CLV-Setup" program: choose REA-<br />
DING CONFIGURATION tab, SEGMENTATION<br />
section. Is START/STOP selected Perform<br />
read with reference code.<br />
• See Chapter 8.5.2 Malfunctions in Reading<br />
mode: reading trigger errors,<br />
Page 8-11<br />
• Check wiring as shown in Fig. 5-2,<br />
Page 5-14<br />
• Measure voltages<br />
• In "CLV-Setup" program: choose HOST<br />
INTERFACE tab, DATA FORMAT section. Are<br />
the interface type (hardware) and data<br />
format correct Check settings in INTER-<br />
FACE PROTOCOL section.<br />
Switch the CLV off and on again. Does the<br />
"Device Ready" LED light up If not, contact<br />
the SICK Service department.<br />
Table 8-7: Troubleshooting: result output errors in Reading mode<br />
8 008 796/0000/25-06-2002 © SICK AG · Division Auto Ident · Germany · All rights reserved 8-13
Chapter 8<br />
Troubleshooting<br />
Operating Instructions<br />
CLV 490 Bar Code Scanner<br />
Malfunction Possible cause Remedy<br />
4. The data content of the bar code output<br />
by the CLV is incorrect or incomplete<br />
• The data format on the host interface is<br />
parameterized incorrectly in the CLV<br />
• The CLV suppresses the last character in<br />
the bar code<br />
• In the "CLV-Setup" program: choose the<br />
HOST INTERFACE tab, DATA FORMAT section.<br />
Are the values correct<br />
• In the "CLV-Setup" program: choose the<br />
CODE CONFIGURATION tab. Click the EDIT<br />
CODES button. Choose the tab for the relevant<br />
code. Is the TRANSMIT CHECK DIGIT<br />
checkbox activated Change if necessary.<br />
Download to CLV!<br />
Table 8-7: Troubleshooting: result output errors in Reading mode<br />
8.5.4 Malfunctions in Reading mode: errors in the result status output<br />
¾<br />
Check whether the "Device Ready" LED lights up.<br />
If the LED does not light, see Table 8-5, Page 8-10 .<br />
Malfunction Possible cause Remedy<br />
The<br />
– "Result 1"<br />
(default setting: Device Ready)<br />
– "Result 2"<br />
(default setting: Good Read)<br />
– "Result 3"<br />
(default setting: No Read)<br />
– "Result 4"<br />
(default setting: Match 1)<br />
switching outputs are not outputting any<br />
pulses<br />
• The event associated with the assigned<br />
function for outputting the result status of<br />
the read does not occur in the reading<br />
operation<br />
• Incorrect switching mode parameterized<br />
in the CLV<br />
Table 8-8: Troubleshooting: errors in the result status output in Reading mode<br />
• Not applicable.<br />
• In the "CLV-Setup" program: choose the<br />
DEVICE CONFIGURATION tab. Click the EDIT<br />
RESULT OUTPUTS button. Are the outputs<br />
set to NO INVERT OUTPUT Change if necessary.<br />
Download to CLV!<br />
8-14 © SICK AG · Division Auto Ident · Germany · All rights reserved 8 008 796/0000/25-06-2002
Operating Instructions Chapter 8<br />
CLV 490 Bar Code Scanner<br />
Troubleshooting<br />
8.5.5 Malfunctions in Reading mode: oscillating mirror errors<br />
¾<br />
Check whether the "Device Ready" LED lights up.<br />
If the LED does not light, see Table 8-5, Page 8-10.<br />
Malfunction Possible cause Remedy<br />
1. The oscillating mirror does not move. Incorrect operating mode set on the CLV In the "CLV-Setup" program choose the<br />
OSCILLATING MIRROR tab, OSCILLATING MIRROR<br />
section.<br />
Is OSCILLATING WITH MAXIMUM AMPLITUDE or<br />
OSCILLATING WITH VARIABLE AMPLITUDE<br />
selected<br />
2. The oscillating mirror oscillates with<br />
maximum deflection (40 CW), even<br />
though a variable amplitude, e. g. 10 CW,<br />
is set in the distance configuration 1<br />
• OSCILLATING WITH MAXIMUM AMPLITUDE set<br />
on the CLV by mistake<br />
• The oscillating amplitude is paramterized<br />
in the wrong distance configuration<br />
(here: no. 2)<br />
• From the OSCILLATING MIRROR tab, choose<br />
OSCILLATING WITH VARIABLE AMPLITUDE.<br />
Download to the CLV!<br />
• In the "CLV-Setup" program: choose the<br />
READING CONFIGURATION tab, click the DI-<br />
STANCE CONFIGURATION/ASSIGNMENT<br />
TABLE button. Is the amplitude value set in<br />
the correct distance configuration<br />
(here: no. 1)<br />
3. One-Shot: The One-Shot function cannot<br />
be triggered (sensor correctly connected<br />
to the "IN 3" or "IN 4" switching input)<br />
• The distance configuration (focus<br />
position) was not changed<br />
Trigger source incorrectly parameterized<br />
and/or "IN 3" or "IN 4" switching input has<br />
not been assigned this function.<br />
• In the "CLV-Setup" program: choose the<br />
DEVICE CONFIGURATION tab. Assignment<br />
IN 3 and IN 4: is dynamic focus control<br />
selected Connect sensors to the switching<br />
inputs. Check sensor wiring (see<br />
Fig. 5-5, Page 5-17). Measure output<br />
signal at sensor<br />
In CLV-Setup: choose the OSCILLATING<br />
MIRROR tab. Trigger mode ok<br />
Choose DEVICE CONFIGURATION tab. Assignment<br />
IN 3 or IN 4: is trigger One-Shot selected<br />
Table 8-9: Troubleshooting: oscillating mirror errors in Reading mode<br />
8.6 SICK Support<br />
If a system error occurs repeatedly ( "CLVSYS-Failure: xxx", xxx= 000 ... 299) or if you<br />
cannot correct an error using the above measures, the CLV may be defective. The CLV does<br />
not contain any components that can be repaired by the user.<br />
Please contact your local SICK office or subsidiary. The telephone and fax numbers are listed<br />
on the back page of this manual.<br />
¾ Please contact SICK before sending the device for repair.<br />
8 008 796/0000/25-06-2002 © SICK AG · Division Auto Ident · Germany · All rights reserved 8-15
Chapter 8<br />
Troubleshooting<br />
Operating Instructions<br />
CLV 490 Bar Code Scanner<br />
Notes<br />
8-16 © SICK AG · Division Auto Ident · Germany · All rights reserved 8 008 796/0000/25-06-2002
Operating Instructions Chapter 9<br />
CLV 490 Bar Code Scanner<br />
Technical data<br />
9 Technical data<br />
9.1 Data sheet CLV 490-0010/-2010/-6010 bar code scanner<br />
Type CLV 490-0010<br />
(Standard density)<br />
Design<br />
Reading window<br />
front<br />
Laser diode (wave length)<br />
red light (λ = 650 nm)<br />
Service life of laser diode<br />
MTBF 20 000 h<br />
CLV 490-2010<br />
(High density)<br />
line scanner (standard device), without heater<br />
CLV 490-6010<br />
(Low density)<br />
Laser class Class 2 (pursuant to DIN EN 60825-1), shutoff of laser diode after 10 min 1)<br />
Focus Control<br />
Autofocus, alternatively event-controlled focus control<br />
No. of distance configurations (DC) max. 8<br />
Focus adjustment time<br />
≤ 20 ms (typically)<br />
Focus trigger source<br />
"IN 0 ... IN 4" switching inputs/data interface/timer<br />
Useful aperture angle<br />
max. 60° (front reading window)<br />
Scanning/decoding frequency600 ... 1 200 Hz<br />
Resolution (typically) 0.25 ... 1.0 mm 0.17 ... 0.4 mm 0.35 ... 1.2 mm<br />
Reading ranges see Page 10-3 see Page 10-16 see Page 10-27<br />
Bar code print contrast (PCS) ≥ 60 %<br />
Ambient light compatibility<br />
2 000 lx (on bar code)<br />
No. of bar codes per scan<br />
1 ... 12 (standard decoder), 1 ... 5 (SMART decoder)<br />
No. of bar codes per reading interval 2) 1 ... 50 (autodiscriminating)<br />
Bar code types (SMART decoder) Code 39, Code 128, Code 93, Codabar, EAN, EAN 128, UPC, 2/5 Interleaved<br />
Bar code length<br />
max. 50 characters (max. 600 characters across all bar codes per reading interval)<br />
Print ratio 2:1 ... 3:1<br />
No. of multiple reads 1 ... 99<br />
Optical indicators<br />
4 x LEDs (status indicators)<br />
Reading pulse<br />
"Sensor" switching input/Free-running/Serial interface/OPC/OTC<br />
"Host" data interface<br />
RS 232 or RS 422/485, variable data output format<br />
Data transmission rate<br />
300 ... 57 600 bit/s<br />
Protocols<br />
SICK Standard, SICK Network and 3 964(R)<br />
Physical configurations<br />
Stand-alone, SICK Network (Bus), Daisy Chain (Pass-Through or Master/Slave)<br />
"CAN" data interface<br />
CANopen protocol, CAN scanner network<br />
Data transmission rate<br />
10 kbit/s ... 1 Mbit/s<br />
"Terminal" data interface<br />
RS 232, 9 600 bit/s, 8 data bits, no parity, 1 stop bit, fixed output format<br />
Switching inputs 6 ( Sensor, "IN 0 ... IN 4")<br />
– optodecoupled, V imax = +30 V, non-interchangeable, can be connected to PNP outputs<br />
– "Sensor" (reading pulse): max. internal delay 30 ms, reduced max. 2 ... 6 ms<br />
– "IN 0 ... IN 4": focus position switching, IN 3 and IN 4: selectable function,<br />
max. internal delay 30 ms<br />
Switching outputs 4 ("Result 1" ... "Result 4")<br />
– PNP, short-circuit-proof,<br />
variable pulse duration (static; resolution 10... 990 ms or 100 ... 9 900 ms)<br />
– Variable output function for result status<br />
Electrical connections<br />
1 x 15-pin D Sub HD plug, 1 x 15-pin D Sub HD socket<br />
Operating voltage/power consumption 18 ... 30 V DC/ typically 9 W, max. 16 W<br />
Housing<br />
Aluminium die-cast, does not represent a problem in paint shops<br />
1) Default setting, in Reading mode with the "Switching input sensor" and "Serial interface pulse" types.<br />
2) Reading interval: time window generated internally for evaluating the code.<br />
Table 9-1: Technical specifications of the CLV 490-0010/-2010/-6010<br />
8 008 796/0000/25-06-2002 © SICK AG · Division Auto Ident · Germany · All rights reserved 9-1
Chapter 9<br />
Technical data<br />
Operating Instructions<br />
CLV 490 Bar Code Scanner<br />
Type CLV 490-0010<br />
(Standard density)<br />
Enclosure rating/protection class IP 65 3) (to DIN 40 050)/class 3(to VDE 0106/IEC 1010-1)<br />
EMC/vibration/shock tested<br />
to EN 50081-1, 50082-2/IEC 68-2-6 Test FC/to IEC 68-2-27 Test EA<br />
Weight<br />
approx. 1.5 kg<br />
Ambient operating/storage temperature 0 ... +40 °C/–20 ... +70 °C<br />
Max. rel. humidity90 %, non condensing<br />
3) With plug cover or plug cover with parameter memory<br />
Table 9-1: Technical specifications of the CLV 490-0010/-2010/-6010<br />
Type CLV 490-1010<br />
(Standard density)<br />
Design<br />
Reading window<br />
side<br />
CLV 490-2010<br />
(High density)<br />
CLV 490-6010<br />
(Low density)<br />
9.2 Data sheet CLV 490-1010/-3010/-7010 bar code scanner<br />
Technical data as CLV 490-0010/-2010/-6010 with the following exceptions:<br />
line scanner with oscillating mirror<br />
CLV 490-3010<br />
(High density)<br />
CLV 490-7010<br />
(Low density)<br />
Angle of emergence 105° (center position CW = 50)<br />
Trigger source for focus control<br />
also: oscillating mirror reversal points<br />
Useful aperture angle max. 50°<br />
Oscillating mirror functions permanent (variable position)/oscillating (amplitude per DC variable or fixed)/One-Shot 1)<br />
Oscillating frequency0.2 ... 4 Hz<br />
Max. angle of deflection<br />
max. ±20° (±40 CW), (set with software)<br />
Reading ranges see Page 10-9 see Page 10-21 see Page 10-31<br />
Deflection ranges see Page 10-15 see Page 10-26 seePage 10-33<br />
Operating voltage/power consumption 18 ... 30 V DC/ typically 9 W, max 18 W<br />
Weight<br />
approx. 2.2 kg<br />
1) One-Shot: one-off oscillating movement per reading pulse (start position and velocity can be selected for forward and return phase)<br />
Table 9-2: Technical specifications of the CLV 490-1010/-3010/-7010<br />
9.3 Data sheet CLV 490-0011 /-2011/-6011 bar code scanner<br />
Technical data as CLV 490-0010/-2010/-6010 with the following exceptions:<br />
Type CLV 490-0011<br />
(Standard density)<br />
Design<br />
line scanner with heater<br />
CLV 490-2011<br />
(High density)<br />
CLV 490-6011<br />
(Low density)<br />
Switching on function/temperature graph see Chapter 10.4 Optional heating, Page 10-38<br />
Power-on delay35 ... 40 min (at 24 V DC and min. ambient operating temperature –35 °C)<br />
Operating voltage 24 V DC +20 %/–10 %<br />
Power consumption<br />
typically 75 W, max 90 W<br />
Required cross-section<br />
min. 0.5 mm 2 (for power supply)<br />
Weight<br />
approx. 1.5 kg<br />
Ambient operating/storage temperature –35 ... +35 °C/–20 ... +70 °C<br />
Table 9-3: Technical specifications of the CLV 490-0011/-2011/-6011<br />
9-2 © SICK AG · Division Auto Ident · Germany · All rights reserved 8 008 796/0000/25-06-2002
Operating Instructions Chapter 9<br />
CLV 490 Bar Code Scanner<br />
Technical data<br />
Type CLV 490-1011<br />
(Standard density)<br />
Design<br />
9.4 Data sheet CLV 490-1011/-3011/-7011 bar code scanner<br />
Technical data as CLV 490-1010/-2010/-6010 with the following exceptions:<br />
CLV 490-3011<br />
(High density)<br />
9.5 Dimensioned drawings – CLV<br />
9.5.1 Line scanner (standard device) without /with heater<br />
CLV 490-7011<br />
(Low density)<br />
line scanner with oscillating mirror and heater<br />
Switching on function/temperature graph see Chapter 10.4 Optional heating, Page 10-38<br />
Power-on delay35 ... 40 min (at 24 V DC and min. ambient operating temperature –35 °C)<br />
Operating voltage 24 V DC +20 %/–10 %<br />
Power consumption<br />
typically 75 W, max 90 W<br />
Required cross-section<br />
min. 0.5 mm 2 (for power supply)<br />
Weight<br />
approx. 2.2 kg<br />
Ambient operating/storage temperature –35 ... +35 °C/–20 ... +70 °C<br />
Table 9-4: Technical specifications of the CLV 490-1011/-3011/-7011<br />
Drilled hole, ∅ 3.6,<br />
6 mm deep<br />
Blind hole thread, M 6,<br />
7 mm deep<br />
CLV 490-0010<br />
10<br />
CLV 490-0011<br />
10<br />
CLV 490-2010<br />
10<br />
CLV 490-2011<br />
CLV 490-6010<br />
CLV 490-6011<br />
33.4 43.3<br />
56<br />
38.5<br />
12<br />
78<br />
21<br />
31<br />
26 37<br />
Device Ready<br />
Sensor<br />
Read Result<br />
Data<br />
60 °<br />
117<br />
CLV490<br />
73.5<br />
117<br />
94<br />
All values in mm<br />
Fig. 9-1:<br />
Dimensions of the CLV 490 line scanner, front reading window<br />
8 008 796/0000/25-06-2002 © SICK AG · Division Auto Ident · Germany · All rights reserved 9-3
Chapter 9<br />
Technical data<br />
Operating Instructions<br />
CLV 490 Bar Code Scanner<br />
9.5.2 Line scanner with oscillating mirror (without/with heater)<br />
CLV 490-1010<br />
CLV 490-1011<br />
CLV 490-3010<br />
CLV 490-3011<br />
CLV 490-7010<br />
CLV 490-7011<br />
Device Ready<br />
Sensor<br />
Read Result<br />
Data<br />
127,5<br />
max. 20°<br />
86<br />
21 78<br />
56<br />
43.3<br />
33.4<br />
25.5<br />
15°<br />
183<br />
70<br />
117<br />
Drilled hole, ∅ 3.6,<br />
6 mm deep<br />
2<br />
12<br />
38.5<br />
10<br />
82<br />
10<br />
10<br />
3.5<br />
Blind hole thread, M 6,<br />
7 mm deep<br />
CLV490<br />
50°<br />
All values in mm<br />
Fig. 9-2:<br />
Dimensions of the CLV 490: line scanner with oscillating mirror, side reading window<br />
9-4 © SICK AG · Division Auto Ident · Germany · All rights reserved 8 008 796/0000/25-06-2002
Operating Instructions Chapter 10<br />
CLV 490 Bar Code Scanner<br />
Appendix<br />
10 Appendix<br />
10.1 Overview<br />
The appendix contains the following additional information:<br />
• Specification diagrams<br />
– Line scanner (all variants)<br />
– Line scanner with oscillating mirror (all variants)<br />
• Installation and operating instructions for the external parameter memory<br />
• Optional heating (temperature graph/ switching on function)<br />
• System messages<br />
• Installation and operating instructions for the PC-based "CLV-Setup" program<br />
• Configuring a CLV using command strings<br />
• Parameter value calculations for configuring the CLV<br />
• Tables<br />
• Discussion of a parameterization example<br />
• Special applications and procedures<br />
• Instructions for replacing a CLV (copying the parameter set)<br />
• Accessories<br />
• Dimensioned drawings of the accessories<br />
• Notes on supplementary documentation<br />
• Glossary<br />
• Copy of the EC-Declaration of Conformity<br />
• Index<br />
• Scannable sample bar codes<br />
10.2 Specification diagrams<br />
10.2.1 Reading conditions for all diagrams<br />
Test code Code 128<br />
Print ratio > 90 %<br />
Tilt ±45°<br />
Ambient light<br />
< 2 000 lx<br />
Good Read rate > 75 %<br />
Table 10-1: Reading conditions for specification diagrams<br />
Note<br />
The min. and max. reading distances are measured radially by the CLV.<br />
8 008 796/0000/25-06-2002 © SICK AG · Division Auto Ident · Germany · All rights reserved 10-1
Chapter 10<br />
Appendix<br />
Operating Instructions<br />
CLV 490 Bar Code Scanner<br />
10.2.2 Overview of diagrams<br />
Line scanner<br />
CLV-Type Resolution Scanning method Diagram Page<br />
CLV 490-0010/-0011 Standard densityLine scanner Reading field height/resolution as a function of reading distance 10-3<br />
CLV 490-0010/-0011 Standard densityLine scanner Min. and max. reading distance (DOF) for 0.35 mm/40° 10-4<br />
CLV 490-0010/-0011 Standard densityLine scanner Min. and max. reading distance (DOF) for 0.35 mm/56° 10-5<br />
CLV 490-0010/-0011 Standard densityLine scanner Min. and max. reading distance (DOF) for 0.50 mm/40° 10-6<br />
CLV 490-0010/-0011 Standard densityLine scanner Min. and max. reading distance (DOF) for 0.50 mm/56° 10-7<br />
CLV 490-0010/-0011 Standard densityLine scanner Characteristics field scanning frequency 10-8<br />
CLV 490-2010/-2011 High densityLine scanner Reading field height/resolution as a function of reading distance 10-16<br />
CLV 490-2010/-2011 High densityLine scanner Min. and max. reading distance (DOF) for 0.25 mm/40° 10-17<br />
CLV 490-2010/-2011 High densityLine scanner Min. and max. reading distance (DOF) for 0.35 mm/40° 10-18<br />
CLV 490-2010/-2011 High densityLine scanner Min. and max. reading distance (DOF) for 0.35 mm/56° 10-19<br />
CLV 490-2010/-2011 High densityLine scanner Characteristics field scanning frequency 10-20<br />
CLV 490-6010/-6011 Low densityLine scanner Reading field height/Tilt as a function of reading distance for 10-27<br />
0.5 mm<br />
CLV 490-6010/-6011 Low densityLine scanner Min. and max. reading distance (DOF) for 0.5 mm/40° 10-28<br />
CLV 490-6010/-6011 Low densityLine scanner Min. and max. reading distance (DOF) for 0.5 mm/60° 10-29<br />
CLV 490-6010/-6011 Low densityLine scanner Characteristics field scanning frequency 10-30<br />
Table 10-2: Overview of specification diagrams for the line scanner<br />
Line scanner with oscillating mirror<br />
CLV-Type Resolution Scanning method Diagram Page<br />
CLV 490-1010/-1011 Standard densityL.s. with osci. mirror Reading field height/resolution as a function of reading 10-9<br />
distance<br />
CLV 490-1010/-1011 Standard densityL.s. with osci. mirror Min. and max. reading distance (DOF) for 0.35 mm/40° 10-10<br />
CLV 490-1010/-1011 Standard density L.s. with osci. mirror Min. and max. reading distance (DOF) for 0.35 mm/50° 10-11<br />
CLV 490-1010/-1011 Standard densityL.s. with osci. mirror Min. and max. reading distance (DOF) for 0.50 mm/40° 10-12<br />
CLV 490-1010/-1011 Standard densityL.s. with osci. mirror Min. and max. reading distance (DOF) for 0.50 mm/50° 10-13<br />
CLV 490-1010/-1011 Standard densityL.s. with osci. mirror Characteristics field scanning frequency 10-14<br />
CLV 490-1010/-1011 Standard densityL.s. with osci. mirror Deflection range 10-15<br />
CLV 490-3010/-3011 High densityL.s. with osci. mirror Reading field height/resolution as a function of reading 10-21<br />
distance<br />
CLV 490-3010/-3011 High densityL.s. with osci. mirror Min. and max. reading distance (DOF) for 0.25 mm/40° 10-22<br />
CLV 490-3010/-3011 High densityL.s. with osci. mirror Min. and max. reading distance (DOF) for 0.35 mm/40° 10-23<br />
CLV 490-3010/-3011 High densityL.s. with osci. mirror Min. and max. reading distance (DOF) for 0.35 mm/50° 10-24<br />
CLV 490-3010/-3011 High densityL.s. with osci. mirror Characteristics field scanning frequency 10-25<br />
CLV 490-3010/-3011 High densityL.s. with osci. mirror Deflection range 10-26<br />
CLV 490-7010/-7011 Low densityL.s. with osci. mirror Reading field height/Tilt as a function of reading distance for 10-31<br />
0.5 mm<br />
CLV 490-7010/-7011 Low densityL.s. with osci. mirror Min. and max. reading distance (DOF) for 0.5 mm/40° 10-28<br />
CLV 490-7010/-7011 Low densityL.s. with osci. mirror Min. and max. reading distance (DOF) for 0.5 mm/50° 10-29<br />
CLV 490-7010/-7011 Low densityL.s. with osci. mirror Characteristics field scanning frequency 10-32<br />
CLV 490-7010/-7011 Low densityL.s. with osci. mirror Deflection range 10-33<br />
Table 10-3: Overview of specification diagrams for the line scanner with oscillating mirror<br />
10-2 © SICK AG · Division Auto Ident · Germany · All rights reserved 8 008 796/0000/25-06-2002
Operating Instructions Chapter 10<br />
CLV 490 Bar Code Scanner<br />
Appendix<br />
10.2.3 Standard density: Reading performance data of line scanner<br />
Line scanner (front reading window):<br />
CLV 490-0010/-0011<br />
Reading field height<br />
[mm]<br />
700<br />
600<br />
500<br />
400<br />
300<br />
200<br />
100<br />
0<br />
-100<br />
-200<br />
-300<br />
-400<br />
-500<br />
-600<br />
-700<br />
400 600 800 1000 1200 1400 1600 1800 2000 2200<br />
Reading distance [mm]<br />
Resolution:<br />
0.30 mm<br />
0.35 mm<br />
0.50 mm<br />
Characteristics field<br />
scanning frequency/<br />
reading distance:<br />
see Fig. 10-6,<br />
Page 10-8<br />
Reading conditions:<br />
see Table 10-1,<br />
Page 10-1<br />
Aperture angle α = 40°<br />
Aperture angle α = 40°<br />
Fig. 10-1:<br />
CLV 490-0010/-0011 (Standard density): Reading field height as a function of the reading distance and resolution<br />
8 008 796/0000/25-06-2002 © SICK AG · Division Auto Ident · Germany · All rights reserved 10-3
Chapter 10<br />
Appendix<br />
Operating Instructions<br />
CLV 490 Bar Code Scanner<br />
r<br />
Line scanner (front reading window): CLV 490-0010/-0011<br />
Reading distance [mm]<br />
Resolution: 0.35 mm<br />
Aperture angle: 40°<br />
2200<br />
2100<br />
2000<br />
1900<br />
1800<br />
1700<br />
max. reading distance<br />
1600<br />
min. reading distance<br />
1500<br />
1400<br />
1300<br />
1200<br />
1100<br />
1000<br />
900<br />
800<br />
Reading ranges from approx. 1 540 mm<br />
focus position are typical values!<br />
700<br />
600<br />
500<br />
400<br />
500 700 900 1100 1300 1500 1700 1900 2100<br />
Characteristics field scanning frequency/<br />
reading distance: see Fig. 10-6, Page 10-8<br />
Reading conditions:<br />
see Table10-1, Page10-1<br />
Focus position [mm]<br />
Fig. 10-2:<br />
CLV 490-0010/-0011 (Standard density): Min. and Max. reading distance (measured radially) as a function of the focus<br />
position at a resolution of 0.35 mm and an aperture angle of α =40°<br />
10-4 © SICK AG · Division Auto Ident · Germany · All rights reserved 8 008 796/0000/25-06-2002
Operating Instructions Chapter 10<br />
CLV 490 Bar Code Scanner<br />
Appendix<br />
Line scanner (front reading window): CLV 490-0010/-0011<br />
Reading distance [mm]<br />
Resolution: 0.35 mm<br />
Aperture angle: 56°<br />
2200<br />
2100<br />
2000<br />
1900<br />
1800<br />
1700<br />
1600<br />
1500<br />
max. reading distance<br />
1400<br />
1300<br />
min. reading distance<br />
1200<br />
1100<br />
1000<br />
900<br />
800<br />
700<br />
600<br />
500<br />
400<br />
500 700 900 1100 1300 1500 1700 1900 2100<br />
Focus position [mm]<br />
Characteristics field scanning frequency/<br />
reading distance: see Fig. 10-6, Page 10-8<br />
Reading conditions:<br />
see Table 10-1, Page 10-1<br />
Fig. 10-3:<br />
CLV 490-0010/-0011 (Standard density): Min. and Max. reading distance (measured radially) as a function of the focus<br />
position at a resolution of 0.35 mm and an aperture angle of α =56°<br />
8 008 796/0000/25-06-2002 © SICK AG · Division Auto Ident · Germany · All rights reserved 10-5
Chapter 10<br />
Appendix<br />
Operating Instructions<br />
CLV 490 Bar Code Scanner<br />
Line scanner (front reading window): CLV 490-0010/-0011<br />
Reading distance [mm]<br />
Resolution: 0.50 mm<br />
Aperture angle: 40°<br />
2200<br />
2100<br />
max. reading distance<br />
2000<br />
1900<br />
min.<br />
reading distance<br />
1800<br />
1700<br />
1600<br />
1500<br />
1400<br />
1300<br />
1200<br />
1100<br />
1000<br />
900<br />
800<br />
700<br />
600<br />
500<br />
400<br />
500 700 900 1100 1300 1500 1700 1900 2100<br />
Focus position [mm]<br />
Characteristics field scanning frequency/<br />
reading distance: see Fig. 10-6, Page 10-8<br />
Reading conditions:<br />
see Table10-1, Page10-1<br />
Fig. 10-4:<br />
CLV 490-0010/-0011 (Standard density): Min. and Max. reading distance (measured radially) as a function of the focus<br />
position at a resolution of 0.50 mm and an aperture angle of α =40°<br />
10-6 © SICK AG · Division Auto Ident · Germany · All rights reserved 8 008 796/0000/25-06-2002
Operating Instructions Chapter 10<br />
CLV 490 Bar Code Scanner<br />
Appendix<br />
Line scanner (front reading window): CLV 490-0010/-0011<br />
Reading distance [mm]<br />
Resolution: 0.50 mm<br />
Aperture angle: 56°<br />
2200<br />
2100<br />
2000<br />
1900<br />
1800<br />
1700<br />
1600<br />
max. reading distance<br />
1500<br />
1400<br />
1300<br />
1200<br />
min. reading distance<br />
1100<br />
1000<br />
900<br />
800<br />
700<br />
600<br />
500<br />
400<br />
500 700 900 1100 1300 1500 1700 1900 2100<br />
Focus position [mm]<br />
Characteristics field scanning frequency/<br />
reading distance: see Fig. 10-6, Page 10-8<br />
Reading conditions:<br />
see Table 10-1, Page 10-1<br />
Fig. 10-5:<br />
CLV 490-0010/-0011 (Standard density): Min. and Max. reading distance (measured radially) as a function of the focus<br />
position at a resolution of 0.50 mm and an aperture angle of α =56°<br />
8 008 796/0000/25-06-2002 © SICK AG · Division Auto Ident · Germany · All rights reserved 10-7
Chapter 10<br />
Appendix<br />
Operating Instructions<br />
CLV 490 Bar Code Scanner<br />
Line scanner (front reading window): CLV 490-0010/-0011<br />
Scanning frequency [Hz]<br />
1300<br />
1200<br />
1100<br />
1000<br />
900<br />
800<br />
700<br />
600<br />
500 700 900 1100 1300 1500 1700 1900 2100<br />
Reading distance [mm]<br />
Resolution:<br />
0.35 mm<br />
0.50 mm<br />
Reading conditions:<br />
see Table 10-1, Page 10-1<br />
Fig. 10-6:<br />
Characteristics field CLV 490-0010/-0011: Scanning frequency as a function of the reading distance and resolution<br />
10-8 © SICK AG · Division Auto Ident · Germany · All rights reserved 8 008 796/0000/25-06-2002
Operating Instructions Chapter 10<br />
CLV 490 Bar Code Scanner<br />
Appendix<br />
10.2.4 Standard density: Reading performance data of line scanner with<br />
oscillating mirror<br />
Line scanner with oscillating mirror (side reading window):<br />
CLV 490-1010/-1011<br />
Reading field height<br />
[mm]<br />
700<br />
600<br />
500<br />
400<br />
300<br />
200<br />
100<br />
0<br />
-100<br />
-200<br />
-300<br />
-400<br />
-500<br />
-600<br />
-700<br />
400 600 800 1000 1200 1400 1600 1800 2000 2200<br />
Reading distance [mm]<br />
Resolution:<br />
0.30 mm<br />
0.35 mm<br />
0.50 mm<br />
Characteristics field<br />
scanning frequency/<br />
reading distance:<br />
see Fig. 10-12,<br />
Page 10-14<br />
Reading conditions:<br />
see Table 10-1,<br />
Page 10-1<br />
Aperture angle α = 40°<br />
Aperture angle α = 40°<br />
Fig. 10-7:<br />
CLV 490-1010/-1011 (Standard density): Reading field height as a function of the reading distance and resolution<br />
8 008 796/0000/25-06-2002 © SICK AG · Division Auto Ident · Germany · All rights reserved 10-9
Chapter 10<br />
Appendix<br />
Operating Instructions<br />
CLV 490 Bar Code Scanner<br />
Line scanner with oscillating mirror (side reading window): CLV 490-1010/-1011<br />
Reading distance [mm]<br />
Resolution: 0.35 mm<br />
Aperture angle: 40°<br />
2200<br />
2100<br />
2000<br />
1900<br />
1800<br />
1700<br />
max. reading distance<br />
1600<br />
min. reading distance<br />
1500<br />
1400<br />
1300<br />
1200<br />
1100<br />
1000<br />
900<br />
800<br />
700<br />
600<br />
Reading ranges from approx. 1 440 mm<br />
focus position are typical values!<br />
500<br />
400<br />
500 700 900 1100 1300 1500 1700 1900 2100<br />
Focus position [mm]<br />
Characteristics field scanning frequency/<br />
reading distance: see Fig. 10-12, Page 10-14<br />
Reading conditions:<br />
see Table 10-1, Page 10-1<br />
Fig. 10-8:<br />
CLV 490-1010/-1011 (Standard density): Min. and Max. reading distance (measured radially) as a function of the focus<br />
position at a resolution of 0.35 mm and an aperture angle of α =40°<br />
10-10 © SICK AG · Division Auto Ident · Germany · All rights reserved 8 008 796/0000/25-06-2002
Operating Instructions Chapter 10<br />
CLV 490 Bar Code Scanner<br />
Appendix<br />
Line scanner with oscillating mirror (side reading window): CLV 490-1010/-1011<br />
Reading distance [mm]<br />
2200<br />
Resolution: 0.35 mm<br />
Aperture angle: 50°<br />
2100<br />
2000<br />
1900<br />
1800<br />
1700<br />
1600<br />
1500<br />
max. reading distance<br />
1400<br />
1300<br />
min. reading distance<br />
1200<br />
1100<br />
1000<br />
900<br />
800<br />
700<br />
600<br />
500<br />
400<br />
500 700 900 1100 1300 1500 1700 1900 2100<br />
Focus position [mm]<br />
Characteristics field scanning frequency/<br />
reading distance: see Fig. 10-12, Page 10-14<br />
Reading conditions:<br />
see Table 10-1, Page 10-1<br />
Fig. 10-9:<br />
CLV 490-1010/-1011 (Standard density): Min. and Max. reading distance (measured radially) as a function of the focus<br />
position at a resolution of 0.35 mm and an aperture angle of α =50°<br />
8 008 796/0000/25-06-2002 © SICK AG · Division Auto Ident · Germany · All rights reserved 10-11
Chapter 10<br />
Appendix<br />
Operating Instructions<br />
CLV 490 Bar Code Scanner<br />
Line scanner with oscillating mirror (side reading window): CLV 490-1010/-1011<br />
Reading distance [mm]<br />
2200<br />
2100<br />
Resolution: 0.50 mm<br />
Aperture angle: 40°<br />
max.<br />
reading distance<br />
2000<br />
1900<br />
1800<br />
1700<br />
1600<br />
min.<br />
reading distance<br />
1500<br />
1400<br />
1300<br />
1200<br />
1100<br />
1000<br />
900<br />
800<br />
700<br />
600<br />
500<br />
400<br />
500 700 900 1100 1300 1500 1700 1900 2100<br />
Focus position [mm]<br />
Characteristics field scanning frequency/<br />
reading distance: see Fig. 10-12, Page 10-14<br />
Reading conditions:<br />
see Table 10-1, Page 10-1<br />
Fig. 10-10: CLV 490-1010/-1011 (Standard density): Min. and Max. reading distance (measured radially) as a function of the focus<br />
position at a resolution of 0.50 mm and an aperture angle of α =40°<br />
10-12 © SICK AG · Division Auto Ident · Germany · All rights reserved 8 008 796/0000/25-06-2002
Operating Instructions Chapter 10<br />
CLV 490 Bar Code Scanner<br />
Appendix<br />
Line scanner with oscillating mirror (side reading window): CLV 490-1010/-1011<br />
Reading distance [mm]<br />
Resolution: 0.50 mm<br />
Aperture angle: 50°<br />
2200<br />
2100<br />
2000<br />
1900<br />
1800<br />
1700<br />
1600<br />
1500<br />
max. reading distance<br />
1400<br />
1300<br />
min. reading distance<br />
1200<br />
1100<br />
1000<br />
900<br />
800<br />
700<br />
600<br />
500<br />
400<br />
500 700 900 1100 1300 1500 1700 1900 2100<br />
Focus position [mm]<br />
Characteristics field scanning frequency/<br />
reading distance: see Fig. 10-12, Page 10-14<br />
Reading conditions:<br />
see Table 10-1, Page 10-1<br />
Fig. 10-11: CLV 490-1010/-1011 (Standard density): Min. and Max. reading distance (measured radially) as a function of the focus<br />
position at a resolution of 0.50 mm and an aperture angle of α =50°<br />
8 008 796/0000/25-06-2002 © SICK AG · Division Auto Ident · Germany · All rights reserved 10-13
Chapter 10<br />
Appendix<br />
Operating Instructions<br />
CLV 490 Bar Code Scanner<br />
Line scanner with oscillating mirror (side reading window): CLV 490-1010/-1011<br />
Scanning frequency [Hz]<br />
1300<br />
1200<br />
1100<br />
1000<br />
900<br />
800<br />
700<br />
600<br />
500 700 900 1100 1300 1500 1700 1900 2100<br />
Reading distance [mm]<br />
Resolution:<br />
0.35 mm<br />
0.50 mm<br />
Reading conditions:<br />
see Table 10-1, Page 10-1<br />
Fig. 10-12: Characteristics field CLV 490-1010/-1011: Scanning frequency as a function of the reading distance and resolution<br />
10-14 © SICK AG · Division Auto Ident · Germany · All rights reserved 8 008 796/0000/25-06-2002
Operating Instructions Chapter 10<br />
CLV 490 Bar Code Scanner<br />
Appendix<br />
Line scanner with oscillating mirror (side reading window): CLV 490-1010/-1011<br />
Deflection range<br />
[mm]<br />
1600<br />
Deflection angle ±20°<br />
Deflection angle ±10°<br />
1200<br />
800<br />
0.50 mm<br />
0.35 mm<br />
0.30 mm<br />
Deflection angle ±5°<br />
400<br />
0<br />
-400<br />
-400 0 400 800 1200 1600 2000 2400<br />
Reading distance [mm]<br />
Resolution:<br />
0.30 mm<br />
0.35 mm<br />
0.50 mm<br />
Reading conditions:<br />
see Table 10-1, Page 10-1<br />
Fig. 10-13: CLV 490-1010/-1011 (Standard density): deflection range as a function of reading distance, deflection angle and<br />
resolution<br />
8 008 796/0000/25-06-2002 © SICK AG · Division Auto Ident · Germany · All rights reserved 10-15
Chapter 10<br />
Appendix<br />
Operating Instructions<br />
CLV 490 Bar Code Scanner<br />
10.2.5 High density: Reading performance data of line scanner<br />
Line scanner (front reading window): CLV 490-2010/-2011<br />
Reading field height<br />
[mm]<br />
600<br />
500<br />
400<br />
300<br />
200<br />
100<br />
0<br />
-100<br />
-200<br />
-300<br />
-400<br />
-500<br />
-600<br />
400 600 800 1000 1200 1400 1600<br />
Reading distance [mm]<br />
Resolution:<br />
0.20 mm<br />
0.25 mm<br />
0.30 mm<br />
Characteristics field scanning<br />
frequency/reading distance:<br />
see Fig. 10-18, Page 10-20<br />
Reading conditions:<br />
see Table 10-1,<br />
Page 10-1<br />
Aperture angle α = 40°<br />
Aperture angle α = 40°<br />
Fig. 10-14: CLV 490-2010/-2011 (High density): Reading field height as a function of the reading distance and resolution<br />
10-16 © SICK AG · Division Auto Ident · Germany · All rights reserved 8 008 796/0000/25-06-2002
Operating Instructions Chapter 10<br />
CLV 490 Bar Code Scanner<br />
Appendix<br />
Line scanner (front reading window): CLV 490-2010/-2011<br />
Reading distance [mm]<br />
2200<br />
Resolution: 0.25 mm<br />
Aperture angle: 40°<br />
2100<br />
2000<br />
1900<br />
1800<br />
Resolution 0.2 mm:<br />
Depth of field reduced by 20 % compared<br />
to depth of field at resolution 0.25 mm<br />
(typical values)<br />
1700<br />
1600<br />
1500<br />
max. reading distance<br />
1400<br />
1300<br />
min. reading distance<br />
1200<br />
1100<br />
1000<br />
900<br />
800<br />
700<br />
600<br />
Reading ranges typical values!<br />
500<br />
400<br />
500 700 900 1100 1300 1500 1700 1900 2100<br />
Focus position [mm]<br />
Characteristics field scanning frequency/<br />
reading distance: see Table 10-18, Page 10-20<br />
Reading conditions:<br />
see Table 10-1, Page 10-1<br />
Fig. 10-15: CLV 490-2010/-2011 (High density): Min. and Max. reading distance (measured radially) as a function of the focus<br />
position at a resolution of 0.25 mm and an aperture angle of α =40°<br />
8 008 796/0000/25-06-2002 © SICK AG · Division Auto Ident · Germany · All rights reserved 10-17
Chapter 10<br />
Appendix<br />
Operating Instructions<br />
CLV 490 Bar Code Scanner<br />
Line scanner (front reading window): CLV 490-2010/-2011<br />
Reading distance [mm]<br />
Resolution: 0.35 mm<br />
Aperture angle: 40°<br />
2200<br />
2100<br />
2000<br />
1900<br />
1800<br />
1700<br />
max. reading distance<br />
1600<br />
min. reading distance<br />
1500<br />
1400<br />
1300<br />
1200<br />
1100<br />
1000<br />
900<br />
800<br />
Reading ranges from approx. 1 540 mm<br />
focus position are typical values<br />
700<br />
600<br />
500<br />
400<br />
500 700 900 1100 1300 1500 1700 1900 2100<br />
Focus position [mm]<br />
Characteristics field scanning frequency/<br />
reading distance: see Table 10-18, Page 10-20<br />
Reading conditions:<br />
see Table 10-1, Page 10-1<br />
Fig. 10-16: CLV 490-2010/-2011 (High density): Min. and Max. reading distance (measured radially) as a function of the focus<br />
position at a resolution of 0.35 mm and an aperture angle of α =40°<br />
10-18 © SICK AG · Division Auto Ident · Germany · All rights reserved 8 008 796/0000/25-06-2002
Operating Instructions Chapter 10<br />
CLV 490 Bar Code Scanner<br />
Appendix<br />
Line scanner (front reading window): CLV 490-2010/-2011<br />
Reading distance [mm]<br />
2200<br />
Resolution: 0.35 mm<br />
Aperture angle: 56°<br />
2100<br />
2000<br />
1900<br />
1800<br />
1700<br />
1600<br />
1500<br />
max. reading distance<br />
1400<br />
1300<br />
min. reading distance<br />
1200<br />
1100<br />
1000<br />
900<br />
800<br />
700<br />
600<br />
500<br />
400<br />
500 700 900 1100 1300 1500 1700 1900 2100<br />
Focus position [mm]<br />
Characteristics field scanning frequency/<br />
reading distance: see Table 10-18, Page 10-20<br />
Reading conditions:<br />
see Table 10-1, Page 10-1<br />
Fig. 10-17: CLV 490-2010/-2011 (High density): Min. and Max. reading distance (measured radially) as a function of the focus<br />
position at a resolution of 0.35 mm and an aperture angle of α =56°<br />
8 008 796/0000/25-06-2002 © SICK AG · Division Auto Ident · Germany · All rights reserved 10-19
Chapter 10<br />
Appendix<br />
Operating Instructions<br />
CLV 490 Bar Code Scanner<br />
Line scanner (front reading window): CLV 490-2010/-2011<br />
Scanning frequency [Hz]<br />
1300<br />
1200<br />
1100<br />
1000<br />
900<br />
800<br />
700<br />
600<br />
400 600 800 1000 1200 1400 1600<br />
Reading distance [mm]<br />
Resolution:<br />
0.20 mm<br />
0.25 mm<br />
0.30 mm<br />
Reading conditions:<br />
see Table 10-1, Page 10-1<br />
Fig. 10-18: Characteristics field CLV 490-2010/-2011: Scanning frequency as a function of the reading distance and resolution<br />
10-20 © SICK AG · Division Auto Ident · Germany · All rights reserved 8 008 796/0000/25-06-2002
Operating Instructions Chapter 10<br />
CLV 490 Bar Code Scanner<br />
Appendix<br />
10.2.6 High density: Reading performance data line scanner with oscillating mirror<br />
Line scanner oscillating mirror (side reading window): CLV 490-3010/-3011<br />
Reading field height<br />
[mm]<br />
600<br />
500<br />
400<br />
300<br />
200<br />
100<br />
0<br />
-100<br />
-200<br />
-300<br />
-400<br />
-500<br />
-600<br />
400 600 800 1000 1200 1400 1600<br />
Reading distance [mm]<br />
Resolution:<br />
0.20 mm<br />
0.25 mm<br />
0.30 mm<br />
Characteristics field scanning<br />
frequency/reading distance:<br />
see Fig. 10-23, Page 10-25<br />
Reading conditions:<br />
see Table 10-1,<br />
Page 10-1<br />
Aperture angle α = 40°<br />
Aperture angle α = 40°<br />
Fig. 10-19: CLV 490-3010/-3011 (High density): Reading field height as a function of the reading distance and resolution<br />
8 008 796/0000/25-06-2002 © SICK AG · Division Auto Ident · Germany · All rights reserved 10-21
Chapter 10<br />
Appendix<br />
Operating Instructions<br />
CLV 490 Bar Code Scanner<br />
Line scanner with oscillating mirror (side reading window): CLV 490-3010/-3011<br />
Reading distance [mm]<br />
Resolution: 0.25 mm<br />
Aperture angle: 40°<br />
2200<br />
2100<br />
2000<br />
1900<br />
1800<br />
1700<br />
1600<br />
1500<br />
max. reading distance<br />
1400<br />
1300<br />
min. reading distance<br />
1200<br />
1100<br />
1000<br />
900<br />
800<br />
700<br />
Reading ranges typical values!<br />
600<br />
500<br />
400<br />
500 700 900 1100 1300 1500 1700 1900 2100<br />
Focus position [mm]<br />
Characteristics field scanning frequency/<br />
reading distance: see Table 10-23, Page 10-25<br />
Reading conditions:<br />
see Table 10-1, Page 10-1<br />
Fig. 10-20: CLV 490-3010/-3011: (High density) Min. and Max. reading distance (measured radially) as a function of the focus<br />
position at a resolution of 0.25 mm and an aperture angle of α =40°<br />
10-22 © SICK AG · Division Auto Ident · Germany · All rights reserved 8 008 796/0000/25-06-2002
Operating Instructions Chapter 10<br />
CLV 490 Bar Code Scanner<br />
Appendix<br />
Line scanner with oscillating mirror (side reading window): CLV 490-3010/-3011<br />
Reading distance [mm]<br />
2200<br />
Resolution: 0.35 mm<br />
Aperture angle: 40°<br />
2100<br />
2000<br />
1900<br />
1800<br />
1700<br />
max. reading distance<br />
1600<br />
1500<br />
min. reading distance<br />
1400<br />
1300<br />
1200<br />
1100<br />
1000<br />
900<br />
800<br />
700<br />
Reading ranges from approx. 1 440 mm<br />
focus position are typical values<br />
600<br />
500<br />
400<br />
500 700 900 1100 1300 1500 1700 1900 2100<br />
Focus position [mm]<br />
Characteristics field scanning frequency/<br />
reading distance: see Table 10-23, Page 10-25<br />
Reading conditions:<br />
see Table 10-1, Page 10-1<br />
Fig. 10-21: CLV 490-3010/-3011 (High density): Min. and Max. reading distance (measured radially) as a function of the focus<br />
position at a resolution of 0.35 mm and an aperture angle of α =40°<br />
8 008 796/0000/25-06-2002 © SICK AG · Division Auto Ident · Germany · All rights reserved 10-23
Chapter 10<br />
Appendix<br />
Operating Instructions<br />
CLV 490 Bar Code Scanner<br />
Line scanner with oscillating mirror (side reading window): CLV 490-3010/-3011<br />
Reading distance [mm]<br />
Resolution: 0.35 mm<br />
Aperture angle: 50°<br />
2200<br />
2100<br />
2000<br />
1900<br />
1800<br />
1700<br />
1600<br />
1500<br />
1400<br />
max. reading distance<br />
1300<br />
min. reading distance<br />
1200<br />
1100<br />
1000<br />
900<br />
800<br />
700<br />
600<br />
500<br />
400<br />
500 700 900 1100 1300 1500 1700 1900 2100<br />
Focus position [mm]<br />
Characteristics field scanning frequency/<br />
reading distance: see Table 10-23, Page 10-25<br />
Reading conditions:<br />
see Table 10-1, Page 10-1<br />
Fig. 10-22: CLV 490-3010/-3011 (High density): Min. and Max. reading distance (measured radially) as a function of the focus<br />
position at a resolution of 0.35 mm and an aperture angle of α =50°<br />
10-24 © SICK AG · Division Auto Ident · Germany · All rights reserved 8 008 796/0000/25-06-2002
Operating Instructions Chapter 10<br />
CLV 490 Bar Code Scanner<br />
Appendix<br />
Line scanner with oscillating mirror (side reading window): CLV 490-3010/-3011<br />
Scanning frequency [Hz]<br />
1300<br />
1200<br />
1100<br />
1000<br />
900<br />
800<br />
700<br />
600<br />
400 600 800 1000 1200 1400 1600<br />
Reading distance [mm]<br />
Resolution:<br />
0.20 mm<br />
0.25 mm<br />
0.30 mm<br />
Reading conditions:<br />
see Table 10-1, Page 10-1<br />
Fig. 10-23: Characteristics field CLV 490-3010/-3011: Scanning frequency as a function of the reading distance and resolution<br />
8 008 796/0000/25-06-2002 © SICK AG · Division Auto Ident · Germany · All rights reserved 10-25
Chapter 10<br />
Appendix<br />
Operating Instructions<br />
CLV 490 Bar Code Scanner<br />
Line scanner with oscillating mirror (side reading window): CLV 490-3010/-3011<br />
Deflection range<br />
[mm]<br />
1600<br />
Deflection angle ±20°<br />
1200<br />
Deflection angle ±10°<br />
Deflection angle ±5°<br />
800<br />
400<br />
0.30 mm<br />
0.25 mm<br />
0.20 mm<br />
0<br />
-400<br />
-400 0 400 800 1200 1600 2000 2400<br />
Reading distance [mm]<br />
Resolution:<br />
0.20 mm<br />
0.25 mm<br />
0.30 mm<br />
Reading conditions:<br />
see Table 10-1, Page 10-1<br />
Fig. 10-24: CLV 490-3010/-3011: Deflection range as a function of reading distance, deflection angle and resolution<br />
10-26 © SICK AG · Division Auto Ident · Germany · All rights reserved 8 008 796/0000/25-06-2002
Operating Instructions Chapter 10<br />
CLV 490 Bar Code Scanner<br />
Appendix<br />
10.2.7 Low density: Reading performance data of line scanner<br />
Line scanner (front reading window): CLV 490-6010/-6011<br />
Reading field height<br />
[mm]<br />
900<br />
800<br />
700<br />
600<br />
500<br />
400<br />
300<br />
200<br />
100<br />
0<br />
-100<br />
-200<br />
-300<br />
-400<br />
-500<br />
-600<br />
-700<br />
-800<br />
-900<br />
400 600 800 1000 1200 1400 1600 1800 2000 2200<br />
Reading distance [mm]<br />
Resolution: 0.5 mm<br />
Tilt<br />
–45° ... +45°<br />
–30° ... +30°<br />
–15° ... +15° (typical values!)<br />
Characteristics field scanning<br />
frequency/reading distance:<br />
see Fig. 10-28, Page 10-30<br />
Reading conditions:<br />
see Table 10-1,<br />
Page 10-1<br />
Aperture angle α = 40°<br />
Aperture angle α = 40°<br />
Fig. 10-25: CLV 490-6010/-6011 (Low density): Reading field height as a function of the reading distance and the tilt at a resolution of<br />
0.5 mm<br />
8 008 796/0000/25-06-2002 © SICK AG · Division Auto Ident · Germany · All rights reserved 10-27
Chapter 10<br />
Appendix<br />
Operating Instructions<br />
CLV 490 Bar Code Scanner<br />
Line scanner (front reading window): CLV 490-6010/-6011<br />
Reading distance [mm]<br />
Resolution: 0.5 mm<br />
Aperture angle: 40°<br />
2200<br />
2100<br />
2000<br />
1900<br />
CLV 490-7010/-7011:<br />
Max. reading distance for 0.5 mm/40° reduced by<br />
25 % compared to max. reading distance for<br />
CLV 490-6010/6011<br />
1800<br />
1700<br />
1600<br />
max. reading distance<br />
1500<br />
1400<br />
1300<br />
1200<br />
min. reading distance<br />
1100<br />
1000<br />
900<br />
800<br />
700<br />
600<br />
500<br />
400<br />
500 700 900 1100 1300 1500 1700 1900 2100<br />
Focus position [mm]<br />
Characteristics field scanning frequency/<br />
reading distance: see Table 10-28, Page 10-30<br />
Reading conditions:<br />
see Table 10-1, Page 10-1<br />
Fig. 10-26: CLV 490-6010/-6011 (Low density): Min. and Max. reading distance (measured radially) as a function of the focus position<br />
at a resolution of 0.5 mm and an aperture angle of α =40°<br />
10-28 © SICK AG · Division Auto Ident · Germany · All rights reserved 8 008 796/0000/25-06-2002
Operating Instructions Chapter 10<br />
CLV 490 Bar Code Scanner<br />
Appendix<br />
Line scanner (front reading window): CLV 490-6010/-6011<br />
Reading distance [mm]<br />
2200<br />
Resolution: 0.5 mm<br />
Aperture angle: 60°<br />
2100<br />
2000<br />
1900<br />
CLV 490-7010/-7011:<br />
Max. reading distance for 0.5 mm/50° reduced<br />
by 25 % compared to max. reading distance for<br />
CLV 490-6010/6011<br />
1800<br />
1700<br />
1600<br />
1500<br />
1400<br />
max. reading distance<br />
1300<br />
1200<br />
1100<br />
min. reading distance<br />
1000<br />
900<br />
800<br />
700<br />
600<br />
500<br />
400<br />
500 700 900 1100 1300 1500 1700 1900 2100<br />
Focus position [mm]<br />
Characteristics field scanning frequency/<br />
reading distance: see Table 10-28, Page 10-30<br />
Reading conditions:<br />
see Table 10-1, Page 10-1<br />
Fig. 10-27: CLV 490-6010/-6011 (Low density): Min. and Max. reading distance (measured radially) as a function of the focus position<br />
at a resolution of 0.5 mm and an aperture angle of α =60°<br />
8 008 796/0000/25-06-2002 © SICK AG · Division Auto Ident · Germany · All rights reserved 10-29
Chapter 10<br />
Appendix<br />
Operating Instructions<br />
CLV 490 Bar Code Scanner<br />
Line scanner (front reading window): CLV 490-6010/-6011<br />
Scanning frequency [Hz]<br />
1300<br />
1200<br />
1100<br />
1000<br />
900<br />
800<br />
700<br />
600<br />
500 700 900 1100 1300 1500 1700 1900 2100<br />
Reading distance [mm]<br />
Resolution:<br />
0.50 mm<br />
Reading conditions:<br />
see Table 10-1, Page 10-1<br />
Fig. 10-28: Characteristics field CLV 490-6010/-6011: Scanning frequency as a function of the reading distance and resolution<br />
10-30 © SICK AG · Division Auto Ident · Germany · All rights reserved 8 008 796/0000/25-06-2002
Operating Instructions Chapter 10<br />
CLV 490 Bar Code Scanner<br />
Appendix<br />
10.2.8 Low density: Reading performance data of line scanner with<br />
oscillating mirror<br />
Line scanner with oscillating mirror (side reading window): CLV 490-7010/-7011<br />
Reading field height<br />
[mm]<br />
900<br />
800<br />
700<br />
600<br />
500<br />
400<br />
300<br />
200<br />
100<br />
0<br />
-100<br />
-200<br />
-300<br />
-400<br />
-500<br />
-600<br />
-700<br />
-800<br />
-900<br />
Reading distance [mm]<br />
400 600 800 1000 1200 1400 1600 1800 2000 2200<br />
Resolution: 0.5 mm<br />
Tilt<br />
–45° ... +45°<br />
–30° ... +30°<br />
–15° ...+15° (typical values!)<br />
Characteristics field scanning<br />
frequency/reading distance:<br />
see Fig. 10-30, Page 10-32<br />
Reading conditions:<br />
see Table 10-1,<br />
Page 10-1<br />
Aperture angle α = 40°<br />
Aperture angle α = 40°<br />
Fig. 10-29: CLV 490-7010/-7011 (Low density): Reading field height as a function of the reading distance and tilt at a resolution of<br />
0.5 mm<br />
8 008 796/0000/25-06-2002 © SICK AG · Division Auto Ident · Germany · All rights reserved 10-31
Chapter 10<br />
Appendix<br />
Operating Instructions<br />
CLV 490 Bar Code Scanner<br />
Reading distance at a resolution of 0.5 mm/aperature angle 40°<br />
see Fig. 10-26, Page 10-28<br />
Reading distance at a resolution of 0.5 mm/aperature angle 50°<br />
see Fig. 10-27, Page 10-29<br />
Line scanner with oscillating mirror (side reading window): CLV 490-7010/-7011<br />
Scanning frequency [Hz]<br />
1300<br />
1200<br />
1100<br />
1000<br />
900<br />
800<br />
700<br />
600<br />
500 700 900 1100 1300 1500 1700 1900 2100<br />
Reading distance [mm]<br />
Resolution:<br />
0.50 mm<br />
Reading conditions:<br />
see Table 10-1, Page 10-1<br />
Fig. 10-30: Characteristics field CLV 490-7010/-7011: Scanning frequency as a function of the reading distance and resolution<br />
10-32 © SICK AG · Division Auto Ident · Germany · All rights reserved 8 008 796/0000/25-06-2002
Operating Instructions Chapter 10<br />
CLV 490 Bar Code Scanner<br />
Appendix<br />
Line scanner with oscillating mirror (side reading window): CLV 490-7010/-7011<br />
Deflection range<br />
[mm]<br />
1600<br />
Deflection angle ±20°<br />
1200<br />
800<br />
-15 ... +15<br />
-30 ... +30<br />
-45 ... +45<br />
Deflection angle ±10°<br />
Deflection angle ±5°<br />
400<br />
0<br />
-400<br />
-400 0 400 800 1200 1600 2000 2400<br />
Reading distance [mm]<br />
Tilt:<br />
–45° ... +45°<br />
Resolution: 0.50 mm<br />
–30° ... +30°<br />
–15° ...+15°<br />
Reading conditions:<br />
see Table 10-1, Page 10-1<br />
Fig. 10-31: CLV 490-7010/-7011: Deflection range as a function of reading distance, deflection angle and tilt at a resolution of<br />
0.5 mm<br />
8 008 796/0000/25-06-2002 © SICK AG · Division Auto Ident · Germany · All rights reserved 10-33
Chapter 10<br />
Appendix<br />
Operating Instructions<br />
CLV 490 Bar Code Scanner<br />
10.3 Installing and operating the external parameter memory<br />
The external parameter memory is available as an accessory. It is located in a connector<br />
cover and comprises a permanent, rewriteable memory (EEPROM). The connector cover covers<br />
the two connections of the CLV in the enclosure rating IP 65. The cover is shown in<br />
Fig. 10-32. Two connection cables that are secured by means of conduit thread connections<br />
supply the signals to the CLV.<br />
22 22<br />
88.5<br />
50<br />
27<br />
27<br />
Fig. 10-32: External parameter memory, installed on the CLV<br />
The external parameter memory is available in different implementations:<br />
Order no. Two Connection cables with CLV Length Connection<br />
2 020 307 Two 15-pin D Sub HD plug connections<br />
(pin assignment identical to device connections)<br />
Without heater 3 m CLV to AMV/S 60<br />
AMV 30-071 and BMV 10<br />
2 020 981 Two open cable ends Without heater 3 m CLV to non-Sick Power pack, free wiring<br />
2 020 308 One 9-pin D Sub cable connector and one Without heater 3 m CLV to BMS 20<br />
open cable end<br />
2 021 689 Two 15-pin D Sub HD plug connections,<br />
(pin assignment identical to device connections)<br />
With heater 3 m CLV to AMV 100/200<br />
Table 10-4: External parameter memory<br />
10.3.1 Function<br />
When it is started, the CLV is initialized with the data stored in its internal parameter set. If<br />
this parameter set has been copied to an external memory, the device can be replaced easily.<br />
The replacement device, therefore, does not have to be configured manually. Instead, it<br />
accesses the external parameter memory automatically (assuming that the correct start<br />
option has been selected). It then imports the parameter set to its RAM. This option is set<br />
by default. The "Device Ready" and "Read Result" LEDs indicate whether the external memory<br />
was accessed successfully. The CLV also outputs plain-text messages for troubleshooting<br />
purposes on the terminal interface.<br />
10-34 © SICK AG · Division Auto Ident · Germany · All rights reserved 8 008 796/0000/25-06-2002
Operating Instructions Chapter 10<br />
CLV 490 Bar Code Scanner<br />
Appendix<br />
10.3.2 Installation and electrical connection<br />
The pin assignments for the connection cables of the parameter memory no. 2 020 307/<br />
no. 2 021 689 are shown in Table 5-5 and Table 5-6, Page 5-7.<br />
¾<br />
Mount the parameter memory on the CLV as shown in Chapter 5.5.3 Connecting the<br />
supply voltage, Page 5-13 and connect the cables to the AMV/S 60 Connection Module.<br />
The color assignment of the wiring for the open ends of the connection cables for the<br />
parameter memory no. 2 020 981 is shown in Table 5-12 and Table5-13, Page5-11.<br />
¾<br />
Mount the parameter memory on the CLV as shown in Chapter 5.5.3 Connecting the<br />
supply voltage, Page 5-13 and connect the cables to the external power supply.<br />
10.3.3 Operation<br />
The parameter memory connected to the CLV is accessed<br />
• using the selected CLV start option<br />
• after the parameters have been downloaded to the CLV with the permanent storage<br />
function and the START WITH EXTERNAL PARAMETERS option<br />
The start option is set at the bottom right of the DEVICE CONFIGURATION tab as shown in<br />
Fig. 10-33 (white frame). The START WITH EXTERNAL PARAMETERS option is selected by default.<br />
Fig. 10-33: CLV-Setup: "Device configuration" tab with the CLV start options<br />
Start with internal parameters<br />
When it starts, the CLV loads the internal parameter set to its RAM.<br />
The "Device Ready" LED lights up constantly.<br />
Since the data is stored permanently, it is not lost when the device is switched off.<br />
Start with external parameters (default setting)<br />
When it starts, the CLV loads the external parameter set to its RAM.<br />
The "Device Ready" LED blinks for approx. 10 s and then lights up constantly.<br />
The data in the CLV is lost when the device is switched off.<br />
8 008 796/0000/25-06-2002 © SICK AG · Division Auto Ident · Germany · All rights reserved 10-35
Chapter 10<br />
Appendix<br />
Operating Instructions<br />
CLV 490 Bar Code Scanner<br />
Start with copy internal -> external<br />
When it starts, the CLV loads the internal parameter set to its RAM. It then copies the parameter<br />
set to the external memory and resets the start option to START WITH EXTERNAL PARA-<br />
METERS.<br />
The two "Device Ready" and "Read Result" LEDs blink alternately for approx. 10 s. The "Device<br />
Ready" LED then lights up constantly.<br />
The data is not lost when the device is switched off since it is stored permanently in the CLV<br />
and is identical to the internal parameter set.<br />
10.3.4 Switching on the device for the first time<br />
Since the external parameter memory is empty on delivery, the "Device Ready" and "Read<br />
Result" LEDs blink constantly when the device is switched on for the first time with the default<br />
setting (START WITH EXTERNAL PARAMETER). The CLV has not found an external<br />
parameter set and has loaded the internal parameter set. However, it is not ready for<br />
operation and does not output data on the host interface.<br />
¾<br />
Transfer the CLV parameter set to the parameter memory for the first time as described<br />
in Chapter 6.3.2 Switching the CLV with external parameter memory connected on for<br />
the first time with the factory default settings, Page 6-4.<br />
10.3.5 Adjusting the parameter set in the external parameter memory after it has<br />
been downloaded to the CLV<br />
If the CLV is started with the START WITH EXTERNAL PARAMETERS option with an external parameter<br />
memory and if the parameter set is downloaded from CLV-Setup to the CLV with the<br />
permanent storage option, CLV-Setup asks you whether the new parameter set is also to<br />
be copied to the external parameter memory (Fig. 10-34). This function prevents the CLV<br />
from reloading the old parameter set the next time it starts.<br />
Fig. 10-34: CLV-Setup: dialog box for adjusting the external parameter memory<br />
¾<br />
Adjust the parameter set in the external parameter memory as described in<br />
Chapter 6.4.1 Configuring the CLV via the user interface of CLV-Setup, Page 6-5<br />
10-36 © SICK AG · Division Auto Ident · Germany · All rights reserved 8 008 796/0000/25-06-2002
Operating Instructions Chapter 10<br />
CLV 490 Bar Code Scanner<br />
Appendix<br />
10.3.6 Meaning of the LEDs<br />
The function of the two "Device Ready" and "Read Result" LEDs, as defined by the selected<br />
start option, is shown in Table 3-3, Page 3-10. Their function in the event of an error accessing<br />
the external memory as well as troubleshooting measures are described in Table 8-2,<br />
Page 8-5.<br />
10.3.7 Error messages<br />
If errors occur accessing the external parameter memory, the CLV outputs error messages<br />
on the terminal interface. When the CLV is started, these messages can be displayed using<br />
the "CLV-Setup" program.<br />
1. Connect the PC to the terminal interface on the CLV using an RS 232 cable (AMV/S 60:<br />
connect the PC to the internal 9-pin Service plug). See Chapter 5.5.5 Connecting the<br />
CAN interface, Page 5-15.<br />
2. Switch on the PC and start Windows.<br />
3. Start the "CLV-Setup" program and open the Terminal Emulator.<br />
4. Choose the extended display mode.<br />
5. Switch on the power supply for the AMV/S 60.<br />
The CLV starts and loads the parameter set from the external memory.<br />
6. Monitor the messages in the main window of the Terminal Emulator.<br />
Table 8-3, Page 8-7 lists the error messages in alphabetical order with the appropriate troubleshooting<br />
measures.<br />
10.3.8 Replacing a CLV<br />
The device is replaced by starting the new CLV with the START WITH EXTERNAL PARAMETERS option<br />
(default). This is the case when the device is put into service for the first time, e. g. when<br />
it is taken from the warehouse. The device must be replaced with a device of the same type.<br />
You do not need to connect a PC to replace the device.<br />
¾<br />
Replace the device as described in Chapter 10.12.2 Importing the parameter set from<br />
the external memory, Page 10-70.<br />
The CLV imports the external parameter set into the RAM. This is sufficient to ensure that<br />
the device operates correctly. If the parameter set is to be stored permanently in the CLV<br />
(EEPROM), a PC with the "CLV-Setup" program must be connected to upload the parameter<br />
set from the CLV to CLV-Setup and then download it again to the CLV with the PERMANENT<br />
storage option. When asked to do so, adjust the external memory again.<br />
8 008 796/0000/25-06-2002 © SICK AG · Division Auto Ident · Germany · All rights reserved 10-37
Chapter 10<br />
Appendix<br />
Operating Instructions<br />
CLV 490 Bar Code Scanner<br />
10.4 Optional heating<br />
10.4.1 Features<br />
• Integrated heater (permanently installed)<br />
• Wider range of applications for CLV: up to max. –35 °C<br />
• Supply voltage 24 V DC +20 %/–10 %<br />
• CLV enabled via internal temperature switch (power-up delay approx. 35 ... 40 min. at<br />
24 V DC and min. ambient temperature of –35 °C)<br />
• Required cable cross-section (power supply): min. 0.75 mm 2<br />
10.4.2 Design<br />
The heating system comprises two parts:<br />
• the front window heater<br />
• the housing heater<br />
The optional heating system is installed and tested at the factory. The user cannot install it<br />
on site.<br />
10.4.3 Function<br />
When the 24 V DC supply voltage is applied, a temperature switch first supplies electric<br />
current to the heater only. This switch enables the supply voltage for the CLV when the internal<br />
temperature rises above 7 °C during the warm-up phase (approx. 35 min). The device<br />
then performs a self-test and switches to Reading mode. The "Device Ready" LED lights up<br />
to indicate that the device is ready.<br />
When the internal temperature has reached approx. 25 °C, a further temperature switch<br />
deactivates the housing heater and reactivates it if necessary. Reading mode is not interrupted<br />
as a result. The front window heater remains active constantly. The temperature curve<br />
inside the housing is shown in Fig. 10-35.<br />
Temperature<br />
inside housing<br />
[°C]<br />
The temperature enables the operating<br />
voltage for the CLV internally<br />
Time [min]<br />
Fig. 10-35: CLV with heater: temperature curve inside the housing<br />
10-38 © SICK AG · Division Auto Ident · Germany · All rights reserved 8 008 796/0000/25-06-2002
Operating Instructions Chapter 10<br />
CLV 490 Bar Code Scanner<br />
Appendix<br />
10.4.4 Electrical installation<br />
Cable cross-section<br />
The connection cables for the power supply must have a cross-section of at least<br />
0.75 mm 2 .<br />
See also Chapter 5.4.2 Supply voltage, Page 5-8.<br />
Power consumption<br />
The power consumption depends on the variant:<br />
• Line scanner with heater: typically 75 W and max. 90 W<br />
• Line scanner with oscillating mirror and heater: typically 75 W and max. 100 W<br />
These values apply to operation without the switching outputs connected.<br />
AMV/S 60 Connection Module<br />
The AMV/S 60 Connection Module is not suitable to power the CLV with heater. An external<br />
power supply pack with a higher power output should be used for this purpose.<br />
See Chapter 3.1.3 System requirements, Page 3-2.<br />
10.4.5 Outdoor applications<br />
If the CLV with integrated heater is used outdoors, it should be installed in a protective housing<br />
to prevent the front window from being damaged by rain, snow, or dust. The housing<br />
also acts as a wind protector.<br />
8 008 796/0000/25-06-2002 © SICK AG · Division Auto Ident · Germany · All rights reserved 10-39
Chapter 10<br />
Appendix<br />
Operating Instructions<br />
CLV 490 Bar Code Scanner<br />
10.5 System messages<br />
The CLV outputs all system messages in plain text on the terminal interface. The messages<br />
are in English and can be displayed in the extended Terminal Emulator mode in the "CLV-<br />
Setup" program.<br />
See also Chapter 6.6.1 Displaying messages, Page 6-33.<br />
10.5.1 CLV without external parameter memory<br />
Message Meaning<br />
"CLV 490<br />
Soft.Vers. Vx.xx<br />
Aend. Nr. 0000<br />
CLV 490/OTS"<br />
"internal parameters loaded"<br />
"laser safety timeout"<br />
"no code"<br />
"No ext. parameter memory connected"<br />
The software version and revision is displayed when the power<br />
supply is switched on.<br />
When the CLV is started, it imports the parameter set that was last<br />
stored permanently in the internal EEPROM to the RAM<br />
The CLV has shut off the laser diode 10 minutes (default setting)<br />
after a reading pulse has begun. The reading interval is still active,<br />
even though the CLV is no longer reading. The reading interval has<br />
to be terminated by a corresponding pulse signal. The laser diode<br />
is activated again with the next reading pulse.<br />
In Reading/Percentage Evaluation mode, the CLV indicates that no<br />
codes matching the parameterized evaluation conditions were<br />
detected during the reading interval (error status ST = 2 output on<br />
the host interface).<br />
No external parameter memory was connected to the CLV when it<br />
was started.<br />
Table 10-5: CLV system messages<br />
10.5.2 CLV with external parameter memory connected<br />
In addition to the messages above, the CLV also indicates whether it was able to access the<br />
external parameter memory<br />
Message<br />
Meaning<br />
"diff. SW version of parameters" When the CLV was started, the software version of the parameter<br />
set in the external memory was different from that in the CLV. The<br />
parameter set is still transferred.<br />
"external parameters loaded" When the CLV was started, the external parameter set was<br />
imported successfully to the RAM.<br />
"internal parameters copied to<br />
external memory"<br />
When the CLV was started, the internal parameter set was<br />
successfully copied to the external parameter memory.<br />
Table 10-6: Additional CLV system messages for the connected parameter memory<br />
10-40 © SICK AG · Division Auto Ident · Germany · All rights reserved 8 008 796/0000/25-06-2002
Operating Instructions Chapter 10<br />
CLV 490 Bar Code Scanner<br />
Appendix<br />
10.6 Installing and operating the "CLV-Setup" program<br />
The scope of delivery of the CLV includes a CD-ROM containing the "CLV-Setup" program.<br />
The software can be installed on a PC with the following minimum configuration: 80486 processor,<br />
66 MHz, and 16 MB RAM, CD drive, serial interface and mouse (recommended) as<br />
well as an operating system Windows 95 TM /98 TM , Windows NT TM or Windows NT TM . Approximately<br />
26 MB of hard disk space is required to install CLV-Setup, CLV Assistant, CLV-Setup<br />
Help, and I-ViewPro TM offline browser.<br />
10.6.1 Preparations<br />
1. Make sure you have the CD-ROM at hand.<br />
2. Connect the CLV to the AMV/S 60 Connection Module (see Chapter 5.5.3 Connecting<br />
the supply voltage, Page 5-13).<br />
3. Connect the PC to the terminal interface on the CLV using an RS 232 cable<br />
(AMV/S 60: connect the PC to the internal 9-pin "Service" plug).<br />
See Chapter 5.5.5 Connecting the CAN interface, Page 5-15.<br />
4. Switch on the power supply to the AMV/S 60.<br />
Once the CLV has started, the "Device Ready" LED lights up.<br />
5. Switch on the PC and start Windows.<br />
10.6.2 Installing the software<br />
The "CLV-Setup" installation program creates a directory "CLV", a series of subdirectories,<br />
and the necessary links. A deinstaller is also installed automatically so that you can remove<br />
the program from the PC at any time. As of version V 2.6, CLV-Setup will only be available<br />
and further developed as a 32-bit application.<br />
Initial installation<br />
1. Close all Windows applications.<br />
2. Insert CD-ROM in CD-drive.<br />
3. Choose RUN in Windows.<br />
In the OPEN drop-down list, enter: "X:\setup.exe" (X = destination of drive).<br />
Confirm the dialog box with OK.<br />
– or –<br />
Open Windows Explorer, open the CD-ROM drive and double click on the "setup.exe"<br />
file.<br />
The installation program is started and guides you step by step through the installation<br />
procedure. The program asks you for your user name and company name. This information<br />
appears as a header in printouts. The "CLV-Setup" software, CLV Assistant and<br />
the CLV-Setup Help online help are installed according to the selected configuration.<br />
4. Install the I-ViewPro TM HTML browser if necessary (the system asks you whether you<br />
want to do so). If you choose not to install I-ViewPro TM , the system searches your hard<br />
disk for the Netscape Navigator TM and uses it to display the CLV-Setup Help.<br />
5. Read the Readme file that contains the latest information and problems regarding CLV-<br />
Setup.<br />
6. Then confirm the installation message by clicking OK.<br />
7. Restart the PC.<br />
The Windows DLL files are possibly updated.<br />
The "CLV-Setup" program and CLV-Setup Help are installed and ready.<br />
8 008 796/0000/25-06-2002 © SICK AG · Division Auto Ident · Germany · All rights reserved 10-41
Chapter 10<br />
Appendix<br />
Operating Instructions<br />
CLV 490 Bar Code Scanner<br />
The program logs all of the files that are installed to the "install.log file". This list is used by<br />
the deinstaller to remove the program and must not be deleted if you want to use the<br />
deinstaller at some time in the future.<br />
Updating the program<br />
There are two ways of installing a new version of CLV-Setup:<br />
• You can install the new version and still keep the old version (parallel installation)<br />
– or –<br />
• You can install the new version over the old version (overwrite)<br />
Installing the new version while still keeping the old one<br />
If you want to install the new version and still keep the old version of CLV-Setup, follow the<br />
procedure described under Initial installation. When the program asks you for the target<br />
directory, you must specify a new directory. Both versions of the software are then available<br />
but must not be started simultaneously. The configuration files "*.scl " of the old version can<br />
be used in the new version and contain the CLV parameter sets. In order to do so, copy the<br />
configuration files from the "data" directory of the old version to the "data" directory of the<br />
new version.<br />
Installing the new version over the old one<br />
Before you can install the new version of the software, you must remove the files of the old<br />
version – with the exception of the configuration files "*.scl", which contain the CLV parameter<br />
sets.<br />
The deinstaller of the old version removes the program files. You can use the deinstaller to<br />
remove all of the files (with the exception of the configuration files) or only selected files. The<br />
default setting is a complete deinstallation (the configuration files are not deleted). With the<br />
custom deinstallation, the files are listed and only selected files are deinstalled. If you choose<br />
this deinstallation method, make sure that the main directory containing the configuration<br />
files "*.scl" is not deleted. We recommend that you move these files to a different directory<br />
and copy them back to the "data" directory later.<br />
1. From the Windows Start menu, choose PROGRAMS and the deinstaller for CLV-Setup. The<br />
deinstaller starts and guides you step by step through the deinstallation procedure.<br />
2. Choose the deinstallation method (complete or custom).<br />
3. Install the new version of CLV-Setup as described under Initial installation, making sure<br />
to choose the same directory.<br />
The new version of CLV-Setup is installed. The configuration files of the old version can be<br />
used again.<br />
10-42 © SICK AG · Division Auto Ident · Germany · All rights reserved 8 008 796/0000/25-06-2002
Operating Instructions Chapter 10<br />
CLV 490 Bar Code Scanner<br />
Appendix<br />
10.6.3 Starting CLV-Setup<br />
The "CLV-Setup" program is launched with the following default settings:<br />
Communication<br />
Transmit control character<br />
Receive control character<br />
Unit of measure<br />
Browser<br />
Language<br />
Company name<br />
User name<br />
Automatic connection to CLV<br />
Initial screen<br />
Storage confirmation prompt<br />
Last type selected<br />
File storage location<br />
COM 1, 9 600 bit/s, 8 data bits, 1 stop bit, no parity<br />
Start: STX, Stop: ETX<br />
Start: STX, Stop: ETX<br />
Metric (depending on the selected installation)<br />
I-ViewPro TM (if installed), alternatively Netscape Navigator TM<br />
As selected for the installation<br />
As entered for the installation<br />
As entered for the installation<br />
On startup: yes<br />
On scanner selection: yes<br />
When the Terminal Emulator is started/closed: yes<br />
Yes<br />
Yes<br />
CLV 41x<br />
"data" (configuration files for CLV)<br />
Table 10-7: Default settings in CLV-Setup<br />
1. Switch on the PC and start Windows.<br />
2. Choose CLV-SETUP from the Start menu.<br />
The SICK logo is then followed by the initial screen.<br />
3. Confirm the initial screen.<br />
CLV-Setup then checks whether a CLV is connected to the COM 1 port on the PC (default<br />
setting in CLV-Setup) and whether the communication parameters on the PC<br />
match those on the CLV. If this is the case, the CONNECTED status is displayed with the<br />
CLV specification in the status bar right in the bottom of the screen. The CLV type (here:<br />
CLV 490) is displayed in the DEVICE drop-down list in the top right of the toolbar.<br />
The program then loads the internal description of the CLV as well as the default parameter<br />
values and displays them on the tabs. Finally, CLV-Setup uploads the current parameter set<br />
from the RAM of the CLV and displays the values on the tabs instead of the default values.<br />
You can edit the current parameter set on the tabs. The default values are displayed when<br />
the device is used for the first time.<br />
Troubleshooting<br />
If the program cannot establish communication, it outputs a timeout warning and displays<br />
NO CONNECTION in the status field. This may be because the CLV is not connected or because<br />
the communication parameters on the CLV do not match those on the PC. In this case, CLV-<br />
Setup enters the CLV type of the device it last communicated with in the DEVICE field on the<br />
toolbar. The default setting the first time the device is used is the CLV 41x. The software<br />
then loads the internal device description for this CLV type and displays the default values<br />
on the tabs.<br />
8 008 796/0000/25-06-2002 © SICK AG · Division Auto Ident · Germany · All rights reserved 10-43
Chapter 10<br />
Appendix<br />
Operating Instructions<br />
CLV 490 Bar Code Scanner<br />
1. Connect the PC to the terminal interface on the CLV using a RS 232 cable (AMV/S 60:<br />
connect the PC to the internal 9-pin "Service" plug).<br />
See Chapter 5.5.5 Connecting the CAN interface, Page 5-15.<br />
2. Click (AutoBaud detect) in the toolbar or choose OPTIONS, AUTOBAUD DETECT.<br />
CLV-Setup scans the serial interface by varying the communication parameters and<br />
sends a telegram to the CLV repeatedly. As soon as a response is registered from the<br />
CLV, CLV-Setup signals the detected communication parameters. Fig. 10-36 shows an<br />
example of the results of the AutoBaud detect function. The CONNECTED status is displayed<br />
right in the status bar in the bottom of the screen.<br />
3. Confirm the AUTO DETECT dialog box with OK.<br />
CLV-Setup displays the detected CLV type in a separate dialog box and asks you<br />
whether you want to upload the current parameter set from the CLV.<br />
4. Confirm the dialog box with Yes.<br />
CLV-Setup uploads the current parameter set from the RAM of the CLV to its database<br />
and displays the values on the tabs.<br />
You can edit the current parameter set on the tabs.<br />
Fig. 10-36: CLV-Setup: Result display of the AutoBaud Detect function<br />
– or–<br />
2. Choose OPTIONS, SERIAL INTERFACE from the menu bar.<br />
CLV-Setup displays the current communication parameter settings on the PC in the<br />
COM PARAMETERS dialog box.<br />
3. Make sure that the communication parameters on the PC and CLV are identical<br />
(connected COM port, 9 600 bit/s, 8 data bits, 1 stop bit, no parity)<br />
4. Confirm the dialog box with OK.<br />
CLV-Setup attempts to communicate with the CLV again.<br />
If it is successful, it displays the CONNECTED status right in the status bar in the bottom<br />
of the screen.<br />
5. Click in the toolbar.<br />
CLV-Setup then uploads the current parameter set from the RAM of the CLV to its<br />
database and displays the values on the tabs.<br />
You can edit the current parameter set on the tabs.<br />
10-44 © SICK AG · Division Auto Ident · Germany · All rights reserved 8 008 796/0000/25-06-2002
Operating Instructions Chapter 10<br />
CLV 490 Bar Code Scanner<br />
Appendix<br />
10.6.4 User interface<br />
The graphical user interface (GUI) of the CLV-Setup is largely self explanatory. The online<br />
CLV-Setup Help function provides a description of how to use the program under HELP , PRO-<br />
GRAMM INFORMATION. The GUI is shown in Fig. 10-37 below (V 3.1).<br />
The GUI comprises the following elements:<br />
• Title bar that displays the program name, current configuration file, and its status, e. g.<br />
No File<br />
• Menu bar with pull-down menus<br />
• Toolbar with buttons for triggering various functions<br />
• Drop-down list (top right) for selecting the device type<br />
• Up to 9 tabs (reading configuration, device configuration etc.). The parameters on the<br />
tabs are grouped according to their function. Some of these parameters open further<br />
dialog boxes.<br />
• Status bar (bottom) with two display fields for the communication between CLV-Setup<br />
and the CLV, the PC’s interface parameter display, error display field (system errors),<br />
device specification field and status display for the connection to the CLV.<br />
Fig. 10-37: User interface of the "CLV-Setup" software<br />
8 008 796/0000/25-06-2002 © SICK AG · Division Auto Ident · Germany · All rights reserved 10-45
Chapter 10<br />
Appendix<br />
Operating Instructions<br />
CLV 490 Bar Code Scanner<br />
10.6.5 Functions<br />
The "CLV-Setup" program features (version V 3.0 and above) the following function to carry<br />
out the following:<br />
• Upload the default parameter set from the database<br />
• Automatic communication attempt with the CLV when the program is started<br />
• Automatic software compatibility check in the CLV<br />
• Upload parameter set stored in the CLV<br />
• Change the values on the tabs<br />
• Save the changes to the parameter set in the CLV (download)<br />
• Save the changes to the parameter set as a configuration file "*.scl"<br />
• Print the configuration files<br />
• Export the configuration files in RTF format<br />
• Direct access to the CLV via a Terminal Emulator (select operating mode, start<br />
operating functions, log file for communication between the CLV and CLV-Setup,<br />
extended Terminal mode, e. g. for displaying CLV messages)<br />
• AutoBaud Detect for automatic communication setup with the CLV<br />
• Select the COM port for adapting the data transfer parameters<br />
• Observation monitor for the CLV host interface’s data communication<br />
• Select language setting<br />
• Select units of measure<br />
• Display the last 10 configuration files that were processed<br />
• Save the CLV type that was selected last<br />
• Automatic storage confirmation prompt when changes are made to the configuration file<br />
• Wizards for individual functions<br />
• CLV 490 only: Aligment check to calculate the required setting for angles<br />
• CLV 490 only: Background analysis<br />
• Set switches for starting the program (in the "CLVmain.ini" file)<br />
• Hot keys [F keys] for important functions (using the program without a mouse)<br />
• Start program with SCL file as argument<br />
• Context-sensitive help via the [F1] key<br />
10.6.6 CLV-Setup Help<br />
The procedure for setting the CLV parameters is supported by the online help function,<br />
which is displayed in an HTML browser, such as Netscape TM , Internet Explorer TM , or the<br />
I-View Pro TM browser supplied with the program. You can call up context-sensitive help on<br />
each parameter as well as a description of its function and permissible values.<br />
1. Press the [F1] key.<br />
The browser is launched automatically and displays the help topic.<br />
2. If the program cannot find a browser, it asks you to specify the storage location on the<br />
hard disk.<br />
Enter the name of the executable file and the path in the dialog box<br />
(e. g. "Iviewpro32.exe" in the "Iview" directory).<br />
3. Use the [ALT]+[TAB] keys to switch between the CLV-Setup and CLV-Setup Help<br />
applications and prevent several browser windows from being opened.<br />
4. To display an overview of the Help function, Choose HELP, CONTENTS from the CLV-Setup<br />
menu bar.<br />
10-46 © SICK AG · Division Auto Ident · Germany · All rights reserved 8 008 796/0000/25-06-2002
Operating Instructions Chapter 10<br />
CLV 490 Bar Code Scanner<br />
Appendix<br />
5. To display information on a tab, click the tab in the top, horizontal frame. The vertical<br />
frame on the left-hand side of the screen then displays a list of parameters.<br />
6. Click on a parameter in the list for a description.<br />
CLV-Setup Help then displays the associated help text in the right-hand frame and<br />
jumps to the parameter heading.<br />
10.6.7 Transferring parameter sets between CLV-Setup and the CLV<br />
See Chapter 6.4.1 Configuring the CLV via the user interface of CLV-Setup, Page 6-5.<br />
10.6.8 Unknown parameters<br />
Uploading from the CLV<br />
If CLV-Setup does not recognize certain parameters or parameter values when it uploads<br />
them from the CLV, it outputs a warning. This may be due to the fact that the CLV is a special<br />
model or because the version of CLV-Setup is older than the version on the CLV. CLV-Setup<br />
displays the unknown parameters in the window on the EXTRAS tab. The parameters are displayed<br />
in the form of command strings and can be edited using the command string<br />
conventions. In this way, upward compatibility with the CLV is ensured. When the parameter<br />
set is saved as a configuration file in CLV-Setup, these parameters are also included and<br />
are also downloaded to the CLV.<br />
Downloading to the CLV<br />
If the CLV does not accept individual parameters or parameter values in the parameter set<br />
downloaded with CLV-Setup, it outputs a separate warning for each parameter on the<br />
screen. This could be due to the fact that the version of the "CLV-Setup" software is newer<br />
than the software version on the CLV and therefore contains new parameters and parameter<br />
values that are not implemented in the older software version.<br />
We recommend that you check the effects of warnings in the CLV as follows:<br />
1. Check whether the CLV functions correctly after the parameter set is downloaded.<br />
2. Click in the toolbar.<br />
CLV-Setup loads the default settings from the database.<br />
3. Click in the toolbar.<br />
CLV-Setup uploads the problem parameter set from the CLV.<br />
4. Click in the toolbar.<br />
CLV-Setup prints out the problem parameter set when you confirm the dialog box.<br />
5. Open the previous configuration file "*.scl" for the CLV.<br />
6. Click in the toolbar.<br />
CLV-Setup prints out the parameter set used up to now when you confirm the dialog<br />
box.<br />
7. Compare the two parameter sets.<br />
To restore the previous status, correct individual parameters in the problem parameter<br />
set if necessary and download them to the CLV again.<br />
Opening configuration files "*.scl"<br />
Every time it loads configuration files, CLV-Setup checks whether it recognizes all the parameters/values.<br />
If the program detects an error, it outputs a warning and enters the problem parameter/<br />
value in the window on the EXTRAS tab.<br />
8 008 796/0000/25-06-2002 © SICK AG · Division Auto Ident · Germany · All rights reserved 10-47
Chapter 10<br />
Appendix<br />
Operating Instructions<br />
CLV 490 Bar Code Scanner<br />
10.6.9 Log file in the Terminal Emulator<br />
The Terminal Emulator can log the communication between CLV-Setup and the CLV.<br />
CLV-Setup stores the data transmitted in both directions with the following identifiers:<br />
--> PC: CLV sending to CLV-Setup<br />
PC --> CLV receiving from CLV-Setup<br />
1. Click in the toolbar.<br />
The Terminal Emulator window opens.<br />
2. Click the empty checkbox in front of the WRITE LOGFILE option on the right.<br />
The SAVE LOGFILE AS ... dialog box opens.<br />
3. Enter a file name with the extension ".log" and exit the window by choosing SAVE.<br />
CLV-Setup saves the file in the "data" directory and records an entry in the log file.<br />
4. To deactivate the log function, click the checkbox in front of the WRITE LOGFILE option<br />
again or close the Terminal Emulator window.<br />
10.6.10 Starting CLV-Setup with an "INI file" as an argument<br />
When the program is started, CLV-Setup can also be transferred the name of an "INI file" as<br />
a parameter. To do so, enter "/INI" in front of the file.<br />
Example:<br />
"CLVmain32.exe\data\Set1_490.scl /INI user.ini "<br />
CLV-Setup is launched with the initialization data contained in the "user.ini" file and loads the<br />
configuration file "Set1_490.scl" from the "data" directory straight away.<br />
The "user.ini" file must be stored in the same directory as "CLVmain32.exe".<br />
You can use this method to link CLV-Setup to several different configurations on your<br />
Windows desktop.<br />
In this way, for example, you can prevent CLV-Setup from attempting to establish a<br />
connection when a CLV is not connected.<br />
10.6.11 The CLV Assistant<br />
The CLV assistant is not suitable for parameterizing the CLV 490.<br />
10-48 © SICK AG · Division Auto Ident · Germany · All rights reserved 8 008 796/0000/25-06-2002
Operating Instructions Chapter 10<br />
CLV 490 Bar Code Scanner<br />
Appendix<br />
10.7 Configuring a CLV with command strings<br />
The CLV can be parameterized and operated with command strings via the terminal interface<br />
or the host interface. Parameters which are unknown to the CLV-Setup may be used<br />
providing that the command string convention is followed. This allows, among other things,<br />
the setting of special devices as well as the configuration of new CLV parameters (which are<br />
unknown to "CLV-Setup" program) if your version of the CLV is older in comparison. The<br />
"CLV-Setup" user interface is based on the command language.<br />
The command language accesses the CLV’s command interpreter directly. Use this language<br />
with care. Commands sent to the CLV are carried out immediately.<br />
Parameter values changed by commands are at first only activated in the current parameter<br />
set in the CLV’s RAM. The altered parameter values must be saved to non-volatile memory<br />
in the EEPROM (after the changes are made) using a special command. If the values are not<br />
saved, they will be lost when the voltage supply is cut off.<br />
The "CLV-Setup" Terminal Emulator’s online mode makes it possible to parameterize the<br />
CLV with command strings directly. Fig. 10-38 shows a view of the Terminal Emulator with<br />
command lines and PC/CLV communication output windows.<br />
!<br />
"<br />
Fig. 10-38: CLV-Setup: entering commands in the Terminal Emulator<br />
1. Click on in the symbol bar.<br />
The Terminal Emulator window opens. The CLV is in Reading mode.<br />
2. Under DEVICE MODE, click on the PARAMETERIZING option field.<br />
The CLV aborts reading mode. The "Device Ready" LED extinguishes.<br />
CLV-Setup switches the CLV into the parameterize mode with a command.<br />
All commands in parameterize mode begin with "3".<br />
3. Enter the desired command in command line 1, and press the key.<br />
The command is sent to the CLV.<br />
The CLV answers with an echo if the command was syntactically correct (in most cases).<br />
8 008 796/0000/25-06-2002 © SICK AG · Division Auto Ident · Germany · All rights reserved 10-49
Chapter 10<br />
Appendix<br />
Operating Instructions<br />
CLV 490 Bar Code Scanner<br />
Note<br />
Example:<br />
The command "3LT" causes the CLV to display the parameter values of the reading<br />
trigger in coded form in output window 2.<br />
4. To return to Reading mode, click on the READING MODE option field.<br />
The "Device Ready" LED lights up.<br />
The parameter values directly changed with command strings in the CLV are registered and<br />
shown only after the parameter set is uploaded from the CLV.<br />
A list of command strings, is available on request.<br />
10-50 © SICK AG · Division Auto Ident · Germany · All rights reserved 8 008 796/0000/25-06-2002
Operating Instructions Chapter 10<br />
CLV 490 Bar Code Scanner<br />
Appendix<br />
10.8 Calculating parameter values for setting the CLV<br />
10.8.1 Calculating the number of scans (for standard decoders)<br />
The maximum number of scans possible for a bar code depends on the conveyor velocity v.<br />
Line scanner: ladder-type bar code arrangement<br />
Line scanner: lateral reading at object<br />
I s<br />
v<br />
=<br />
s<br />
--<br />
t<br />
Calculation for<br />
standard decoder!<br />
v<br />
=<br />
l s<br />
t scan<br />
1<br />
------------------------ ; t<br />
n×<br />
scan<br />
= ---<br />
f<br />
v<br />
=<br />
l<br />
--- s<br />
× f<br />
n<br />
v<br />
n<br />
=<br />
l s<br />
v ----<br />
× f<br />
Specified values:<br />
Number of scans n = <br />
Convoyer velocity v = 1.5 m/s<br />
Bar length l S = 20 mm<br />
Scanning frequency f = 600 Hz<br />
Bar code 100 % readable<br />
n<br />
0.02 m<br />
= ---------------------- × 600/s n = 8<br />
1.5 m/s<br />
Fig. 10-39: Line scanner: calculating the number of scans for ladder-type bar code arrangements<br />
Line scanner: fence-type bar code arrangements<br />
Line scanner: lateral reading on object<br />
I c<br />
v<br />
=<br />
s<br />
--<br />
t<br />
Calculation for<br />
standard decoder!<br />
v<br />
=<br />
( – ) 1<br />
------------------------ ; t<br />
n<br />
scan<br />
= ---<br />
f<br />
l LH<br />
l c<br />
× t scan<br />
I LH<br />
v<br />
Specified values:<br />
Number of scans n = <br />
Convoyer velocity v = 2 m/s<br />
Code length with blanc zone l C = 150 mm<br />
Reading field height l LH = 400 mm<br />
Scanning frequency f = 600 Hz<br />
Bar code 100 % readable,<br />
all scans on the code<br />
Code window s = l LH – l C<br />
v =<br />
n =<br />
n =<br />
( l LH<br />
– l c<br />
)<br />
----------------------- × f<br />
n<br />
( l LH<br />
– l c<br />
)<br />
----------------------- × f<br />
v<br />
( 0.4 – 1.5) m<br />
-------------------------------------- × 600/ s<br />
2 m/s<br />
n = 75<br />
Fig. 10-40: Line scanner: calculating the number of scans for fence-type bar code arrangements<br />
8 008 796/0000/25-06-2002 © SICK AG · Division Auto Ident · Germany · All rights reserved 10-51
Chapter 10<br />
Appendix<br />
Operating Instructions<br />
CLV 490 Bar Code Scanner<br />
Line scanner with oscillating mirror: fence-type bar code arrangement<br />
Line scanner with oscillating mirror: side read on object<br />
I LM<br />
I CW<br />
Calculation for<br />
standard decoder!<br />
I c<br />
10°<br />
Specified values:<br />
Number of scans n = <br />
Conveyer velocity v = 0.5 m/s<br />
Code length with blanc zone l C = 100 mm<br />
Code length under 10°:<br />
100 mm<br />
l CW<br />
= ---------------------------- = 102 mm<br />
cos 10<br />
Reading field height l LH = 500 mm<br />
Scanning frequency f = 600 Hz<br />
Bar code 100 % readable, all scans on the code<br />
Code windows = l LH - l C<br />
1. Dwell time of the bar code<br />
in the reading area:<br />
2. Required oscillating mirror<br />
frequency:<br />
t<br />
=<br />
s<br />
--<br />
v<br />
1<br />
f SW<br />
= ---<br />
t<br />
t =<br />
t =<br />
( l LH<br />
– l CW<br />
)<br />
-----------------------------<br />
v<br />
( 0.5 – 0.102)<br />
---------------------------------------<br />
0.5 m/s<br />
t = 796 ms<br />
1<br />
f SW<br />
= ----------------------<br />
0.796 s<br />
f SW = 1.26 Hz<br />
3. Number of possible scans<br />
(rough estimate):<br />
n<br />
=<br />
f<br />
---------<br />
f SW<br />
n<br />
=<br />
600 Hz<br />
----------------------<br />
1.26 Hz<br />
n = 476<br />
Fig. 10-41: Line scanner with oscillating mirror: calculating the number of scans for fence-type bar<br />
code positioning<br />
10-52 © SICK AG · Division Auto Ident · Germany · All rights reserved 8 008 796/0000/25-06-2002
Operating Instructions Chapter 10<br />
CLV 490 Bar Code Scanner<br />
Appendix<br />
10.8.2 Calculating the start position and mirror speed for the forward and return<br />
phase of the One-Shot function<br />
Line scanner with oscillating mirror<br />
Theoretical calculation: reading from the front (object moving towards CLV)<br />
v<br />
h o<br />
A<br />
d<br />
B<br />
(Scanning direction is vertical to drawing plane)<br />
x 1<br />
x 2<br />
d<br />
h s<br />
Legend:<br />
Calculation for<br />
Standard decoder!<br />
h 0 = Max. object height<br />
h S = Distance of the CLV across conveyor level<br />
ϕ = Oscillating angle<br />
α = Max. angle of impact on bar code (skew)<br />
Start Phase 1: Point A<br />
Start Phase 2: Point B<br />
Specified values:<br />
h S > h 0<br />
α ≤ 45° (better: α ≤ 30°)<br />
Set max. deflection angle: ±20°<br />
¾ Determine distances through measurement:<br />
x 1 = Distance at Start Phase 1<br />
x 2 = Distance at Start Phase 2<br />
1. Focus position for distance configuration:<br />
h s<br />
sin α= ---- ⇒ d =<br />
d<br />
2. Oscillating angle ϕ<br />
γ = 90°– α<br />
cos( ϕ + γ)<br />
=<br />
( h s<br />
– h 0<br />
)<br />
-------------------------<br />
d<br />
( )<br />
h s<br />
– h 0<br />
ϕ=<br />
arc cos⎛--------------------------⎞ – γ<br />
⎝ d ⎠<br />
h<br />
------------ s<br />
sinα<br />
¾ Enter ϕ symmetrically to CW = 50:<br />
StartPos 1 50 CW ϕ 2 --- 1 CW<br />
= + × ---------------<br />
⎝<br />
⎛ 0.5 ⎠<br />
⎞<br />
3. Mirror speed ϕ *) :<br />
v<br />
ϕ*<br />
⇒<br />
=<br />
∆x<br />
------ ; ∆x = x<br />
∆t<br />
1<br />
– x 2<br />
=<br />
∆x<br />
------<br />
v<br />
∆ϕ<br />
-------<br />
∆t<br />
During the period ∆t, in which the object moves from x 1 to x 2<br />
the oscillating mirror must also pass through the angle ∆ ϕ<br />
= ------<br />
∆ϕ<br />
ϕ* = ∆ϕ<br />
ϕ*<br />
v<br />
× ------ where 1 °/s = 2 CW/s<br />
∆x<br />
When entering the values, note the following:<br />
– Debouncing time of the Sensor 2 switching input<br />
(One-Shot trigger)<br />
– Start time of the oscillating mirror<br />
(inertia)<br />
StartPos 2 50 CW ϕ 2 --- 1 CW<br />
= – × ---------------<br />
⎝<br />
⎛ 0.5 ⎠<br />
⎞<br />
¾<br />
¾<br />
Select the mirror speed of the return phase, in accordance<br />
with the distances between the objects, so that the scan<br />
line returns to the starting position (Point A) at the right<br />
time.<br />
Check the theoretically calculated values on site and adapt<br />
them if required.<br />
Fig. 10-42: One-Shot: Line scanner with oscillating mirror: calculating the number of scans for fence-type bar code positioning<br />
8 008 796/0000/25-06-2002 © SICK AG · Division Auto Ident · Germany · All rights reserved 10-53
Chapter 10<br />
Appendix<br />
Operating Instructions<br />
CLV 490 Bar Code Scanner<br />
10.8.3 Calculating the necessary bar code distance if several bar codes are read on<br />
each object<br />
dx<br />
A B C D E A B C D E<br />
dx<br />
dy<br />
A B C D E A B C D E<br />
SMART Decoder:<br />
for bar codes with identical code type and identical or different data contents.<br />
Distance dx:<br />
Distance dy:<br />
min. 60 x module width<br />
e. g. 30 mm for module width 0.5 mm<br />
7 x d scan<br />
where d scan = vertical distance between two consecutive scan lines<br />
e. g. scan line 90 to bar code, scanning frequency 800 Hz, v = 2 m/s<br />
V<br />
2000 mm/s<br />
dscan = ---- dscan = -------------------- = 2.5<br />
f 800 /s<br />
dy = 7 x 2.5 mm = 17.5 mm<br />
Standard Decoder:<br />
The above distances are also required for reading bar codes with identical names (identical<br />
data content and code types).<br />
Prerequisite for separating bar codes with identical names:<br />
1. The CODE DISTANCE between the bar codes must be parameterized correctly<br />
(DEVICE CONFIGURATION tab, EDIT TRACKING PARAMETERS button)<br />
2. The code position comparison must be activated<br />
(CODE CONFIGURATION tab, under CODE POSITION)<br />
Bar code lines in conveyor direction:<br />
If the scan line is to detect bar codes of the same name with the same code position, the travel<br />
information must be supplied by an external incremental sensor or the internal INC timer so<br />
that the bar codes can be distinguished from one another.<br />
Rule of thumb: the blank zone should surround the bar code completely!<br />
Fig. 10-43: Required distance between the bar codes on an object<br />
10-54 © SICK AG · Division Auto Ident · Germany · All rights reserved 8 008 796/0000/25-06-2002
Operating Instructions Chapter 10<br />
CLV 490 Bar Code Scanner<br />
Appendix<br />
10.9 Tables<br />
10.9.1 Calculating the code length of a bar code<br />
The code length of a bar code is the number of useful characters in the printed code<br />
including the check digit (if present). This code length must be specified in CLV-Setup.<br />
If the code type of a bar code is known, the code length can be calculated by counting the<br />
bars and gaps. The relevant formulas are provided in Table 10-8.<br />
1. Count the bars and gaps as specified in Table 10-8.<br />
Do not forget to include the start and stop characters.<br />
2. Calculate the code length using the formula in the table.<br />
3. Enter the value in CLV-Setup as described in column 4 in the table.<br />
Code type Count Calculation of code length 1)2) Entry in CLV-Setup<br />
Code 39 Number of bars Number – 10<br />
Calculated code length<br />
I Code = —————————<br />
5<br />
2/5 Interleaved Number of wide elements<br />
(bars and gaps)<br />
Number – 1<br />
I Code = —————————<br />
2<br />
EAN Not applicable 13 characters (normal version)<br />
8 characters (short version)<br />
UPC Not applicable 12 characters (UPC A, normal version)<br />
6 characters (UPC E, short version)<br />
Codabar Number of bars Number – 8<br />
I Code = —————————<br />
4<br />
Code 128<br />
(character set A)<br />
Code 93<br />
Number of bars Number – 10<br />
I Code = —————————<br />
3<br />
Number of bars plus<br />
separator after the<br />
stop character<br />
Number – 13<br />
I Code = —————————<br />
3<br />
EAN 128 Number of bars Number – 10<br />
I Code = —————————<br />
3<br />
1) Check digit optional for Code 39, 2/5 Interleaved, Codabar.<br />
Check digit always integrated in printed bar code with EAN, UPC, Code 128, Code 93, EAN 128<br />
(suppressed automatically when the CLV read result is output)<br />
2) With only few exceptions each printed character that has to be decoded corresponds to an ASCII character.<br />
With Code 39 extended, Code 93, Code 128 and EAN 128, the number of characters in the data string of the CLV<br />
can be larger than the number of characters in the printed code because it comprises several character sets.<br />
Table 10-8: Formulas for calculating the code length of a bar code<br />
Calculated code length<br />
Activate 13-digit<br />
Activate 8-digit<br />
Activate Version A<br />
Activate version E<br />
Calculated code length<br />
Calculated code length<br />
Calculated code length<br />
Calculated code length<br />
8 008 796/0000/25-06-2002 © SICK AG · Division Auto Ident · Germany · All rights reserved 10-55
Chapter 10<br />
Appendix<br />
Operating Instructions<br />
CLV 490 Bar Code Scanner<br />
10.10 Discussion of a parameterization example<br />
10.10.1 Application Conditions<br />
• Reading with the CLV 490’s autofocus function<br />
• Reading the packages from above<br />
• Barcode with lines running vertically on the top side of the package, tilt across from the<br />
scan line: ±30°<br />
• Package height: 100 ... 600 mm, package width: 200 ... 550 mm, packages not guided<br />
• Conveyer velocity: v = 1 m/s, conveyer belt width: 600 mm<br />
• Object distance between packages: min. 300 mm<br />
• Barcode: 2/5 Interleaved, module width 0.4 mm, line length 15 mm, PR 2.5:1,<br />
Quality 3 or 4, 14 characters with test code (mod 10)<br />
• Do not read under plastic sheeting, do not use very dark packages<br />
(spectral reflection > 20 %)<br />
• 1 barcode per package<br />
• Reading pulse is through a SICK photoelectric switch<br />
• Output of read results via the host interface<br />
• Parameterization of the CLV based on the factory defaults<br />
Requirements:<br />
• Testing the application for feasability with the CLV 490 before buying, with the help of<br />
the SMART calculation sheet (service provided by SICK)<br />
• Choice of CLV type: here standard density line scanner (CLV 490-0010)<br />
• No objects irrelevant for reading portruding into conveyor path<br />
Tools:<br />
• Measuring tape (up to 3 000 mm)<br />
• Protractor (to set up the CLV)<br />
• A PC with Windows and the SICK software "CLV-Setup"<br />
• RS-232 interface (pin 2 and pin 3 crossed), e. g. no. 2 014 054<br />
• These operating instructions<br />
10.10.2 Purpose of this discussion<br />
• To make important clarifications<br />
• To indicate the fitting location of the CLV<br />
• To point out the parameters to be set in the CLV-Setup user interface<br />
10.10.3 Instructions for solution – step by step<br />
¾<br />
¾<br />
¾<br />
¾<br />
¾<br />
Determine the reading range and CLV’s installation height over the conveyor belt<br />
Determine the CLV’s distance measurement type<br />
Mount the CLV<br />
Parameterize the CLV<br />
Test an application<br />
10-56 © SICK AG · Division Auto Ident · Germany · All rights reserved 8 008 796/0000/25-06-2002
Operating Instructions Chapter 10<br />
CLV 490 Bar Code Scanner<br />
Appendix<br />
10.10.4 Important clarifications<br />
¾ Sketch out the reading situation and enter the parameter values and variables for the CLV.<br />
y coord.<br />
a) View from the front<br />
b) Side view<br />
Y2 Y1<br />
alpha = 270° beta = 10°<br />
Z2<br />
z coord.<br />
1400<br />
700<br />
10<br />
x coord.<br />
100<br />
Z1<br />
LS<br />
200<br />
100<br />
300<br />
550<br />
600<br />
All values in mm<br />
Fig. 10-44: Parameterization example: prepare a sketch of the reading situation<br />
¾<br />
¾<br />
Determine the reading range and installation height of the CLV above the conveyor belt:<br />
With a covered conveyor belt with a 600 mm width, the CLV can read an object at a distance<br />
of 600 mm (according to the reading field diagram in Fig. 10-1, Page 10-3). For<br />
a reserve of an additional 100 mm and a maximum package height of 600 mm, the resulting<br />
reading range of the CLV can be set to 700 ... 1 300 mm from the reading window.<br />
The CLV is to be mounted 1 400 mm above the conveyor belt, as the package must be<br />
at least 100 mm high.<br />
Determine the CLV’s distance measurement type:<br />
For the required total field depth range of 600 mm, a height detection of the focal position<br />
changeover is required. This is carried out by activating the CLV’s direct distance<br />
measurement (the basis of the autofocus function).<br />
10.10.5 Mounting and electrical connection<br />
1. Mount the CLV centered 1 400 mm above the conveyor belt (vertically) according to<br />
a) Fig. 10-44 , reading window facing downward.<br />
2. Align and screw in the CLV in a reading axis with the reading window at a 10° angle<br />
against the required reading direction as shown in b) Fig. 10-44<br />
The CLV can carry out a distance measurement from the front of the package to the<br />
top of the package while it is in motion.<br />
3. Attach the pulse photoelectric switch and reflector to the conveyor belt so that there is<br />
a distance of approx. 100 mm between the photoelectric switch and the scan line<br />
position on the package with the smallest height.<br />
4. Connect the CLV to the AMV/S 60 connection module.<br />
(see Chapter 5.2.3 Connections/cables for the AMV/S Connection Module, Page 5-3)<br />
5. Connect the pulse photoelectric switch to the AMV/S 60 connection module<br />
(see Chapter 5.5.7 Connecting the switching inputs, Page 5-16).<br />
6. Turn on the supply voltage to the CLV.<br />
8 008 796/0000/25-06-2002 © SICK AG · Division Auto Ident · Germany · All rights reserved 10-57
Chapter 10<br />
Appendix<br />
Operating Instructions<br />
CLV 490 Bar Code Scanner<br />
10.10.6 Parameterize the CLV with the "CLV-Setup" program<br />
1. Connect the PC to the CLV’s terminal interface (see Chapter 5.5.5 Connecting the CAN<br />
interface, Page 5-15)<br />
2. Start Windows and the "CLV-Setup" program on the PC.<br />
3. Invoke the CLV 490’s default setting in the "CLV-Setup" program<br />
(see Chapter 6.1 Overview of steps for starting up the CLV, Page 6-1).<br />
4. Parameterize the CLV with the help of Chapter 6.4.4 Guide to parameterization menu,<br />
Page 6-8 and the tab cards by following the steps described.<br />
5. After completing parameter value alterations, download them to the CLV!<br />
(see chapter Chapter 6.4.1 Configuring the CLV via the user interface of CLV-Setup,<br />
Page 6-5).<br />
1. Setting up the autofocus function (Part 1): READING CONFIGURATION tab<br />
¾ Set the following parameters:<br />
– Scanning frequency: 800 Hz<br />
– Start/stop ratio: auto<br />
– Trigger for focus position changeover: autofocus<br />
– Autofocus mode: differential background<br />
Fig. 10-45: Parameterization example: settings on the "Reading Configuration" tab<br />
¾<br />
Click on the EDIT AUTOFOCUS button.<br />
The EDIT AUTOFOCUS dialog window then opens.<br />
¾ Set the following parameters on the ADJUSTMENTS tab (Fig. 10-46, Page 10-59):<br />
– Preference of focus distance: Fix focus position: 1200 mm<br />
(approx. 100 mm above the packet with the smallest height)<br />
10-58 © SICK AG · Division Auto Ident · Germany · All rights reserved 8 008 796/0000/25-06-2002
Operating Instructions Chapter 10<br />
CLV 490 Bar Code Scanner<br />
Appendix<br />
Fig. 10-46: Parameterization example: "Edit Auto Focus/Adjustments" dialog window<br />
¾<br />
To set the background, switch to the LIMIT VALUES tab in the same dialog window (Fig.<br />
10-47). The background is formed using the autofocus area’s terminating planes. The<br />
CLV registers the altered reading distances in this area only.<br />
– Autofocus limitation: min: 600 mm; max: 1400 mm<br />
– Autofocus space: Right edge of conveyor (Y1): 50 mm<br />
(Limiting levels Left edge of conveyor (Y2): 550 mm<br />
from feed level) Level of conveyor (Z1): 50 mm<br />
Maximum scanning height (Z2): 800 mm<br />
Fig. 10-47: Parameterization example: "Edit Auto Focus/Limits" dialog window<br />
8 008 796/0000/25-06-2002 © SICK AG · Division Auto Ident · Germany · All rights reserved 10-59
Chapter 10<br />
Appendix<br />
Operating Instructions<br />
CLV 490 Bar Code Scanner<br />
¾ Set the following parameters on the OPTIMIZATION tab (Fig. 10-48)<br />
– Delay of focus change<br />
Timeout: 50 ms<br />
Hysteresis: 50 mm<br />
– Distance Measurement: active<br />
– Source of Distance information: internal<br />
– Smooth filter active: active Length: 3<br />
Fig. 10-48: Parameterization example: "Edit Auto Focus/Optimizations" dialog window<br />
¾<br />
Confirm the dialog window by clicking "OK".<br />
2. Setting up the autofocus function (Part 2): DEVICE CONFIGURATION tab<br />
Fig. 10-49: Parameterization example: Buttons on the "Device Configuration" tab<br />
10-60 © SICK AG · Division Auto Ident · Germany · All rights reserved 8 008 796/0000/25-06-2002
Operating Instructions Chapter 10<br />
CLV 490 Bar Code Scanner<br />
Appendix<br />
¾<br />
Click on the EDIT SCANNER POSITION tab.<br />
The EDIT SCANNER POSITION dialog window then opens.<br />
Set the following CLV position definition parameters regarding the movement level (see also<br />
Fig. 10-44, Page 10-57):<br />
¾ Set the following parameters on the ANGLES tab:<br />
–Angle alpha: 90 degrees (Laser beam’s direction of deflection relative to the direction<br />
of convoyer belt.<br />
– Angle beta: 10 degrees (Laser beam’s angle of incidence relative to the perpendicular<br />
in the area (Skew to the barcode), 10 degrees in the direction of feed)<br />
– Angle gamma: 0 degrees (Divergence of the scanner (reading windows) from the<br />
perpendicular in the plane askew to the direction of feed)<br />
Fig. 10-50: Parameterization example: "Edit Scanner Position/Angles" dialog window<br />
¾ Set the following parameters on the COORDINATES tab, see Fig. 10-51, Page 10-62<br />
– X coordinate: Measure the distance from the pulse photoelectric switch to the<br />
CLV’s reading window perpendicular!<br />
(x offset + x coordinate = the distance from the pulse photoelectric switch to the<br />
CLV’s reading window perpendicular)<br />
–Y coordinate: 300 mm (The middle of the CLV to the left edge of the conveyor belt<br />
in the direction of convoyer belt)<br />
– Z coordinate: 1400 mm (Height of the CLV above the conveyor belt)<br />
8 008 796/0000/25-06-2002 © SICK AG · Division Auto Ident · Germany · All rights reserved 10-61
Chapter 10<br />
Appendix<br />
Operating Instructions<br />
CLV 490 Bar Code Scanner<br />
Fig. 10-51: Parameterization example: "Edit Scanner Position/Coordinates" dialog window<br />
¾<br />
Confirm the dialog box with "OK".<br />
3. Set the reading pulse source: DEVICE CONFIGURATION tab<br />
¾<br />
¾<br />
In the READING TRIGGER MODE group click the option Sensor Input (Active High).<br />
In the Output on Good read group click the option End of label.<br />
Fig. 10-52: Parameterization example: Settings on the "Device Configuration" tab<br />
¾<br />
Confirm the dialog box with "OK".<br />
10-62 © SICK AG · Division Auto Ident · Germany · All rights reserved 8 008 796/0000/25-06-2002
Operating Instructions Chapter 10<br />
CLV 490 Bar Code Scanner<br />
Appendix<br />
4. Set the evaluation properties: CODE CONFIGURATION tab<br />
¾<br />
Set the following parameters:<br />
- Codes: 2/5 Interleaved; deactivate all other code types! (remove check)<br />
- Number of Codes: Minimum 1, Maximum 1<br />
- Code Positions: deactivate (remove check)<br />
- Decoder: SMART/Standard<br />
Fig. 10-53: Parameterization example: settings on the "Code Configuration" tab<br />
¾<br />
¾<br />
Click on the EDIT CODES button.<br />
Set the following parameters on the 2/5 INTERLEAVED tab in the dialog window:<br />
- Code Length: Fixed; length 1: 14 characters<br />
- Multiple Reads for Length 1: 3<br />
- Check Digit Test for Length 1: mod 10<br />
- Transmit Check Digit: activate<br />
- Transmit Leading Zero: activate<br />
Fig. 10-54: Parameterization example: "2/5 Interleaved" tab<br />
¾<br />
Confirm dialog box with ”OK”.<br />
8 008 796/0000/25-06-2002 © SICK AG · Division Auto Ident · Germany · All rights reserved 10-63
Chapter 10<br />
Appendix<br />
Operating Instructions<br />
CLV 490 Bar Code Scanner<br />
5. Set the output properties: HOST INTERFACE tab<br />
¾ Set the CLV’s end-user communication condition parameters<br />
Fig. 10-55: Parameterization example: "Host interface" tab (base setting)<br />
DATA STRINGS tab<br />
¾ Set the CLV output message format in the end-user communication conditions<br />
Fig. 10-56: Parameterization example: "Data Strings" tab (basic setting)<br />
¾<br />
Perform download to CLV.<br />
10.10.7 Testing the application<br />
¾<br />
Check the reading rate with the Terminal Emulator in the CLV-Setup while an application<br />
is running.<br />
The reading rate should be > 90%.<br />
10-64 © SICK AG · Division Auto Ident · Germany · All rights reserved 8 008 796/0000/25-06-2002
Operating Instructions Chapter 10<br />
CLV 490 Bar Code Scanner<br />
Appendix<br />
10.11 Special applications and procedures<br />
10.11.1 Auxiliary input<br />
If the CLV cannot read a bar code in Reading mode (e. g. if there is no bar code on the object),<br />
the data content of the bar code can be sent subsequently to the host by using the<br />
"Auxiliary input" function. In this way, the sequence of reading results can be completed if<br />
necessary.<br />
The auxiliary input function uses the terminal interface of the CLV exclusively and features<br />
two options:<br />
• <strong>Manual</strong> entry of the data content on the keyboard of a connected terminal or PC<br />
(Terminal Emulation function)<br />
• Entry of the bar code using a hand-held reader. The data is then forwarded to the CLV<br />
via an internal or external decoder.<br />
Fig. 10-57 shows the basic auxiliary input principle.<br />
CLV<br />
Data contents +<br />
Status ST=7<br />
HOST<br />
Data<br />
contents<br />
Fig. 10-57: Auxiliary input via the terminal interface of the CLV<br />
The CLV sends the data content of the bar code that it receives via the terminal interface to<br />
the host in the same format as the other reading results on the host interface. Each string<br />
can contain the data from a bar code with a maximum length of 50 characters. The CLV automatically<br />
enters the status ST = 7 if the error status has been enabled for transmission.<br />
The values of the other reading diagnosis data in the data string do not have any significance.<br />
To enable the CLV to receive the data content of the bar code on the terminal interface, you<br />
must switch the operating mode on the interface to auxiliary input .<br />
1. Connect the PC to the terminal interface on the CLV using an RS 232 data connection<br />
cable (AMV/S 60: connect the PC to the internal 9-pin "Service" plug).<br />
See Chapter 5.5.5 Connecting the CAN interface, Page 5-15.<br />
2. Start CLV-Setup on your PC.<br />
See Chapter 10.6.3 Starting CLV-Setup, Page 10-43.<br />
3. Choose the AUXILIARY INTERFACE tab.<br />
4. Choose the AUXILIARY INPUT option from the drop-down list.<br />
5. Download the changes to the CLV by clicking in the toolbar .<br />
The DOWNLOAD PARAMETERS dialog box is then displayed.<br />
6. Confirm the dialog box by choosing the TEMPORARY storage option.<br />
The terminal interface then operates temporarily in "Auxiliary input" mode.<br />
8 008 796/0000/25-06-2002 © SICK AG · Division Auto Ident · Germany · All rights reserved 10-65
Chapter 10<br />
Appendix<br />
Operating Instructions<br />
CLV 490 Bar Code Scanner<br />
Entering the bar code using the Terminal Emulator function in CLV-Setup<br />
1. Click on the toolbar.<br />
The Terminal Emulator is launched.<br />
The CLV is in Reading mode.<br />
2. Click the EXTENDED radio button in the TERMINAL MODE section.<br />
The start and stop characters used by the Terminal Emulator are displayed at the top<br />
of the screen, on the left and right of the text input field.<br />
Fig. 10-58 shows the Terminal Emulator window in extended mode.<br />
3. Use the drop-down lists to set the start and stop characters to NUL.<br />
4. Enter the data content of the bar code (character string) on the keyboard.<br />
Use the backspace key to correct any input errors.<br />
The data content must not contain control characters.<br />
5. Press the [RETURN] or [ENTER] key.<br />
The CLV then interprets all further characters as a new data string.<br />
CLV-Setup sends the character string to the CLV and deletes the entry in the text field.<br />
The CLV does not send an echo.<br />
6. Once the active reading pulse has ended, the CLV sends the data received from the PC<br />
to the host via the host interface.<br />
Fig. 10-58: CLV-Setup: auxiliary input on the Terminal Emulator<br />
10-66 © SICK AG · Division Auto Ident · Germany · All rights reserved 8 008 796/0000/25-06-2002
Operating Instructions Chapter 10<br />
CLV 490 Bar Code Scanner<br />
Appendix<br />
Entering a bar code using a terminal/PC keyboard<br />
1. Connect the terminal /PC with Terminal Emulation program to the terminal interface on<br />
the CLV (via AMV/S 60). For the pin assignment, see Chapter 5.5.5 Connecting the CAN<br />
interface, Page 5-15.<br />
2. Set the communication parameters and data output format as shown in Table 10-9.<br />
Parameter<br />
Value<br />
Data transmission rate 9 600 bit/s<br />
Data bits 8<br />
ParityNone<br />
Stop bits 1<br />
Data output format Data terminator<br />
e. g. 1234 CR<br />
Table 10-9: Communication parameters on the terminal/PC for the auxiliary input<br />
3. Enter the data content of the bar code on the keyboard.<br />
The terminal sends the individual characters to the CLV immediately.<br />
Use the backspace key to correct input errors.<br />
4. Terminate the data content with the control character .<br />
The CLV then interprets all further characters as a new data string and ignores other<br />
control characters. The data content itself must not contain any control characters.<br />
5. Once the active reading pulse has ended, the CLV sends the data received from the PC<br />
to the host via the host interface.<br />
Entering bar codes using a handheld scanner with decoder<br />
1. Connect the handheld scanner with decoder to the terminal interface of the CLV (via<br />
AMV/S 60). For the pin assignment, see Chapter 5.5.5 Connecting the CAN interface,<br />
Page 5-15.<br />
2. Set the data format and communication parameters on the handheld scanner as shown<br />
in Table 10-9.<br />
3. Read the bar code with the handheld scanner.<br />
Once the active reading pulse has ended, the CLV sends the data received from the PC<br />
to the host via the host interface.<br />
If you are using the ST 1100 decoder from SICK, for example, set the communication parameters<br />
and data output as shown in Table 10-10.<br />
Parameter<br />
Value<br />
Terminal ID<br />
Unassigned<br />
WA Network<br />
No<br />
ACK/NAK<br />
No<br />
Baud rate<br />
9 600 bit/s<br />
Data bits 7<br />
ParitySpace<br />
Configuration RS 232<br />
Preamble (Header) Clear<br />
Postamble (Terminator) CR<br />
Table 10-10: Communication parameter settings for the ST 1100 decoder<br />
8 008 796/0000/25-06-2002 © SICK AG · Division Auto Ident · Germany · All rights reserved 10-67
Chapter 10<br />
Appendix<br />
Operating Instructions<br />
CLV 490 Bar Code Scanner<br />
10.11.2 Daisy-chain configuration<br />
(data forwarding or master/slave arrangement)<br />
See Technical Information "Master/Slave with Bar Code Scanners from the CLV Series"<br />
(no. 8 007 675).<br />
10.11.3 SICK network (RS 485)<br />
See Technical Description "CLX 200 Network Controller"<br />
(no. 8 007 157, German/English edition).<br />
10.11.4 Connection to Profibus DP<br />
See Operating Instructions "BMV/BMH 10 for Profibus DP" (no. 8 008 825).<br />
10.11.5 Connection to the DeviceNet<br />
See Operating Instructions "BMV/BMH 10 for DeviceNet" (no. 8 008 972).<br />
10.11.6 Connection to Interbus-S<br />
See Technical Information "BMS 10/20 for Interbus-S" (no. 8 007 546).<br />
10.11.7 Connection to Ethernet<br />
See Operating Instructions "BMV/BMH 10 for Ethernet" (no. 8 009 398).<br />
10.11.8 Building a CAN scanner network<br />
See Operating Instructions "Application of the CAN interface" (no. 8 009 180).<br />
10.11.9 Integration in an OPS reading system<br />
See Operating Instructions "Omni Tracking System OTS 400" (no. 8 008 869).<br />
10-68 © SICK AG · Division Auto Ident · Germany · All rights reserved 8 008 796/0000/25-06-2002
Operating Instructions Chapter 10<br />
CLV 490 Bar Code Scanner<br />
Appendix<br />
10.12 Replacing a CLV (copying the parameter set)<br />
There are two methods of replacing a CLV and transferring the current parameter set to the<br />
new device:<br />
• By downloading the parameters from CLV-Setup<br />
• By importing the parameter set from the external memory<br />
The parameter set can only be transferred between identical device types.<br />
10.12.1 Downloading the parameter set<br />
To download the parameter set, you must connect a PC running the "CLV-Setup" software<br />
to the replacement device. The parameter set of the CLV that is to be replaced must be<br />
available as a configuration file in CLV-Setup, otherwise the device must be parameterized<br />
from scratch.<br />
1. Disconnect the power supply to the AMV/S 60 Connection Module (of the CLV).<br />
2. Disconnect all cable connectors from the CLV.<br />
3. Remove the CLV from the bracket.<br />
Before doing so, mark the position and alignment on the bracket/station.<br />
4. Mount, align, and connect the replacement device.<br />
5. Connect the PC to the terminal interface on the CLV using an RS 232 data connection<br />
cable (AMV/S 60: connect the PC to the internal, 9-pin "Service" plug).<br />
See Chapter 5.5.5 Connecting the CAN interface, Page 5-15.<br />
6. Switch on the power supply to the AMV/S 60.<br />
Once the CLV has started, the "Device Ready" LED lights up.<br />
7. Switch on your PC and start Windows.<br />
8. Start CLV-Setup.<br />
If the communication parameters on the PC and CLV are identical, CLV-Setup uploads<br />
the parameter set from the CLV and displays the values on the tabs.<br />
9. Open the archived parameter set as a configuration file "*.scl" in CLV-Setup and download<br />
it to the CLV.<br />
10. Confirm the dialog box by choosing the TEMPORARY storage option.<br />
11. Check whether the CLV reads the bar codes correctly.<br />
Correct the parameter settings if necessary.<br />
12. Finally, download the tested parameter set to the CLV and save it with the PERMANENT<br />
storage option.<br />
The parameter set is transferred permanently to the replacement device.<br />
13. Save the modified parameter set as a new configuration file in CLV-Setup.<br />
Troubleshooting<br />
If the software version on the replacement device is older than the version on the old device<br />
(e. g. new device is from warehouse stock), the parameter set transferred may contain coded<br />
parameters or parameter values that cannot be interpreted by the older software. The<br />
new device, however, outputs an error message in CLV-Setup for each of these parameters/values<br />
when the parameter set is downloaded.<br />
8 008 796/0000/25-06-2002 © SICK AG · Division Auto Ident · Germany · All rights reserved 10-69
Chapter 10<br />
Appendix<br />
Operating Instructions<br />
CLV 490 Bar Code Scanner<br />
¾<br />
Check whether all of the parameter settings used are necessary to configure the CLV<br />
for the current reading application. If necessary, replace the software version in the new<br />
device.<br />
If the software version on the new device is more recent than that on the old one, the default<br />
settings in the imported parameter set will include parameters that were not contained in<br />
the old version.<br />
¾<br />
Upload the parameter set and check whether the new parameters are relevant for configuring<br />
the CLV for the current reading application. If necessary, change the parameter<br />
values and download the parameter set to the CLV again. Save the new parameter set<br />
as a configuration file in CLV-Setup.<br />
See also Chapter 10.6.8 Unknown parameters, Page 10-47.<br />
10.12.2 Importing the parameter set from the external memory<br />
A PC does not have to be connected to import the parameter set from the external memory.<br />
The parameter set in the external memory must contain an up-to-date copy of the set used<br />
by the CLV that is to be replaced. Otherwise, the replacement device will import a different<br />
parameter set to its RAM when it is started. The start option in the device must be set to<br />
START WITH EXTERNAL PARAMETERS. This is the default setting.<br />
1. Switch off the power supply to the AMV/S 60 Connection Module (of the CLV).<br />
2. Remove the connector cover (containing the parameter memory) from the CLV.<br />
3. Remove the CLV from the bracket.<br />
Mark the position and alignment of the CLV on the bracket station.<br />
4. Mount the connector cover on the terminals correctly and screw it into place.<br />
5. Mount and align the replacement device.<br />
6. Switch on the power supply to the AMV/S 60.<br />
The CLV starts and loads the parameter set from the external memory to the RAM.<br />
The "Device Ready" LED blinks for approx. 10 s and then lights up constantly.<br />
The parameter set is transferred temporarily to the replacement device. It is lost when the<br />
device is switched off but is loaded again from the external memory the next time the CLV<br />
starts.<br />
See also Chapter 10.3.8 Replacing a CLV, Page 10-37.<br />
Troubleshooting<br />
If the software version on the replacement device is older than that of the parameter set in<br />
the external memory (e. g. if the replacement device originated from the warehouse), the<br />
loaded parameter set may contain parameters or parameter values that cannot be interpreted<br />
by the older software. In this case, the "Device Ready" and "Read Result" LEDs blink<br />
together for approx. 10 s, after which the "Device Ready" LED lights up constantly. See also<br />
Chapter 10.6.8 Unknown parameters, Page 10-47.<br />
If the software on the replacement device is newer than that of the parameter set in the<br />
external memory, the parameter set loaded from the external parameter memory to the<br />
replacement device will contain new parameters that are set to the default values.<br />
10-70 © SICK AG · Division Auto Ident · Germany · All rights reserved 8 008 796/0000/25-06-2002
Operating Instructions Chapter 10<br />
CLV 490 Bar Code Scanner<br />
Appendix<br />
10.13 Accessories<br />
10.13.1 Mounting accessories<br />
Order No. Description Figure<br />
2 016 110 Quick clamping device, complete with securing material Fig. 10-61<br />
2 013 824 Angle bracket, single, with 2 screws M 6 x 10 mm, self-locking Fig. 10-59<br />
2 018 435 Articulated bracket (two angle brackets 2 013 824), with 2 screws M 6 x 10 mm, self-locking Fig. 10-60<br />
Table 10-11: Accessories: mounting accessories<br />
Order No. Type Description<br />
10.13.2 Connection modules<br />
1 017 134 AMV 60-011 Connection Module for one CLV 490 without heater, with 1 x 15-pin D Sub HD device socket/plug,<br />
terminal strips (signal distributor) for connecting the data and function interfaces, internal 9-pin D<br />
Sub "Service" plug, strain-relief clamps, polycarbonate housing, enclosure rating IP 30 (max. IP 54),<br />
operating voltage 18 ... 30 V DC<br />
1 017 139 AMS 60-013 As AMV 60-011, with integrated power pack: 230 V AC 50 Hz/24V DC<br />
1 017 140 AMS 60-012 As AMV 60-011, with integrated power pack: 115 V AC 50/60 Hz/24V DC<br />
1 017 387 AMS 60-023 As AMS 60-013, with 2-row LCD<br />
1 017 391 AMV 30-071 Connection Module with two CLV 490 without heater, with 2 x 15-pin D Sub HD device socket/plug,<br />
terminal strips (signal distributor) for connecting the data and function interfaces, two 9-pin D Sub<br />
"Service" plugs, strain-relief clamps, polycarbonate housing, enclosure rating IP 30 (max. IP 54),<br />
operating voltage 18 ... 30 V DC<br />
1 019 592 AMV 71-081 Connection module for CLV 490 without heater, with 1 x 15-pin D Sub HD device socket/plug,<br />
spring terminal strips (signal distributors) for connecting the data and function interfaces, internal 9-<br />
pin D-Sub "Service" plug, plastic cable glands, polycarbonate housing, enclosure rating max. IP 30.<br />
With address function for network operation, operating voltage 10 ... 30 V DC<br />
6 021 105 AMV 100-011 Universal Connection Module for one CLV 490 with/without heater, with 1 x 15-pin D Sub HD<br />
device socket/plug, terminal strips (signal distributor) for connecting the data and function interfaces,<br />
internal 9-pin D Sub "Service" plug, strain-relief clamps, cast aluminum housing, enclosure<br />
rating IP 54 (max. IP 65 with connector cover), operating voltage 18 ... 30 V DC<br />
6 021 106 AMV 200-011 As AMV 100, but for two CLV 490s with/without heater<br />
6 007 655 – Power cable, 3-wire, length 2 m, with 3-pin connector (grounding) and one open end (stripped)<br />
Table 10-12: Accessories: connection modules<br />
Order No. Type Description<br />
10.13.3 Bus connection modules<br />
6 020 896 BMV 10-0111 Bus Connection Module for connecting one CLV 490 with/without heater to a Profibus DP, with 1 x<br />
15-pin D Sub HD device socket/plug. With 9-pin D Sub bus socket, terminal strips (signal distributor)<br />
for connecting the RS 232 and function interfaces, internal 9-pin D Sub "Service" plug, strainrelief<br />
clamps, cast aluminum housing, enclosure rating IP 54 (max. IP 65 with connector cover),<br />
operating voltage 20 ... 30 V DC<br />
6 020 893 BMH 10-0111 Bus module for connection of one CLV 490 to Profibus DP; with terminal screws, a 9-pin D-sub bus<br />
socket, no housing, for top-hat-rail installation, enclosure rating max. IP 20, operating voltage<br />
10 to 30 V DC<br />
6 021 190 BMV 10-0311 Bus connection module for connection of one CLV 490 to DeviceNet, terminal strips for bus<br />
connection, otherwise, as BMV 10-0111<br />
Table 10-13: Accessories: bus connection modules<br />
8 008 796/0000/25-06-2002 © SICK AG · Division Auto Ident · Germany · All rights reserved 10-71
Chapter 10<br />
Appendix<br />
Operating Instructions<br />
CLV 490 Bar Code Scanner<br />
Order No. Type Description<br />
6 021 188 BMH 10-0111 Bus module for connection of one CLV 490 to DeviceNet, otherwise as BMH 10-0111<br />
1 012 683 BMS 20-0113 Bus Connection Module for connection of one CLV 490 without heater to an Interbus-S, with 1 x<br />
15-pin D Sub HD device socket/plug, two 9-pin D Sub bus connections (in/out), terminal strips (signal<br />
distributor) for connecting the data and function interfaces, internal 9-pin D Sub "Service" plug,<br />
integrated power pack 230 V AC 50 Hz/ 24 V DC, strain-relief clamps, enclosure rating IP 30 (max.<br />
IP 54)<br />
1 012 684 BMS 20-0112 As BMS 20-0113, with integrated power pack 115 V AC 50/60 Hz/ 24 V DC<br />
6 025 757 BMV 10-0411 Bus connection module for the connection of one CLV 490 with/without heater to Ethernet.<br />
TCP/IP communication, data transmission rate 10 MBit/s.<br />
For the CLV 490 with 1x 15-pin D Sub HD device socket/plug. With a 8-pin RJ-45 bus socket, terminal<br />
strips (signal distributors) for wiring the RS 232 data interface and the functional interfaces,<br />
internal 9-pin D Sub "Service" plug, cable grips, die-cast aluminum housing, enclosure rating max.<br />
IP 54 (enclosure rating max. IP 65 with connector cover), operating voltage 20 to 30 V DC<br />
6 025 756 BMH 10-0411 Bus module for connection of one CLV 490 to Ethernet.<br />
TCP/IP communication, data transmission rate 10 MBit/s.<br />
With terminal screws, a 8-pin RJ-45 bus socket, no housing, for top-hat-rail installation, enclosure<br />
rating max. IP 20, operating voltage 10 to 30 V DC<br />
6 022 140 BMV 10-0431 as BMV 10-0411, but with FTP communication, data transmission rate 10/100 MBit/s<br />
6 025 748 BMH 10-0431 as BMH 10-0411, but with FTP communication, data transmission rate 10/100 MBit/s<br />
6 007 655 – Power cable, 3-wire, length 2 m, with 3-pin connector (grounding) and one open end (stripped)<br />
Table 10-13: Accessories: bus connection modules<br />
10-72 © SICK AG · Division Auto Ident · Germany · All rights reserved 8 008 796/0000/25-06-2002
Operating Instructions Chapter 10<br />
CLV 490 Bar Code Scanner<br />
Appendix<br />
10.13.4 Cables, external parameter memories and plug cover<br />
a) CLV without heater<br />
Temperature range of connection material:<br />
Stationary: –30 ... +70 °C; moving: 0 ... +70 °C<br />
Order No. Description Wires Length Connection<br />
2 020 302 Connection cable for data interfaces ("Host/Term") or function interfaces<br />
("I/O"), ∅ 8 mm, shielded, with 15-pin D Sub HD socket and<br />
15-pin D Sub HD plug.<br />
Required: 2 per CLV<br />
2 020 303 Connection cable for data interfaces ("Host/Term"), ∅ 8 mm, shielded, with<br />
15-pin D Sub HD socket and one open end (stripped).<br />
Required: 1 per CLV<br />
2 020 264 Connection cable for function interfaces and power supply ( "I/O"),<br />
∅ 8 mm, shielded, with 15-pin D Sub HD plug and one open end (stripped).<br />
Required: 1 per CLV<br />
2 020 307 Connector cover with parameter memory (EEPROM),<br />
enclosure rating IP 65, with two connection cables,each ∅ 8 mm, shielded,<br />
with 15-pin D Sub HD socket and 15-pin D Sub HD plug.<br />
Required: 1 per CLV<br />
2 020 981 Connector cover with parameter memory (EEPROM),<br />
enclosure rating IP 65, with two connection cables, each ∅ 8 mm, shielded,<br />
two open ends (stripped).<br />
Required: 1 per CLV<br />
2 020 308 Connector cover with parameter memory (EEPROM),<br />
enclosure rating IP 65, with two connection cables ∅ 8 mm each, shielded,<br />
with 9-pin D Sub HD plug and one open end (stripped).<br />
Required: 1 per CLV<br />
2 014 054 RS 232 data cable, ∅ 5 mm, shielded, with two 9-pin D Sub sockets<br />
(Pin2 (RxD) and Pin 3 (TxD) crossed)<br />
6 010 088 Data cable, ∅ 6.6 mm, shielded, for connection cables up to 3 m 15 x 0.09<br />
mm 2<br />
15 3 m CLV 490 to<br />
AMV/S 60<br />
AMV 30-071<br />
BMV 10/BMS 20<br />
15 3 m CLV 490 to Host<br />
15 3 m CLV 490 to sensors<br />
PLC and non-SICK<br />
Power pack<br />
each 15 x<br />
0.14 mm 2 3 m CLV 490 to<br />
AMV/S 60<br />
AMV 30-071<br />
BMV 10<br />
each 15 x<br />
0.14 mm 2 3 m CLV 490 to host,<br />
sensors, PLC and<br />
non-SICK Power<br />
pack<br />
each 10 x 3 mm CLV 490 to<br />
0.2 mm 2 BMS 20<br />
3 3 m PC to AMV/S<br />
BMV 10/BMS 20<br />
Meter<br />
ware<br />
6 007 508 Data cable, ∅ 8.5 mm, twisted pair, shielded 2 x 2 x Meter<br />
0.23 mm 2 ware<br />
Table 10-14: Accessories: cables and connector covers for the CLV without heater<br />
Free wiring<br />
SICK network<br />
(RS 485)<br />
Note<br />
Other cable lengths/types for CLV without heater available on request.<br />
8 008 796/0000/25-06-2002 © SICK AG · Division Auto Ident · Germany · All rights reserved 10-73
Chapter 10<br />
Appendix<br />
Operating Instructions<br />
CLV 490 Bar Code Scanner<br />
b) CLV with heater<br />
Temperature range of connection material:<br />
Stationary: –50 ... +70 °C; moving: –40 ... +70 °C<br />
Order No. Description Wires Length Connection<br />
2 021 689 Connector cover with with parameter memory (EEPROM),<br />
enclosure rating IP 65, with 2 connection cables, each ∅ 8 mm,<br />
shielded, with 15-pin D Sub HD socket and 15-pin D Sub HD plug<br />
Required: 1 per CLV<br />
2 021 298 2 x connector cover, enclosure rating IP 65,<br />
with 2 connection cables, each ∅ 6.7 mm, shielded.<br />
Required: 1 per CLV<br />
2 021 267 Connector cover, enclosure rating IP 65,<br />
with 2 connection cables, each ∅ 6.7 mm, shielded,<br />
two open ends (stripped).<br />
Required: 1 per CLV<br />
each 15 x 3 m CLV 490 to<br />
0.14 mm 2 AMV 100/200<br />
each 13 x 3 m CLV 490 to<br />
2x 0.75mm 2<br />
0.14 mm 2 +<br />
AMV 100/200<br />
1 x 18 x<br />
0.14 mm 2 +<br />
1 x 2 x 0.75 mm 2 3 m CLV 490 to<br />
Host, sensors,<br />
PLC and non-<br />
Sick Power pack<br />
Table 10-15: Accessories: cables and connector covers for the CLV with heater<br />
Note<br />
Other cable lengths/types for CLVs with heater available on request.<br />
10.13.5 Plug-in connections<br />
Order No. Description<br />
6 009 438 D Sub connector housing (metal) for 9-pin or 15-pin HD inserts<br />
6 007 335 D Sub connector insert, 9-pin socket connector<br />
6 010 019 D Sub connector insert, 15-pin HD socket connector<br />
6 010 020 D Sub connector insert, 15-pin HD pin connector<br />
Table 10-16: Accessories: plug-in connections<br />
10.13.6 Reading pulse generators<br />
The SICK catalog "SENSICK Sensors for Automation" (no. 8 006 530) contains a large selection<br />
of photoelectric switches and photoelectric proximity switches as well as the associated<br />
accessories (brackets, connection cables)<br />
Order No. Type Description<br />
10.13.7 Network controller<br />
On request CLX 200 Network controller with LCD, touch-sensitive keypad, integrated power pack and 9-pin D-Sub<br />
connections for network, host and terminal, enclosure rating IP 31<br />
Table 10-17: Accessories: network controller<br />
10-74 © SICK AG · Division Auto Ident · Germany · All rights reserved 8 008 796/0000/25-06-2002
Operating Instructions Chapter 10<br />
CLV 490 Bar Code Scanner<br />
Appendix<br />
10.14 Dimensioned drawings of the accessories<br />
10.14.1 Angle bracket, single no. 2 013 824<br />
30<br />
6.5<br />
7.5<br />
45<br />
15<br />
30<br />
25<br />
45<br />
50<br />
Enclosed to securing the CLV:<br />
2 x cylinder head screws M 6 x 10 mm,<br />
self-locking<br />
6.5<br />
ø 6.5<br />
97.5<br />
6.5<br />
30<br />
7<br />
ø 6.5<br />
15<br />
30<br />
56<br />
Fig. 10-59: Dimensions of the angle bracket, single No. 2 013 824<br />
10.14.2 Articulated bracket No. 2 018 435<br />
68<br />
Enclosed to securing<br />
the CLV:<br />
2 x cylinder head screws<br />
M 6 x 10 mm,<br />
self-locking<br />
Fig. 10-60: Dimensions of the articulated bracket No. 2 018 435<br />
10.14.3 Quick clamping device No. 2 016 110<br />
No. 2 016 110<br />
Enclosed parts:<br />
– 2 x hexagon socket head screws<br />
M 6 x 16 mm<br />
– 2 x flat-head screws M 6 x 12 mm<br />
– 2 x washer A 6.4<br />
– 1 x threaded pin M 8 x 16 mm<br />
No. 2 013 824<br />
Fig. 10-61: Front view of quick clamping device No. 2 016 110 with angle braket No. 2 0130824<br />
8 008 796/0000/25-06-2002 © SICK AG · Division Auto Ident · Germany · All rights reserved 10-75
Chapter 10<br />
Appendix<br />
Operating Instructions<br />
CLV 490 Bar Code Scanner<br />
10.15 Supplementary documentation<br />
Order No. Title Contents<br />
2 021 445 Technical Documentation Set – CLV 490 Operating Instructions in German and English<br />
– 1 CD-ROM with the CLV-Setup/CLV-Setup Help/I-ViewPro TM browser<br />
software<br />
8 008 296 "AMV/S 60"<br />
Operating Instructions<br />
8 008 648 "AMV 30-071"<br />
Operating Instructions<br />
Description for connecting the CLV without heater to the host/PLC/sensor<br />
via the AMV/S 60 Connection Module<br />
Description for installing two CLVs without heaters to the host/PLC/sensor<br />
via the AMV 30-071 connection module<br />
8 009 154 Operating Instructions "AMV 70/71" Description for wiring the CLV to the SICK-Netzwerk/PLC/sensor via the<br />
AMV/S 71 connection module<br />
8 008 879 "AMV 100/200"<br />
Operating Instructions<br />
8 007 675 "Master/Slave with CLV Bar Code Scanners"<br />
Technical Information<br />
8 007 157 "CLX 200 Network Controller"<br />
Technical Description<br />
8 008 825 "BMV/BMH 10 for Profibus DP"<br />
Operating Instructions<br />
8 008 972 "BMV/BMH 10 for DeviceNet"<br />
Operating Instructions<br />
8 007 546 "BMS 10/20 for Interbus-S"<br />
Technical Information<br />
8 009 398 "BMV/BMH 10 for Ethernet"<br />
operating instructions<br />
8 008 869 "Omni Tracking System OTS 400"<br />
Operating Instructions<br />
8 009 180 "Application of the CAN Interface"<br />
Operating Instructions<br />
Description for connecting 1 (2) CLV without/with heater to the host/PLC/<br />
sensor via the AMV 100 (AMV 200) Connection Module<br />
Description of building a daisy-chain configuration<br />
(master/slave or data forwarding)<br />
Description of building a SICK Network (RS 485) with<br />
CLV bar code scanners<br />
Description for connecting the CLV to the Profibus/PLC/sensor<br />
via the BMV/BMH 10 Bus Connection Module<br />
Description for connecting the CLV to the DeviceNet/PLC/sensor via the<br />
BMV/BMH 10 bus connection module<br />
Description for connecting the CLV to the Interbus/SPS/sensor via the<br />
BMS 20 Bus Connection Module<br />
Description of the connection of the CLV to the Ethernet/the PLC/the<br />
sensor via the bus connection module BMV/bus module BMH 10<br />
Description of the integration of the CLV 490 in an omnidirectional OPS<br />
reading system<br />
Description for building a CAN network (electrical connection, configuration<br />
of the CLV, functions)<br />
On request Command strings Description of the command strings for the CLV functions<br />
Table 10-18: Supplementary documentation in English language<br />
10-76 © SICK AG · Division Auto Ident · Germany · All rights reserved 8 008 796/0000/25-06-2002
Operating Instructions Chapter 10<br />
CLV 490 Bar Code Scanner<br />
Appendix<br />
10.16 Glossary<br />
For further terms, please refer to the "CLV-Setup Help".<br />
Adjusting mode<br />
Special operating mode that enables the center of the scan line to be positioned exactly on<br />
the object containing the bar code.<br />
Aperture angle α<br />
Angle within whose limits the laser beam is deflected by the polygon mirror wheel. A<br />
V-shaped range perpendicular to the scan direction, which must contain the bar code, is formed<br />
in front of the reading window. If only part of this aperture angle is used (part of the<br />
scan line symmetric around the center point), the depth of field for the focus position and<br />
resolution is greater.<br />
Aspect ratio<br />
Ratio code height (bar length) to code length (numer of characters) Using the SMART Decoder<br />
even bar codes with very small code height can be read.<br />
Autofocus function<br />
Ability of the CLV to detect the distance of the objects during the reading operation without<br />
external sensors in order to adapt the focus position to the reading plane of the bar codes.<br />
Auxiliary input<br />
Special function on Ö the terminal interface. Used to enter bar code data subsequently in<br />
order to complete reading results sent to the host.<br />
Capture range<br />
Zone around a moving bar code created by the CLV using the increment management and<br />
code position comparison functions. Enables bar codes with identical contents and code<br />
type to be separated.<br />
Christmas tree effect<br />
Effect caused by limiting the active scan line range (CP values) and oscillating amplitude<br />
(CW values) on the Ö line scanner with oscillating mirror. In this way, a uniform sharply<br />
defined window can be created in the reading field for each distance configuration,<br />
independent of the reading distance.<br />
CLV-Setup<br />
PC program that runs on Windows 95 TM /98 TM and Windows NT TM and is used to parameterize<br />
the CLV offline (adjust the device to the local conditions) and operate it online. The<br />
parameter set is exchanged with the CLV by Ö uploading and Ö downloading it.<br />
CLV-Setup Help<br />
Online help function that provides support for using the "CLV-Setup" program. The help<br />
function explains the CLV parameters and their permissible values and can be launched<br />
directly from CLV-Setup in an HTML browser, such as Netscape Navigator TM , or I-ViewPro TM<br />
supplied with the program.<br />
8 008 796/0000/25-06-2002 © SICK AG · Division Auto Ident · Germany · All rights reserved 10-77
Chapter 10<br />
Appendix<br />
Operating Instructions<br />
CLV 490 Bar Code Scanner<br />
Code angle (CW value)<br />
Current deflection range of he scan line (oscillating mirror) perpendicular to the scan<br />
direction when a bar code is recorded. Calculated by the CLV for each scan and used, for<br />
example, to define a capture range so that bar codes with identical data contents in a given<br />
range can be separated.<br />
Code geometry<br />
Length and height dimensions of the bar code.<br />
Code position (CP value)<br />
Position of the first dark bar in a detected bar code along the Ö scan line. Calculated by the<br />
CLV for each scan and can be used, for example, to separate bar codes with identical data<br />
contents. The active evaluation range in the scan line can be restricted for Ö decoding<br />
purposes by specifying the maximum and minimum CP value for the application.<br />
Command strings, commands<br />
CLV user interface – alternative to the "CLV-Setup" program. Basic, yet clearly structured<br />
command language for modifying the CLV parameter sets online. Accesses the CLV<br />
command interpreter directly. Special programming activities are required to use the<br />
command strings from the host.<br />
Configuration file<br />
File in the "CLV-Setup" program that archives the entire Ö parameter set of the CLV. Can<br />
also be printed out in tabular form.<br />
Data forwarding<br />
Option of forwarding data sent by the host transparently to a terminal via the CLV using an<br />
identifier. Data can also be forwarded in the opposite direction. Furthermore, this function<br />
also allows data received on one of the serial interfaces to be output again straight away on<br />
one of the same interfaces (echo). Application: forwarding reading results in pass-through<br />
mode, e. g. in a master/slave network.<br />
Data output string<br />
Structured data telegram in the Ö reading result output by the CLV on the Ö host interface.<br />
The structure of the data string is flexible and can be adapted to a large extent to the subsequent<br />
data processing task. The data output format of the Ö terminal interface, on the<br />
other hand, cannot be changed.<br />
Decoder, decoding<br />
Code-type-specific evaluation routine for reconstructing the read bar code in electronic form<br />
in order to decode its data content.<br />
Deflection angle<br />
Angle about each side of the center position CW = 50 (equal to 0 ) that the Ö scan line<br />
sweeps when it is deflected by the oscillating mirror. Also referred to as the oscillating angle.<br />
Deflection range<br />
Deflection of the scan line caused by the Ö oscillating mirror, perpendicular to the scan<br />
direction about the center position CW = 50 at each side (corresponds to a deflection angle<br />
of 105 ). Also referred to as oscillating amplitude. The maximum deflection range is set in<br />
10-78 © SICK AG · Division Auto Ident · Germany · All rights reserved 8 008 796/0000/25-06-2002
Operating Instructions Chapter 10<br />
CLV 490 Bar Code Scanner<br />
Appendix<br />
OSCILLATING WITH FIXED AMPLITUDE mode. In OSCILLATING WITH VARIABLE AMPLITUDE mode, the<br />
deflection range is set for each distance configuration using the OSCILLATING MIRROR tab in<br />
the "CLV-Setup" program.<br />
Distance configuration<br />
Data record in the CLV for defining a Ö focus position for the laser beam for Ö dynamic<br />
focus control. The focus position as well as the maximum and minimum Ö code position<br />
must be entered on the READING CONFIGURATION tab in the "CLV-Setup" program for this purpose.<br />
In the case of the line scanner with oscillating mirror, the Ö oscillating amplitude<br />
(deflection range) is also required. The depths of field for the individual focus positions are<br />
shown as a function of the resolution values in the specification diagrams.<br />
Distance detector<br />
System for recording the distance of objects with a bar code in front of the CLV in stages.<br />
When the bar code is read from above, for example, the distance is detected by installing<br />
photoelectric reflex switches above one another beside the conveyor belt. Together with the<br />
combination of "IN 0" to "IN 4" switching inputs and the assignment table for the Ö distance<br />
configurations, the ranges for Ö dynamic focus control are defined. Only required if the<br />
Ö Autofocus function is not used.<br />
Distance profile<br />
When using the Ö Autofocus function with differential background (with or without tracking),<br />
the CLV can teach-in the ambient background (without objects) to narrow its active reading<br />
range. The CLV creates a profile of the various distances in its reading field along the scan<br />
lines in a special mode. This profile is then used to detect objects in the reading field and to<br />
set the required focus position at the level of the bar code on the object.<br />
Download<br />
Method of transferring the Ö parameter set that was modified with the Ö "CLV-Setup" program<br />
offline from the PC to the RAM of the CLV. CLV-Setup transfers either a complete copy<br />
of the CLV (DOWNLOAD TO CLV) to the memory (RAM) or just the edited parameters using the<br />
right mouse button’s context menus (DOWNLOAD PARAMETER). You can overwrite the existing<br />
parameter set in EEPROM of the CLV by choosing the PERMANENT storage option.<br />
Dynamic focus control<br />
Function for shifting the focal point of the laser beam across a wide range in the reading plane.<br />
The dynamic focus control function is event controlled (e. g. by the distance detector) or<br />
dynamic in the Ö Autofocus function.<br />
Error messages<br />
Messages in Ö plain text that are used to identify a malfunction on the CLV in Reading mode.<br />
The messages are output on the terminal interface only. Exception: ST = 3 (device error),<br />
which is also output on the host interface. The error messages can be displayed in<br />
extended mode under TERMINAL EMULATOR in the "CLV-Setup" program.<br />
Error status<br />
Identifier output with the reading result by the CLV for errors that were diagnosed while the<br />
bar code was being read. The entry for the host interface is made in the separator of the<br />
Ö data output string and must be enabled using the parameters (enabled by default).<br />
8 008 796/0000/25-06-2002 © SICK AG · Division Auto Ident · Germany · All rights reserved 10-79
Chapter 10<br />
Appendix<br />
Operating Instructions<br />
CLV 490 Bar Code Scanner<br />
Focus position<br />
Distance of the focal point of the emitted laser beam in front of the reading window. Can be<br />
varied using the optical components in the CLV. Creates a distance-specific depth of field<br />
(DOF) in which he bar code can be detected.<br />
Functional interfaces<br />
Switching inputs and outputs on the CLV.<br />
Good Read<br />
The CLV successfully detected a bar code or the required number of bar codes specified by<br />
the evaluation parameters during the Ö reading pulse.<br />
Header<br />
Data block in the reading result on the Ö host interface. Used as a header in the Ö data<br />
output string for the subsequent data content of the bar code. Contains reading diagnosis<br />
data and/or constants (e. g. letters), depending on the configuration (empty by default).<br />
Host interface<br />
Main data interface on the CLV with configurable data output format. Used to output the<br />
Ö reading result in telegram form to the host/PLC. Integrates the CLV in the SICK network<br />
or builds a master/slave arrangement. Physically switchable to RS 232 or RS 422/485. It<br />
supports various transmission protocols.<br />
Increment management<br />
Used in certain applications to separate bar codes with identical contents that move during<br />
the reading procedure and assign them to the objects.<br />
Line scanner<br />
Scanner that uses a polygon mirror wheel with paraxial mirrors to deflect a focused laser<br />
beam extremely fast. As a result, it creates a light spot in the reading plane that moves along<br />
a straight line, which appears to the naked eye as a stationary scan line.<br />
Line scanner with oscillating mirror<br />
Line scanner that also deflects the laser beam about a central position, on both sides and<br />
perpendicular to the scan direction using an oscillating mirror. By doing so, the CLV can search<br />
for bar codes in larger areas. In addition to basic deflection with the maximum oscillating<br />
amplitude, optimum oscillating mirror functions are also possible (variable deflection per<br />
distance configuration, Ö One-Shot).<br />
Master/slave configuration<br />
Special arrangement for connecting up to max. 10 SICK bar code scanners in the CAN scanner<br />
network to one reading station (e. g. left/right read). Thanks to the master, the entire network<br />
appears as one device to the host.<br />
Multiple read<br />
Variable number of reading operations that must provide identical reading results (data<br />
content) of the same bar code before the CLV outputs the result.<br />
10-80 © SICK AG · Division Auto Ident · Germany · All rights reserved 8 008 796/0000/25-06-2002
Operating Instructions Chapter 10<br />
CLV 490 Bar Code Scanner<br />
Appendix<br />
No Read<br />
The CLV failed to detect a bar code or the required number of bar codes specified by the<br />
evaluation parameters during the Ö reading pulse.<br />
No Read format<br />
Special, parameterizable data block as a substitute for bar codes, which were expected but<br />
not detected, in the data output string on the host interface for Ö No Read. Comprises a<br />
variable combination of the error string and the Ö separator.<br />
Object height detector<br />
See distance detector.<br />
One-Shot<br />
Selective, one-off deflection of the oscillating mirror for each Ö reading pulse. Usually comprises<br />
a slow forward phase (read) and a fast return phase (return to starting position).<br />
Oscillating mirror reversal point<br />
Deflection point of the oscillating mirror at which it changes direction. Can be used to trigger<br />
a Ö focus position switchover for slower applications (search mode).<br />
Parameter set<br />
Data record used to initialize and activate the functions implemented in the CLV. With<br />
Ö downloading and Ö uploading the parameter set is transferred form CLV-Setup to the<br />
CLV or from the CLV to CLV-Setup.<br />
Parameter memory, external<br />
Optional accessory containing an integrated connector cover. Enables devices to be conveniently<br />
replaced by storing a copy of the CLV parameter set (EEPROM). The replacement<br />
device then accesses this parameter set directly and does not have to be configured<br />
manually.<br />
Percentage evaluation<br />
Special operating mode in which the quality of the reads (not those of the bar codes, however)<br />
is assessed statistically. The bar codes must be stationary. The CLV carries out 100<br />
scans and evaluates the reading quality. It then outputs the reading results on the Ö terminal<br />
interface every 2 s together with the Ö reading diagnosis data.<br />
Plain text<br />
Legible form of a CLV message. The CLV outputs special messages in coded form, e. g. the<br />
result of the self-test is represented as three digits.<br />
Reading diagnosis data<br />
Data directly derived from the reading procedure by the CLV. This data enables the quality<br />
of the read to be assessed. The data is always output on the Ö terminal interface together<br />
with the reading result. Only output on the host interface if enabled on the DATA STRING tab<br />
in the "CLV-Setup" program. The error status ST is output in the separator by default.<br />
8 008 796/0000/25-06-2002 © SICK AG · Division Auto Ident · Germany · All rights reserved 10-81
Chapter 10<br />
Appendix<br />
Operating Instructions<br />
CLV 490 Bar Code Scanner<br />
Reading field height<br />
Length of the Ö scan line that is available for detecting the bar code in the reading plane.<br />
Due to the V-principle of beam generation, the reading field height is dependent on the<br />
reading distance.<br />
Reading interval<br />
Timeslot in which the CLV activates the laser diode and attempts to detect valid bar codes<br />
from the information read. The reading interval may be shorter than the external reading pulse,<br />
depending on the selected output mode for the reading result.<br />
Reading pulse<br />
Clock pulse applied externally to the CLV to trigger the internal Ö reading interval. Can be<br />
supplied by a photoelectric reflex switch or a command from the host on the serial interface.<br />
Reading range (DOF)<br />
Depth of field about the focal point of the laser beam on two sides. The extent of the reading<br />
range depends on the resolution and reading distance.<br />
Reading result<br />
Electronic representation of the data content of the read bar code together with the Ö reading<br />
diagnosis data in one Ö data output string that is generated after the reading pulse has<br />
elapsed. The reading result on the terminal interface has a fixed format (content and output<br />
format); the reading result on the host interface can be configured separately for Good<br />
Reads and No Reads. Special characters can also be added if necessary.<br />
Result status output<br />
Function of the four "Result 1" ... "Result 4" switching outputs in Reading mode. Signals the<br />
status of the reading result without indicating its contents (e. g. Good Read). You can assign<br />
a status to each output on the DEVICE FUNCTION tab in CLV. The "Read Result" LED is linked<br />
to the "Result 2" output.<br />
Scan line<br />
See line scanner.<br />
Sending point<br />
Point at which the reading result is output with respect to the start of the Ö reading pulse<br />
and the internal Ö reading interval.<br />
Separator<br />
Data block in the reading result on the Ö host interface. Used to separate the data content<br />
of the bar codes. Can be attached to the bar code as a prefix or suffix. Contains reading<br />
diagnosis data and/or constants (e. g. letters), depending on the configuration. The error<br />
status ST is output in the seperator by default.<br />
SICK network<br />
Special, high performance network of max. 31 CLVs with high data transfer rates on the<br />
RS 485 interface. The CLVs are coordinated (polling) and connected to the host via the CLX<br />
200 Network Controller.<br />
10-82 © SICK AG · Division Auto Ident · Germany · All rights reserved 8 008 796/0000/25-06-2002
Operating Instructions Chapter 10<br />
CLV 490 Bar Code Scanner<br />
Appendix<br />
SMART decoder<br />
Specially developed Ö decoder for reading bar codes with an extremely small code height<br />
and for poor-quality or contaminated code prints.<br />
Specification diagrams<br />
Diagrams for reading the resolution-specific depth of field (DOF) for specific focus positions.<br />
Standard decoder<br />
Tried-and-tested Ö decoder from the CLV product family. Suitable for applications with an<br />
adequate code height, limited tilt, and high-quality code prints.<br />
Storage in the CLV<br />
The application-specific Ö parameter set can be stored temporarily or permanently in the<br />
CLV. If it is stored temporarily in the RAM, it is lost as soon as the power supply is switched<br />
off. Parameter sets that are stored permanently are transferred to the EEPROM in the CLV<br />
and remain active as the current data record when the power supply is switched off. The<br />
default setting is not affected by this and is stored in a read-only memory (ROM).<br />
Switching sequence<br />
Focus control function for event-controlled switching. Sequence of focus position settings<br />
with associated depths of field. The numbers of the active Ö distance configurations are entered<br />
at the required position in the assignment table for this purpose.<br />
System messages<br />
Messages Ö in plain text used to output the operating status of the CLV. The messages<br />
are output on the terminal interface only and can be displayed in extended mode in the TER-<br />
MINAL EMULATOR of the "CLV-Setup" program.<br />
Teach-in<br />
Method of programming the information required to adjust the CLV to the reading application<br />
in Parameterization mode. Example: teaching in the background for the Autofocus<br />
function, also known as a Ö distance profile.<br />
Terminal interface<br />
Auxiliary data interface (RS 232) on the CLV with fixed data output format. Used to connect<br />
the "CLV-Setup" program to the CLV so that it can operate and configure the device. Also<br />
used to output system and error messages. Can be assigned various functions.<br />
Terminator<br />
Data block in the reading result on the Ö host interface. Used to terminate the data content<br />
of the bar code. Contains reading diagnosis data and/or constants (e. g. letters), depending<br />
on the configuration. The control characters and are output in the terminator by<br />
default.<br />
Upload<br />
Method of transferring the Ö parameter set from the CLV to the PC using the Ö "CLV-Setup"<br />
program. CLV-Setup loads either a complete copy of the current parameter set from the<br />
CLV’s memory (RAM)(UPLOAD TO CLV) or just the recently edited parameter, using the right<br />
mouse button’s context menus (UPLOAD PARAMETER). Displays the current parameter values<br />
on the tabs. Prerequisite for modifying the current parameter set.<br />
8 008 796/0000/25-06-2002 © SICK AG · Division Auto Ident · Germany · All rights reserved 10-83
Chapter 10<br />
Appendix<br />
Operating Instructions<br />
CLV 490 Bar Code Scanner<br />
User interface<br />
Windows-based PC software "CLV-Setup" for operating and configuring the CLV.<br />
10-84 © SICK AG · Division Auto Ident · Germany · All rights reserved 8 008 796/0000/25-06-2002
Operating Instructions Chapter 10<br />
CLV 490 Bar Code Scanner<br />
Appendix<br />
10.17 Copy of the EC Declaration of Conformity<br />
Fig. 10-62: Reproduction of the declaration of conformity (Page 1, reduced in size)<br />
8 008 796/0000/25-06-2002 © SICK AG · Division Auto Ident · Germany · All rights reserved 10-85
Chapter 10<br />
Appendix<br />
Operating Instructions<br />
CLV 490 Bar Code Scanner<br />
Fig. 10-63: Reproduction of the declaration of conformity (Page 2, reduced in size)<br />
10-86 © SICK AG · Division Auto Ident · Germany · All rights reserved 8 008 796/0000/25-06-2002
Operating Instructions Chapter 10<br />
CLV 490 Bar Code Scanner<br />
Appendix<br />
10.18 Index<br />
A<br />
Abbreviations.................................................................................I-10<br />
Accessories<br />
- Dimensioned drawings...................................................10-75<br />
- Order specifications ........................................................10-71<br />
Adjusting mode<br />
- Function .....................................................................................4-9<br />
- Starting the mode ...............................................................6-24<br />
Adjusting the CLV<br />
- Reading angles........................................................................4-5<br />
- Steps...........................................................................................4-8<br />
AMV/S 60 Connection Module<br />
- Block diagram..........................................................................5-3<br />
- Cables.........................................................................................5-3<br />
- Function .....................................................................................5-3<br />
- Mounting.................................................................................4-10<br />
Aperture angle<br />
- Definition....................................................................................4-4<br />
- Max. value.................................................................................4-4<br />
Autofocus<br />
- Function .....................................................................................3-6<br />
- Operating mode......................................................................3-6<br />
- Parameterization.....................................................................6-9<br />
Auxiliary input<br />
- Function ...............................................................................10-65<br />
- Starting the mode ............................................................10-65<br />
Azimuth angle (Tilt)<br />
- Definition....................................................................................4-5<br />
- Limit values...............................................................................4-5<br />
B<br />
Background teach-in<br />
- Function .....................................................................................3-6<br />
- Starting the mode ...............................................................6-25<br />
Bar code<br />
- Calculation the unknown bar code length ..............10-55<br />
- Sample (scannable) ........................................................10-91<br />
C<br />
Cables<br />
- Overview ....................................................................................5-2<br />
- Wire colors................................................................................5-9<br />
CAN network<br />
- Building a CAN network..................................................10-68<br />
- Interfaces ..................................................................................5-6<br />
- Tab...............................................................................................6-8<br />
Cleaning the CLV...........................................................................7-1<br />
CLV-Setup<br />
- Default settings.................................................................10-43<br />
- Download ..................................................................................6-6<br />
- Functions .............................................................................10-46<br />
- Intallation on the PC ........................................................10-41<br />
- Log file for serial communication ...............................10-48<br />
- Starting .................................................................................10-43<br />
- Tabs.............................................................................................6-6<br />
- Unknown parameters .....................................................10-47<br />
- Upload ........................................................................................6-5<br />
- User interface ....................................................................10-45<br />
Code angle CW<br />
- Count direction ....................................................................... 4-6<br />
- Output in the data string (host interface) ..................... 4-7<br />
- Parameterization.................................................................... 6-9<br />
Code position CP<br />
- Count direction within the scanline................................. 4-6<br />
- Output in the data string (host interface) ..................... 4-7<br />
- Parameterization.................................................................... 6-9<br />
Command strings<br />
- Function............................................................................... 10-48<br />
- Input into terminal emulator ........................................ 10-49<br />
Configuation (parameterization).............................................. 6-5<br />
Connecting the PC..................................................................... 5-15<br />
Connection diagram .................................................................... 5-3<br />
Connection modules<br />
- Order specification .......................................................... 10-71<br />
- Overview.................................................................................... 5-1<br />
Connector cover<br />
- Electrical connecting............................................................. 5-5<br />
- Function..................................................................................... 3-8<br />
- Pin assignment ....................................................................... 5-7<br />
- Wire colors ............................................................................ 5-12<br />
Control elements .......................................................................... 3-8<br />
D<br />
Declaration of conformity.................................................... 10-85<br />
Decoder<br />
- SMART decoder ..................................................................... 3-5<br />
- Standard decoder ................................................................. 3-5<br />
Default settings<br />
- CLV-Setup........................................................................... 10-43<br />
- Extract of CLV.......................................................................... 6-2<br />
- Printing the settings of CLV................................................ 6-1<br />
Depth of field (DOF)<br />
- Adjusting the radial pattern................................................ 3-6<br />
- Diagrams................................................................................ 10-1<br />
Device functions (interactively)<br />
- Start ......................................................................................... 6-32<br />
Device number GN ...................................................................... 5-8<br />
DeviceNet.................................................................................. 10-68<br />
Dimensioned drawings............................................................... 9-3<br />
Dismantling<br />
- Disposal..................................................................................... 7-2<br />
- Steps ....................................................................................... 4-13<br />
Display.............................................................................................. 3-8<br />
Disposal of the CLV ..................................................................... 7-2<br />
Distance configuration<br />
- Function..................................................................................... 3-7<br />
- Parameterization................................................................. 6-11<br />
Distance profile (background)<br />
- Function..................................................................................... 3-6<br />
- Learning.................................................................................. 6-25<br />
Documentation additional ................................................... 10-76<br />
Download<br />
- Function..................................................................................... 6-5<br />
- Start Download....................................................................... 6-6<br />
E<br />
Electrical installation .................................................................... 5-1<br />
8 008 796/0000/25-06-2002 © SICK AG · Division Auto Ident · Germany · All rights reserved 10-87
Chapter 10<br />
Anhang<br />
Operating Instructions<br />
CLV 490 Bar Code Scanner<br />
EMC ................................................................................................... 9-2<br />
Enclosure rating ............................................................................ 9-2<br />
Error messages<br />
- Display in the Terminal Emulator ..................................... 8-2<br />
- Function..................................................................................... 3-5<br />
- List (CLV with external parameter memory)................ 8-7<br />
- List (CLV without external parameter memory) ......... 8-2<br />
Error status in the reading result............................................ 8-9<br />
Ethernet...................................................................................... 10-68<br />
Evaluation<br />
- Decoder types ........................................................................ 3-5<br />
- Parameterization................................................................. 6-17<br />
F<br />
Figures ............................................................................................. I-12<br />
Focus position switching<br />
- Parameterization................................................................. 6-11<br />
- Trigger modes......................................................................... 3-7<br />
G<br />
Glossary..................................................................................... 10-77<br />
Good Read................................................................................... 6-21<br />
H<br />
Header........................................................................................... 6-30<br />
Heating<br />
- Behavior .............................................................................. 10-38<br />
- Design.................................................................................. 10-38<br />
- Electrical connection....................................................... 10-39<br />
- Funktion............................................................................... 10-38<br />
- Power consumption........................................................ 10-39<br />
- Switching on delay........................................................... 10-38<br />
- System requirements........................................................... 3-2<br />
- Temperatur range............................................................ 10-38<br />
Host interface<br />
- Connecting ............................................................................ 5-14<br />
- Data output string............................................................... 6-30<br />
- Default setting...................................................................... 5-14<br />
- Function..................................................................................... 3-5<br />
- Max. cable lengths ................................................................ 5-8<br />
- Monitoring in the Terminal Emulator ........................... 6-29<br />
- Parameterization................................................................. 6-17<br />
- Select hardware.................................................................. 5-15<br />
I<br />
Identical bar codes<br />
- Function of CP, CW values ................................................. 4-6<br />
- Parameterizise the evaluation ....................................... 6-17<br />
- Separation................................................................................ 4-6<br />
IN 0 ... IN 4 switching inputs<br />
- Assignment table ................................................................ 5-18<br />
- Caracteristic data................................................................ 5-18<br />
- Connection ............................................................................ 5-17<br />
- Function..................................................................................... 3-5<br />
- Parameterization................................................................. 6-11<br />
Installation<br />
- Overview...................................................................................... I-4<br />
Intended use of CLV.................................................................... 2-1<br />
Interbus-S.................................................................................. 10-68<br />
Interfaces of CLV<br />
- Functions................................................................................... 3-5<br />
- Overview ....................................................................................5-2<br />
- Pin assignment........................................................................5-6<br />
L<br />
Laser radiation<br />
- Laser power .............................................................................2-2<br />
- Laser warning lables, content............................................2-2<br />
- Protection class ......................................................................2-2<br />
- Protective circuits, internal..................................................2-3<br />
- Replacing the laser warning labels..................................4-2<br />
- User instructions.....................................................................2-2<br />
- Wave length..............................................................................2-2<br />
LEDs<br />
- Function (CLV with ext. param. memory) ...................3-10<br />
- Function (CLV without ext. param. memory)................3-9<br />
- Parameterization Result 1 (LED "Read Result")......6-17<br />
Line...............................................................................................10-14<br />
Line scanner<br />
- Dimensional drawing.............................................................9-3<br />
- Function .....................................................................................3-7<br />
- Quick start.................................................................................6-3<br />
- Technical data .........................................................................9-1<br />
M<br />
Maintenance...................................................................................7-2<br />
Master/slave.............................................................................10-68<br />
Messages (terminal interface)..............................................6-33<br />
Method of operation<br />
- Block diagram..........................................................................3-5<br />
- Description................................................................................3-5<br />
Monitoring host interface<br />
- Function ..................................................................................6-29<br />
- Starting the mode ...............................................................6-29<br />
Mounting<br />
- Accessories..............................................................................4-1<br />
- Mounting the CLV...................................................................4-3<br />
- Mounting the distance sensors.....................................4-12<br />
- Preparations.............................................................................4-1<br />
- Reading pulse sensor........................................................4-10<br />
Mounting bracket<br />
- Dimensioned drawings...................................................10-75<br />
- Function .....................................................................................4-3<br />
N<br />
No Read.........................................................................................6-21<br />
O<br />
One-Shot (oscillating mirror)<br />
- Calculating parameter values for the CLV ..............10-53<br />
- Function ..................................................................................6-14<br />
Online help.................................................................................10-46<br />
Operating data<br />
- Display.....................................................................................6-28<br />
- Reset........................................................................................6-28<br />
Operating modes<br />
- Adjusting mode ....................................................................6-24<br />
- Overview of modes.............................................................6-19<br />
- Percentage evaluation ......................................................6-22<br />
- Reading mode ......................................................................6-19<br />
- Show CP-limits......................................................................6-26<br />
Oscillating mirror<br />
10-88 © SICK AG · Division Auto Ident · Germany · All rights reserved 8 008 796/0000/25-06-2002
Operating Instructions Chapter 10<br />
CLV 490 Bar Code Scanner<br />
Appendix<br />
- Deflection range, high density.....................................10-26<br />
- Deflection range, low denstiy.......................................10-33<br />
- Deflection range, standard density...........................10-15<br />
- Design.........................................................................................3-4<br />
- Dimensioned drawings.........................................................9-4<br />
- Function .....................................................................................3-7<br />
- Function in adjusting mode .............................................6-24<br />
- Function in background Teach-in ..................................6-25<br />
- Function in reading mode ................................................6-19<br />
- Function in show CP-limits ...............................................6-27<br />
- Function in the percentage evalutation ......................6-22<br />
- Operating modes.................................................................6-12<br />
- Parameterization..................................................................6-12<br />
- Quick Start ................................................................................6-3<br />
- Reversal points .......................................................................3-7<br />
- Technical data .........................................................................9-2<br />
- Troubleshooting ...................................................................8-15<br />
P<br />
Parameter memory, external<br />
- Design...................................................................................10-34<br />
- Electrical connection.......................................................10-35<br />
- Error messages.......................................................................8-7<br />
- Function ...............................................................................10-34<br />
- LEDs ............................................................................................3-9<br />
- Mounting..............................................................................10-35<br />
- Operating.............................................................................10-35<br />
- Pin assignment........................................................................5-7<br />
- Replacing the CLV............................................................10-37<br />
- Saving parameters after download.................................6-6<br />
- Startup first time...............................................................10-36<br />
- Troubleshooting ......................................................................8-5<br />
- Wire colors.............................................................................5-10<br />
Parameter set<br />
- Download ..................................................................................6-6<br />
- Function .....................................................................................6-5<br />
- Upload ........................................................................................6-5<br />
Parameterization .....................................................................10-56<br />
- Calculating parameter values......................................10-51<br />
- CLV-Setup .................................................................................6-5<br />
- Command strings.............................................................10-49<br />
- Function .....................................................................................6-5<br />
- Guide...........................................................................................6-8<br />
- Replacing a CLV................................................................10-69<br />
Percentage evaluation<br />
- Function ..................................................................................6-22<br />
- Function of "Read Result" LED .........................................3-9<br />
- Read result output ..............................................................6-23<br />
- Start the mode.....................................................................6-22<br />
Pin assignment of CLV ................................................................5-6<br />
Pitch<br />
- Definition....................................................................................4-5<br />
- Limit values...............................................................................4-5<br />
Power consumption .....................................................................2-4<br />
Power-up delay<br />
- Function .....................................................................................5-8<br />
- Parametrization .......................................................................5-8<br />
Profibus.......................................................................................10-68<br />
Protection class............................................................................. 9-2<br />
Q<br />
Quick start ....................................................................................... 6-3<br />
R<br />
Reading diagnosis<br />
- Function.................................................................................. 6-28<br />
- Starting the mode............................................................... 6-29<br />
Reading distance<br />
- Definition ................................................................................... 4-4<br />
- Detection (external sensors)............................................. 3-7<br />
- Distance profile (background) .......................................... 3-6<br />
Reading field diagrams............................................................ 10-1<br />
Reading field height<br />
- High density, line scanner............................................. 10-16<br />
- High density, line scanner with osc. mirror............. 10-21<br />
- Low density, line scanner ............................................. 10-27<br />
- Low density, line scanner with osc. mirror ............. 10-31<br />
- Standard density, line scanner ...................................... 10-3<br />
- Standard density, line scanner with osc. mirror...... 10-9<br />
Reading mode<br />
- Function.................................................................................. 6-19<br />
- Output of the reading result............................................ 6-19<br />
- Troubleshooting................................................................... 8-11<br />
Reading pulse sensor<br />
- Electrical connecting.......................................................... 5-16<br />
- Mounting ................................................................................ 4-10<br />
- Parametrization for trigger source................................ 4-11<br />
Reading result<br />
- Host interface....................................................................... 6-29<br />
- Terminal interface............................................................... 6-20<br />
- Troubleshooting................................................................... 8-14<br />
Reading trigger<br />
- Function..................................................................................... 3-5<br />
- Parameterization................................................................. 6-16<br />
- Trigger modes......................................................................... 3-5<br />
- Triggering via Terminal Emulator................................... 6-20<br />
- Troubleshooting................................................................... 8-11<br />
Reading window<br />
- Cleaning..................................................................................... 7-1<br />
- Position ...................................................................................... 3-4<br />
Repair............................................................................................. 8-15<br />
Replacing a CLV<br />
- Via CLV-Setup ................................................................... 10-69<br />
- Via the external parameter memory........................ 10-70<br />
Result 1 ... Result 4 switching outputs<br />
- Caracteristic data................................................................ 5-20<br />
- Connecting ............................................................................ 5-19<br />
- Function..................................................................................... 3-5<br />
- Parameterization................................................................. 6-17<br />
S<br />
Scanning frequency<br />
- High density, line scanner............................................. 10-20<br />
- High density, line scanner with osc. mirror............. 10-25<br />
- Low density, line scanner ............................................. 10-30<br />
- Low density, line scanner with osc. mirror ............. 10-32<br />
- Standard density, line scanner ...................................... 10-8<br />
- Standard density, line scanner with osc. mirror... 10-14<br />
8 008 796/0000/25-06-2002 © SICK AG · Division Auto Ident · Germany · All rights reserved 10-89
Chapter 10<br />
Anhang<br />
Operating Instructions<br />
CLV 490 Bar Code Scanner<br />
Scope of supply............................................................................ 3-1<br />
Self-test<br />
- Error messages...................................................................... 8-2<br />
- Function.................................................................................. 6-31<br />
- Starting the mode............................................................... 6-31<br />
Sensor for distance detection<br />
- Electrical Connection......................................................... 5-17<br />
- Function.................................................................................. 4-12<br />
- Mounting ................................................................................ 4-12<br />
- Parametrize for trigger source....................................... 4-12<br />
Sensor switching input<br />
- Caracteristic data................................................................ 5-16<br />
- Connecting ............................................................................ 5-16<br />
- Function..................................................................................... 3-5<br />
- Parameterization................................................................. 6-16<br />
Separator...................................................................................... 6-30<br />
Show CP-limits<br />
- Function.................................................................................. 6-26<br />
- Starting the mode............................................................... 6-27<br />
SICK network............................................................................ 10-68<br />
SICK Support............................................................................... 8-15<br />
Skew<br />
- Definition ................................................................................... 4-5<br />
- Limit values .............................................................................. 4-5<br />
SMART decoder............................................................................ 3-5<br />
Software versions........................................................................... I-2<br />
Specification diagrams ............................................................ 10-1<br />
Start-up............................................................................................. 6-3<br />
Supply voltage ............................................................................... 5-8<br />
- Connecting ............................................................................ 5-13<br />
Surface reflection<br />
- Avoiding reflection ................................................................. 4-5<br />
Switching off the CLV ............................................................... 6-34<br />
System messages<br />
- Display in the terminal emulator ................................... 6-33<br />
- Function..................................................................................... 3-5<br />
- List of messages.............................................................. 10-40<br />
System requirements<br />
- Connection Modules ............................................................ 3-2<br />
- Sensors ..................................................................................... 3-2<br />
- Supply voltage......................................................................... 3-2<br />
T<br />
Tables .............................................................................................. I-10<br />
Technical data................................................................................ 9-1<br />
Terminal emulator ..................................................................... 6-20<br />
Terminal interface<br />
- Connecting ............................................................................ 5-15<br />
- Data format........................................................................... 6-20<br />
- Default setting...................................................................... 5-16<br />
- Function..................................................................................... 3-5<br />
- Max. cable length................................................................... 4-2<br />
- Operating mode .................................................................. 6-28<br />
Terminator.................................................................................... 6-30<br />
Thread Blind hole<br />
- Dimensions .............................................................................. 4-3<br />
- Position ...................................................................................... 3-4<br />
Troubleshooting<br />
- Analysis and remedy..........................................................8-10<br />
- Error messages.......................................................................8-2<br />
- Error status in the reading result......................................8-9<br />
U<br />
Upload<br />
- Function .....................................................................................6-5<br />
- Starting upload........................................................................6-5<br />
V<br />
Variants of CLV...............................................................................3-1<br />
W<br />
Warning messages<br />
- Display in the Terminal Emulator...................................6-33<br />
- Function .....................................................................................3-5<br />
- List of messages .................................................................6-33<br />
10-90 © SICK AG · Division Auto Ident · Germany · All rights reserved 8 008 796/0000/25-06-2002
Operating Instructions Chapter 10<br />
CLV 490 Bar Code Scanner<br />
Appendix<br />
10.19 Bar code example<br />
! " #<br />
Codabar<br />
2/5 Interleaved<br />
9876543210<br />
Code 39<br />
C L V 4 9 0<br />
A 1 2 3 4 A<br />
Module width<br />
0.35 mm<br />
Module width<br />
0.5 mm<br />
Module width<br />
1.0 mm<br />
Fig. 10-64: Scannable bar codes with various module widths (print ratio 2:1)<br />
8 008 796/0000/25-06-2002 © SICK AG · Division Auto Ident · Germany · All rights reserved 10-91
Australia<br />
Phone +61 3 9497 4100<br />
(0 08) 33 48 02–toll free<br />
Fax +61 3 9497 1187<br />
Austria<br />
Phone +43 22 36/62 28 8-0<br />
Fax +43 22 36/62 28 85<br />
Belgium/Luxembourg<br />
Phone +32 24 66 55 66<br />
Fax +32 24 63 31 04<br />
Brazil<br />
Phone +55 11 5561 2683<br />
Fax +55 11 5535 4153<br />
China<br />
Phone +85 2 2763 6966<br />
Fax +85 2 2763 6311<br />
Czech Republic<br />
Phone +42 02-579 11 850<br />
+42 02-578 10 561<br />
Fax +42 02-578 10 559<br />
Denmark<br />
Phone +45 45 82 64 00<br />
Fax +45 45 82 64 01<br />
Finland<br />
Phone +358 9-728 85 00<br />
Fax +358 9-72 88 50 55<br />
Japan<br />
Phone +81 3 3358 1341<br />
Fax +81 3 3358 0586<br />
Korea<br />
Phone +82 2 786 6321/4<br />
Fax +82 2 786 6325<br />
Netherlands<br />
Phone +31 30 229 25 44<br />
Fax +31 30 229 39 94<br />
Norway<br />
Phone +47 67 56 7500<br />
Fax +47 67 56 6100<br />
Poland<br />
Phone +48 22 837 40 50<br />
Fax +48 22 837 43 88<br />
Singapore<br />
Phone +65 67 44 37 32<br />
Fax +65 68 41 77 47<br />
Spain<br />
Phone +34 93 4 80 31 00<br />
Fax +34 93 4 73 44 69<br />
Sweden<br />
Phone +46 8-680 64 50<br />
Fax +46 8-710 18 75<br />
8 008 796/0000/25-06-2002 · 5M/TR · SMD · Printed in Germany · Subject to change without prior notice · AftE3605sw<br />
France<br />
Phone +33 1 64 62 35 00<br />
Fax +33 1 64 62 35 77<br />
Germany<br />
Phone (+49 2 11) 53 01-0<br />
Fax (+49 2 11) 53 01-1 00<br />
Great Britain<br />
Phone +44 17 27-83 11 21<br />
Fax +44 17 27-85 67 67<br />
Italy<br />
Phone +39 02-92 14 20 62<br />
Fax +39 02-92 14 20 67<br />
Switzerland<br />
Phone +41 41 61 92 93 9<br />
Fax +41 41 61 92 92 1<br />
Taiwan<br />
Phone +886 2 2365-6292<br />
Fax +886 2 2368-7397<br />
USA<br />
Phone +1(781) 302-2500<br />
Fax +1(781) 828-3150<br />
Representatives and agencies in<br />
all major industrial countries.<br />
SICK AG · Division Auto Ident · Nimburger Straße 11 · 79276 Reute · Germany · www.sick.de