Every year, my co-organizer Larry and I say the same thing: “We simply must get out there and go on a drive as soon as possible!” With Easter arriving early this year (April 1), we saw that as an opportunity to organize a drive as early as April 8.
Except, it snowed that weekend.
The next best date that worked for us was April 29. Certainly, it HAD to be warm by then….
After a glorious and sunny Saturday which saw temps in the 70s, Sunday dawned with sprinkles, a temperature of 55 degrees, and a stiff wind. Nevertheless, ten intrepid souls ventured out for a drive to the Readington Diner in Whitehouse Station NJ, where good chow and hot java awaited us.
Waiting for takeoff
One of the many things I personally enjoy about our informal club is that we have no rules regarding what you can drive. New, old, domestic, import, high-end, rolling wreck(!), if you think it can get you there and back, then we accept you into the fraternity. On some level, everyone’s car is interesting. This can result in quite the eclectic mix of cars, and today’s group was exactly that. We had:
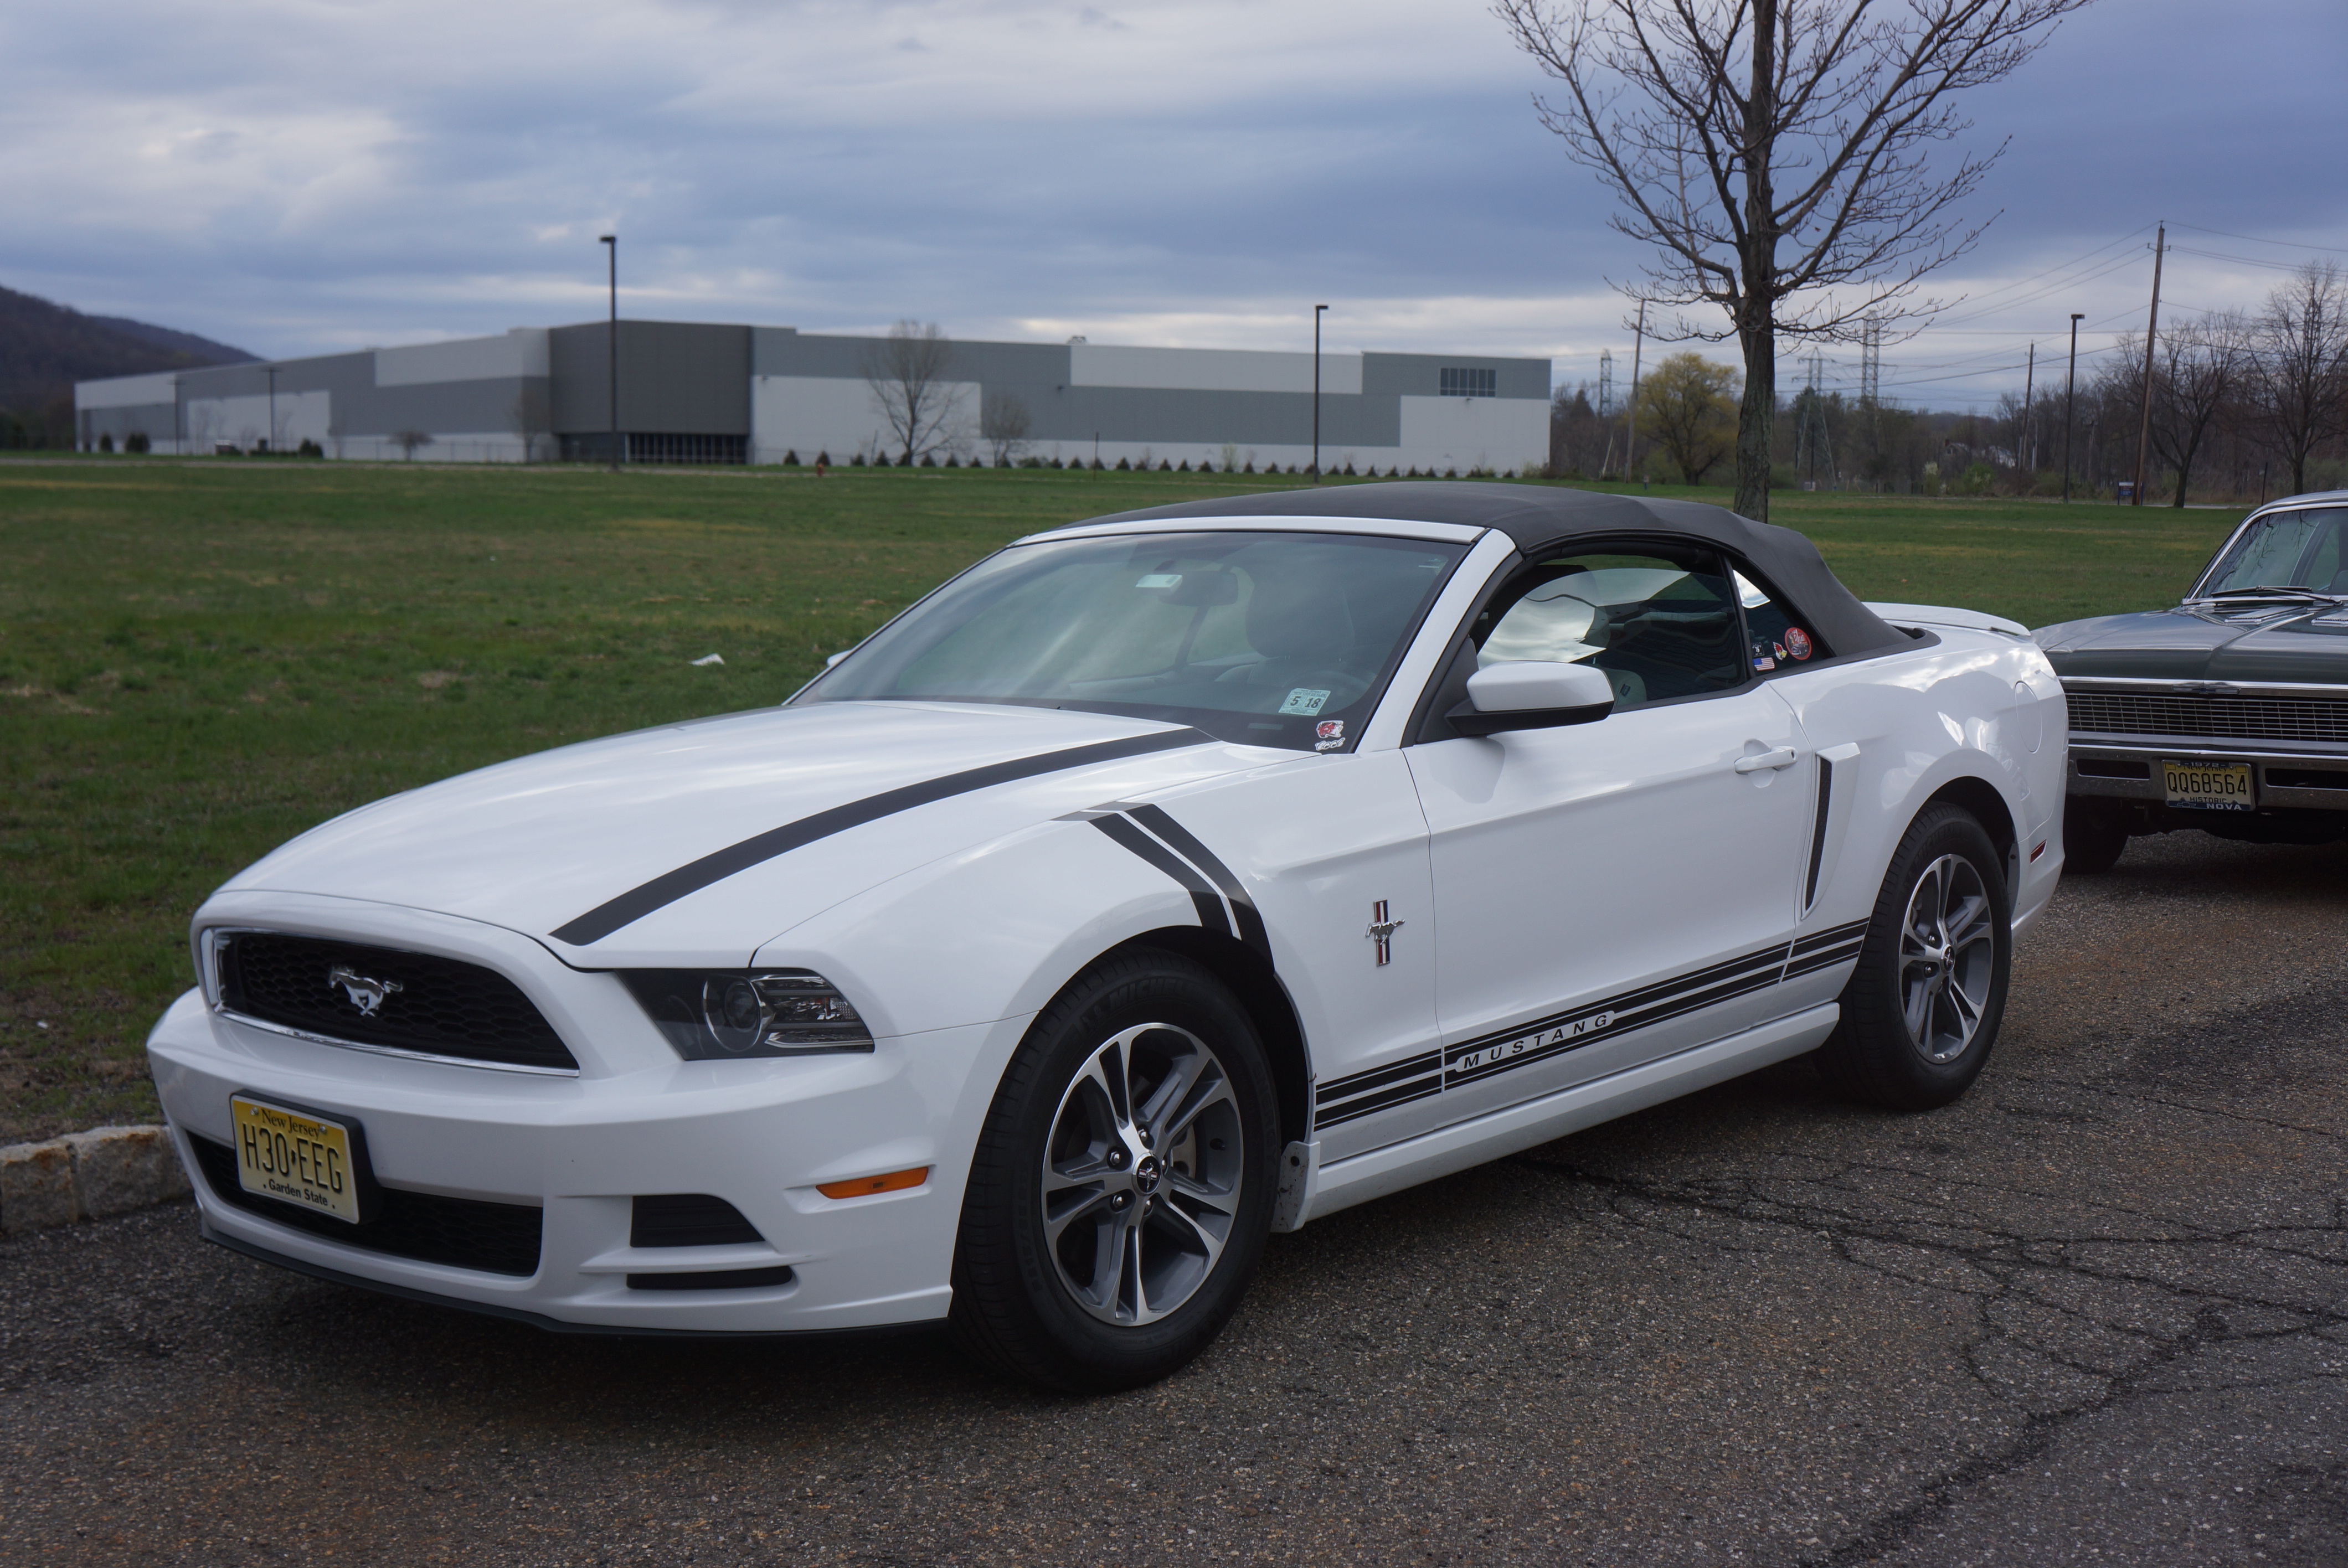
Three domestic cars: a ’39 Ford (wearing a ’40 front clip), a ’72 Nova, and a late-model Mustang.
Six European cars, broken out as two Italian (both Alfas), two German (BMW and Porsche) one British (Jaguar F-type) and one Swedish (Volvo 1800S).
One Japanese car, an NB (2nd generation) Miata.
BMW E30 2-door
Jaguar F-Type
1972 Chevy Nova
1967 Alfa Romeo GT 1300 Jr
Second-generation (NB) Mazda Miata
Andy’s Volvo C70 Coupe (he didn’t join us for the drive)
Another enjoyable aspect is the chance to meet new people. John in his Miata and Tom in the Volvo (which he’s owned for only a month) were both with us for the first time, and I dare say that they enjoyed themselves enough that we can expect to see them again.
Porsche 911
1964 Volvo 1800S
“This ain’t no ’40, this ain’t no flathead, this ain’t no foolin’ around”
1991 Alfa Romeo Spider
“Mustang Sally” 21st century style
We shoved off from the Mahwah Sheraton parking lot at 8:28 (early for once, as the group was shivering), and headed south on Route 287, destination Morristown. Taking route 24/510 west through Morristown and Mendham, we ended up in Chester, where we made a quick pit stop (for Bill).
“… and it’s got 3.90 gears so the mileage isn’t too bad….”
Tom’s gorgeous 1800 at the rest stop
Continuing on Route 513 through Chester, we turned left in Long Valley and had a spirited drive along the winding curves of Route 517 South. A quick right turn onto Route 22 West had us motoring only another half mile before arriving at the diner.
A favorite car club eatery
Andre the Magnificent served us mightily (anyone who brings coffee refills every 10 minutes is my hero), and as is our habit, we lingered long after the plates cleared. It’s obvious that the camaraderie is there; after all, most of us had not seen each other since last fall. As one participant exclaimed, “we really are CAR people!”
As we exited the diner, we finally saw some sun (enough for Nick to drop his top)
Let’s hope that we have many additional opportunities for Sunday breakfast drives in 2018.
2018 marks the 4th consecutive year that I’m bringing you a Spring Carlisle Auction Report. You can read about the 2015, 2016, and 2017 auctions by clicking on the links, or, you can just skip it if you don’t feel like doing that.
It IS interesting, though, to glance at the 2015 summary from three years ago and see what has changed and what has not. At that time, I described the Carlisle Auction as a “mom and pop” kind of event, and while vast improvements have been made in the ensuing years, it still has a certain aw-shucks quality.
The Expo Center is a well-lit, comfortable building
One of the bigger changes is the move from a 2-day to a 3-day auction. Of course, this means substantially more cars are on the ground. Space is at such a premium within the grounds of the Carlisle Expo Center that the Tree Of Life Church next door had its parking lot absconded in order to help contain the approximately 600 vehicles dragged across the block.
Thursday and Friday auctions started at 2pm, and the newly-added Saturday bonanza started at 10am. Part of the plan is to lure attendees at the Spring Carlisle swap meet to walk an extra three blocks and perhaps buy an auction car.
The Expo Center was well-attended during my time there on Thursday and Friday, but I wouldn’t call it jammed. Like other auctions, the crowd is thinner during the early and late hours, which can be a good time to snag a deal. As always, especially compared to Mecum, Carlisle appears to be primarily populated by dealers who are both buyers and sellers. You might get the car of your dreams for something less than retail. Caveat Emptor (I’ve been dying to slip some Latin into a blog post).
Below are descriptions of cars that I found interesting, and which I personally inspected and observed cross the block. Richard’s Car Blog continues to bring you auction reports with A) multiple photos of each featured car, and B) sold vehicles arranged in sale price order. At the end are a few notable no-sales.
I invite your comments about which of these cars you’d like to own, and whether you found the sale prices to be favorable or not. Enjoy the report!
$7,500 and under:
Lot T115, 1981 Mercedes-Benz 380 SL roadster, metallic grey, grey hardtop, black interior. No indication if soft top is included. Miles not recorded. Paint looks unmarked, chrome is decent. Factory alloys on black wall tires. Interior looks like a 20 year old used car: it’s dirty and worn in spots, but not a project. Just another used 107.
380SL front looks good
As does rear
Interior worn but not shot
SOLD FOR $2,500; CPI #3: $16,000. I inspected this car after the sale, so I really wasn’t supposed to touch it, but I did open the door. As the kids would say, WTH? Unless there is a salvage title, or the motor knocks, this was one of the steals of the auction. Happens with cars that run very early or very late in the day, before the crowds filter in.
Lot T166, 2002 Mazda Miata, dark blue metallic, black vinyl convertible top, black leather interior. Four-cylinder, 5-speed manual. Sign on windshield says 69k original miles. Mazda alloys show well, Hankook tires all around. Paint looks good, no chips in front. Some wear on driver’s seat side. Interior otherwise OK. This is the first time I can recall seeing a Miata at a Carlisle auction.
Just a used car?
2002 makes this a 2nd gen NB
Interior is austere in black
SOLD FOR $5,000; CPI #3: $6,850. Just a used car; sold for wholesale, but notable as identifying a Miata as a (future) collectible.
Lot T156, 1964 Chevy Corvair Monza 900 convertible, red, white vinyl convertible top, white vinyl interior. Five-digit odometer shows 62,191. 95 HP 2-bbl H6, 2-speed Powerglide automatic transmission. Sign claims car is all original. Full factory wheel covers, black wall tires. Paint looks tired, no signs of rust. Interior shows multiple shades of white, especially on door panels. Sign on dash: “Jiggle shifter in neutral to start”.
Last year of 1st gen
Whitewalls might help look
“sporty” buckets
SOLD FOR $5,800; CPI #3: $7,150. Many, myself included, prefer the styling of the 2nd generation ‘vairs. If the 1st gen cars are your preference, this looked like an honest one for the money. Improve it while enjoying it.
Lot F321, 1989 Nissan 300ZX, metallic white, t tops, 2 tone brown cloth interior. Six-digit odometer reads 056,538. White factory alloys , black wall tires. Rear window louvers are behind seats. Very nice last year model of this generation, but car has automatic transmission. Paint is clean, no chips in nose. Wheels are a bit scuffed. Interior is very clean, with some minor wear on driver’s seat bottom. Some black peeling off outside trim.
’89 last year for this body
Exterior very clean
As is interior
SOLD FOR $6,400; CPI #3-#2 RANGE: $4,000-$8,475. Fair price for a clean low-mileage car, provided you are OK with the automatic (which I would not be on a Z car).
Lot T145, 1978 VW Beetle convertible, red, black vinyl convertible top, black vinyl interior. 80,323 miles on 5-digit odometer. Aftermarket black alloy wheels. No rust showing, one tail light broken, looks like it was repainted once, top is decent shape, interior is original and is all there.
Air-cooled VWs becoming…
… collectible, esp drop-tops
Old-fashioned interior
SOLD FOR $7,500; CPI #3: $12,300. Red is not the best color for a Beetle, but after a good detailing, car will be ready for cruising and touring. Wheels are a cheap fix if originality is your thing. Price was a bit advantageous to buyer.
$10,000 to $20,000:
Lot F313, 1987 Mercedes-Benz 560 SL, red, black cloth convertible top, black interior. No indication if hardtop is included. 107,322 showing no 6-digit odometer. Inspection sticker on windshield is from MA, expires in 2018. Chrome Benz alloys look blingy, black wall tires. Interior upholstery and wood are worn. Tear in soft top on left side.
Red perhaps not best color
Top ripped on L side
Inside worn but servicable
SOLD FOR $10,250; CPI #4-#3 RANGE $17,000-31,000. This was one of several of this generation SLs (the 107 platform) at this auction. Condition-wise, this one was average. Sale price was a bit of a bargain, as the big-engine 560SLs are hot in the market right now. Admittedly better condition ones on Bring A Trailer are fetching twice this amount.
Lot F456, 1965 Chevy Corvair Corsa convertible. Dark green metallic, black vinyl convertible top, black vinyl interior. 58,614 on 5-digit odometer. Full wheel coves, narrow white walls. Passenger door fit off, rubbing at back edge. Looks like a repaint. 4-speed manual floor shift, tachometer on dash. Sign on car claims long-term ownership from within family that owned Chevy dealership where this car originated. Stiff shifter almost impossible to move from gear to gear, true for all 4 forward gears.
Dark green looks good
as does silver back panel
4-speed needs fixing
SOLD FOR $10,600; CPI #3: $11,100 Fair price, if a bit close to retail, and that’s if shifter is easy fix. Still, nice cruiser, and way less money than that other brand which features air-cooled rear-mounted flat-6 engines….
Lot T237, 1968 Oldsmobile Toronado, white, black vinyl roof, black cloth/vinyl interior. 46,663 on 5-digit odometer. Full wheel covers, white wall tires. Sign on car says original 46k car. Car is dirty, sheet metal looks straight. Massive front bumper, hideaway headlights. V8 and automatic. Driver’s seat cloth is worn through and showing foam at leading edge of seat.
Massive front bumper
Some styling cues from ’66
FWD makes for big space
SOLD FOR $16,250; CPI #3-#2 RANGE $8,800-18,000. This was a #3 car which sold for #2 money. Colors were bland, and car was just OK. I would have held out for the better-looking ’66-’67 model.
Lot F393, 1963 Ford Thunderbird convertible, bronze metallic, white vinyl convertible top, bronze vinyl interior. 77,328 on 5-digit odometer. Narrow white walls, full wheel covers. Left front fender trim and bumper do not line up. Top and chrome look OK. Some swirls in paint. Interior is very nice, has factory AM radio. Car has optional “roadster” tonneau cover over rear seats.
’63 last year for bullet Bird
Would look better topless
Space-age interior
SOLD FOR $17,800; CPI #4-#3 RANGE $14,000-25,000. Based on sale price, I’m presuming that this is not a factory “sports roadster”, which doubles its book value. The car was impressive overall. As bullet Birds go, colors were right, the top dropped, and it was within book retail. Fair deal all around.
Lot F434, 1957 Ford Skyliner retractable hardtop/convertible. . Green and white two-tone paint, green interior. V8, automatic. Full wheel covers, white walls. Painted wheels not in good shape. Sign says that car was restored in the 1980s. Chrome is just OK. Trunk lid fit is off. Dash looks unrestored, gauges look aged. Aftermarket A/C unit hanging below dash looks very out of place. Not great, but not a project car. Ben J. Smith, the father of the retractable, autographed the glove box.
’57 Fords outsold Chevy
Big butt needed for top
A/C looks out of place
SOLD FOR $18,000; CPI #4-#3 RANGE $35,000-62,000. Fifties cars, in general, seem to be out of favor right now. The generation that collected them is dying, and the younger collectors have yet to discover them (but they will). This was an older restoration which lacked eyeball. I think that the book value is high, but still, if car drove and top worked, someone got a bargain.
$20,000 to $30,000:
Lot F439, 1956 Ford Thunderbird, 2 seat convertible. V8, automatic. 5-digit odometer shows 30,798. White with white porthole hardtop. Soft top is included according to sign, but it was not inspected. Windshield has RI inspection sticker from 2000. Full T-Bird wheel covers. Black and white vinyl interior. Factory Continental kit has been removed from rear, looks strange without it. Black windlace trim out of place along fender skirts. Hardtop is not in good shape: rubber AND chrome are shot. PW, PS, factory radio in dash, aftermarket radio below dash. Middling T Bird.
2nd year for T-Bird
Conti Kit MIA
Power windows & seat
SOLD FOR $23,500; CPI #4: $25,375. Sold on the money for #4 condition car, which this was. Two-seat T-Bird prices have been stagnant, maybe slipping a bit, for the last 20 years.
Lot F414, 1958 Edsel Pacer convertible. Coral and white two-tone inside and out. 95,340 on 5-digit odometer. V8, automatic. Power white vinyl convertible top. Wide white walls, full Edsel wheel covers, dual outside mirrors. Hard to fault on outside, except some fender and door gaps less than ideal. Car was restored to original appearance. Interior well–restored, only nit to pick was crack in trim at bottom of seat. A rare car. Styling took only 60 years to mellow out in most people’s minds.
Style no worse than other ’58s
Looks mild from rear
Real ’50s interior
SOLD FOR $28,250; CPI #4-#3 RANGE $18,750-33,500. A nice Edsel, a #2 car for #3 money; well-bought.
Lot T140.4, 1966 Chevrolet Corvette convertible, blue, white vinyl-covered hardtop, no sign of soft top, white interior. Mileage not recorded. Base V8, automatic. Full wheel covers, white wall tires. Side pipes. Paint, possibly original, is worn down to nothing all along sharp body edges. Paint is also blotchy on hood. But no visible fiberglass damage. Interior worn but not trashed.
Looks OK from afar
Remaining paint shiny
Auto trans disappointing
SOLD FOR $29,000; CPI #4-#3 RANGE $21,000-38,000 This was potentially an all-original ‘vette. If it were mine, I wouldn’t paint it, I’d drive it and call the paint job “patina”. A fair price, maybe a little bit of a steal.
INTERESTING NO-SALES:
Lot T149, 1986 Jaguar XJ6, 4 door sedan, 6-cylinder, automatic, blue green metallic, black wall tires, factory alloy wheels, beige leather interior. 6-digit odometer shows 061,146. Paint very tired, all horizontal surfaces are dull. Might be original paint, might buff back. No body damage. Wheels are dirty and peeling. Compared to paint, interior is surprisingly good except for center console wood which is cracked and delaminated. Driver’s seat rather unmarked.
Rain makes paint look OK
Lots of ’80s elegance
Interior better than outside
NO SALE, NO BIDS! CPI #4: $2,275. In all my years of attending auctions, never before have I witnessed a car fail to garner a single bid. Auctioneer was disgusted, spent about 30 seconds on it, then exclaimed “get it out of here”. If it ran, car is at least worth $2,500-3,000.
Lot F376, 1955 Imperial Newport 2-door hardtop (not Chrysler). Jade green metallic paint with white painted roof. Interior gold cloth and white leather. 27,620 on 5-digit odometer. 331 cubic inch Hemi V8, two-speed automatic. Last year that Chrysler used 6-volt positive ground electrical system. Full wheel covers, wide white wall tires. Factory air conditioning. Some waviness in front fenders, tail light chrome is pitted, bumpers look OK, no obvious signs of rust. Engine compartment dirty and unkempt. Driver’s seat bottom upholstery is shot. Immense dashboard with tranny shifter in dash. Each outboard seating position has its own ash tray and lighter (back when everyone smoked, even your grandmother).
Front styling shared with C300
First year gunsight tail lights
Highly-styled dash
Door panel detail
NO SALE, BID TO $12,500; CPI #4: $13,225. At every auction, there’s one car that I become smitten with, and at Spring Carlisle 2018, this was that car. What a magnificent beast. It was loaded (FACTORY AIR), and it had a Hemi. I heard it start and run coming off the block: smooth, quiet, and powerful. I want to drive a rally in it and show up the F-car owners. Still, it was rough around the edges and perhaps should have sold for high bid. Why didn’t I bid? It doesn’t fit in my garage, but I’m considering knocking down a wall….
Lot F336, 1941 DeSoto Custom S8C, 2-door convertible, blue, white vinyl convertible top, blue vinyl interior. 71,934 on 5-digit odometer. 228 c.i. flat head 6, fluid drive with shifter on column. Dog dish caps, black wall tires. Restored to decent driver-level condition. Top has some marks from folding. Interior looks like non-original pattern. Steering wheel and pedals let down the interior: wheel is brown, looks unrestored, and matches nothing else on car; and pedals show significant wear.
Pre-war styling…
… but top drops
non-original interior bland
NO SALE, BID TO $21,250; CPI #3 (for 1946 convertible): $23,200. Bid was fair, maybe a bit generous. There cannot be a big demand for ’41 DeSotos.
Lot T231, 1956 BMW Isetta, bubble window coupe, red and white, white sunroof, white interior. Door is locked, unable to inspect interior. Car has rare “Z stripe” molding. Car is restored, for the most part to original standards, but engine door uses wing screw. Car looks like it was painted with glass in. Black wall tires, BMW hub caps and trim rings. Non-original exhaust, correct accessory exterior luggage rack.
US spec car w/overriders
Bubble window w/huge back glass
Luggage rack is cute
NOT SOLD, BID TO $22,000; CPI #3: $30,000. Bid was light, especially for “rare” bubble window coupe. Carlisle may not have been the best audience.
Lot F371 1994 Ferrari 348 USA spider (convertible). Windshield sign states “PINNIFINARI Special Edition”. Sign also claims 29k original miles. Black paint, black cloth convertible top, tan leather interior. Black and silver aftermarket wheels, Hankook black wall tires. Car is not clean, swirls in paint. Top has 4 patches sewn in place, one patch does not even cover hole in top. Dog leg gated shifter. Driver’s seat looks ok, but sitting in car, seat is completely loose, and rocks in place as you apply pressure to clutch. No seat belt visible at driver’s seat.
Boy racer look on these wheels
Complicated top
Interior OK, but seat loose
NO SALE, BID TO $39,000; CPI #3: $42,225. I was wondering if Pinnifinari is a special Italian sandwich served on panini bread. This one is simple: other than the fact that the car is badged a “Ferrari”, it had nothing going for it. If that bid were real money, seller should have taken it and run. This car is the poster child for the cliché “There’s nothing more expensive than a cheap Ferrari”.
Lot F407, 1970 Mercedes-Benz 280 SL convertible. White, brown soft top, brown vinyl interior. Sign says hardtop is included. Inline-6, automatic transmission. 5-digit odometer reads 36,037. Factory hub caps, black wall tires. Outside is cosmetically very nice, paint cannot be faulted. Windshield shows PA inspection sticker from 2014. Spare tire missing from trunk. Interior is a mess: driver door pocket ripped, loose handle in pocket. Both seats have cracked vinyl. Driver’s seat uncomfortable, foam is hard and flat. Brown carpet has faded to a green. Big gap in soft top above passenger door.
Very straight exterior
Soft top looks good
Interior does not look good
NO SALE, BID TO $67,000; CPI #4-#3 RANGE $85,000—125,000 House announced that “it’s going to take $75,000”. Something between high bid and reserve is probably a fair price, but that interior is going to cost money to make right.
Those of you who have followed this Isetta Saga have endured 11 chapters of a story that has covered parts of three decades. You’ve read about the initial discovery of these tiny cars, first in a magazine ad, then in a Vermont barn. You learned that I’m very good at letting a few years (like, ten) go by without any work transpiring. You saw that getting my own garage gave me the work space I longed for. My pictures illustrated progress with dismantling and restoring major components such as the chassis, engine, and rear axle.
At what point, dear readers, did you ask yourselves:
WHEN IS THIS THING GOING TO RESEMBLE A CAR?
Can’t say as I blame you. If you didn’t know better (and I have yet to prove that you will), you might conclude that the freshly-painted engine is destined for a museum display cabinet. And “rolling chassis”? Please. The cynics out there (I know who you are) are thinking “just throw a sheet of plywood on it and use it as a garden cart”.
But are we any closer to actually taking it for a drive? Let’s recap the two most recent chapters. Chapter 10 included the story of the combo starter-generator known as the Dynastart. Its renewed wiring was complete, even if it was yet to be reinstalled onto the crank nose. And Chapter 11 displayed photos of a Dynastart-less engine bolted to the chassis, with a complete transmission and final drive axle right behind it. The next steps were to install the Dynastart, obtain a voltage regulator and battery, and pick up a quart of fuel at the local gas station. Oh, and then try to start it.
Any book about the internal combustion engine will tell you that provided your internals are mechanically sound, only three things are needed to start an engine: air, fuel, and spark.
I made a checklist.
Air: check. (My backyard had an abundance of it, and there were no obstructions in front of the carb.)
Fuel: check. (The Isetta has no fuel pump. Someone just needed to hold a funnel higher than the carb, and pour fuel into it while a hose ran to the carb.)
Spark: check. (If I was correctly reading John Jensen’s Isetta Restoration, touching certain wires from the Dynastart and the voltage regulator to a 12 volt source would crank the engine and deliver spark to the plug.)
Heavy red cable feeds Dynastart; voltage regulator is temporarily clamped to chassis
On Sunday, March 26, 1995, I rolled the chassis out of the garage and into the backyard. Enlisting the help of my friend John M and his 10-year-old son Nick, we poured fuel into the funnel, and touched wires to the battery.
John not only lent the services of his son, perched as he was on a step stool for this grand experiment; John also had a video camera set up, ready to record the scene live as it happened.
This long-hidden VHS tape was recently rediscovered and transferred to DVD. Please click on the YouTube link below so that you may verify the results with your own eyes:
I assure you that these moments were not rehearsed. Once I remembered to supply sufficient fuel to the carburetor, the engine actually started on the first try. The fist-pumping at the end was a spontaneous display of exuberance, a reflexive reaction to the sheer joy of the moment. The feeling was indescribable; it certainly energized me to keep pushing myself to complete the car in the few short months I had remaining to meet my own self-imposed deadline.
The PLAN was to spend free time during this past winter working on the Miata. What happened? Where did the winter go? Of course, I ask that based on the CALENDAR, not on the actual WEATHER. (As I sit here composing this missive at 7:24 p.m. EDT on April 15, it is 38 degrees F outside, and the rain and wind make it feel like 31F. Clearly, it does NOT feel like spring!)
The to-do list for the ’93 Miata, drawn up last November, included: rear brake service, transmission service, new lights, new tires, and an engine compartment detail. I haven’t gotten very far. The first item to be tackled, the brakes, wasn’t started until March, and still needs bleeding and parking brake adjustment before it’s crossed off the list.
Since e-brake adjustment requires removal of the center console, I combined that with servicing the shifter. Here was a case where online forums provided information not to be found in a service manual.
My Miata service book, published not by Mazda itself but by an independent publisher, is quite good. However, it says nothing of servicing the shifter “turret”. The turret is an oil-filled box at the rear of the transmission, in which the shift rod connects to the external shift linkage. It does not share its oil with the rest of the gearbox.
Under the leather faux boot is the real rubber shift boot. Old (L) and new (R) side-by-side.
Once the shift knob was unscrewed and the center console lifted out of the way (the leather boot attached to the console is but a decorative item), it was obvious that repair work was overdue. (This is what happens when you drive the same car for 21 years, and the small deteriorations are not noticed.) The large rubber shift boot was shredded, and the flexible rubber cap, bonded to a metal plate which forms the top of the turret, was equally damaged. Removal of the cap allowed the shift rod itself to be extricated. The plastic bushings at the bottom of the rod were worn but not broken. Most of the turret’s gear oil was gone.
Bottom of shift rod, with old plastic bushings still attached
One of the major forum findings was just that: “You’ll find the turret to be empty or almost empty. Service it by refilling it with oil”. The mystery remains: where did the oil GO? Using a turkey baster which has been appropriated to the garage, the scant remaining oil was sucked out, and fresh 75W-90 gear oil was added until it almost reached the top of the turret.
Peering into the now-empty turret
It was time to rebuild the shift knob. The aftermarket replicates all the needed plastic and rubber parts; however, scanning the various online listings convinced me that spending a bit more and getting OEM components was the wiser move. A Mazda dealer in Vienna VA, Priority Mazda, runs an eBay store and had the best combination of price/availability/shipping cost/delivery time. I placed the order and had all my parts, in Mazda bags, at my house in 3 days.
Old (bottom) and new (top) service parts lined up
The new pieces went together quite easily. With the turret full, everything at the center console was reinstalled. While I was there, I drained the gearbox oil, and again using a recommendation from the forum, refilled it with Valvoline “Manual Transmission Fluid”, GL4, NOT GL5. After visiting 3 auto parts stores looking for this stuff, I had to order the Valvoline online also. What did we do before the World Wide Web?
Valvoline MTF, hard to find in stores
The trick to getting 75W-90 gear oil to flow in 50 degree weather
Rebuilt shift rod reattached to now-filled turret
The Miata is still up on 4 jackstands; just as well, because it ain’t goin’ out in this weather just yet. Once it warms up, I’m excited to take that first test drive and try out the shift action. With fresh tranny oil, refilled turret, and new rubber booties, I have great expectations. But I better put a hustle in my bustle. The NJ Region AACA annual car show is Sunday May 6, EXACTLY 3 weeks from today, and my now-25-year-old Miata will be making its AACA debut there. It’s at the Mennen Arena in Morristown. If you’re in the area, I expect you’ll come by.
The Isetta Saga has many more chapters to go before reaching its inevitable conclusion. With the help of some colleagues, I’m working on a big surprise, and hope to have it available for your viewing pleasure soon.
FUN FACT:
Road & Track magazine, in its July 1989 edition, ran its first full road test of the new 1990 Mazda Miata. A sidebar article crowned it one of the “World’s Best Cars”. Here’s what they said about its manual transmission:
“…. performance is further enhanced by a close-ratio 5-speed that rates nothing less than a 10 for its smooth, positive operation. With the feel of a Formula car, this tranny is fun just to run through the gears.”
In Chapter 10, the rolling chassis debuted to the world. In Chapter 11, that chassis gets the rest of its drivetrain reunited with it, but not before a very long drive turns fruitless.
The year 1995 had dawned. Staring me in the face was the sign I created and hung in my workshop: “The Isetta Will Drive in ’95”. Could this be possible? Theoretically, I had until 11:59 p.m. on December 31, but practically, I knew that it needed to happen before winter set in.
Never mind the still-unanswered dilemma about body and paint. There were two more immediate challenges:
The restoration had reached the point of discovering that many small pieces were completely missing. I had no ignition switch, headlight switches (on/off and low/high beam), turn signal switch, motor mount brackets, or hub caps. Some of the pieces I did have were in such poor repair that it would help if I could find other used ones in better condition.
My completed engine and transmission were not yet installed in the restored chassis. This was a priority because once installed, I needed to prove that the engine would start and run. Should there be a failure there, I wanted enough time to correct whatever needed correcting.
The Old Cars Weekly ad, complete with note from Bob
The solution to Challenge #1 came to me via interoffice mail. A fellow-fanatic colleague, Bob McCown, sent me a clipping from Old Cars Weekly magazine. Either I no longer subscribed, or I had missed the ad. Someone in Pennsylvania had a “complete, solid” Isetta PLUS a rolling parts car, for $1,000. I called the number, and the conversation went something like this:
ME: Hi. About the complete car you’re selling, what would it take for it to run?
SELLER: A battery.
ME: And the rolling parts car, is it complete?
SELLER: It has no drivetrain, but the rest of it is there.
This sounded like a deal to me. The plan was already decided: I’d buy both cars, strip them, keep what I needed, and sell off what I didn’t. What the heck, I’d been doing exactly that for the past 5 years!
I called my good friend Steve M, who was always up for an adventure. Checking a map (no, not Google Maps, that hadn’t been invented yet), I found the town outside Pittsburgh, about a 6 hour drive one-way. Steve and I agreed to a Saturday 6 a.m. departure from my house. I hooked up the open landscape trailer (a recent purchase made for express purpose of moving Isetta bodies) to my Volvo 850 wagon, and we were off.
Car & trailer (here with body in tow) made 12-hour round trip to PA
Steve said: “You know, showing up with an empty trailer is bad. He’ll conclude that you’re buying his cars no matter what. I suggest that you find a spot about a mile from his house and park the trailer.” I would have none of it. I retorted “Look, as excited as I am about these cars, if I don’t want them, I’m not buying them.”
We arrived at the seller’s house around noon. The property was a large farm, with numerous outbuildings. About 50 yards away I spotted a canvas cover draped over the unmistakable silhouette of an Isetta. We didn’t see a soul, so we headed toward it. Peeking under the cover, the Isetta was quite rough. “This must be the rolling parts car” I told myself.
“John” the seller emerged from one of the buildings. Spotting the NJ plate, he correctly presumed that I was the guy who called.
ME: So this must be the rolling parts car.
JOHN: No, that’s the better of the two.
We peeled the cover completely back. The sunroof was missing. The interior was gutted. The engine was on the floor of the car.
ME: You told me on the phone that the better car only needed a battery to run.
JOHN: Well, that engine would run once it’s reinstalled. At least it’s there.
ME: Oh boy. Since we’re here, let’s look at the rolling parts car.
We followed him to another part of the farm. The roller was inside. The roller had been in a fire. Everything consumable was gone: paint, glass, plastic. There was sheetmetal, but it was impossible to tell what color the car had been. The roller was worth more as scrap metal.
I was too disappointed to be angry. There was no way I was purchasing these two Isettas from him. If he had offered them for free I would have declined, as neither car had the parts I needed. In a situation like this, the best way to get even is to walk away. I said to John, “I’m not buying these”, shook his hand, and we got back into my car. Steve and I had a nice dinner somewhere in PA. So much for that idea.
Challenge #2 was more within my control. Bolting major mechanical subassemblies to the chassis with the body removed was quite straightforward, except for the missing components. I had no motor mount brackets, and they weren’t being reproduced, so one of my local suppliers was able to fulfill an order for a pre-owned set. The engine, complete with cylinder head, carburetor, and clutch, went in first. Next, the transmission was installed.
Chassis with engine and transmission in place
From left rear: both Giubos are visible, as is carb. Dynastart not yet reinstalled.
The world’s shortest driveshaft, freshly painted and with a Giubo at each end, was positioned between the trans output and rear axle input. Two issues here required focus:
One, the Giubo bolts were special items with very thin heads. The clearance between the bolt head and gearbox case was so small that standard-sized bolts would rub against the case, gouging it. This was written about repeatedly in the club newsletters.
Two, the flanges on either side of the driveshaft were not aligned, and again, newsletter articles warned novices NOT to align them. Something about the way the entire drivetrain moved required the flanges to be ever-so-slightly offset, with the flexible Giubos correcting the difference.
From left rear: note carb fuel bowl
From this angle: note oil filler tube, upper motor mounts, trans linkage. Left Giubo is quite twisted.
The drivetrain was installed. I resigned myself to being “nickel-and-dimed” from local suppliers for any further missing parts. Spring was on its way. Next, I would attempt to start the engine, then really get serious about finding a body shop.
Exhaust manifold not installed yet. Adjustable plate on final drive takes up chain slack.
Did I mention that I didn’t have a title to the car?
Next time in the Isetta Saga: As taught in class, an engine only needs 3 things to run: air, fuel, and spark. Is that still true if you only have one cylinder?
Giubo joints have their own Wikipedia page. The name “Giubo” (pronounced JOO-boh) is derived from the first three letters of “giunto” (Italian for “joint”) and the first two letters of the inventor’s last name, Antonio Boschi. “Giubo” is frequently misspelled as “guibo”, and then mispronounced as “guEE-bo”. The coupling was first used on the Alfa Romeo 1900 of the early 1950s, and was used on many BMW cars throughout the second half of the 20th century.
In Chapter 9, the transmission and final drive got overhauled, and the chain-driven axle was ready to be reattached to the chassis. In Chapter 10, the restored rolling chassis finally sees the light of day.
Smack in the middle of calendar year 1994, elbow-deep in my restoration of this fine German bubble car, I was at a “good news / bad news” crossroads. The good news: much mechanical progress had been made. One engine, minus a cylinder head, was complete. With the transmission and enclosed-chain rear axle both restored, the drivetrain was essentially done. The chassis, currently on its front tires only, was very close to rolling on all four wheels and tires.
But the bad news, like a devil on my shoulder, would lean into my ear and whisper: “You’re not going to get this done”. I still had parts procurement issues. In spite of my dealing with multiple parts suppliers, no one vendor had everything I needed, and there were still some parts which no one seemed to have. My commitment to the rebuild of a 2nd engine was detracting me from progress on my own car. Work to be sent out, in this case the cylinder head rebuild, left me stymied, as I was having difficulty finding a machine shop willing to take on an Isetta valve job. I continued to discover that I was missing parts (remember that I did not disassemble these cars), which had me on the hunt for good used ones. I had not even begun looking into a shop for the body and paint work. Yet I continued to brag how “the Isetta will drive in ‘95”, and 1995 was next year.
Let’s pause for a moment and reflect back, with 25 years of hindsight. Why was I doing this? What were the motivating factors? The truth is that there was nothing rational about the time, money, and effort being expended to restore this microcar which most people never heard of, and which had little monetary value in the collector car market. This was a labor of love, driven by these factors:
Having failed once at an attempt to sell the car, there was little choice but to make something out of the pile of parts.
Fifteen years after purchasing the car, I felt an obligation to do something with it.
It was a pipe dream to prove that I could take a non-running car and restore it.
Having heard horror stories about stalled projects, I was determined to show that it was possible to finish one.
I had the tools, the space, and the mechanical knowledge, giving me the confidence to tackle the work.
This is not to say my time was otherwise not occupied. My career with Volvo was in full swing, and it included regular domestic and international travel. My home and family life were full of commitments. I continued to perform on the drum kit in various bands, although not to the extent I had during the previous decade.
Primarily, the Isetta restoration was my way of immersing myself in the old car hobby. Both the ’57 Ford and ’67 Dart were gone. Aside from the Isetta, my only other car was my daily driver, a company-leased Volvo. There was no room, financially or physically, for another collector car. What drove me? The drive came from the knowledge that a finished, drivable Isetta was my ticket into the world of collector car events.
In an earlier post on the Isetta Saga, I mentioned that one cannot embark on these kinds of journeys alone. Working for an automobile company as I did meant that I was surrounded by fellow enthusiasts. In countless ways, they provided advice, assistance, and direction. One of my colleagues, Galen Royer, was a motorcycle guy, which I was not. Speaking to him one day, he mentioned a BMW motorcycle shop near his home. C & S BMW was in Chester NY, in Orange County. Although I had contacted other BMW bike shops (the one-cylinder Isetta engine is motorcycle-based), no one had been willing to take on the head work. From C & S I finally got a positive response. I dropped off one cylinder head with them, and they performed a complete overhaul, including installation of new valve guides, and cutting of valve seats. Finally, I could complete the reassembly of one engine.
A Polaroid of the heads prior to the machine work
New valve guides…
… and recut seats
The bill from C&S; a large expense compared to what I had been spending
One last shot of piston before head covers it
Turning my attention back to the chassis, the restoration of the rear axle along with its various attachment points brought me that much closer to a very important goal: the completion of a chassis rolling on its own four wheels. That goal was reached early in 1994, and I celebrated that accomplishment by throwing a party. Why not?
With rope power, the rolling chassis awaits its debut
It’s not a party without champagne
The gathering of friends to raise a glass in toast to a milestone was not intended as an egotistical, “look what I did” exercise in chest-beating. I thought of it as quite the opposite, actually. The small cadre of friends who were invited to the Rolling Chassis Debut all had been playing supporting roles in the restoration. Chris, Steve H, and Linda were of great assistance in procuring parts. Steve M and John had both been to the house multiple times when I needed an extra pair of hands.
Great friends raise a glass…. Judie, Chris, and Linda have passed on….
It was also important that I not take myself too seriously, as serious as I was about doing the highest quality work I could, and getting it done in a timely fashion. It was still “just a car”, and this was supposed to be fun. By having a party, I was letting you in on the secret: this was a lark, an Isetta for heaven’s sake! I wanted you to laugh with me. If that also meant laughing AT me, well, that was OK too. Celebrating a turning point held the promise of future celebrations at future turning points. Let’s pop a few corks, tell a few stories, and hope that you’ll keep helping me as I keep pushing myself to finish the darn thing.
The chassis finally is returned to rolling on 4 wheels
As a reminder, this is how it looked in 1990
From this angle, rear chain drive assembly is shown; no engine or trans yet
Front shock towers were black, now red; front and rear tread difference obvious here
The next big turning point looked like it would be the installation of the engine and transmission onto the chassis. But we were not quite there yet. There were a few subassemblies for the engine, chassis, and interior which needed work:
Brakes
Like almost all cars from the 1950s, the Isetta used drum brakes front and rear. Compared to normal cars, there was a difference: the lack of a differential meant that the two rear wheels, mounted on a solid axle, were not free to spin independently of each other. In execution, only one rear brake was needed, so viola, the Isetta had a total of three drum brakes.
Unpainted and painted drums
Contact surfaces only needed cleaning
The brake rebuild process was not without its challenge. All the wheel cylinders were frozen solid, and dislodging the pistons meant days of soaking in coffee cans full of Liquid Wrench. Even then, the pistons were still removed via destruction. The cylinders themselves were salvageable, and pistons and shoes were available from several of my local suppliers.
Brake line formation; new master cylinder is in place
Brake lines, on the other hand, were not. The only solution was to purchase metric brake lines, which I cut to length and bent to form using a tubing bender. The flaring of the ends required borrowing an ISO bubble flare tool. (It was a huge advantage to complete with work on the body-less chassis. I cannot imagine doing this with the body in place.) Various articles recommended using VW brake hoses for the front, and that’s exactly what I did.
My “before” photos came in very handy for the forming of new brake lines
Finally, the hunt was on for a new master cylinder, as the ones I had looked like they had been stored in New York Harbor. Mr. Krause in Emmaus delivered on that front, and it was a case of “pay whatever the asking price is”, as at that time, no one else had new Isetta master cylinders for sale.
Front brake shoes and wheel cylinder shown with drum removed
Steering wheel & column
My steering wheel had minimal cracks, and based on some discussions I had with steering wheel restoration companies at Carlisle, I wasn’t about to pay what they wanted to restore a wheel. It looked to me that a complete sanding and recoating of the wheel would get me to where I wanted to be with it.
Steering wheel as found, with worn factory coating
I had read that store-bought epoxy appliance paint, intended to refinish your kitchen fridge or oven, worked quite well on automotive interior items which are subject to handling and wear. Popping into my local Home Depot, I found spray paint in a nice almond shade, and committed to using it on the steering wheel as well as items like the light switch, shift knob, and interior door handle.
After sanding; wheel was overall in decent shape
The steering wheel was hand-sanded to remove all traces of existing paint, then given a good cleaning. With the rattle can, the intention was to apply multiple coats as lightly as possible. If I could get the wheel to rotate while spraying it, there would be no chance of runs. Using an old piece of outdoor furniture and a drumstick, I mounted the wheel so that I could spin it and spray it. It probably got four or five coats of paint this way, and to me it looked as good as new.
Restorations drive you to be creative and make your own tools
I was unsure if the steering column from the factory was painted silver or the same off-white as the steering wheel. In the end, I decided that the almond color would look better, so that‘s what it got. The u-joint at the bottom of the column was made of brass, and it polished up so brightly that it would have been a shame to paint it, so I didn’t. Instead, I sprayed it with a clear lacquer for protection.
The polished brass steering column u-joint; note BMW roundel stamped into surface
Pedals
The Isetta pedal setup is conventional: from left to right, there are the clutch, brake, and gas pedals. The steering column is located directly between the clutch and brake pedals, though, so any thought of left-foot braking, much less heel-and-toeing, must be dismissed. What do you think, this is a race car?
The pedal assembly before cleaning; note tube for steering column
The assembly came apart easily enough, and the metal pedals were cleaned and painted, just like so many other parts. Knowing that the pedal surfaces would eventually show some wear, I applied extra coats of paint to them, and decided that if I drove the car enough to create evidence of use on the pedals, I’d just call it “patina”.
Clean pedals, ready for paint
Dynastart
Instead of a separate starter and generator, the Isetta (and other contemporaneous small cars) used a combined starter/generator called a Dynastart. The combo unit mounted directly on the nose of the crankshaft. A heavy B+ lead went from the battery, to the voltage regulator, then to the starter post on the Dynastart. Turning the ignition key to “start” energized the unit to spin the armature. Once the engine started, it switched to charging mode, and along with regulator, fed DC voltage to the battery.
The Dynastart in “as found” condition
Mine looked like some sparrows had spent several seasons nesting in its confines. The internal magnets, wrapped in electrical tape, showed signs of fraying. Thankfully, John Jensen in his Isetta Restorationbook provided explicit instructions for rebuilding the Dynastart. I took on the task, but not until I purchased supplies of various color wiring and cloth-covered tape.
Magnets removed….
… and retaped
The trickiest part of the job was removing the magnets, and Jensen warned about that. The only way they could be removed was by using a hammer-driven impact tool. Compounding the difficulty, the magnets were held in place with slotted screws, which could be easily stripped. Eventually, it all came apart. All the magnets were retaped, all the wires were replaced, and it all looked visually pleasing. Whether it would start and charge remained to be seen.
The bare shell, to be cleaned and reassembled
Done, and awaiting mounting to engine. Note tags on wiring.
The completed Dynastart meant that I could almost hear that thump-thump-thump of that one-cylinder vertical at idle. That moment would need to wait. With 1994 drawing to a close, the year gave me a final chance to take my car, as it was, to a show:
TOY DAY
My employer, Volvo Cars of North America, had an irregular annual tradition called Toy Day. It was a chance for employees who were auto buffs to display their toys at work. A Toy Day was held in October of 1994, and I was determined to make a presentation, even if I were the only one who wasn’t going to drive his toy to work.
Measuring the back of my Volvo 245, I saw that the rolling chassis would indeed fit in the rear of Sweden’s finest wagon (2nd row seats folded, of course). I maneuvered the chassis in there, and included a folding card table so that I could display my photo album and some Isetta literature. I managed to procure a parking spot between two other fine German automobiles, a Beetle convertible and a Porsche 911. (Re-read above about “willingness to allow others to laugh at you”.) My good friend John felt it was his obligation to effect his best salesperson pose for this photograph:
First “public display”. Along with John, two Swedish engineers steal ideas for future Volvos
Events like this only motivated me to keep going. Next, I would prove that the engine would run. Then, I could turn my attention to the body. Not for the first time, I asked myself, “how difficult could this be?”
Next time in the Isetta Saga: 1995 arrives. I said that “The Isetta Will Drive in ’95”. But will it? The year starts auspiciously, as I explore a risky way to purchase all the parts I’m still missing.