Cue the fanfare: Presenting homemade Circular Cinnamon Babka

Swirls of a cinnamon-sugar-butter filling run through luscious Circular Cinnamon Babka, sure to please your palate and other culinary aesthetics.

By Betty Gordon 

© 2024 text and photos. All rights reserved.

When you bring a Circular Cinnamon Babka to the table, expect your family or guests to “ooh and ahh,” because this is a confection that screams “ta-da!,” as in “Look at me. NOW.” 

You might be hearing “it’s gorgeous,” or “it’s beautiful,” as your guests admire the ripples of rich cinnamon snaking through the babka, and because as we all know, we also “eat” with our eyes. 

And it’s even prettier when it’s sliced, showing off its dark, interior swirls. 

But what your guests will really want to know is how did you do it?

It’s almost all in the twists, literally. Dough logs filled with a sweet paste are criss-crossed and then wrestled into a pan, where it rises and bakes into lusciousness. It’s time-consuming in parts to prepare, and it may try your patience, but the payoff is worth it. 

Inclement weather was in the forecast recently, and in the South that meant copious amounts of rain. I’d been eyeing this recipe for several months and decided it was time to test it, even if the high humidity level might affect the dough’s rise. 

I needn’t have worried. Though the rise was less than I expected, baking solved the issue. 

Babka is said to have originated in Poland in the 1800s, when Jewish bakers filled leftover challah dough (for braided Sabbath loaves) with jam or cinnamon. But there are many variations, especially associated with other Eastern European countries. Traditionally babka — it means “small grandmother” — is baked in a loaf shape, but a circular version as I prepared is a really pretty alternative. 

Babka can be more cakelike or breadlike, depending the amount of butter, eggs, milk and sugar used and the amount of kneading. In that I used my bread machine to make the dough (probably sacrilege in some quarters), its longish kneading cycle resulted in a more briochelike finish. So be aware of this difference.

Babka can be filled with a cinnamon-sugar-butter paste like this recipe calls for, but melted chocolate, finely diced raisins or dried apricots, or chopped nuts can also be added. As always, tailor the recipe to your tastes.

The topping can be varied too; some babka come with a crumb topping, something fairly close to streusel.

So is babka a breakfast food like jelly doughnuts or Danish pastry? (Not if you usually eat something healthy like avocado toast.) Is it a dessert? (Maybe. It certainly has the butter and sugar to make the case.) Or is it best when had with midafternoon coffee or tea? (Perhaps, because it is sort of like a coffee cake.) 

The answer is there is no wrong time for babka, just limit your portion size as you would for any high-fat, high-calorie treat! And then eat sensibly the rest of the day.

Babka has always been a staple in Jewish delis and bakeries, but you can find it sometimes at Trader Joe’s sold as Cinnamon Brooklyn Babka or Chocolate Brooklyn Babka, made by a supplier in Brooklyn, New York. Look for more sources online.

There are also plenty of recipes on the web, so if I’ve piqued your interest but you want to try something else, go right ahead. The point is to do it!

Circular Cinnamon Babka

Applying a cinnamon-sugar syrup after baking gives the babka a shiny finish.

Hands on: about 1 hour, 10 minutes, depending on your skill level

Total time: about 10 hours, including resting/rising, overnight refrigeration and baking

Serves: 10 to 12

Make the dough a day ahead and refrigerate it overnight to let it firm up, so it’s easier to work with. That also lets the flavors meld. Some recipes use bread flour, or half all-purpose and half bread flour, so the task ahead may be experimenting to see which you like best. Online, you can find video of a recipe as demonstrated on PBS’ “Cook’s Country.” In that video, the ingredients were combined in the bowl of a standing mixer with a dough hook, and I think that would work for this recipe also. 

For the dough: 

4 cups all-purpose flour, plus more for the work surface as needed

1/4 cup granulated sugar

2 1/2 teaspoons rapid-rise yeast

1 teaspoon fine sea salt

2/3 cup whole milk (don’t use skim milk)

2 large eggs, beaten

1 tablespoon vanilla extract

1/2 cup (1 stick) unsalted butter, slightly softened and cut into 6 to 8 pieces

For the filling:

3/4 cup (1 1/2 sticks) unsalted butter, softened

1/2 cup lightly packed dark brown sugar

1/2 cup granulated sugar

3 tablespoons ground cinnamon

3 tablespoons all-purpose flour

1/2 teaspoon fine sea salt

For the syrup: 

1/2 cup granulated sugar

1/2 cup water

1 cinnamon stick broken into 3 pieces or 1/2 teaspoon ground

To make the dough in a food processor: Place the flour, sugar, yeast and salt in a food processor fitted with the plastic blade. Pulse 5 times. Warm the milk for about 15 seconds in a microwave. Add to flour mixture with the eggs and vanilla. Pulse 5 times, then continue processing until a soft, tacky dough forms, about 1 minute. Add the butter and pulse 5 times. Continue processing about another minute until a loose dough forms. It will be soft and tacky. Take off the top of the processor and place plastic wrap right on the dough. Let dough rest for 45 minutes. 

To make the dough by hand: In a large mixing bowl, stir together flour, sugar, yeast and salt. Warm the milk in a microwave about 15 seconds. Add the milk, eggs and vanilla to the dry ingredients and stir until a tacky dough forms. Add the butter pieces and knead in by hand. If the dough is too sticky, add 1 tablespoon of flour. Continue kneading until the butter is fully incorporated. Place plastic wrap right on the surface so a skin doesn’t form. Rest dough for 45 minutes.

After the dough has rested, place a large piece of plastic wrap on your work surface. Scrape out the dough onto the center of the plastic wrap. Flour your hands and form the dough into a 7-inch square. Wrap in the plastic and place in refrigerator at least 6 hours, or overnight.

To prepare the pan: Butter the bottom and sides of a 10-inch springform pan. Line the sides and bottom of the pan with parchment paper, then butter the paper. (I used a 9-inch nonstick springform pan and did not grease it, but I put a piece of parchment cut to fit on the bottom.)

To make the filling: In a medium bowl, combine the butter, dark brown sugar, granulated sugar, cinnamon, flour and salt. Mix until you have formed a smooth paste.

Start with the longer side of the dough and roll away from you to form a tight log. Repeat with the second piece of dough.

To make dough logs: Remove the dough from the refrigerator. Flour your work surface and rolling pin lightly as needed. Divide the dough into two equal pieces; set one piece aside. Roll the first piece into a 6-by-14-inch rectangle. This is the most hands-on time-consuming part of the recipe, and the biggest possibility of causing frustration. Be patient. If need be, try rolling the dough between 2 pieces of plastic wrap or waxed paper.

Using an offset spatula, spread the filling over the entire rectangle, leaving a 1/2-inch border on all sides. From the long end of the rectangle, start rolling the dough away from you into a tight log. Pinch the edge to seal. Set aside. Repeat sequence with second piece of dough. Try to make the logs equal, but if they’re a bit off don’t worry, the coming steps even out any irregularities.

(Alternatively, roll the dough into a 12-by-28-inch rectangle, fill, roll, then cut into 2 equal logs.)

With a sharp knife, preferably serrated, using one long motion near the seam of the first log (don’t saw it), gently cut all the way through the dough to make two halves. With the cinnamon layers facing up, cross the 2 pieces in the middle forming an X, then continue twisting the pieces around each other until you reach both ends. Pinch each end to seal. Repeat with the second log.

Cross two pieces of dough at the center, then work toward the ends continuing to twist the dough. Pinch the ends to seal.

Place the first double twist, facing up, against the side of the pan. Take the second piece and continue against the side, then work toward the center. It may take a bit of maneuvering to work a lot of dough into a smallish space. Any gaps that are left will be lessened as the dough rises and bakes.

Cover with a kitchen towel and let rise in a warm place until double in size, about 90 minutes to 2 hours. 

Place the first log against the rim of the prepared springform pan, followed by the second log, working it toward the center of the pan.

Toward the end of the rise, preheat oven to 350 degrees Fahrenheit. Place the babka pan on a parchment paper-lined baking sheet (this will make cleanup easier). Bake on the middle rack for about 45-55 minutes, until golden brown on top. If the top is browning too quickly, cover with foil and continue to bake. Rotate the baking sheet about halfway through. To test for doneness, thump all over the top. If it sounds hollow, it’s done, but I also tested with a toothpick, which came out clean in the very dense center. You can also temp it with a thermometer; it should be about 205 degrees.

To make the syrup: While the babka bakes, in a small saucepan, combine granulated sugar, water and cinnamon over medium heat. Bring to a low boil for up to 3 minutes, if using a cinnamon stick. If using ground, stir until the sugar is dissolved and the cinnamon is incorporated. Remove from heat and let cool.

When the babka is done, remove it from the oven and let it cool about 15 minutes. Use a pastry brush to apply the syrup over the whole surface. Repeat several times, but you may have leftover syrup.

Release the latch and remove the ring from the babka. Peel off the parchment paper and place babka on a serving platter. With my nonstick pan, I ran a plastic knife between the babka and the ring and then released the latch and peeled off the bottom round. Let cool for about 3 hours.

Cut into wedges and serve. Cover any leftovers tightly and store at room temperature for up to 5 days. Or wrap individual pieces and freeze.

Adapted from a recipe in “Shabbat: Recipes and Rituals from My Table to Yours” by Adeena Sussman; Avery (an imprint of Penguin Random House), $35, 383 pages, 2023.

A Dalí day out: Spanish coastal home, eccentric museum give visitors a window into artist’s perplexing inner life

This is part of the exterior of the Dalí Theater-Museum in Figueres, Spain. Small, evenly spaced plaster accents, which are meant to evoke loaves of Catalan bread, dot the reddish walls. Eggs are a recurring feature in Dalí’s works, signifying fertility, and appear again at his house in Port Lligat. Note the geodesic dome at left, one of Dalí’s favorite features.
By Betty Gordon

© 2023 text and photos. All rights reserved. 

This is the second in a series about my November 2023 trip to Spain. See my November 26 post about architect Antoni Gaudí and a Barcelona apartment building he designed called La Pedrera.

Before he fully embraced surrealism for a dozen or so years, and long before his theatrical antics and trademark mustache threatened to overshadow his artistic legacy, Salvador Dalí (1904-1989) was a precocious technician. 

A pampered and indulged child, by Dalí’s teenage years there was never any doubt in his mind that he would be famous, and he realized early in life that art was his ticket to that goal. (For evidence of this and much, much more on Dalí’s life, read Ian Gibson’s exhaustively researched “The Shameful Life of Salvador Dalí.”)  

And for him, the quiet surroundings and natural beauty of the Catalan landscape around Cadaqués and nearby Port Lligat in the northeastern corner of Spain (almost into France) provided the backdrop and inspiration to help him on his way. 

“… beside the Latin sea, I gorged myself on light and color,” Dalí wrote to an uncle in 1919, when he was 15. “I spent the fiery days of summer painting frenetically and trying to capture the incomparable beauty of the sea and of the sun-drenched beach” of Cadaqués.

In fact, his breakthrough painting from 1931, “The Persistence of Memory,” known for its melting watches, also immortalizes in the background the craggy cliffs and bay near Port Lligat, where he made his part-time home — when not living in Paris or New York — for decades. (The painting is in the permanent collection at the Museum of Modern Art in New York.)

Dalí was just 27 years old when the 9.5-by-13-inch iconic dreamscape signaled that here was an individual who was going to challenge the art world’s status quo, much as his friend Joan Miró was doing, and as was his absolute idol, Pablo Picasso, both fellow Spaniards. Already a fan and adherent of Austrian psychoanalyst Sigmund Freud, exploration of the unconscious was to become a recurring theme in Dalí’s work.

To get a better understanding of some of Dalí’s influences and lifestyle, it’s best to visit his whitewashed coastal house and olive garden in Port Lligat, and a museum-theater created to his specifications in his hometown of Figueres, about 25 miles (40 kilometers) to the southwest. 

Salvador Dalí borrowed 20,000 French francs from a patron to buy a rundown fishing shack in Port Lligat. Over a span of 40 years, he added on repeatedly until the house and gardens met his expectations. The handrail marks the entrance, which was just two rooms in the late 1920s. Off to the left is the olive garden.

Your best options for this outing are to rent a car or join a tour group. I did the latter, but because no one else signed up (it was the end of the season), I ended up paying extra for a private guide. Over the course of our 11-hour excursion, which included city and highway driving and negotiating twisty roads the closer we got to Cadaqués, I was glad I wasn’t behind the wheel and could enjoy the scenery. 

Behind the Dalí statue you can see some of the pebbly beach and coastline of Cadaqués. This photo was taken in the late morning, and as you’ll note, the sun is in the wrong position with regard to getting a better look at Dalí’s face.

(It is possible to take a train to Figueres, but the bus connections on to the other sites are infrequent and may require engaging a taxi instead. That said, it’s under an hour’s drive from Cadaqués to Figueres, and about a 20-minute walk from Cadaqués to Port Lligat.) 

It’s about a two-hour drive from Barcelona to Cadaqués, where my guide Stefan and I stopped for coffee before he drove to Port Lligat to pick up our tickets for the Dalí house. While he did that, I walked along the waterfront. About 100 years ago and earlier, this was a sleepy fishing village and occasional smugglers’ haven. Nowadays, it’s a popular Costa Brava summer destination. 

Some brave swimmers were having a dip — it was a calm, sunny day but the water must have been chilly — and several beached small boats provided a backdrop for a statue of Dalí, back to the water, in a short coat with his left hand tucked into his pocket.  

Dalí spent youthful summers in the area, and when his work began getting noticed in the late 1920s, he approached patron Viscount Charles de Noailles for a loan so he could buy his own place in Port Lligat. In 1930, Dalí acquired a rundown fishing shack for 20,000 French francs. He planned to live there with Gala, his Russian-born muse and model, who was married to one of Dalí’s poet friends, Paul Éluard. In return, Noallies received Dalí’s “The Old Age of William Tell.”

From a winding road en route to Dalí’s home in Port Lligat, you can catch a glimpse of two enormous heads, symbolic of the artist and his wife, Gala, atop their residence’s roof. 

Reservations are required at the Dalí house, and only eight people are allowed in at a time. A monitor gives a short speech (translated by my guide) in the five areas visitors are allowed to see for 10 minutes each, but you can spend as much time as you want wandering in the gardens.

Over the next 40 years, Dalí added on and on to the house, so that the labyrinth design covers several levels, winding from reception room to studio to library to sitting room to bedroom. The walls of a small media room are plastered with newspaper and magazine clippings and photos of Dalí with his celebrity acquaintances, including Ed Sullivan, on whose January 29, 1961 variety show he appeared. Dalí’s “talent”: Shooting a paint gun at a large canvas and explaining the “art.”

That a stuffed polar bear (a gift from another patron) greets visitors at the entrance should hint at the eclectic style. So should a horseshoe-shaped music room with sectional couches following the curves and a phallic-shaped pool on the terrace. 

The overriding feature of the house is the amount of light flooding in from huge windows, particularly into Dalí’s studio. Even in his later years, when he painted sitting down (an unfinished work is displayed), all he had to do was raise his head to take in the view of his beloved bay landscape. Although he often invited fellow painters and his literary crowd to visit, he reveled in the isolation of the place. 

(I have not included any interior photos of the house or theater-museum because the Dalí Foundation, which oversees the estate, requires written permission and a hefty fee for each use.)

After Gala died in 1982, Dalí never again lived at the Port Lligat house. He took up residence at the Gala-Dalí Castle of Púbol, which he had renovated as a gift to her in the late 1960s and early 1970s, and is her burial spot. The third leg of the Dalí “triangle,” about 25 miles south of Figueres, the castle opened as a museum in 1996. Gala had absolute rule here, attended by a series of much younger lovers. As for Dalí, he agreed he would never visit without a written invitation.

Standing in the olive garden overlooking the bay, visitors can get an idea of how the peaceful scenery and natural beauty inspired Dalí, especially in his earlier years. He spent much of every summer in Port Lligat working in his studio, and often invited his artistic and literary friends to visit.
An appetizer of goat cheese tempura with mixed greens and soy sauce dressing got lunch started at Granada Vins in Figueres.

From Port Lligat, Stefan drove us to Figueres, where we had lunch at a restaurant called Granada Vins. For an appetizer, we shared a round of goat cheese tempura over mixed salad greens and a soy sauce dressing. I had a steak with french fries and green peppers for my main, while Stefan had a pork dish. For dessert, we shared flambéed xuixos de Girona, two fried cylindrical pastries with vanilla ice cream and whipped cream on the side. Yes, it was very rich. 

Dalí, son of a notary and homemaker (Fèlipa died when he was 16), the artist never cut ties with Figueres, even as his relationship with his father deteriorated (he was banished from the family and for a time disinherited), largely over Dalí’s illicit relationship with Gala. (They eventually married in 1934.)

In the 1960s, the then-mayor, Ramon Guardiola, approached Dalí and asked him to donate a work to an existing museum. With typical flamboyance, Dalí went more than one better: He said he would donate a whole museum to Figueres. And not only that, he would oversee every aspect of it, from design to what would be displayed inside.

It was built upon what had been the location of the former Municipal Theater, which was largely destroyed by fire at the end of the Spanish Civil War (1936-39). On September 28, 1974, the Dalí Theater-Museum opened, with a collection of about 1,500 objects ranging from paintings, to sculptures to engravings and more.

“The Municipal Theater, or what remained of it, struck me as very appropriate, and for three reasons: first, because I am an eminently theatrical painter; second, because the theater stands right opposite the church where I was baptized; and third, because it was precisely in the hall of the vestibule of the theater where I hosted my first exhibition,” Dalí said. 

Certainly one of the oddest installations, in the courtyard shortly after visitors enter the building, is “Car Naval (Rainy Taxi).” It’s a 1941 black Cadillac with a female statue standing on the hood. Behind it is a pillar of tires topped by an inverted boat with what look like hanging blue teardrops (Rick Steves’ guidebook says it’s condoms), and a closed umbrella overhead. Put a 1 euro coin in the slot, it rains inside the car and the umbrella opens. Dalí liked to say the installation immortalized Gala sheltering him from any storm. 

Then there’s the portrait done with an octopus acting as the paintbrush. I was told the likeness was supposed to be Beethoven. 

The entrance to the Dalí Theater-Museum in Figueres. The building and almost everything in it sprang from the fertile and bizarre mind of Figueres’ favorite son. It opened in 1974.

And what about that pixilated-ish portrait of Abraham Lincoln that, the closer you get, looks like a standing nude rendering of Gala’s backside in almost the middle of the American president’s face? It only gets weirder as you tour the site.

Unfortunately, much of the artwork throughout is untitled and undated, and no commentary is provided. Many, many of the drawings are overtly sexual. It’s impossible to follow a timeline for Dalí’s artistic development (or regression?), but that may be the point for a trickster who wanted to confound and defy expectations at every turn in his later years.

In 2001, the Dalí Jewels exhibition rooms were opened. They include some of Dalí’s sketches for one-of-a-kind elaborate pins, earrings and necklaces that a New York-based Argentinian jeweler made from the designs. The collection even includes a 1949 version of “The Persistence of Memory,” with a Jaeger LeCoultre 426 watch mechanism fashioned from diamonds and black enamel draped over an 18 karat gold tree limb. 

The theater-museum is also Dalí’s final resting place. His remains are entombed in a crypt below center stage, and if you go downstairs to find his nameplate, you’ll be next to the public bathrooms. Exactly as Dalí intended.

Quick reference: “The Shameful Life of Salvador Dalí” by Ian Gibson (W.W. Norton and Company, American edition 1998, $45, 688 pages of text, 110 pages of notes and index). Two-thirds of the book cover the artist’s life from birth to his late 30s, and those in his orbit. The last third looks at Dalí from 1940 on, when his focus seemed to be notoriety for notoriety’s sake and making as much money as possible, at one point scandalously signing huge scores of blank papers that were eventually used in making copies of his work. This cheapened his name and reputation, to say nothing of dashing collectors’ expectations of owning an original Dalí.

Dalí House (Casa Salvador Dalí) in Port Lligat: The website has not updated its hours and prices for 2024, but general adult entry for 2023 was 18 euros for July and August, and 15€ the rest of the year. It’s very busy during the summer, so plan your visit early and give yourself plenty of time to get there. You must have a reservation and show up 30 minutes before your timed entry. If you are late, you won’t be admitted and you won’t be given another entry time. You also won’t be given a refund. No flash photography. Other restrictions apply as to what you can bring inside. http://www.salvador-dali.org

Dalí Theater-Museum (Teatre-Museu Dalí), Gala-Salvador Dalí Square, 5, Figueres. Advance tickets are recommended. As with the house, 2024 prices are not posted yet, but adult general admission for July and August 2023 was 21€. The rest of the year was 17€. Guided tours are available. Tickets cannot be changed or refunded. No flash photography. www.salvador-dali.org

The website also has a lot of information about Dalí in general, and catalog access to hundreds of images of his artwork.

Where we ate: Granada Vins restaurant, a mix of Spanish and Mediterranean dishes; open for lunch and dinner. Carrer de la Muralla, 1, Figueres, Spain; +34 972 51 40 79; no website.

Tour company: Spanish Trails: www.spanishtrails.com

A French-inspired loaf (sort of), with quiche elements in the mix

This recipe is known to some as Quiche in a Loaf, but baked in a springform pan. Baking time is 40 to 45 minutes to achieve lightly golden perfection.

By Betty Gordon 

© 2023 text and photos. All rights reserved.

When quiche is on the menu, you expect a dish that includes a pastry crust with a cream- and egg-based filling, with vegetables or meat and herbs.

When loaf is the subject, it’s usually about some grain-based bread, that may have myriad variations, (meat loaf and terrines not withstanding).

When you put the two together, what do you get? 

Something that’s sort of in between. Maybe savory pie is just as accurate, or perhaps bread pudding is closer to the mark.

So I wasn’t sure what to expect when I made Quiche in a Loaf, from “A Treasury of Jewish Holiday Baking” by Marcy Goldman. 

The author says she developed this recipe from another called Cake aux Olives from cookbook author Linda Dannenberg. (One of her titles is “Paris Bistro Cooking” [Gramercy, 2006].)

I was not familiar with this “cake,” so I looked it up online. It is very popular in France for picnics, especially in Provence, and traditionally loaded with whole olives and ham and baked in a loaf. Some recipes call it a quick bread.

I also checked my “Le Cordon Bleu at Home” (William Morrow & Co., 1991, $37.50) cookbook and it has a recipe for Cake de Legumes (Vegetable Bread). Similar to what I made, but it uses carrots, zucchini and mushrooms, has no cheese and includes 14.5 tablespoons of butter (because, of course, it’s French). Le Cordon Bleu’s cooking school serves the cake with mackerel rillettes.

Goldman’s directions give an option for baking the recipe in a loaf pan, which means that you’d slice it like bread. Or in a springform pan, where the finished product looks more like a substantial pie, and can be easily parceled into wedges. You could even bake it in a 9-by-13-inch dish and cut small, appetizer-size pieces.

It’s versatile enough to be served any time of day. For a light lunch, say, include a side fruit salad or accompany with a small green salad. For dinner, maybe something a little heartier such as a mix of peas and carrots or a three-bean salad. Think of all that color and all those vitamins.

Let me say upfront that the preparation took much longer than I expected. Short cuts are possible, but they’re mostly about using packaged ingredients, and I prefer to use fresh whenever possible.

So, for example, I grated the cheese by hand, instead of buying shredded cheese, because I don’t like the cellulose that manufacturers used to keep it from clumping.

Once I got everything assembled, I still wondered about the outcome. The batter was thick and very tasty, so I was optimistic. And the aroma was pretty enticing while it baked. I could particularly discern the green onions. Not even a smidge of liquid escaped from the springform pan, and that’s always an encouraging sign.

I also wondered if it would deflate as it cooled, which is what quiche does. Nope. The nicely rounded top kept its height. 

Batter up! The 9-inch springform pan is on a sheet of parchment paper placed on a rimmed baking sheet, which makes it easier to get into and out of the oven and guards against overflow and spills for easier cleanup.

The baked texture is fairly dense, so I can see where the idea of “loaf” came from, and it forms a tender crust, so that fits “loaf” also. I think “quiche” is more of a stretch, aside from the eggs, cheese and liquid used, because there’s nothing wobbly about the filling.

As always, feel free to substitute your favorite vegetables for the onions, sun-dried tomatoes or red bell peppers and olives. I kept pretty close to Goldman’s recipe, but when I make it again, I will probably add mushrooms in some form and leave the olives whole. (If you do this, make sure the olives are well-drained, then pat them dry with a paper towel. Toss them in a few tablespoons of flour and set aside. This step helps them stay suspended in the batter instead of sinking to the bottom.)

Baking it in a loaf pan seems far more traditional, judging by what I saw online, so I’d make that change also.

You might also want to try different cheeses, like Gruyère or gouda, but make sure your choices are conducive to uniform melting.

This can be made a day ahead and reheated. Wrap leftovers tightly in plastic and then foil before freezing. 

So back to what to call it? I’m still thinking that over, but for now I’m going with “delicious” and leaving it with Goldman’s title.

A closeup of the dense texture and a peek at the flecks of some of the ingredients, such as green onions and red bell peppers. Parmesan cheese on top helps give it a golden finish.

Quiche in a Loaf

Hands on: 15 to 30 minutes

Total time: 1 hour to 1 hour, 15 minutes

Serves: 8-10 as an entree, 16-20 as an appetizer

1 3/4 cups all-purpose flour

1 3/4 teaspoons baking powder

1 1/2 teaspoon salt (less if you’re using highly salty cheese)

1 teaspoon garlic powder

2 tablespoons minced fresh flat-leaf parsley (or 1 teaspoon dried)

2 teaspoons minced fresh dill (or 1/2 teaspoon dried)

1/4 teaspoon freshly ground black pepper

6 eggs, lightly beaten 

1/2 cup half and half or light cream or milk

3/4 cup water or vegetable bouillon or white wine

1/2 cup neutral vegetable oil, such as canola

1/2 cup green onions (white and green parts), cut into rounds

1/2 cup black or green olives, sliced widthwise

1/2 cup finely minced sun-dried tomatoes or red bell pepper

2 cups shredded white Cheddar cheese (about 3/4 of an 8-ounce block)

1 cup shredded Swiss or mozzarella (I used Jarlsberg, aka Norwegian Swiss)

2 tablespoons Parmesan, shredded (optional)

Paprika, for sprinkling on top (optional)

Preheat oven to 350 degrees Fahrenheit. Grease a 9-by-5-inch loaf pan or a 9-inch springform pan.

In a large bowl, add flour, baking powder, salt, garlic powder, parsley, dill and black pepper. Mix well to combine.

In a medium bowl, add eggs, half and half or cream or milk and mix to combine. 

Make a well in the dry ingredients and add the water or bouillon or wine and the oil. Mix well to combine. Add the egg mixture to the flour mixture and combine well. 

Add the green onions, olives, sun-dried tomatoes or red bell pepper, the Cheddar and Swiss cheeses and mix until everything is uniformly combined.

Pour into the prepared pan. Place the pan on a parchment paper-lined rimmed baking sheet, just in case it overflows or leaks. 

Sprinkle the Parmesan cheese and paprika on top (optional).

Bake for 40 to 45 minutes, rotating halfway through, until set and lightly brown on top. Let the “loaf” sit 10 to 15 minutes before turning it out of the loaf pan or releasing the springform ring. Slice and serve.

Adapted from a recipe in “A Treasury of Jewish Holiday Baking” by Marcy Goldman (Doubleday, 1998, $25)

In Lyon, France: Lunch at a traditional bouchon delivers a distinctive dining experience

Patrons with reservations for Le Musée were still arriving at a bit past noon on an October Saturday in Lyon, France. Monsieur Luc Minaire (in profile at left, holding white paper) comes to each table to present the daily menu options — and share a bit of conviviality.

By Betty Gordon

© 2023 text and photos. All rights reserved.

This is the third in a series about my October 2022 trip to France and Switzerland. See my November 13 post about a scenic train ride from Zermatt to the Matterhorn area; and my December 11 post about secret WWII mountain defenses in Stanstaad, Switzerland.

Lingering remnants of jet lag and a quickly worsening cold are the wrong ingredients to mix when anticipating a special meal in the gastronomic capital of France.

I didn’t want to miss the opportunity, so with as little ado as possible on my part, we headed to Le Musée, an “authentique Lyonnais bouchon,” and a noon reservation, which had been made for us five days earlier by a kind friend of Sylvia’s who lives in Lyon.

The entrance to the restaurant is through an alley on the right of this photo.

The cozy, atmospheric restaurant is several long blocks north of Place Bellecour, one of the largest squares in Europe, with a dominating equestrian statue of Louis XIV. Technically it’s on  Presqu’ile, the strip of land situated between the rivers Rhône and Saône.

Le Musée displays a sign like this to indicate its status as bestowed by a local group. A second association also uses a puppet-like logo, albeit less colorful or expressive.

At the tourist information center at Place Bellecour, visitors can pose with a seated likeness of chef Paul Bocuse, whose culinary innovations were associated with Lyon for much of his career. Famed chef, TV host and author Jacques Pépin, born in the nearby town of Bourg-en-Bresse, cooked in his mother’s Lyon restaurant from a young age, already certain that his future would involve food and its preparation.

Bouchons date to at least the 17th century in Lyon, and were popular among silk industry workers (les canuts), long important to the city’s economy, who wanted a hearty meal at a reasonable price in a welcoming setting. Think rustic food sourced from nearby regions, crafted more from internal organs and animal body parts rather than filet mignon.

Nowadays there are organizations pledged to preserve the spirit and traditions of bouchons. Certain eateries are authorized by L’Association de défense des bouchons lyonnais (The Association for the Preservation of Lyonnais Bouchons; no website that I could find) to display a specific sticker featuring a top-hatted puppet character — a nod to the city’s long history with marionettes — wearing a blue apron over a green shirt. In his raised left hand he holds a tilted, half-filled glass of red wine. In his right hand, tucked close to his body, is a squarish napkin displaying the white crest of Lyon — a rearing lion, of course — on a red background.

On the web, I came across Les Bouchons Lyonnais (https://lesbouchonslyonnais.org/en/), founded in November 2012, which has a bit of a different logo than described above, but with some background information on bouchons in general and a list of restaurants in Lyon. Some of the restaurants that I looked at were decidedly more upscale, not only in their dining room decor but in the plated examples of their cuisine. This group also has an affiliation with Lyon’s office of tourism.

Le Museé is mentioned with the former but not the latter, so it would appear there are dueling associations claiming to be keeping “the authentic” alive.

My appetizer was cream of butternut squash soup.

While workers may still frequent bouchons, on the day we stopped in it seemed that many of our fellow diners were tourists, though the foursome directly beside us I’m pretty sure were locals, based on their familiarity with the food. We arrived a few minutes earlier than our reservation, and were invited to look at the traboule behind Le Musée.

These pedestrian-only passageways, many of them covered, were used by silk workers to transfer goods in various stages of production from one location to another while mostly protected from the elements. Some are very narrow and plain and are attached to what look like apartment buildings. In some areas of the city, the entry to a traboule is indicated by a decorative lion’s head.

During the Nazi occupation in World War II, familiarity with the traboules allowed members of the French Resistance to evade capture, safely disappearing into the labyrinth and living to fight another day.

We were among the first to be seated, next to the lace-shaded window at a table covered with a red-and-white checkered cloth. I sat on the red padded bench side below a wall-long mirror, with a view of the compact bar on the other side of the room. 

All the tables in long rows were jammed very close together. To get up during the meal meant apologizing for jostling our neighbors. Fewer than 40 people were at lunch, and those who turned up without a reservation were politely sent away.

Sylvia selected an oyster salad with greens and a light dressing.

Service at Le Musée is extremely personalized. Don’t expect a waiter to hand you a menu, recite the day’s specials and disappear. 

No, the routine here is that Monsieur Luc Minaire sandwiches himself close to his patrons, holding a hand-written paper listing in French the day’s offerings. Fortunately he spoke enough English to describe the choices to us.

Before our trip, I had checked an online site to get an idea of what to expect (Le Musée does not have a website). Because I do not eat pork or a lot of what I saw online, I was hoping that there would be some chicken main courses available.

Alas, that was not the case. Our choice of starters included terrine du chef (pâté in a mold), os à moelle (bone marrow), gâteau de foie de volaille (chicken liver cake), escargots au pistou (snails with pesto), salade de pleurottes (greens with oyster mushrooms), velouté de butternut (cream of butternut squash soup), saucisson brioche (sausage baked inside a loaf of bread) and terrine de betterave et chèvre frais (layered pâté with beets and goat cheese). (I used the spellings as written.)

Among our main course options were joue de porc (pork cheeks), boudin aux pommes (blood sausage with apples), échine de porc (pork shoulder), andouillette de bobosse (pork sausage, usually made with tripe), fondant de veau au cognac (veal with cognac) and quenelle de brochet (pike dumplings).

Quenelles de brochet (pike dumplings) were served in a lobster sauce.

I selected the cream of butternut squash soup sprinkled with chives, and Sylvia had the oyster mushroom salad. with a light creamy vinaigrette-like dressing. 

For our entrees, we both ordered a quenelle. Ingredients may vary, featuring such possibilities as a type of ground fish other than pike, chicken, veal or game. There also may be butter, flour, eggs and cheese in the mix. Obviously, I wasn’t in the kitchen, so this description is just a generalization. 

Once the “paste” is made, the oval-shaped quenelle is shaped by passing it back and forth in a parallel scooping and rotating motion between two spoons of equal size. The finished ovals are then poached in a broth, and in our case, served in a rich lobster sauce.

The quenelles came in an oval dish, accompanied by two ample plates of creamy potato gratin, with sliced carrots and sautéed onions. Once the quenelles were sitting atop the gratin, the portion was impressive. Even if I were feeling in top condition, I never would have been able to eat it all.

As you can tell, this wasn’t frou-frou food. I doubt anyone was using tweezers in the kitchen to place a garnish just so, or prattling on about wild-foraged greens or mounds of organic hay.

Praline tart is a Lyon specialty, made with almonds that have been sugar-coated.

The soup was delicious, sublimely silky with just the right amount of seasoning. The dense quenelles reminded me of matzo balls, but much more refined. The potatoes were perfectly delicate but not so much that they fell apart.

For dessert, Sylvia ordered the praline tart, a Lyon specialty, which was accompanied with an oval scoop of dark chocolate mousse. The tart’s almond filling was so red, it would give any cranberry-based concoction a real run for its money. It was also extremely sweet, and I only had a small taste.

For those wanting to make a praline tart at home, shops sell almonds whole or in pieces.

My two courses cost a total of 23 euros, when the dollar was about par with the euro. Sylvia’s was 35 euros with the added dessert, a glass of wine and two cup of espresso. (Prices are 5 euros higher per course for dinner.)

The next day we found the tart’s bright raw ingredient at a small grocery called Ma Petite Fourmi. The red sugar-covered almonds, called simply pralines (though I saw it referred to as Les Pralines Roses de Lyon also), sold for about 5 euros, with the nuts either whole or in pieces. Apparently they are sometimes eaten right out of the bag. The nuts are sold elsewhere in Lyon and also can be ordered online.

Quick reference: Le Musée, 2 Rue des Forces, Lyon. +33 04 78 37 71 54. Entry is through all alley to the back. Hours: Opens at noon for lunch on Tuesdays-Saturdays, and 7:30 p.m. for dinner those days; no dinner service Saturdays. Closed Sundays-Mondays. Hours subject to change. Metro stop: Cordeliers.

Two sunshine-filled weeks in Italy, or, international travel in the time of (waning?) covid-19

The afternoon sun moves across Piazza San Marco, illuminating the magnificent Basilica di San Marco, its domes and mosaics. The four bronze horses above the main entrance are copies; the originals are inside in a museum.

By Betty Gordon

© 2022 text and photos. All rights reserved. 

This is the first in a series about my recent trip to Venice, Florence and Milan, Italy.

I got back 10 days ago from two weeks in Italy, which, if you read my previous post about homemade biscotti, should come as little surprise.

For months, I’d been thinking about going, with the original iteration of this trip starting the first week of March and including several days in Lyon, France, then venturing south to Milan and Venice, Italy. 

That was last fall, before the surge of the latest variants of the coronavirus, and when France and Italy were listed as level 3 on the Centers for Disease Control and Prevention’s website, indicating a high level of covid-19 in both countries and advising that if travelers chose to go, that they be fully vaccinated. Unvaccinated people were discouraged from any travel, and in many cases, required to quarantine for at least five days upon arrival.

Then both countries were elevated to the highest classification, level 4, with the CDC stating to “avoid travel to this destination.” (Italy remains at level 4, according to the CDC.)

So what I came to call the Go Go Go Meter, indicating how likely I was to venture outside the United States, rapidly ramped down from about 80 percent. That doesn’t mean I stopped researching the trip, checking hotel availability and airfares, but it did mean I wasn’t going to commit any money that wasn’t refundable at this point. 

Fast forward two months. I decided that if I pushed the trip back several weeks and stuck to just one country, there might be fewer obstacles to confront with regard to pre- and post-trip covid testing and online forms, in-country rules, and perhaps a lifting of some restrictions. 

I also widened my information-gathering. A friend of a friend was in Venice late last year and reported that there were relatively few tourists, that nearly everyone was taking mask-wearing seriously, and he didn’t see any reason not to go. I further consulted a reliable online travel forum.

And I was checking Italian government websites that evaluated by region the number of covid cases around that country. Its assessment seemed less dire than the CDC, classifying regions by color, as in white, yellow, orange and red, the latter being the most serious outbreak.

As I inched closer to making a decision, no Italian region was in red, and the areas surrounding Venice, Florence and Milan were either orange or yellow.

No cars or trucks are allowed on the islands that make up Venice, so boats of many shapes and sizes deliver all goods and passengers, just as they have done for hundreds of years. A vaparetto (center left in the canal) is the least expensive way to get around, if you aren’t walking to your destination.

Then came reports that Italy, having declared a state of emergency through the end of March 2022, was lifting a requirement to wear masks outdoors. (The state of emergency has since been canceled.)

The unmistakeable lure of unencumbered travel, especially in historically overcrowded Venice, was undeniably strong. Even considering the health risk, would such an opportunity present itself again? The chance to have Venice almost to myself, at least during the week? 

My decision came down to how much hoop-jumping I was willing to put up with in order to be able to travel abroad for the first time in almost 28 months. 

Get a pre-flight covid test? Check.

Wear a mask for long hours on domestic and international flights and in the airport and on public transportation? Check.

In early February, the Go Go Go Meter was reset at 100 percent. I was still cautious and booked (mostly) refundable accommodations, but I committed to an itinerary, knowing that I could buy insurance, or get credit for any canceled segments. 

While I went ahead, I was still not certain that the trip would happen, believing that until I had my feet on the ground in Venice, it could all fall apart — flight cancellation being a notable possibility, or yet another variant surge causing me to re-evaluate.

(After I made by airline reservations, Delta-code share partner KLM canceled my early-morning return from Milan via Amsterdam. I immediately rebooked Delta through JFK in New York.)

All my caution was warranted, but I’m happy to report that everything came off without a hitch, and I did not end up buying insurance. 

Pushing the trip to mid-March meant that the requirement for a covid test 72 hours before departure had expired before I was to leave. One less thing to do.

I filled out online Italy’s mandatory PFL (passenger locator form) — think contact tracing — and printed out a copy to show at airport check-in, and upon arrival, if necessary.

I made a copy of my CDC card, showing my two Pfizer vaccines and one booster. I also took a picture of it on my phone.

And I packed a 15-minute home covid test kit, just in case I didn’t feel well at any point.

While in Venice, Florence and Milan, I walked around for hours without a mask. Let me note here, that the weather for the two weeks of my trip was unexpectedly absolutely perfect: Cool evenings and early mornings, cloudless sky, and sunny, warm afternoons. Not one drop of rain, until the morning of my departure for home. I wore a light jacket some days, and others not.

Many museums also had a machine to take visitors’ temperatures. I passed at each venue.

Perhaps the most recognizable feature of Florence’s skyline is the brilliant brick dome designed and executed by architectural innovator Filippo Brunelleschi that tops the duomo of Santa Maria del Fiore Cathedral. This photo was taken from the south side of the River Arno, near the Piazzale Michelangelo.

At most museums, I was asked to show a Green Pass, the European version of proof of vaccination status. All places accepted my CDC card instead without challenge.

Wear a mask anywhere indoors in Italy? Check.

Liquid sanitizer was ubiquitous, as were posted reminders to use it and wash your hands frequently.

Many small shops had signs on the door that indicated the maximum amount of persons allowed inside at one time, often only two or three, and that a mask was required.

On trains, the N95 mask (or its equivalent) was the only acceptable face-covering, which staff were not shy about enforcing.

Of all of this, putting my mask on when I wanted to go indoors was the biggest annoyance. But overall, still a small price to be able to be traveling again.

All too soon, after countless enlightening hours in museums, wandering happily in each city, and enjoying universally fresh and delightful food, it was time to get ready to leave. 

The largest Gothic cathedral in the world, the construction of Milan’s Duomo took more than 400 years to complete. Visitors can climb the stairs or take an elevator to go outside on the roof to commune among the spires, or just enjoy a panorama of the city.

The last hurdle: A covid test 24 hours or less before departure. I went to a pharmacy down the block from my Milan hotel, paid 15 euros cash, presented my documents and had both nostrils swabbed by a technician. About 15 minutes later, a rapid antigen test with a negative result cleared my way to the U.S.A. 

If it had been positive, I would have had to quarantine for five days in Milan, then retest.

One side note: While local and international media are reporting on the Russian invasion of Ukraine, there is no danger while traveling in Italy.

Destinations whose economies benefit greatly from tourist dollars — and Italy is near the top of the list in this regard — have struggled mightily through the long ordeal of covid. Logically, all the hoteliers, shopkeepers and restaurateurs I spoke to seem eager for visitors to return. Hotel staff said bookings were increasing, not just for weekends, and that they are optimistic for a more robust high season in the coming months.

If you are to be among the visitors to Italy or elsewhere in Europe this year, have a backup plan (or two), and be prepared to be flexible and patient in all aspects of your journey. It’s also up to you to assess your tolerance for hoop-jumping and covid risk.

The lack of business has also been used to renovate properties and improve services, though I did see closed storefronts, particularly of restaurants, that looked like they were not going to reopen, at least not anytime soon.

 And if you are wavering on that decision to travel, remember how much fun it will be once again to experience the richness in all its forms of a culture other than your own, even if you’re still wearing a mask.

Super-crunchy biscotti: A flavorful trip to Italy without leaving your kitchen

Packed with dried cranberries and chocolate chips, these extremely crunchy biscotti benefit from a dunk or two into coffee, milk or hot cocoa.

By Betty Gordon

© 2022 text and photos. All rights reserved.

If you’ve been pining to be traveling internationally while waiting for yet another variant of the coronavirus to subside, activating a few options may lessen your frustration.

From the comfort of your favorite chair or sofa, you can read travel literature — guides, articles, first-person memoirs — dreaming of the distant landscapes and physical adventures in your future. (This goes for watching travel shows also.) 

Form plans, make lists, check accommodation availability and develop an itinerary for where you’ll go next. That way, when you feel that it’s reasonably safe to travel again, you’ll be ready to book immediately. (Alas, wearing a mask may still be required.)

In addition, try a recipe new to you that transports your taste buds to a country where you want to go. I’ve been thinking a lot about Italy lately. It’s been decades since my last visit, so long ago now that no meal or particular culinary experience stands out in my memory.

I’ve loved Italian food since childhood, especially pizza and dishes with a tomato-rich base. Over the years, I’ve developed my cooking skills to cover main courses and sides, but until this week, I’d never made one of the treats most often associated with Italy: biscotti.

To Italians, biscotti (plural of biscotto) can refer to any cookie, not just the familiar wedge-shaped goodie that benefits immensely from a dunk or two into a variety of beverages, from milk, coffee, hot cocoa and tea to appropriately paired wines, ports or distilled spirits. 

Biscotti are twice-baked, which makes an already dry dough even more so after two sessions in the oven. The outcome is a formidably sturdy cookie, with a lengthy shelf life. 

They’re a much more flavorful version of the lightly sweetened German zwieback (which also translates as twice-baked), often consumed by those with digestive issues, or hardtack, aka sea biscuits, made from an unsalted dough of flour and water — the bane of many a hungry (and tooth-challenged) sailor on the high seas over the centuries.

Having a drink with your biscotti is crucial I think, not just because it enhances the total experience, but it can also reduce possible damage to expensive dental work. Compared to many other types of cookies, properly baked biscotti are at the extreme edge of crunchy.

The recipe I used was from Cooking Light magazine, which offered several variations, including the addition of nuts (almonds, hazel nuts and pine nuts are traditional), dried fruit and even icing. But the constants in the ingredient lists were a limited amount of liquid and very little oil, making the biscotti relatively low in calories. 

The hardest part of the recipe was compressing the dry dough into two loaves.

Knowing that one of the missions of Cooking Light recipes is to produce a healthier version of something more indulgent, I headed to my Italian cookbooks and checked a few sites online to compare. 

What many of those recipes featured was a quantity of butter, averaging four to six tablespoons (sometimes more), which would change the texture of the finished cookie somewhat. Those interpretations all sounded delicious, but were richer in fat than what I made.

And on the minimalist side, one recipe, which claimed to be authentically Italy, had no butter or oil at all.

(If  the recipe below sounds too dry for your palate, there are plenty of butter-laden options online.)

The first six ingredients I used can be assembled quickly. Once the liquids were added, I found it very challenging to compress the dough when trying to achieve the desired flattened loaf-like shape for the first bake. 

Stick with it — pun intended — and you’ll be on your way to Italy … if only on the wings of a cookie.

Biscotti have a long shelf life, especially when stored in a tin with a tight-fitting lid.

Dried Cranberry and Chocolate Chip Biscotti

Hands on: 35 minutes

Total time: 1 hour, 40 minutes

Makes: about 24 to 30 1/2-inch cookies

2 3/4 cups all-purpose flour

1 cup granulated sugar

2 teaspoons baking powder

1/8 teaspoon salt

1/2 cup dried cranberries

1/3 cup semisweet chocolate chips

3 large eggs

1 tablespoon vegetable oil

1 teaspoon almond extract

1 teaspoon vanilla extract

Preheat oven to 350 degrees Fahrenheit.

In a large mixing bowl, combine flour, sugar, baking powder and salt. Mix well with a fork or whisk. Add the cranberries and chips and mix again to distribute the berries and chips evenly. 

Crack the eggs into a small bowl and whisk lightly to combine. Add oil and almond and vanilla extracts and whisk again to combine thoroughly. 

Add the liquid mixture to the dry mixture and stir until combined. The dough will be very dry and crumbly. Make sure to repeatedly incorporate the ingredients from the bottom while you are mixing. 

Turn out half the dough onto a piece of parchment paper on your work surface. (The original recipe suggested a floured work surface, but the dough was already so dry I didn’t want to add more flour.)

Press the dough together, gathering all the little bits as best you can. (Several times I stopped and wondered whether I should add a teaspoon or more of water, but I resisted doing so.) Form the dough into a loaf about 8 inches long, then flatten the loaf so that it is 1 inch high. Transfer the loaf to a baking sheet lined with parchment paper. 

Make a second loaf with the remaining dough. Place it about 6 inches from the first on the baking sheet.

After the loaves bake for 35 minutes, slice them into into individual cookies and bake for 10 minutes. Then flip them over and bake another 10 minutes.

Bake on the middle rack for 35 minutes, rotating sheet halfway through. Remove loaves to a wire rack to cool for 10 minutes.

Lower oven temperature to 325 degrees.

Using a sharp serrated knife, cut 1/2-inch slices across the loaf (not horizontally). Try not to use too much of a sawing motion because it might dislodge the cranberries. Place each cookie on its side on the baking sheet. Depending on the size, you might need a second sheet to fit all the cookies for the second bake.

Bake for 10 minutes, then turn each biscotto over. Bake 10 more minutes.

Remove cookies from the oven. Cool on a wire rack. They will continue to harden as they cool.

Store in a tin container with a tight lid. They will keep for several weeks.

Per cookie: 98 calories (17 percent from fat), 1.8 grams fat, 2 grams protein, 18.6 grams carbohydrates, 0.4 grams fiber, 22 milligrams cholesterol, 50 milligrams sodium, 24 milligrams calcium. 

Adapted from a recipe in Cooking Light magazine, November 2000

For planners or procrastinators, a vegetable soup to get a happy Thanksgiving started

Sweet potatoes take a starring role in this healthful soup, packed with vitamins and minerals — and few calories.

By Betty Gordon

© 2021 text and photos. All rights reserved.

Did you wake up this morning with a feeling of dread, already overwhelmed by the tasks ahead? 

Or are you champing at the bit — after that first cup of coffee — eager to embark on the preparation for the celebration that takes place annually on the fourth Thursday in November?

Yes, it’s the beginning of Thanksgiving week in North America, when organized cooks have already purchased the required ingredients, lined up all the recipes and cookware, and are ready to start the countdown on long-established routines with their goals firmly in sight.

Alas, not all cooks are so efficient or keenly anticipating the chopping, mixing and beating that will be necessary. To them, the whole thing is really more of a chore. Last-minute trips to the grocery may be involved, and that only adds to the less-than-upbeat atmosphere.

Whichever camp you’re in, I have a recipe that’s sure to satisfy even the pickiest eaters, even if they say they don’t like vegetables. The real beauty of it is that if you have a well-stocked pantry and freezer, you likely have all the ingredients on hand. If you don’t, go ahead and improvise. 

Prep time is minimal, and it can be made several days ahead, thus getting at least one menu item completed before the real culinary madness sets in later.

(If your menu is already set in stone — after all, ritual is ritual — then set this recipe aside to try at a later date.)

Packed with vitamins and minerals, this recipe is naturally low in calories and high in fiber, especially important to keep in mind when so many tempting, high-fat dishes may be headed to a dining table near you.

Furthermore, it’s joyously colorful, and bursting with a range of textures.

I scaled back some of the ingredients because I thought they were overwhelming the pot, and because I prefer a chunky, less brothy soup. Obviously, and as I always say, feel free to make this recipe your own.

Sweet Potato-Vegetable Soup

Hands on: 15 minutes

Total time: 1 hour, 15 minutes

Serves: 6 as a meal, 10-12 as an appetizer

1/4 cup olive oil

1 medium onion, chopped (either white or yellow is fine; I used Vidalia)

4 cloves garlic, minced

1 (28-ounce) can diced tomatoes with liquid [2 (14.5-ounce cans are fine too)]

6 cups vegetable stock (or 6 cups water with 6 bouillon cubes; I used 4 cups)

2 large sweet potatoes, peeled and cut in 1/4- to 1/2-inch cubes

1 (15.5-ounce) can cannellini beans, rinsed and drained (also known as white kidney beans)

2 cups frozen green beans (no need to defrost)

1 teaspoon salt

1/2 teaspoon granulated sugar

1 teaspoon freshly ground black pepper

1 tablespoon fresh basil (minced) or 1/2 to 1 teaspoon dried

20 ounces frozen corn kernels (no need to defrost; using less is fine) 

In a 6.5-quart Dutch oven (or larger), heat olive oil over medium heat. Add onions and sauté 6 to 7 minutes, or until they soften and are translucent. Add the garlic and sauté an additional 2 to 3 minutes.

Add the tomatoes, vegetable stock and sweet potatoes. Mix completely, then partially cover (leave the lid askew to let steam escape) and bring to a slow boil. Add the cannellini beans, green beans, salt, sugar, pepper and basil. Mix; replace the lid leaving it slightly askew, and bring to a slow boil again. 

Reduce heat to low and cook for 30 minutes, stirring several times. Add corn, stir again and cook with lid askew another 30 minutes, or until the sweet potatoes are tender. Taste and adjust seasoning as necessary.

Leftovers can be easily frozen. When reheating, you may need to add more stock.

Adapted from a recipe from “Kosher by Design: Picture-perfect Food for the Holidays and Every Day” by Susie Fishbein (Mesorah Publications, April 2003) 

Phyllo dough crust elevates one-pot dish from ‘just fine’ to fabulous

Cut into crispy, golden phyllo dough to unveil the surprise of a one-dish meal.

By Betty Gordon 

© 2021 text and photos. All rights reserved.

The beauty of a one-pot dish is that it’s a balanced meal with minimal fuss. The protein, vegetables and carbohydrates are all comfortably present, and possible combinations are almost endless.

You can usually get the finished meal to the table in 30 minutes to an hour, an important consideration when you have a hungry crowd to feed.

Satisfying and nourishing, one-pot meals are great for an informal get-together, but what about serving one to a more upscale dinner party?

With the addition of a crucial ingredient — and some finessing along the way — you can turn hearty into hello there, gorgeous!

That ingredient is phyllo dough (sometimes spelled filo), a versatile favorite in Greek and Mediterranean cuisine. Ways to use these tissue-thin sheets extend far beyond the popular honey-and-walnut sweet treat baklava or spinach- and feta-packed spanikopita.

Phyllo, from the Greek for leaf, is similar to strudel pastry, and in fact, the box mine came in featured a recipe for Viennese apple strudel.

Hard to work with? It can be, but planning and quick execution will mostly mitigate any fears you might have. A bit of patience also goes a long way toward success.

For our purposes, a one-pot combination of chicken chunks, vegetables and pearl couscous is elegantly elevated by enclosing it in a bed of phyllo leaves, baked to a golden finish. 

Slicing into the flaky crust is like opening a surprise package: Great-looking on the outside with a savory present inside.

Wheat-based phyllo dough can be found in your grocer’s freezer. If you are really, really ambitious, you can make it from scratch. (I’ve seen this done on TV cooking shows, and I don’t think it’s something I’m going to attempt when what is available ready-made is of such high quality. That said, when I went to a cooking class in Athens, Greece, we bought handmade phyllo at the market and prepared a cakelike dessert. See my post of October 21, 2018 about the cooking class.) 

Phyllo generally comes in a one-pound box, containing two plastic-wrapped rolls. 

Thaw one portion in the refrigerator overnight, or place on your counter two hours before you plan to use it. Have everything else prepared before you break the plastic seal because phyllo dough dries out fairly quickly, and then it becomes fussier to work with. 

Once open, keep the sheets covered with plastic until you need the next one. 

I put a large piece of parchment paper on my work surface to make the phyllo easily moveable and to keep the counter clean. Place one phyllo sheet at a time on the parchment to apply butter or margarine. (Some recipes use olive oil or cooking spray.) That’s followed by a second and third, or whatever the recipe calls for.

Don’t worry if a sheet tears. You can patch it together, and by the time the dish is assembled and baked, it won’t show anyway.

Once opened, phyllo should be used within one week or refrozen for up to two months. 

One minor downside to leftovers: The phyllo crust won’t recrisp when it’s reheated in the microwave.  Refrigerator humidity wilts the baked delicate sheets.

Chunks of chicken, peas, pearl couscous, onions, orange bell pepper, garlic and seasonings make up the filling of the phyllo pie.

Curried Chicken and Pearl Couscous Phyllo Pie

Hands on: 45 minutes to 1 hour

Total time: 1 hour, 15 minutes to 1 hour, 30 minutes

Serves: 5-6 as an entree, 8 as an appetizer

Aside from the challenge of getting the phyllo prepared correctly, I was worried that the filling would contain too much liquid, which would produce a soggy bottom crust.

I used pearl couscous, a larger, “meatier” version of the familiar grain, usually made from semolina. It resembles small pearls and because it is a bit larger, doesn’t wilt against other ingredients. It takes longer to cook than its more diminutive cousin.

Uncooked pearl couscous (left) is aptly named, larger and more substantial than its cousin.

It “drank” all the liquid, also evaporating my concerns. 

The recipe that my version is adapted from used cooking spray for coating the springform pan and phyllo leaves. I have never used that method, so can’t attest its reliability.

Though I made this in one afternoon, I don’t see any reason why the filling couldn’t be made a day in advance and refrigerated until ready to proceed with the phyllo.

For the filling: 

2 tablespoons extra-virgin olive oil

1 cup onion, diced

1/2 cup orange bell pepper (or another color), diced

2 cloves garlic, minced

1 1/2 teaspoons curry powder

1 pound skinless, boneless chicken or turkey breasts, cut into 1/2-inch chunks

1/2 teaspoon salt

1/8 teaspoon cayenne pepper

1/2 teaspoon granulated sugar

1 (14-ounce) can chicken or vegetable broth

1 cup frozen peas (no need to defrost)

1 cup uncooked pearl couscous

Freshly ground black pepper, optional

1/4 cup cilantro, minced (or 1/2 teaspoon dried), optional

For the pie:

6-8 tablespoons butter or margarine

12 sheets phyllo dough, thawed

To make the filling: In a large nonstick Dutch oven or 12-inch nonstick skillet over medium-high heat, place 2 tablespoons olive oil. Add onion and bell pepper and sauté to soften, about 5 minutes. Add garlic and stir for 30 seconds. Add curry powder to bloom the spice, stirring for 30 seconds.

Add chicken (or turkey) pieces and stir-fry until pieces are no longer pink. Season with salt, cayenne and sugar and stir again. Add broth and peas, stir again to incorporate any brown bits on the bottom of the pan, and bring to a boil.

Remove from the heat. Pour in the couscous and stir. Cover and let stand 10-20 minutes, or until liquid is absorbed. (Time may be less if using smaller couscous.)

Taste and adjust seasoning with salt and pepper. Add cilantro, if using, and stir again. Set aside.

Preheat oven to 350 degrees Fahrenheit.

To make the phyllo crust: In a microwave-safe bowl, melt butter or margarine. (This can also be done on the stovetop.) Grease the bottom and sides of a 9-inch springform pan.

The last three phyllo sheets (left, on parchment) are ready to be placed atop the filling. Pat down to fit the circle, then fold the overhanging edges toward the middle.

Place a large piece of parchment paper on a clean, dry work surface. Unroll phyllo sheets, keeping unused ones covered with plastic until needed. 

Transfer 1 sheet of phyllo to the parchment. Using a pastry brush and working from the edges, lightly cover the entire sheet with butter or margarine. Place a second sheet on top of the first and brush with butter. Repeat with a third sheet.

Lift the three leaves carefully and drape over the bottom and sides of the springform pan.

Repeat layering 3 phyllo sheets as above. Rotate the pan by about a third, and drape the next section of the pan. Repeat with the next 3 sheets and rotate pan again. Position the last sheets so that the sides are now covered completely.

Spoon the filling into the phyllo crust and spread evenly.

Prepare the last 3 phyllo sheets as above. Place in the center and gently fold and pat down as needed to fit. Fold the overhanging portions from the edge inward over the center phyllo pieces. 

Brush butter or margarine over the entire top of the pie.

Place the springform pan on a rimmed baking sheet or a cookie sheet. This will catch any excess moisture and make getting the dish into and out of the oven easier.

Bake for 30 to 40 minutes, or until the top is lightly golden. Rotate at least once for even browning. If the pie is browning too quickly, cover with a tent of aluminum foil.

Let stand 5 to 10 minutes. If necessary, run a knife around the crust to loosen phyllo from the pan. Remove ring from springform pan (careful, it will be hot). 

Using a sharp knife, slice cleanly through the layers and serve.

Adapted from a recipe in “One Dish Dinners,” Better Homes and Gardens Books (Meredith Corporation, 2000, $24.95)

Whatever the definition, you can’t go wrong with this recipe for Chicken and Dumplings (aka Biscuits)

The dumplings/biscuits can be small or large. Keep in mind they will almost double in size as they bake.

By Betty Gordon

© 2020 text and photos. All rights reserved.

For the past several days, I’ve been pondering this trivial question: What is the difference between a dumpling and a biscuit? In the American South, does it indicate one thing, but then something else in other regions of the United States, and for that matter the world? 

(Yes, I know we have far more important challenges facing us these days, but everyone has to eat!)

I’ve always thought of a dumpling as a smallish dough ball dropped in a hot liquid such as soup to solidify the ingredients — think of matzo balls popular in Jewish cuisine or the German favorite spaetzle. Or the Chinese version, featuring a folded, thin dough wrapper stuffed with meat or vegetables and quickly cooked in a bamboo steamer.

On the other hand, biscuits conjure visions of puffy, fluffy quick breads fresh out of the oven (not to be confused with what the British call biscuits, which in American parlance are cookies).

After a jaunt through some of my cookbooks, it appears that the terms are interchangeable, especially considering the similarity of ingredients. Generally, dumplings and biscuits both contain flour, baking powder, a fat (butter or shortening), salt and a liquid such as milk or buttermilk. Both can be flavored with herbs or spices, or contain sugar for a sweeter version.

It’s more the method — baked or boiled — than the components that draws that thin line between a dumpling and a biscuit. 

This recipe should yield eight portions. Don’t be surprised if your crowd asks for seconds.

What provoked my inner discussion was a recipe I found on the King Arthur Baking Company website, always one of my favorites. (The company recently updated its name from King Arthur Flour.) The recipe was titled Chicken and Dumplings, but to me the photo said Chicken and Biscuits. 

But the underlying  message was: I must prepare this. 

The result was one big pot of comfort food: tender chunks of chicken and bite-size vegetables mingling in a silky sauce, crowned with golden pillowy biscuits.

You won’t be quibbling about a food definition. You’ll be contemplating seconds … or thirds. 

An added plus: With Thanksgiving coming up, this would be an excellent way to use up leftover turkey.

Topping the chicken-vegetable mixture with the dumpling/biscuit dough is the last step before putting the dish in the oven.

Chicken and Dumplings (or Chicken and Biscuits)

Hands on: 60 minutes

Total time: 1 hour, 30 minutes to 1 hour, 45 minutes

Serves: 8

It’s a good idea to poach or bake the chicken a day ahead and refrigerate it overnight. I find it’s easier to cut and cube when it’s cold.

You can use any mixture of vegetables, fresh or frozen, but if frozen, defrost first. I used onions, peas, carrots and corn.

Make sure the flour used for the dumplings/biscuits is self-rising. It already includes baking powder and salt. All-purpose flour is specified for use in the filling.

For the dumplings/biscuits:

2 1/4 cups unbleached self-rising flour

4 tablespoons butter (or margarine), cold, cut into pats

2 tablespoons chopped fresh chives or parsley, or 2 teaspoons dried; or 2 teaspoons herbes de Provence (all optional)

3/4 cup buttermilk, or 1/2 cup plain yogurt thinned with 1/4 cup milk

1 large egg

For the filling:

4 cups diced cooked chicken (about 1.7 pounds poached breast meat)

4 tablespoons butter (or margarine)

1/2 cup unbleached all-purpose flour

3 cups chicken or vegetable broth

1 teaspoon dried thyme

1 bay leaf

Salt and pepper to taste

1/4 teaspoon Worcestershire sauce

2 1/2-3 cups mixed vegetables

To start the dumplings/biscuits: In a medium bowl, combine butter (or margarine) with the self-rising flour until the mixture resembles coarse crumbs or small peas. Add herbs, if using. Cover and refrigerate. 

To make the filling: In a 5.5-quart, oven-safe Dutch oven, melt butter (or margarine) over medium heat. Whisk in all-purpose flour and cook for 1 minute. 

Add chicken or vegetable broth 1/2 cup at a time, continuously whisking to prevent lumps. After all the broth has been added, mix in thyme, bay leaf, salt, pepper and Worcestershire sauce. Simmer for 15 minutes, stirring occasionally. 

Cubed cooked chicken, corn, peas, carrots and onions bask in a silky sauce of flour whisked into melted butter.

Add the cubed chicken and vegetables, mix and continue simmering.

Preheat oven to 350 degrees Fahrenheit. 

To finish the dumplings/biscuits: In a small bowl, whisk together buttermilk and egg. Add to flour-butter mixture and combine just until dry ingredients are evenly moistened.

To finish assembly: Roughly divide the dough into eight portions (you can measure or eyeball this). Space dumpling/biscuit dough evenly in a ring around the perimeter of the Dutch oven, and put one in the center. (You can also make them smaller.) The dumplings/biscuits will almost double in size, obscuring the chicken-vegetable mixture underneath.

Put the lid on the pot and place in the oven. (If you don’t have a lid, cover tightly with aluminum foil.) Bake for 20 minutes, then remove the lid (or foil). 

Bake for another 10-15 minutes, or until the biscuits are lightly golden. You might need an additional 10-15 minutes to achieve your desired color.

Remove from oven and serve hot.

Adapted from a King Arthur Baking Company recipe: http://www.kingarthurbaking,com

A glorious galette: Thank France for this solution for taming finicky pastry

gphgV1uqQ6GbEvhv4nsIxg
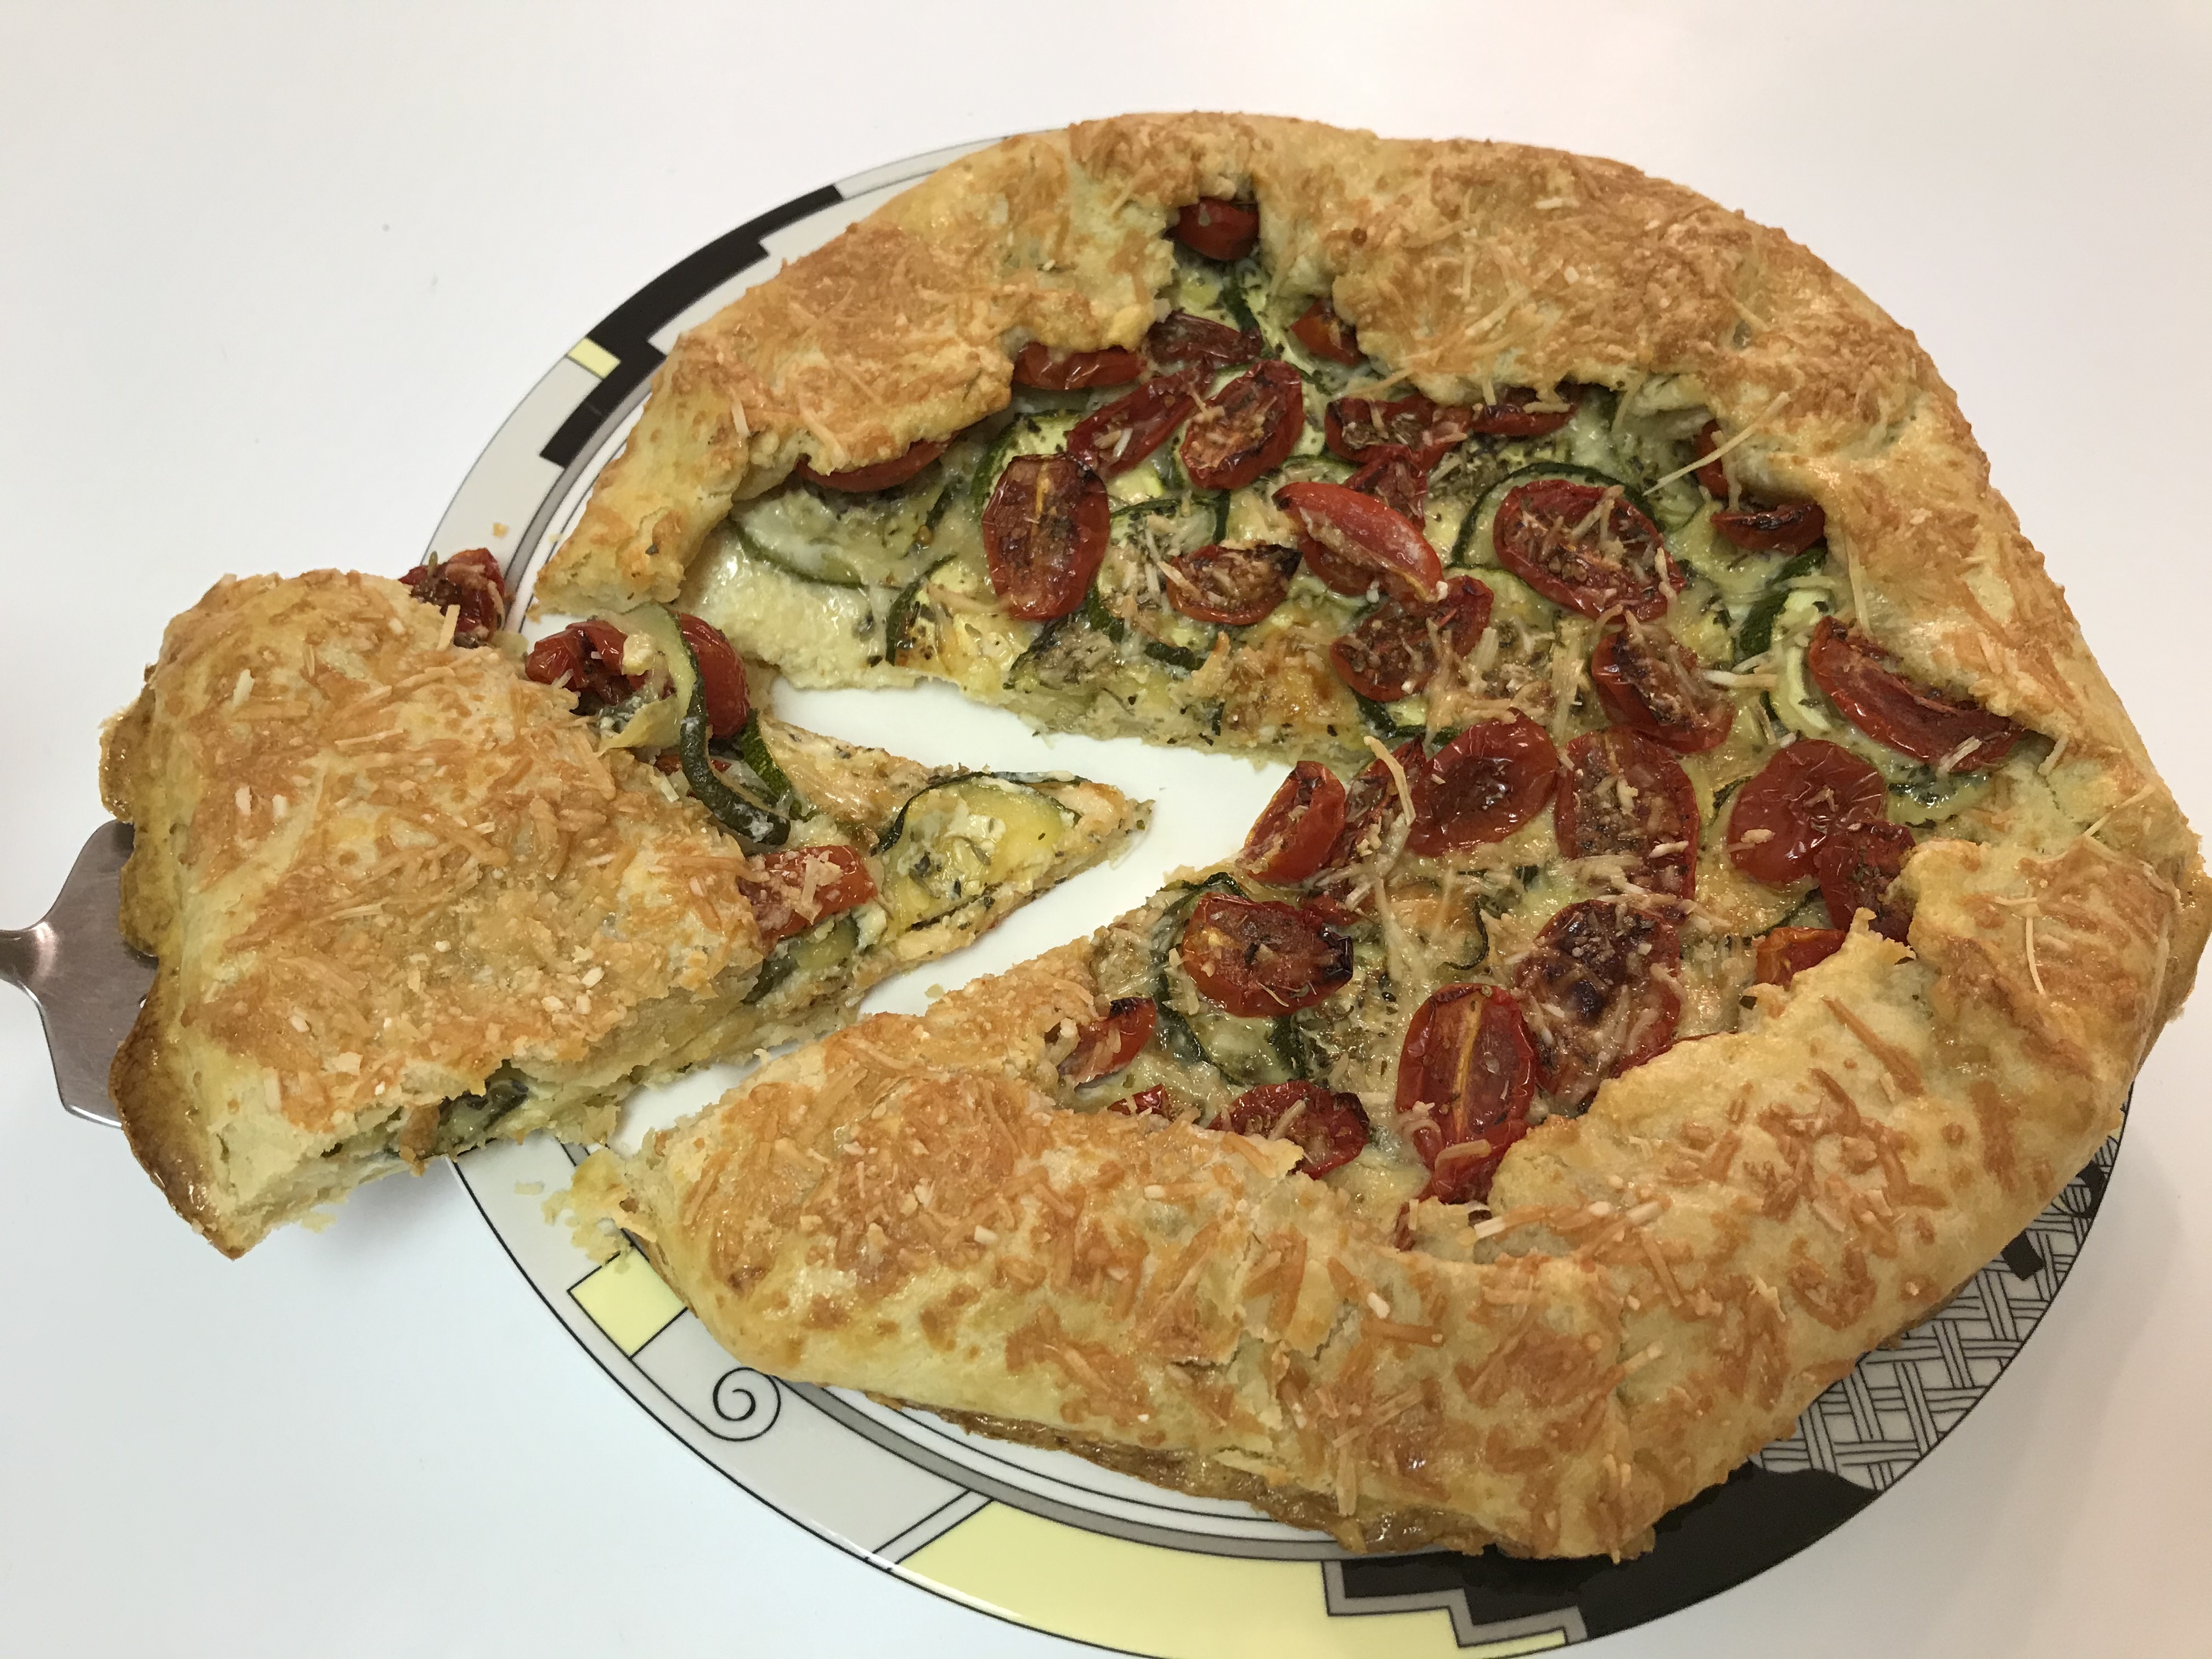
Let the Savory Zucchini Galette cool for about 10 minutes before serving — if you can wait that long. It makes a fine appetizer or light dinner entree.

By Betty Gordon 

© 2020 text and photos. All rights reserved.

Though I love to bake, I rarely prepare pies. Getting the crust the right thickness and texture, and perfecting the appearance is not always an enjoyable experience.

And baking should be fun, as well as paying off with something delicious to eat. 

That leaves the options of using a store-bought shell or refrigerated pastry sheet. Or not making pie at all. 

So the happy medium is a galette, a free-form, semi-open-faced tart, which can have a sweet or savory filling. 

Another plus: You won’t have any pastry scraps left over. 

Your finished galette may look somewhat rustic, but I promise you’ll be pleased with the results.

Until a few weeks ago, I had never attempted to make a galette. I’ve seen them fashioned countless times on TV cooking programs with hosts ranging from Julia Child to Martha Stewart to Jacques Pépin.

Why try this French favorite now? Because while looking for something else on the King Arthur Flour website — one of my go-to Internet destinations for baking ideas — a mouth-watering picture of Savory Zucchini Galette caught my eye.

It also helped that I had everything the recipe called for on hand.

Dough can be finicky: You don’t want to overmix it, or add too much flour when rolling it out because both situations toughen it — not what you’re going for when your goal is flaky pastry. 

My method for rolling out the dough might draw criticism from purists, but it works for me, which is, after all, the point. 

To cut down on frustration, I place the dough between two pieces of plastic wrap, eliminating the possibility of it sticking to the bench. It is also easier to turn in increments and to arrive at a uniform thickness.

fullsizeoutput_59e
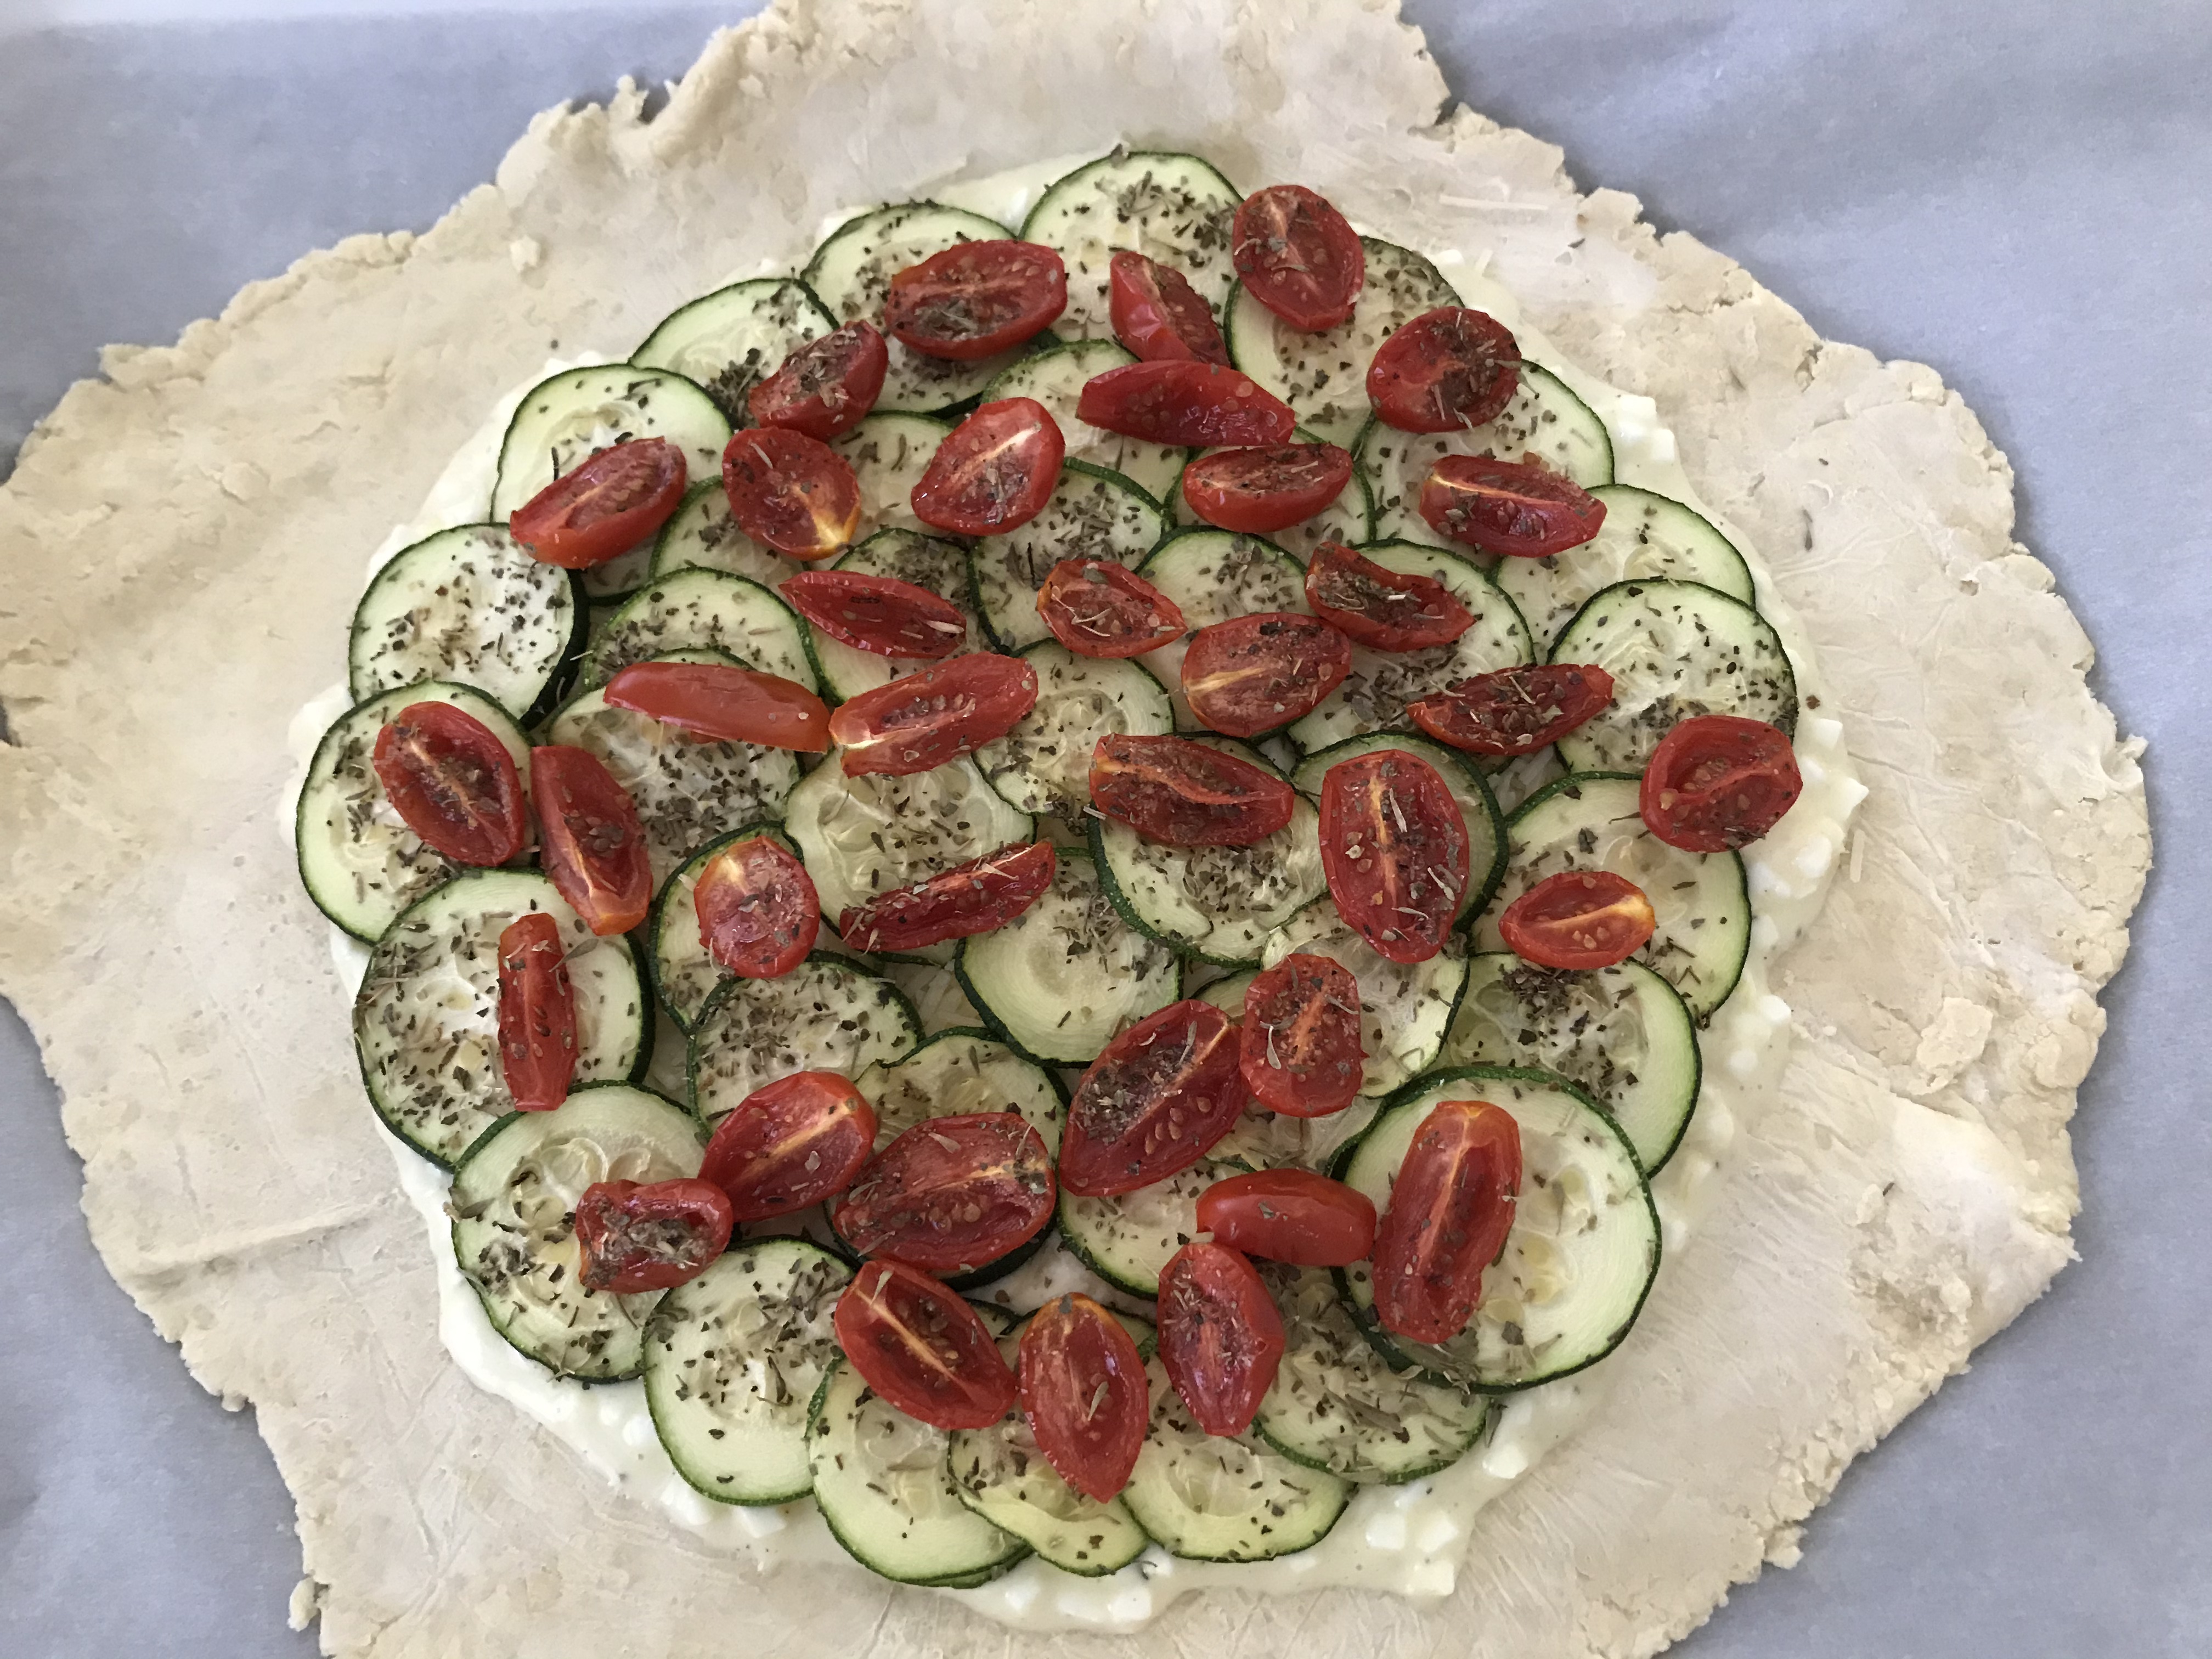
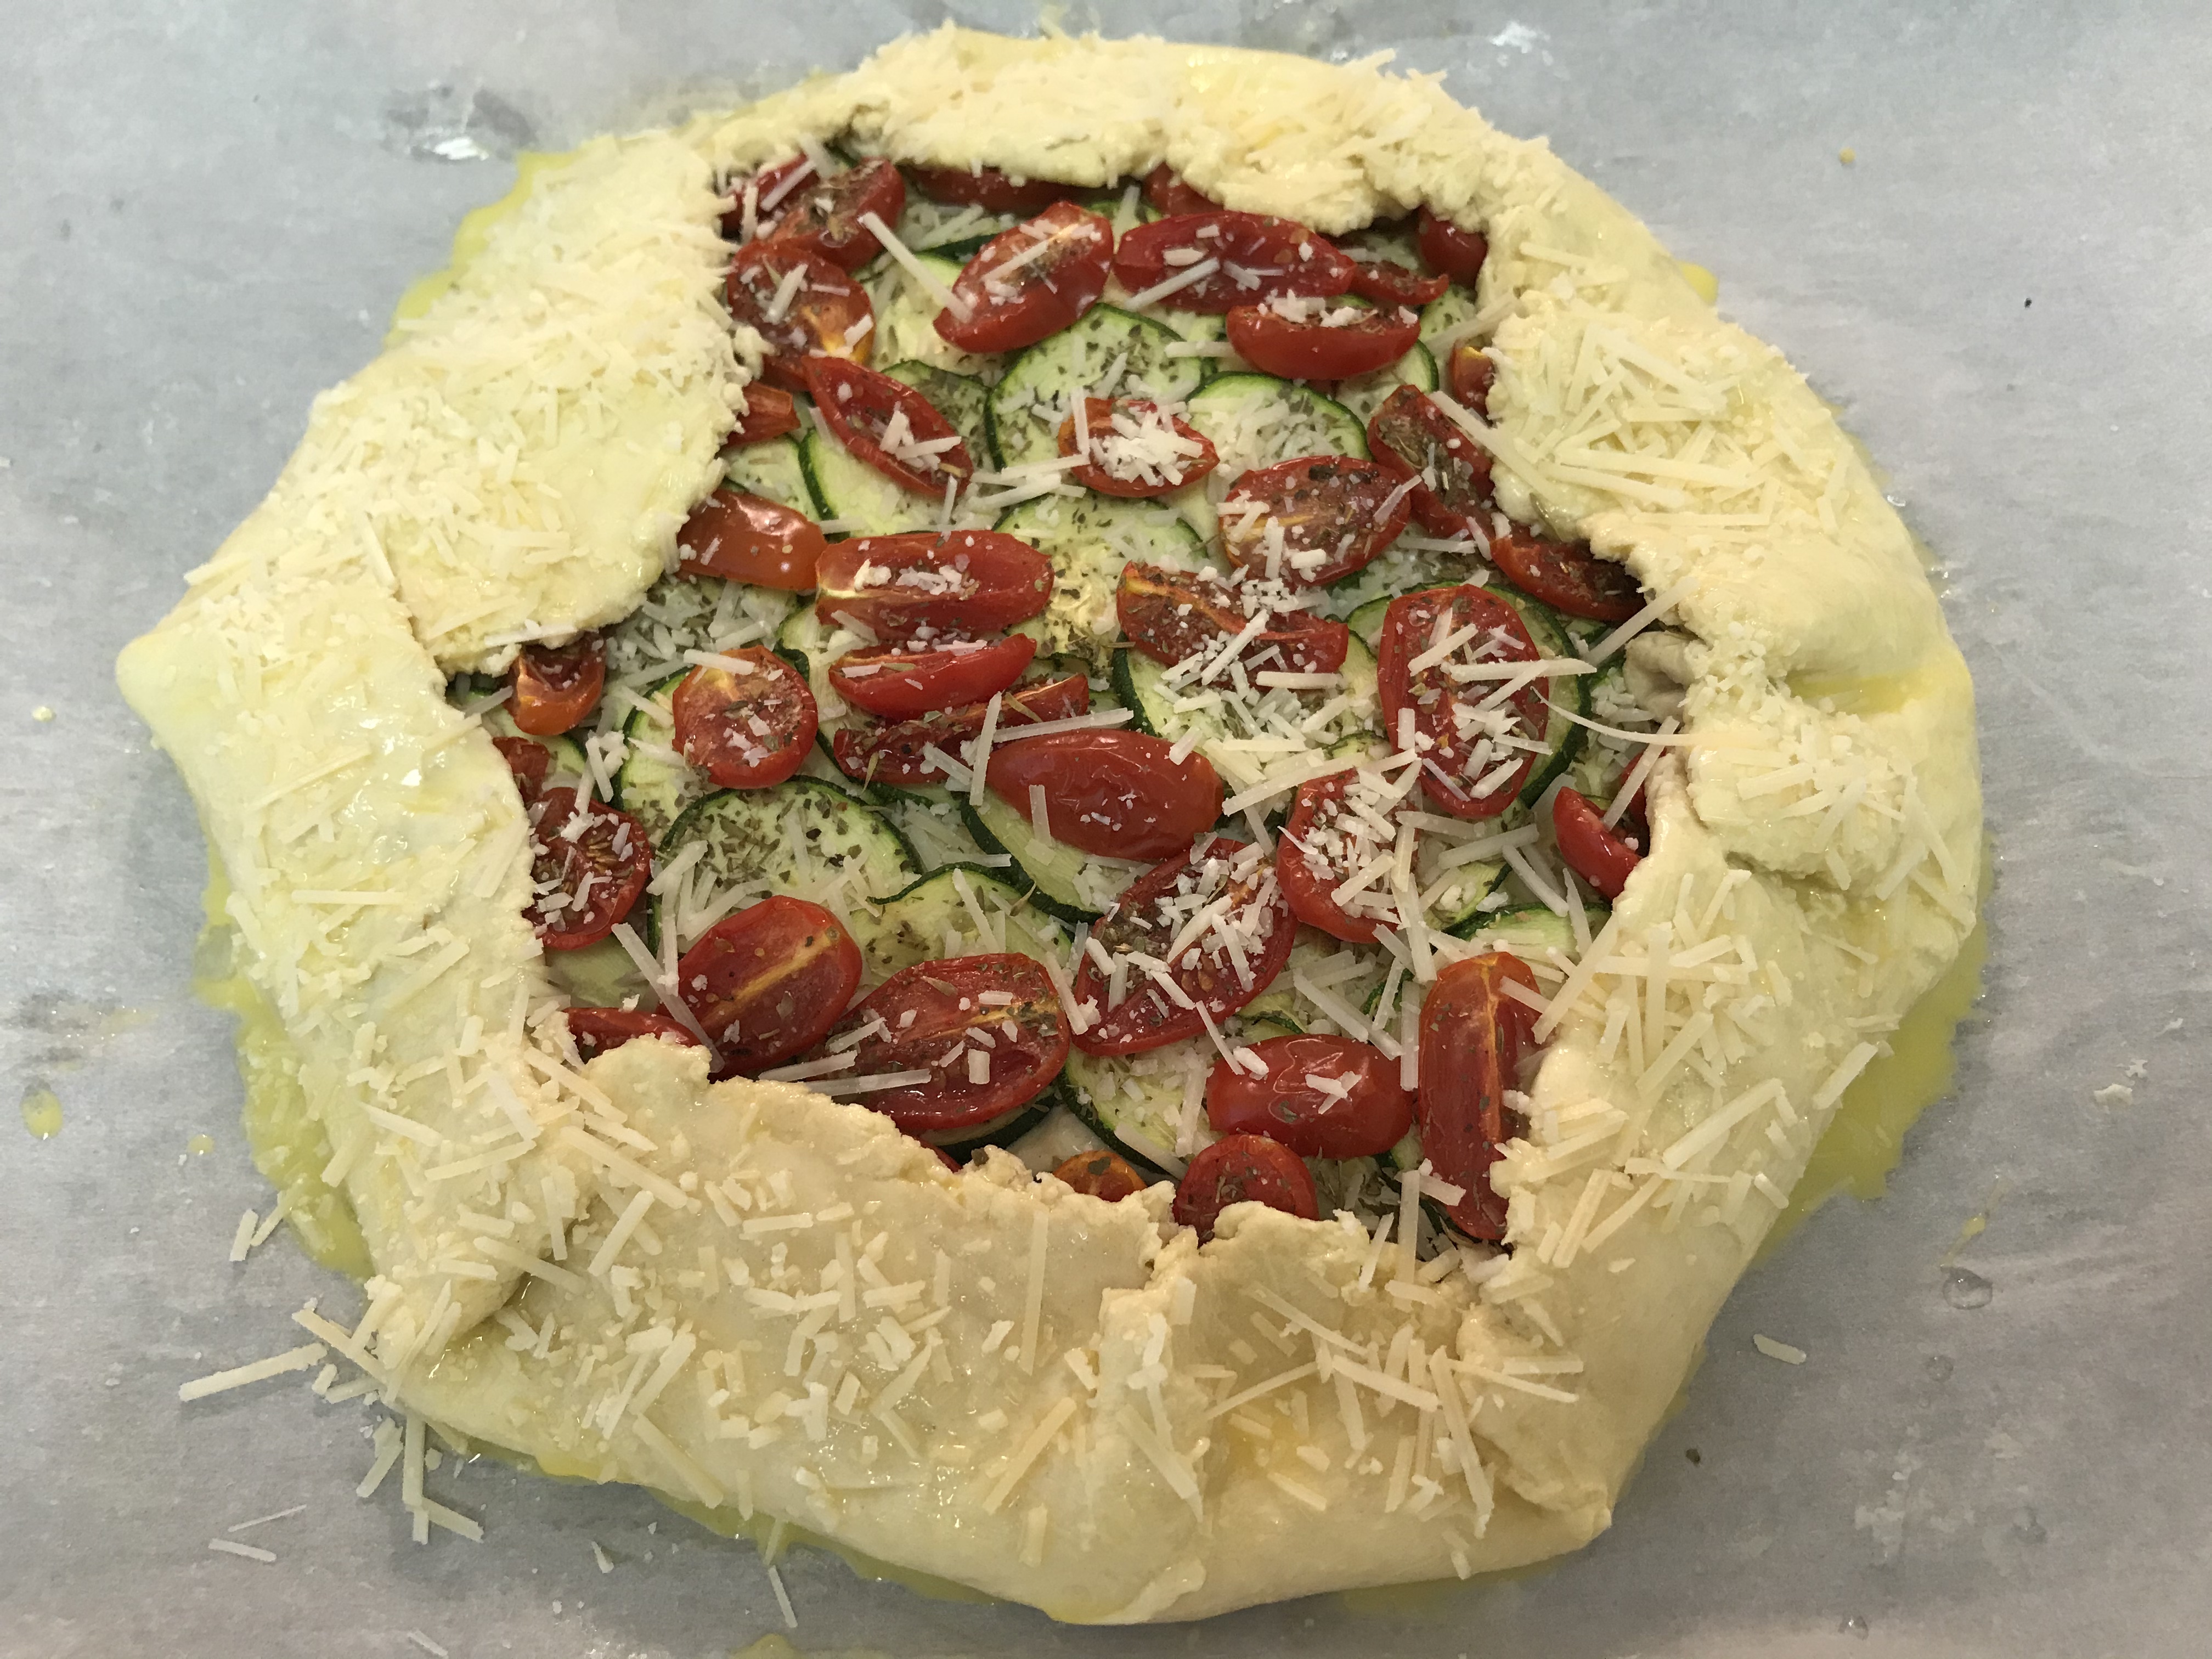
Once the dough is rolled into a roughly circular shape, top with the ricotta mixture and then the roasted zucchini and grape tomatoes. 

Ingredients for galette dough can vary, with the pastry for a fruit tart containing some granulated sugar, for example. Others may feature sour cream for added richness and tang. 

Some, like this KAF one, have just the basics: butter, salt, flour and cold water. (A Vermont cheese powder is optional and I did not use it.)

As usual, I tweaked the recipe to my palate. And because I was baking on a hot and humid day, the dough quickly became sticky and difficult to work with. The solution: Put it back in the refrigerator to resolidify the fat.

That added to the overall preparation time, but it was necessary to achieve success. 

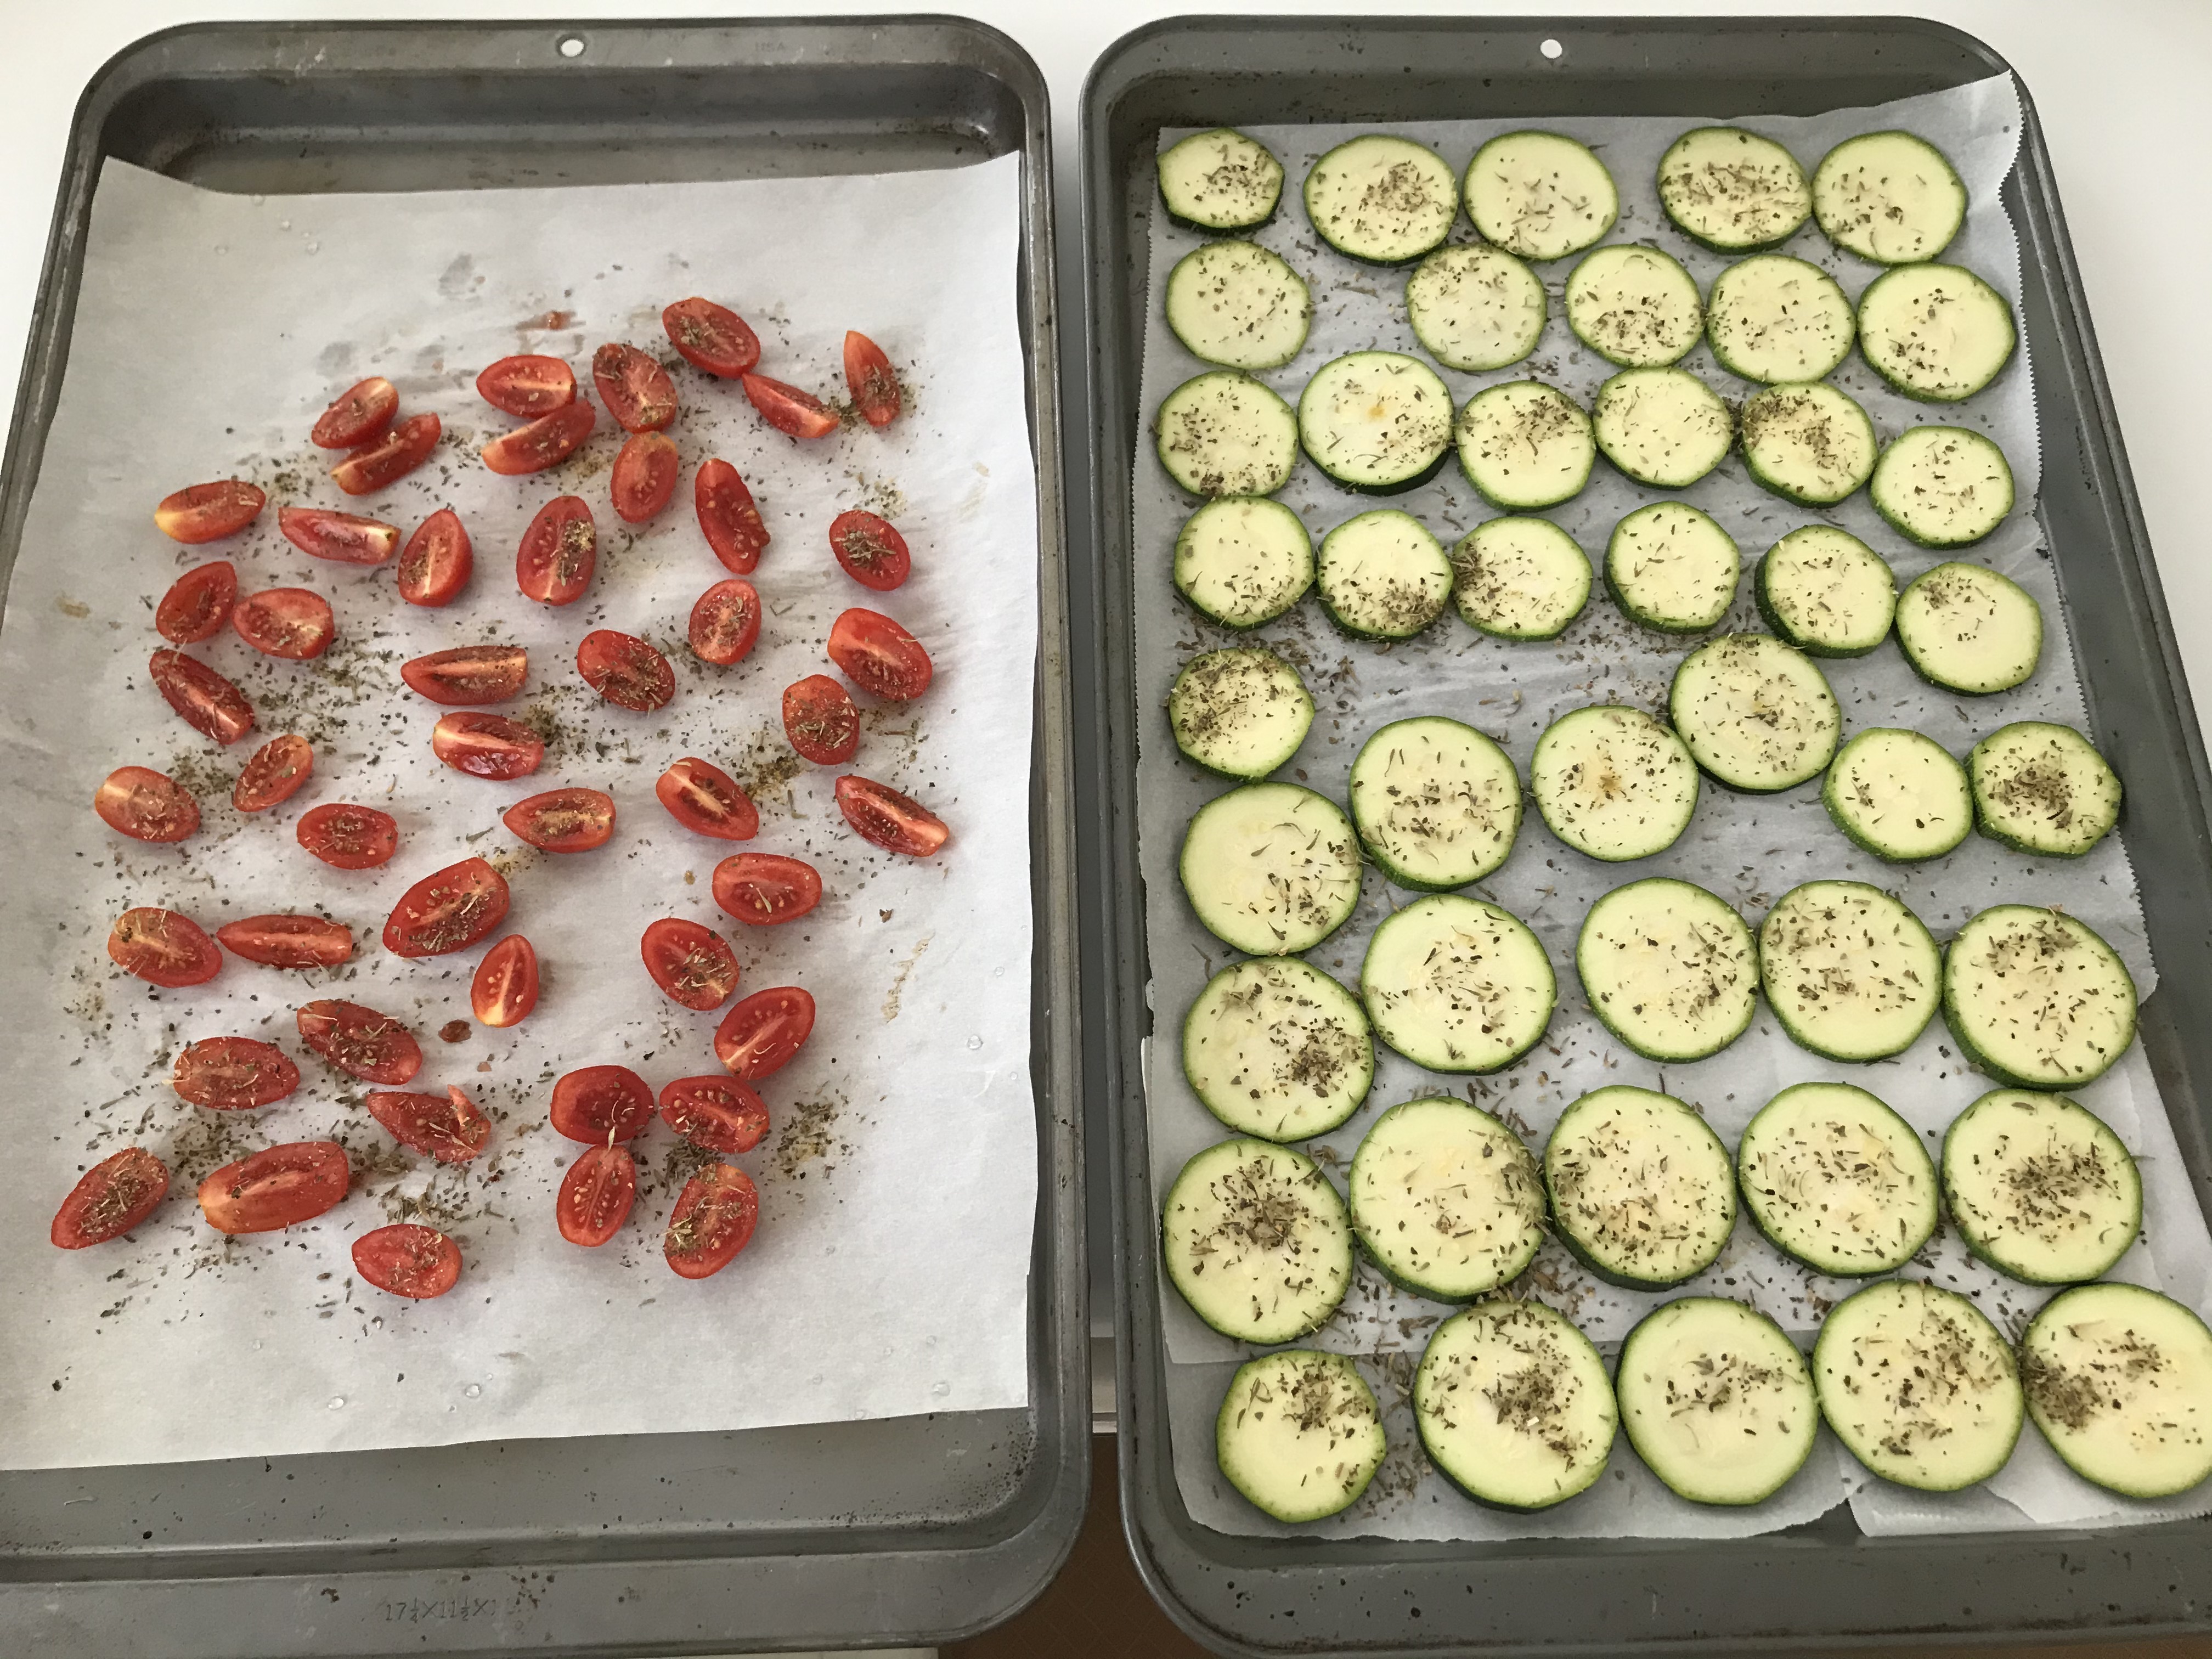
Roasting the zucchini disks and halved grape tomatoes brought out their sweetness and dried out some of the vegetables’ inherent liquid.

If you choose different vegetables, for instance onions and mushrooms, sauté them in a saucepan on the stovetop to reduce their moisture before assembling the galette. 

Other than manipulating the dough, my biggest worry was whether the bottom of the tart would be properly cooked through. In my head, I was hearing British baking doyenne Mary Berry, best known to American audiences from “The Great British Baking Show” on PBS, where she frequently reminds contestants: “no soggy bottoms.” 

No problem. 

The pastry was cooked to GBD perfection (golden, brown and delicious, as Ming Tsai of “Simply Ming” would say. Yes, I watch a lot of cooking shows on PBS).

As we get deeper into summer, the glut of home-grown tomatoes and zucchini approaches. This recipe is one solution for when your neighbors share their garden’s delights.

The takeaway here is that if you find making pie pastry overly fussy — I realize that being proficient in any skill takes patience and practice — try this more forgiving delectable galette. It’s a keeper.

Savory Zucchini Galette

Hands on: 40 minutes

Total time: 2 hours, 15 minutes

(add 15-30 minutes if you need to return the dough to the refrigerator after rolling out the disk)

Makes: one 8- to 10-inch galette

Serves: 4 as an entree, 6-8 as an appetizer

For the dough:

1 1/2 cups all-purpose flour

1/2 teaspoon salt

1 stick (8 tablespoons) unsalted butter or margarine, cold, and cut into cubes

5 to 6 tablespoons cold water

For the filling:

1 large zucchini, sliced into 1/4-inch-thick disks

2 teaspoons Italian seasoning (I used 1 teaspoon oregano, 1/2 teaspoon each thyme and basil)

1/8 teaspoon garlic powder

1/2 pint cherry or grape tomatoes, halved (about 1 cup)

3/4 cup ricotta cheese (I used 2 percent milkfat cottage cheese)

1/4 teaspoon salt

Freshly ground black pepper, to taste

1/2 to 1 teaspoon lemon zest (optional)

1 large egg

1/2 cup grated Parmesan cheese, divided

For the egg wash:

1 large egg, beaten with 1 teaspoon water

To make the dough: In a large bowl, whisk together flour and salt. With a pastry blender or using a fork, cut butter (or margarine) into the flour until the mixture is crumbly. Add 5 tablespoons of water and mix to bring together the dough. If it’s too dry, add the last tablespoon of water. (Alternatively, make the dough in a food processor.)

On your work surface, transfer the dough to a large piece of plastic wrap. Press the dough together to form a disk. Place in refrigerator for 30 minutes.

xasZiZTwRu637oeYw+MjwQ
The zucchini and grape tomatoes lined up and ready for oven-roasting.

While the dough is chilling, make the filling. Preheat oven to 425 degrees Fahrenheit. Line two baking sheets with parchment paper. 

In a small dish like a ramekin, combine oregano, thyme, basil and garlic powder. 

On one sheet, place the zucchini in rows. Sprinkle with 1 1/2 teaspoons Italian seasoning mix.

On the other sheet, place the tomatoes, cut side up. Sprinkle with remaining 1/2 teaspoon Italian seasoning mix. 

Roast vegetables until tender, about 10-15 minutes for the tomatoes and 15-20 minutes for the zucchini. (Don’t overdo it: They’ll cook again in the final baking.)

Remove vegetables from oven and allow to cool for at least 10 minutes.

While the veggies roast: In a small bowl, combine ricotta (or cottage cheese), salt, pepper, lemon zest and egg until mixed. Set aside.

To roll out the dough: On a lightly floured work surface, roll out the dough into a 12-inch circle. (It does not have to be perfectly round.) To achieve a uniform thickness, rotate the dough a quarter turn with each stroke. Transfer to a parchment-paper lined baking sheet.

(Alternatively, roll the dough between two pieces of plastic wrap, likewise rotating a quarter turn with each stroke.

Work quickly, especially if it is a warm day. If the dough becomes too difficult to work with and you sense you’ll have trouble folding over the edges later, keep it between the plastic wrap and place on a parchment paper-lined baking sheet. Refrigerate for 15 to 30 minutes. If you do this step, place the ricotta mixture in the refrigerator at the same time to keep it cold.

Remove the dough and baking sheet from the refrigerator. Carefully peel off the top piece of plastic wrap. With each hand, grasp the vertical edges of the bottom piece of plastic wrap and invert dough onto the center of the parchment-paper-lined baking sheet.)

To finish assembling the galette: Spread the ricotta (cottage cheese) mixture in a circle, leaving a 2-inch dough border all the way around. 

Sprinkle half the Parmesan over the ricotta mixture. 

Working from the outside in, shingle the large zucchini slices in a circle over the ricotta mixture. Repeat the shingling until the center is covered (you may have leftovers). 

Arrange the tomato halves on top of the zucchini.

fullsizeoutput_59f
After the border dough has been folded toward the center, brush the dough with egg wash. Then sprinkle the remaining Parmesan over the rim and the filling. 

Fold the exposed dough toward the center over the top of the filling, all the way around the galette. You may need to loosen the edges with an offset spatula. Try not to tear the dough. 

In a small bowl, mix the egg and water to make a wash, and brush it over the top of the border dough. 

Sprinkle the remaining Parmesan over the pastry and filling. 

Bake for 25 to 30 minutes, or until the crust is golden and the filling is bubbling. Rotate about halfway through for even browning.

Cool for at least 10 minutes before cutting into slices and serving. 

Adapted from a King Arthur Flour recipe: http://www.kingarthurflour.com