


1995-1999 Chevrolet Suburban/Tahoe and GMC Yukon
How to upgrade the stereo system in your Suburban, Tahoe, or Yukon


In brief: This Crutchfield Research Garage article gives you an overview of your truck's stock stereo system and your aftermarket upgrade options. We'll tell you all about:
- The factory stereo system
- Removing the factory radio
- Removing the factory speakers
- Adding more bass
- Other options for your Chevy or GMC
Then, use our vehicle selector to find the gear that will fit your SUV.
Overview of the Chevy Suburban, Chevy Tahoe, and GMC Yukon
What does a classic SUV look like? Is there even such a thing? Well, we're going to have to talk about that subject eventually, so why not start now? Yes, old Broncos, Blazers, Land Rovers, Jeeps and the like all count, but those mostly predate the popular use of "SUV" in everyday language.
So does the Suburban, but this version, along with its (slightly) more compact Chevy Tahoe and GMC Yukon cousins, is as good an example of a "classic" SUV as any. Though it's a little hard to see the "sport" in vehicles big enough to hold most of a youth league soccer team, the utility is pretty obvious. And so is the comfort, whether your Chevy or GMC has every available option, or you're driving an ultra-luxurious 1999-2000 Cadillac Escalade, to which all the tips below also apply.
A new stereo will make your slighly older SUV a more fun place to be, whether you're hauling people or stuff.

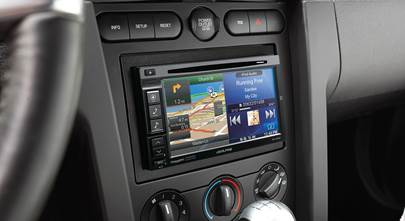
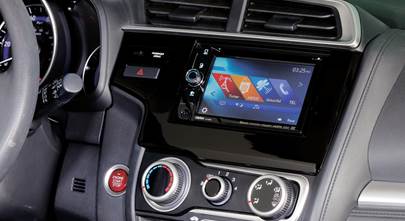
The stock radio can be replaced by a wide number of aftermarket models (Crutchfield Research Photo)
The factory stereo system
The standard stereos were pretty basic to begin with in these trucks, and after a couple of decades, they're even weaker than they were when they were new.
Replacing them is pretty easy, really, but you will need to unbolt or cut out the factory radio's rear support bracket to make room for a new double-DIN (4" tall) receiver. A single-DIN (2" tall) involves less work. Both will require dash kits and wiring harnesses, which are included at a deep discount when you buy from us.
If your truck has a separate CD or cassette player below the climate controls, removing the factory radio will render that unit inoperable. If you don't want to look at a redundant, non-functional relic (And why would you?), remove the old deck and replace it with a factory pocket that's available from a dealership or various online sources.

You'll need to unbolt or cut out the factory radio's rear support bracket to make room for a double-DIN receiver. Single-DINs require less work. (Crutchfield Research Photo)
Removing the factory radio
Before you start removing the radio, there are a few things that need doing. First, check to see if there's a cassette or CD in the deck, because hey, not everything is online, you know, and you might want to hear those songs again. Next, set the parking brake and disconnect the negative battery cable to prevent any electrical short.
The biggest challenge in this process is the dash trim panel, because it's the biggest piece in the process. Removing it isn't hard, but it's a big piece of plastic and you need to be careful with it.
Starting at the top, carefully pull outward around the edges of the panel to release the retaining clips. Pull it away from dash -- just enough to disconnect the headlight switch harness (and any others, if they're there).
If your vehicle has a column shifter, you'll need to move the gear shift to its lowest position before pulling the top of the dash trim panel out from under instrument cluster cowl. Next, lift the panel off the steering column and remove it. It's a good idea to have an old blanket or something soft like that to safely store the panel while you're working.
Detailed stereo and speaker removal instructions

To remove the radio itself, just press down on the tabs on either side of radio. Pull it out, disconnect it, and remove it. You won't need DIN tools for this, just a flat blade screwdriver.
To install the new receiver, secure it to the mounting bracket, following the instructions that come with the bracket, then make the wiring connections following the instructions included with the wiring harness adapter. Slide the entire assembly into the cavity until it snaps into place.
When you're reinstalling the dash panel, the lower edge of the panel must be snapped into place first. Once that's done, you can snap the top part into place. Be sure to reconnect any wiring plugs that you unplugged before.
Tools needed: Flat blade screwdriver
Read our Car Stereo Buying Guide for shopping tips and advice.
Shop for car stereos that fit your Chevrolet Suburban
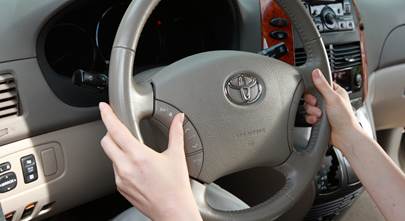
Steering wheel audio controls
In most cases, it's reasonably easy to retain your truck's steering wheel audio controls when you install a new stereo. When you enter your vehicle information, our database will choose the adapter you need to make your factory steering wheel controls work with a compatible aftermarket receiver.

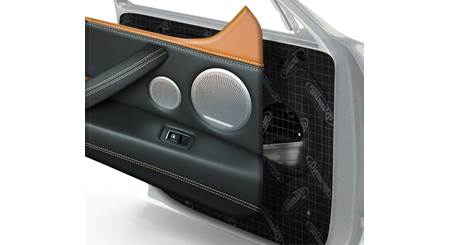
You'll need to remove the door panels to replace the stock door speakers (Crutchfield Research Photo)
Removing the factory speakers
Most of these trucks have speakers in the front doors, rear doors (if there are rear doors), and the rear roof. The more optioned-up trucks have woofers in the door panels and tweeters in the front of the armrests. More basic trucks just have full-range speakers in the doors.

Upper-level models will have woofers behind the door panels and tweeters in front of the armrests (Crutchfield Research Photo)
Removing your front door speakers
The 6-1/2" woofers (or full-range speakers, as the case may be) can be replaced by a wide variety of 5-1/4", 6-1/2", 6-3/4", 7", and even 4"x6" aftermarket models. In some cases, you'll need to drill new mounting screw holes, which isn't hard, but will require some care and attention on your part. Other than that, speakers are easy to deal with, but there are some differences between power window-equipped trucks and their manual cousins.
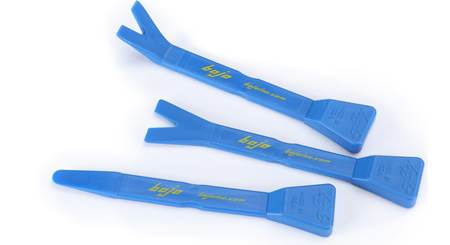
You'll start by carefully (we mean it, this stuff is old) removing the door release trim by using a panel tool or small flat blade screwdriver to pry between the trim and the inner cup at the various pry points. Pay attention, stay patient, and you'll be fine.
Next, you'll pry off the screw cover and remove two 9/32" screws from the armrest cup. From here, just move up the door a bit and pry off the sail panel, starting at the top. The retaining clip is very tight and will probably require substantial force to release. Forewarned is forearmed.
If your truck has power windows, you'll need to remove the switch panel. If you have good ol' roll-up windows, you'll have to use a (clean) shop rag in a "shoeshine" motion to release the "C" clip before you can remove the crank. Complete instructions on both options can be found in the Crutchfield MasterSheet that's included free with your stereo or speaker purchase.
Removing the door panels begins with prying out around the bottom and sides of the door panel to release the retaining clips. These clips are also very, very tight, so it'll take some intelligently applied muscle to remove them.
Once you've won that wrestling match, slide the door panel up and off the window channel. Disconnect the courtesy light harness (if equipped) and remove the panel.
Removing the old speakers is a lot easier. Just pry out the spring tab at the top of the speaker, then fold the speaker down to release the lower tabs and disconnect the harness.
To drill new mounting holes, place the new speaker in the cavity and mark the locations for the new holes. Set the speaker aside and drill the holes with a 1/8" bit. This is a pretty light job for the average DIY-er (or even a beginner), but it's important to carefully survey the area you're drilling into before you start. Work carefully and wear eye protection.
Your speakers might come with mounting screws. Then again, they might not. Check before you start, and make a hardware store run if you need to.
Once you've connected and secured the speaker, use some duct tape to cover the holes around the speakers, because duct tape is wonderful. Test the speakers to see if they're working and, if they are, make sure the locks and windows are also functioning properly, then start putting the doors back together.
Tools needed: Panel tool, Phillips screwdriver, small flat-blade screwdriver

The tweeters are very easy to reach and remove (Crutchfield Research Photo)
The 3" factory tweeters, when present, are located at the front of each armrest. You'll get to them by removing the window lock/switch panels. They pry off pretty easily, starting at the rear edge, and you remove the tweeters by rotating them counter-clockwise. A variety of speakers will fit here, but you'll need to mount them using our universal backstraps (or hot glue or silicone, if you prefer).
Tools needed: Panel tool, Phillips screwdriver, small flat-blade screwdriver

Replacing the 4"x10" roof speakers can produce a notable improvement in overall sound (Crutchfield Research Photo)
Removing the rear roof speakers
The factory 4"x10" rear roof speakers are pretty easy to get to, and aftermarket upgrades are available.
You'll remove the old ones by prying along the short sides of the speaker grille, allowing the grille to bow out in the center. Pull out the front edge of the grille, then slide the grille toward the front of the vehicle.
Remove the four 9/32" screws that secure the speaker to the roof, then remove the old speaker and start securing the new one. Once you're sure they're working, reinstall the grilles and rock on.
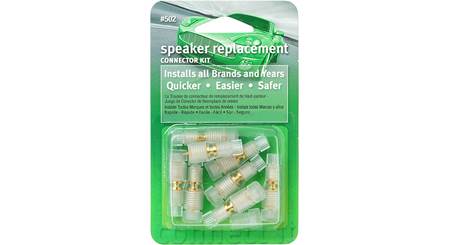
If your Tahoe or Yukon doesn't have a factory stereo, you'll find no speakers or wiring here. You'll need to run your own speaker wire and use Posi-Products speaker connectors to connect the speakers.
Tools needed: Panel tool, 9/32" socket, ratchet and extension

The Suburban's rear door speakers aren't hard to deal with, and you have lots of replacement options (Crutchfield Research Photo)
Removing the rear door speakers (Suburban)
The Suburban's rear door speakers can be replaced by a wide variety of 5-1/4", 6-1/2", or 6-3/4" aftermarket models.
Use your panel tool to pry off the speaker grille, starting at the edge closest to the door hinge. Next, pry out the center pins of the fasteners securing the speaker to the door panel. Grasp the center pins and pull out the fasteners. From here, just remove the speaker, disconnect the harness, and start installing the new speaker.
You'll secure the replacement speaker to the door panel using the fasteners you removed earlier. If the fasteners don't provide a satisfactory mount, you'll need to use screws and speed clips.
Tools needed: Panel tool, small flat-blade screwdriver
Read our Car Speakers Buying Guide for more information.
Shop for speakers that fit your Chevrolet Suburban
Bass in your Suburban, Tahoe, or Yukon
There's obviously tons of room in these trucks, so there's space for bass if you want to install a big enclosure stuffed with big subs. There's a 47" W x 24" H x 31"/33" D space in the Suburban, while the Tahoe/Yukon twins offer a 34" W x 18" H x 36"/32" space.
If you love music, but still love being able to haul people and stuff in your SUV, there are plenty of practical solutions. A jumbo-sized box is one way to go, but a smaller powered subwoofer will give you a surprising amount of thump without taking up your storage space.
Learn more about building a bass system in our Car Subwoofer Buying Guide.
Shop for vehicle-specific subwoofers for your Chevrolet Suburban

Installing Q-Forms kick panel pods will really boost your SUV's sound (Crutchfield Research Photo)
Other options for your Suburban, Tahoe, or Yukon
Here are some other ways to improve your Chevy or GMC.
Rear-view camera
These trucks are a bit airier than the SUVs of today, but they're still big and unwieldy in parking lots. If you're adding a DVD or nav receiver, you should also consider a rear-view camera. These increasingly popular cameras can really help you get out of tight spots.
Kick panel pods
If you really want to improve the sound in your SUV, install a set of Q-Forms Kick Panel Pods. These unloaded, custom-fit speaker enclosures fit into the space where your kick panels are now. They hold a set of component speakers in an ideal position, angling them to maximize sound quality. They're available in a variety of colors to match your truck's interior. Installation takes some work, but it's not beyond the realm of an experienced DIY-er.
Noise reduction
Exterior noise is a fact of life in big, blocky trucks, especially at highway speeds. There's no way to totally eliminate wind and road noise in this (or any truck), but installing some Dynamat in the doors – and potentially, throughout the cabin, can really seal in sound and let you enjoy your stereo.
Antenna replacement
Your truck's antenna has no doubt led a very hard life. If it's still working, you don't have to replace it when you install a new receiver, but this is as good a time as any. The process is pretty simple, and it's all explained in your MasterSheet.
Security systems and remote start
Installing a security system in your Chevy or GMC won't be easy (security systems rarely are), but it's definitely a good idea if you tow long distances and stop overnight. Our Crutchfield Advisors can help figure out what you need to get the job done, but we usually recommend taking your vehicle to a professional installer.
Adding remote start capability to your vehicle lets you warm it up in the winter or cool it down in the summer. Installation is usually easier with these systems, but we still ask that you call to order so that we can make sure you get the right harness for your ride.
Let's get started!
Ready to shop? Use our vehicle selector to find the gear that will fit your car or truck. If you have questions of your own, give us a shout via phone, chat, or email


Joshua from North Las Vegas
Posted on 11/22/2023
Rear door speakers aren't working, I've looked under the driver side front seat in my 1999 gmc Yukon and don't see an amp, is it hidden under the seat?
Jon Paul from Crutchfield
on 11/27/2023
Zak from Andover
Posted on 9/9/2023
I have a 99 Chevy suburban 4D, and I was wondering what wattage and ohm all the speakers are individually
Jon Paul from Crutchfield
on 9/11/2023
Steph from Marion
Posted on 3/20/2021
Does this 95 tahoe have a factory amp? I've looked everywhere with no luck.
Jon Paul from Crutchfield
on 3/22/2021
Jon Paul from Crutchfield
Posted on 3/8/2021
Brian, With questions like that, it's always better to have a conversation with a real live human. Give us a call and talk to one of our advisors. We can help you choose the right gear and give you the right advice on how to install it.
David from Atlanta
Posted on 3/6/2021
Like Ralph, the rear speakers in the 99 Suburban do not play. Bought two Kenwood KDC-X704 radios. Tried them both. Same result. Plugged the factory radio back in and it works perfectly. Checked my wiring adapter with an ohm meter. All connections read zero resistance with no bleed between pins, as it should be. The factory put four speakers in back (rear doors and 4x10s in the roof at the very back). I will guess these are wired in parallel. That would make the ohm load to the Kenwood radio down to 2 ohms, which it may not like. Crutchfield says the radio fits the truck without issue. We're missing something with two of us having the same problem in less than a month. Thoughts?
Jon Paul from Crutchfield
on 3/9/2021
Ralph Zimmerman from Waskom, Tx
Posted on 2/14/2021
How do you get the rear speakers in a 97 suburban to play? I cannot find this info a nowhere. Would be nice.
Jon Paul from Crutchfield
on 2/15/2021
Don Homuth from Salem
Posted on 8/28/2019
I have the receiver unit out, but the vehicle also has the CD player below the a/c controls. What is the process for removing that in a 1999 Yukon?
Jon Paul from Crutchfield
on 8/29/2019