When you click on links to various merchants on this site and make a purchase, this can result in this site earning a commission. Affiliate programs and affiliations include, but are not limited to, the eBay Partner Network.
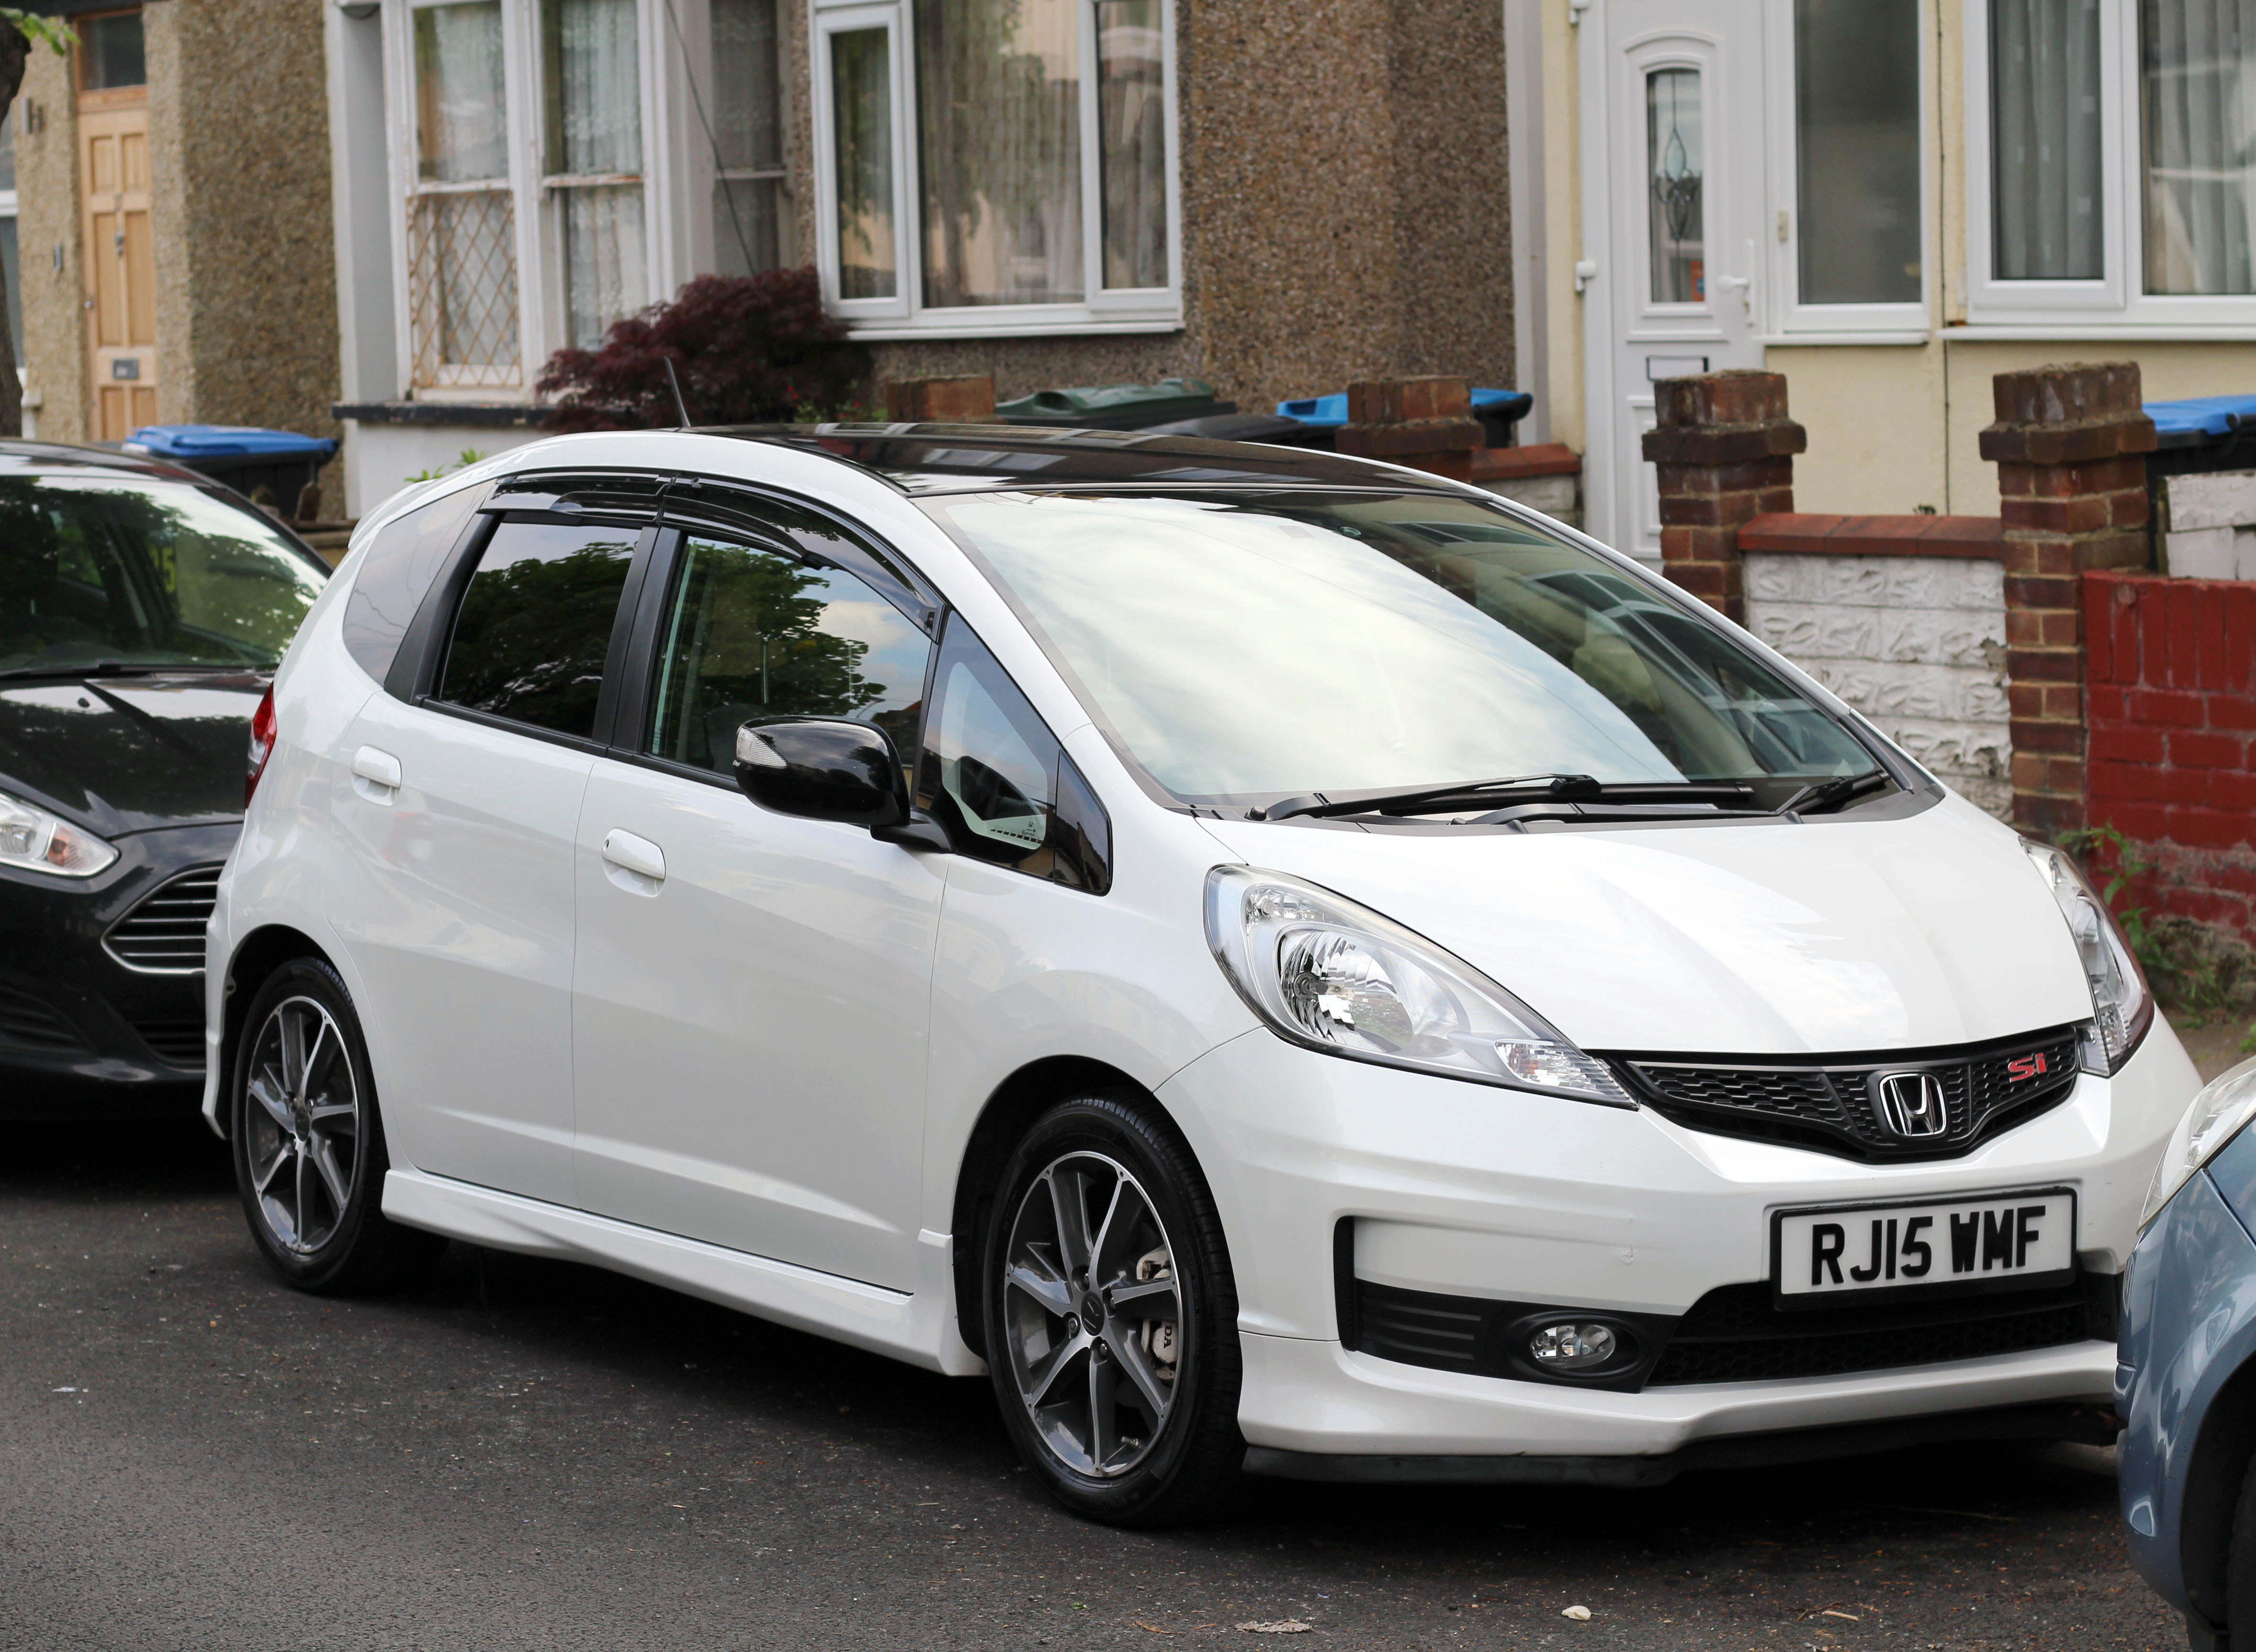
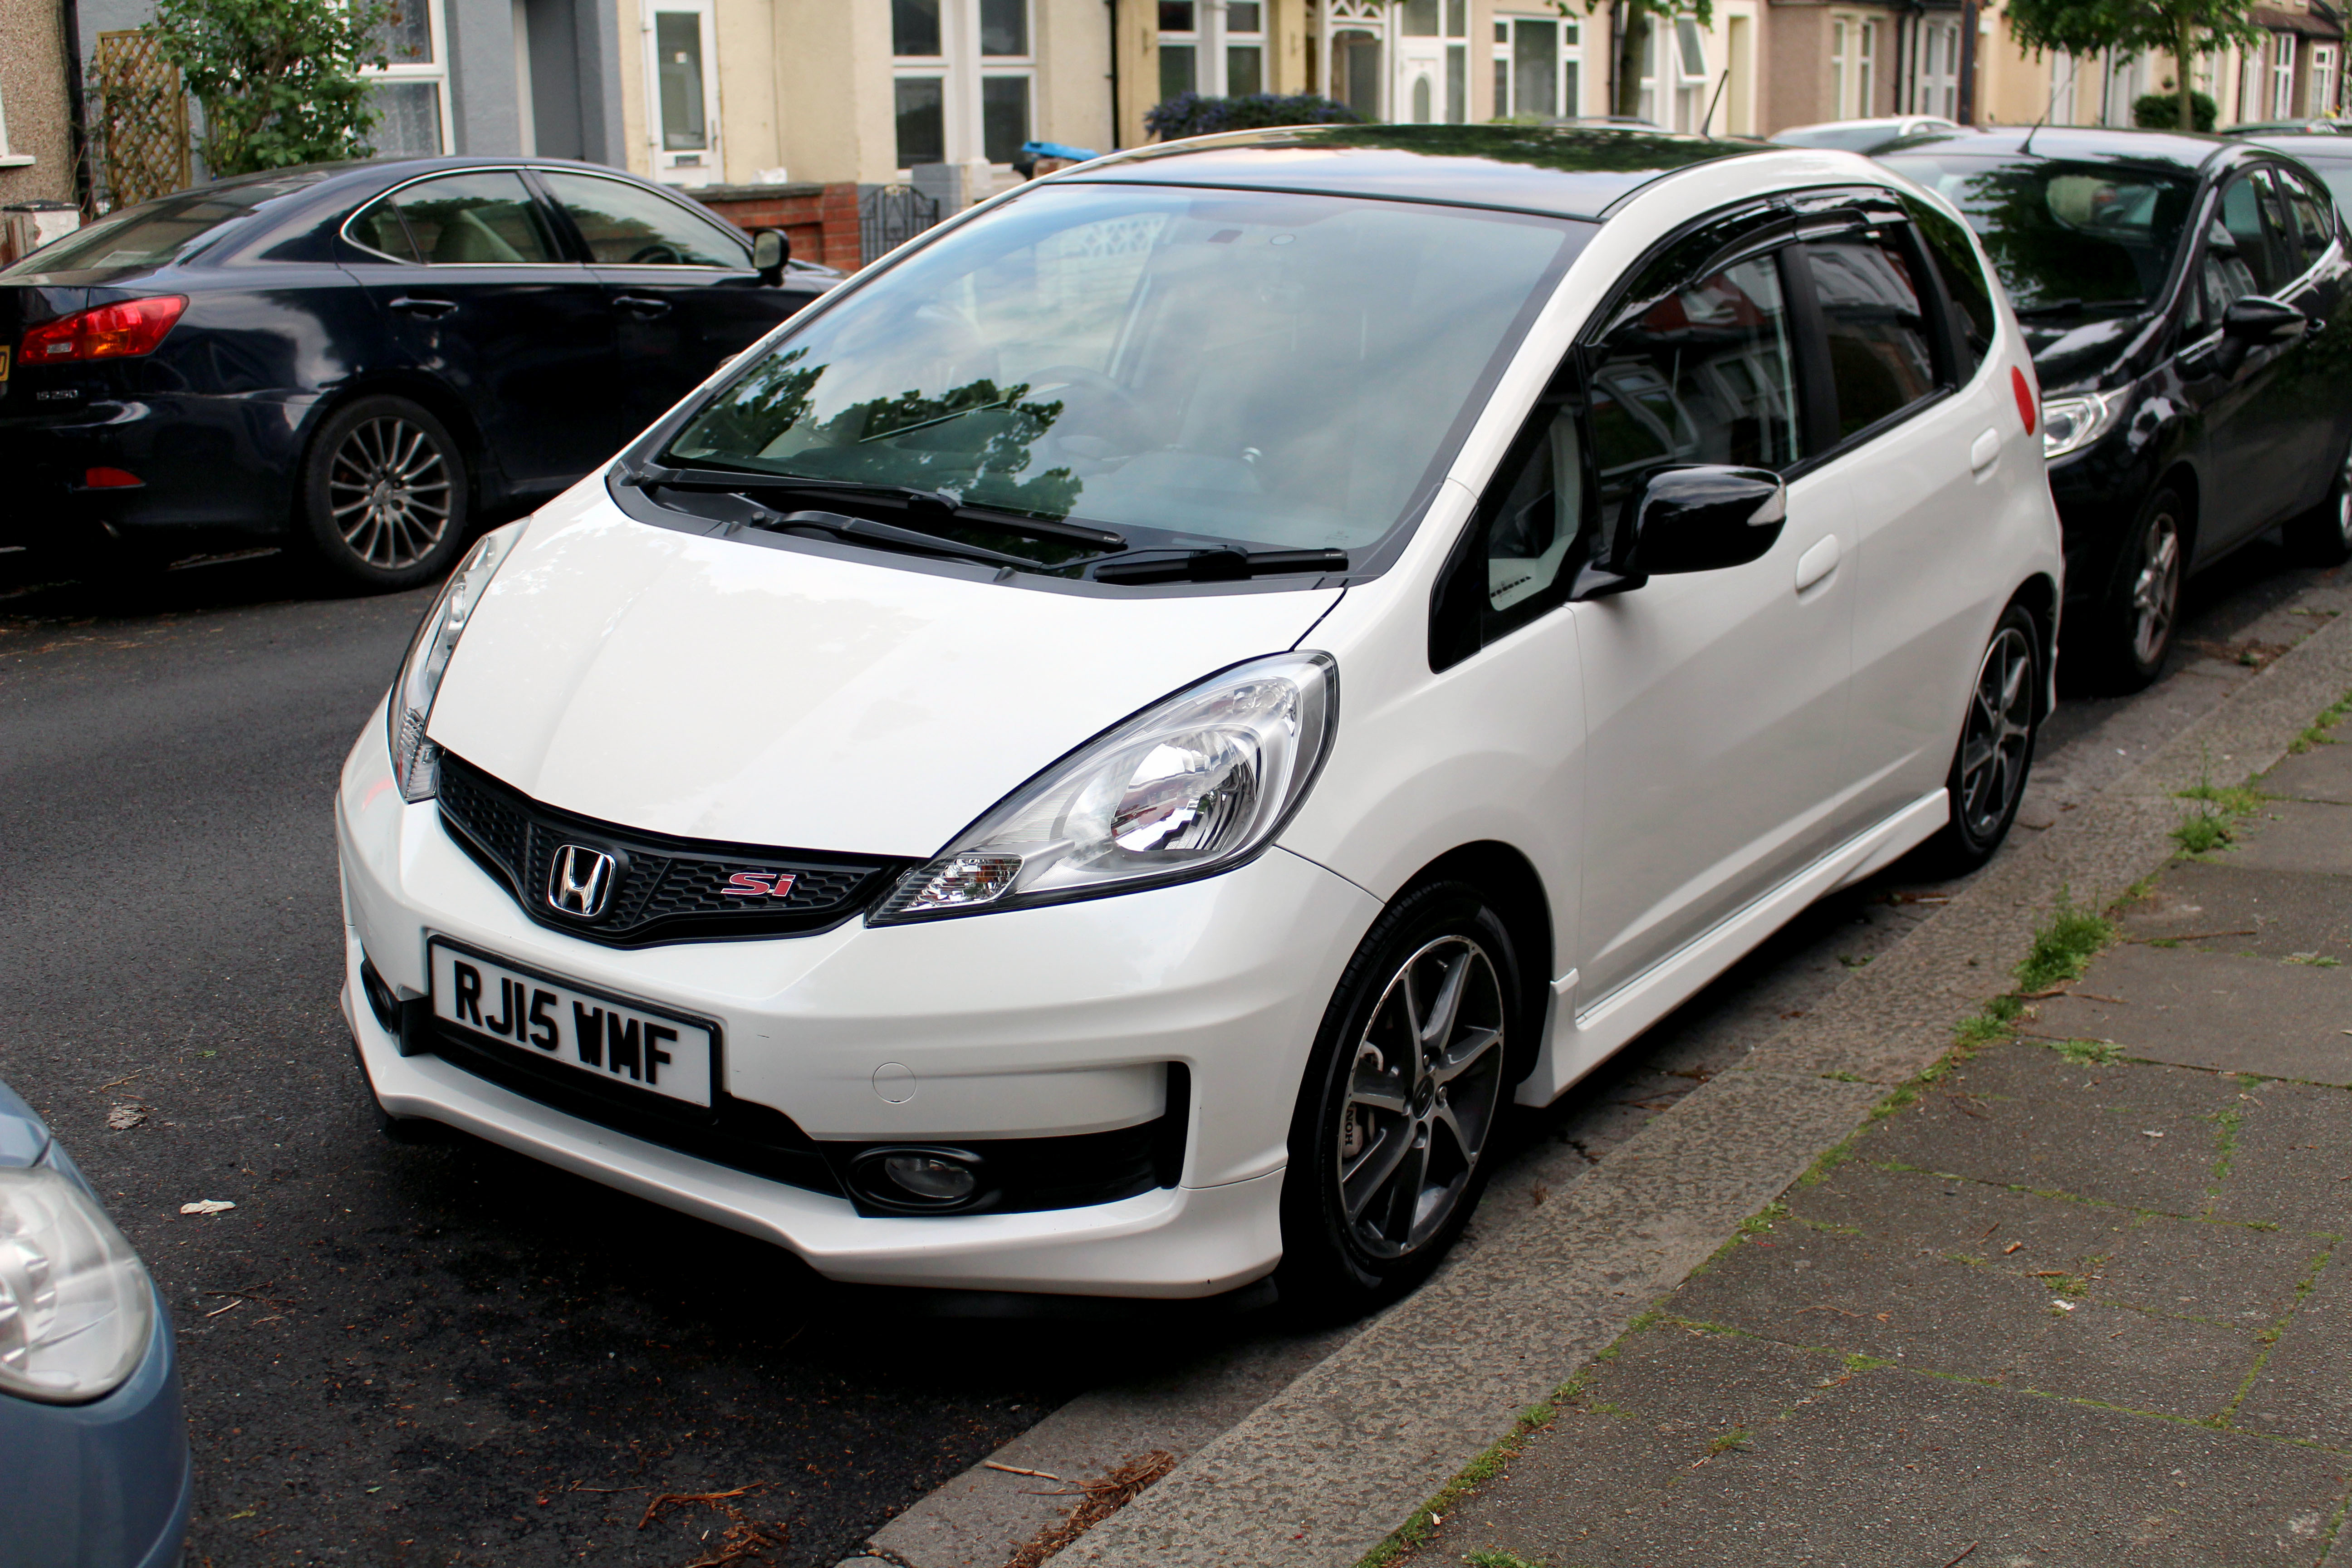
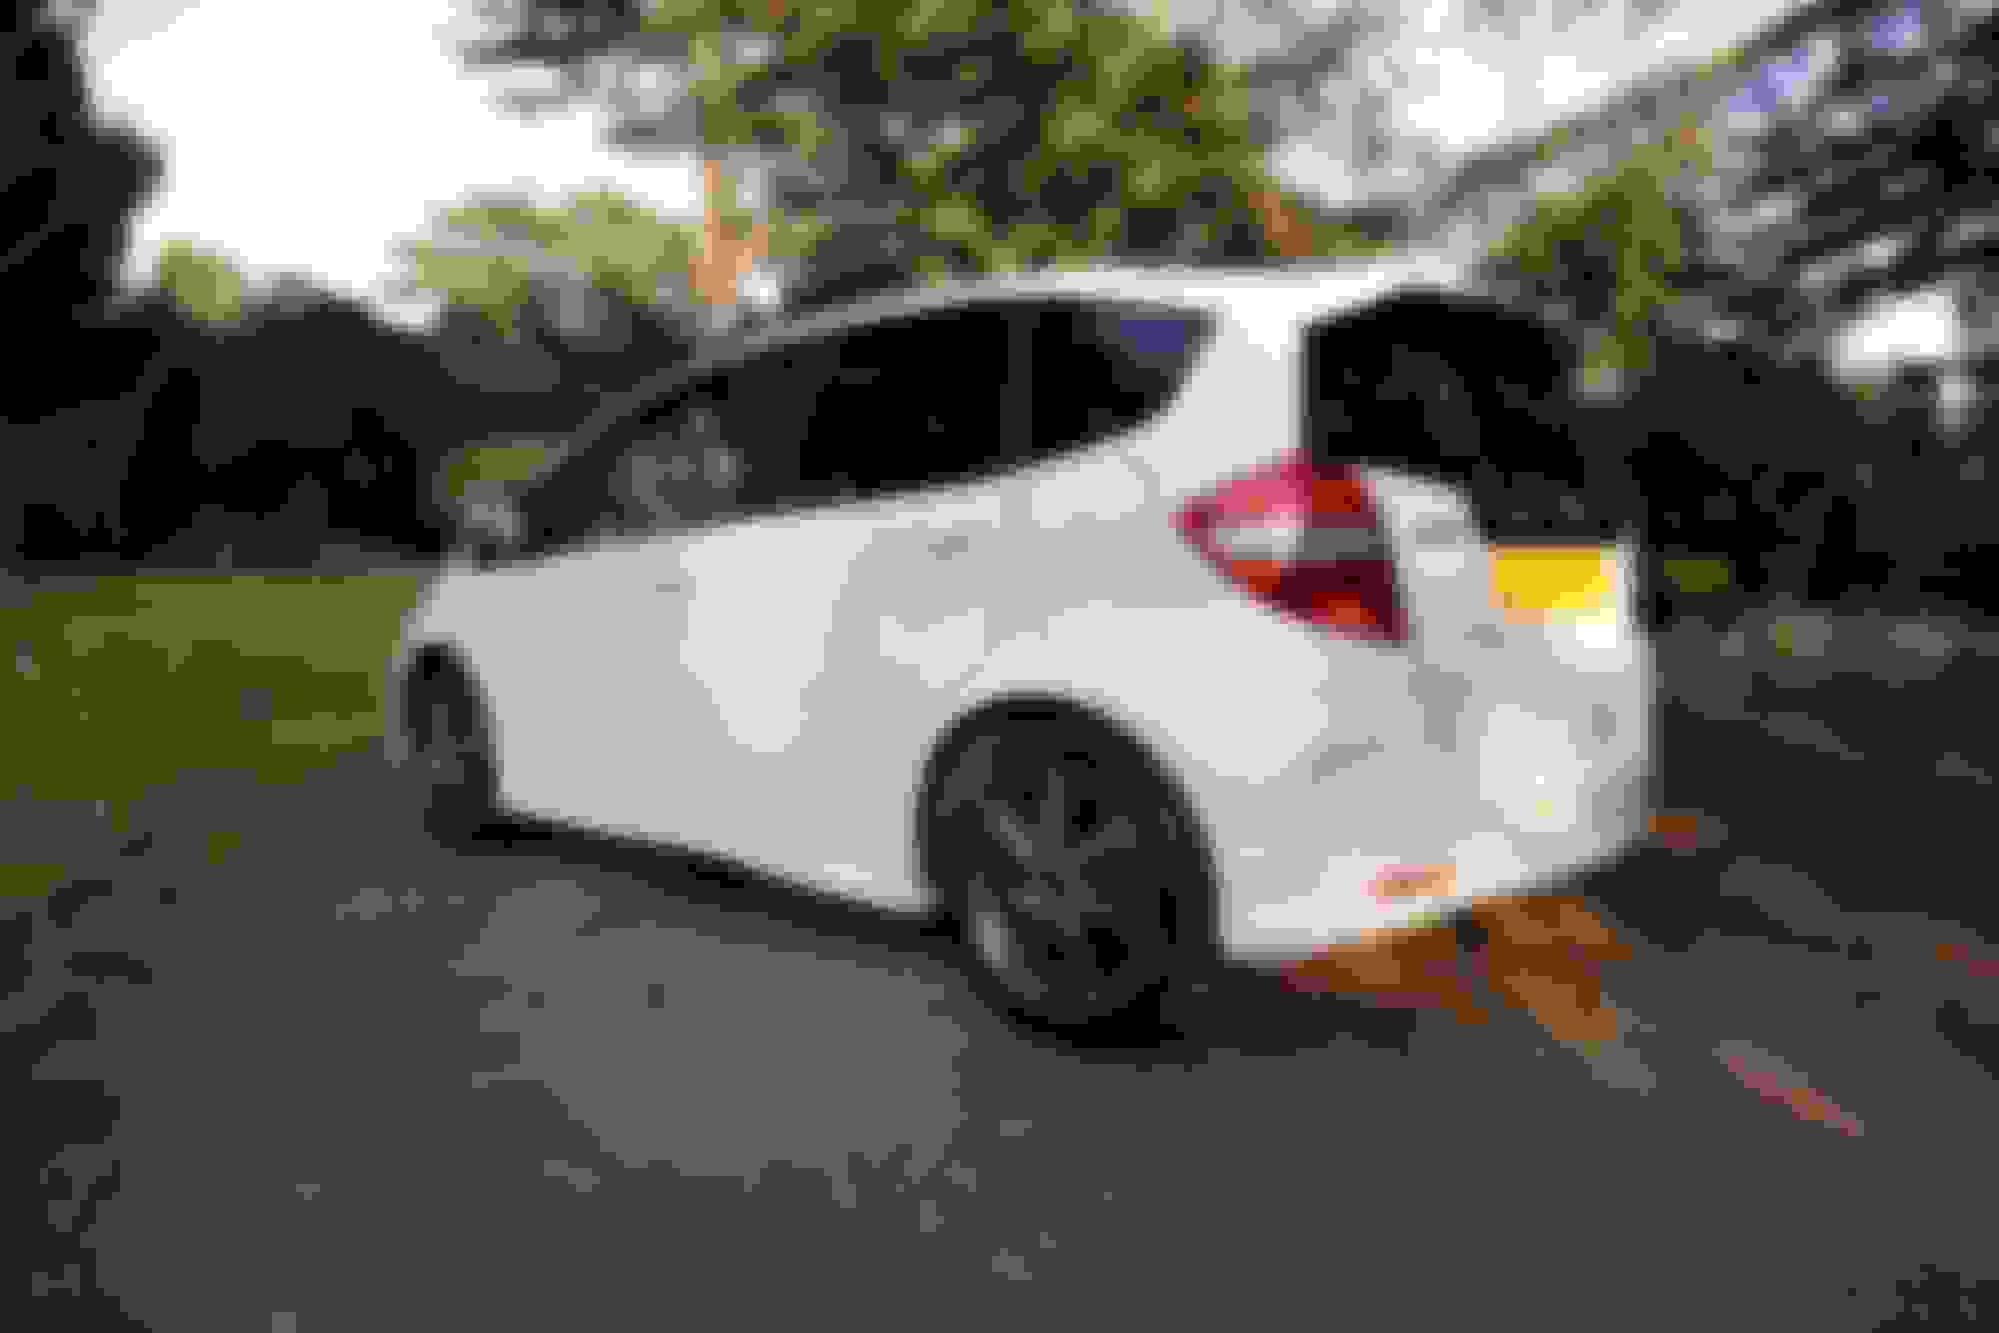
It's been quite a while since I last posted on here, so thought I would post of some pictures of my latest Honda Jazz.
This is the 4th Honda Jazz I've owned, but my first 2nd Gen Jazz.
It's a 2015 Honda Jazz Si in Orchid Pearl White. Bought it at a salvage auction with rear end damage and had it repaired.
Current Mods are:
Interior Arm Rest
Interior LED footwell lighting
Mugen Pedals
Integra Type R Gear Knob
Front Si Badge
Rhino Front Lip
Rear USDM Spoiler (wasn't offered as an option in the UK, so had to import one)
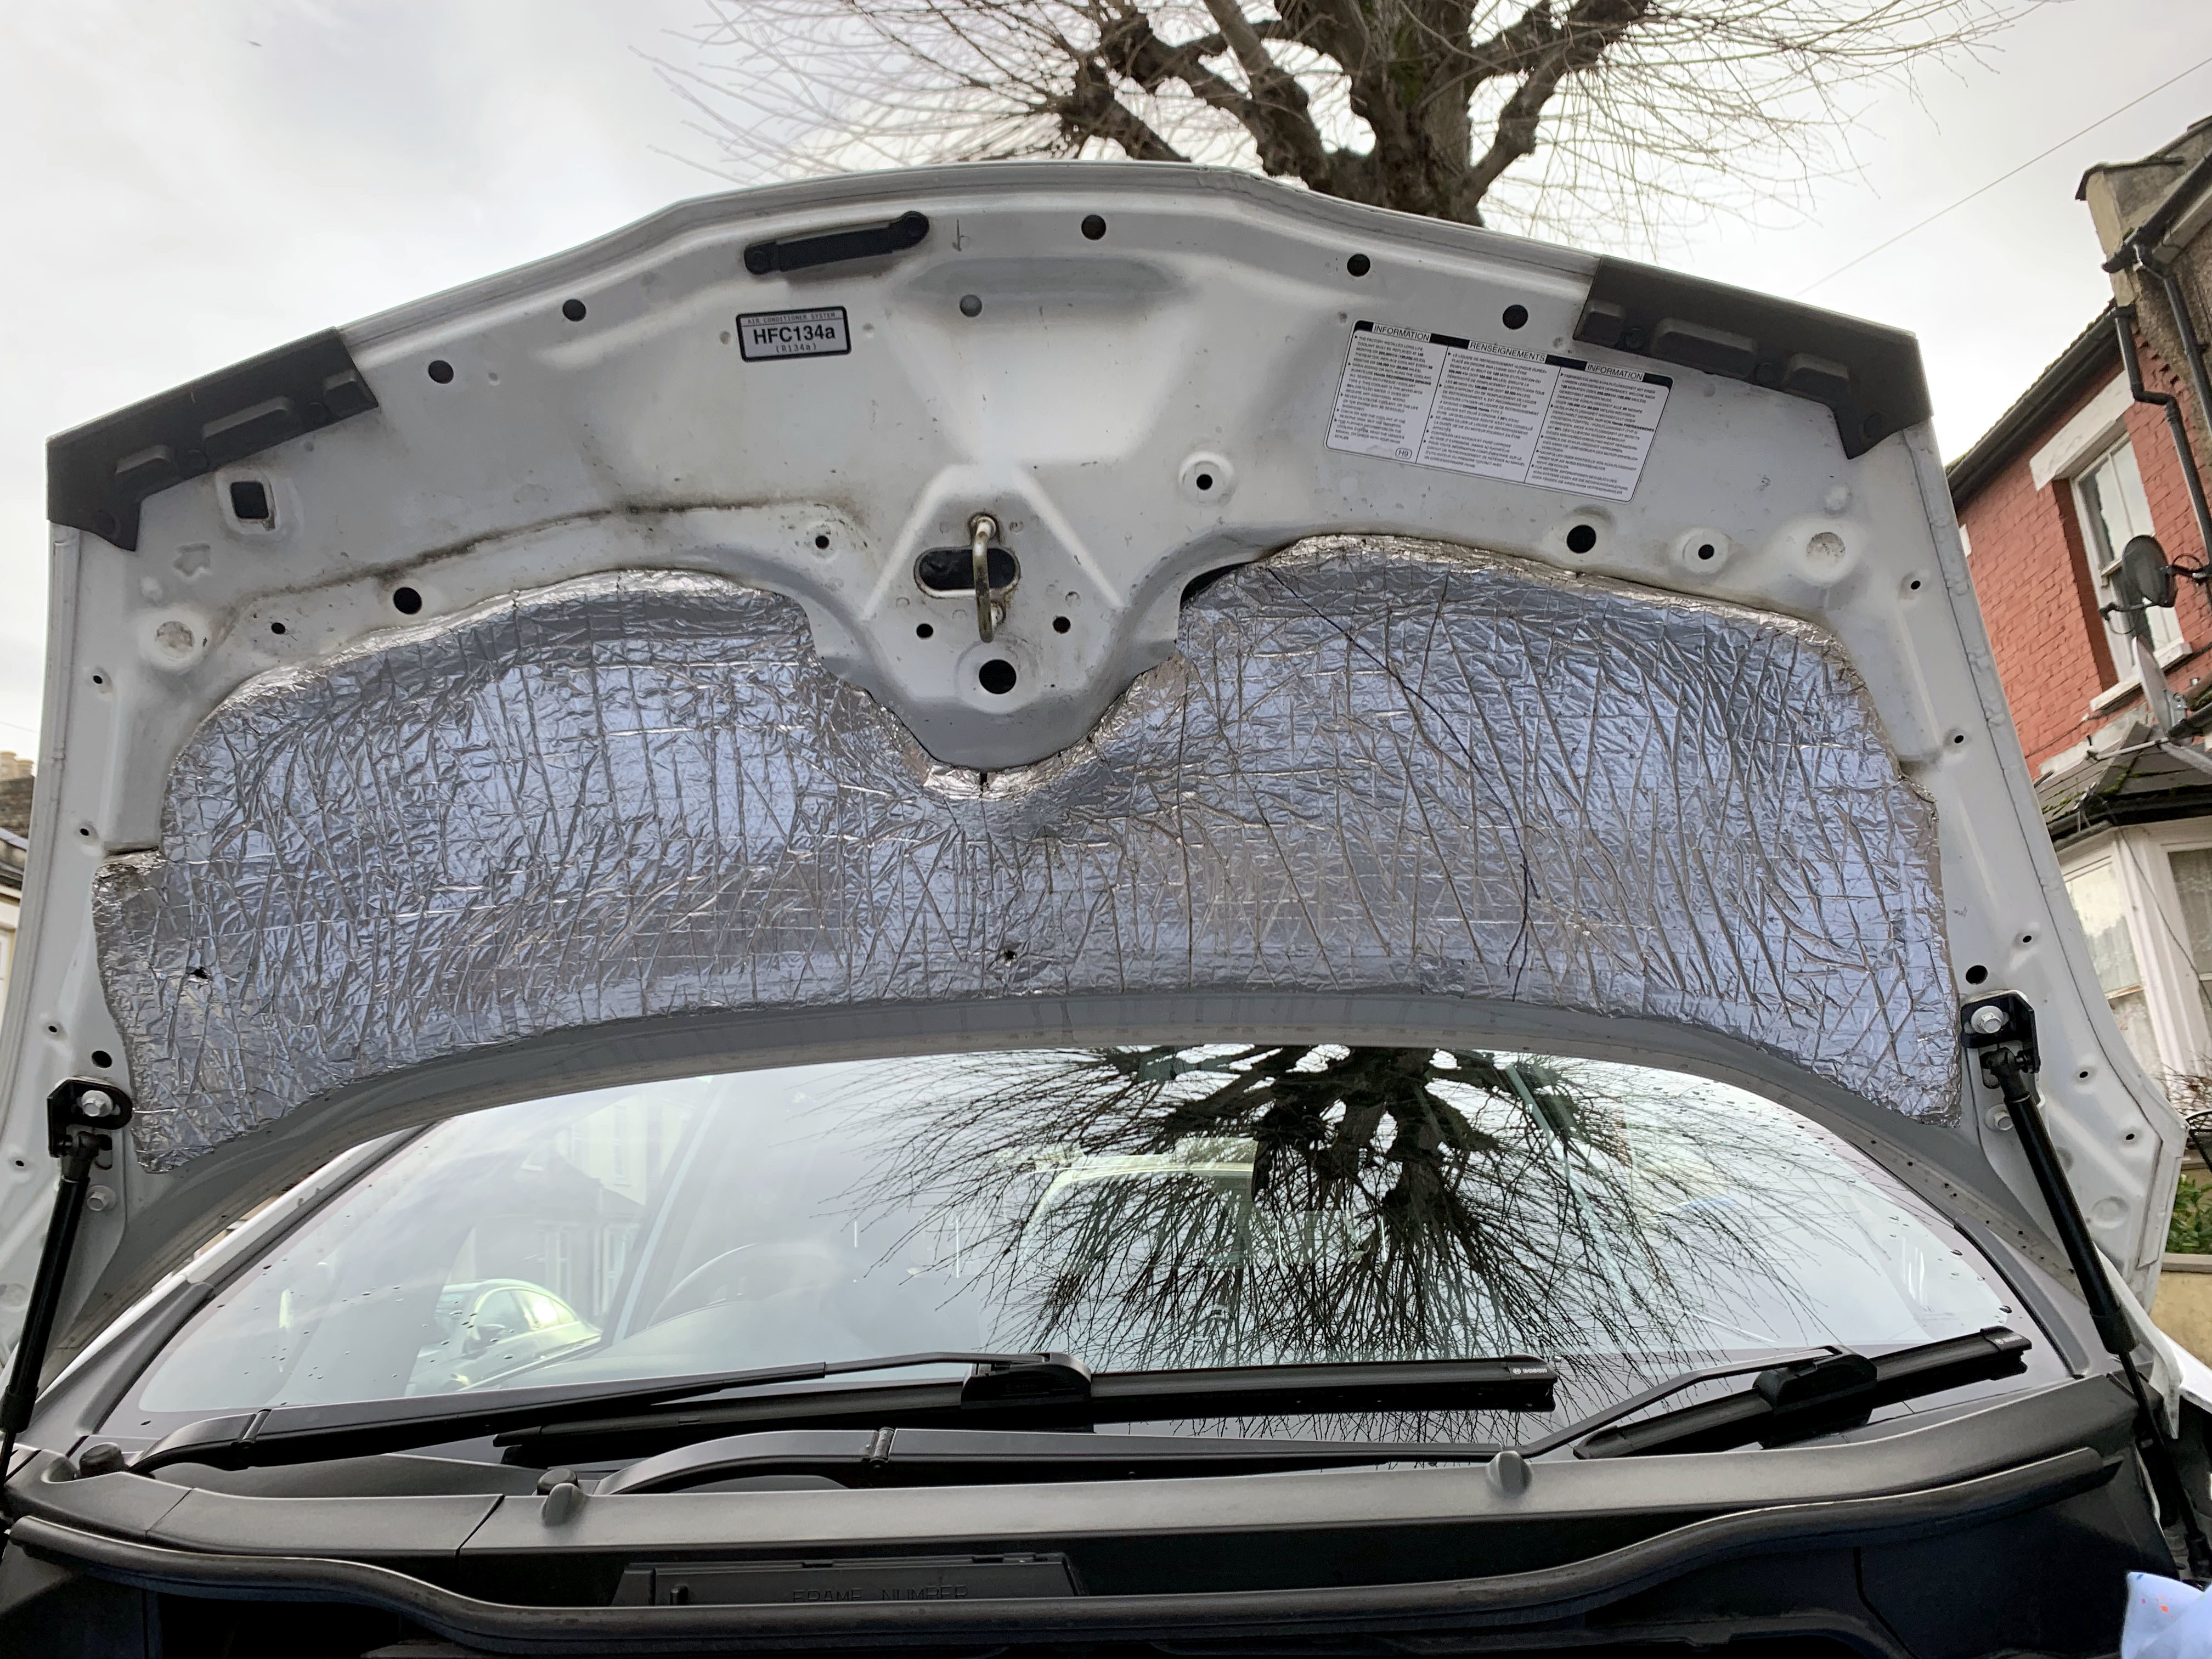
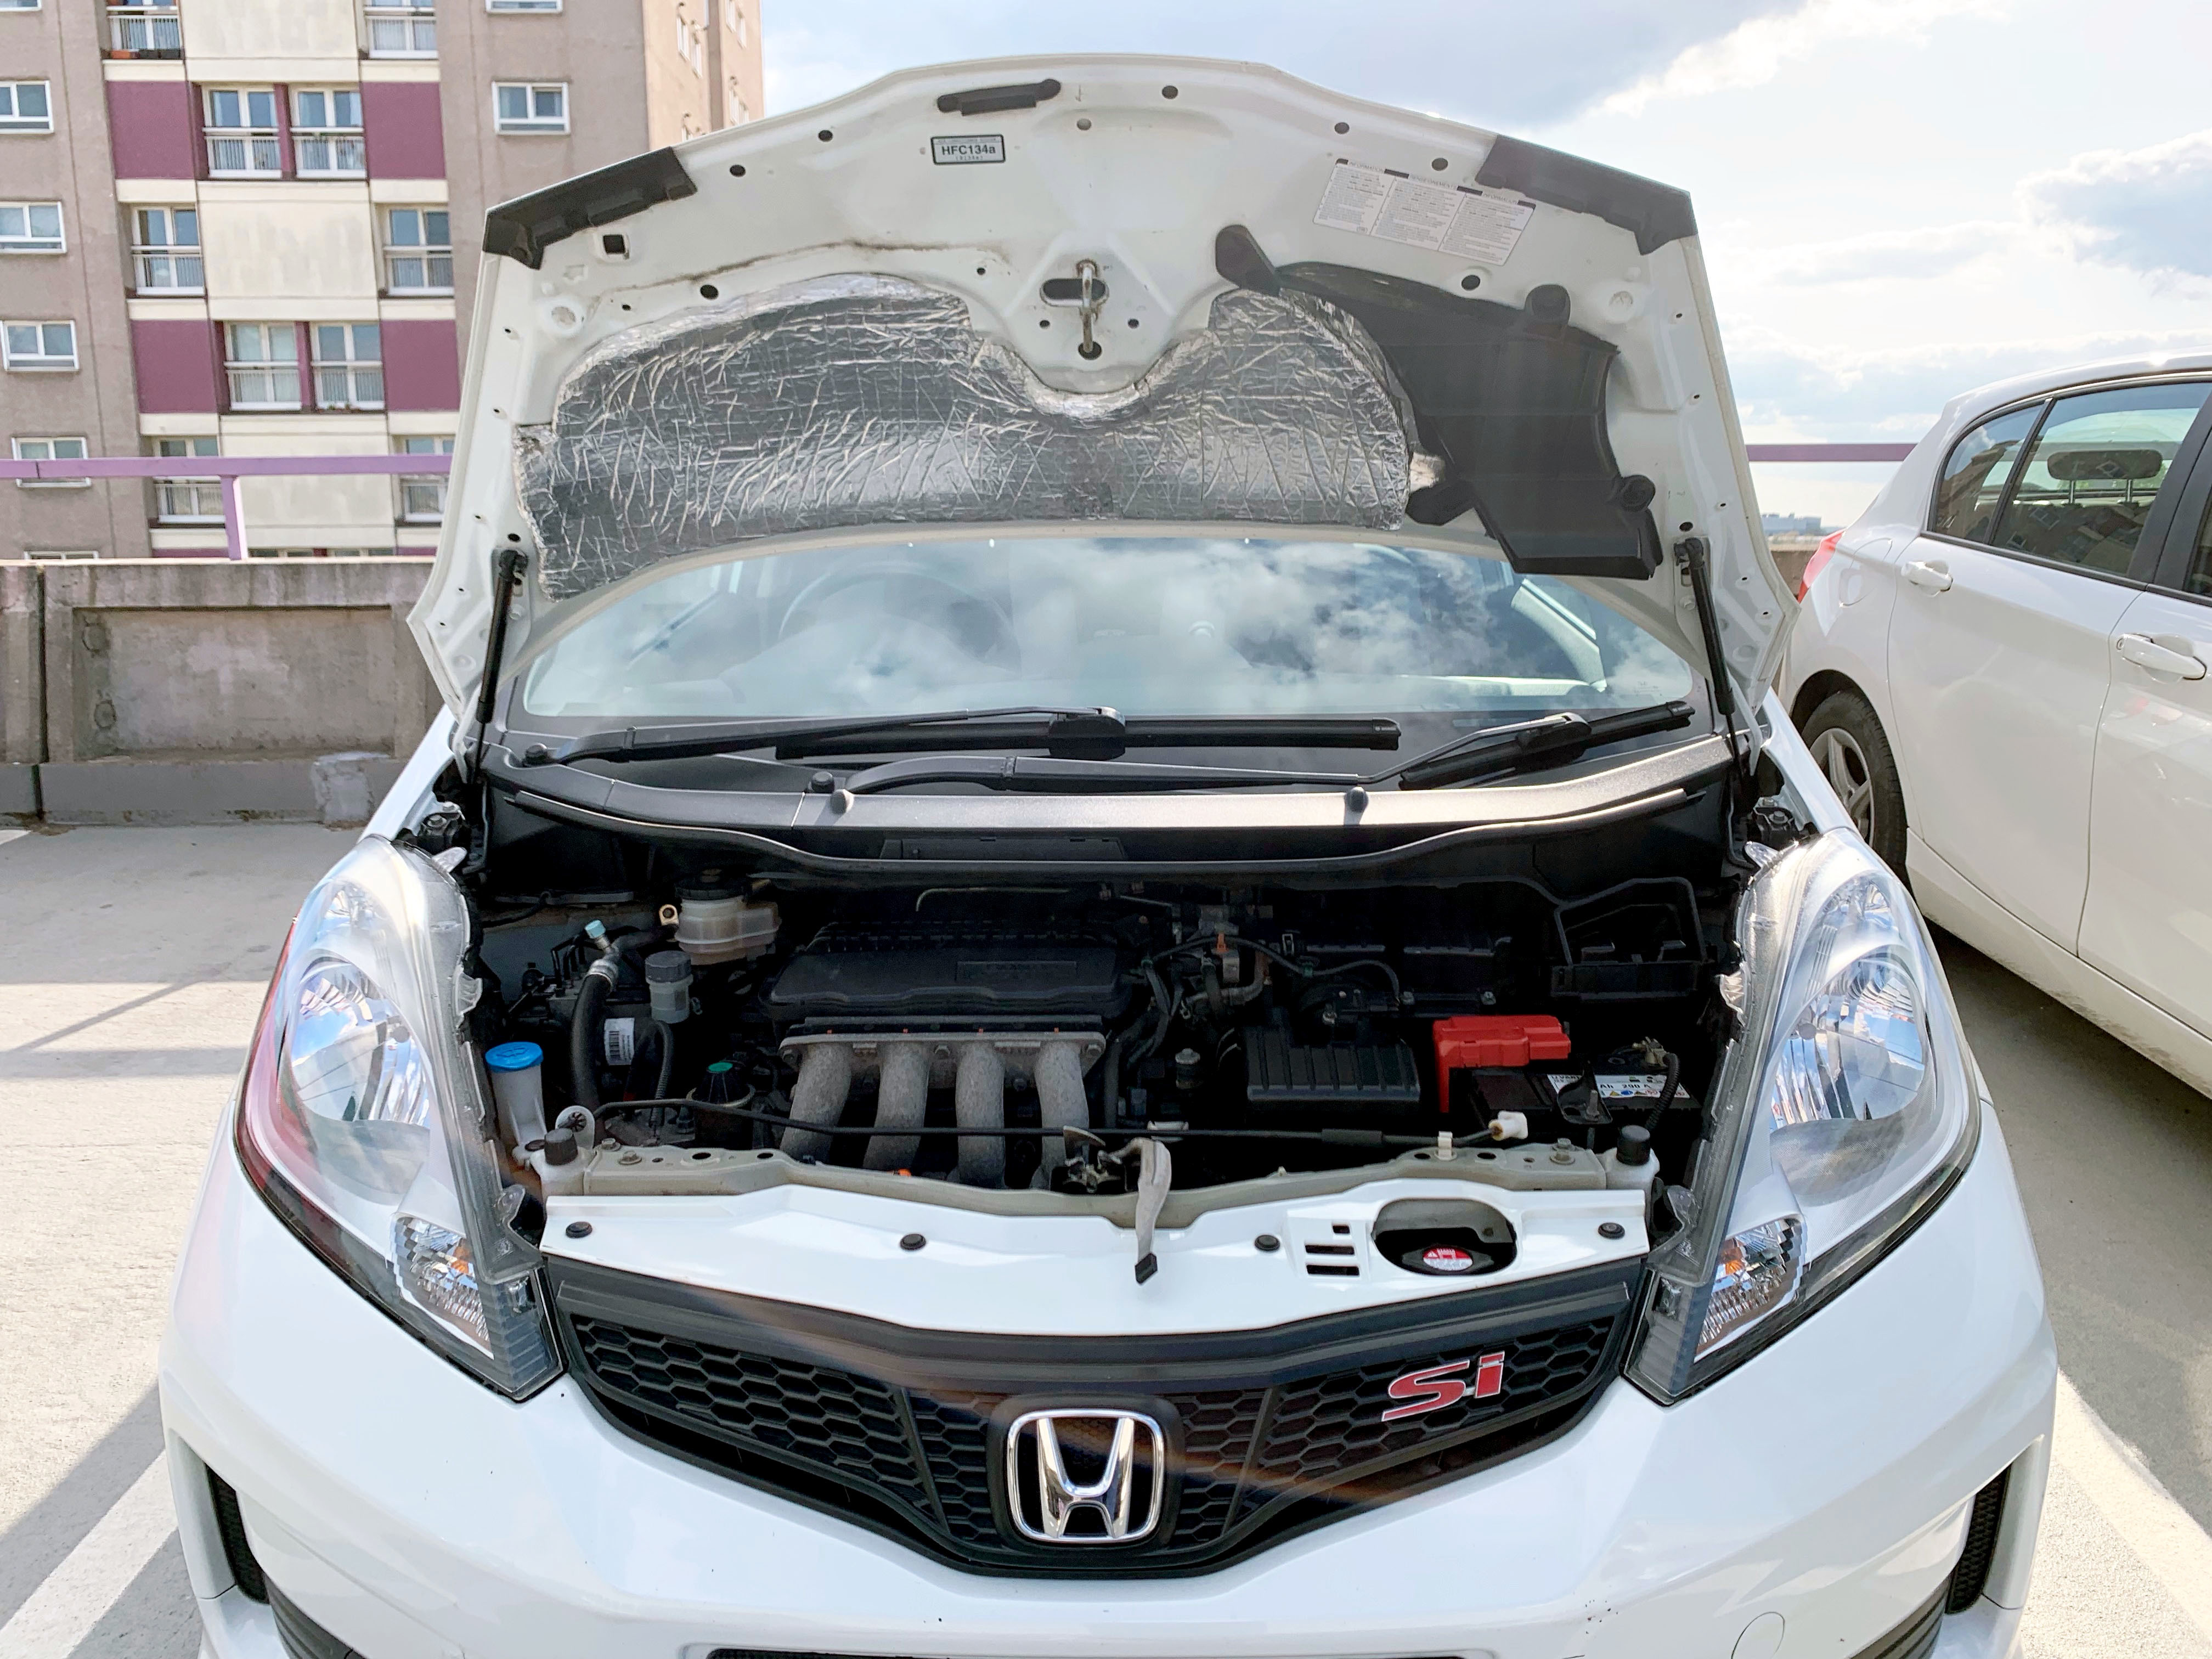
Interior Soundproofing, Sheets of Silent Coat with 10mm closed cel foam (work in progress)
Beautiful! But never heard of an Si version until now.
Looks like you did 100% coverage with the tiles for soundproofing. I did about 80% just for the floors. Will like to see your results.
Thanks, yes I did do 100% coverage, but I regret it now. What I should've done was about 50% and then do closed cell foam and Mass Loaded Vinyl instead.
It's my own fault for not properly doing my research, and just reading the company page (Silent Coat) on the best way apply it. Of course they are going to recommend 100% coverage !
I'm noticing all the other places that make noise now, like the door seals and firewall. I feel like it's a losing battle trying to make the car quiet!
Originally Posted by 2Rismo2
Wow that's a great example! Other than they had put the steering wheel on the wrong side, you'd never know it was a rebuilt salvage vehicle!
Thanks, yes I did do 100% coverage, but I regret it now. What I should've done was about 50% and then do closed cell foam and Mass Loaded Vinyl instead.
It's my own fault for not properly doing my research, and just reading the company page (Silent Coat) on the best way apply it. Of course they are going to recommend 100% coverage !
I'm noticing all the other places that make noise now, like the door seals and firewall. I feel like it's a losing battle trying to make the car quiet!
The only thing I haven't done is the firewall and front wheel wells. I just added Mass Loaded Vinyl to the floor in the passenger area and as high up in the firewall in the front foot area. I've already done the tiles and closed cell foam to the rest of the car (floor, roof, doors, trunk) and I've stuffed the dash. Even with that, if there is a strong wind, you will hear that. But it is a noticeable difference. I was surprised how effective a bit of sound deadening on the hood makes especially at highway speeds. Then again our cars are completely different generations.
The only thing I haven't done is the firewall and front wheel wells. I just added Mass Loaded Vinyl to the floor in the passenger area and as high up in the firewall in the front foot area. I've already done the tiles and closed cell foam to the rest of the car (floor, roof, doors, trunk) and I've stuffed the dash. Even with that, if there is a strong wind, you will hear that. But it is a noticeable difference. I was surprised how effective a bit of sound deadening on the hood makes especially at highway speeds. Then again our cars are completely different generations.
Nice! I applied a bit of sound deadening to the hood, but I didn't really notice a difference. Though looking at your pictures, you used more than I did, so that's probably why:
I've ordered a load of MLV to do the interior. I feel like an idiot for not properly doing my research now. All the good guides are saying 25-50% coverage for the tiles, then cover with Closed Cell foam, and 100% coverage with the MLV.
I guess most of the sound deadening info out there is more for people doing audio installs, where 100% coverage makes the difference for audio competition, but for reducing actual road noise, it doesn't really make a huge difference, compared to the 3 layer approach.
Though my car audio does sound much better I must confess :P!
I've also ordered some door seal strips, so I will see if that makes a difference.
I've definitely noticed the car is slower with all the added weight, which is annoying. I hope it doesn't get much slower after adding the MLV, which is about 23kg (50lbs) more. So far I have added around 50kg (110lbs) in sound deadening to the car. I am tempted to remove some of the tiles from the floor when I install the CLF and MLV, though I don't know if I could remove enough to counter the extra 23kg (50lbs) going in, so I may just leave it. What I might do is put some dumbbells in the car that weigh the same amount, and drive around with it for a few days and see if I actually notice the difference in power. If I don't, then I'll just fit the MLV without removing any tiles.
What did you use to stuff the dash? I couldn't see it in your build thread.
Just for the record, I added the CLD tiles to the hood in case of vibration, but it was the Dynamat hood liner that made the biggest difference.
Since I do have an upgraded audio system, I opted for near 100% coverage. The mass loaded vinyl made the biggest difference on the floors.
For the dash, I used eggcrate foam used for bedding (from Wal-Mart), and a combination of Roberts super felt carpet underlayment and a very thick blanket made from recycled jeans.
I may use what's left of the mlv in the dash someday. After a tire change I'm pretty happy with the results.
It's been a while and I thought I would update this thread with any mods I have done since the last update.
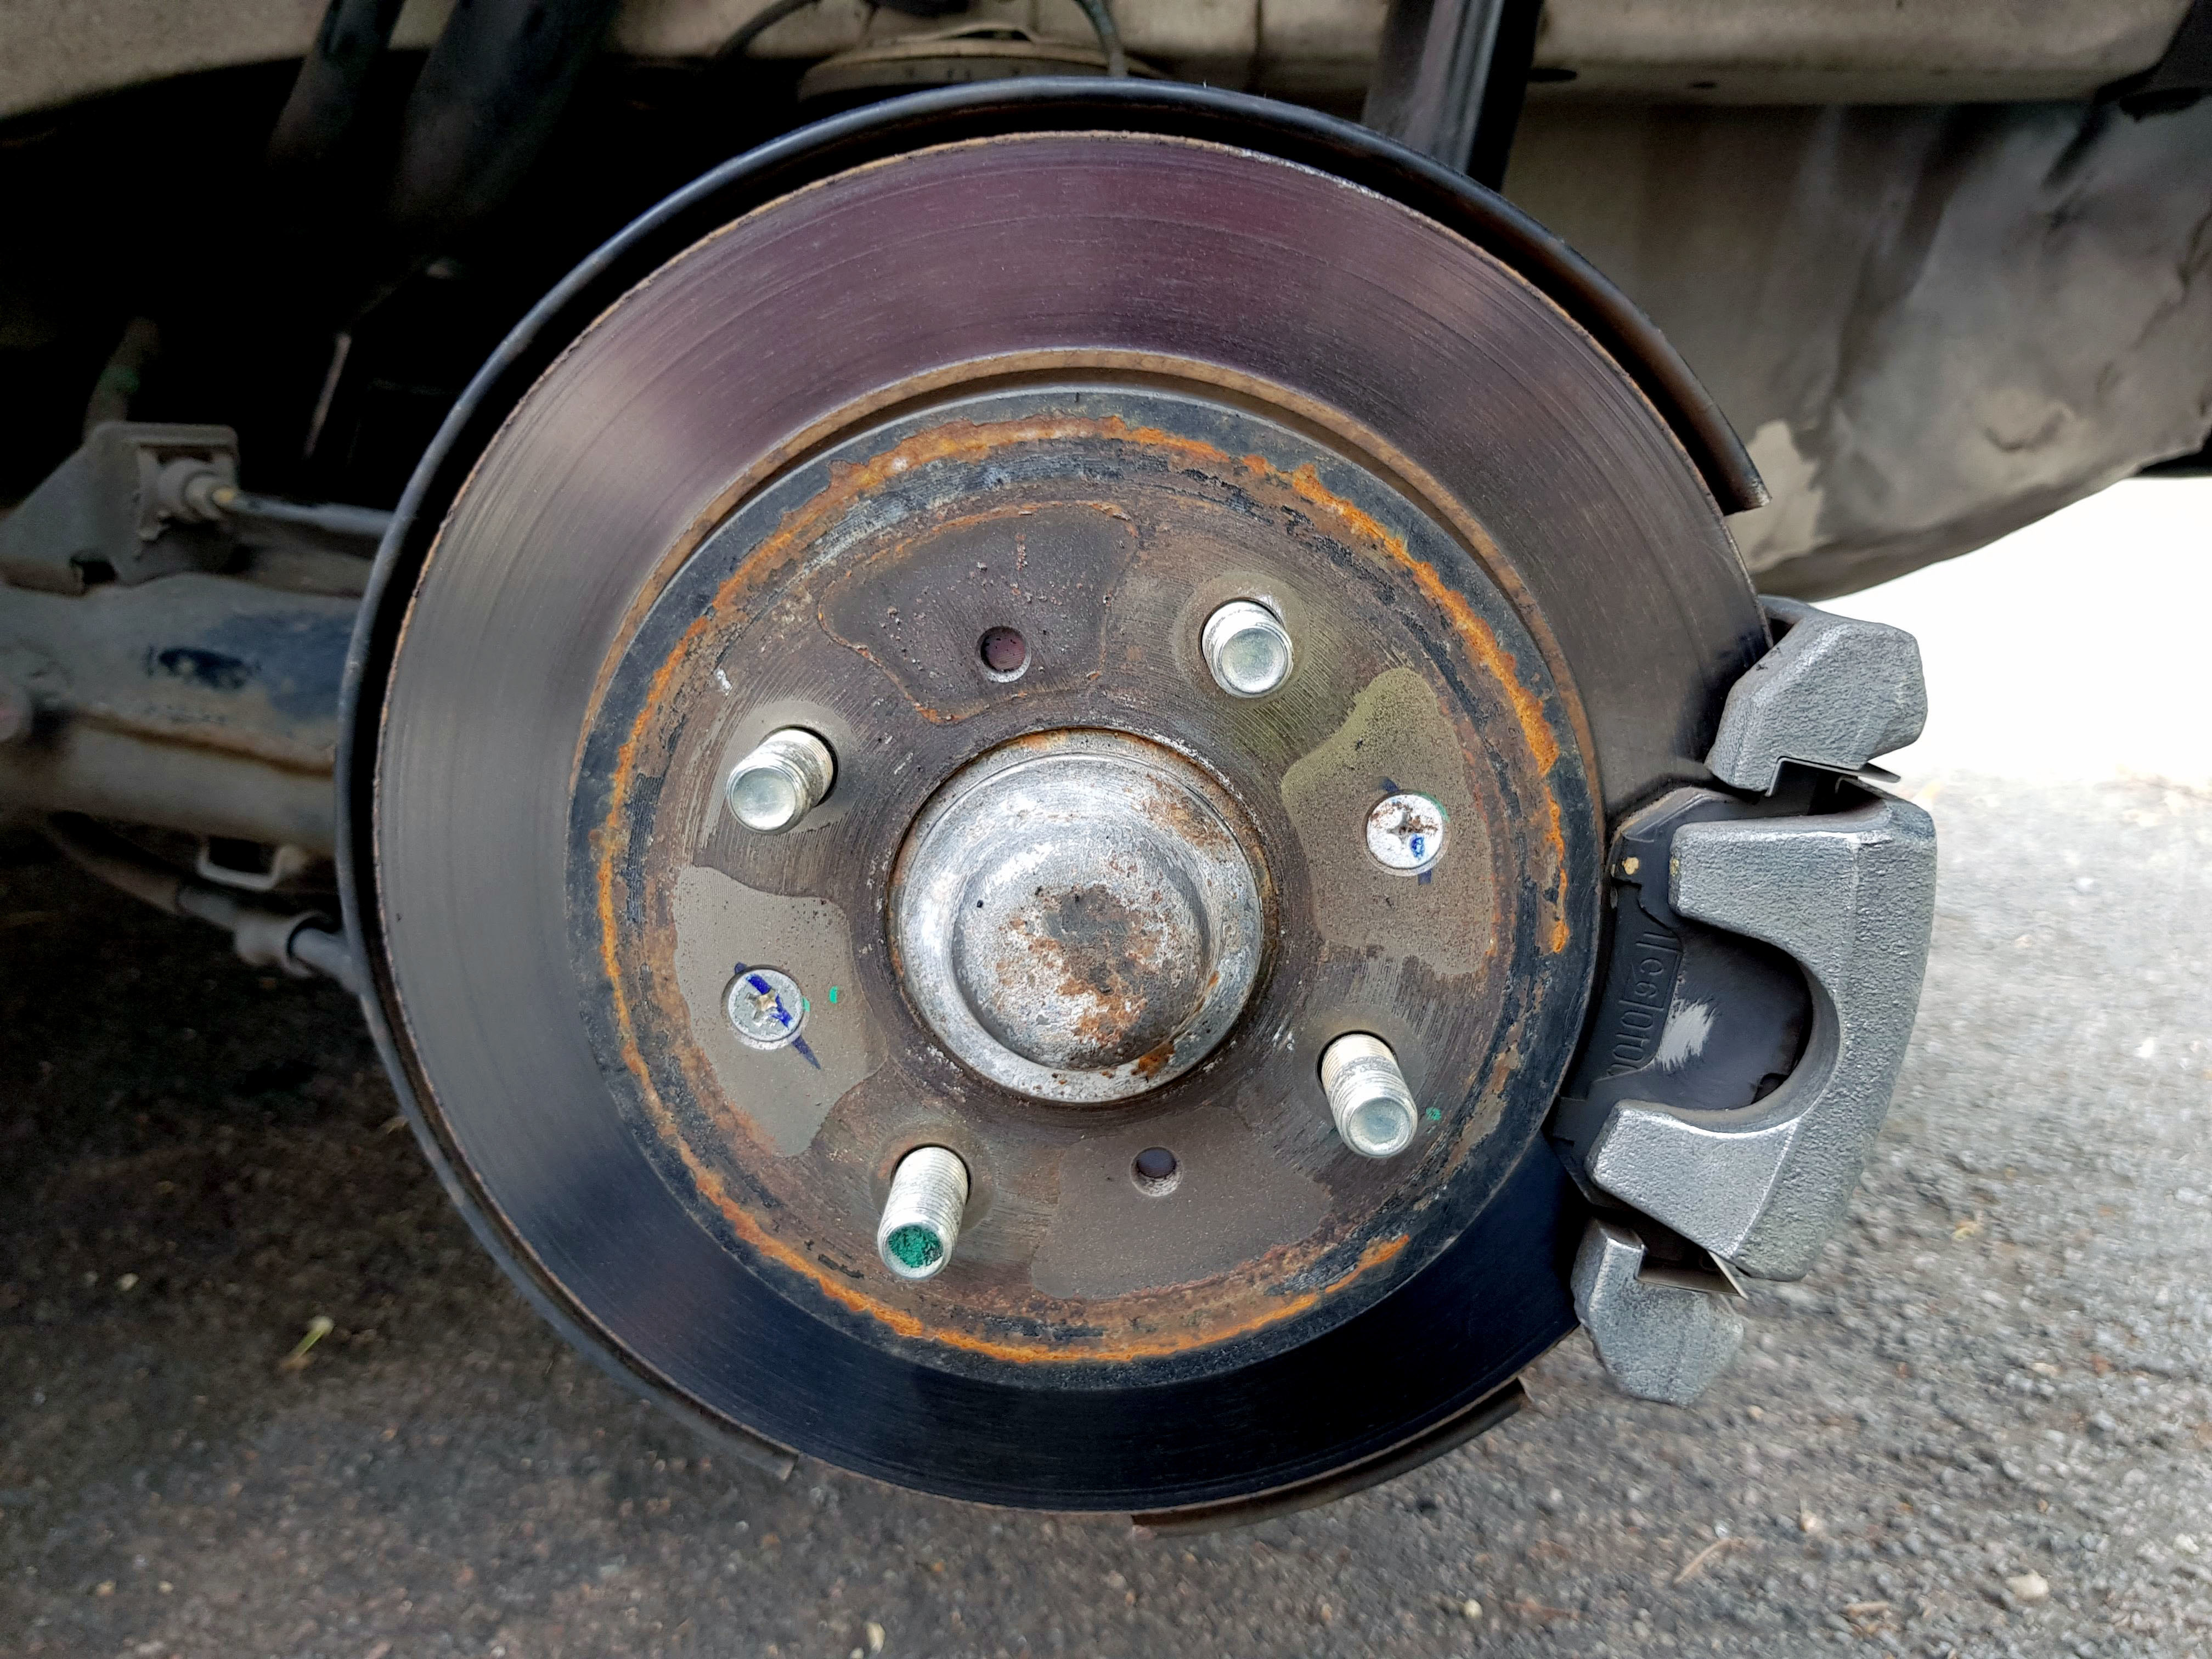
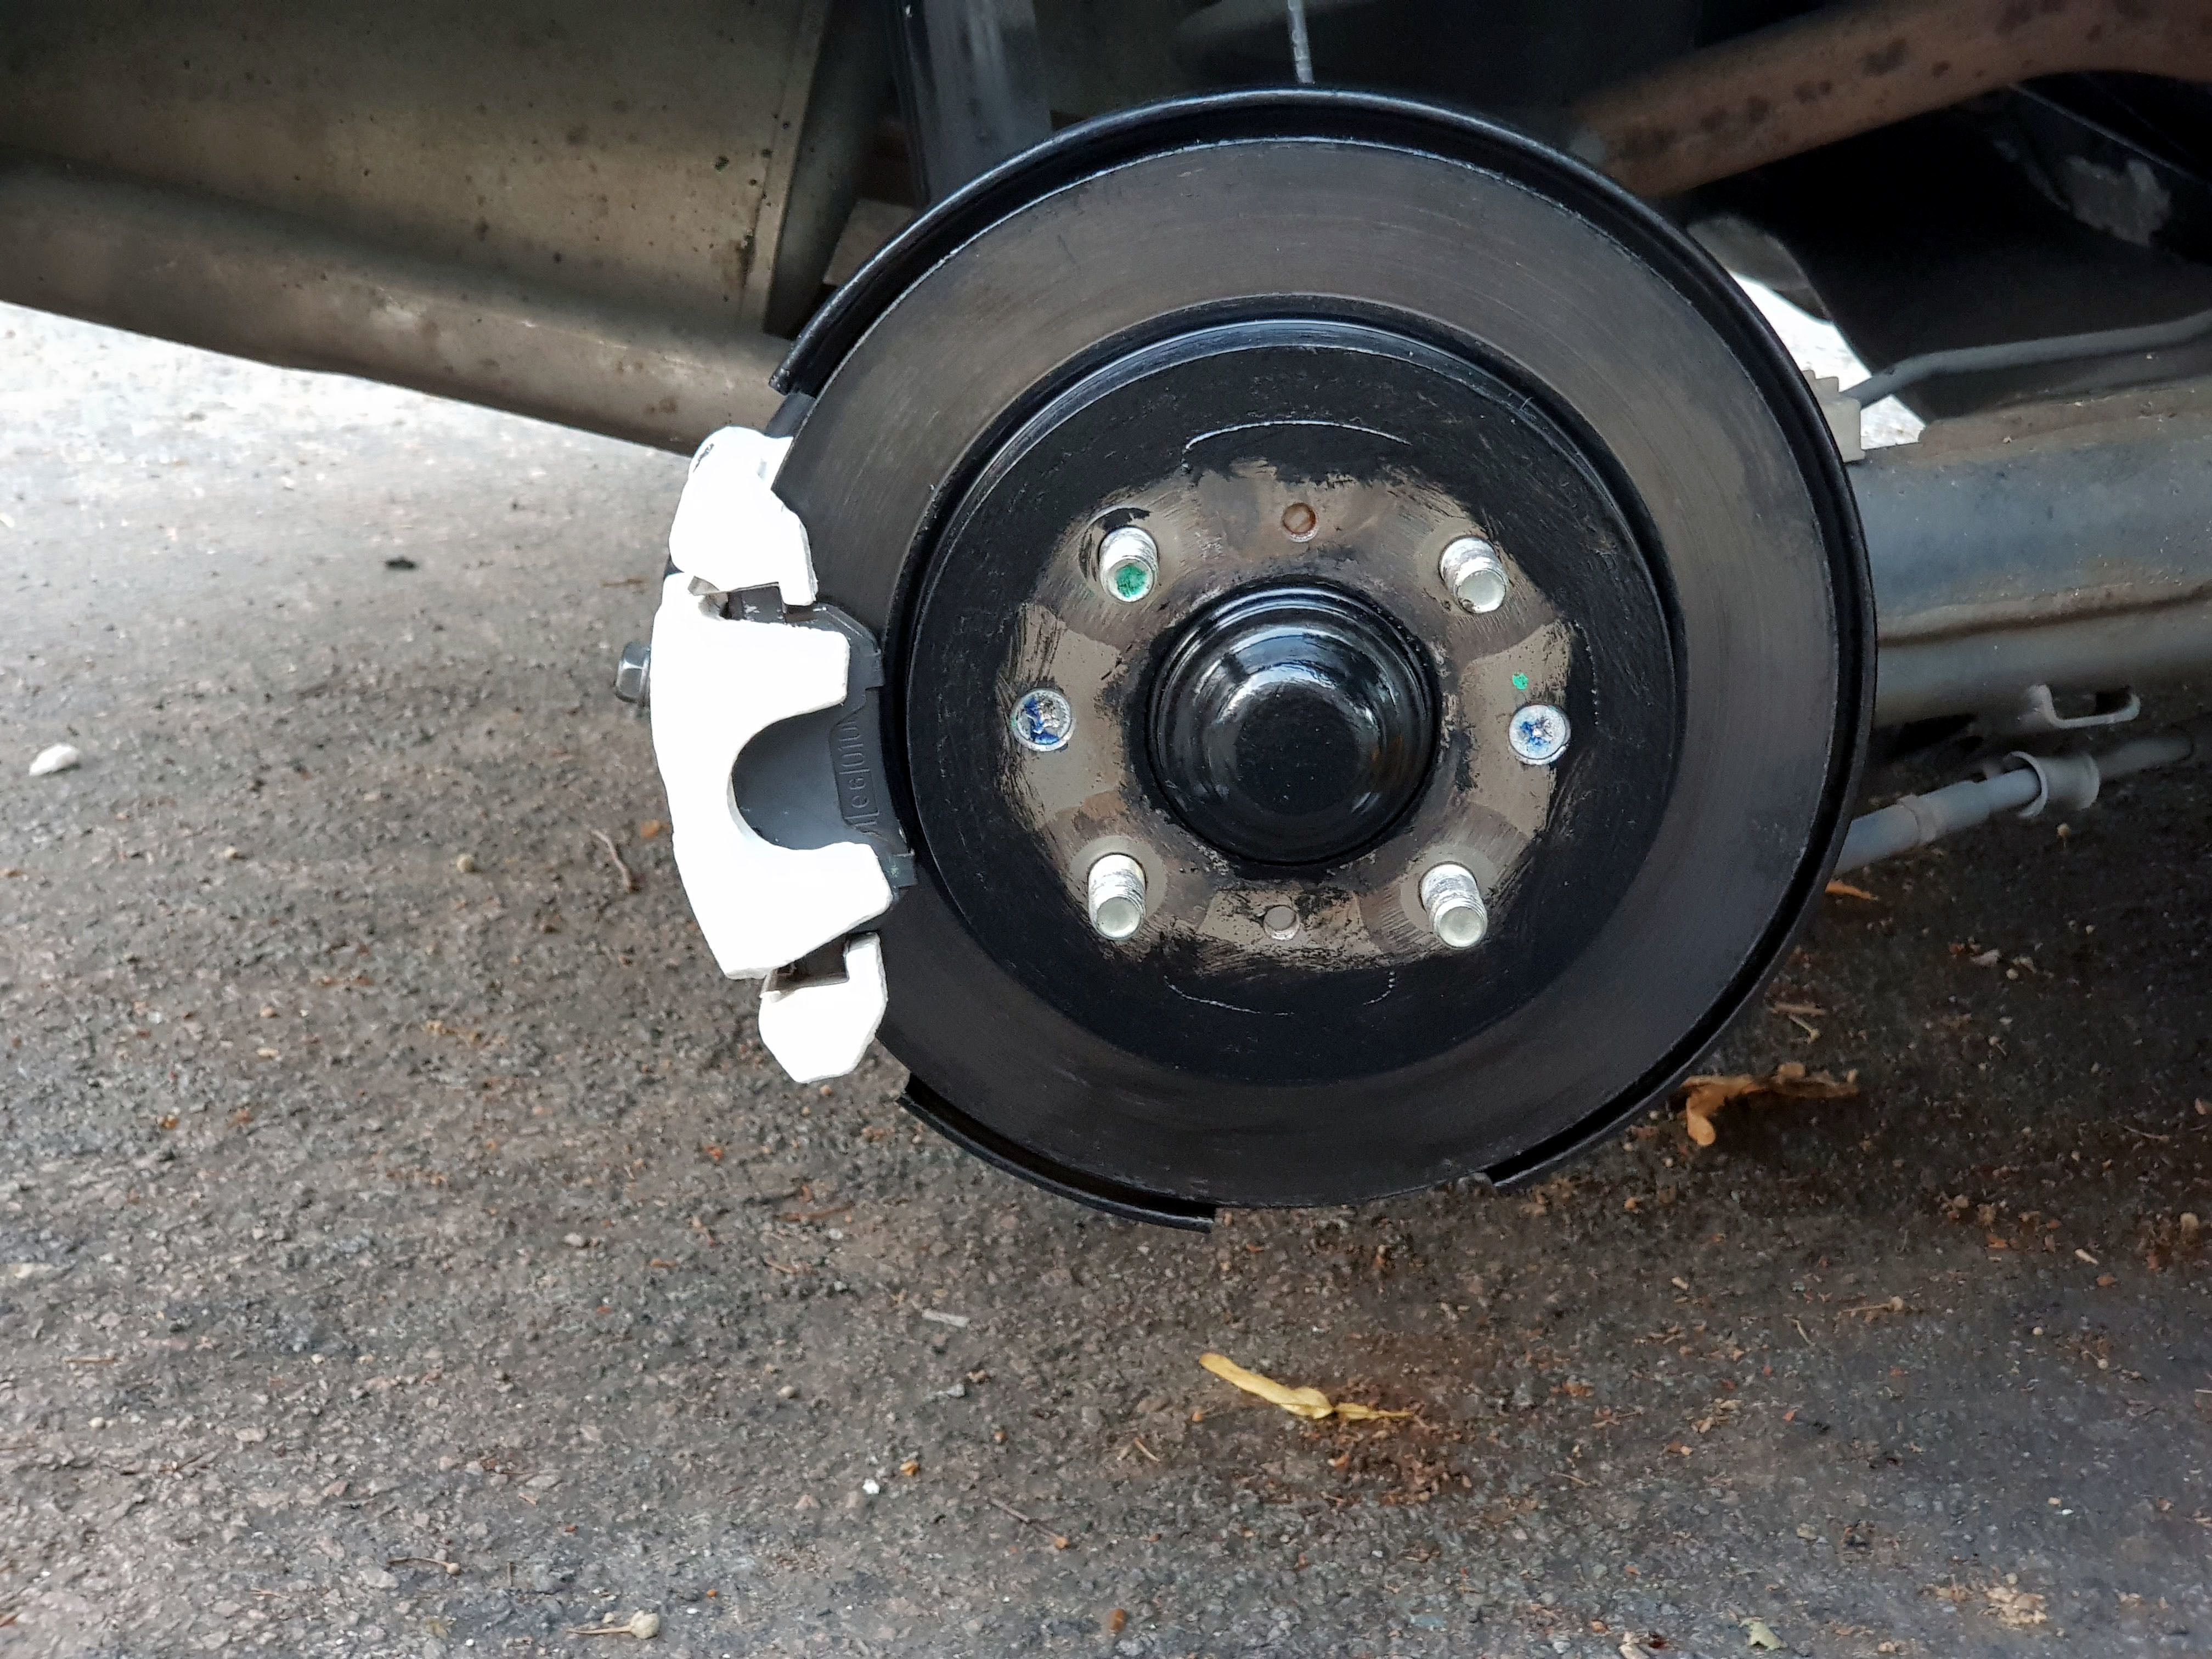
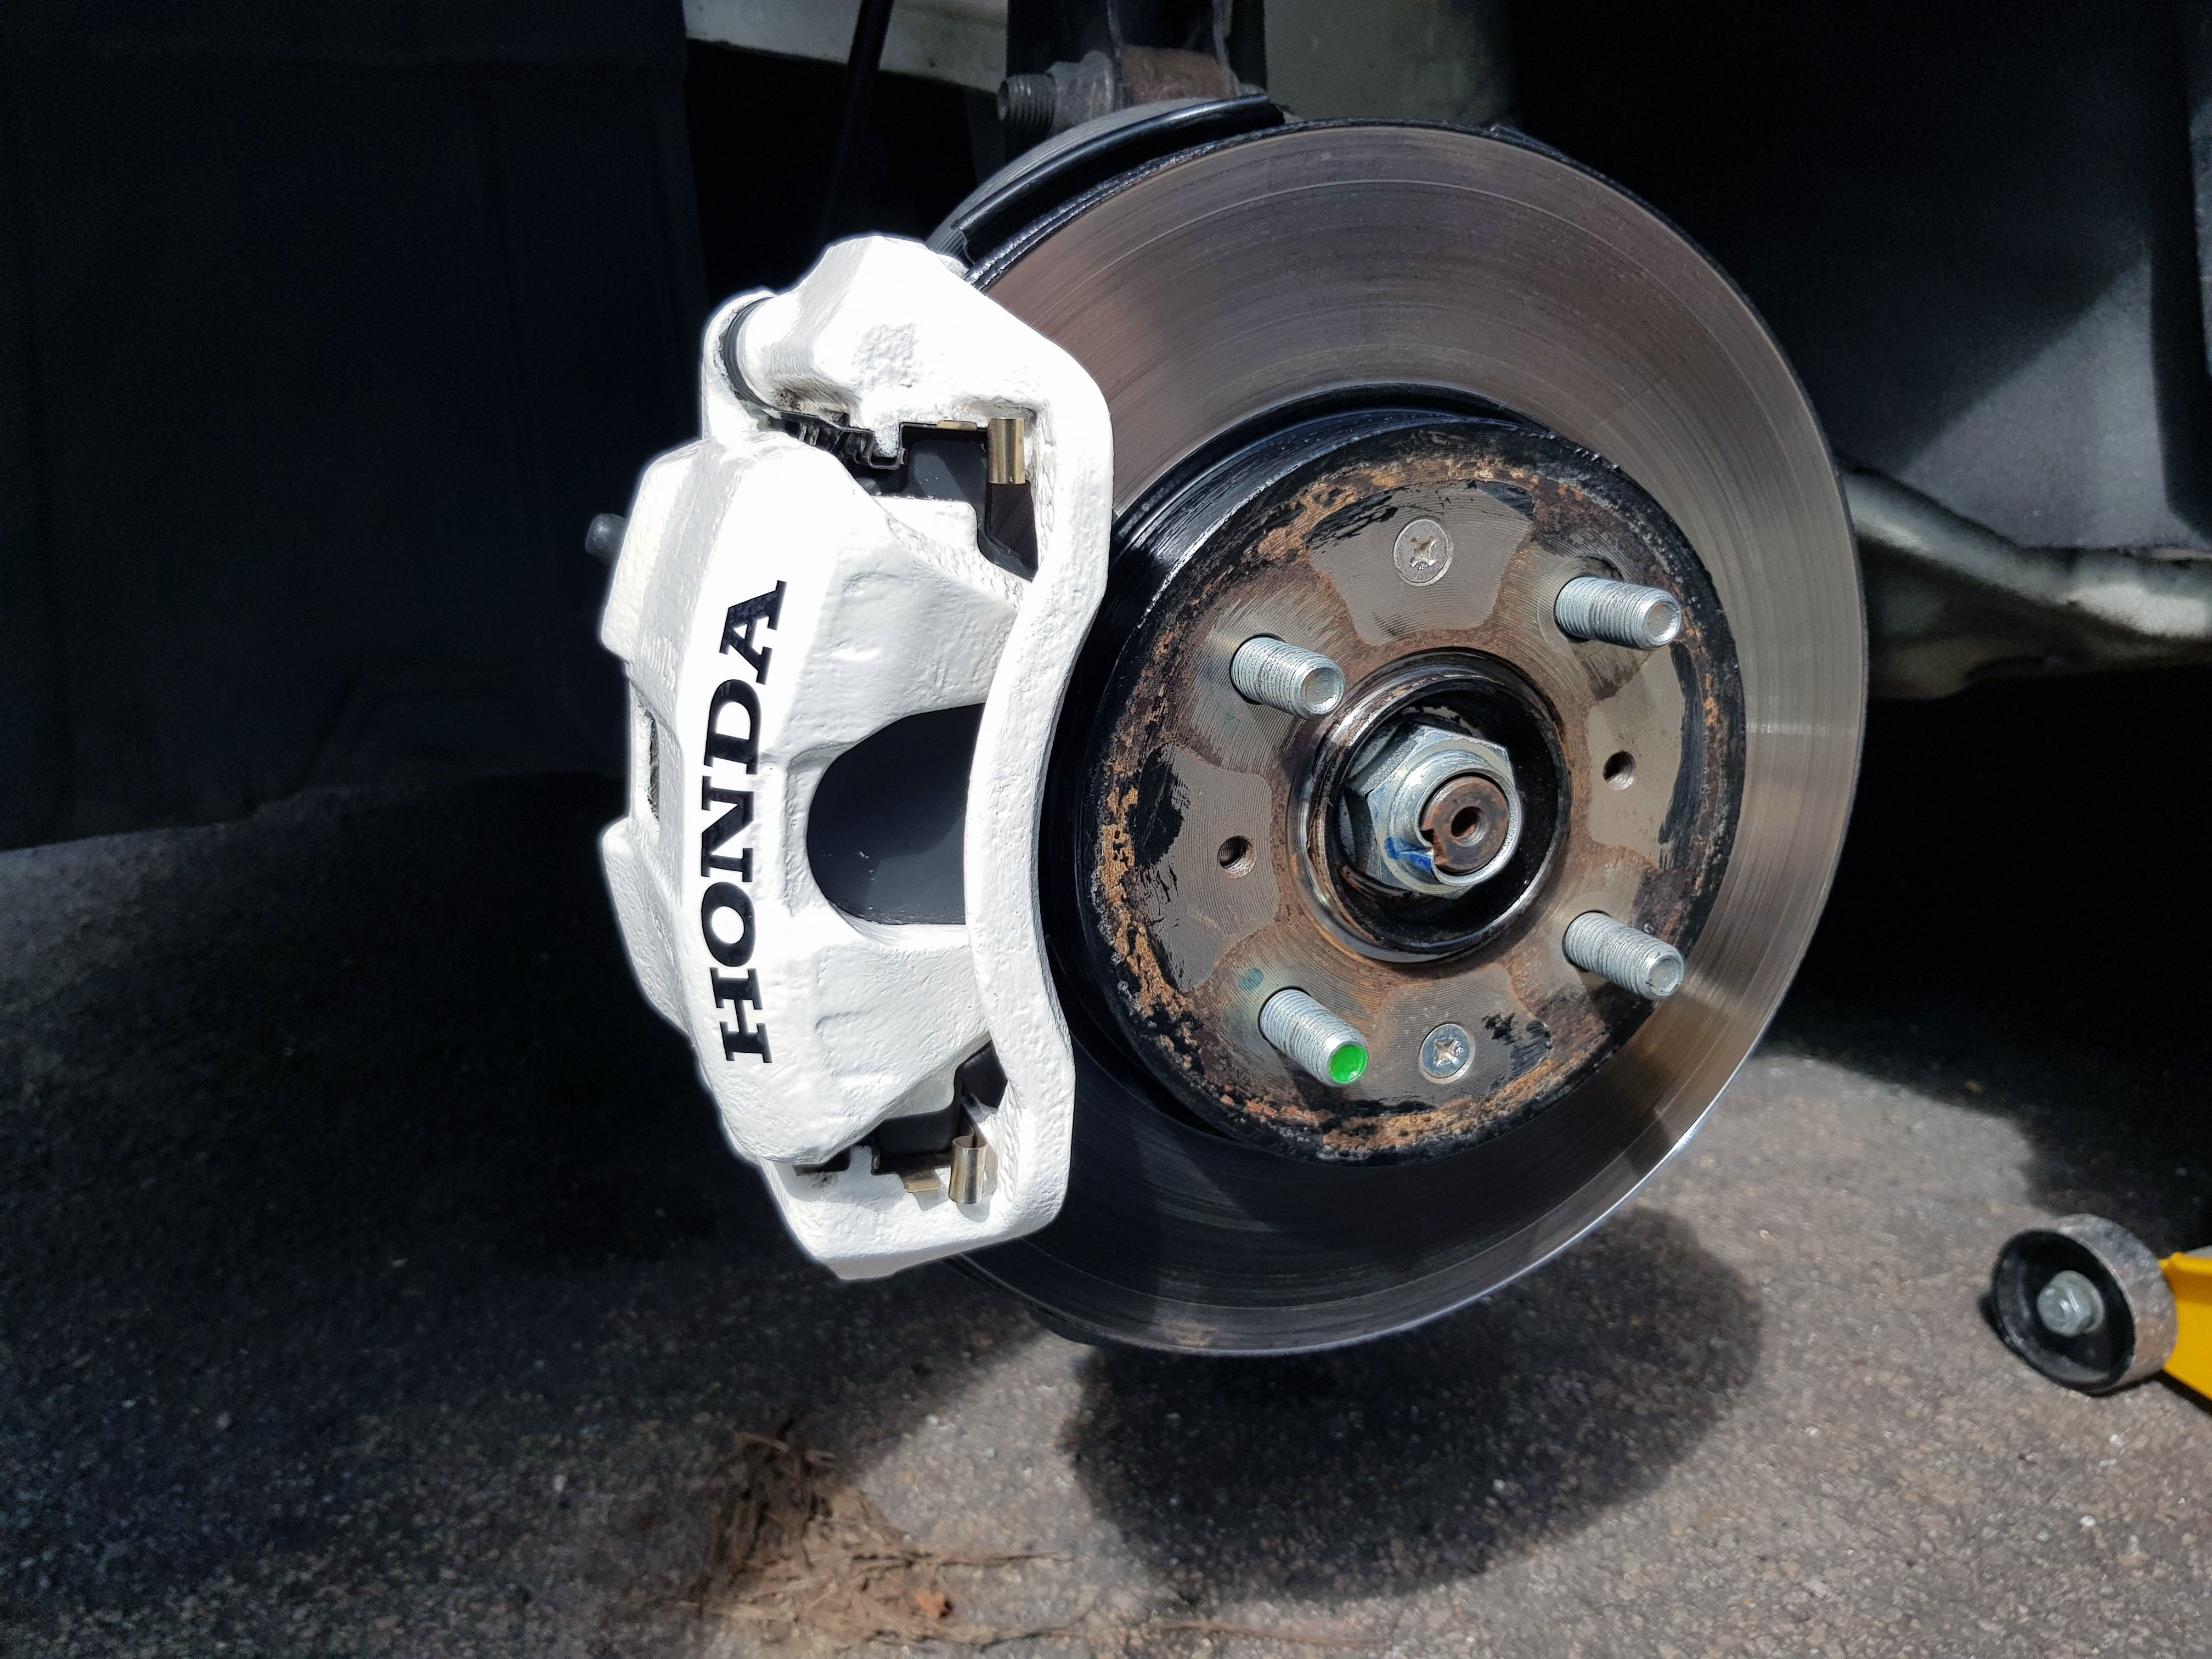
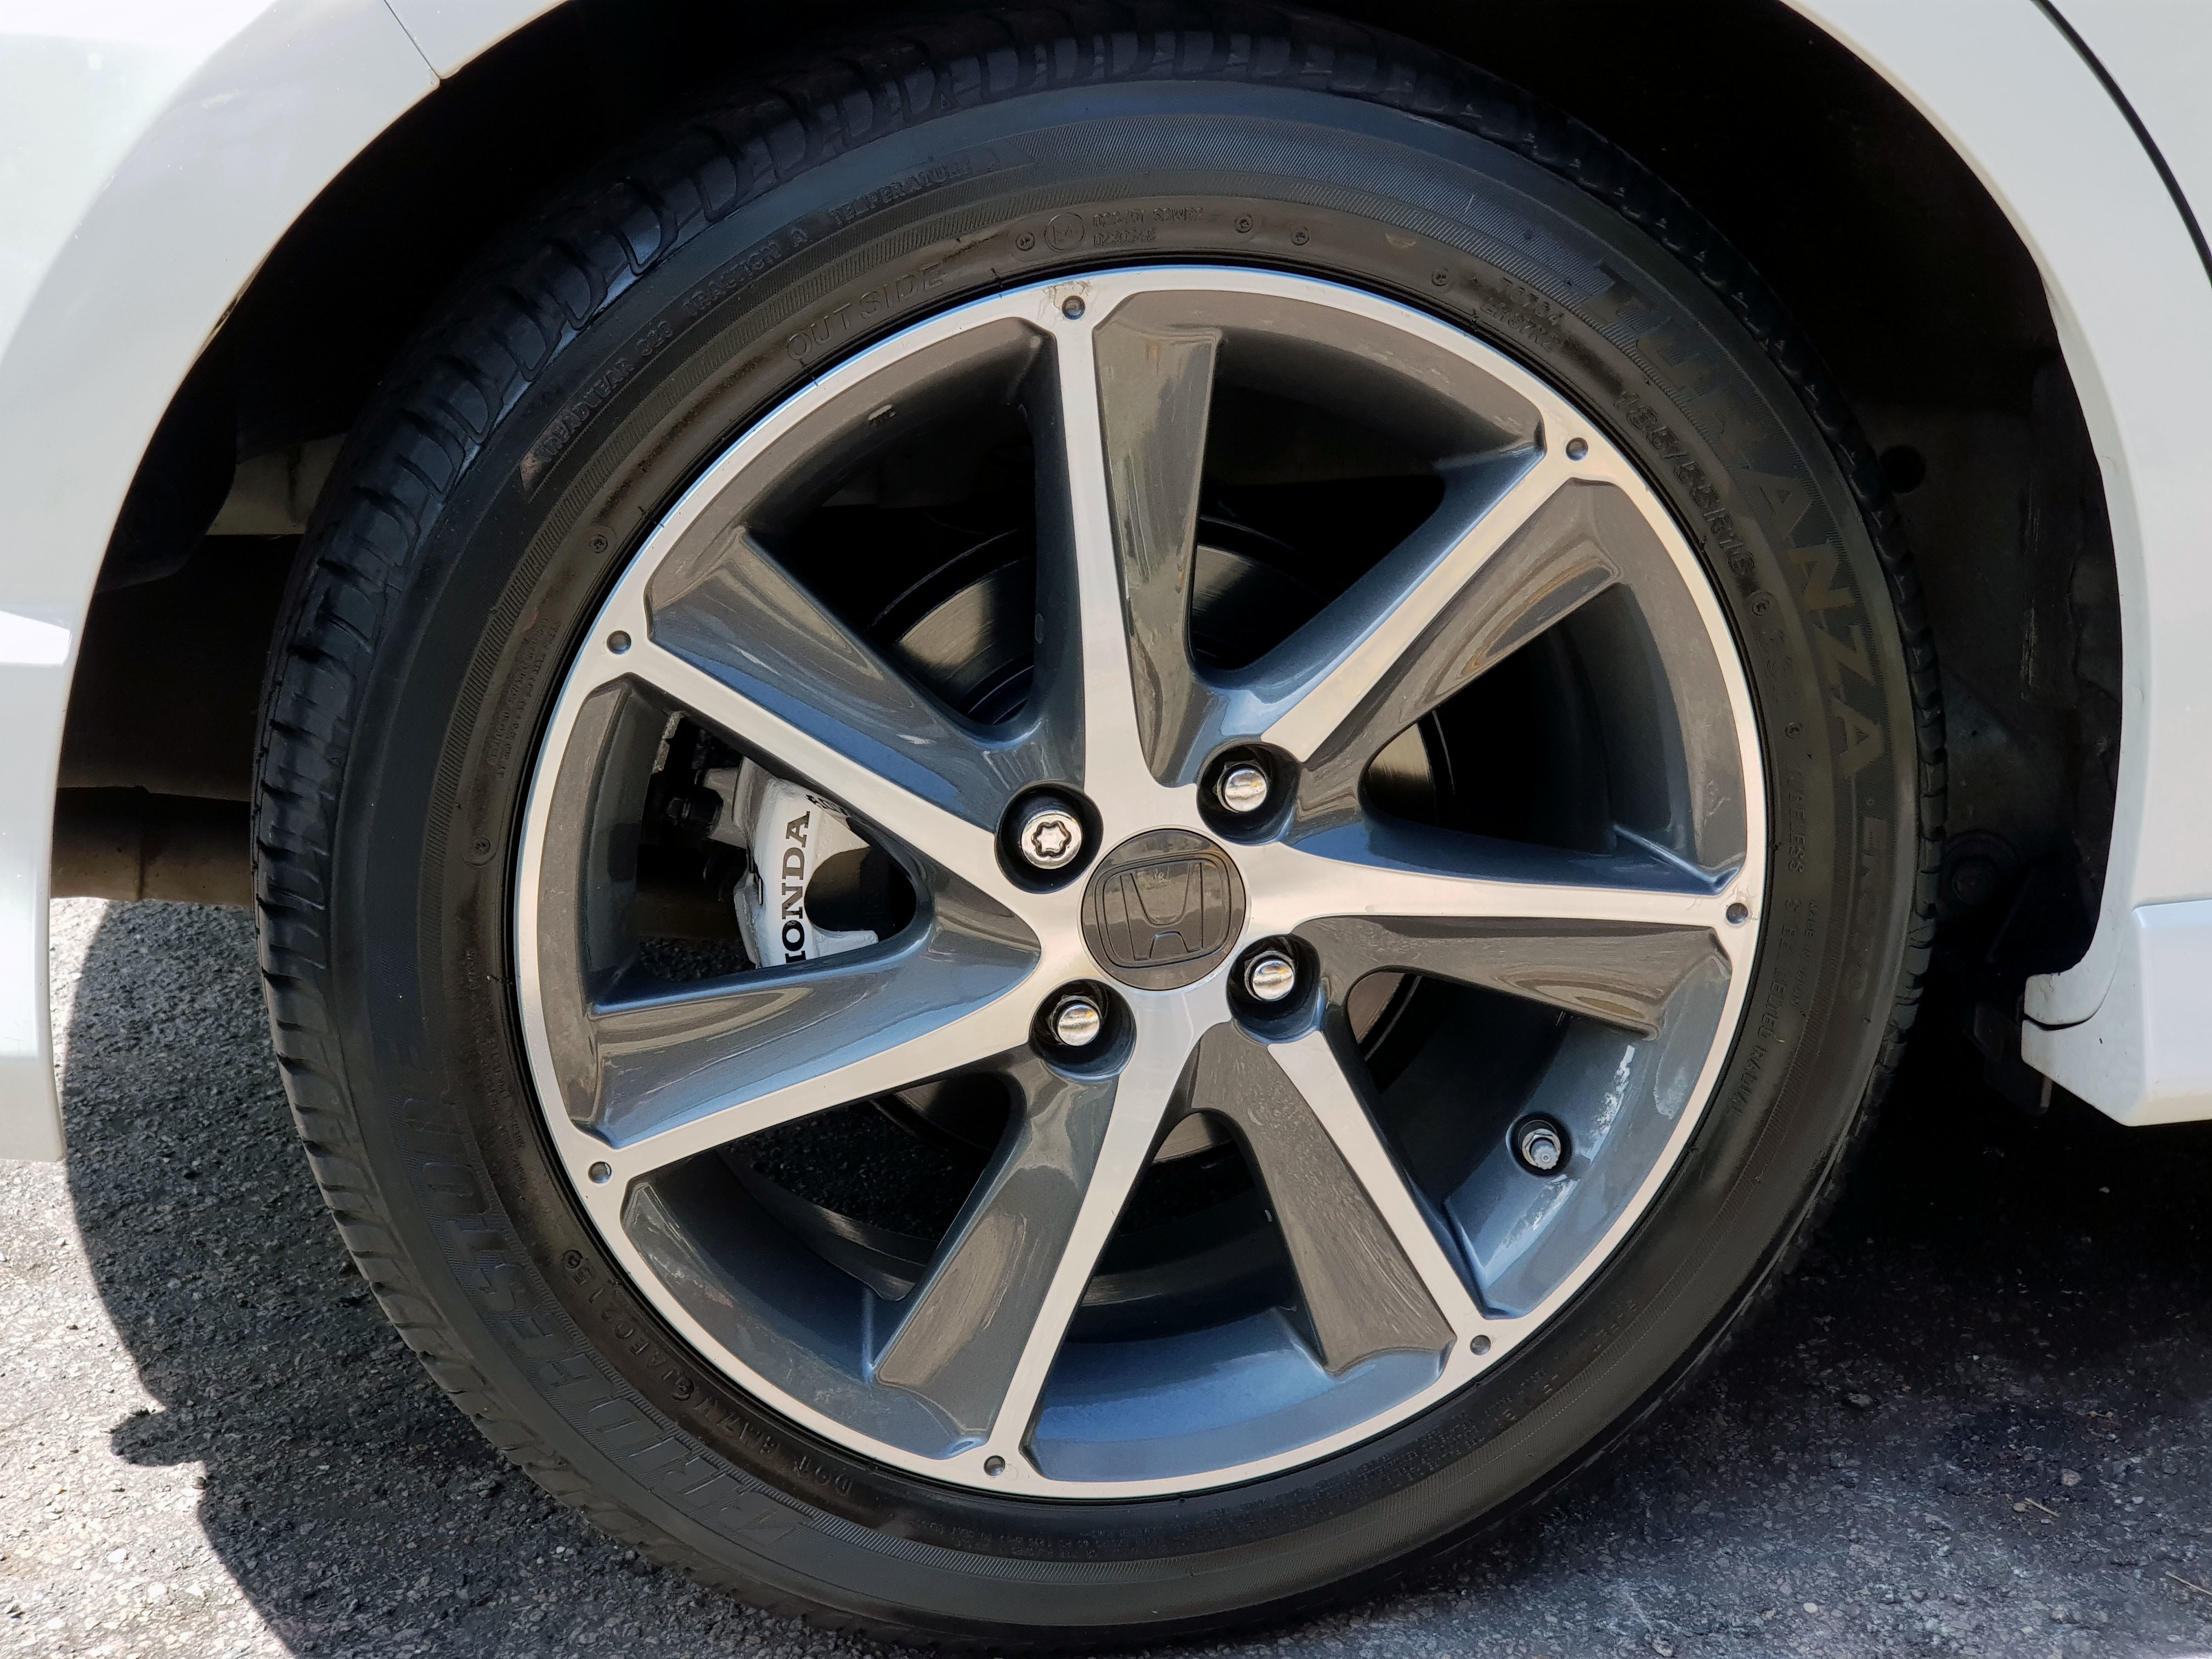
Painted Brake Calipers - July 2019
I wanted to paint the brake calipers white with black Honda lettering, in keeping with the black and white theme of the car.
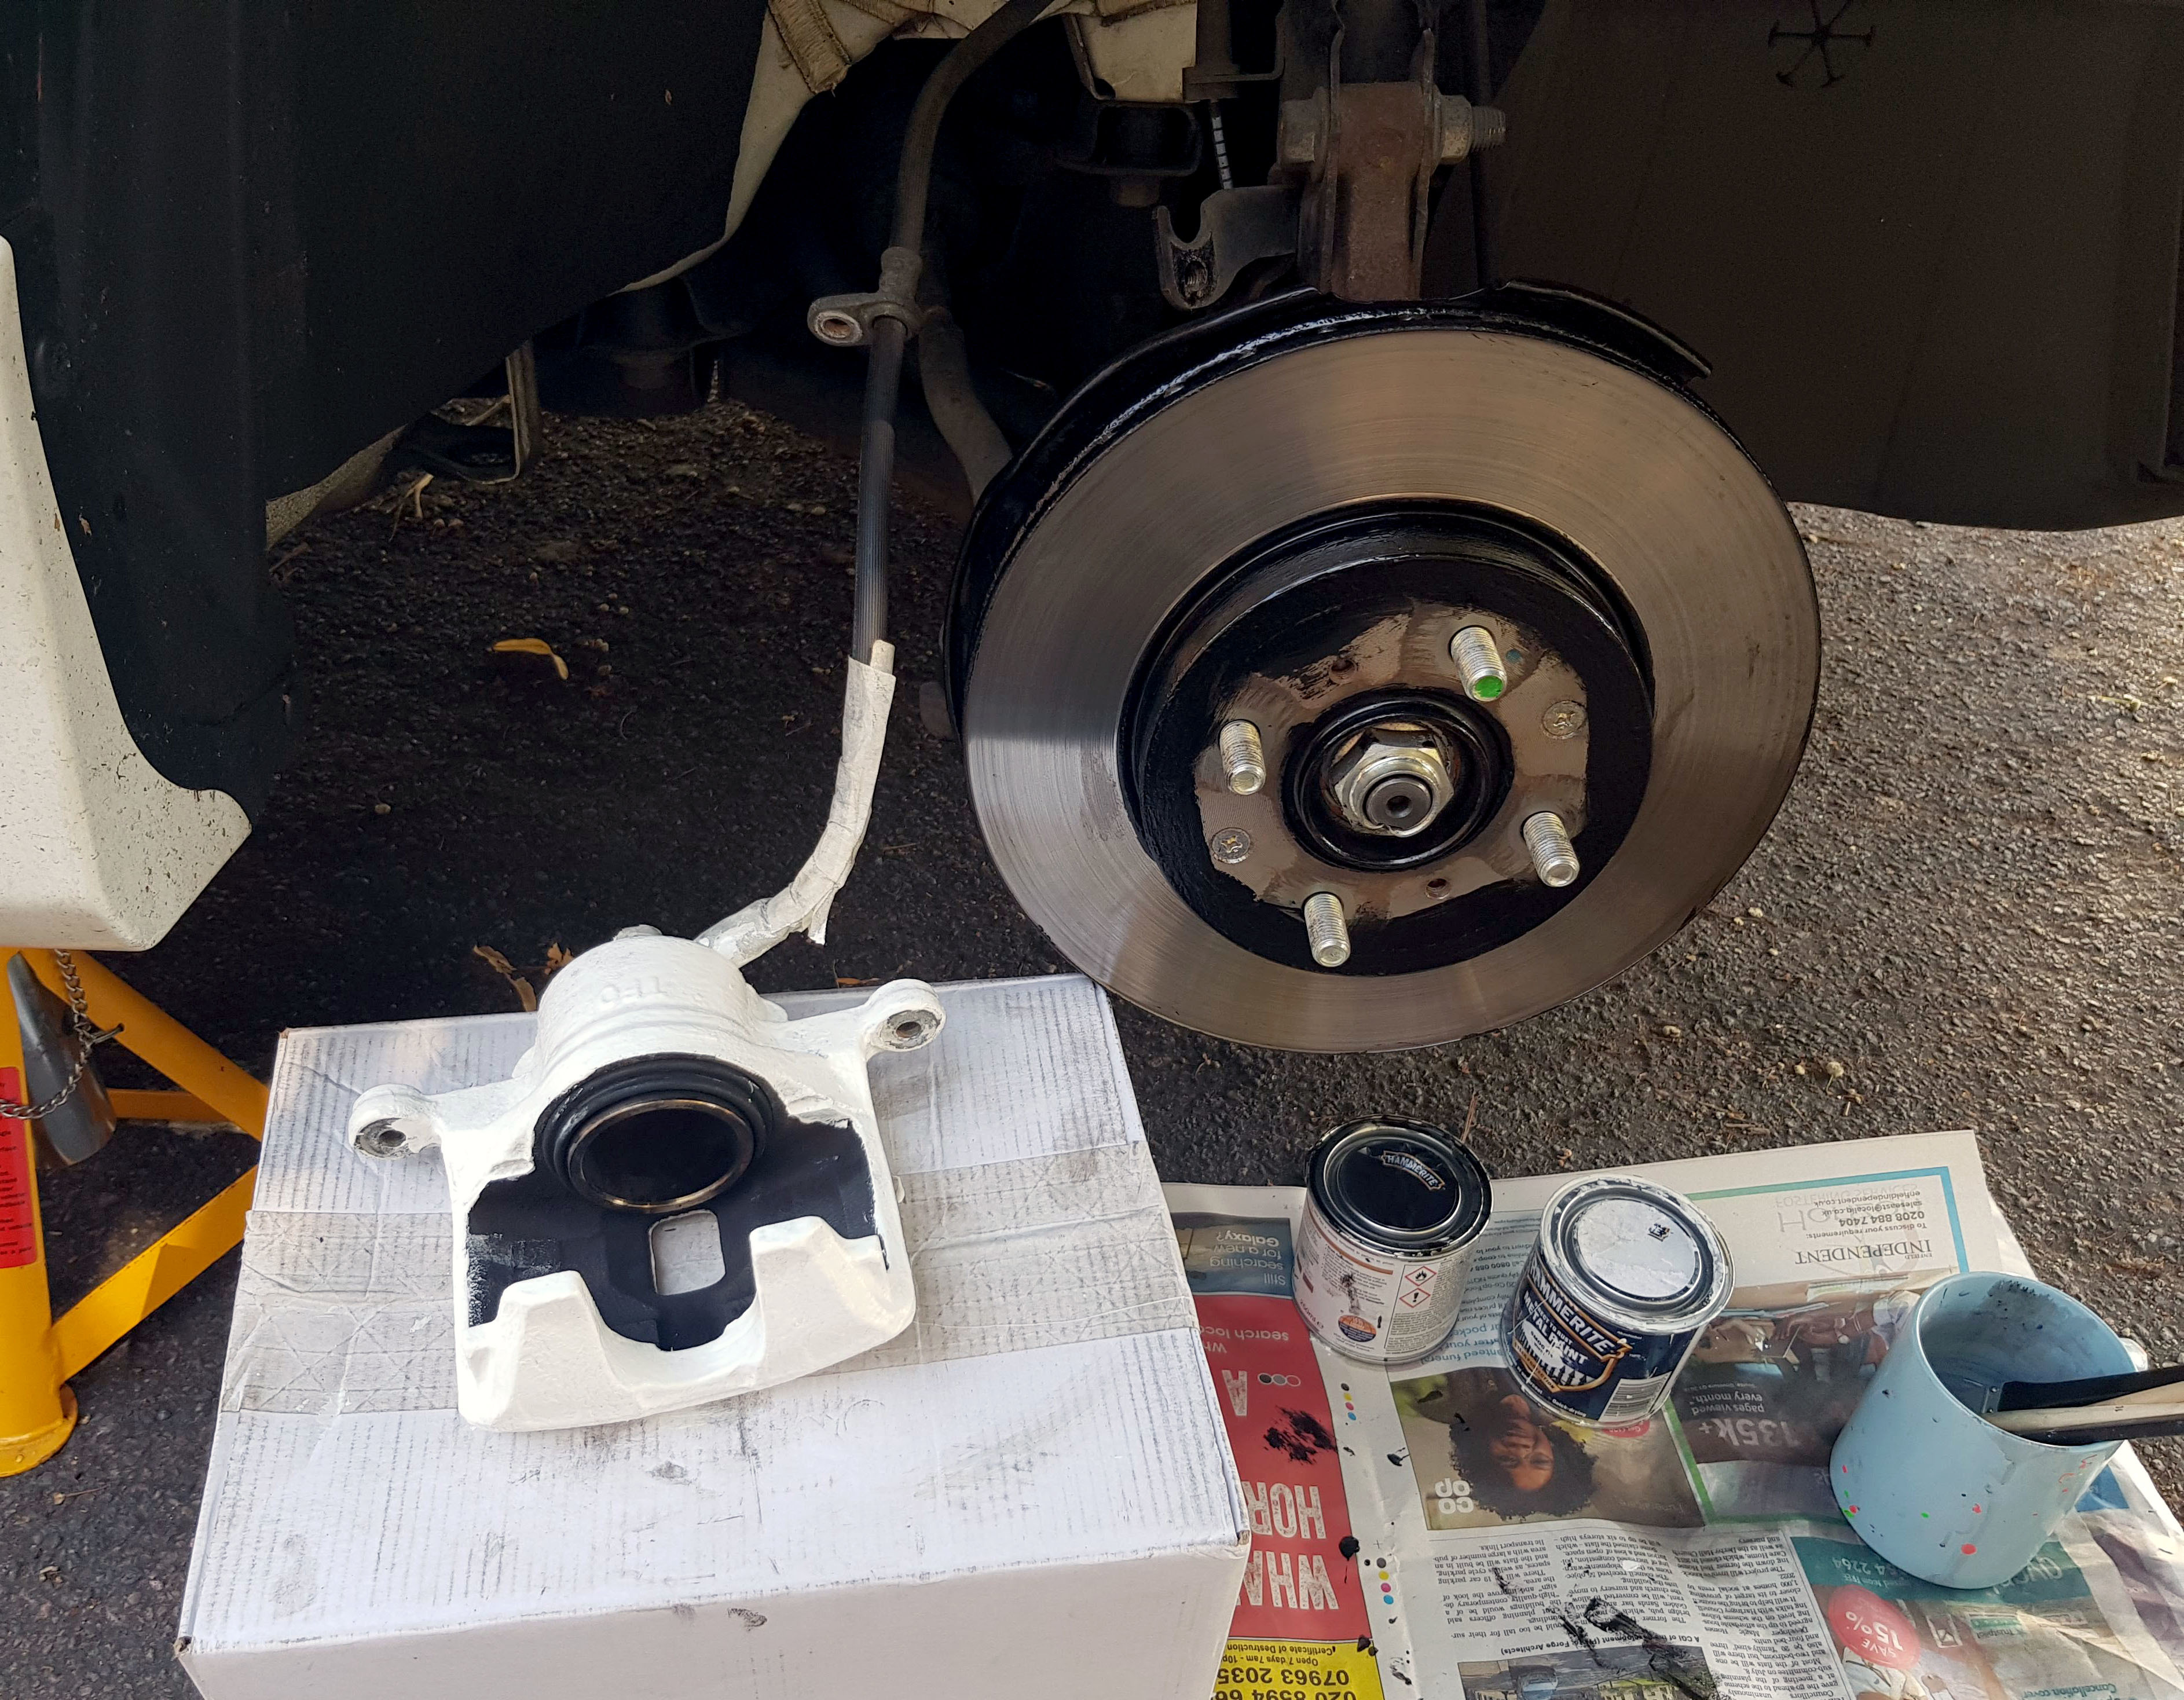
I used Hammerite gloss white paint for the calipers and Hammerite gloss black for the discs and metal surround
I used a wire brush drill attachment to clean off the calipers of any brake dust.
They were quite clean to begin with, so it wasn't much effort to get them looking like new.
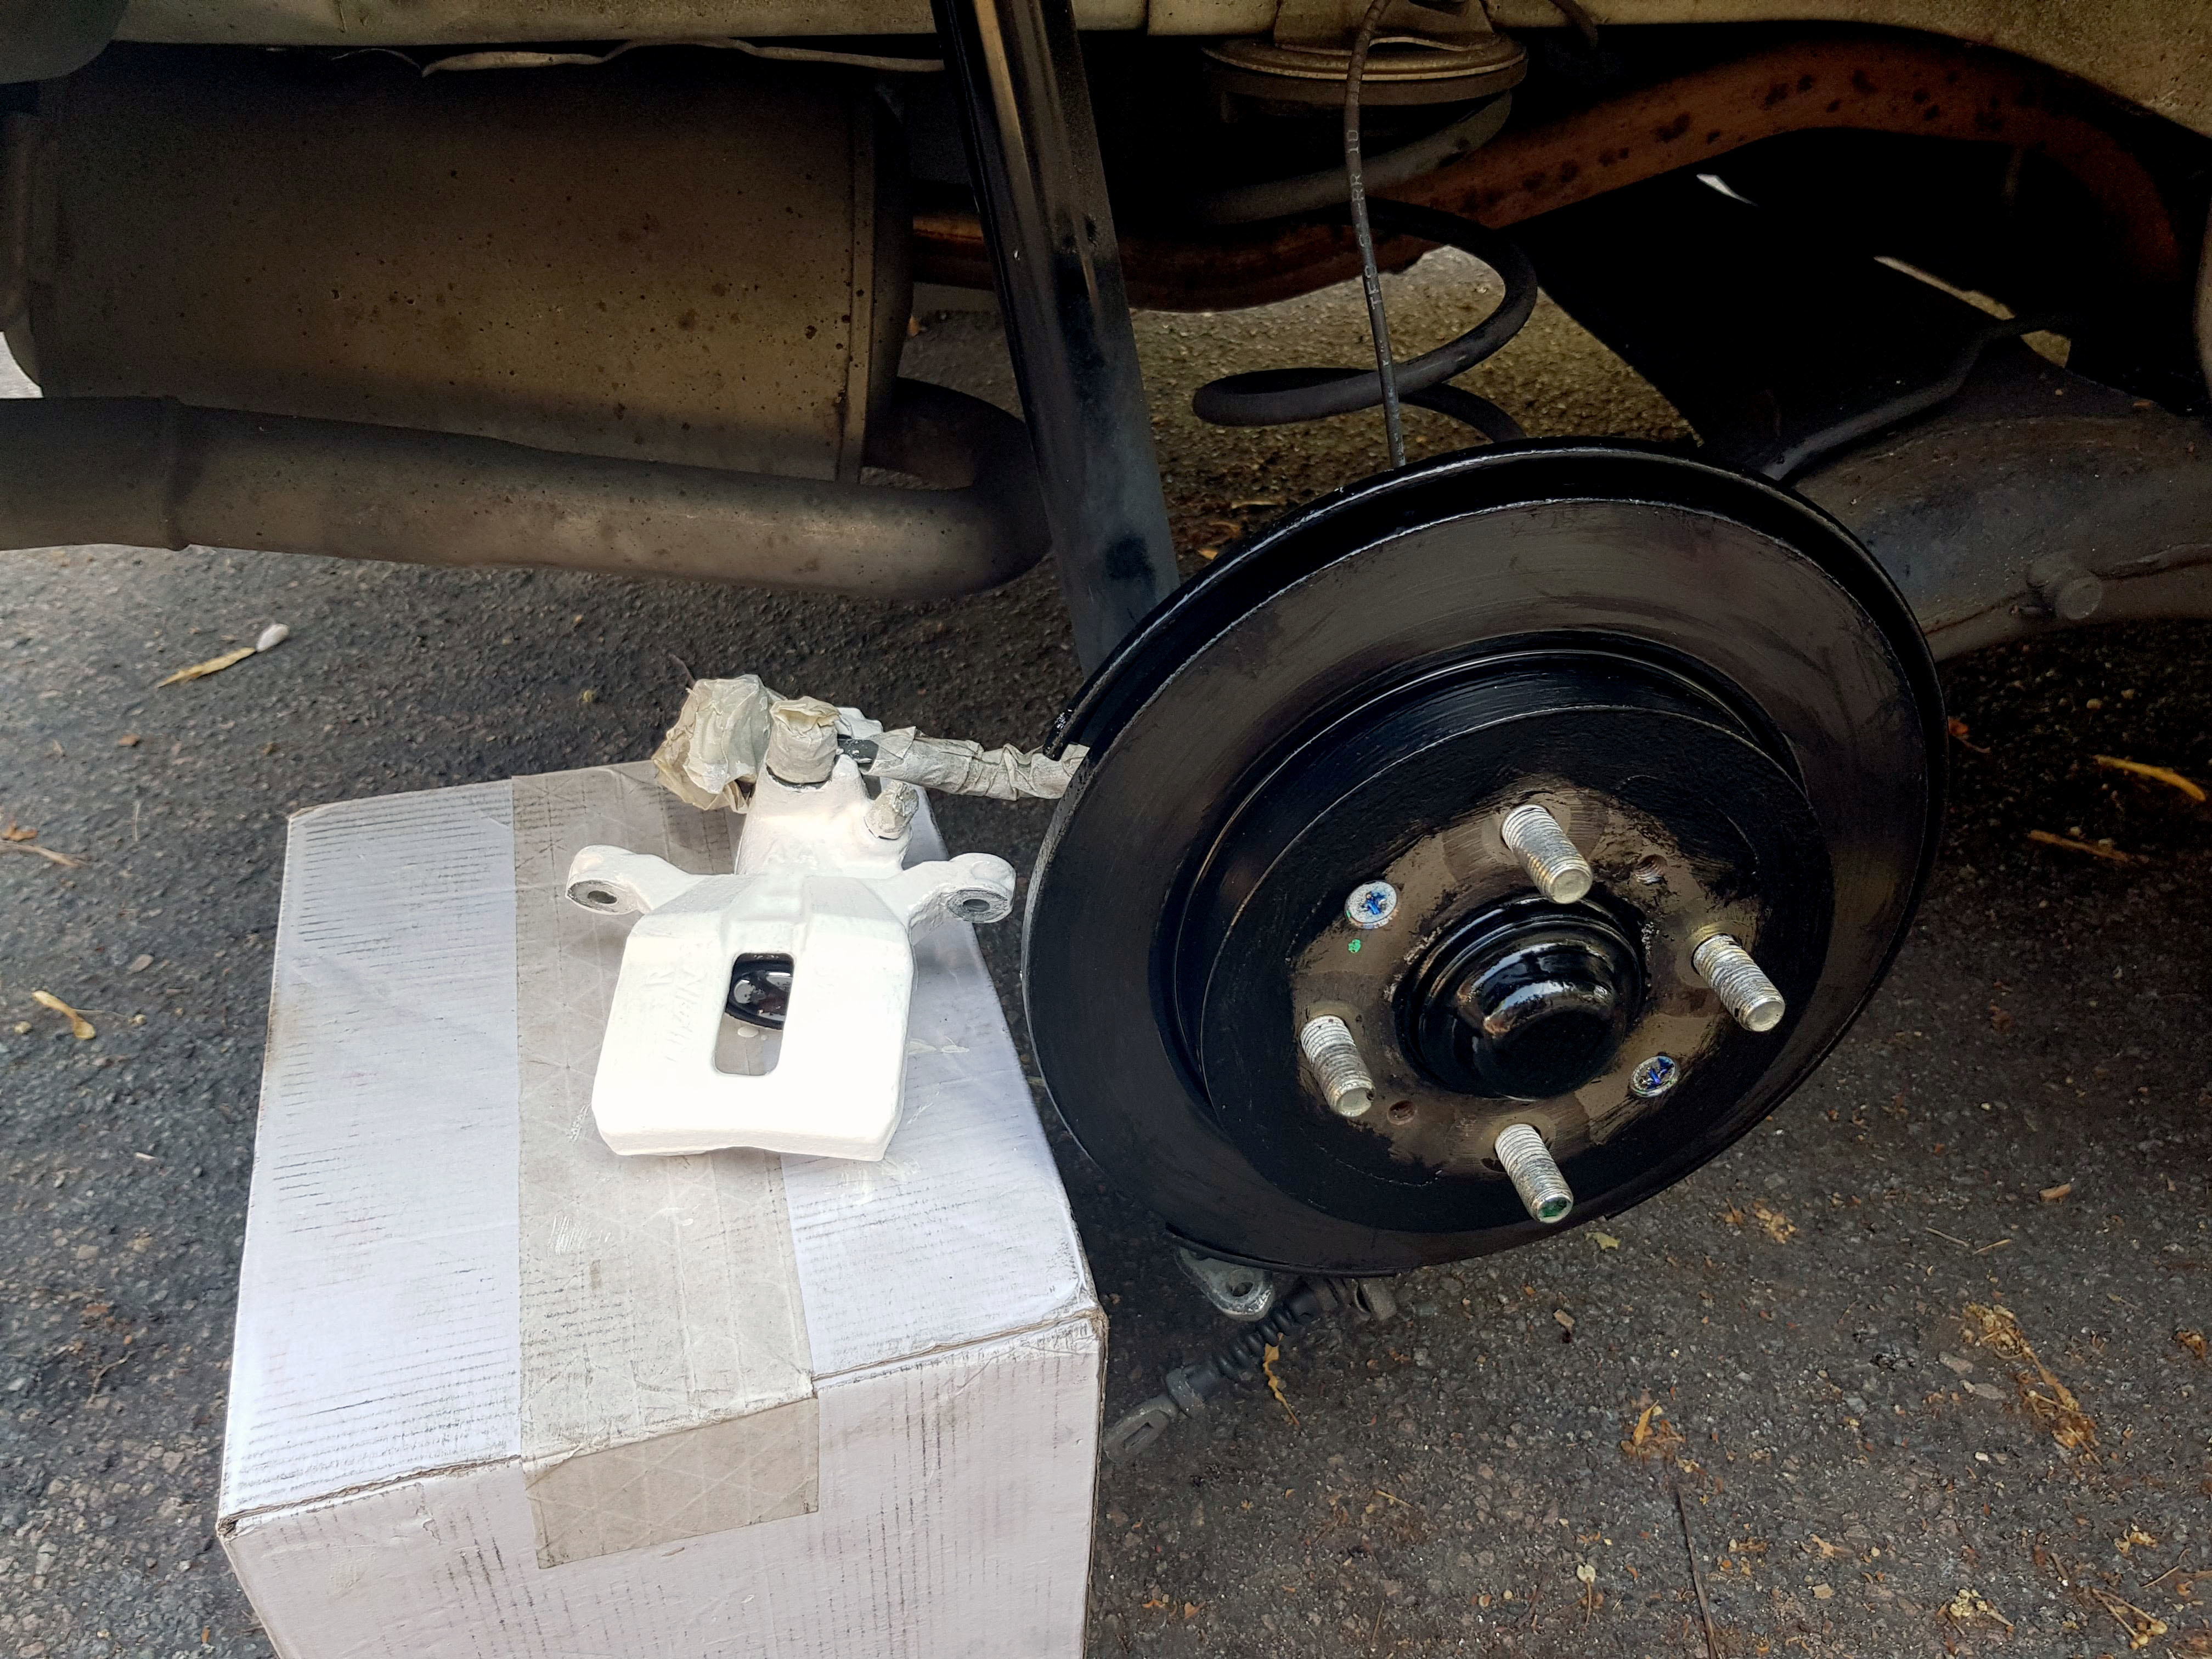
I removed the calipers as best I could without detaching the brake hose, and made sure there was no weight being put on the hose.
It was a bit of a pain to paint this way, but It was a hot July, so the paint dried pretty quickly.
I also painted the discs and surround while I had the caliper off, just to freshen up the look a bit
I ordered some black Honda Caliper decals and put a coat of clear coat over it to protect it
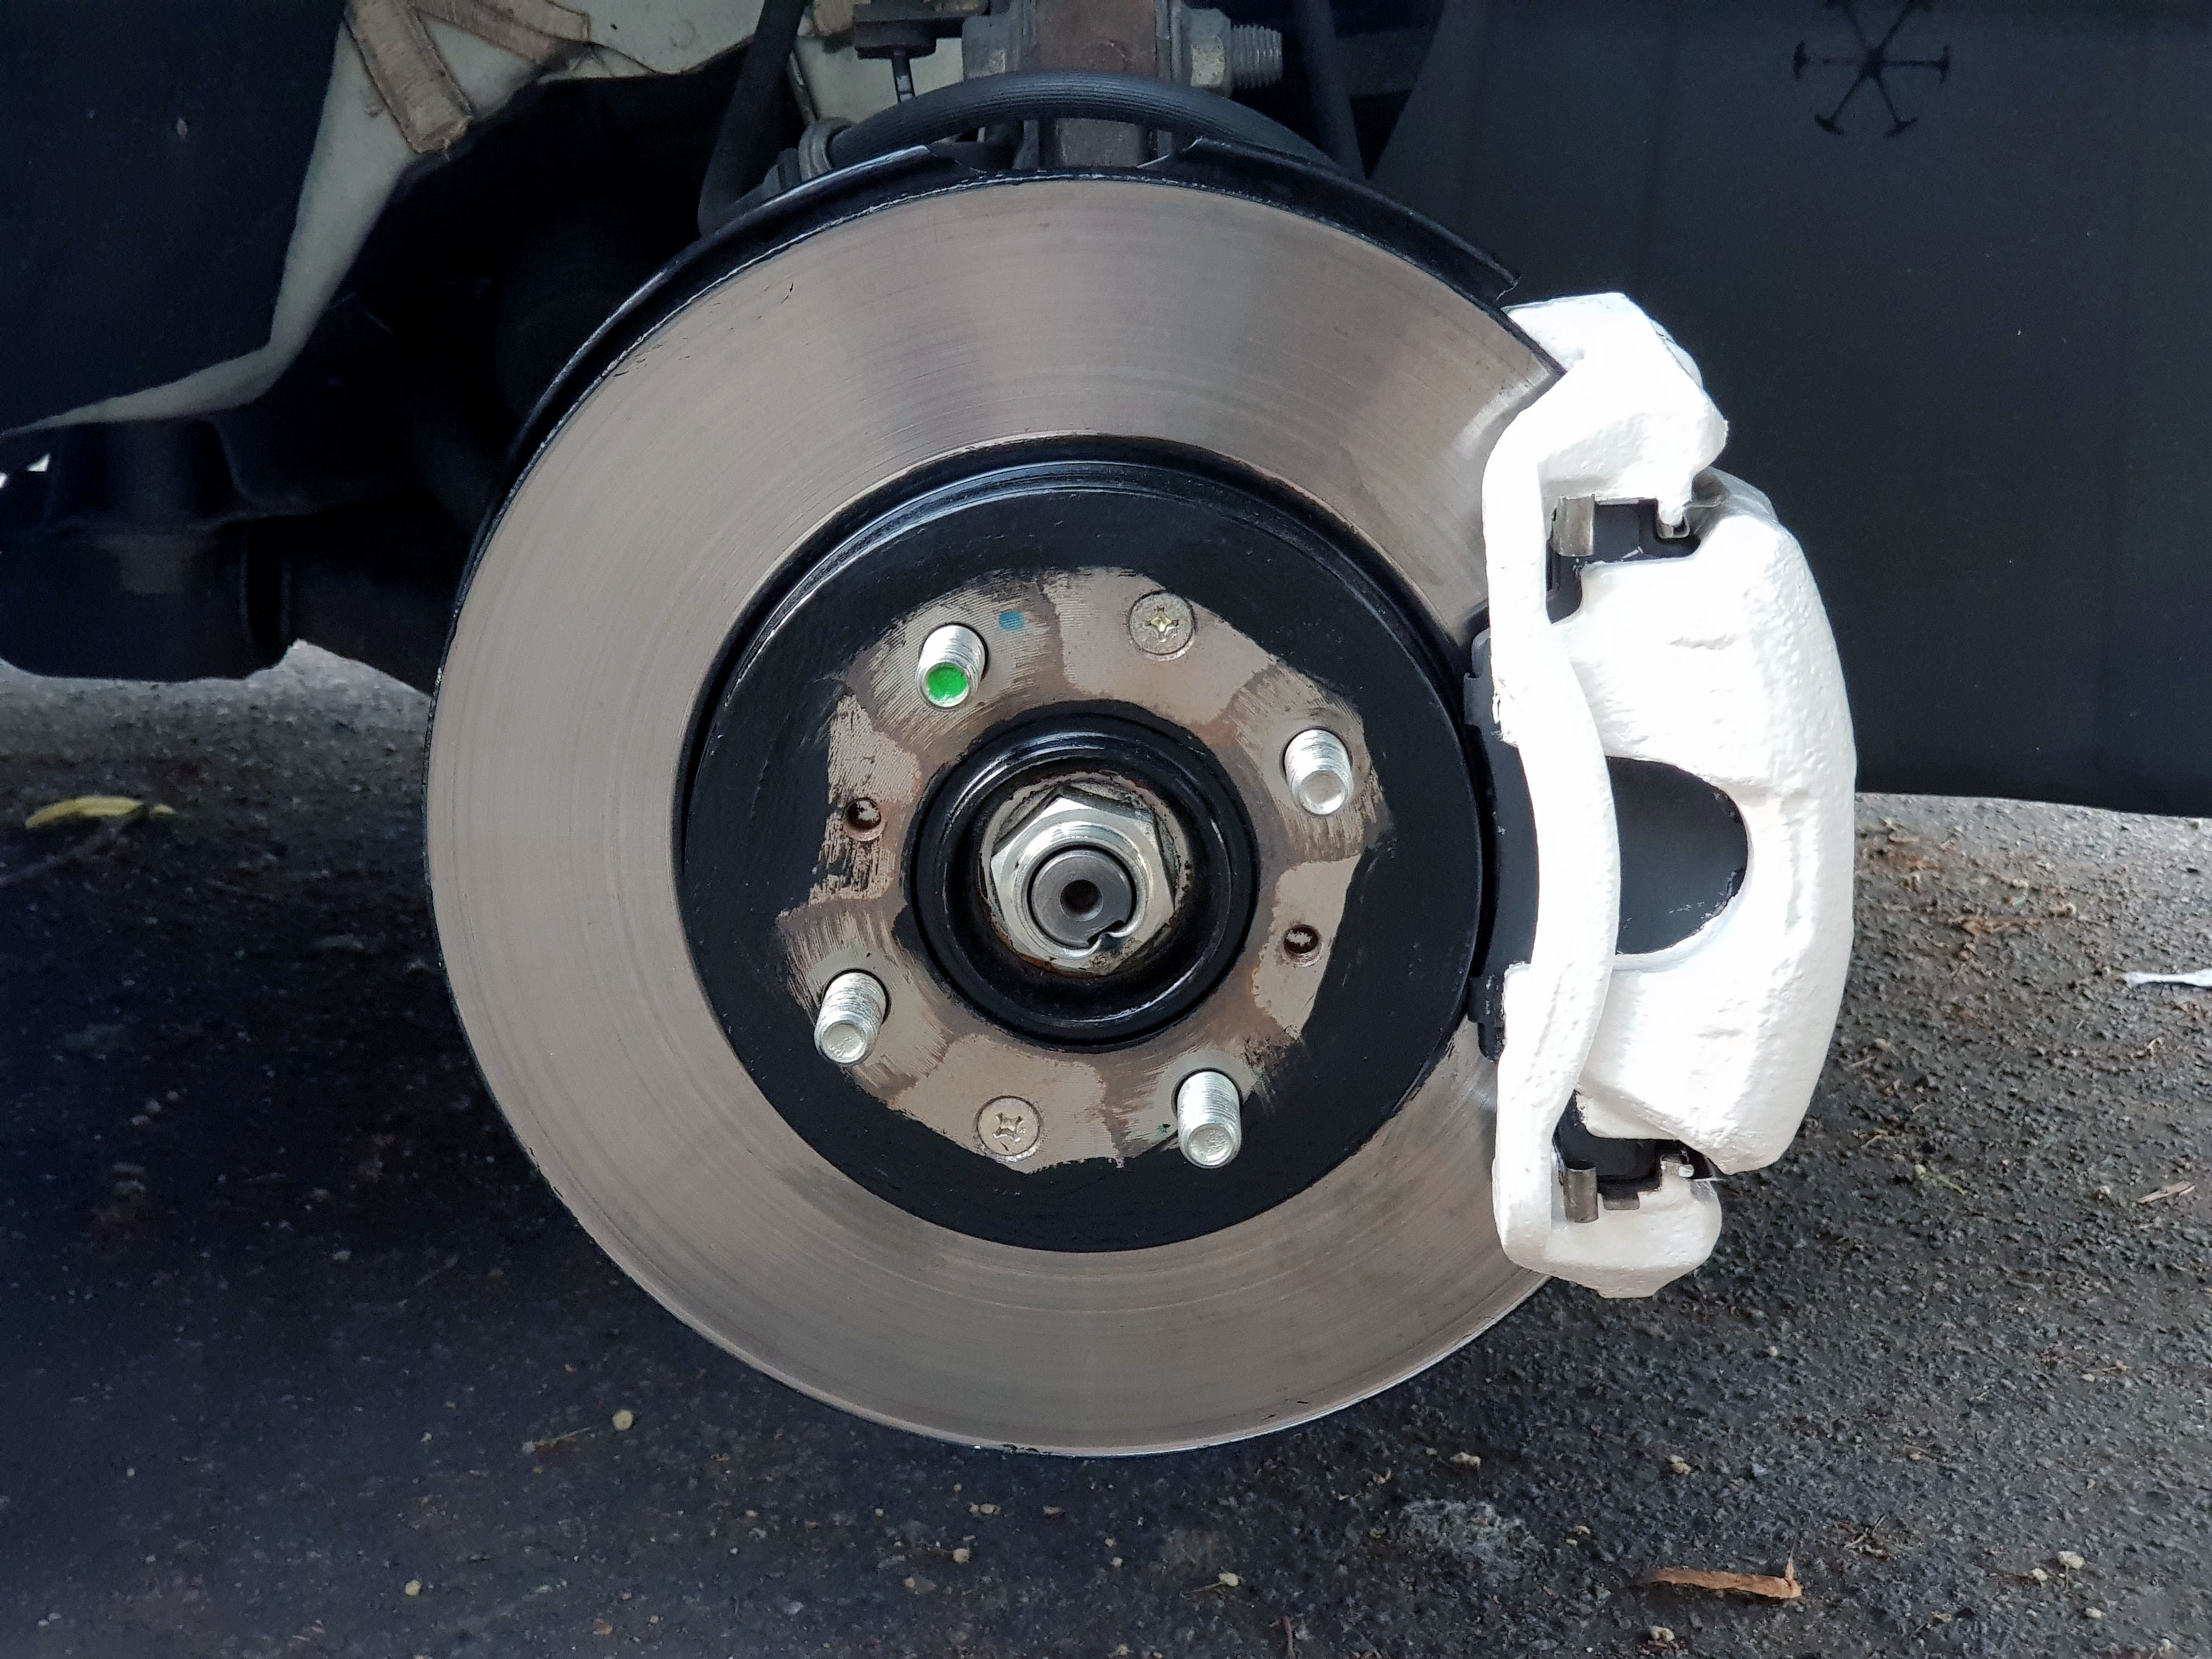
The final result:
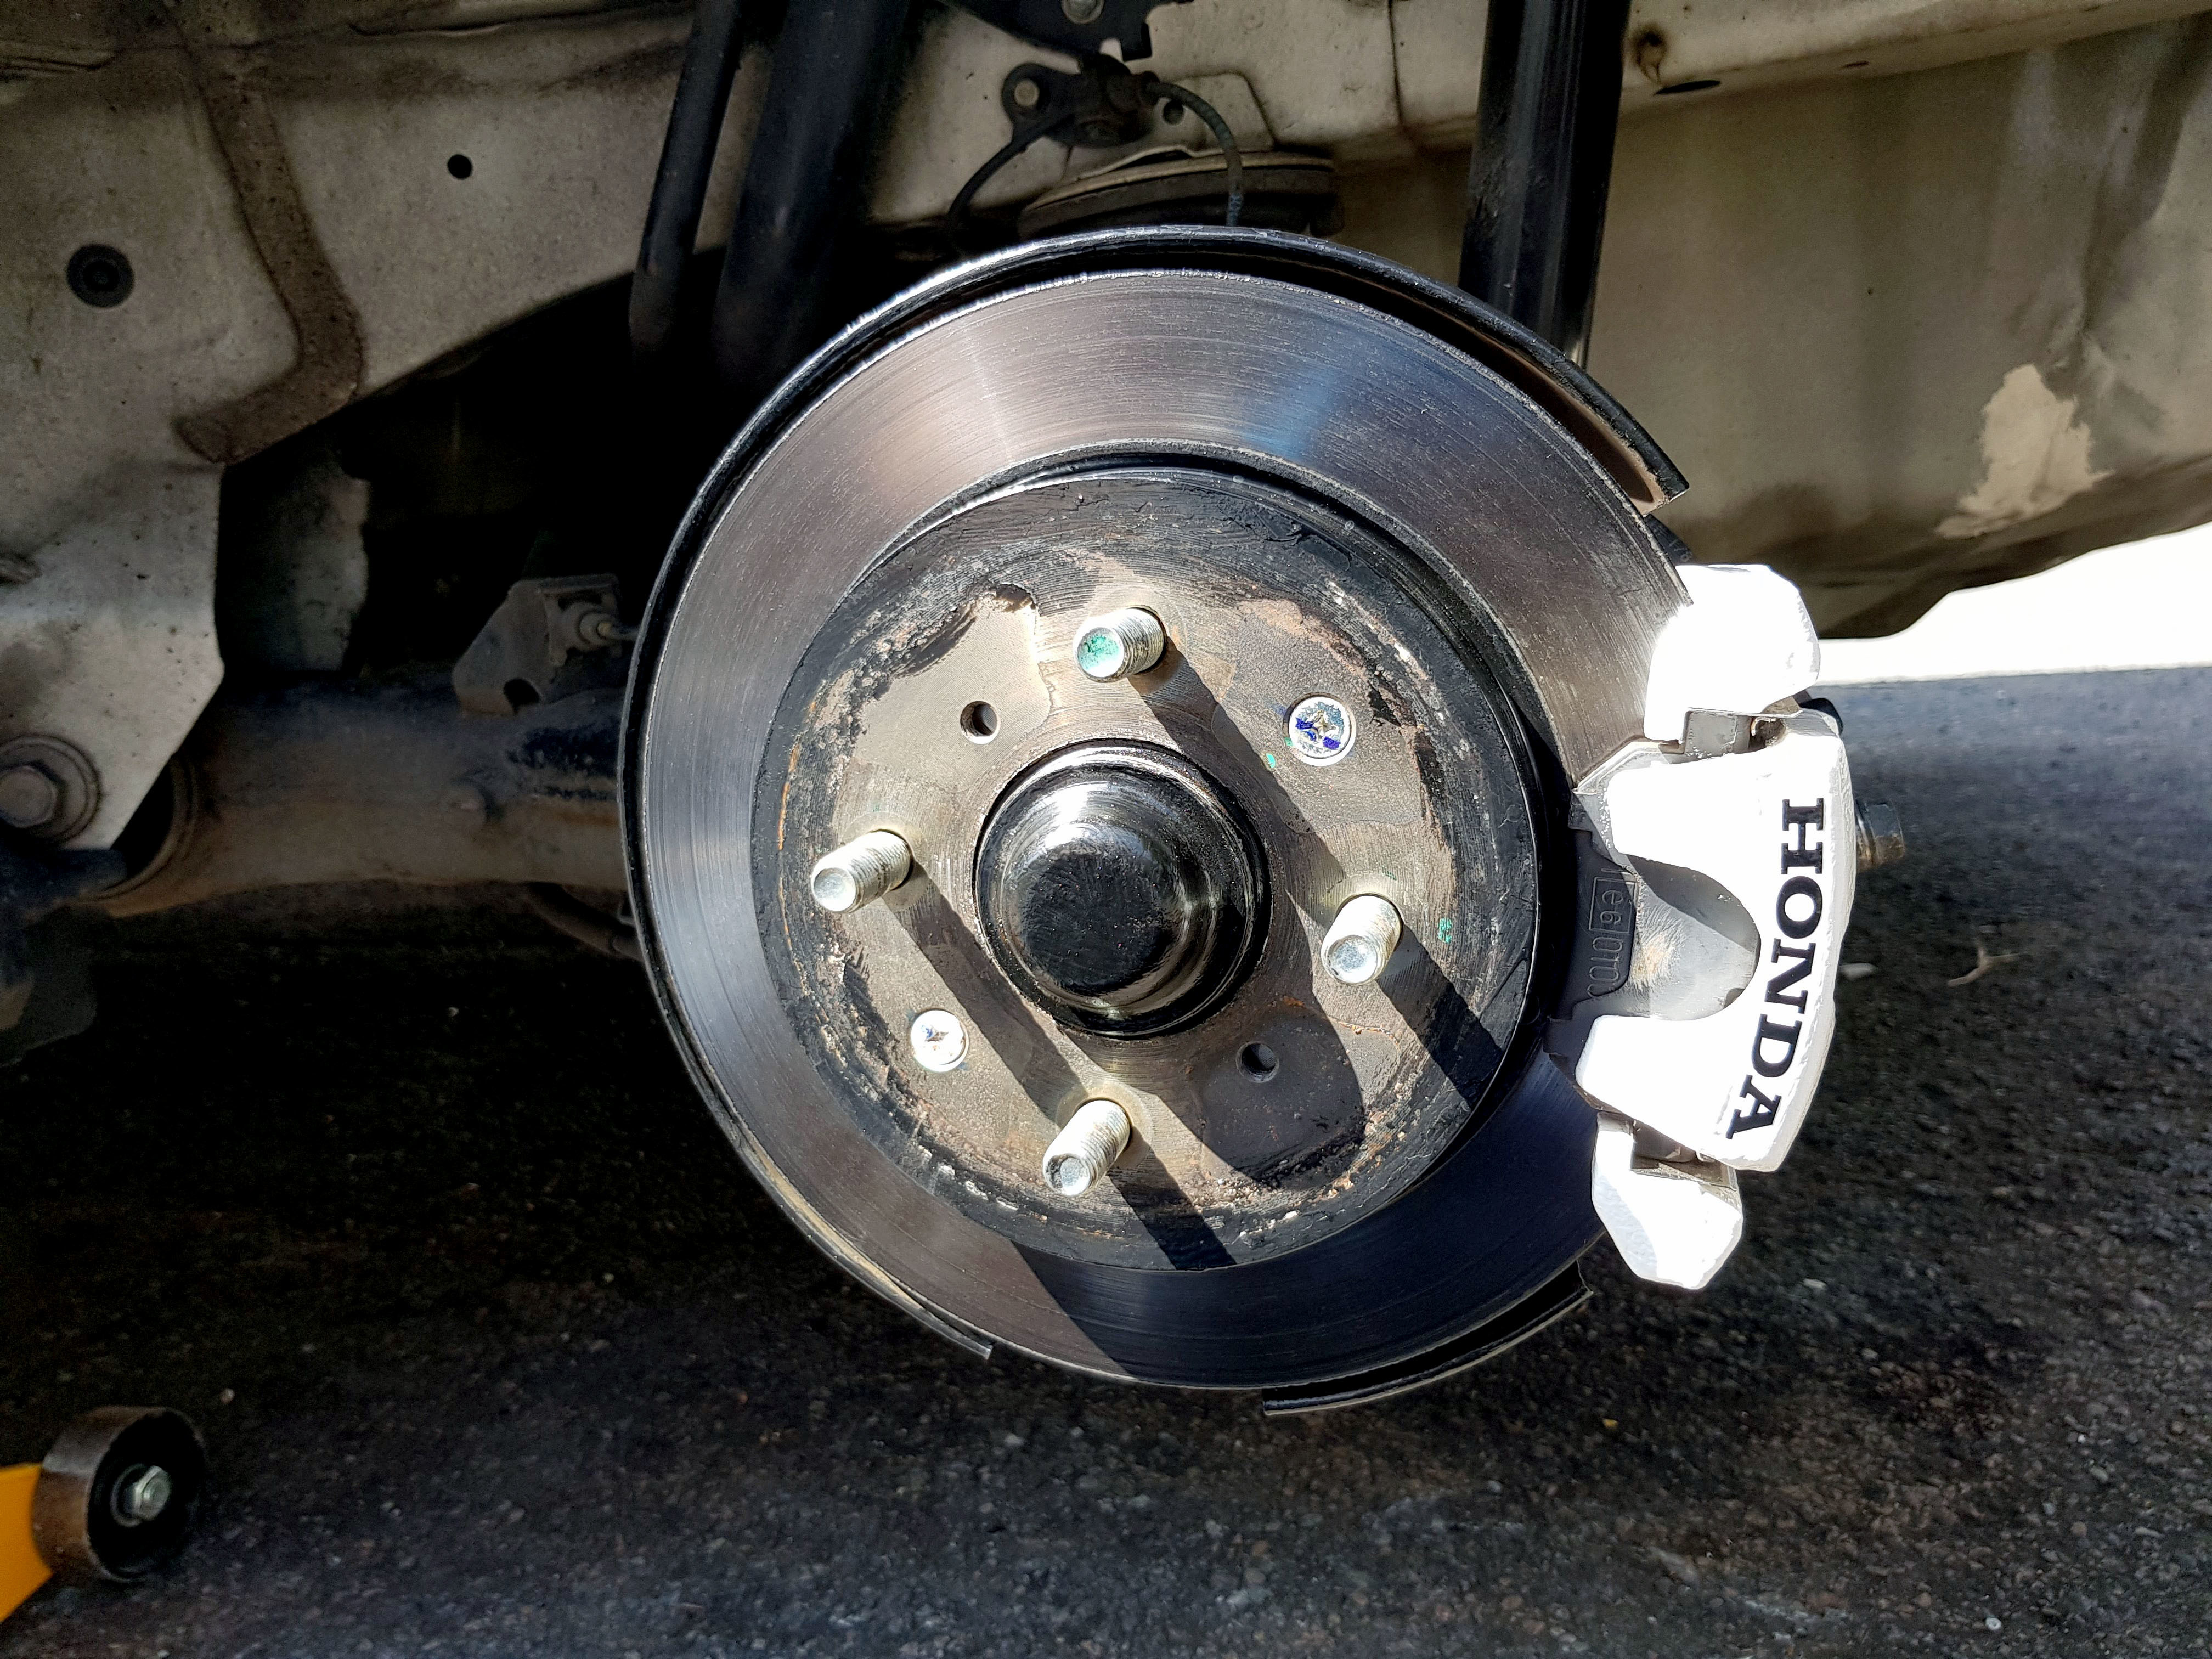
I was really happy with how they turned out, but it didn't take long for them to get dirty and for the brake dust to cake onto the paint.
3 years on, they haven't held up well, and look dirty even when deep cleaned.
So I wish in hindsight I had painted them Black with white (or red) lettering.
I might redo them next summer, depending on how motivated I am to do all the work again.
I would like to paint them red, but I feel red is so cliche, and black will at least not look as noticeably dirty.
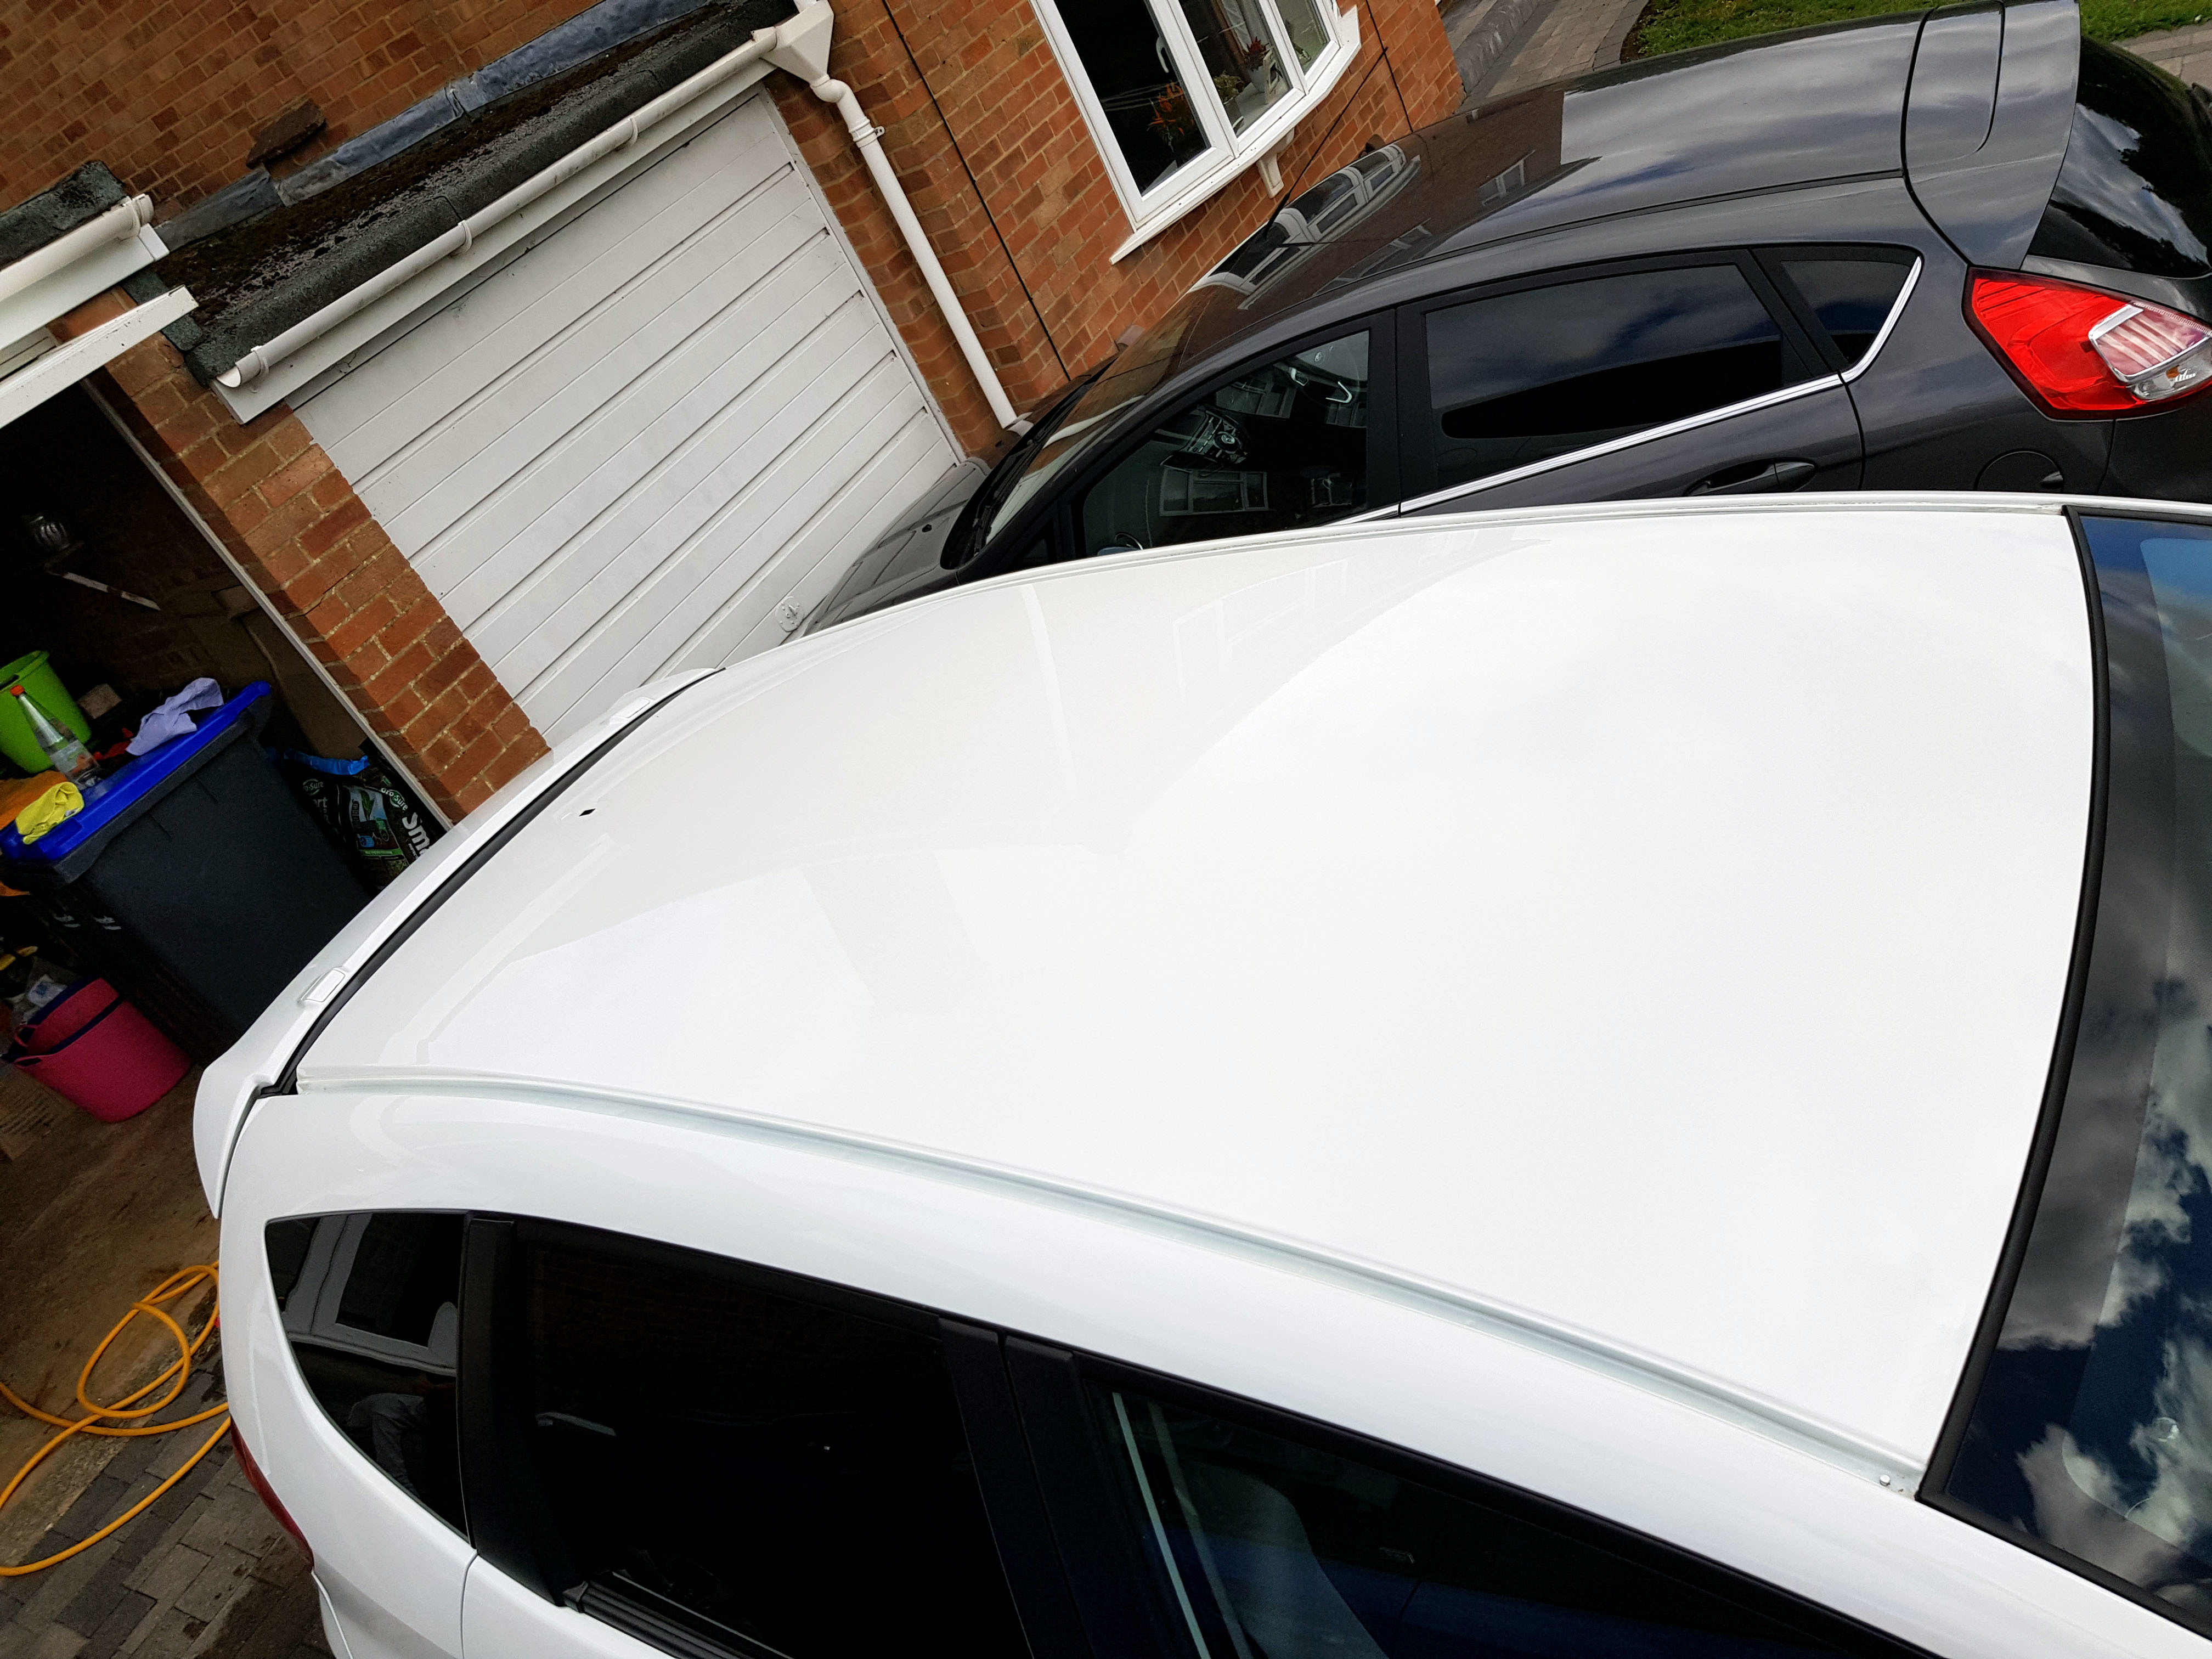
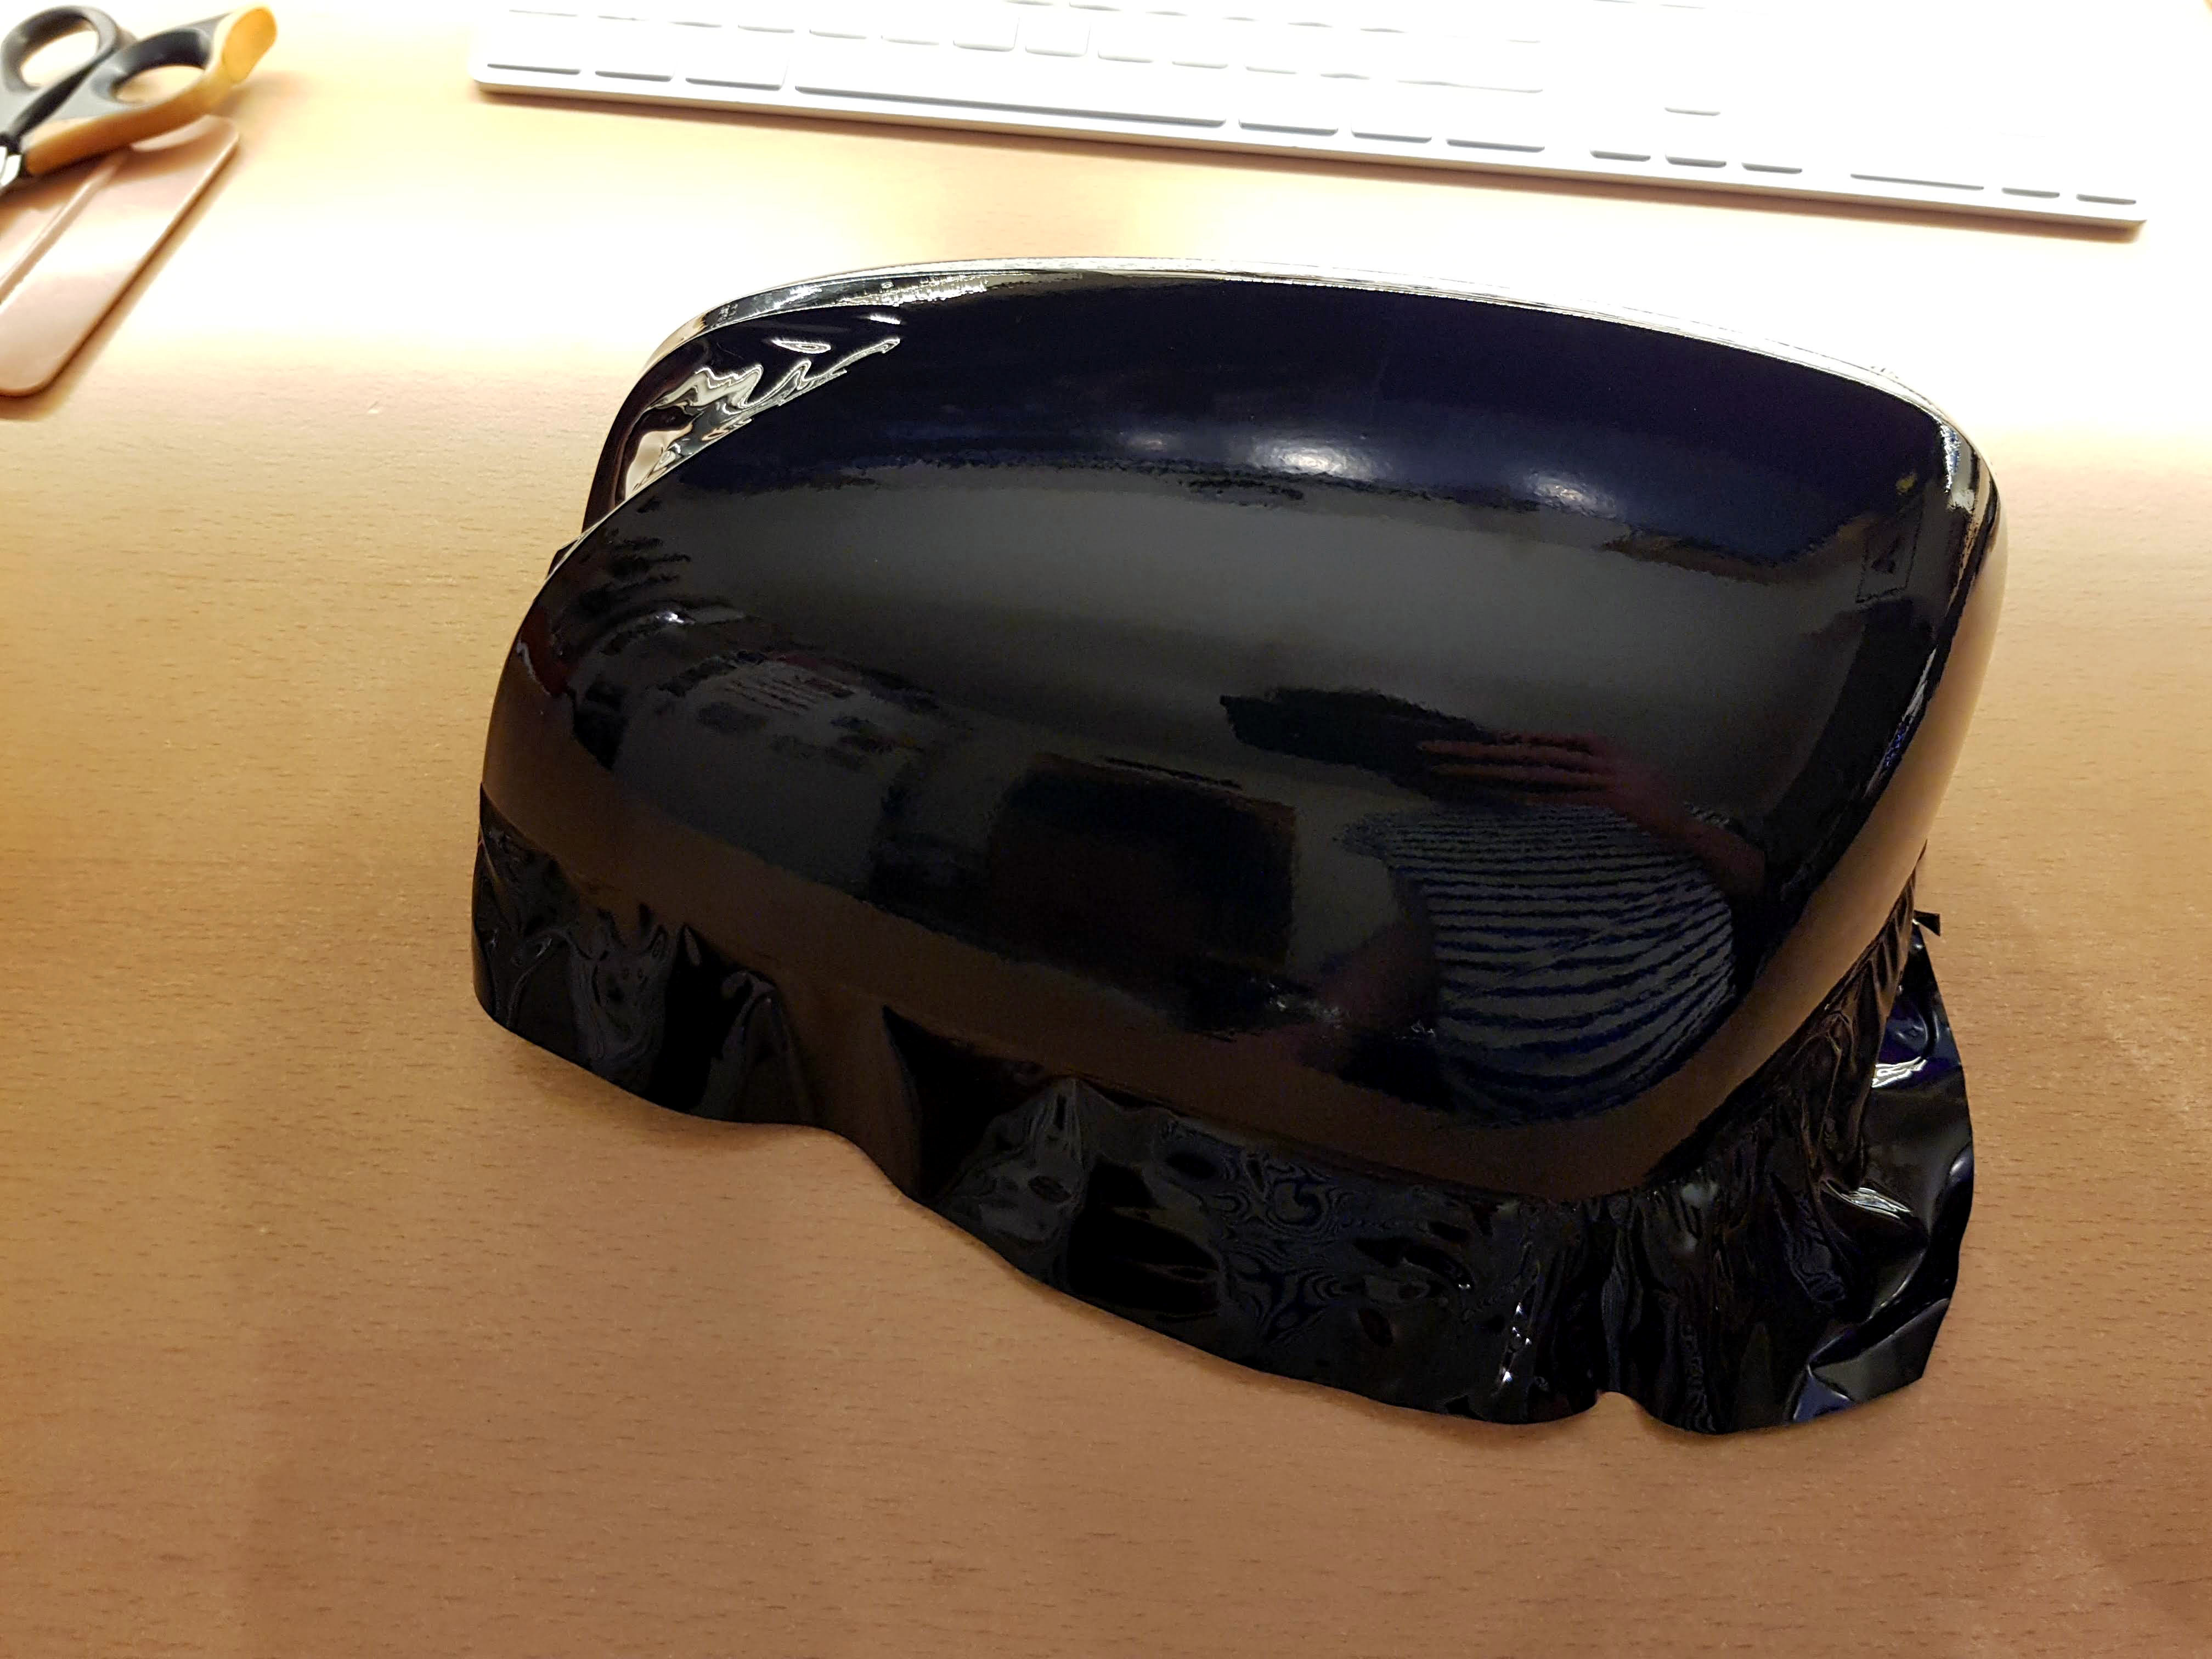
Wrapping the roof in black vinyl - September 2019
I always wanted to wrap the roof black, as I thought it would complement the white exterior well.
I ordered some premium automotive wrap with air release (to help if any bubbles formed). I ordered from MPD, and I was very pleased with the quality of the vinyl.
It was definitely a 2 person job, and took several hours.
There were some imperfections, but overall, I was happy with how it turned out.
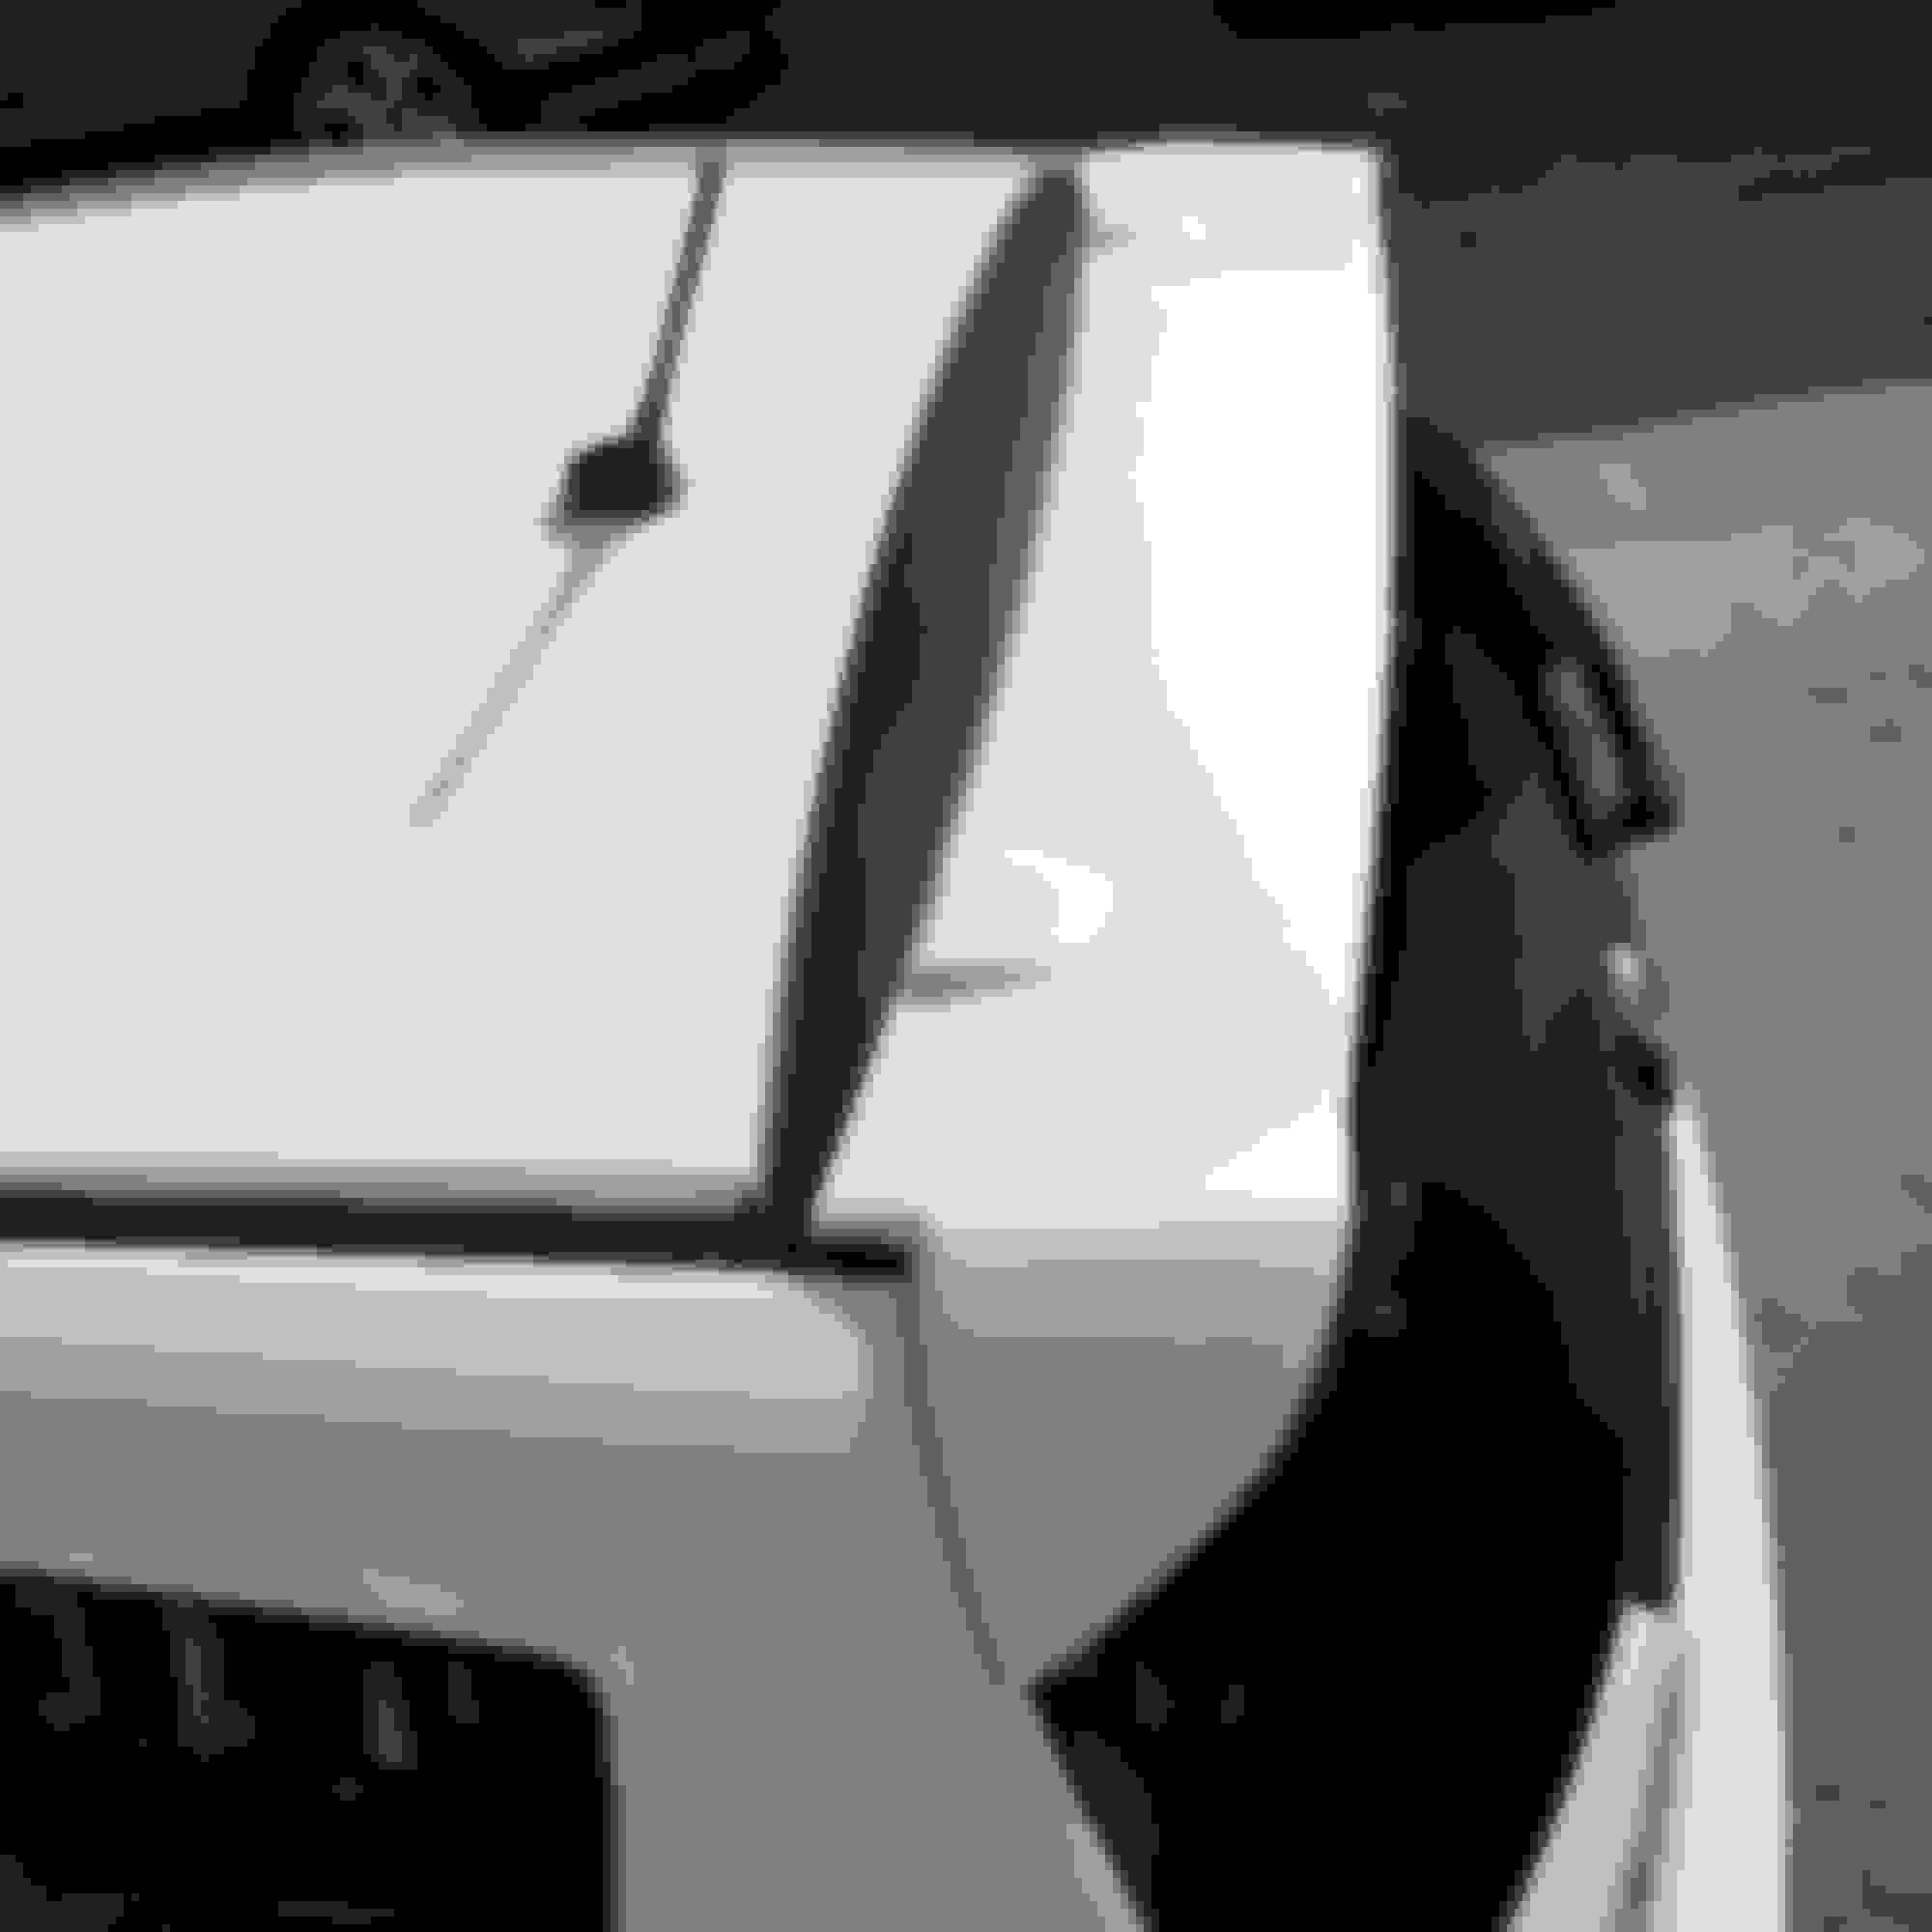
I had to remove the radio antenna and the side plastic channels from the roof.
Using a heat gun helped a lot as well.
The final result.
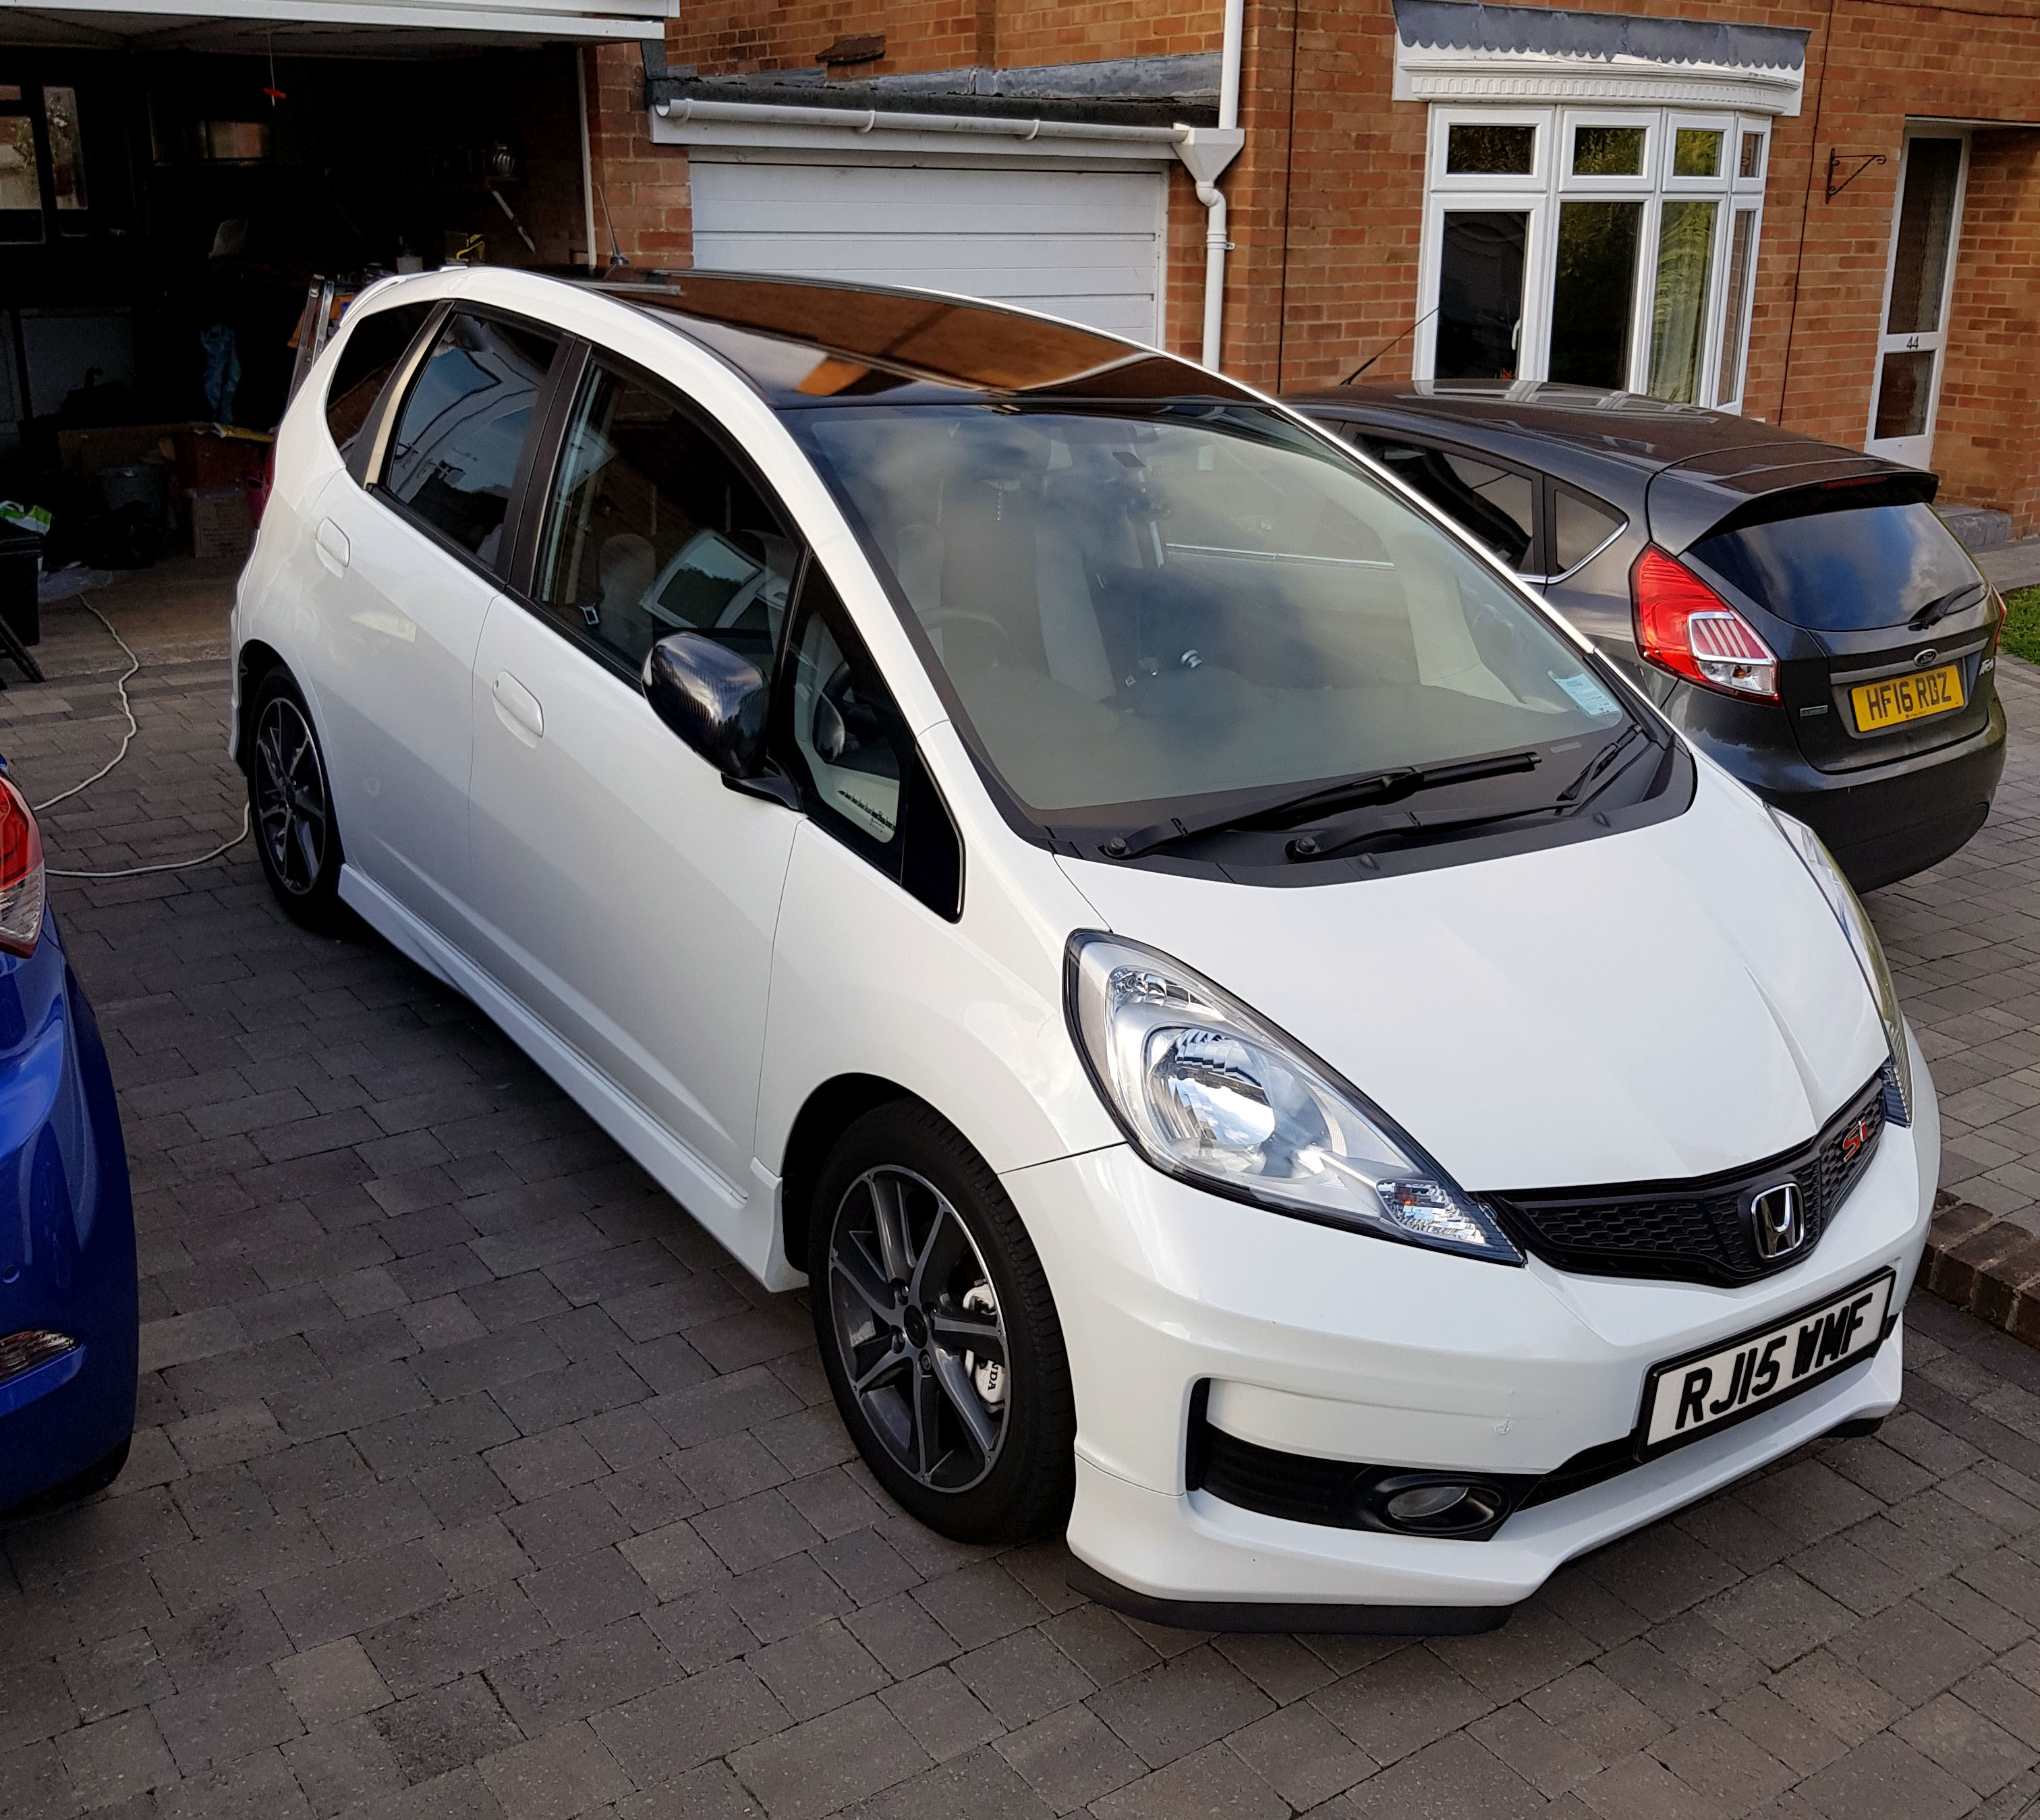
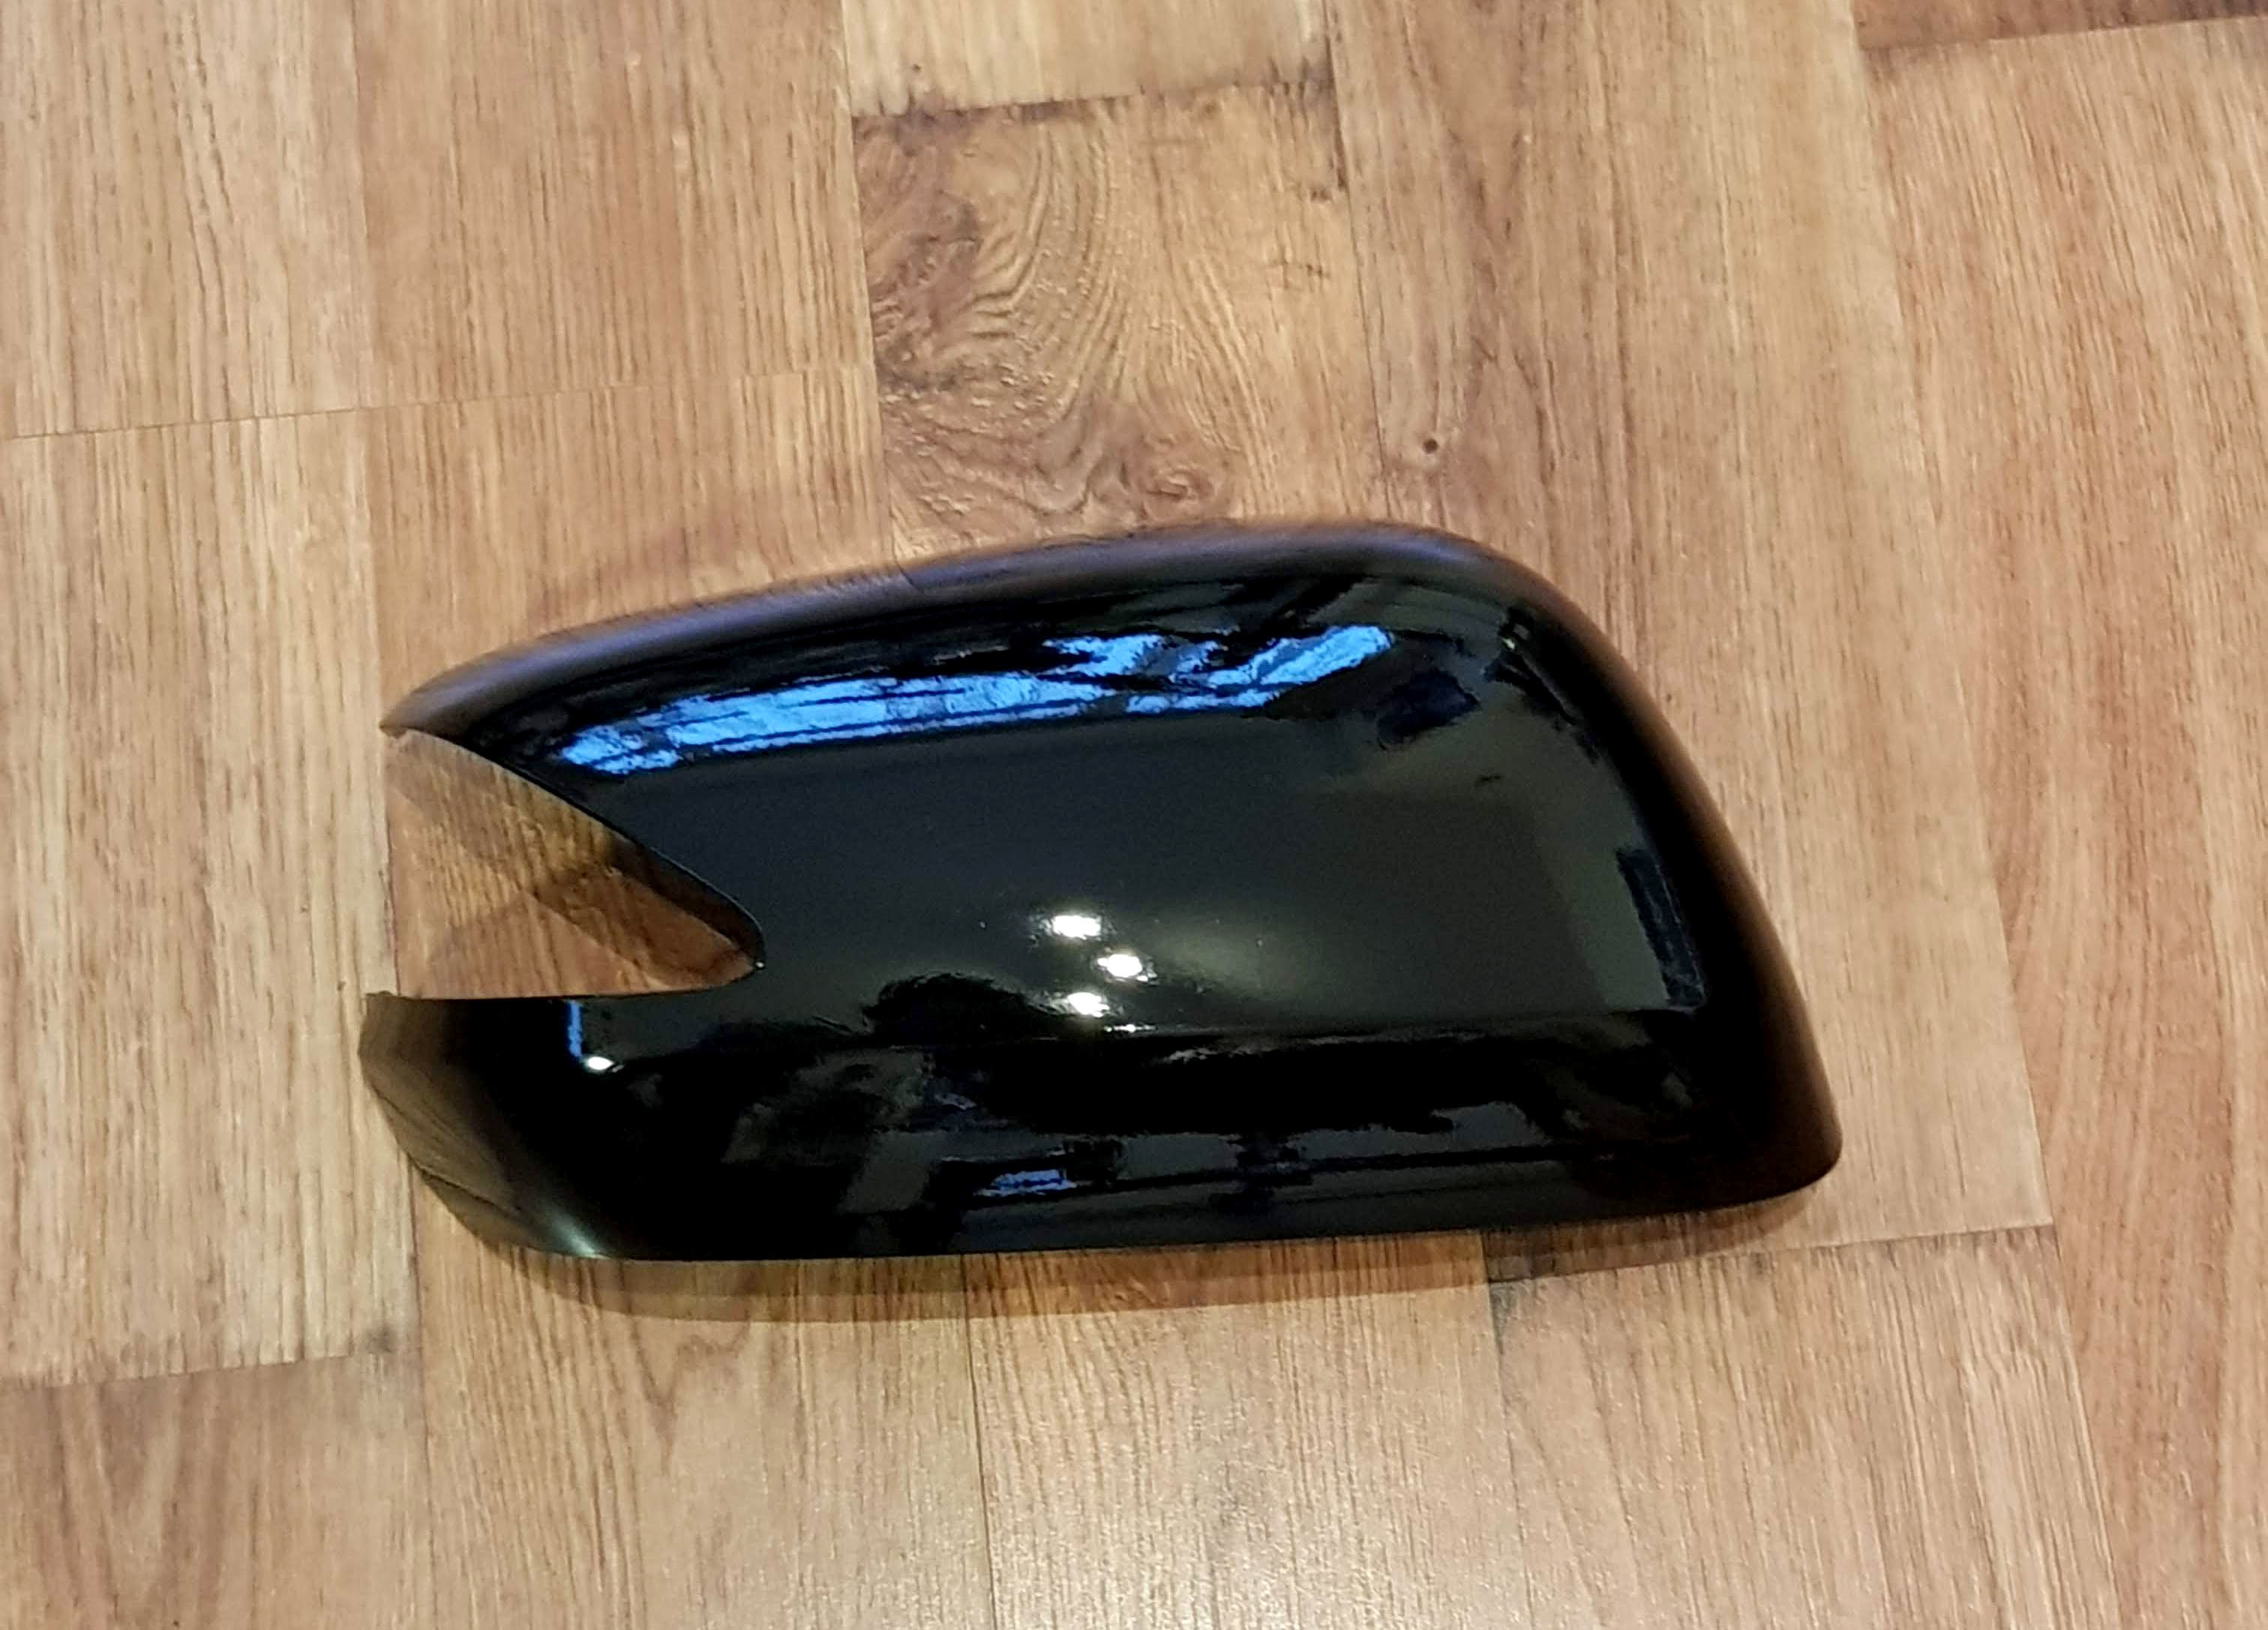
Wrapping the Mirrors in black vinyl - January 2020
I had some black vinyl left over, and I had previously wrapped the mirrors in some carbon fibre wrap I had, but I wasn't happy with the previous job, so I removed it and wrapped them with the black vinyl.
Wrapping anything with curvs is a total pain to do, and even with a heat gun, it was very difficult to do, and not for the faint hearted.
Overall I'm happy with how it turned out and looks pretty good on the car.
Future Mod plans
So I have a couple of mods planned over the coming months.
I have another roll of Black gloss vinyl and intend to wrap the bonnet black as well.
I have some Mugen Wind Visors coming from Japan.
I am working on a cold air intake system, but trying to figure out where to place the ducting is proving to be a pain.
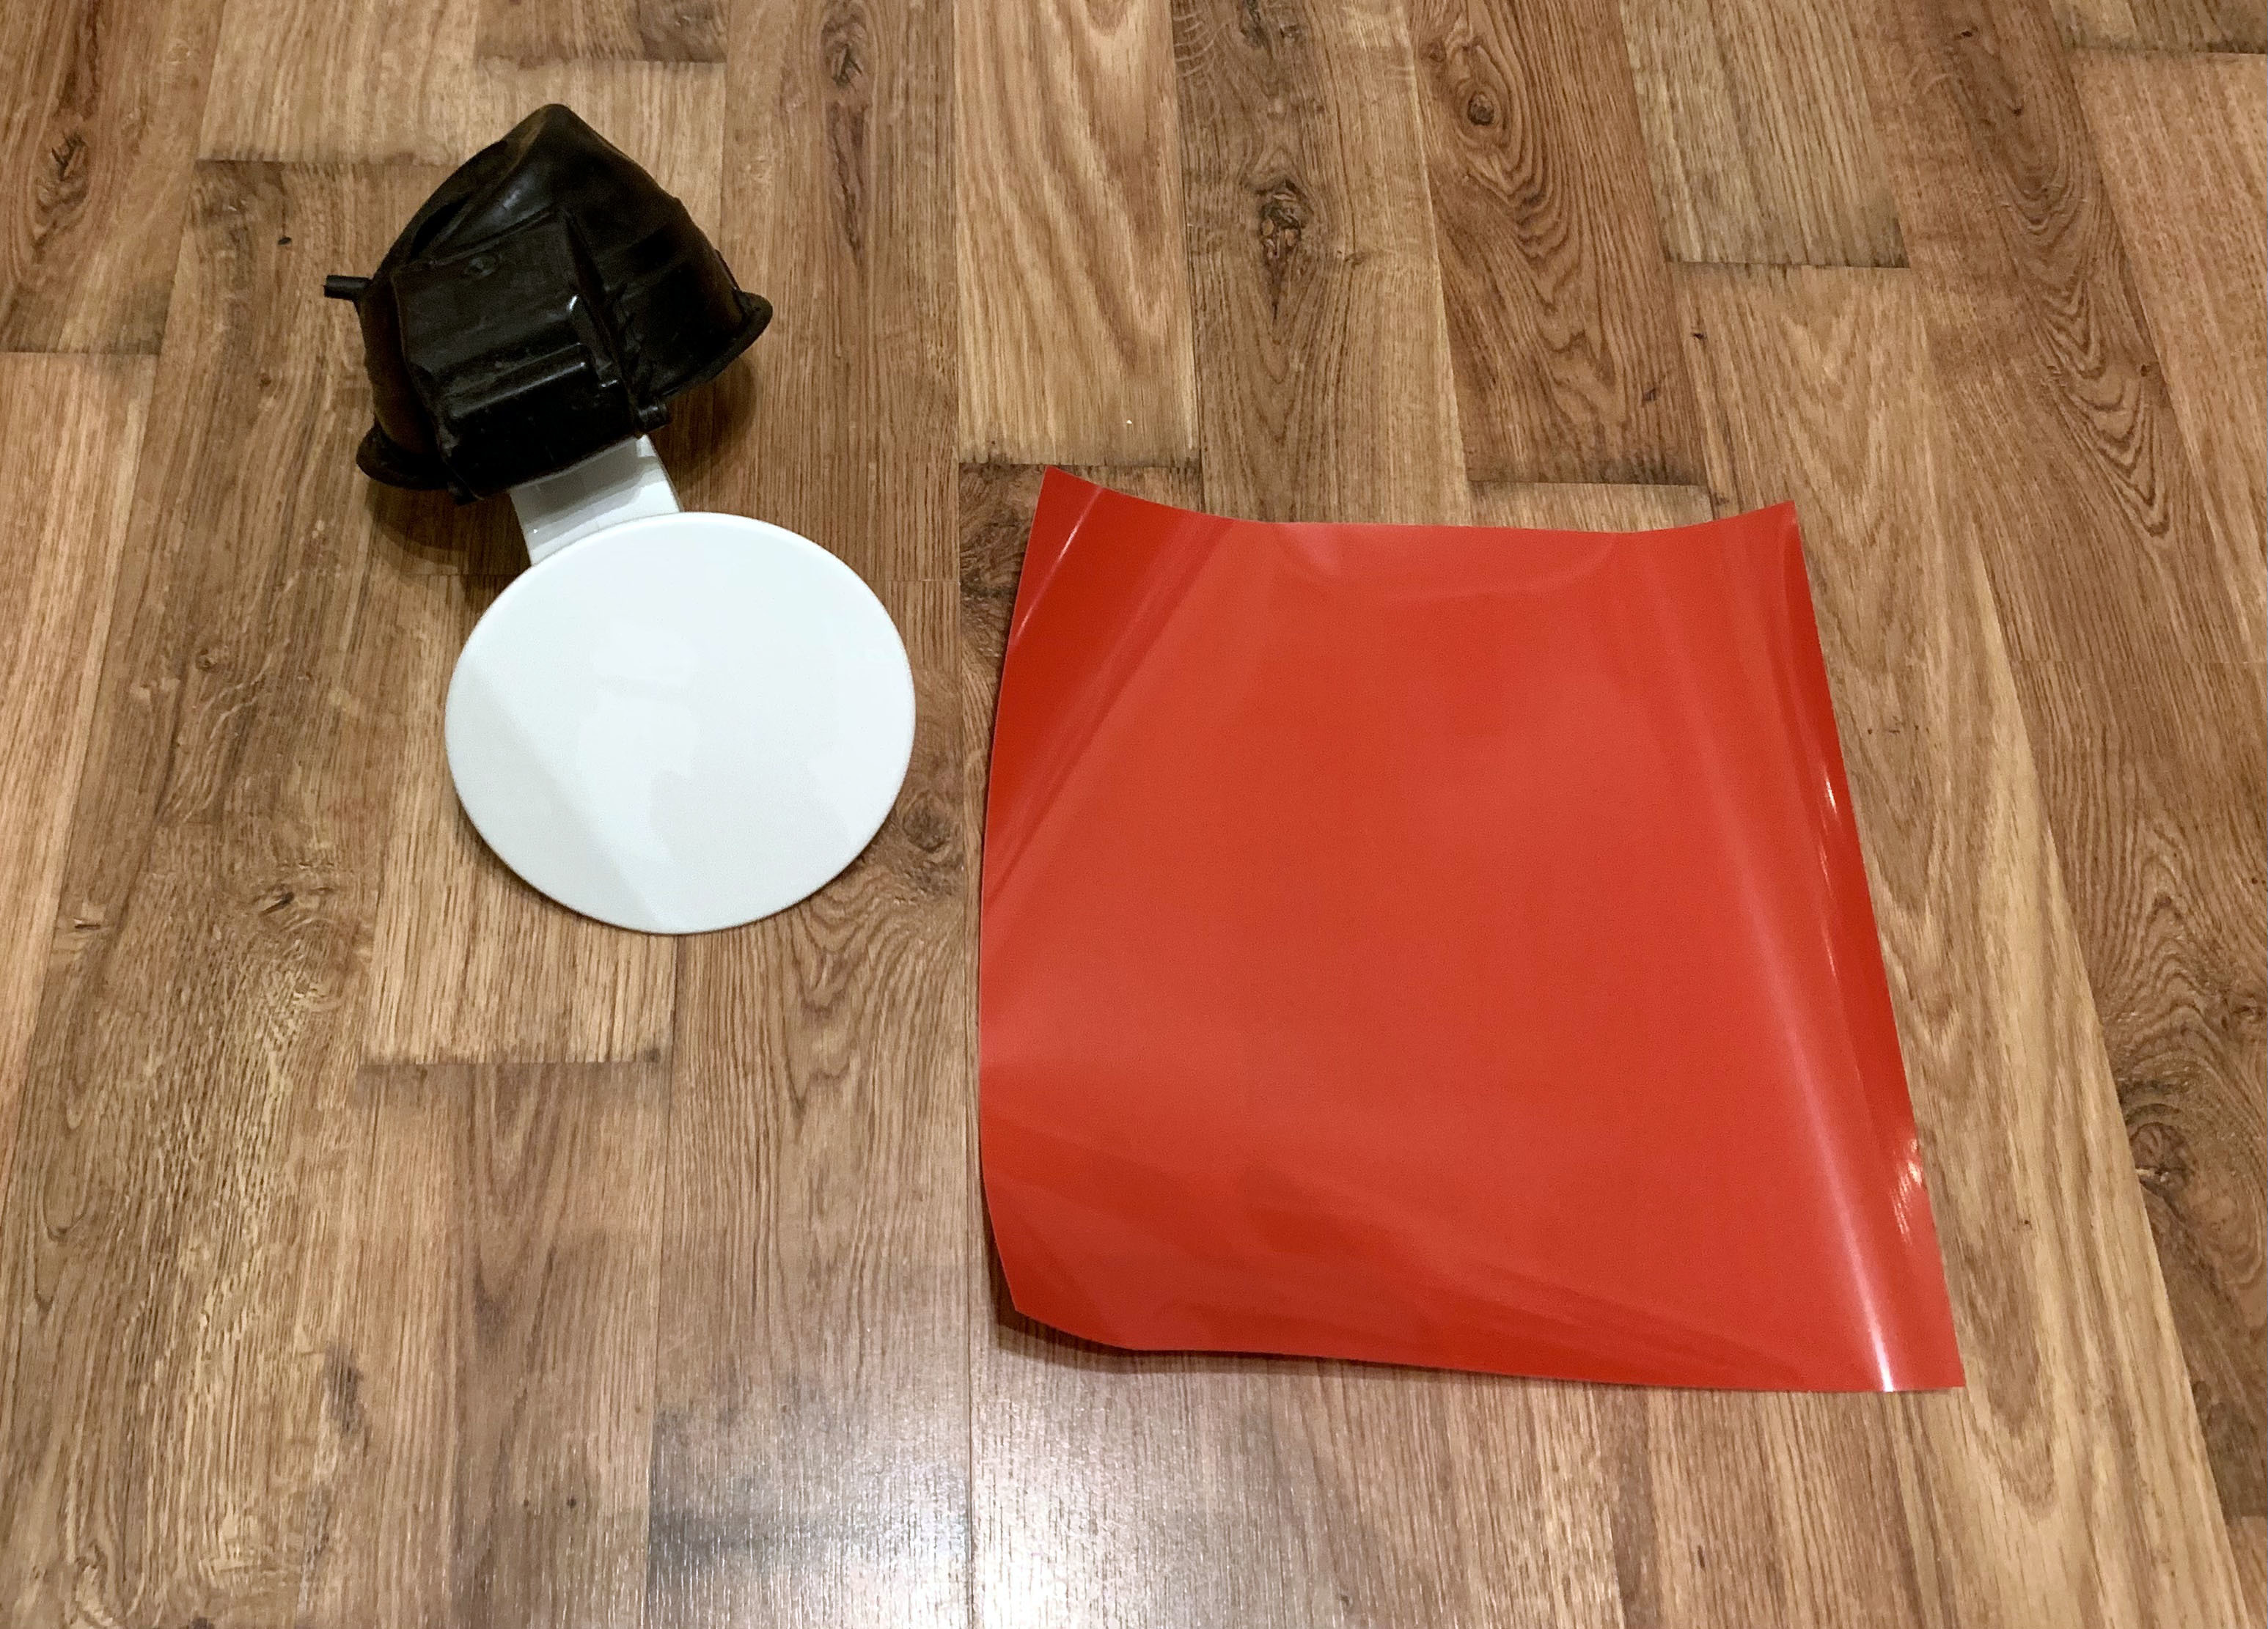
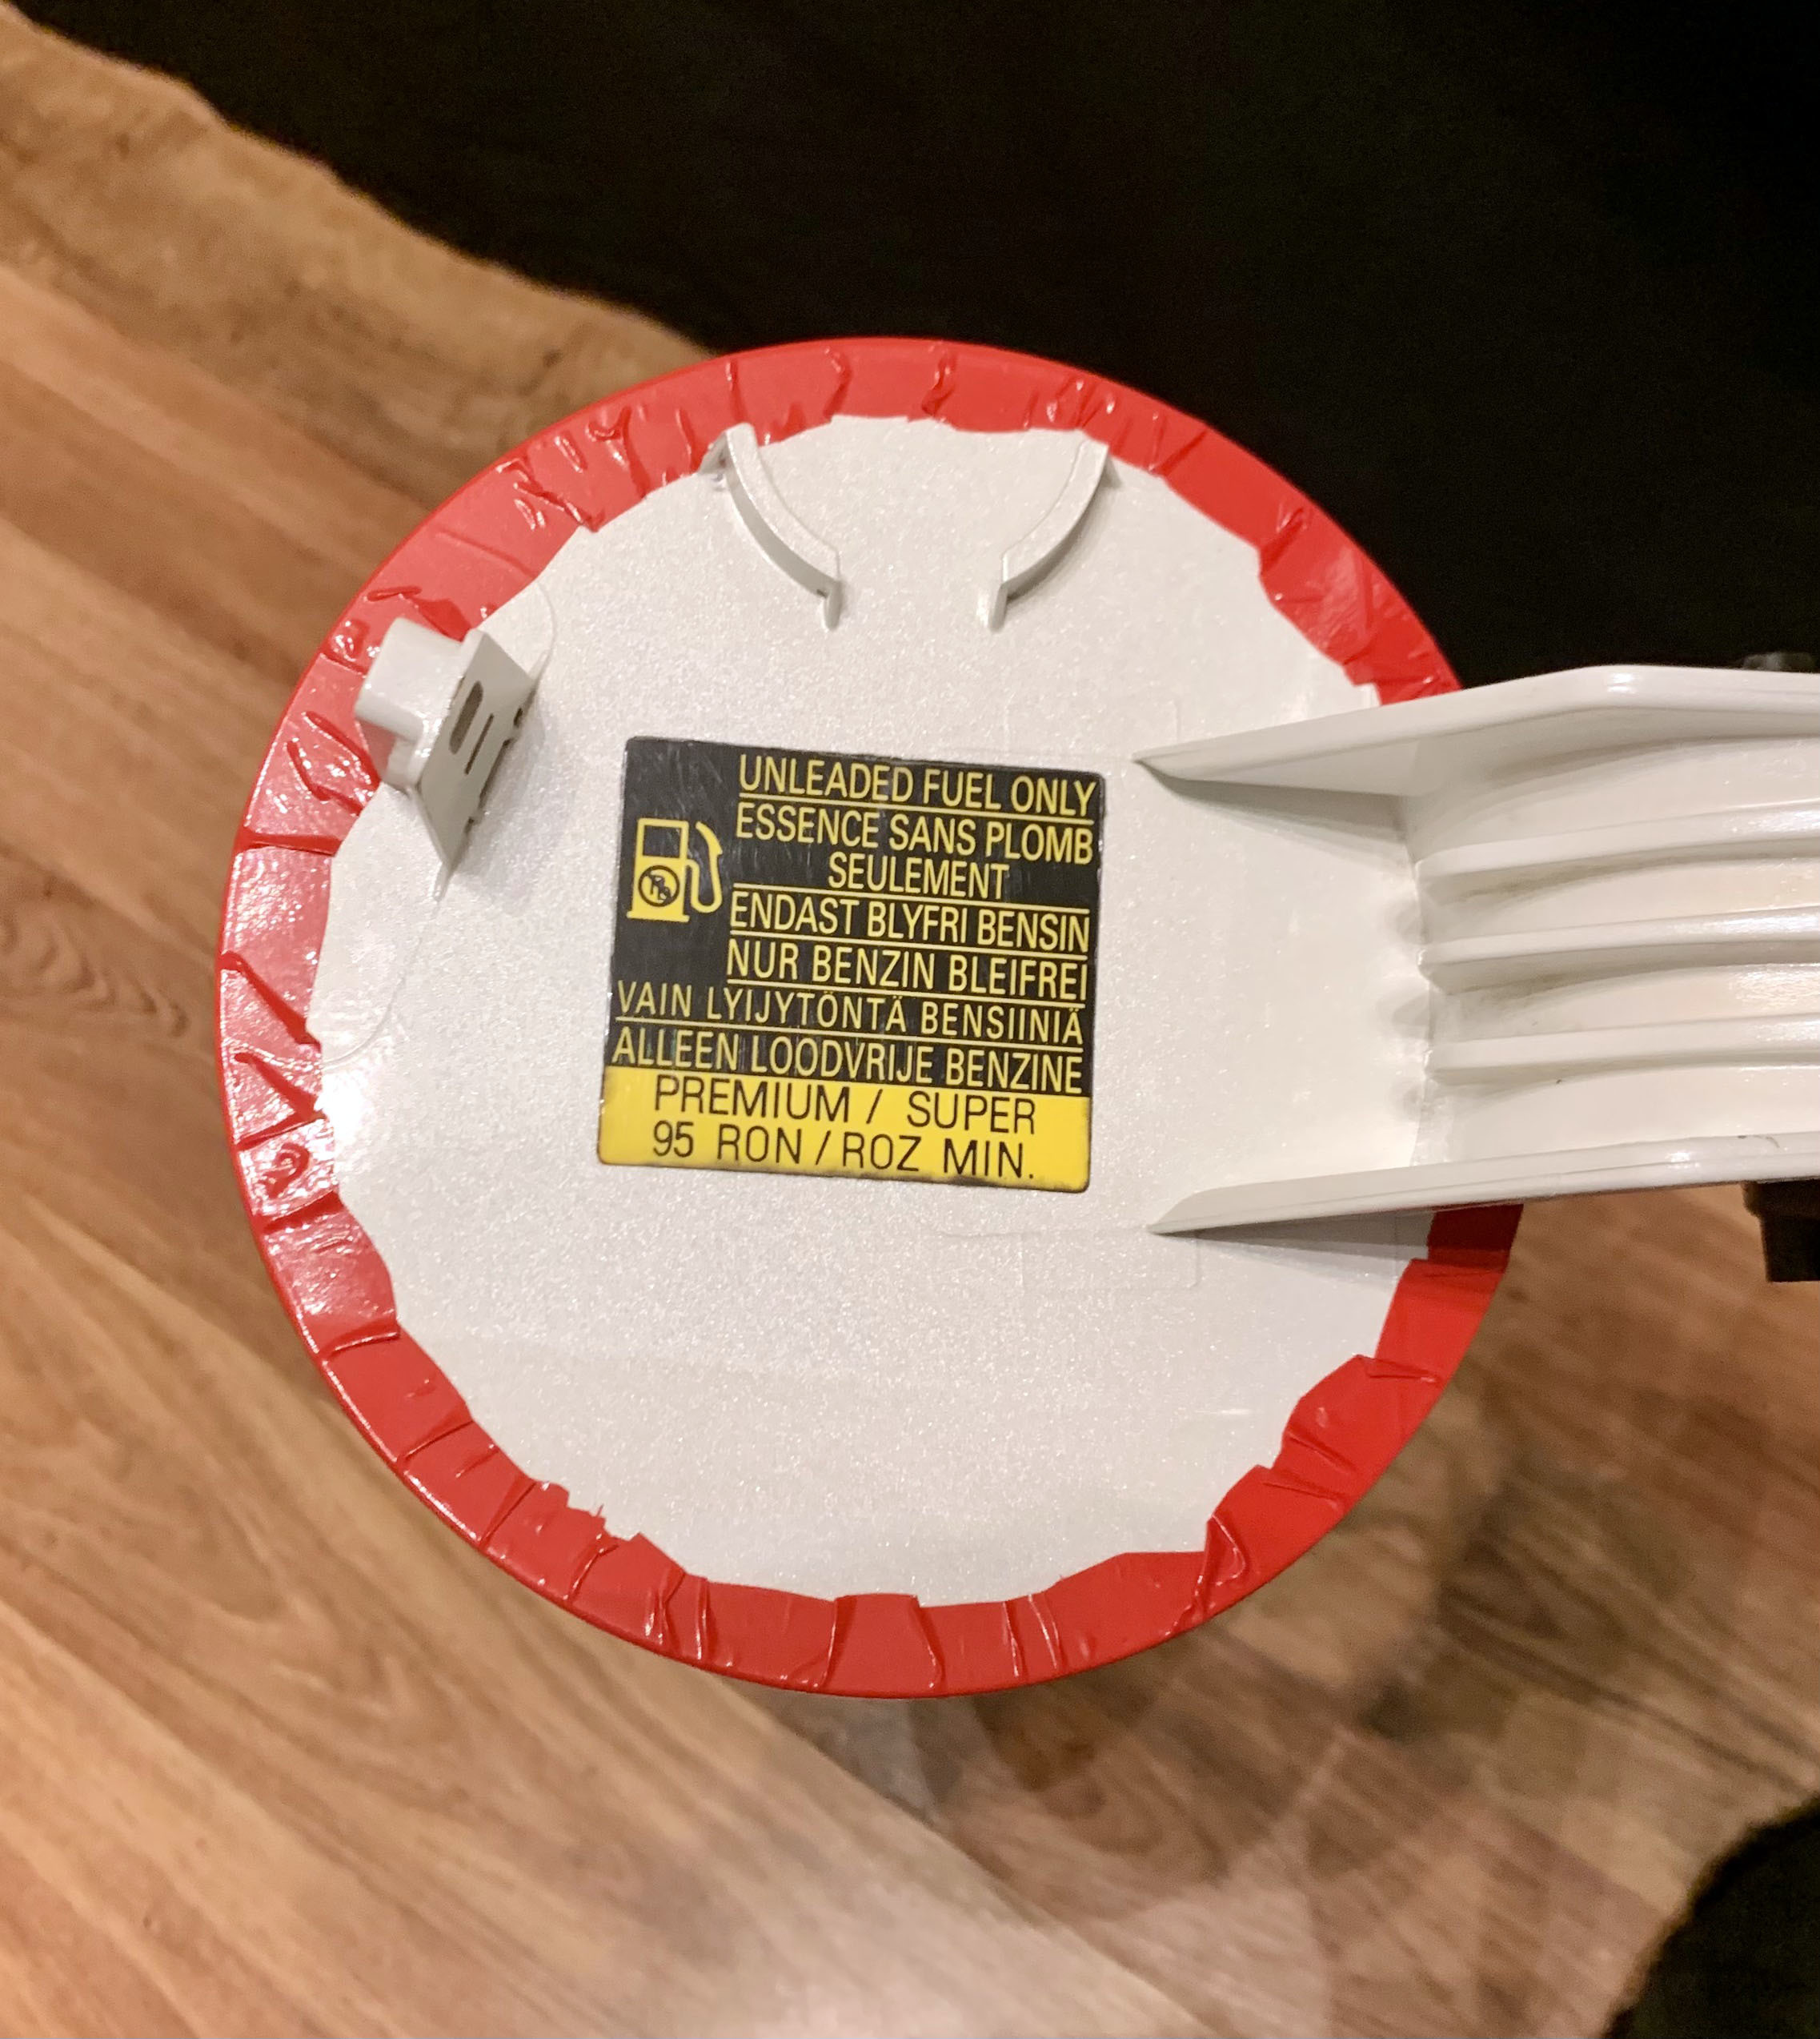
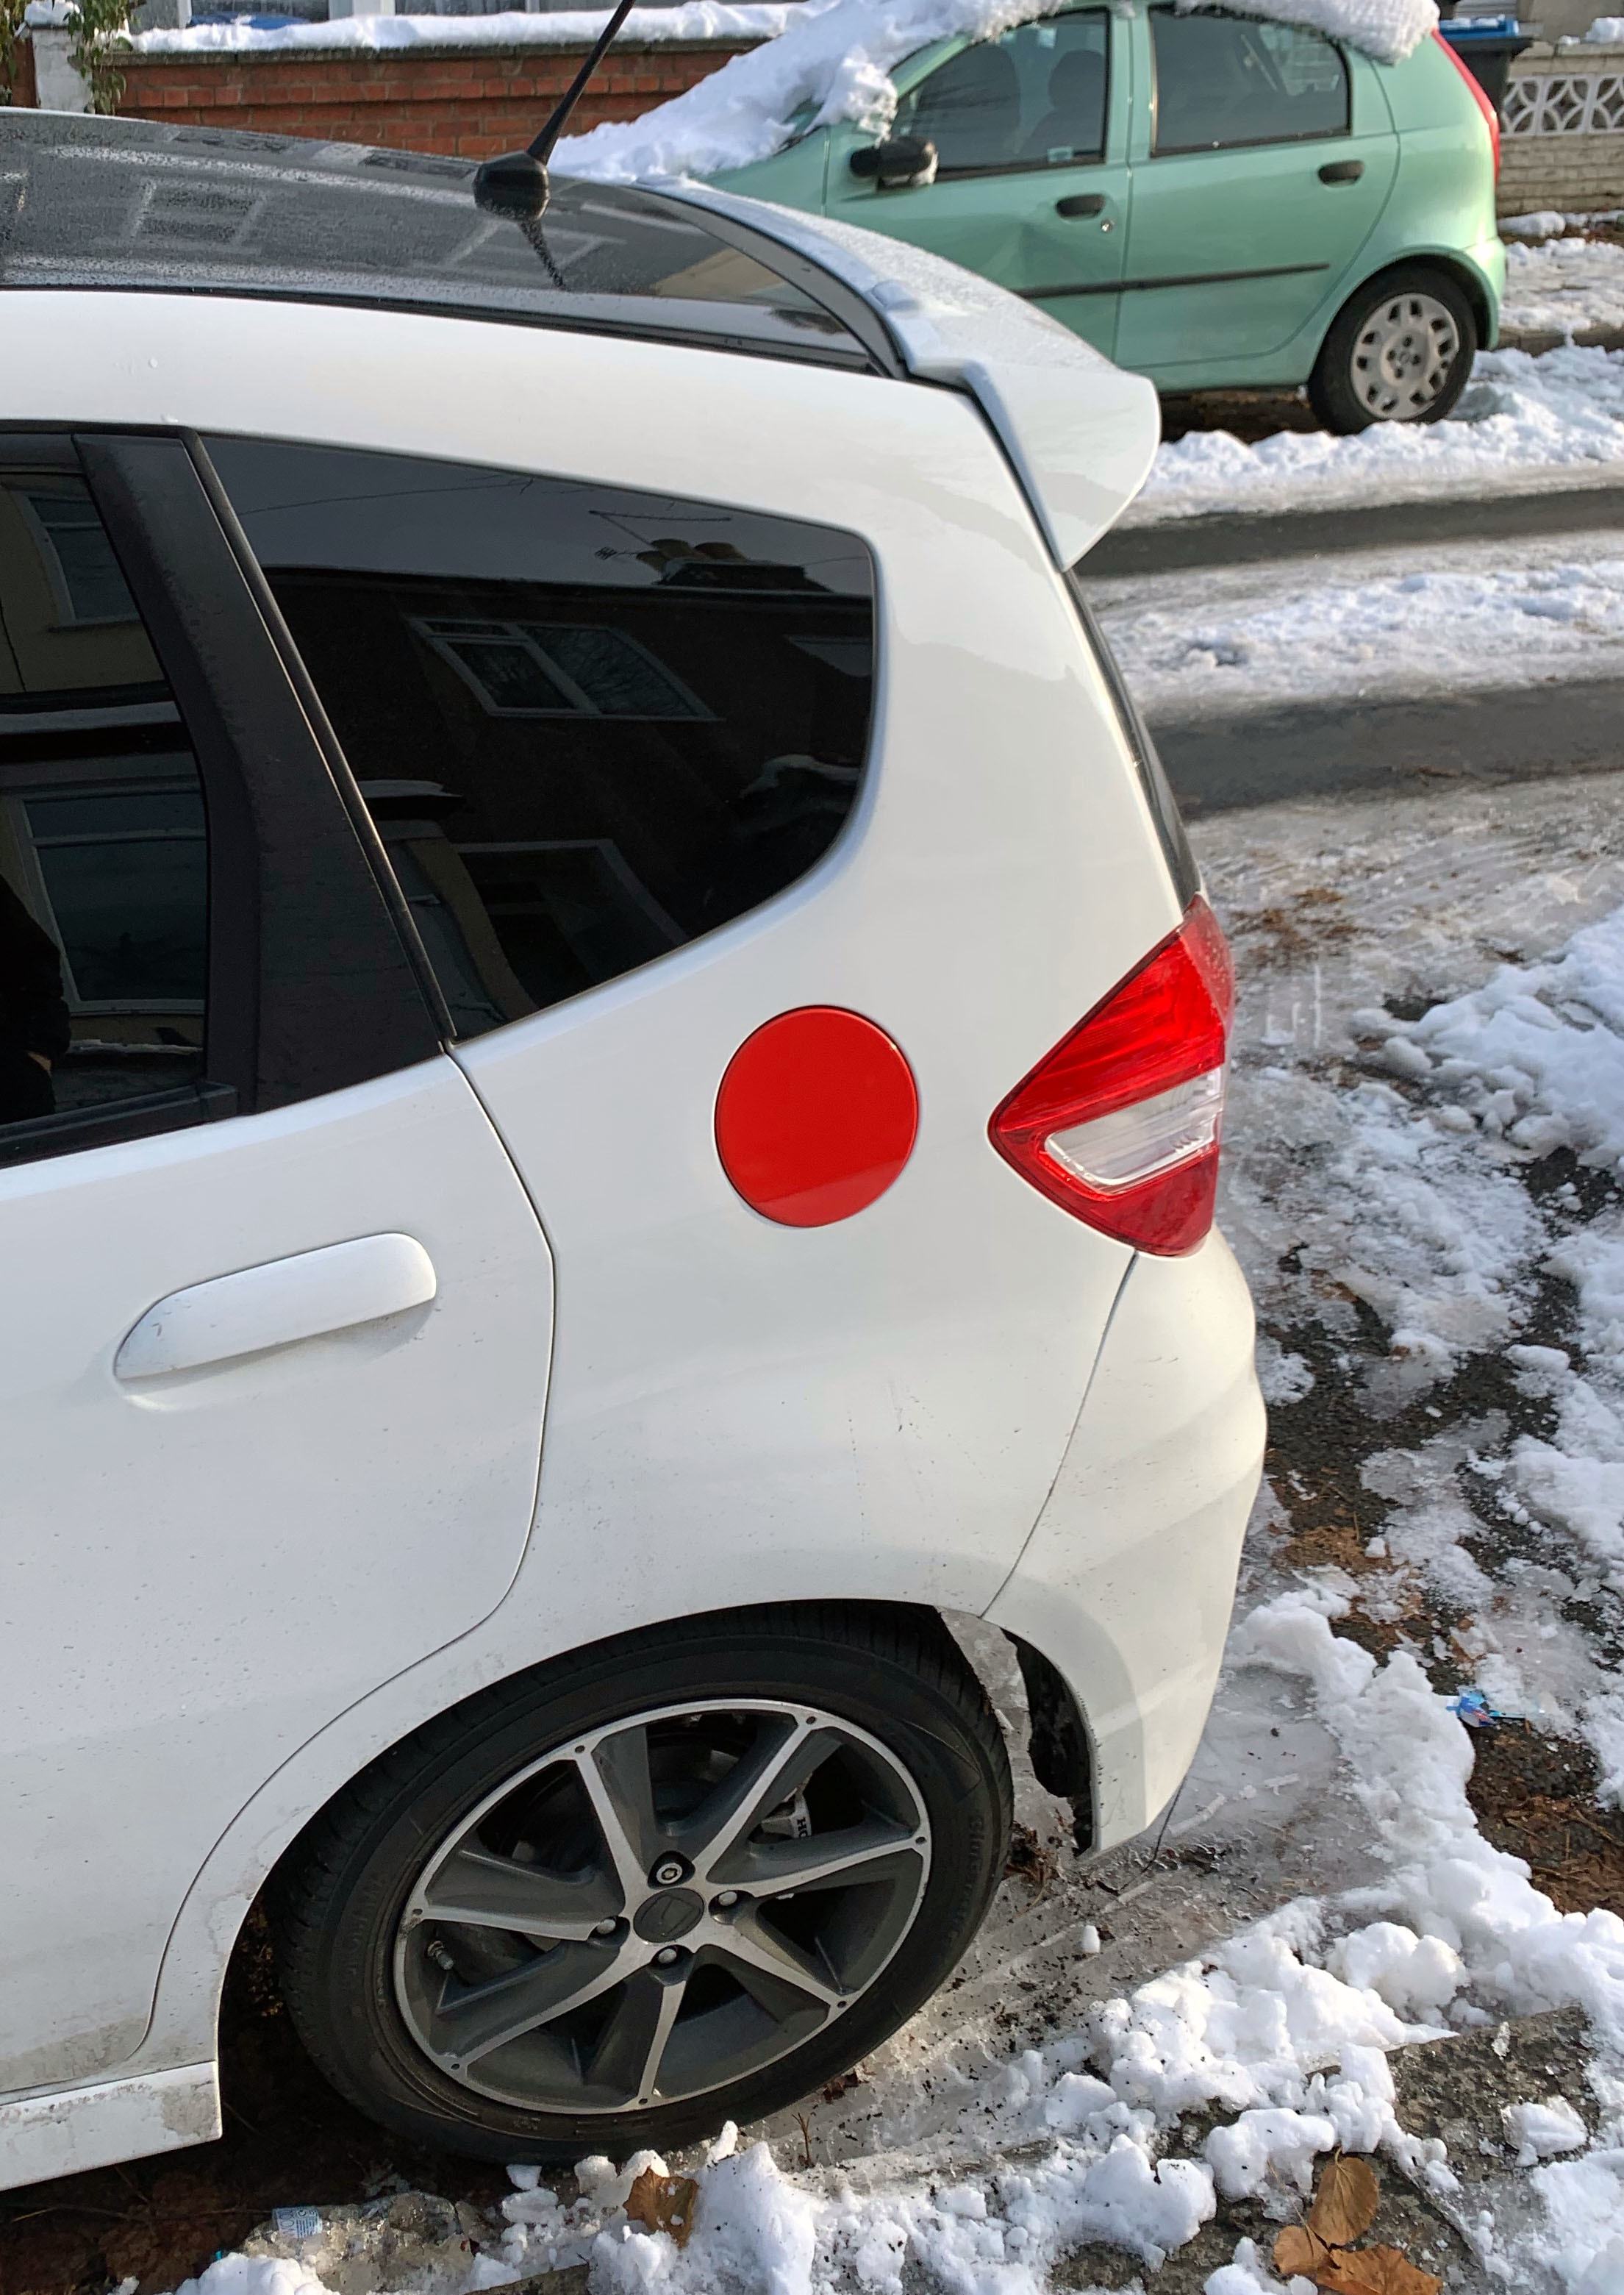
I had some red vinyl wrap spare from a work project and thought it might be fun to wrap the fuel cap red for that Japanese Flag look:
I don't know if I will be keeping it forever, but it's a nice simple touch that stands out.
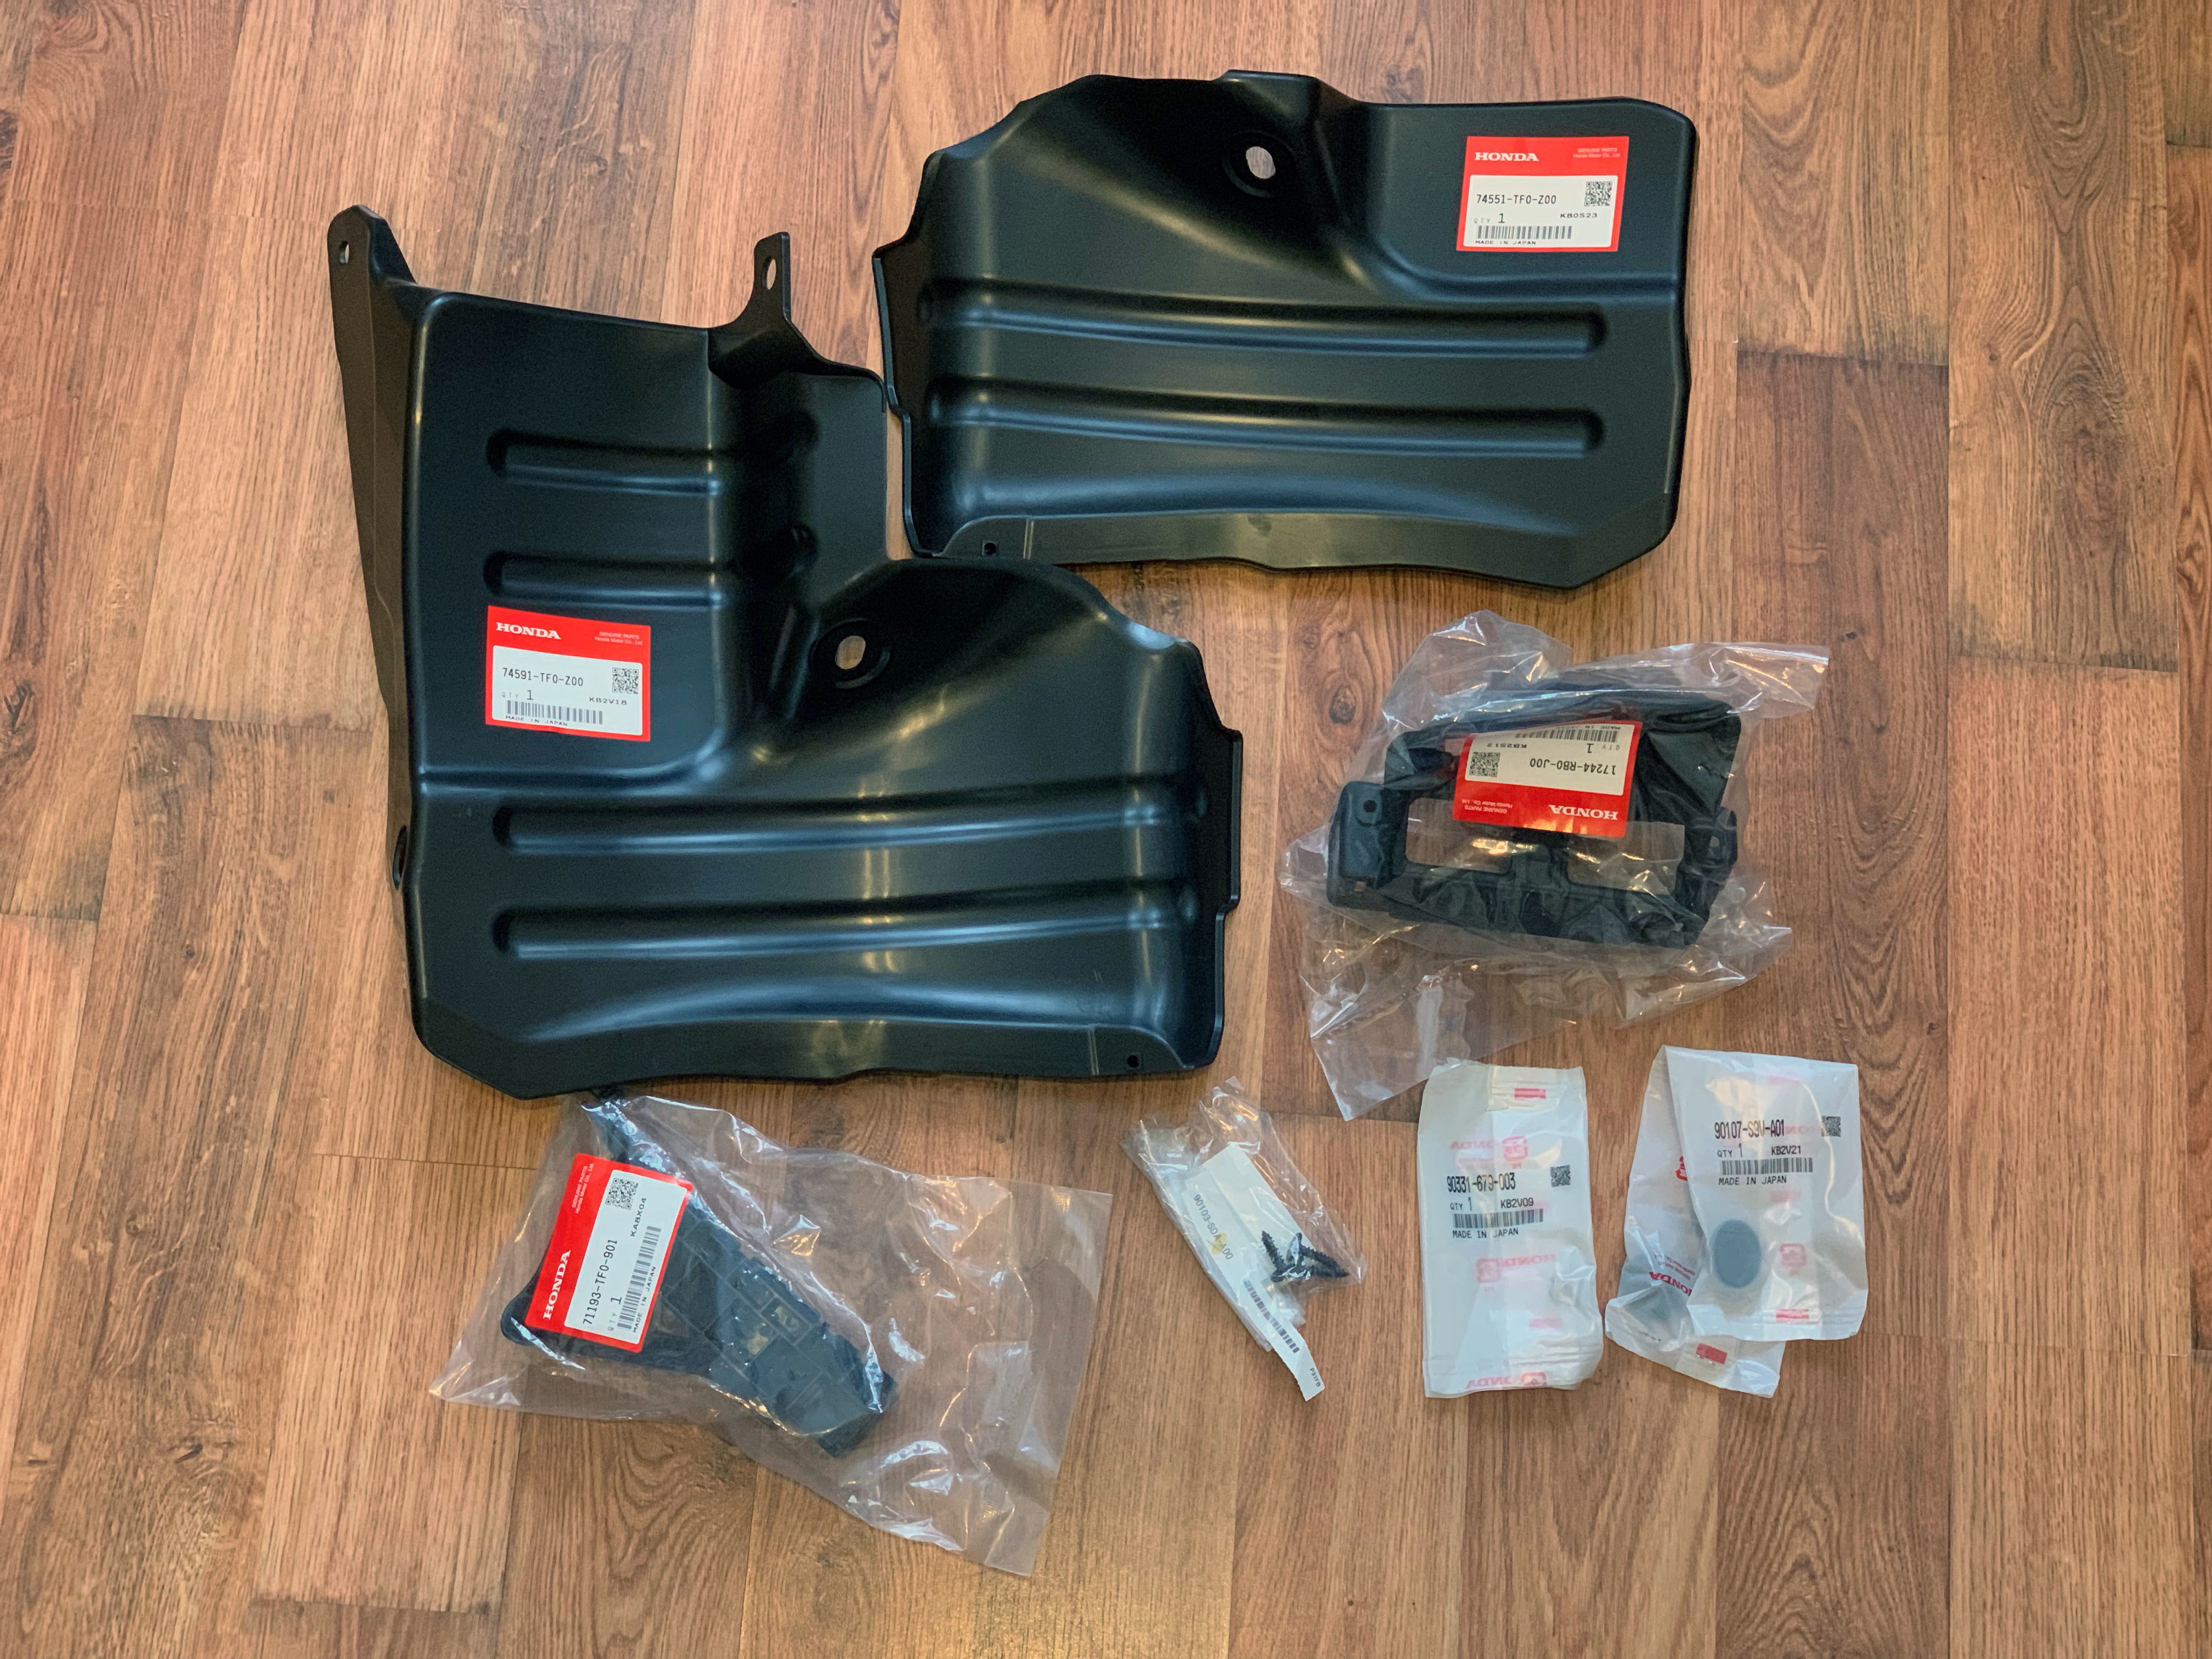
New Honda Parts and Air duct from Japan
I found out it's actually cheaper to order New Honda parts from Japan through Amayama.com than it is to buy from Honda UK in many cases.
I needed some new mud covers for my rear bumper, as the previous owner of my car had replaced the rear bumper from one from a EX and then just cut the mud covers. So when I put the correct bumper on the car, the covers had a gap where it was cut.
I also needed some new clips and a front bumper mount, as I had damaged the current one and broken clips when I removed the front bumper, so the front bumper no longer sits correctly.
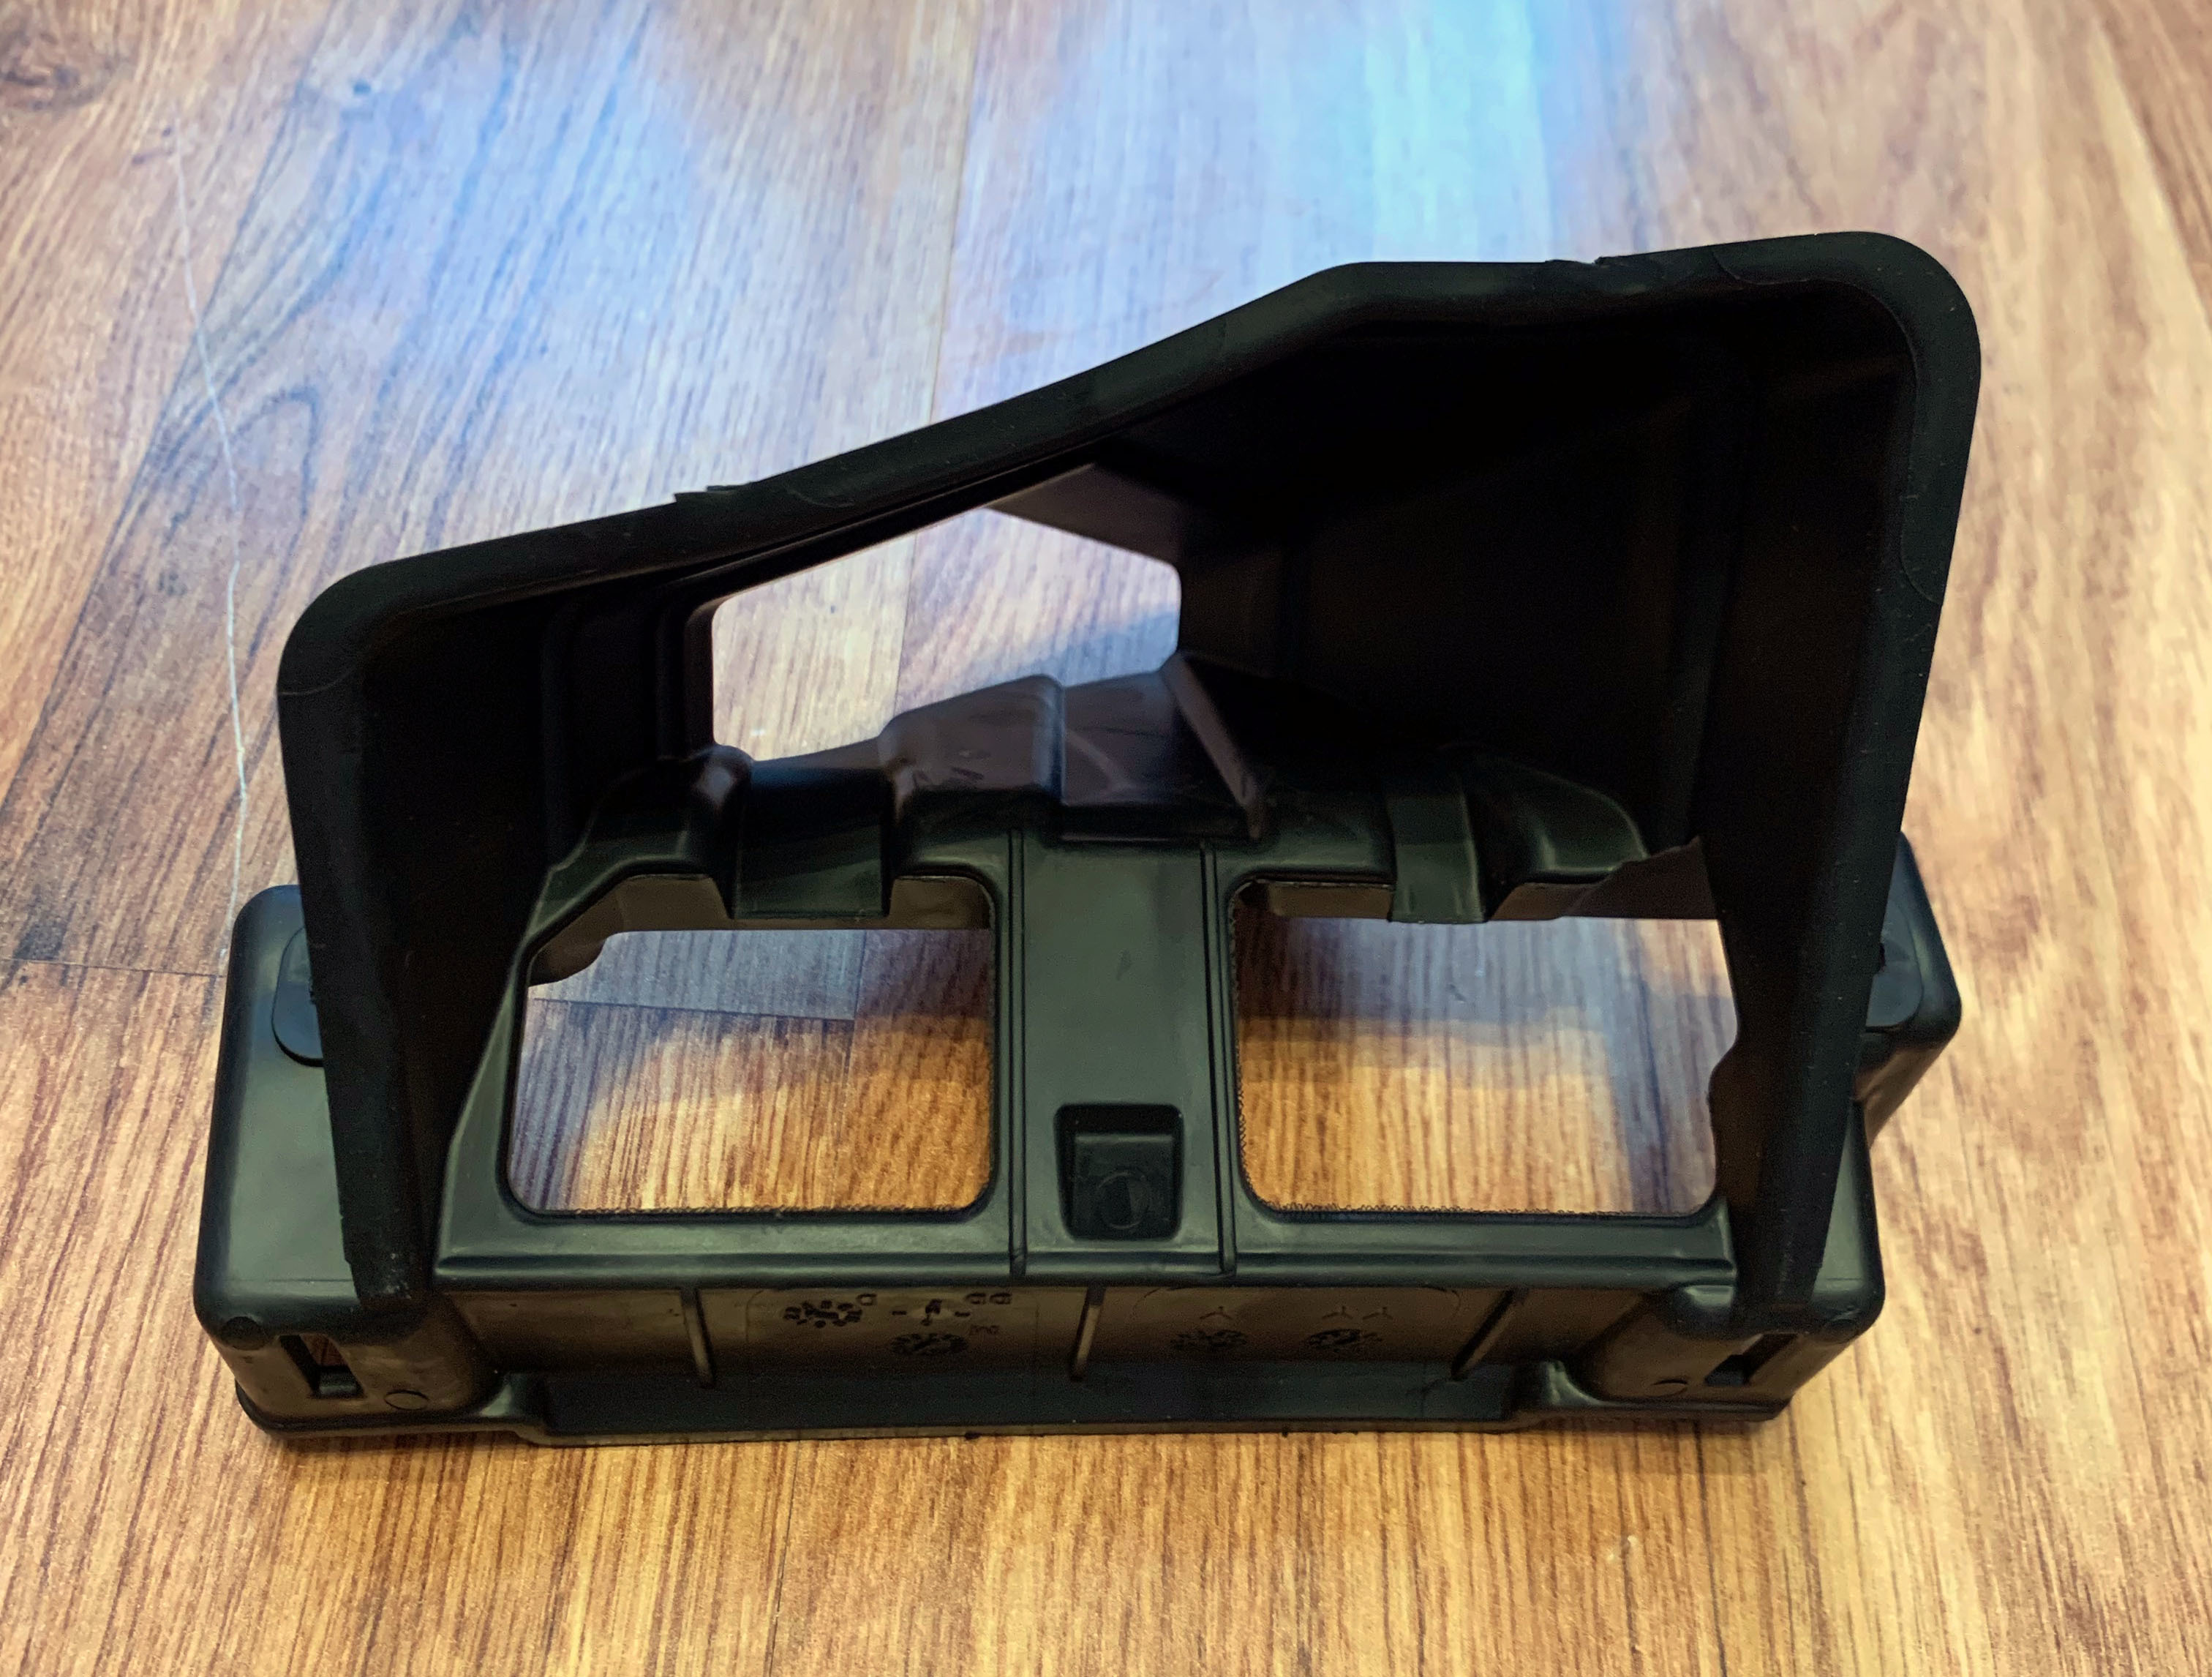
I also learned that some Japanese models come with this air duct to help airflow, and some people fit it to their Jazz to aid performance/MPG. Here's where I found the information: LINK.
The part number is 17244-RB0-J00, and it was �8+delivery. I don't actually know if it has made much of a difference to be honest, but I felt it was worth a try.
I had to glue it to the top of the ECU cover, as I didn't want to order the ECU cover that has the clips for the duct as well.
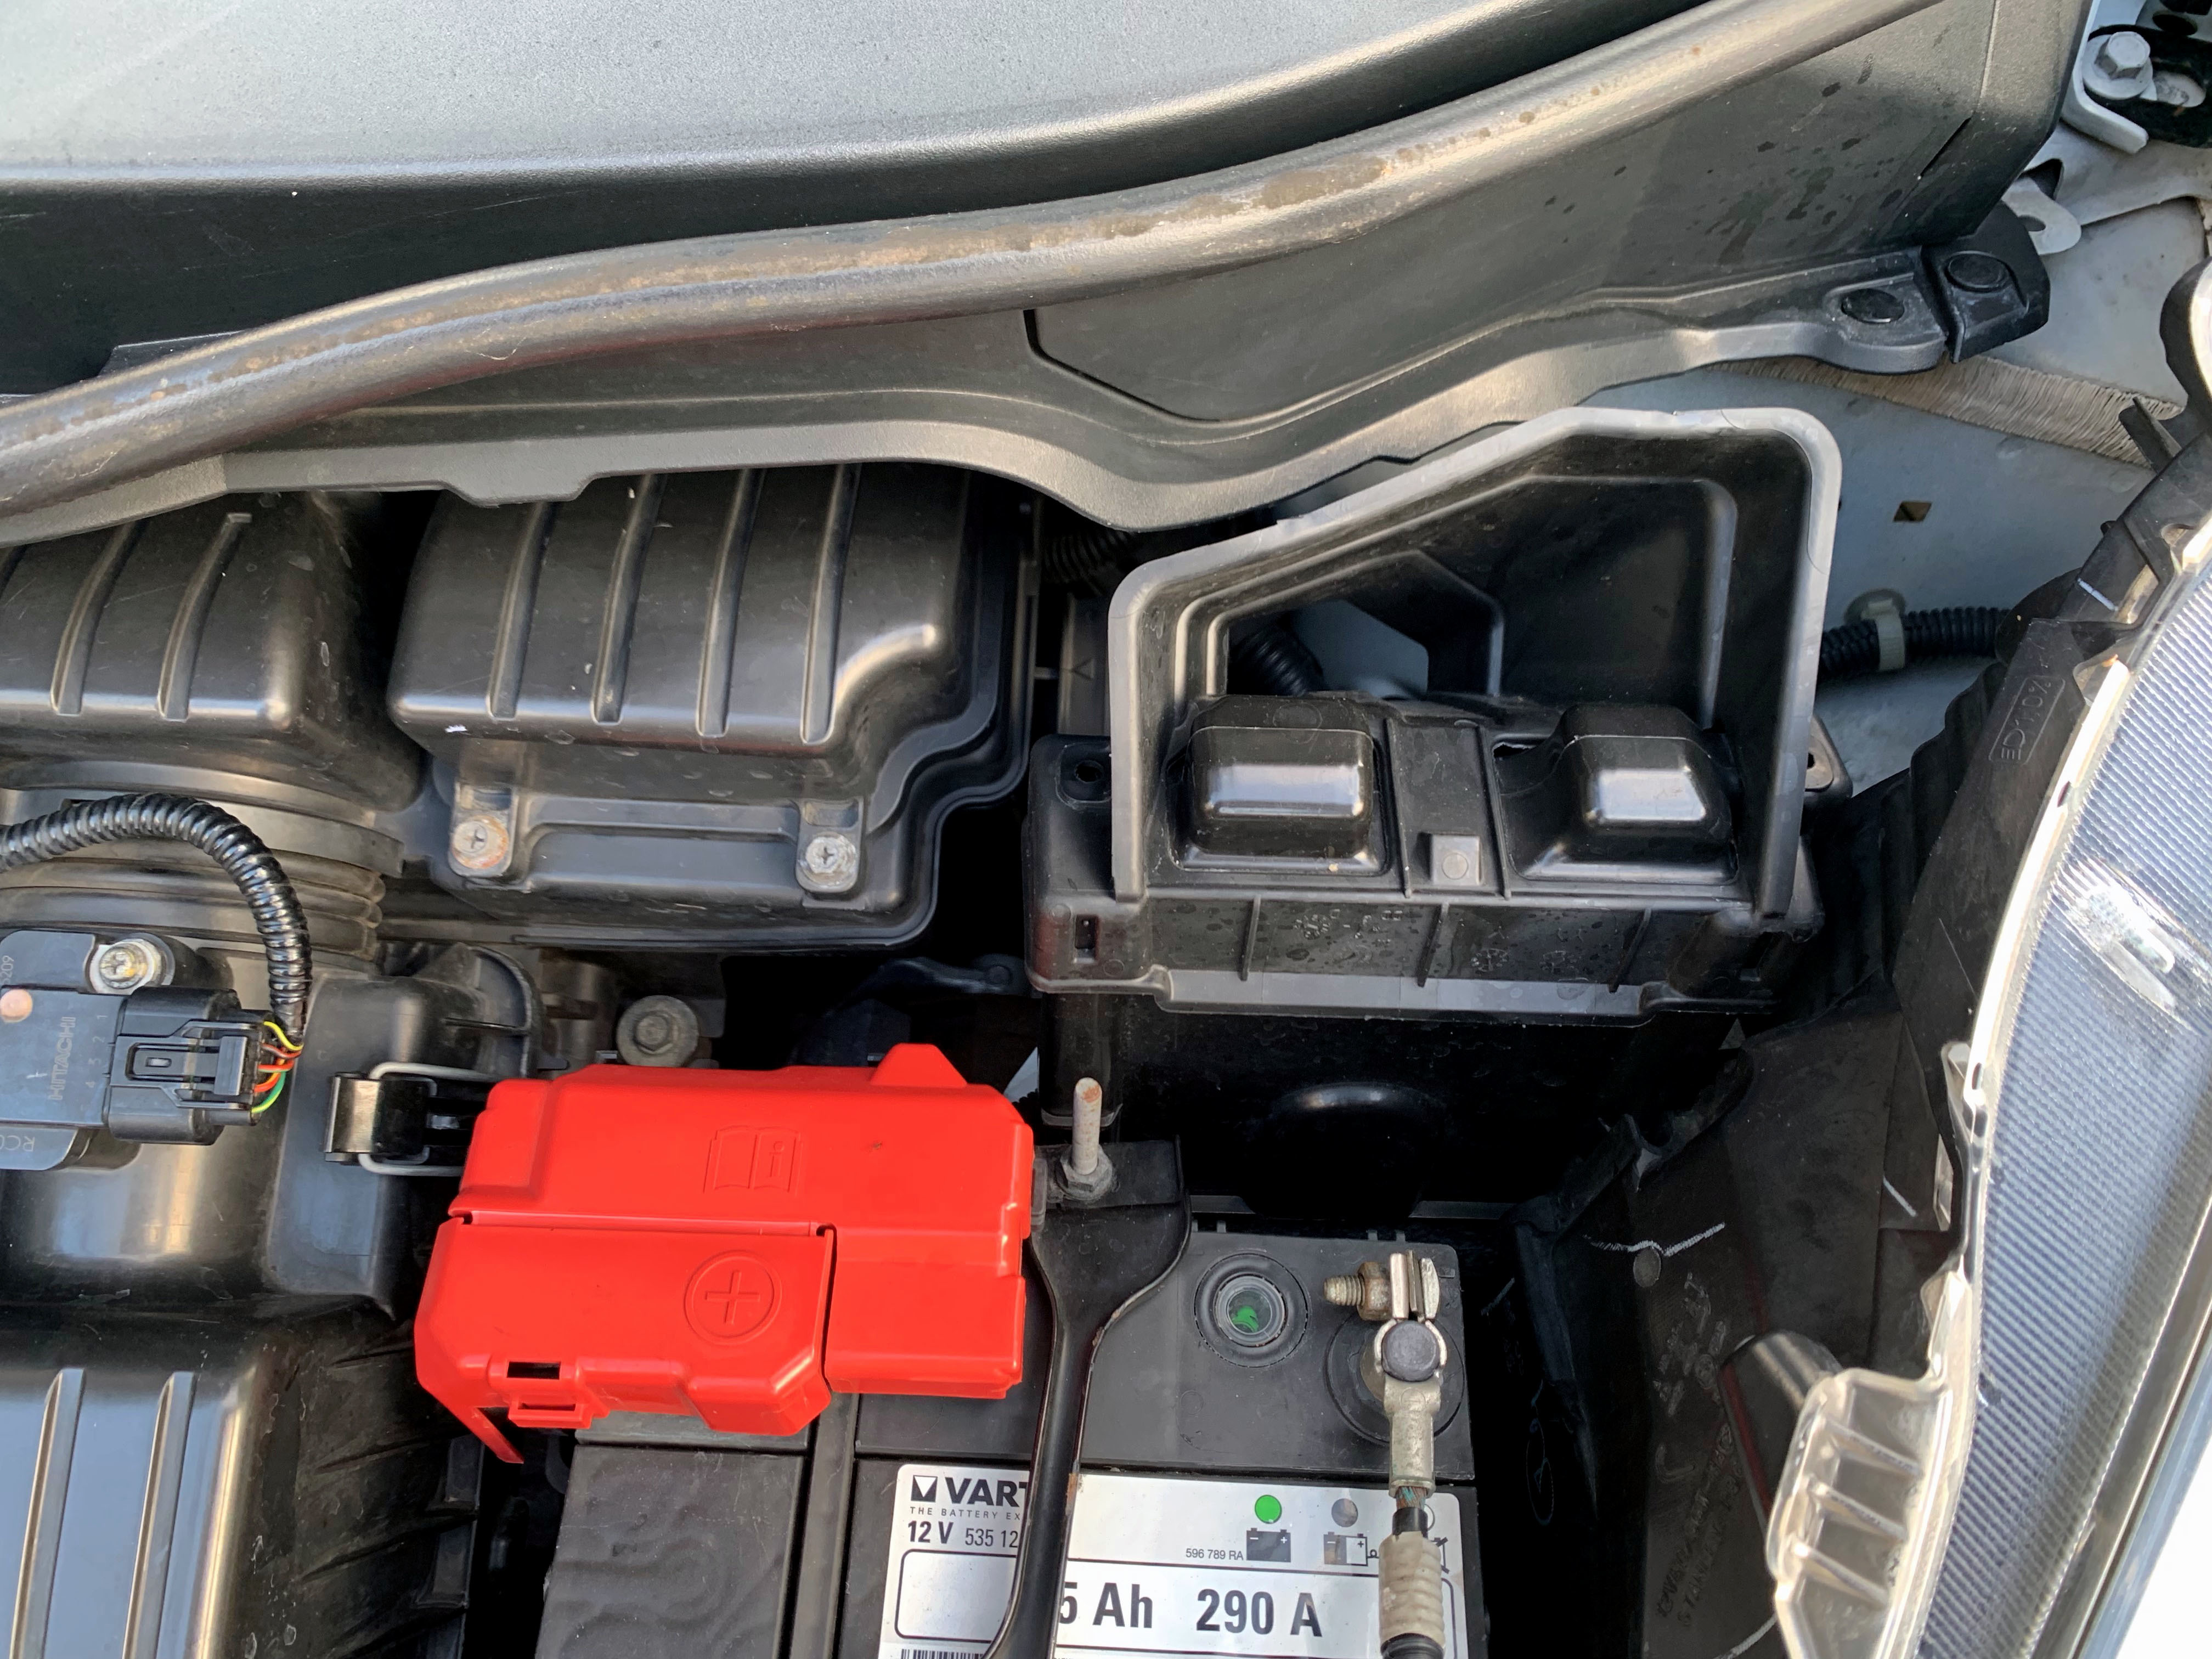
Bonnet Air Duct Refitted
I hadn't realised that the duct on the bonnet had actually made quite the difference to my MPG since I removed it to install the sound deadening. I assumed the drop was because of the 60KG of sound insulation that I added to the Jazz.
I set about removing enough of the sound deadening to allow the refitment of the duct. I also used some aluminium tape to smooth off the surface for better air flow I guess.
The MPG has definitely gotten better. I happily average around 44/45mpg now, which was around 42mpg before.
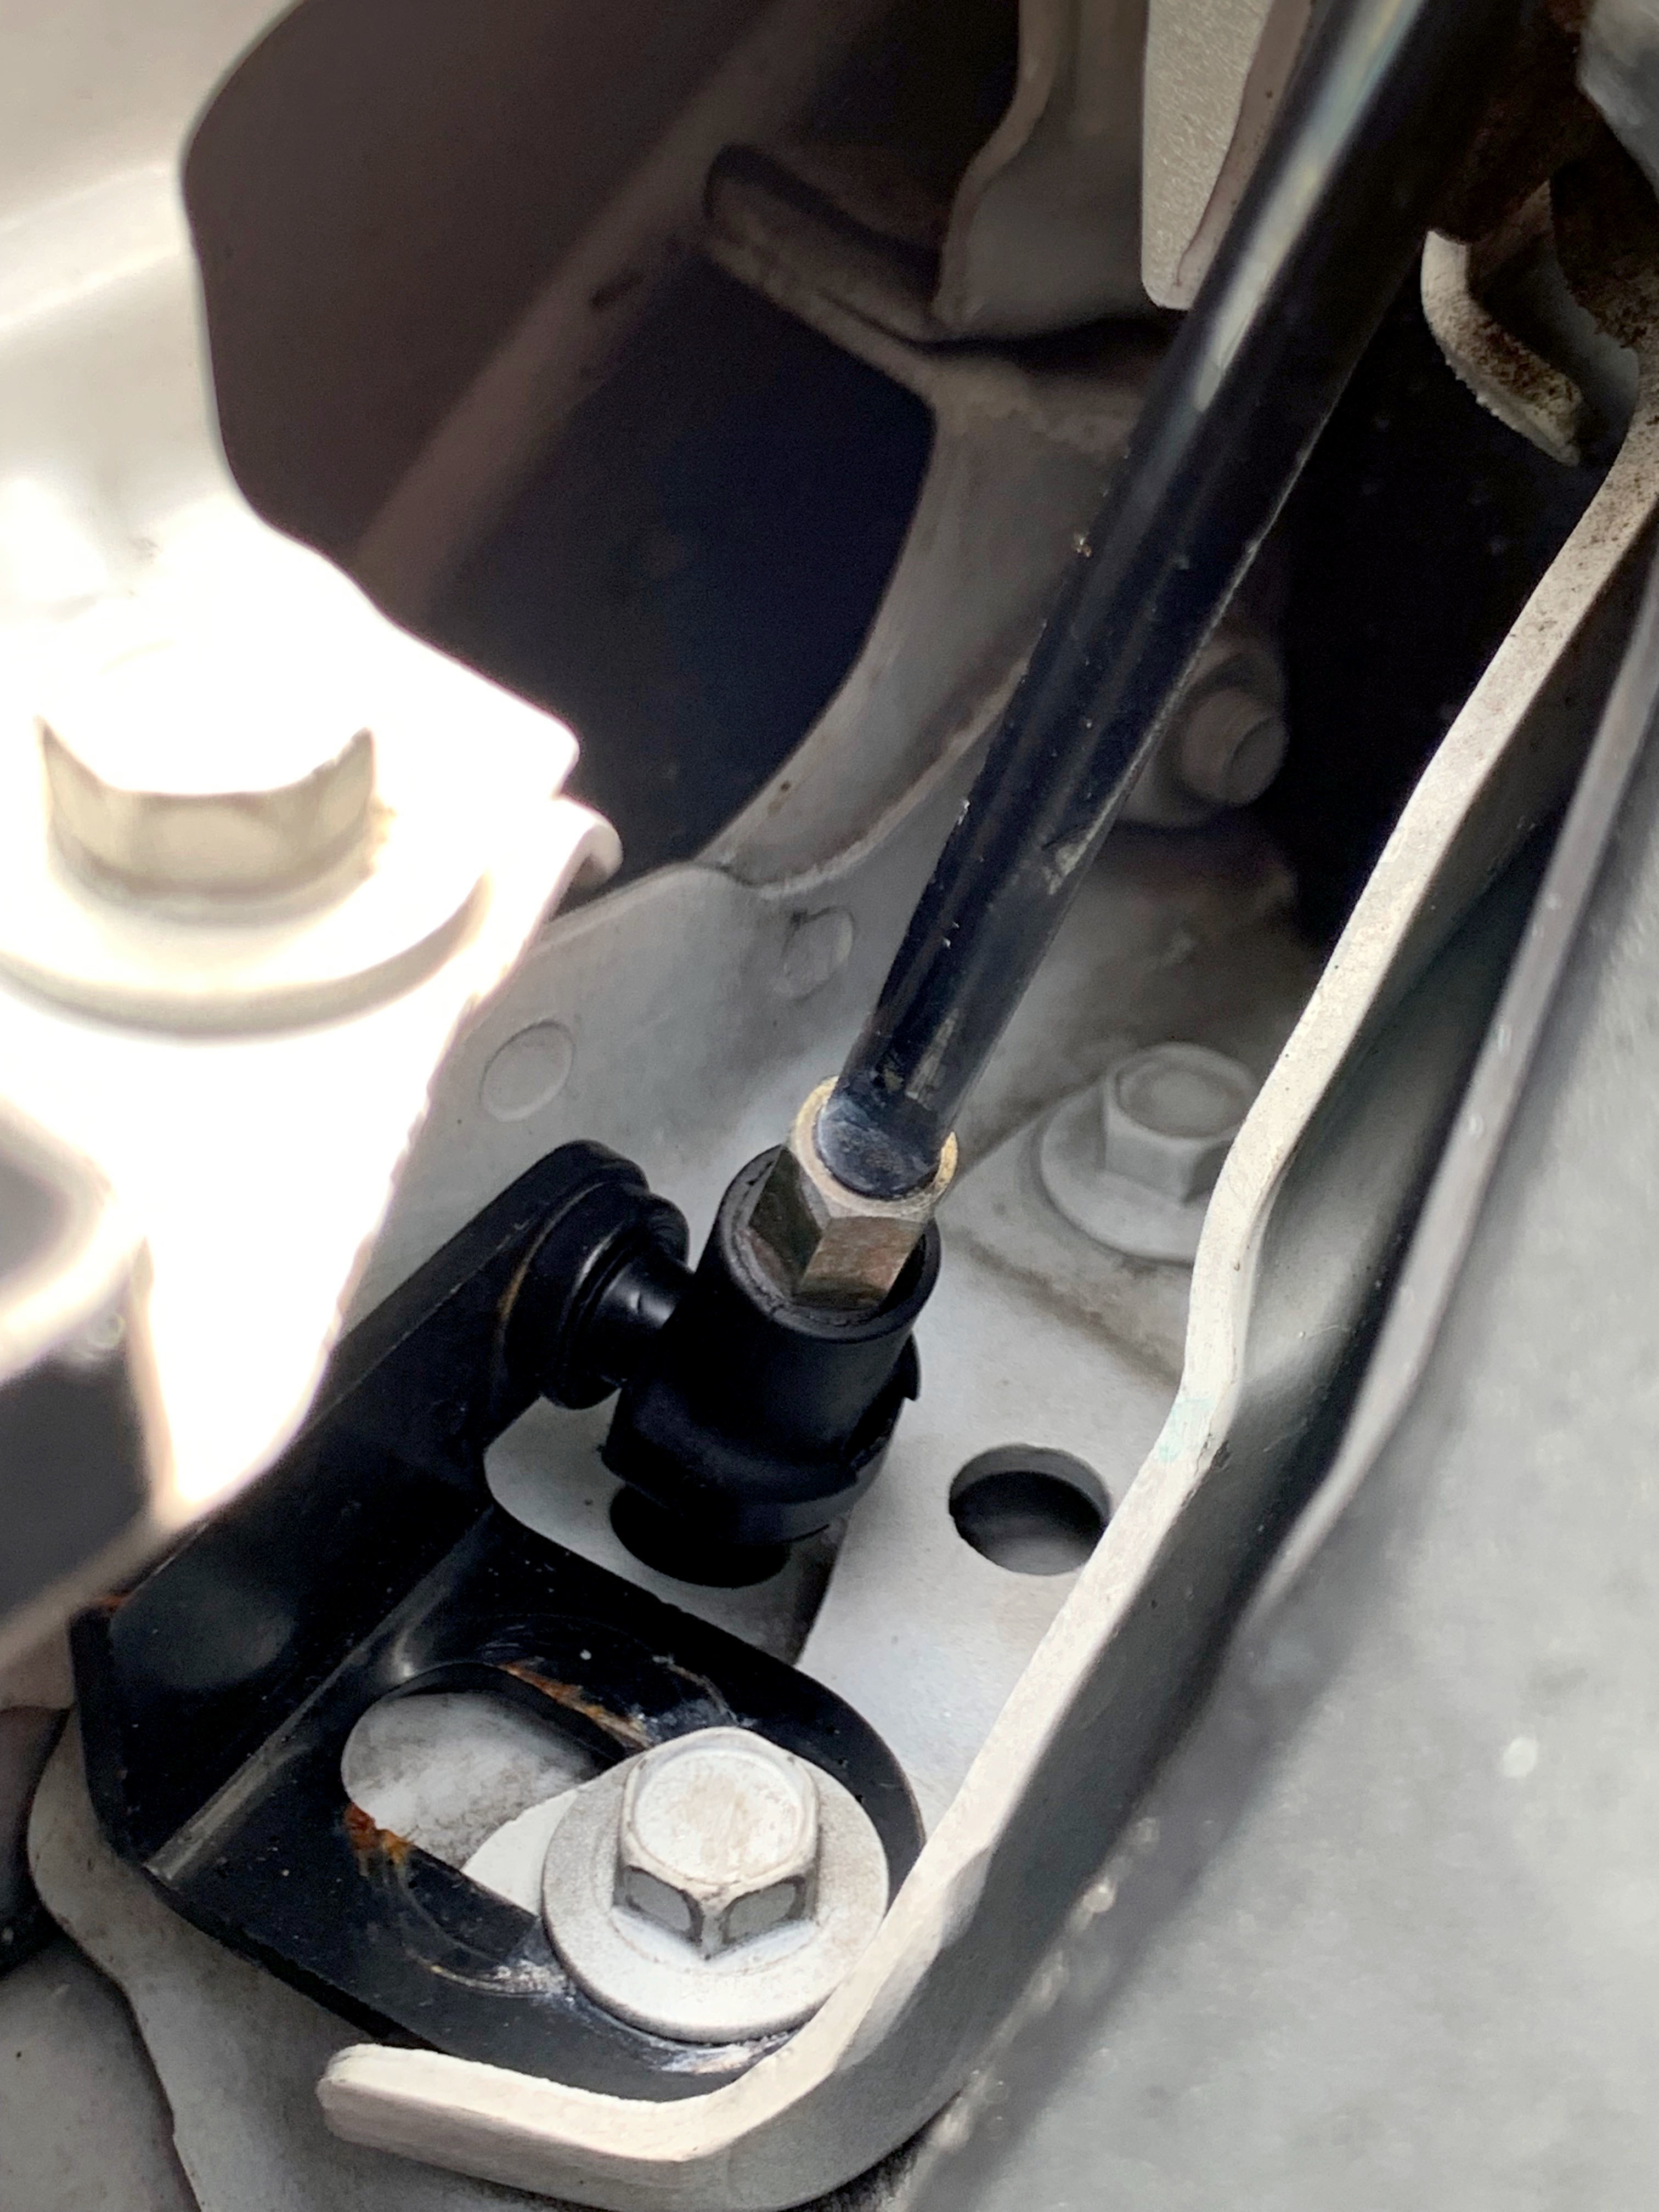
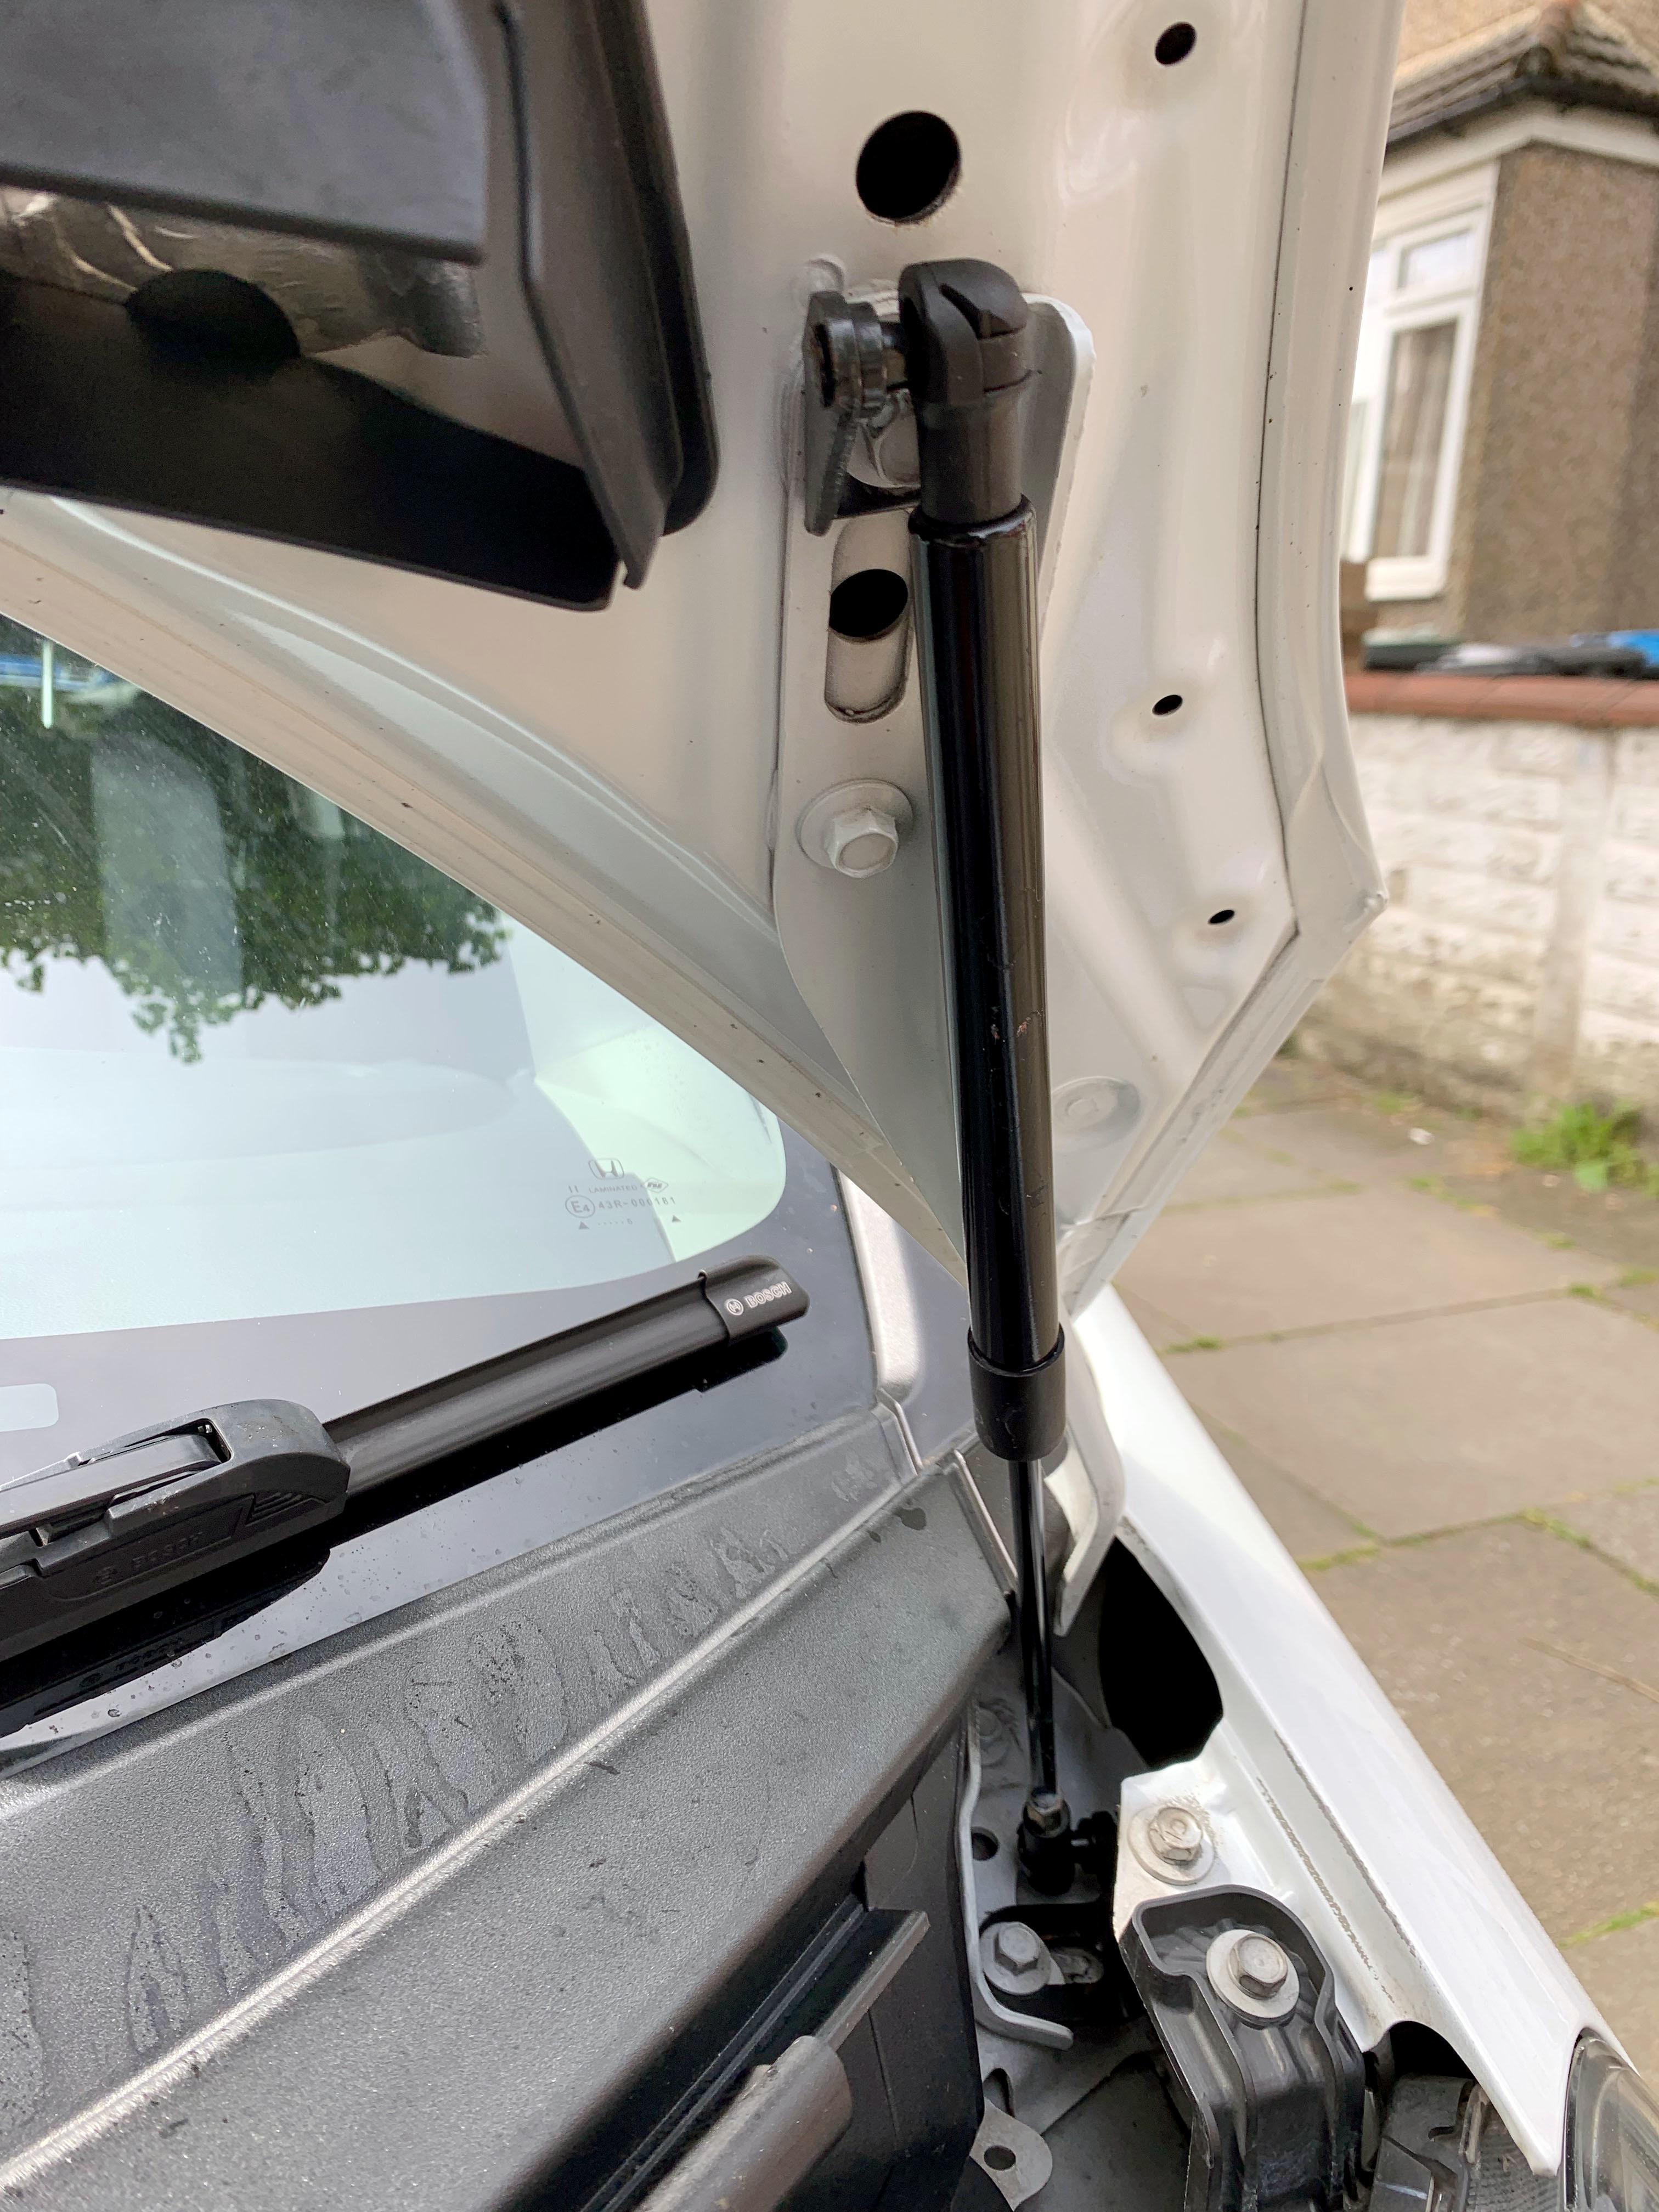
Bonnet Gas Struts
I had a pair of these on my first Civic and loved them, so I thought I would get a pair for the Jazz.
Finding anywhere that sold them for the GE Jazz was a really tough mission. I ended up getting a pair from AliExpress from a company called Xiangshang Car Parts, who seem to be the only manufacturer of gas struts for the GE Jazz.
But when I got the struts, the instructions were very poor and the mounts were completely different to the ones pictured in the instructions. I tried every combination to get them to fit, but the bonnet sat far too low, and the struts rubbed against the plastic.
I had a lot of back and forth from the manufacturer who kept telling me different ways to get it to fit, and eventually sent out a new kit. This new kit also didn't fit, but the struts in the new kit were slightly longer than the first kit, so I used a combination of parts from the first kit and struts from the second kit, as well as a pair of 10mm M6 stand offs to get the kit to fit just right.
I'm happy with the Frankenstein kit that I have, but I probably wouldn't recommend anyone buy one.
Maybe they have taken my feedback on board and made the kit correct now, so if anyone feels brave enough to try, here's the link: LINK
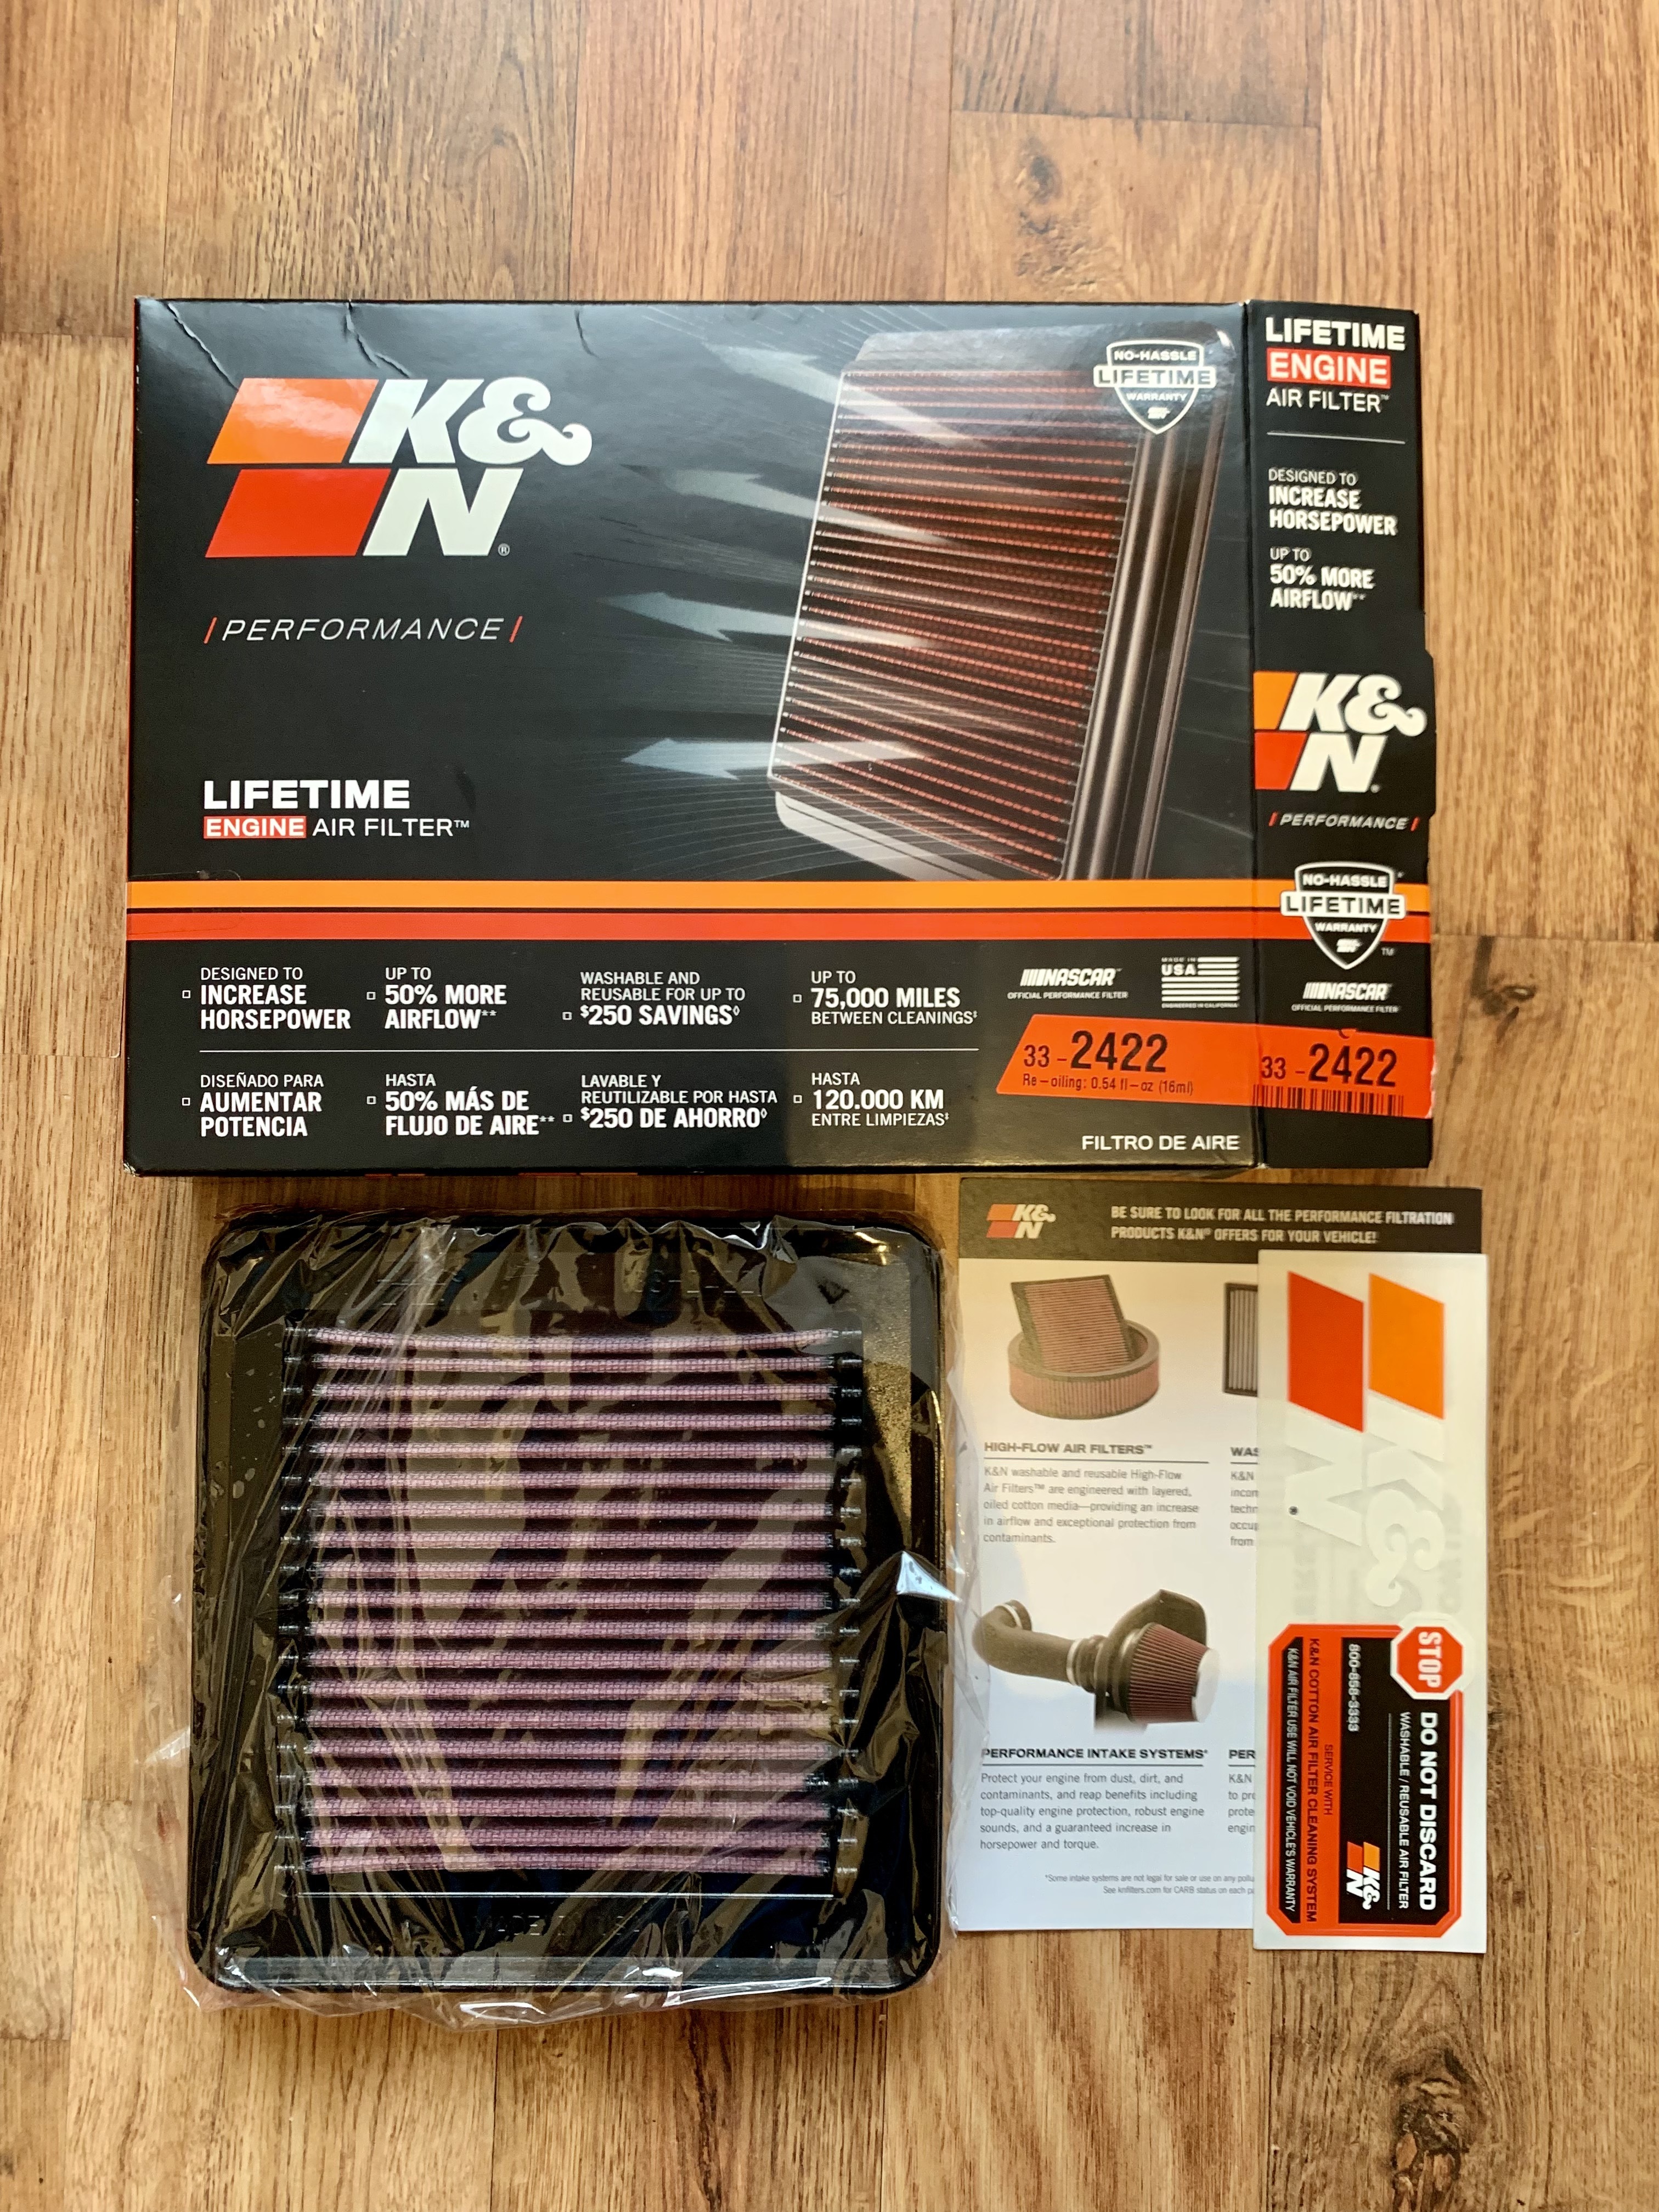
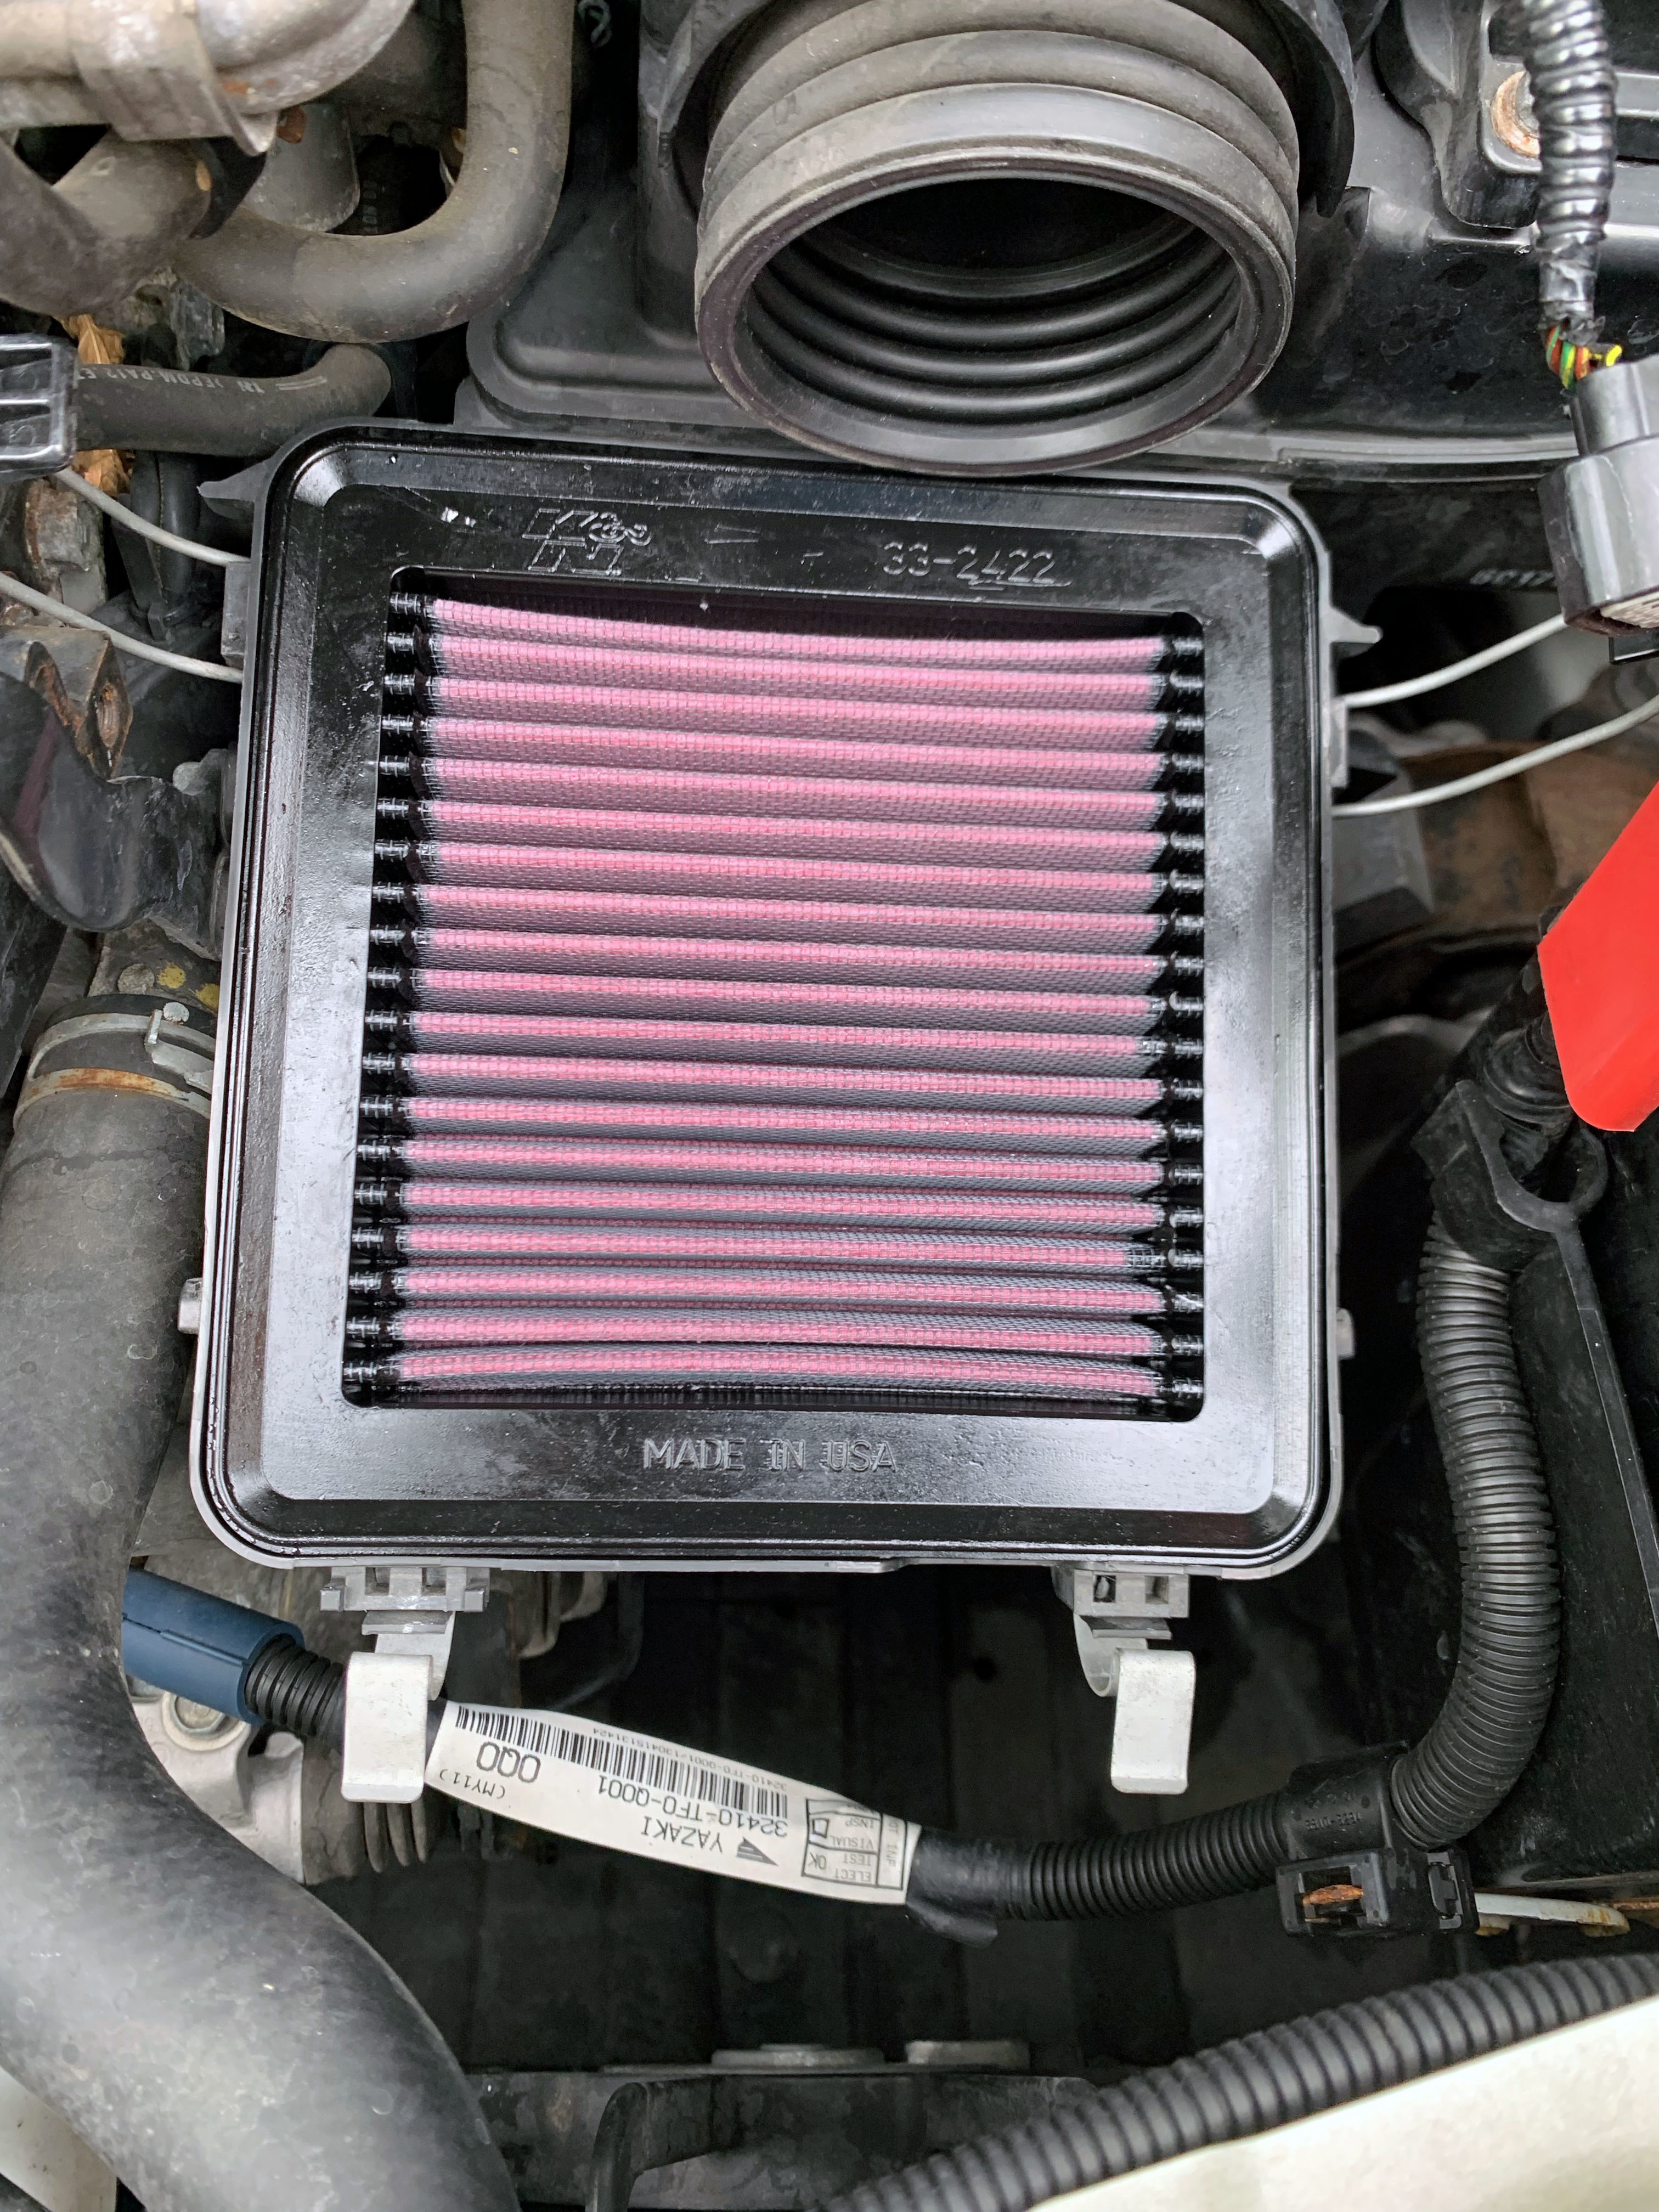
K&N Filter
I had so much trouble finding the right K&N filter for my Jazz, and I ended up purchasing 2 incompatible filters that said they were compatible from eBay, until I eventually found the right model for my Jazz which is Part number: 33-2422.
I would say I probably noticed the slightest increase in performance, very very small, barely noticeable, but I have noticed a small increase in MPG. Around 1-2mpg, but this also could be down to the weather getting warmer, so it might have made no difference whatsoever. But at least I don't have to change the filter for a while now.
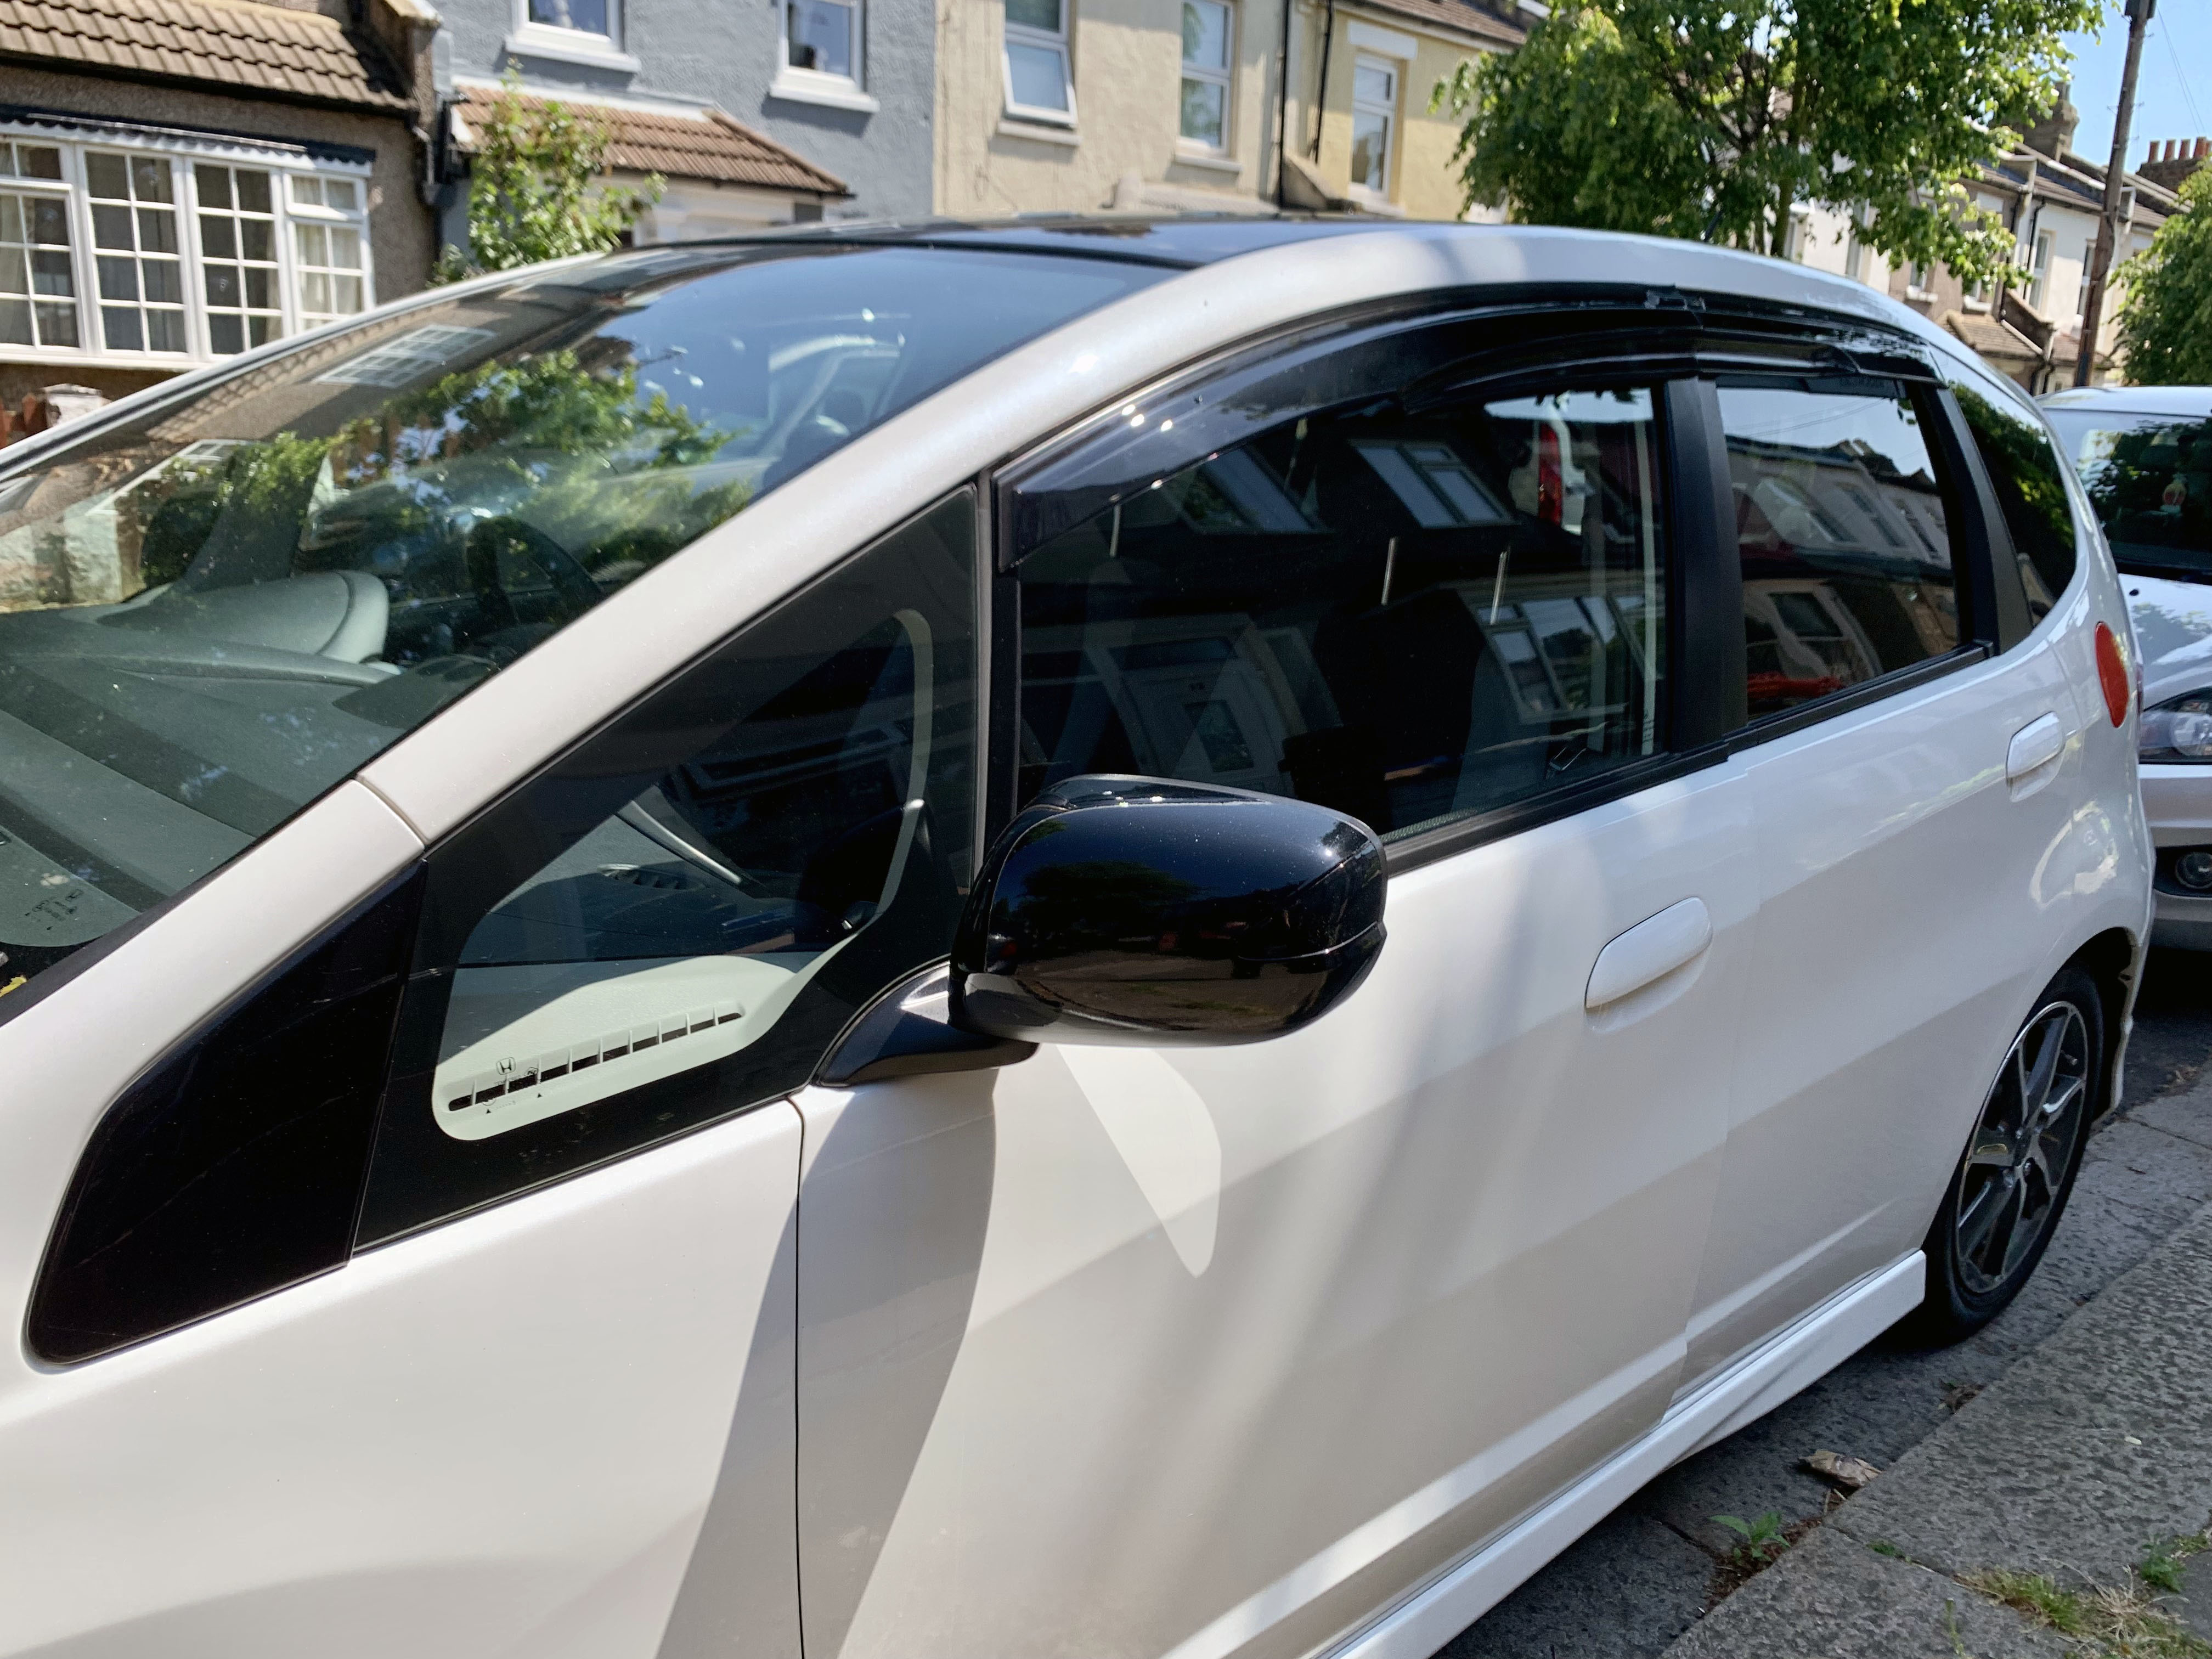
Mugen Wind Deflectors
And finally, the wind deflectors. I purchased these from Torque GT (LINK) back in December, but I wanted to wait until the weather got a bit warmer before fitting them.
I've always owned Mugen style wind deflectors on all my Jazz's, but when I looked at the cost of the copies for the GE (around �90 from China), I thought I may as well spend the extra money and get the real deal that I know will be good quality and a good fit.
They were an absolute pain to fit, and the instructions were in Japanese only, so I had to rely on google translate for the English version.
Here is the translated instructions for anyone who wants them: LINK
It took just over an hour to fit, but I'm pretty happy with them. They are great quality and a nice addition to the car.
They took a bit of getting used to, and make cleaning the car a bit more annoying, but overall they were a good addition to the car.
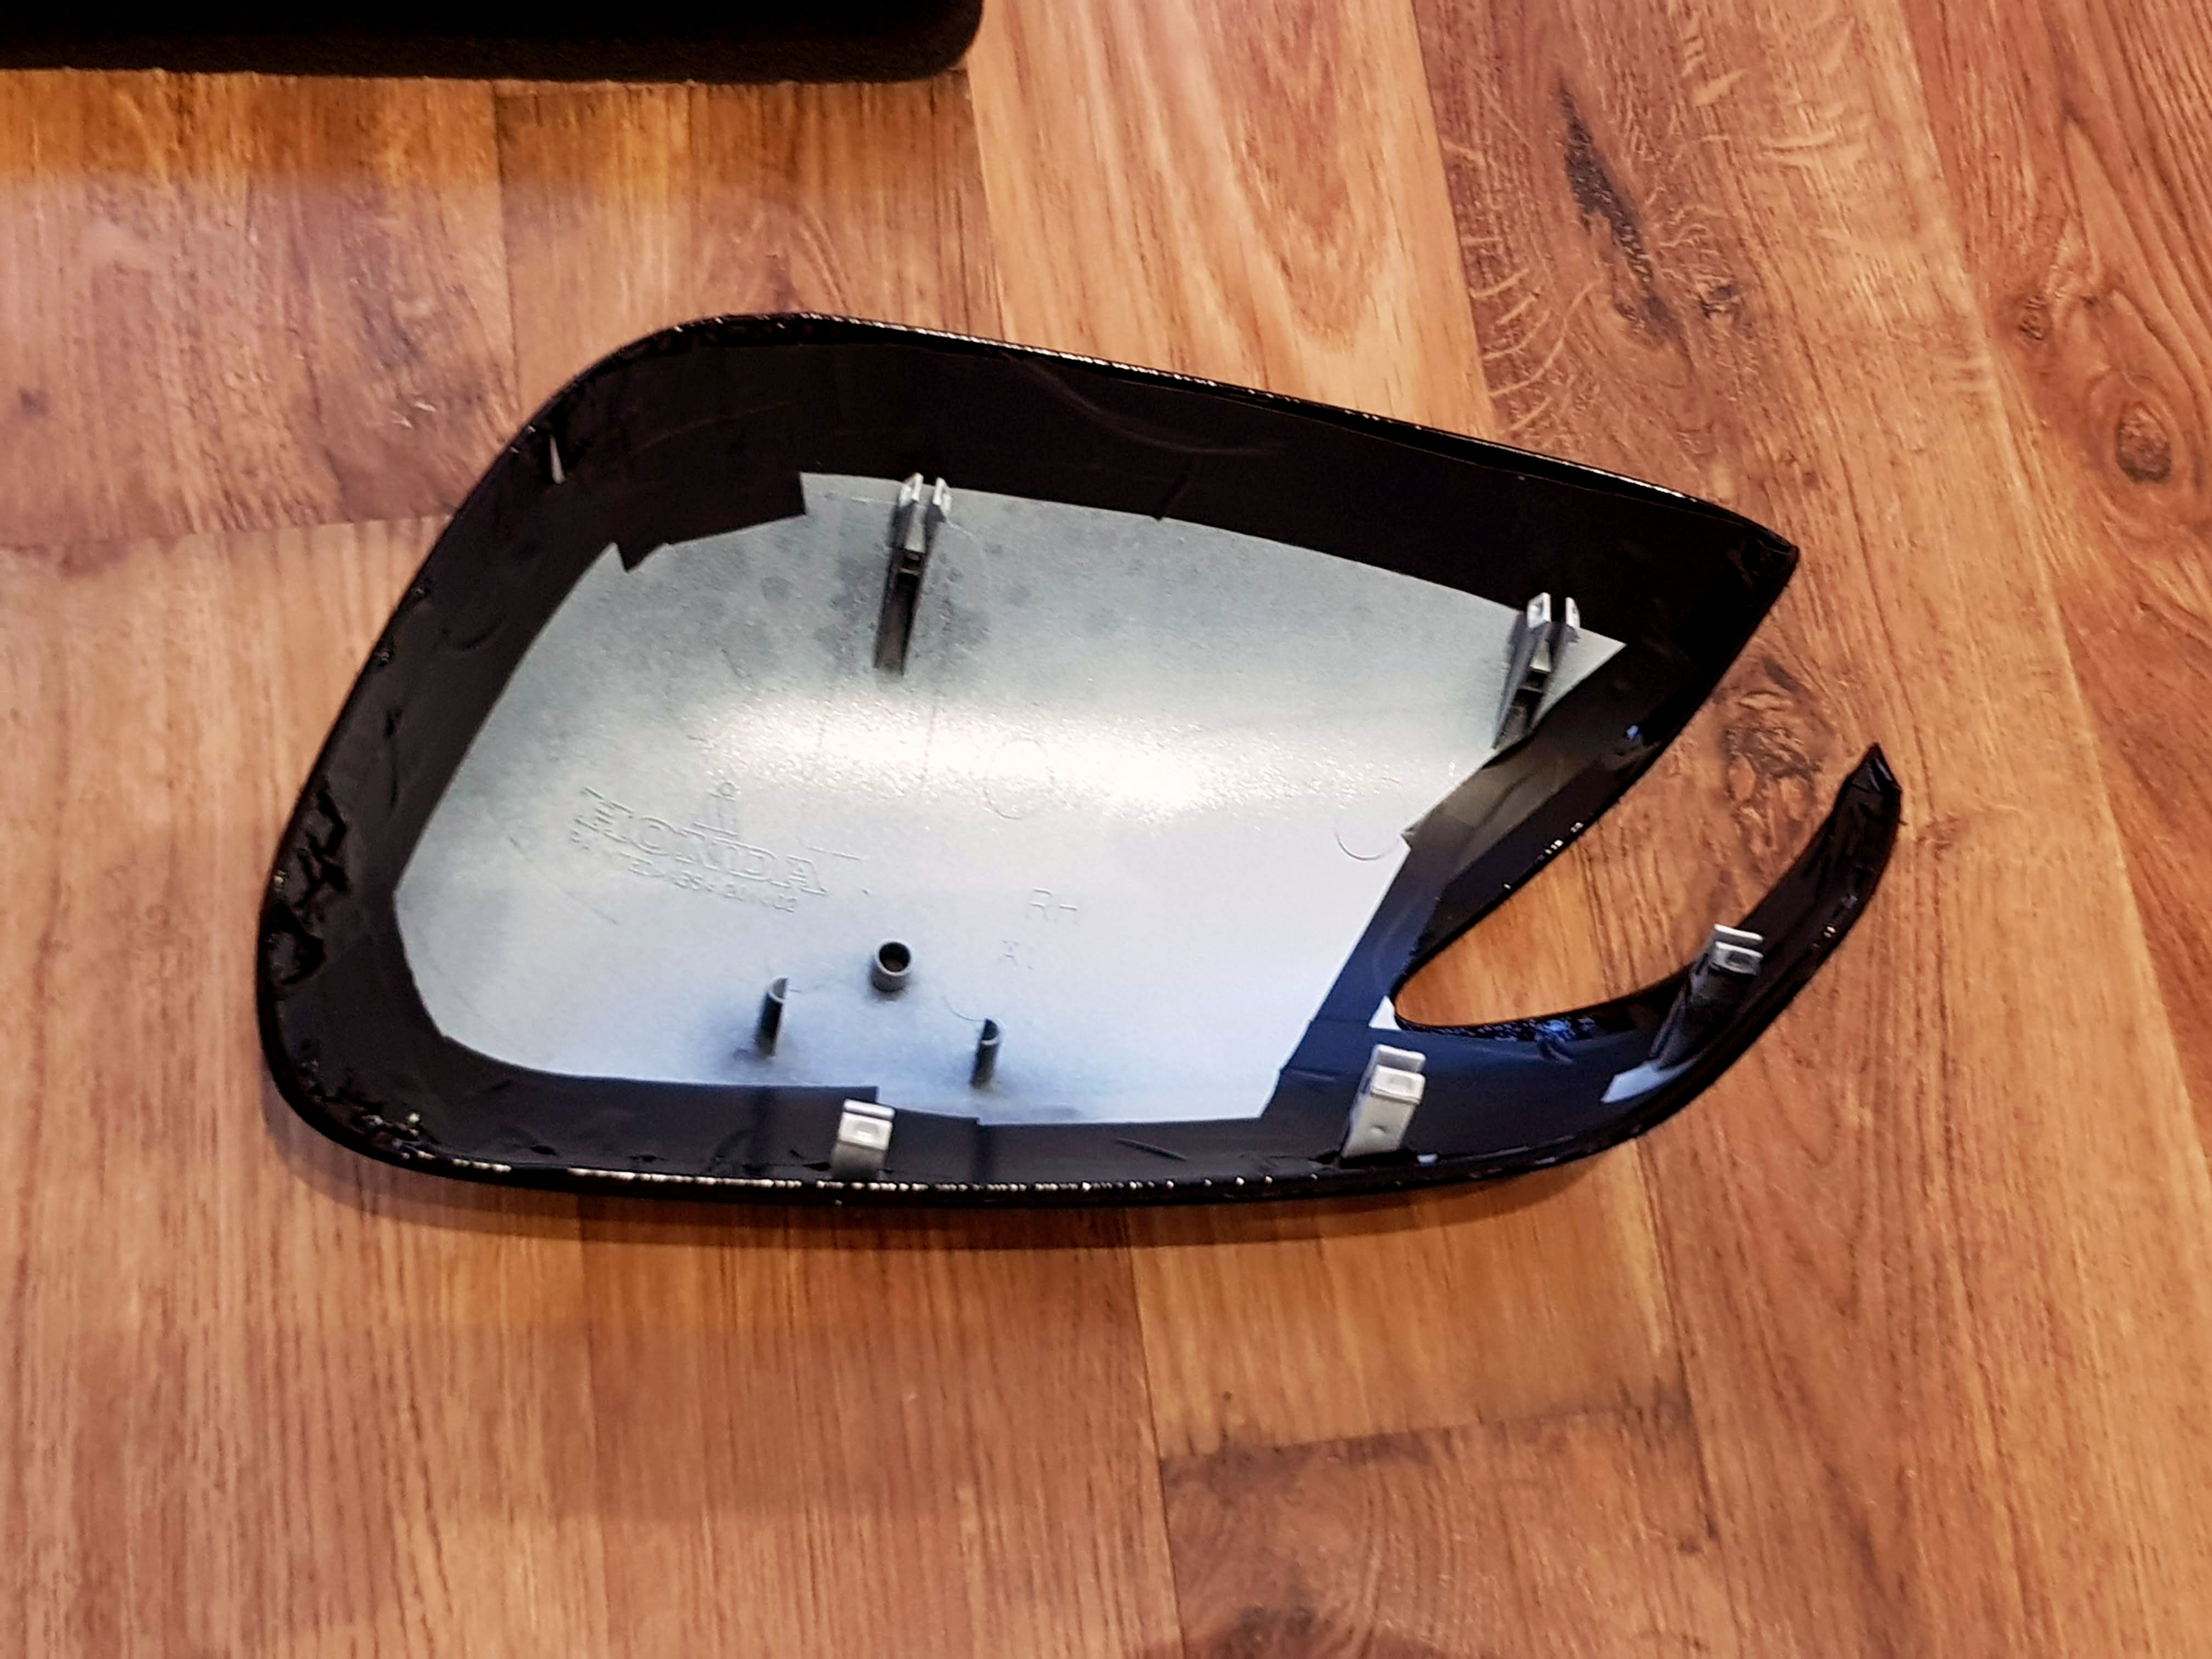
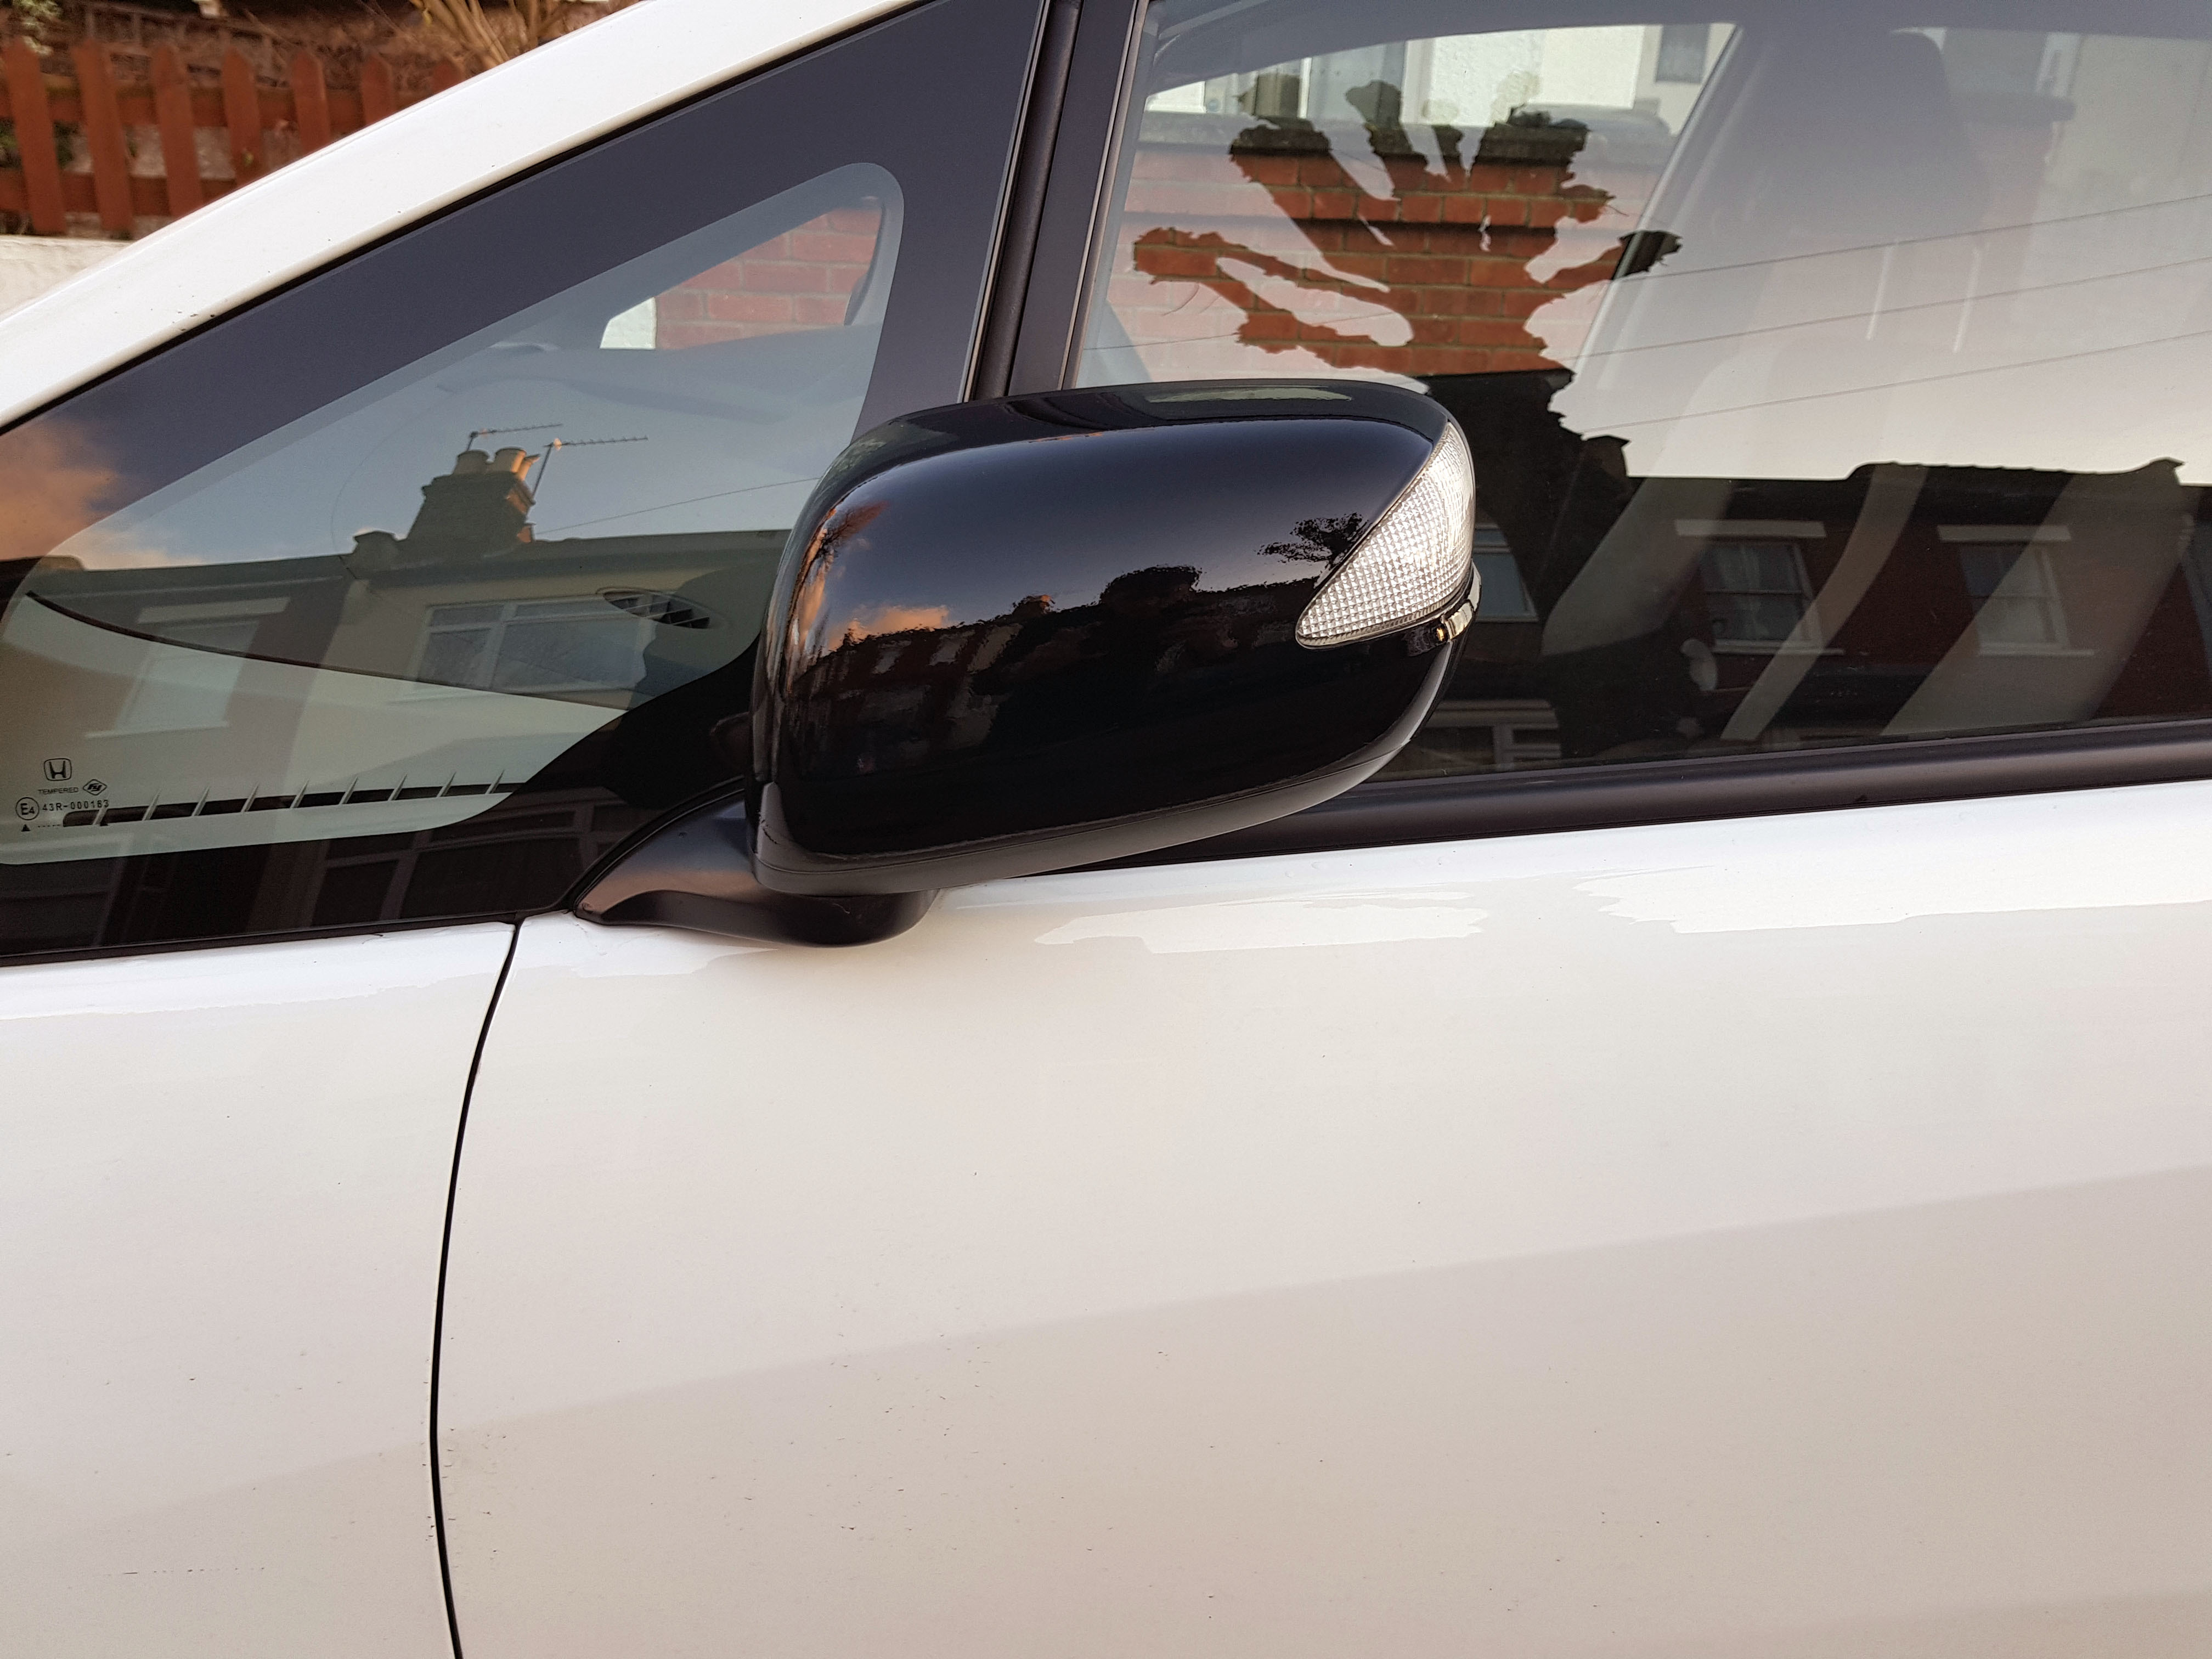
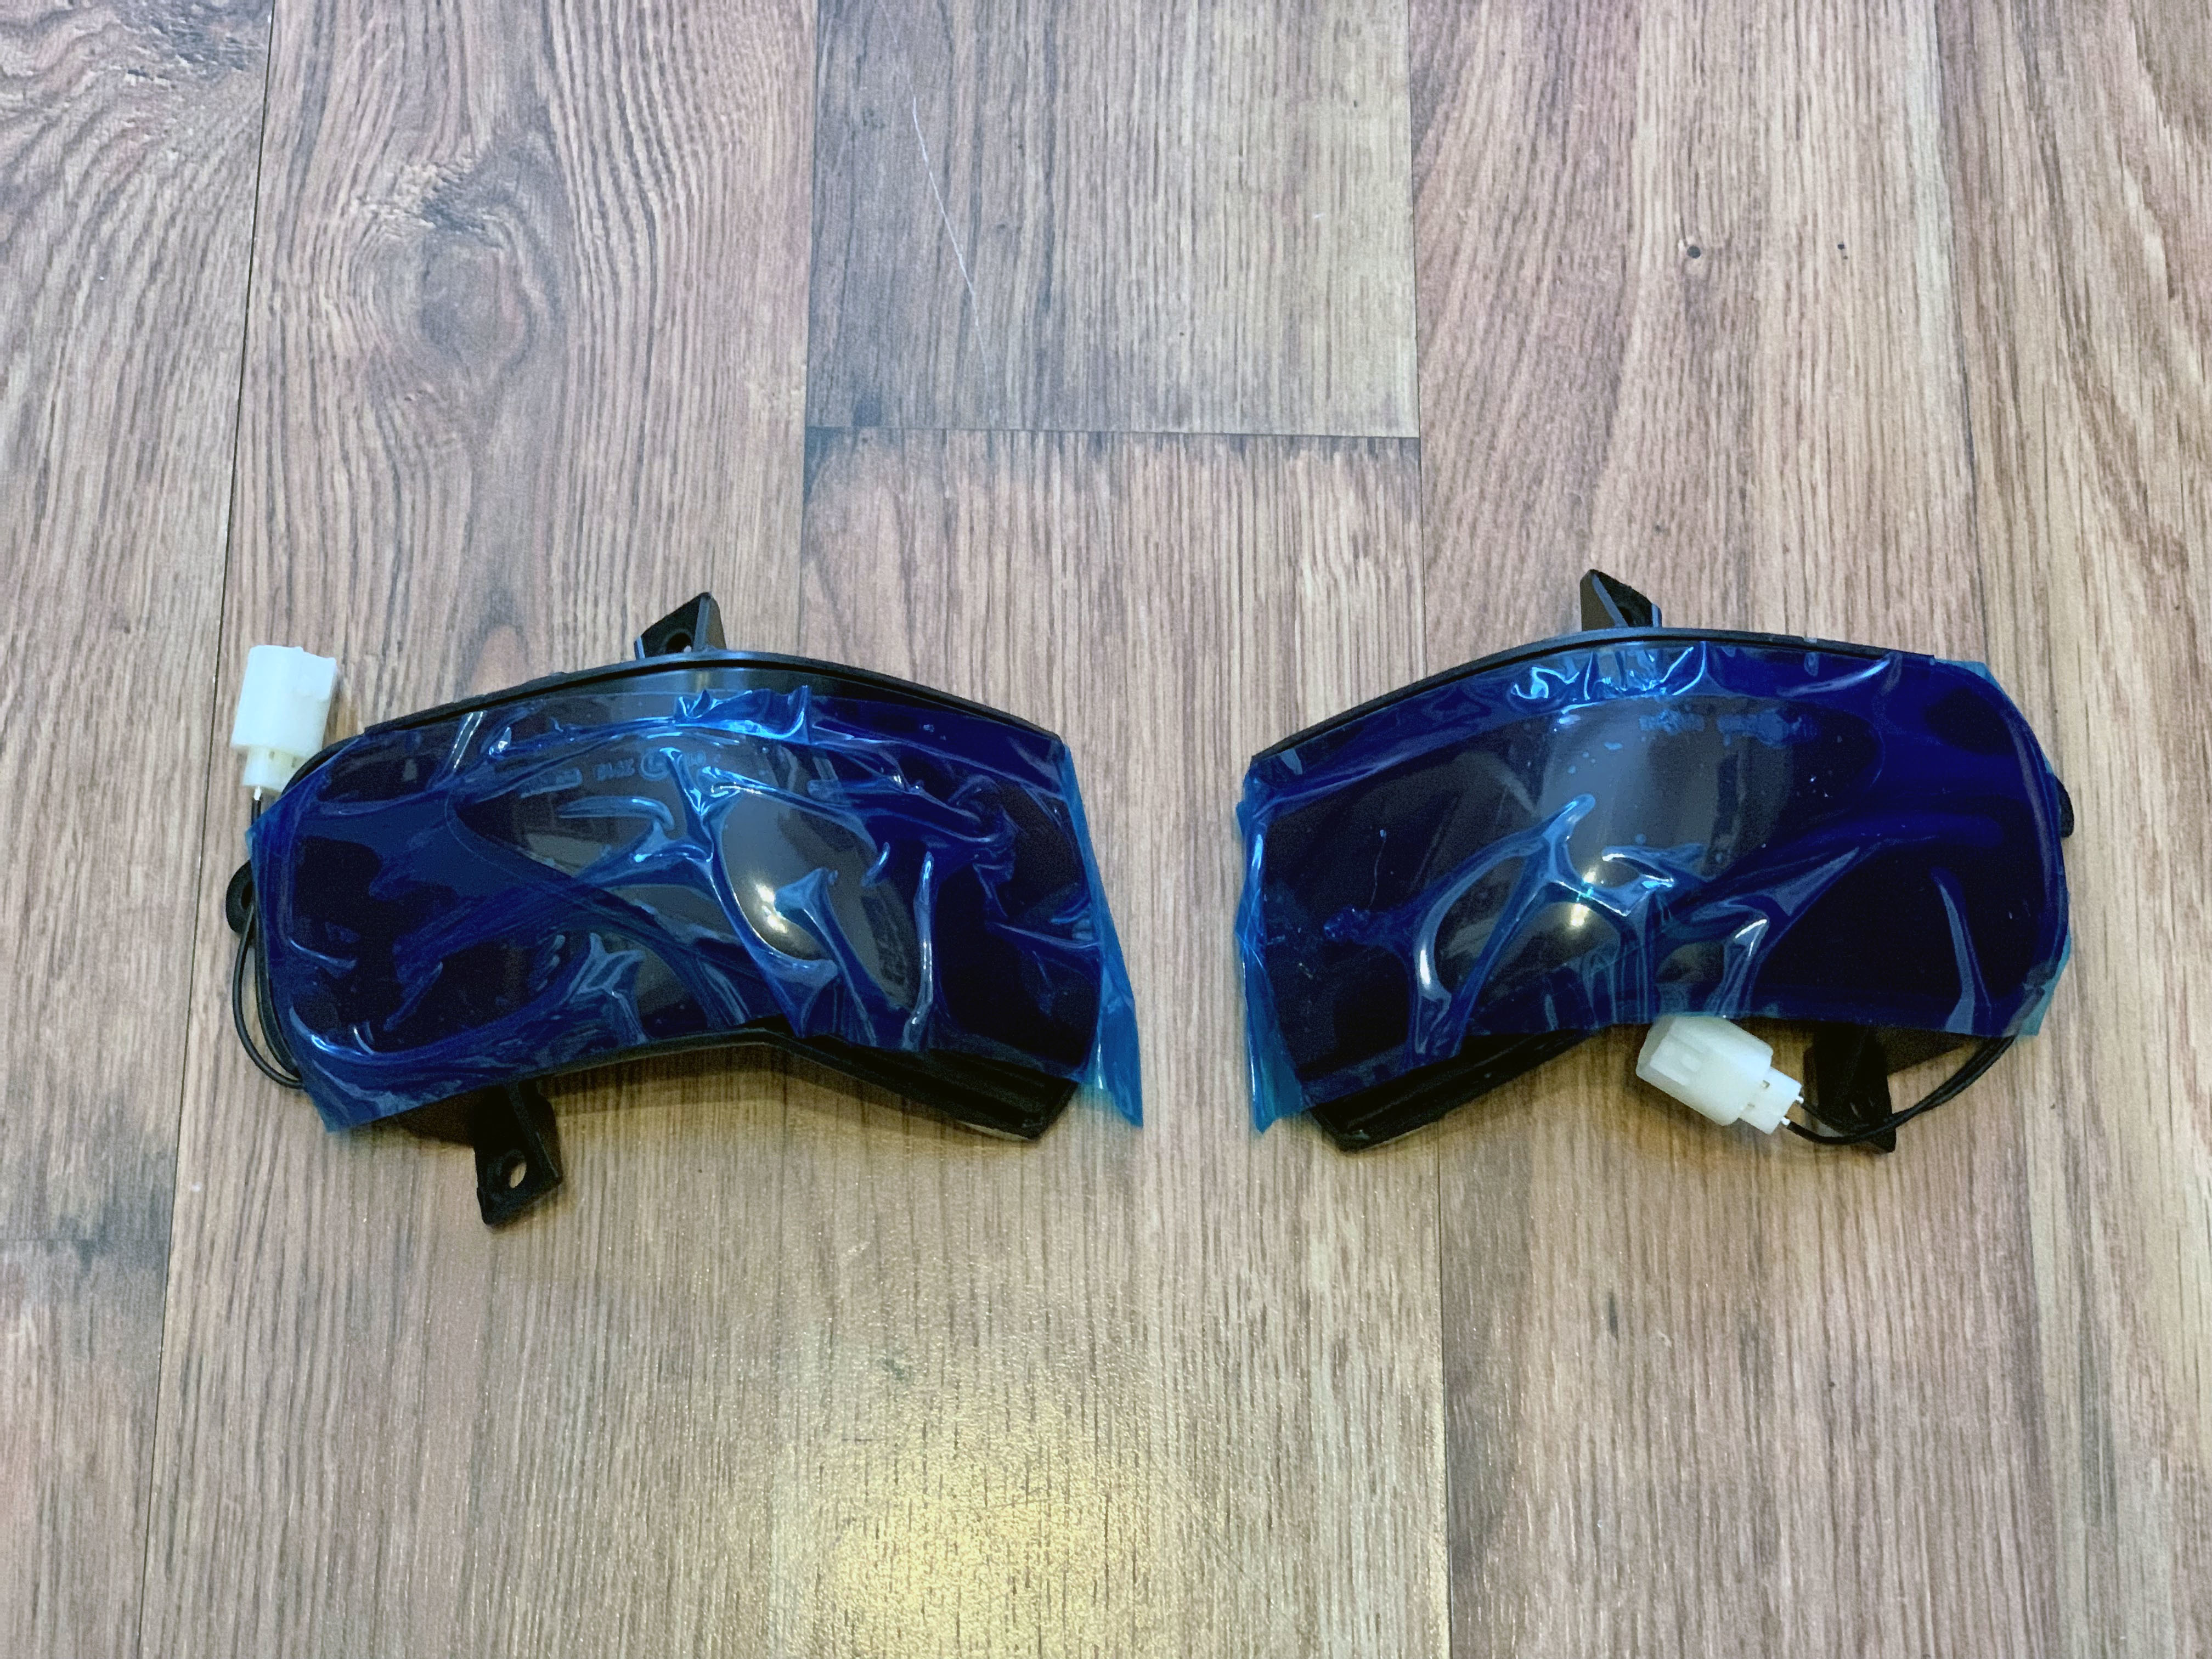
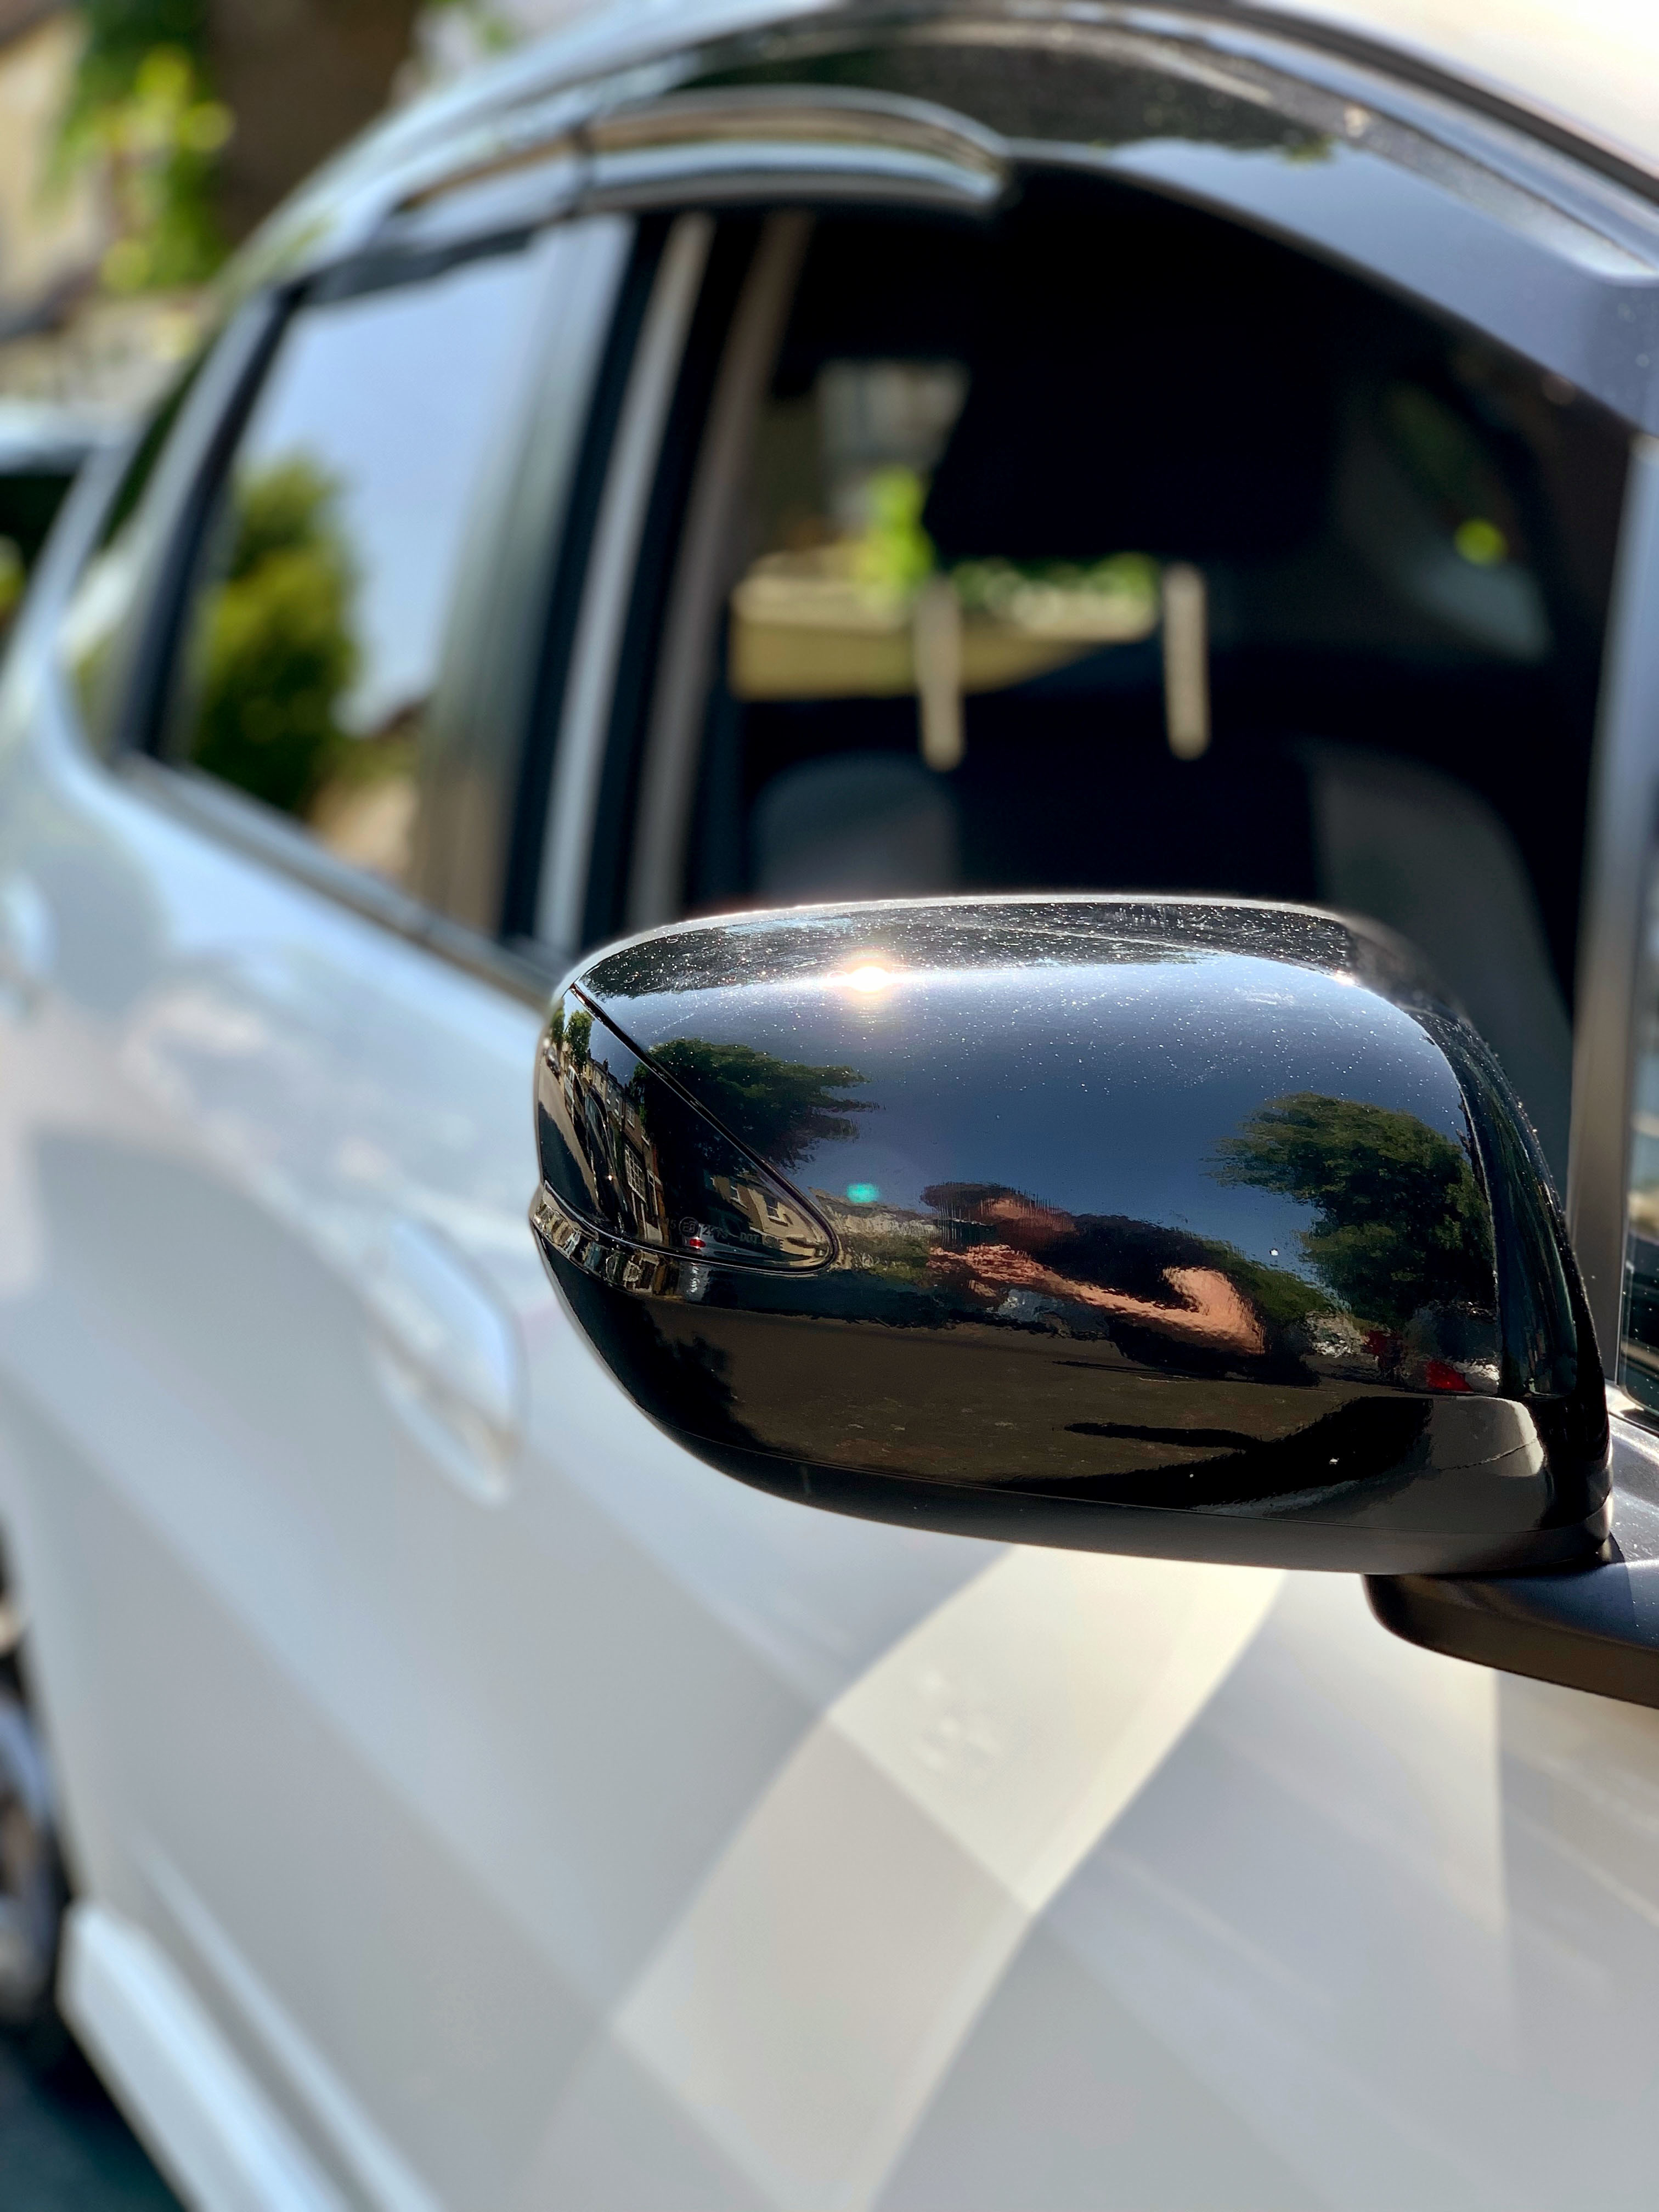
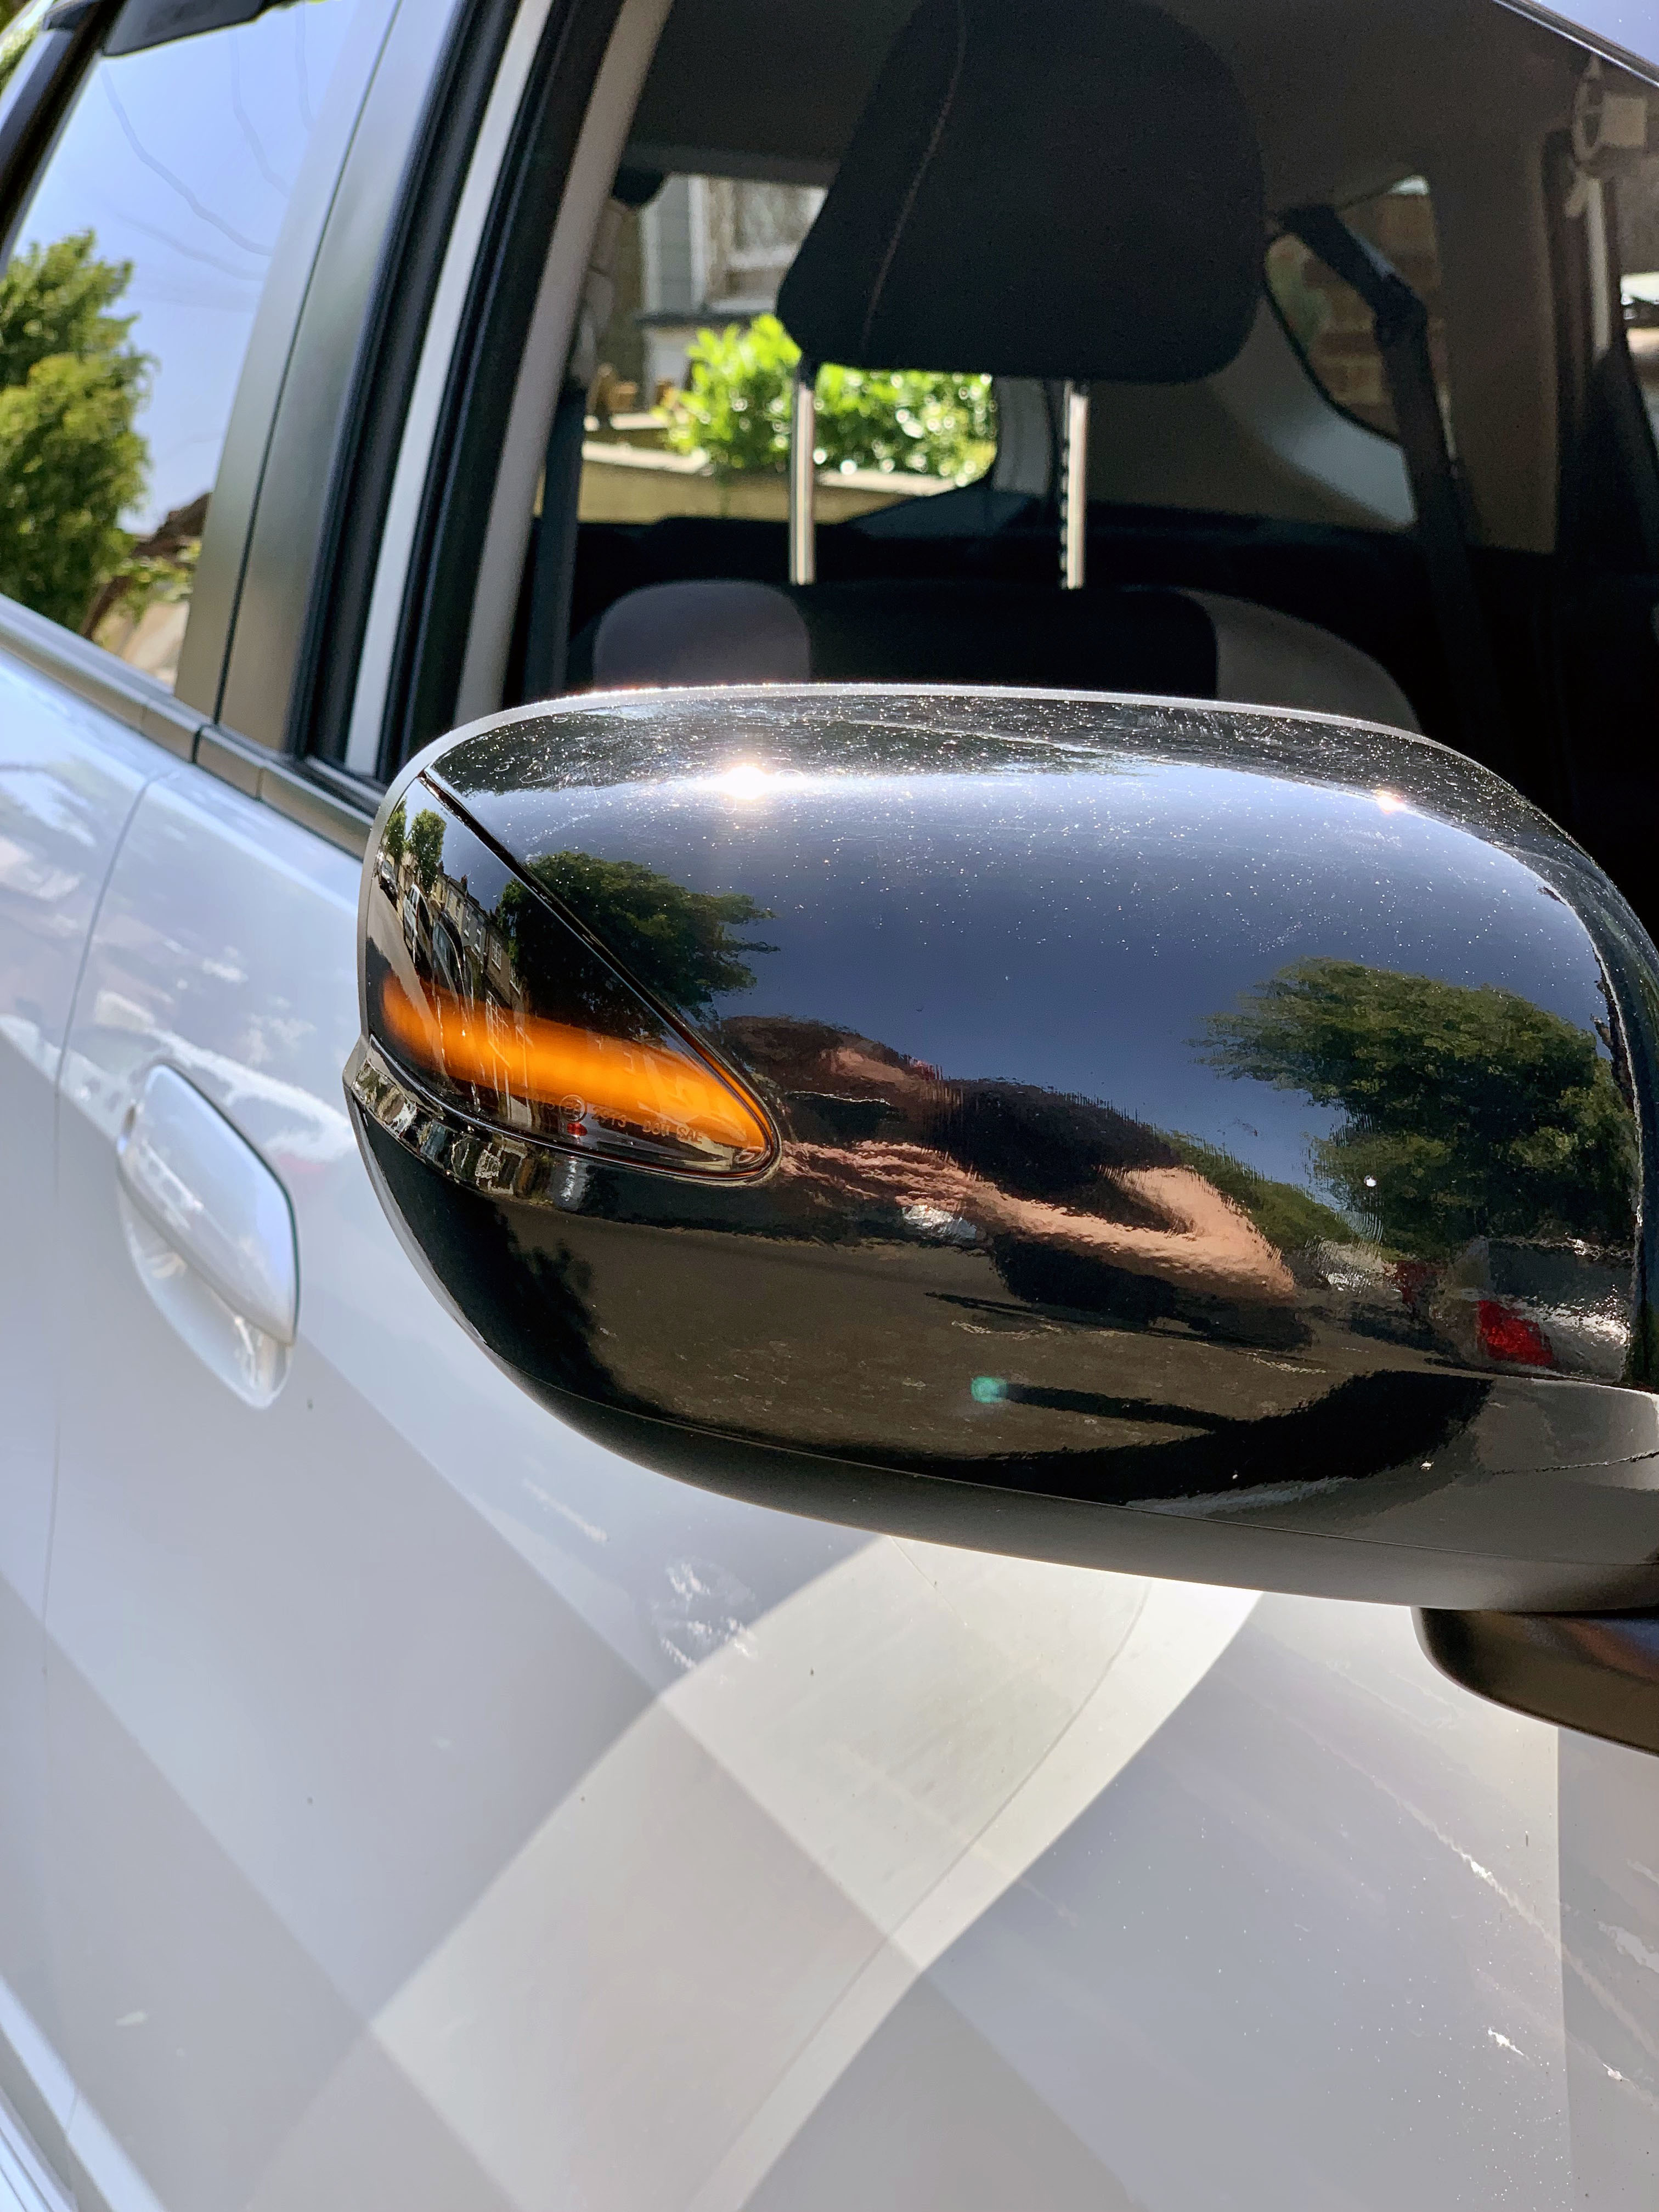
Dynamic Turn Signals
I came across these on AliExpress while searching for other things and thought they looked pretty cool on a black mirror.
If my mirrors weren't black I'm not sure if I would have liked them. But with the black, they blend in nicely.
I got them from here for around �12:LINK
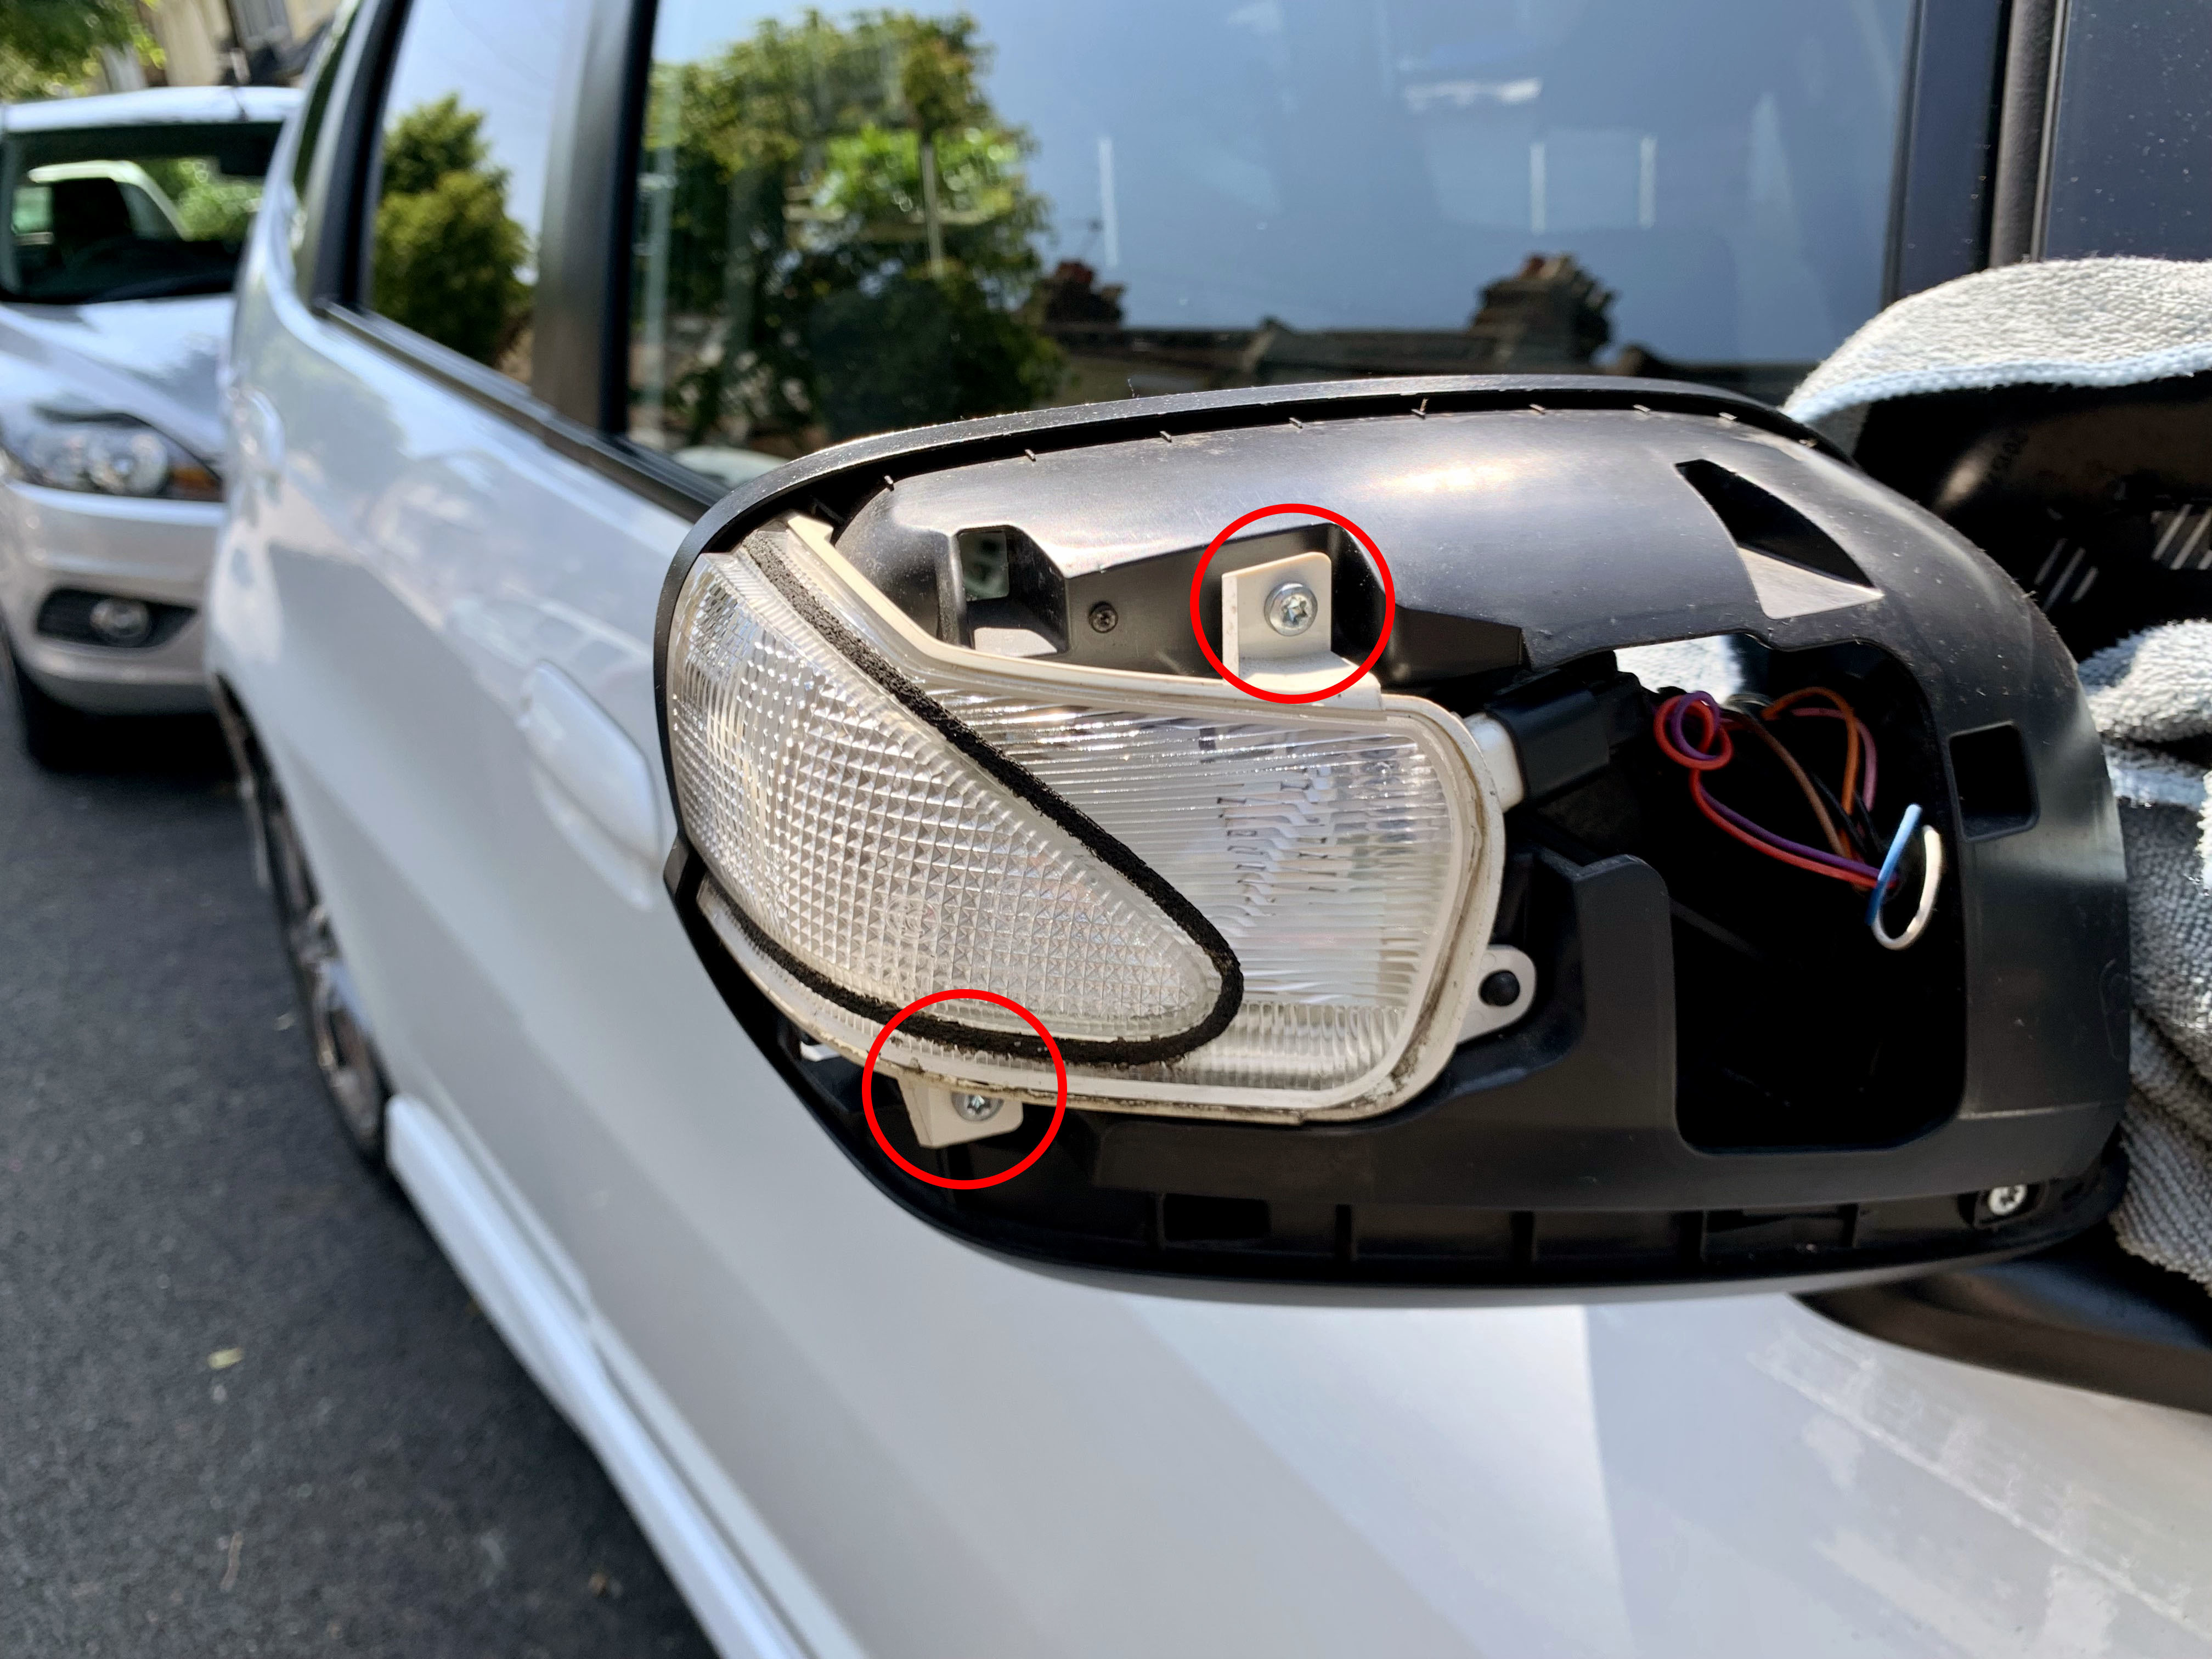
They seem good enough quality, and plug straight into the original Honda plug.
They are fairly easy to fit. You have to remove the mirror glass, and then pop off the mirror cover from inside by pushing the clips, and then there are 2 Torx screws to remove. Took about 15-20mins in total.
I have a few more plans for the Jazz over the summer.
I have black vinyl wrap to wrap the bonnet, and I'm thinking of buying a Buddy Club Short Shifter, but I want to do some more research first. So keep a look out for more updates over the next few months!
Your GE is looking great! I an a fan of your mods thus far.
That black wrap in the roof is gorgeous.
I do have a question for you. Can you get Buddy Club short shifters over there? I can't find one here in the States. 🙁
- Bill
Thank you
Yes, I am finding myself in the same predicament as you. The shifter has very recently been discontinued it would seem. Which is so annoying, as I was putting off getting one, as I didn't want to spend loads of money on the car at Christmas, so I spaced out my purchases, and now I can't get hold of one.
One company I spoke to said they had ordered one for a customer 8 months ago, so it's definitely quite recent they ended production.
I'm just emailing around all the websites that have it listed for order to see if they can actually get it, or are they just not aware that it is no longer in production.
It's a shame because the only other option is the Hybrid Racing short shifter, which is more than 3 times the price! The Buddy Club shifter was a nice reasonably priced alternative.
If I can't get hold of one, I will just have to go without!
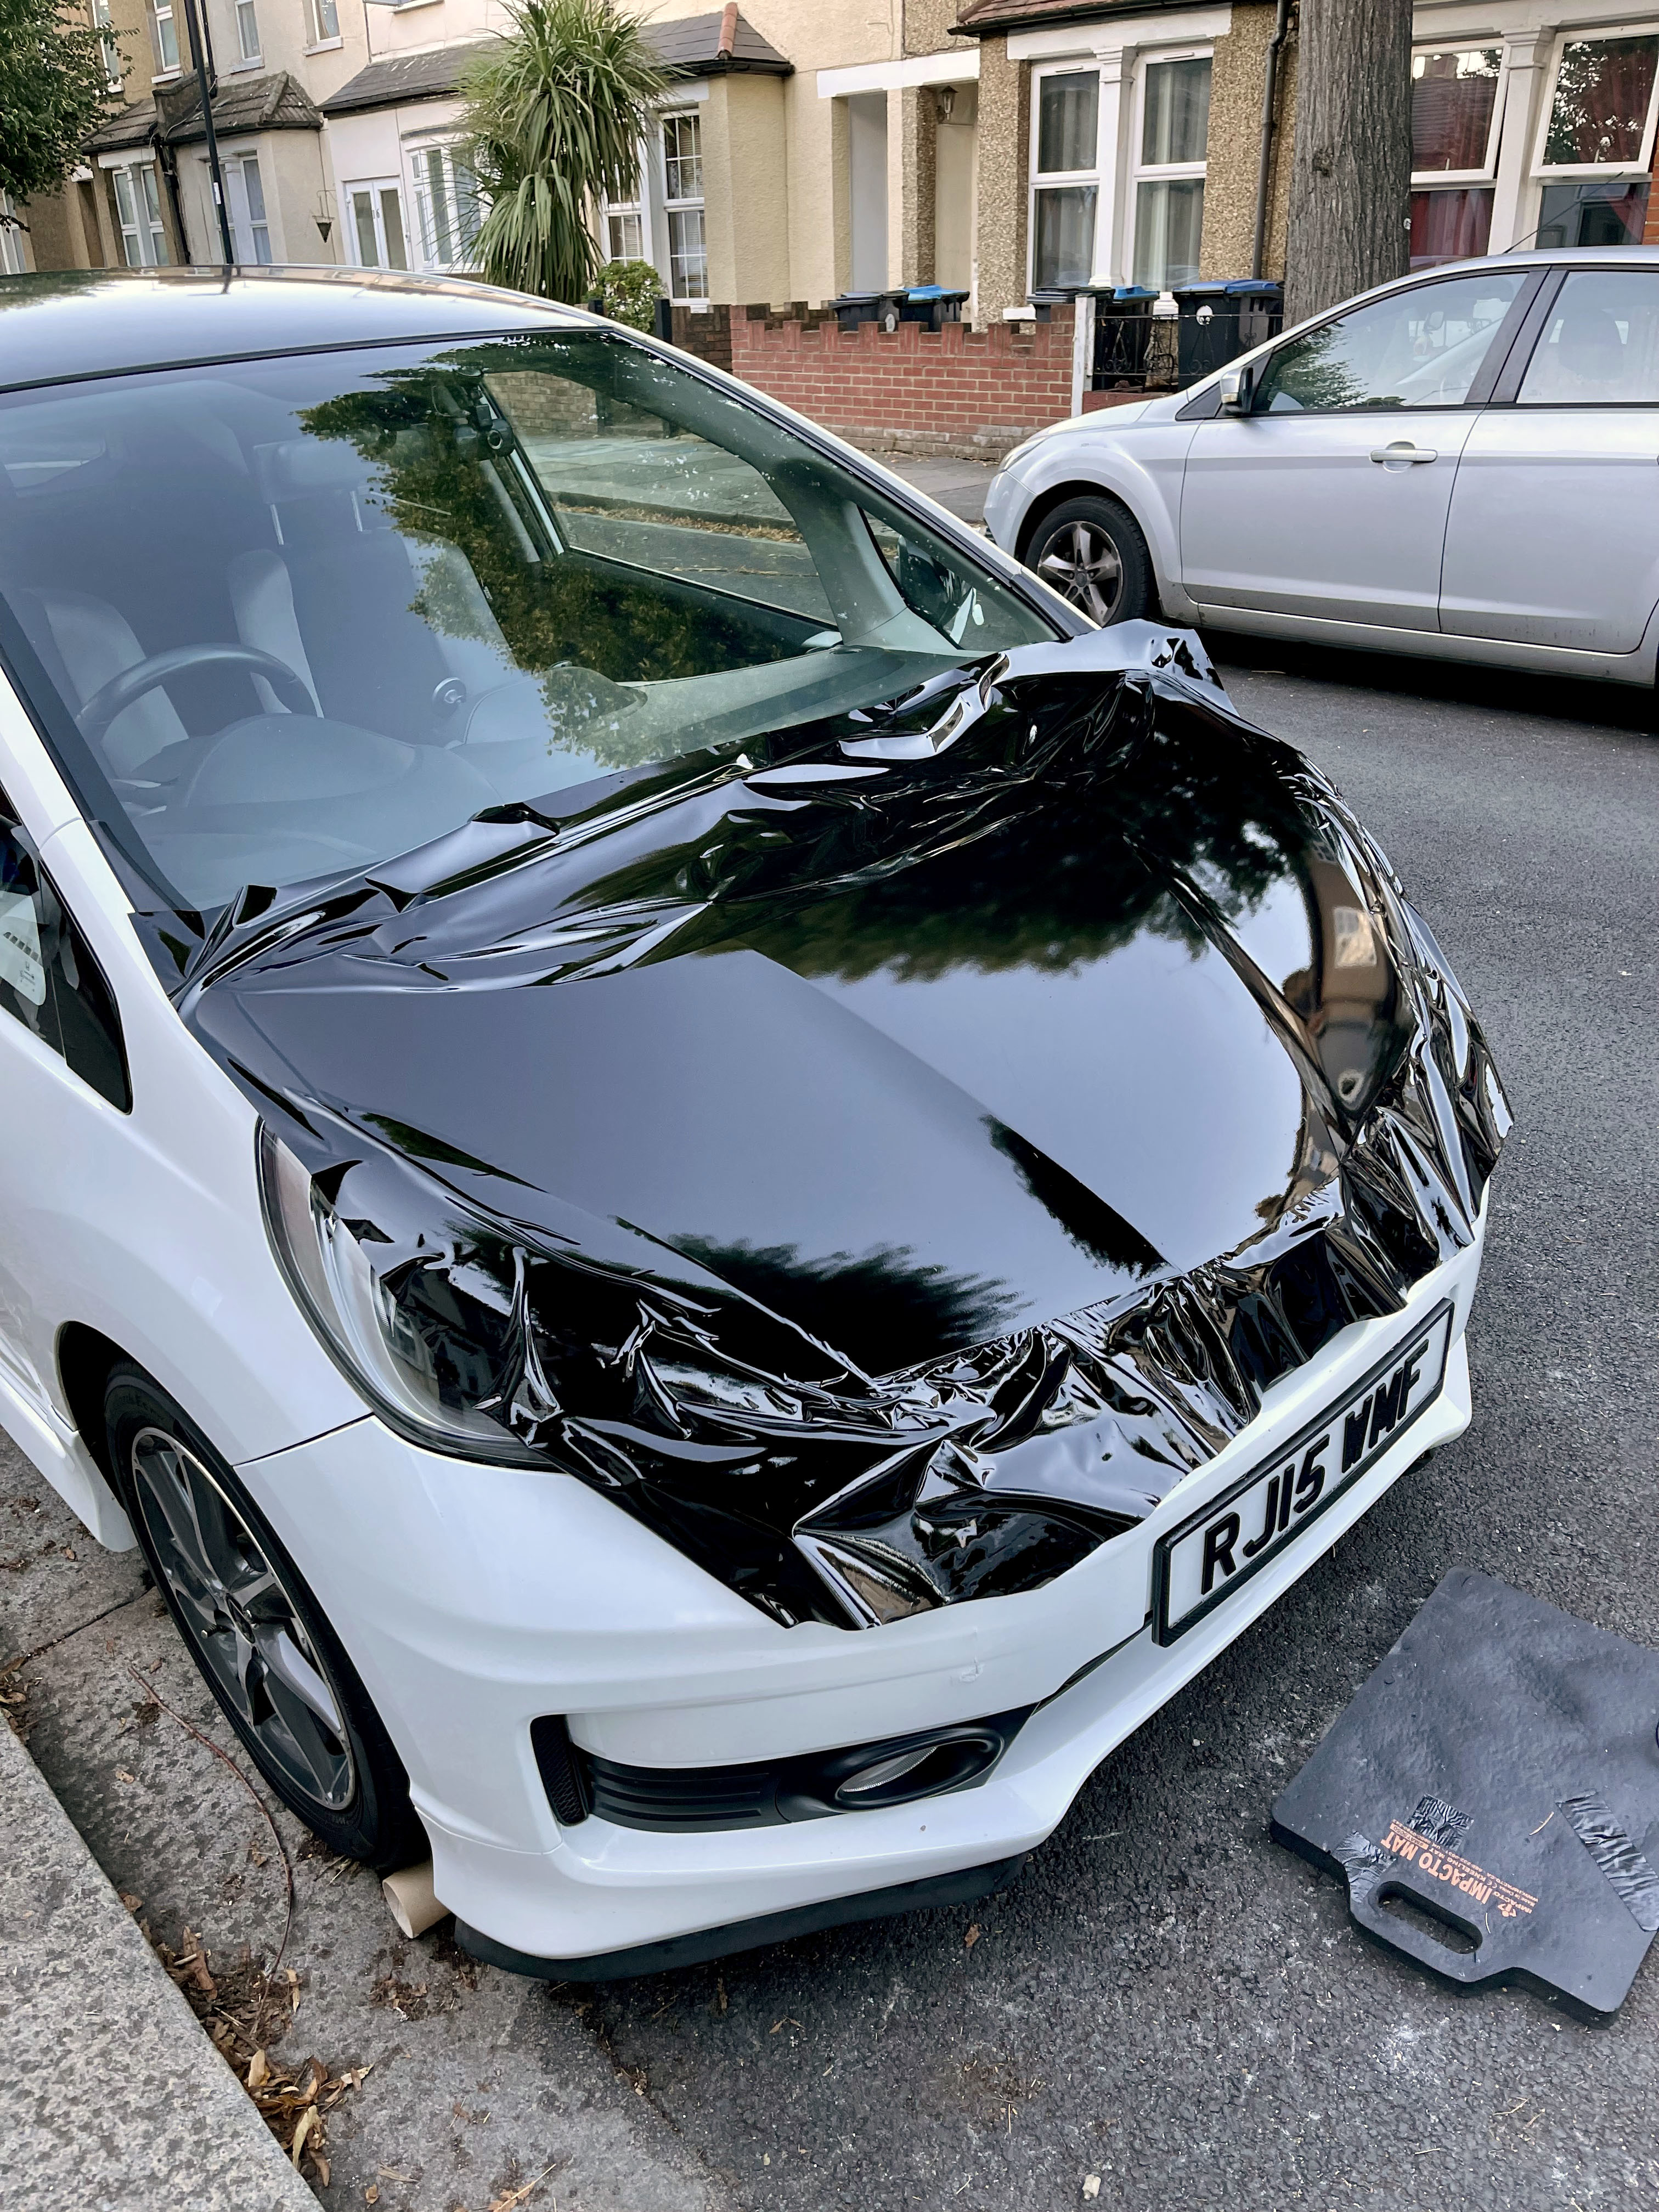
For a while I had been thinking of wrapping the bonnet black to go with the black roof, and I decided to purchase the wrap, as it was only �20, and if I decided that I didn't like it, I could always just remove it and it wasn't much money to lose.
I purchased the wrap in November last year, but then I realised that I needed warmer conditions to apply the wrap. So I stored it away until the summer.
I did put off doing it for a while, as the roof was such a pain to do, but eventually I just forced myself to do it on a nice day.
It was a lot harder than I was expecting, probably because of the way the bonnet slopes. I couldn't just pull it and lay it flat to get the "glass" look straight away. I had to take my time and pull and lay it down, inch by inch.
Some dust did get underneath, which was annoying, but you can only really notice if you look closely.
Overall I'm really happy with how it looks, and I was surprised how much it changes the look of the car.
I wasn't expecting it to make such a difference.
I don't think I will be making many more changes to the appearance.
I have been on the fence about buying Red Honda badges for the front and rear, as I feel it will complete the look. But I'm also not a fan of up-badging, and I feel the Red H is solely reserved for a Type R. And if I do put red badges on, I can't go back as you have to snap off the old Honda H badges in order to install the red ones.
I did think about trying to wrap the wheels black (or white), just to have a nice temporary change, but I recon it would be a real pain and I don't know how well it would turn out.
I was ready to hate it.
But I don't.
That looks really good!
Your Fit looks like an escape pod from the space shuttle ( if there was such a thing)!
Props!
- Bill
Thank you. I was also on the fence about doing it, but I thought it's not very much money and easily reversible if I don't like it, so it was worth the risk.
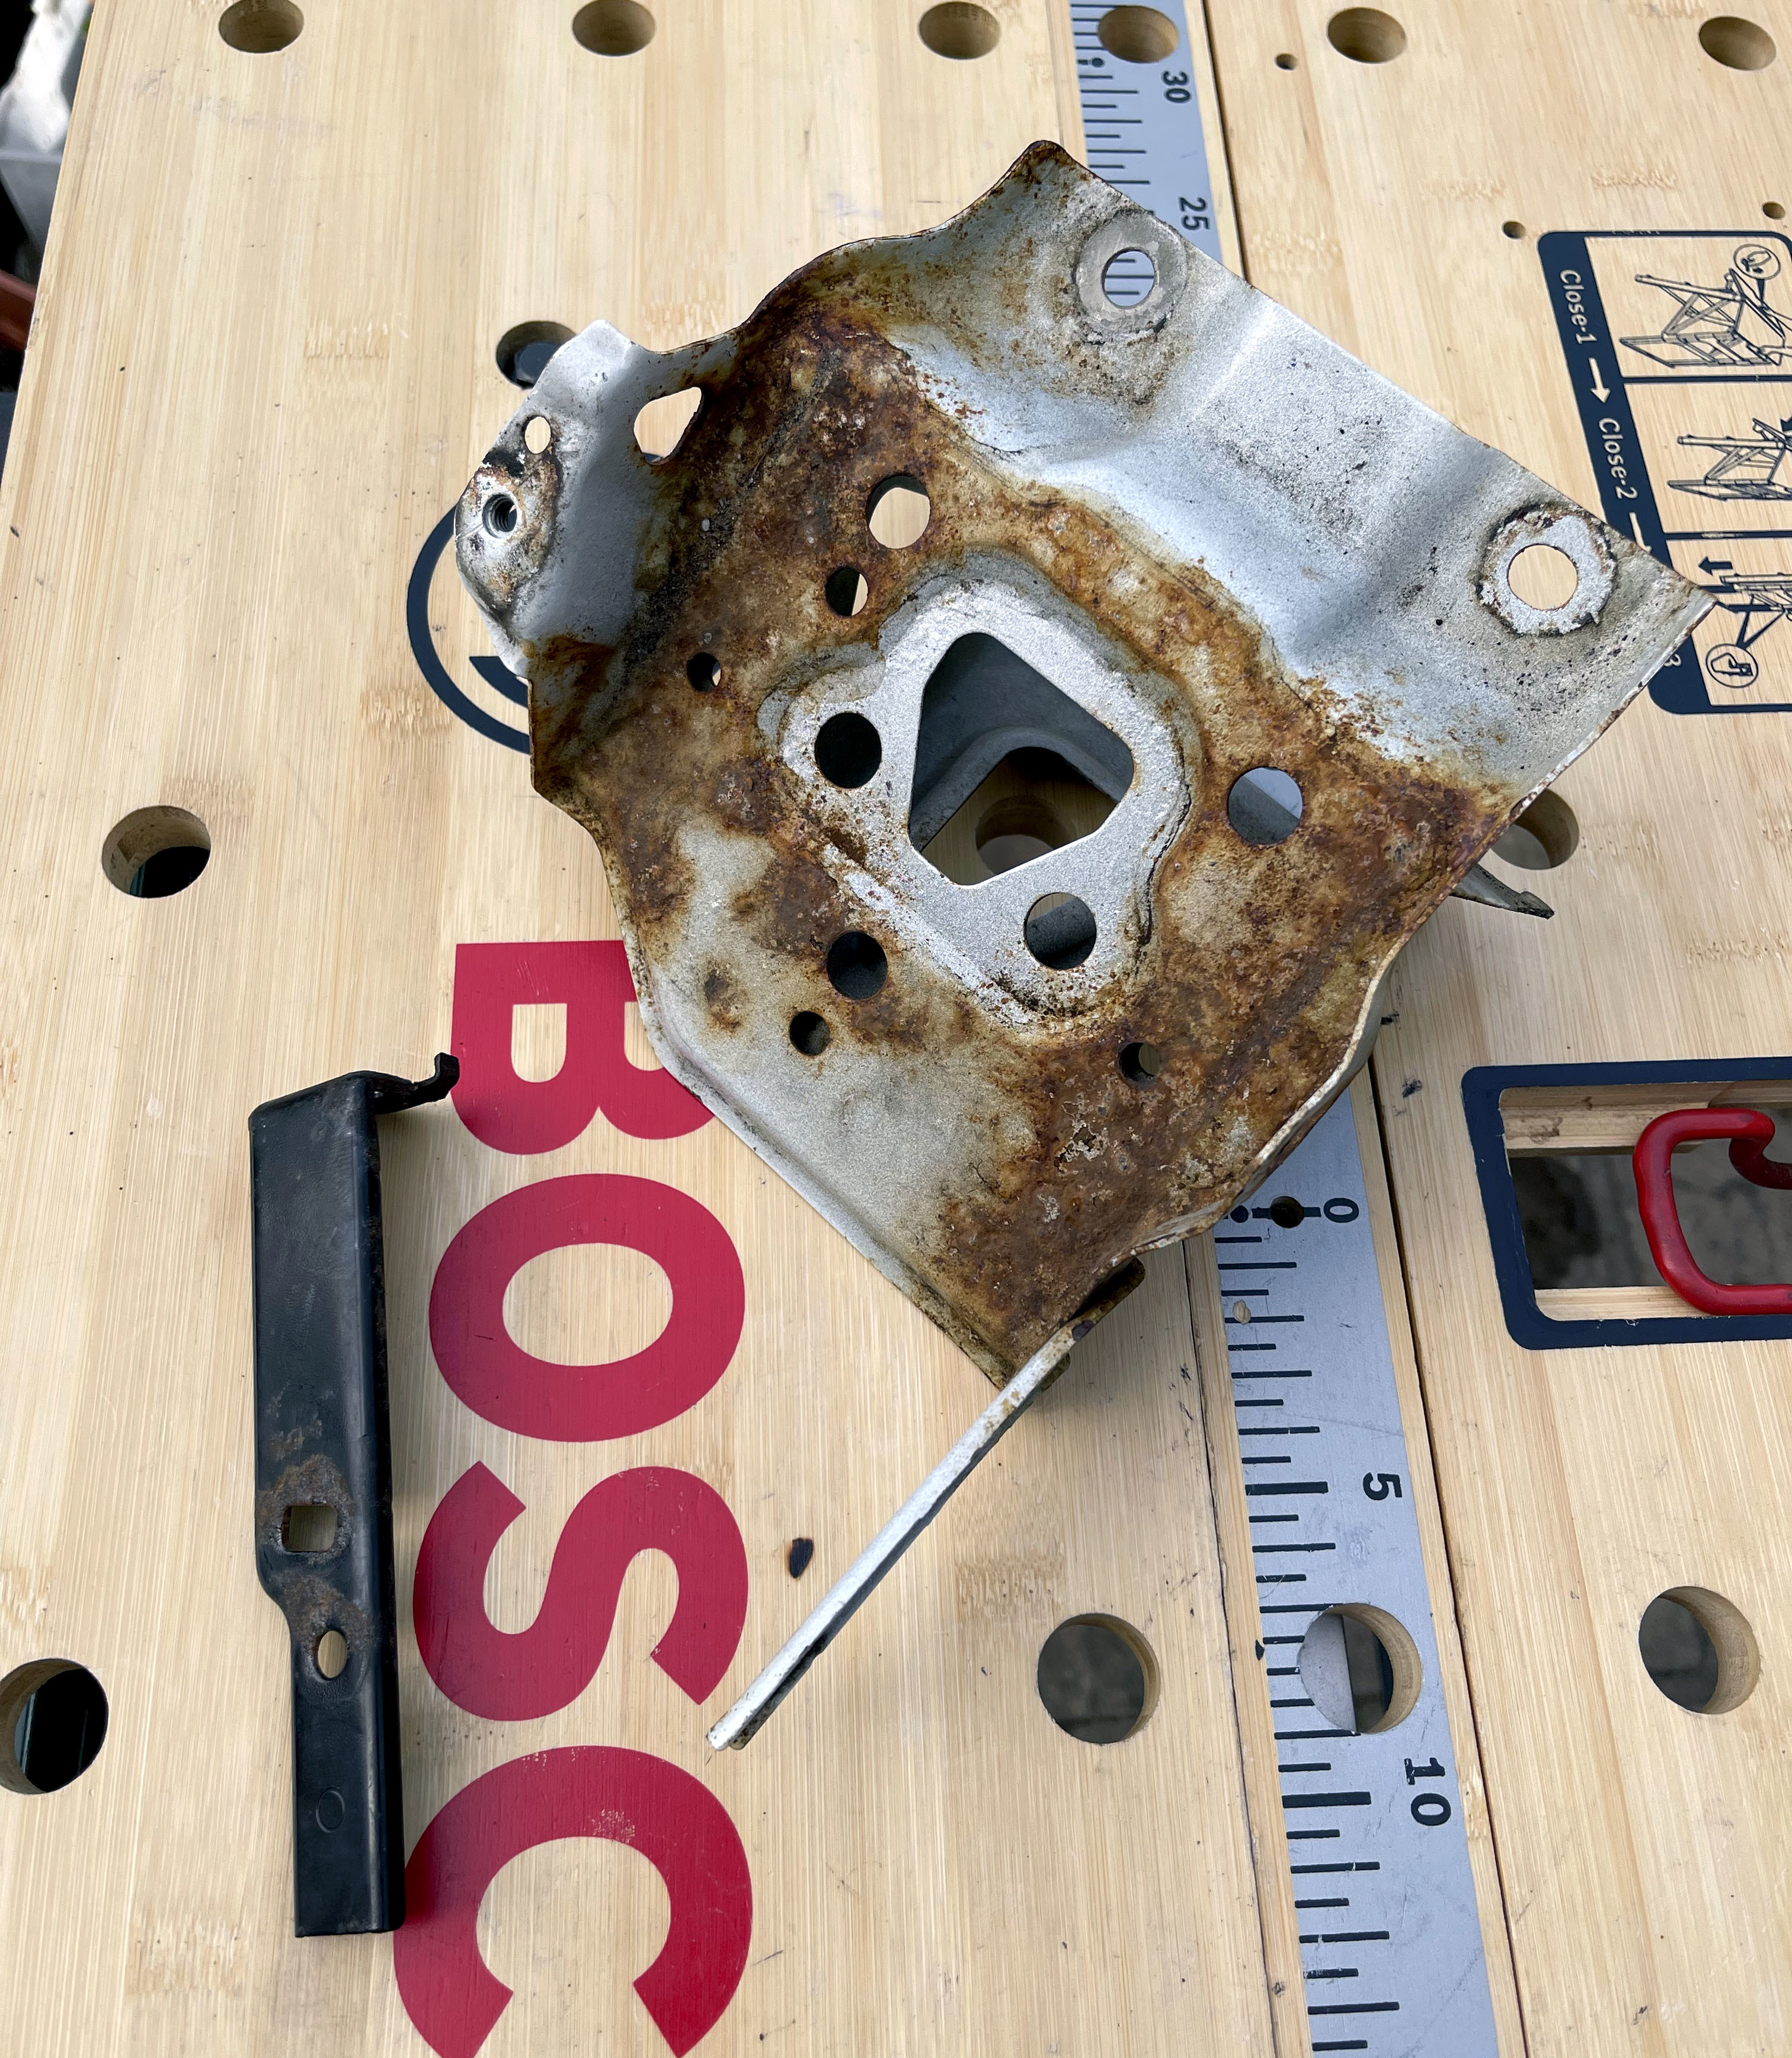
So my 8 year old Varta battery started showing it's wear now that I don't need to use the car for work and only drive it once a week, it got to the point where I would have to jump start it every time I wanted to drive it, so I decided to replace it with a Yuasa 5000 Silver YBX5054 from Tayna Batteries.
When I removed the originally battery, I found the metal battery bracket was very rusty, so I used some white Hammerite paint I had left over from painting my Brake Calipers to bring it back to life.
The part was quite rusty
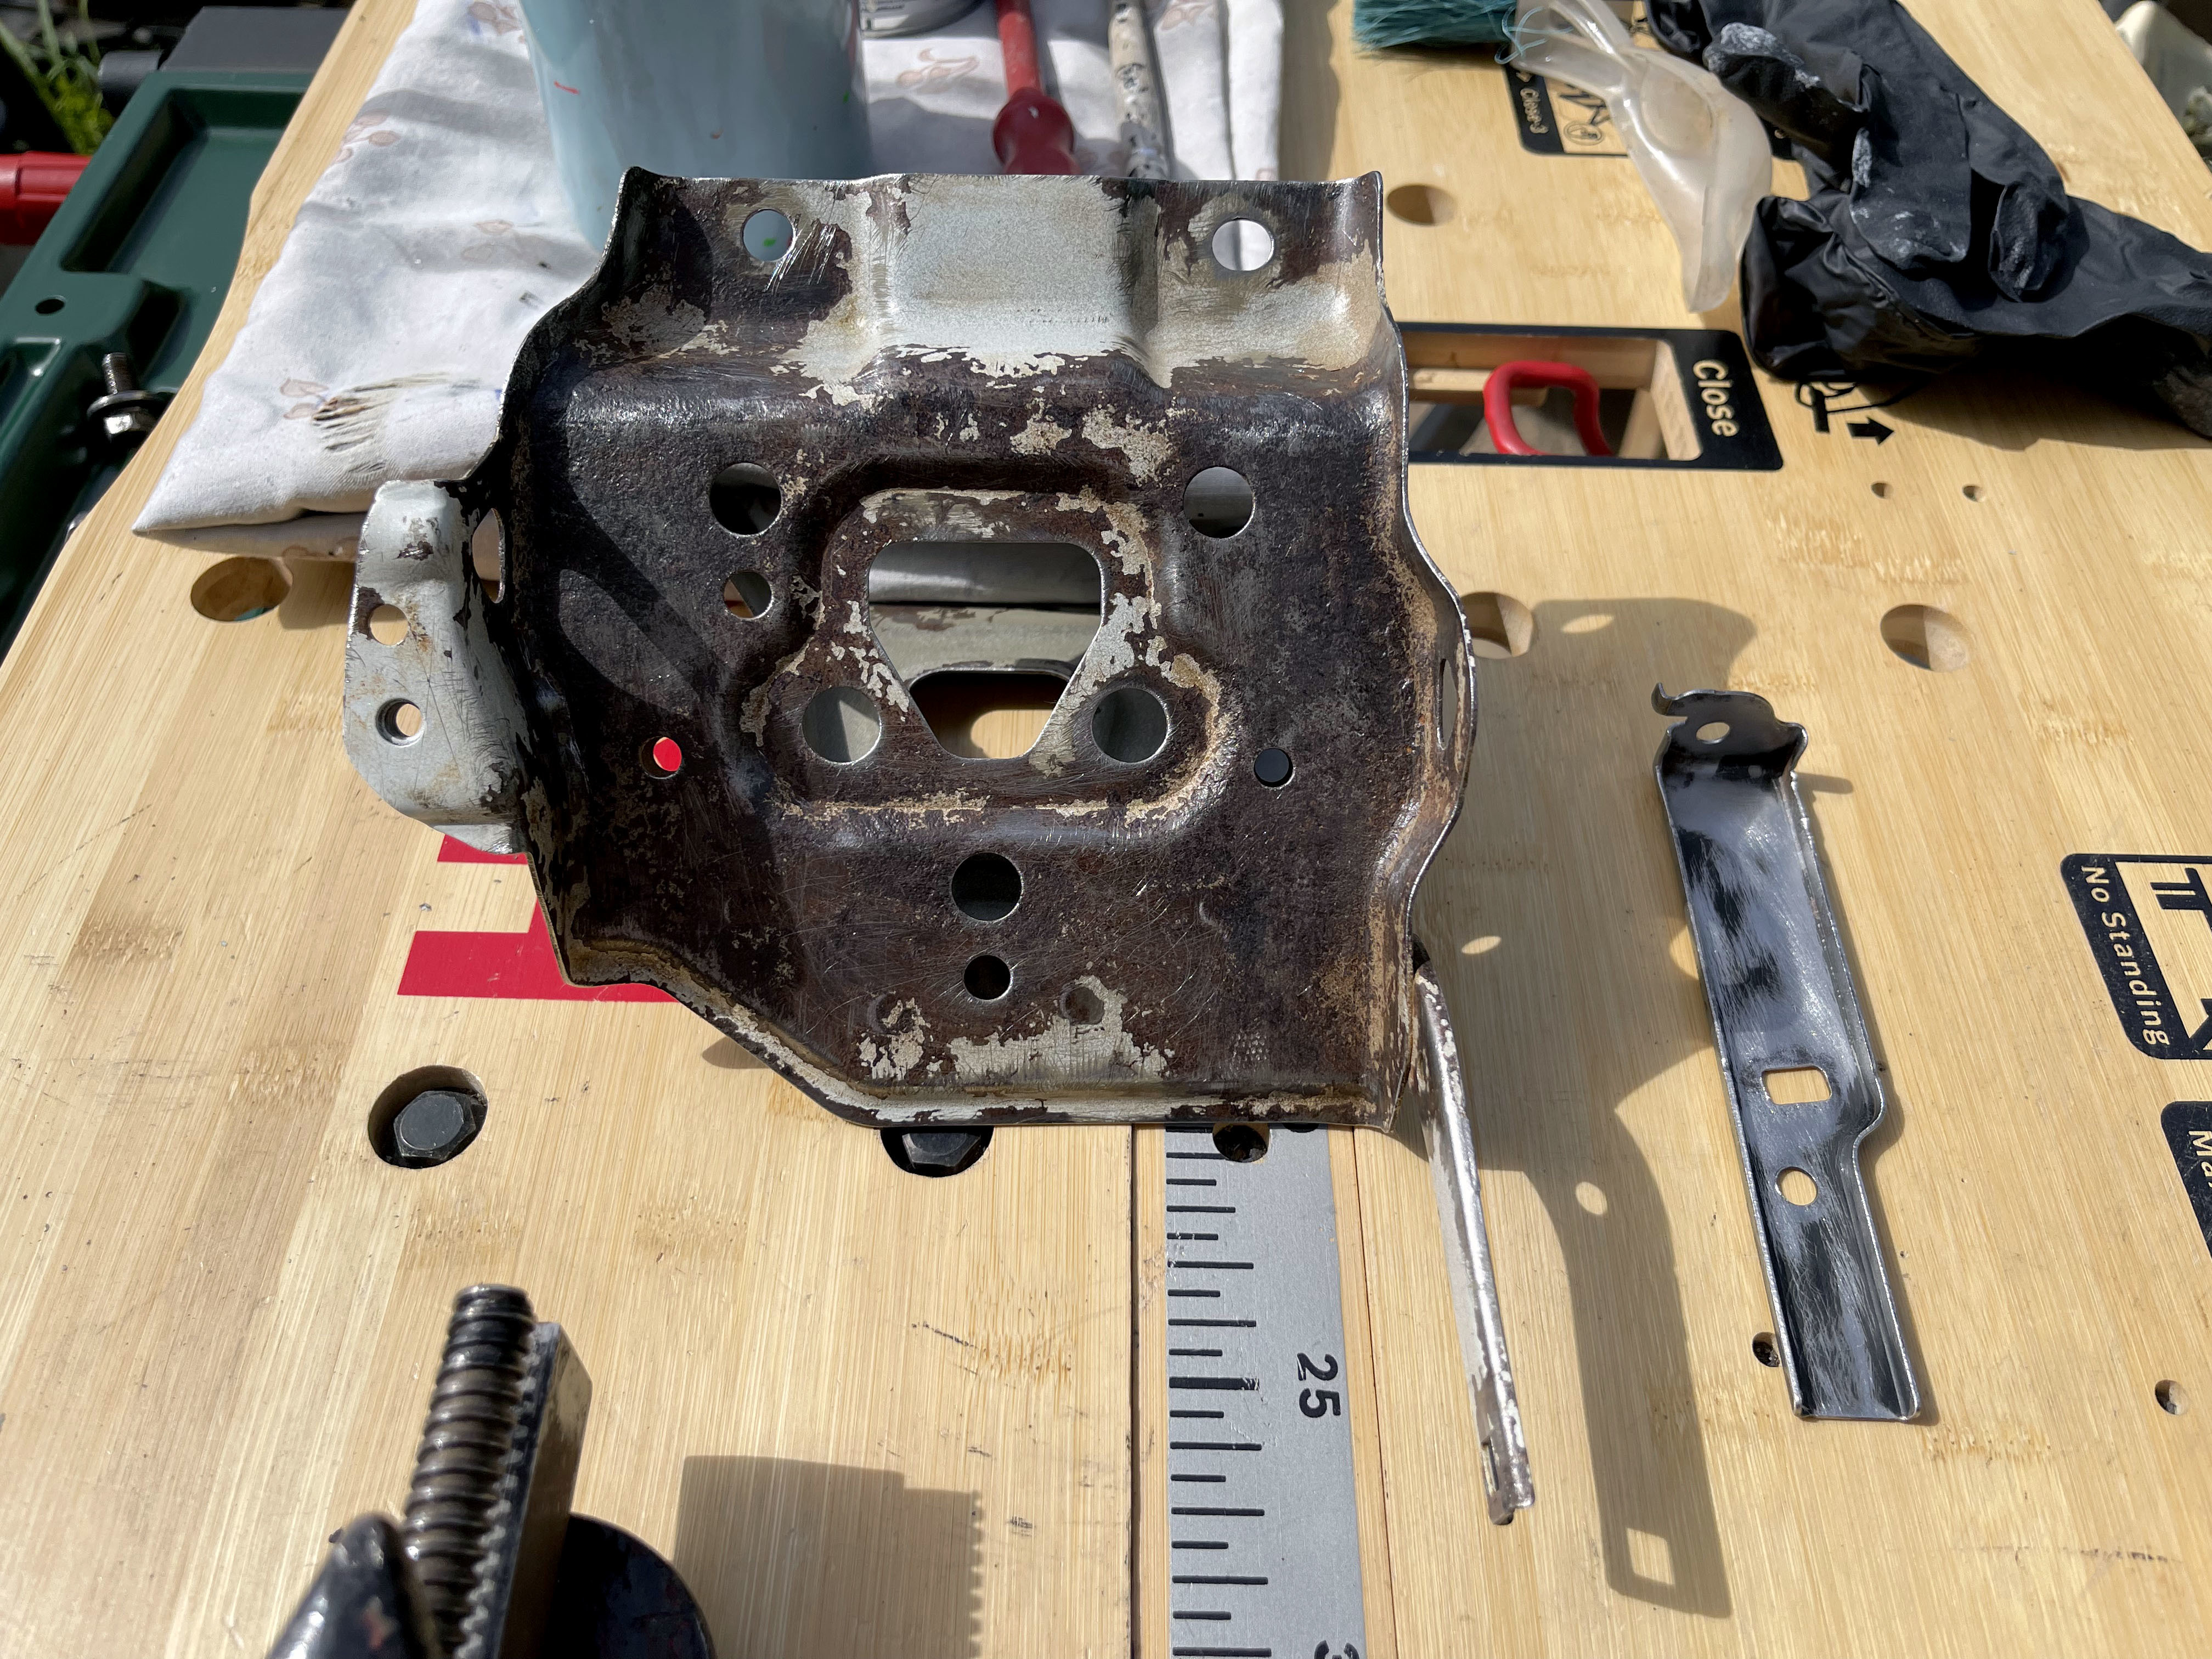
Used a wire brush drill attachment to remove as much of the surface rust as possible
After 2 coats of Hammerite
Freshly painted part installed
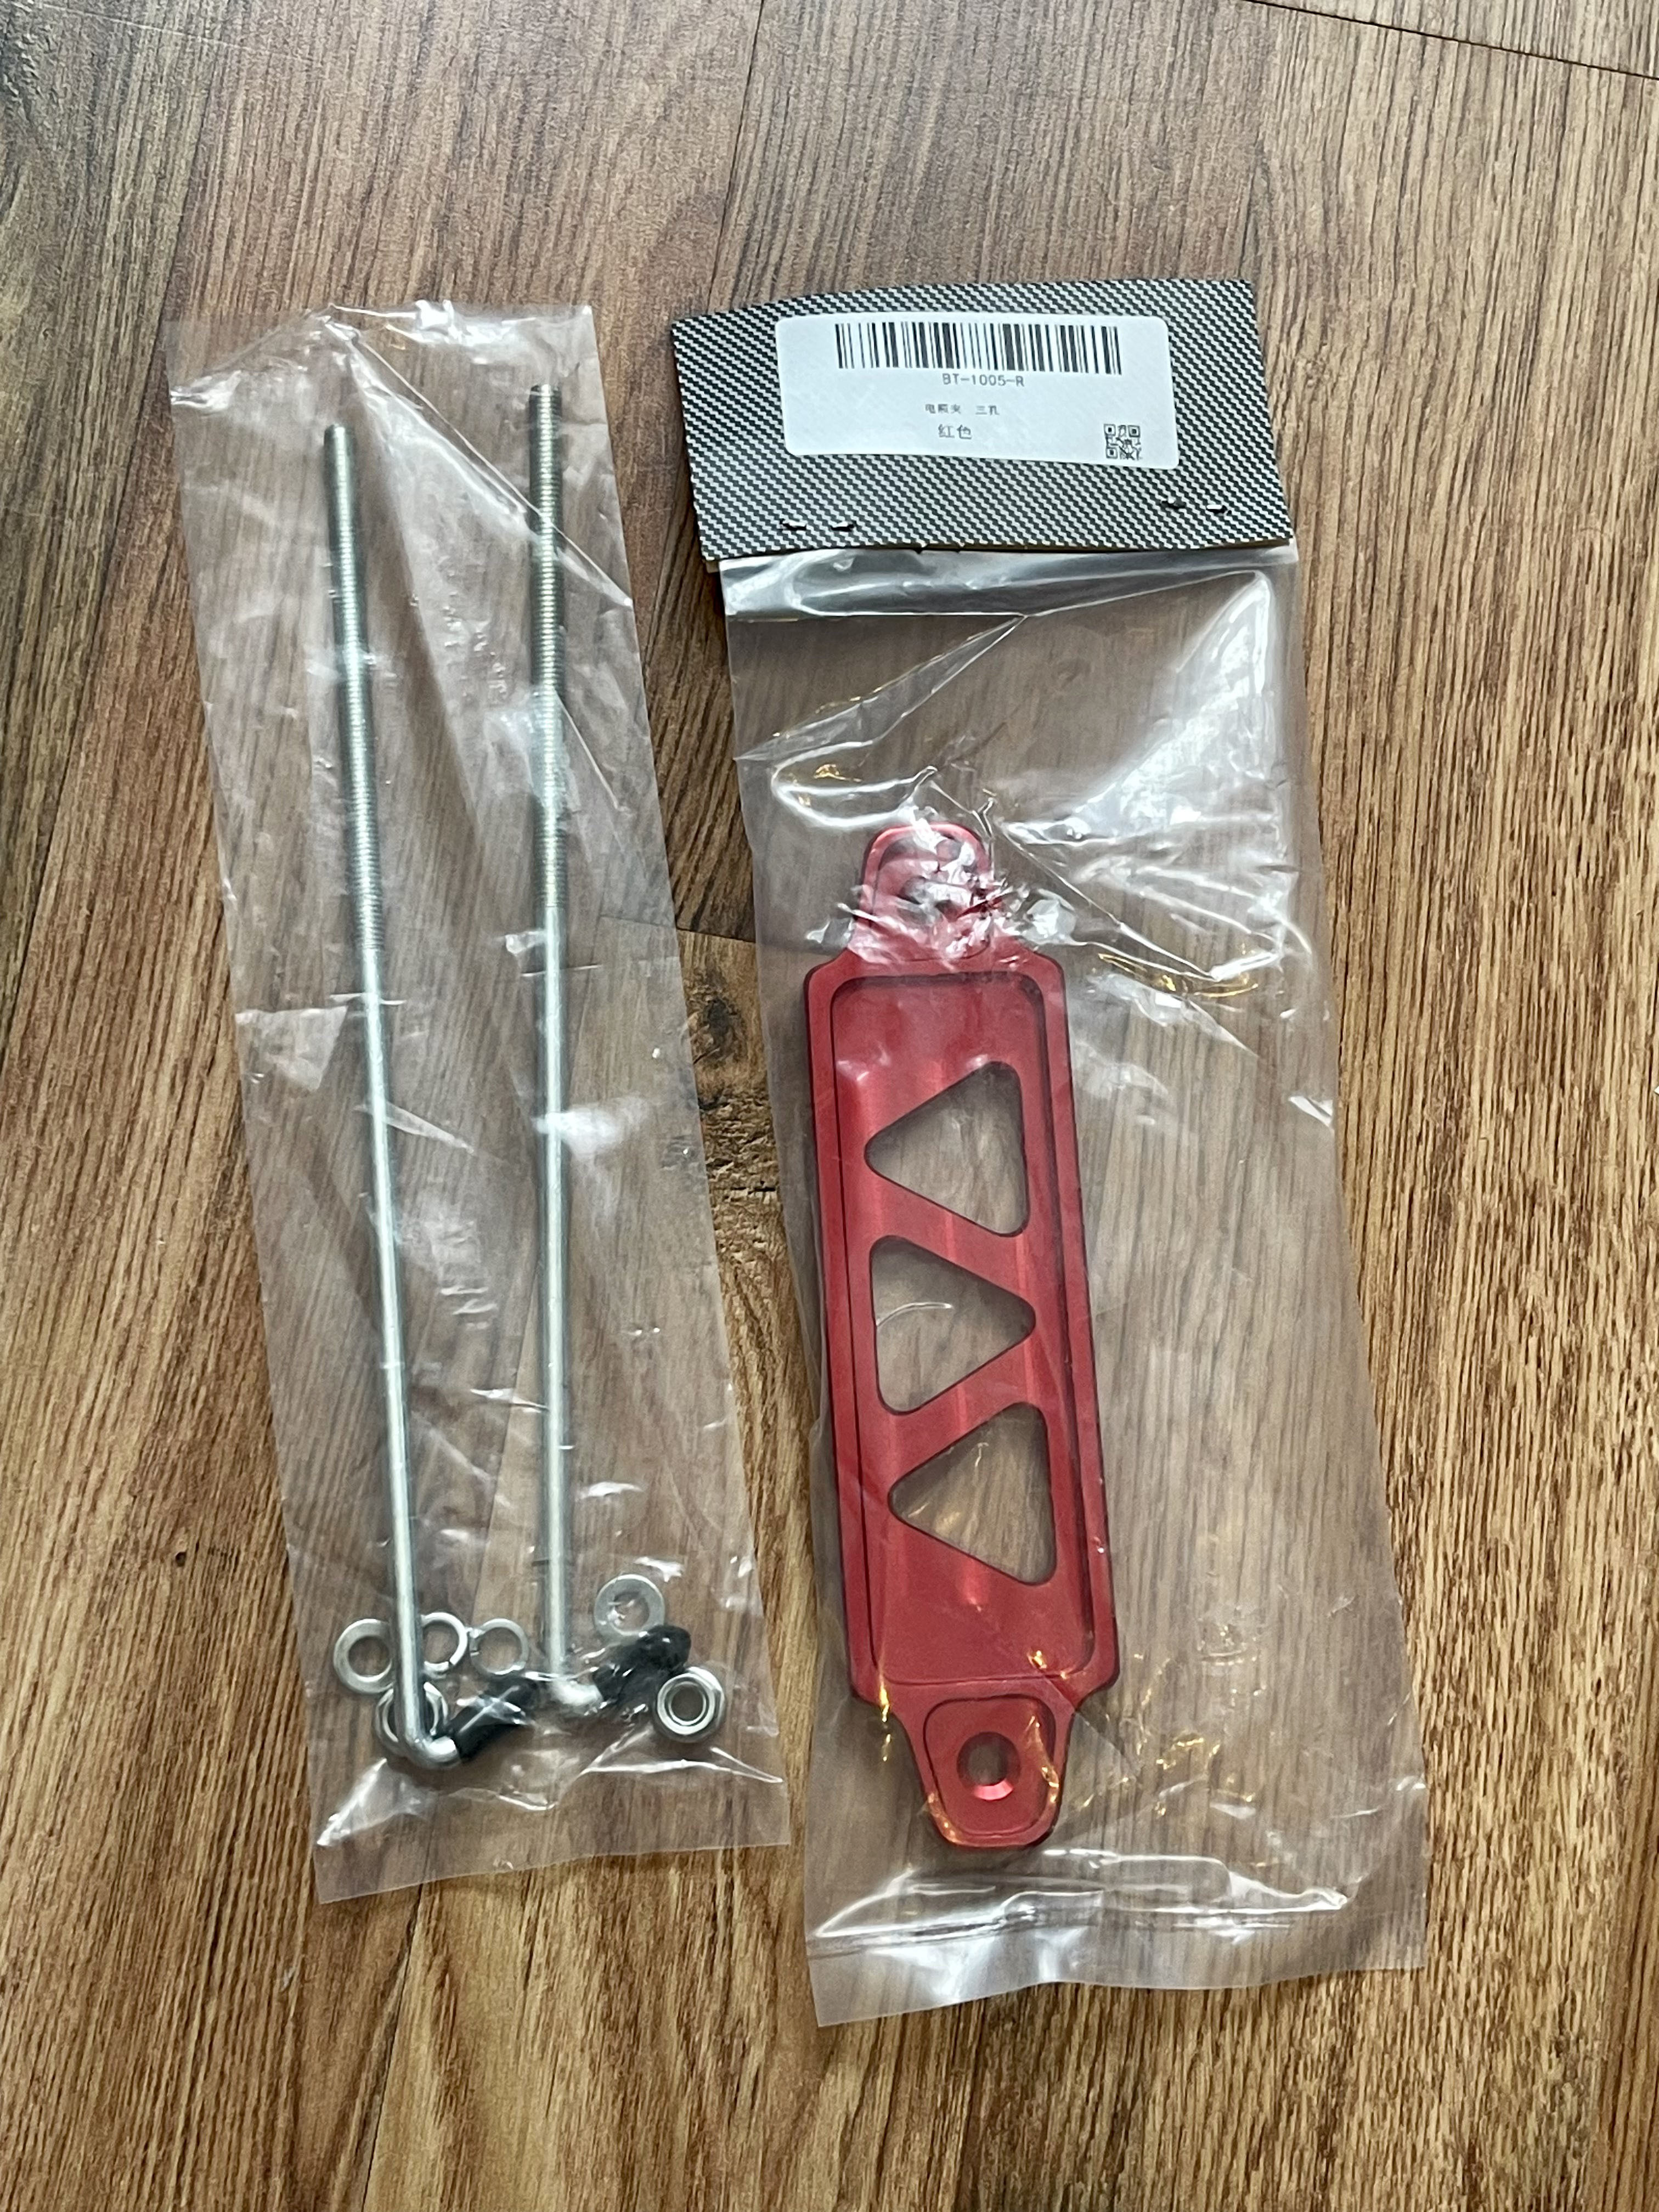
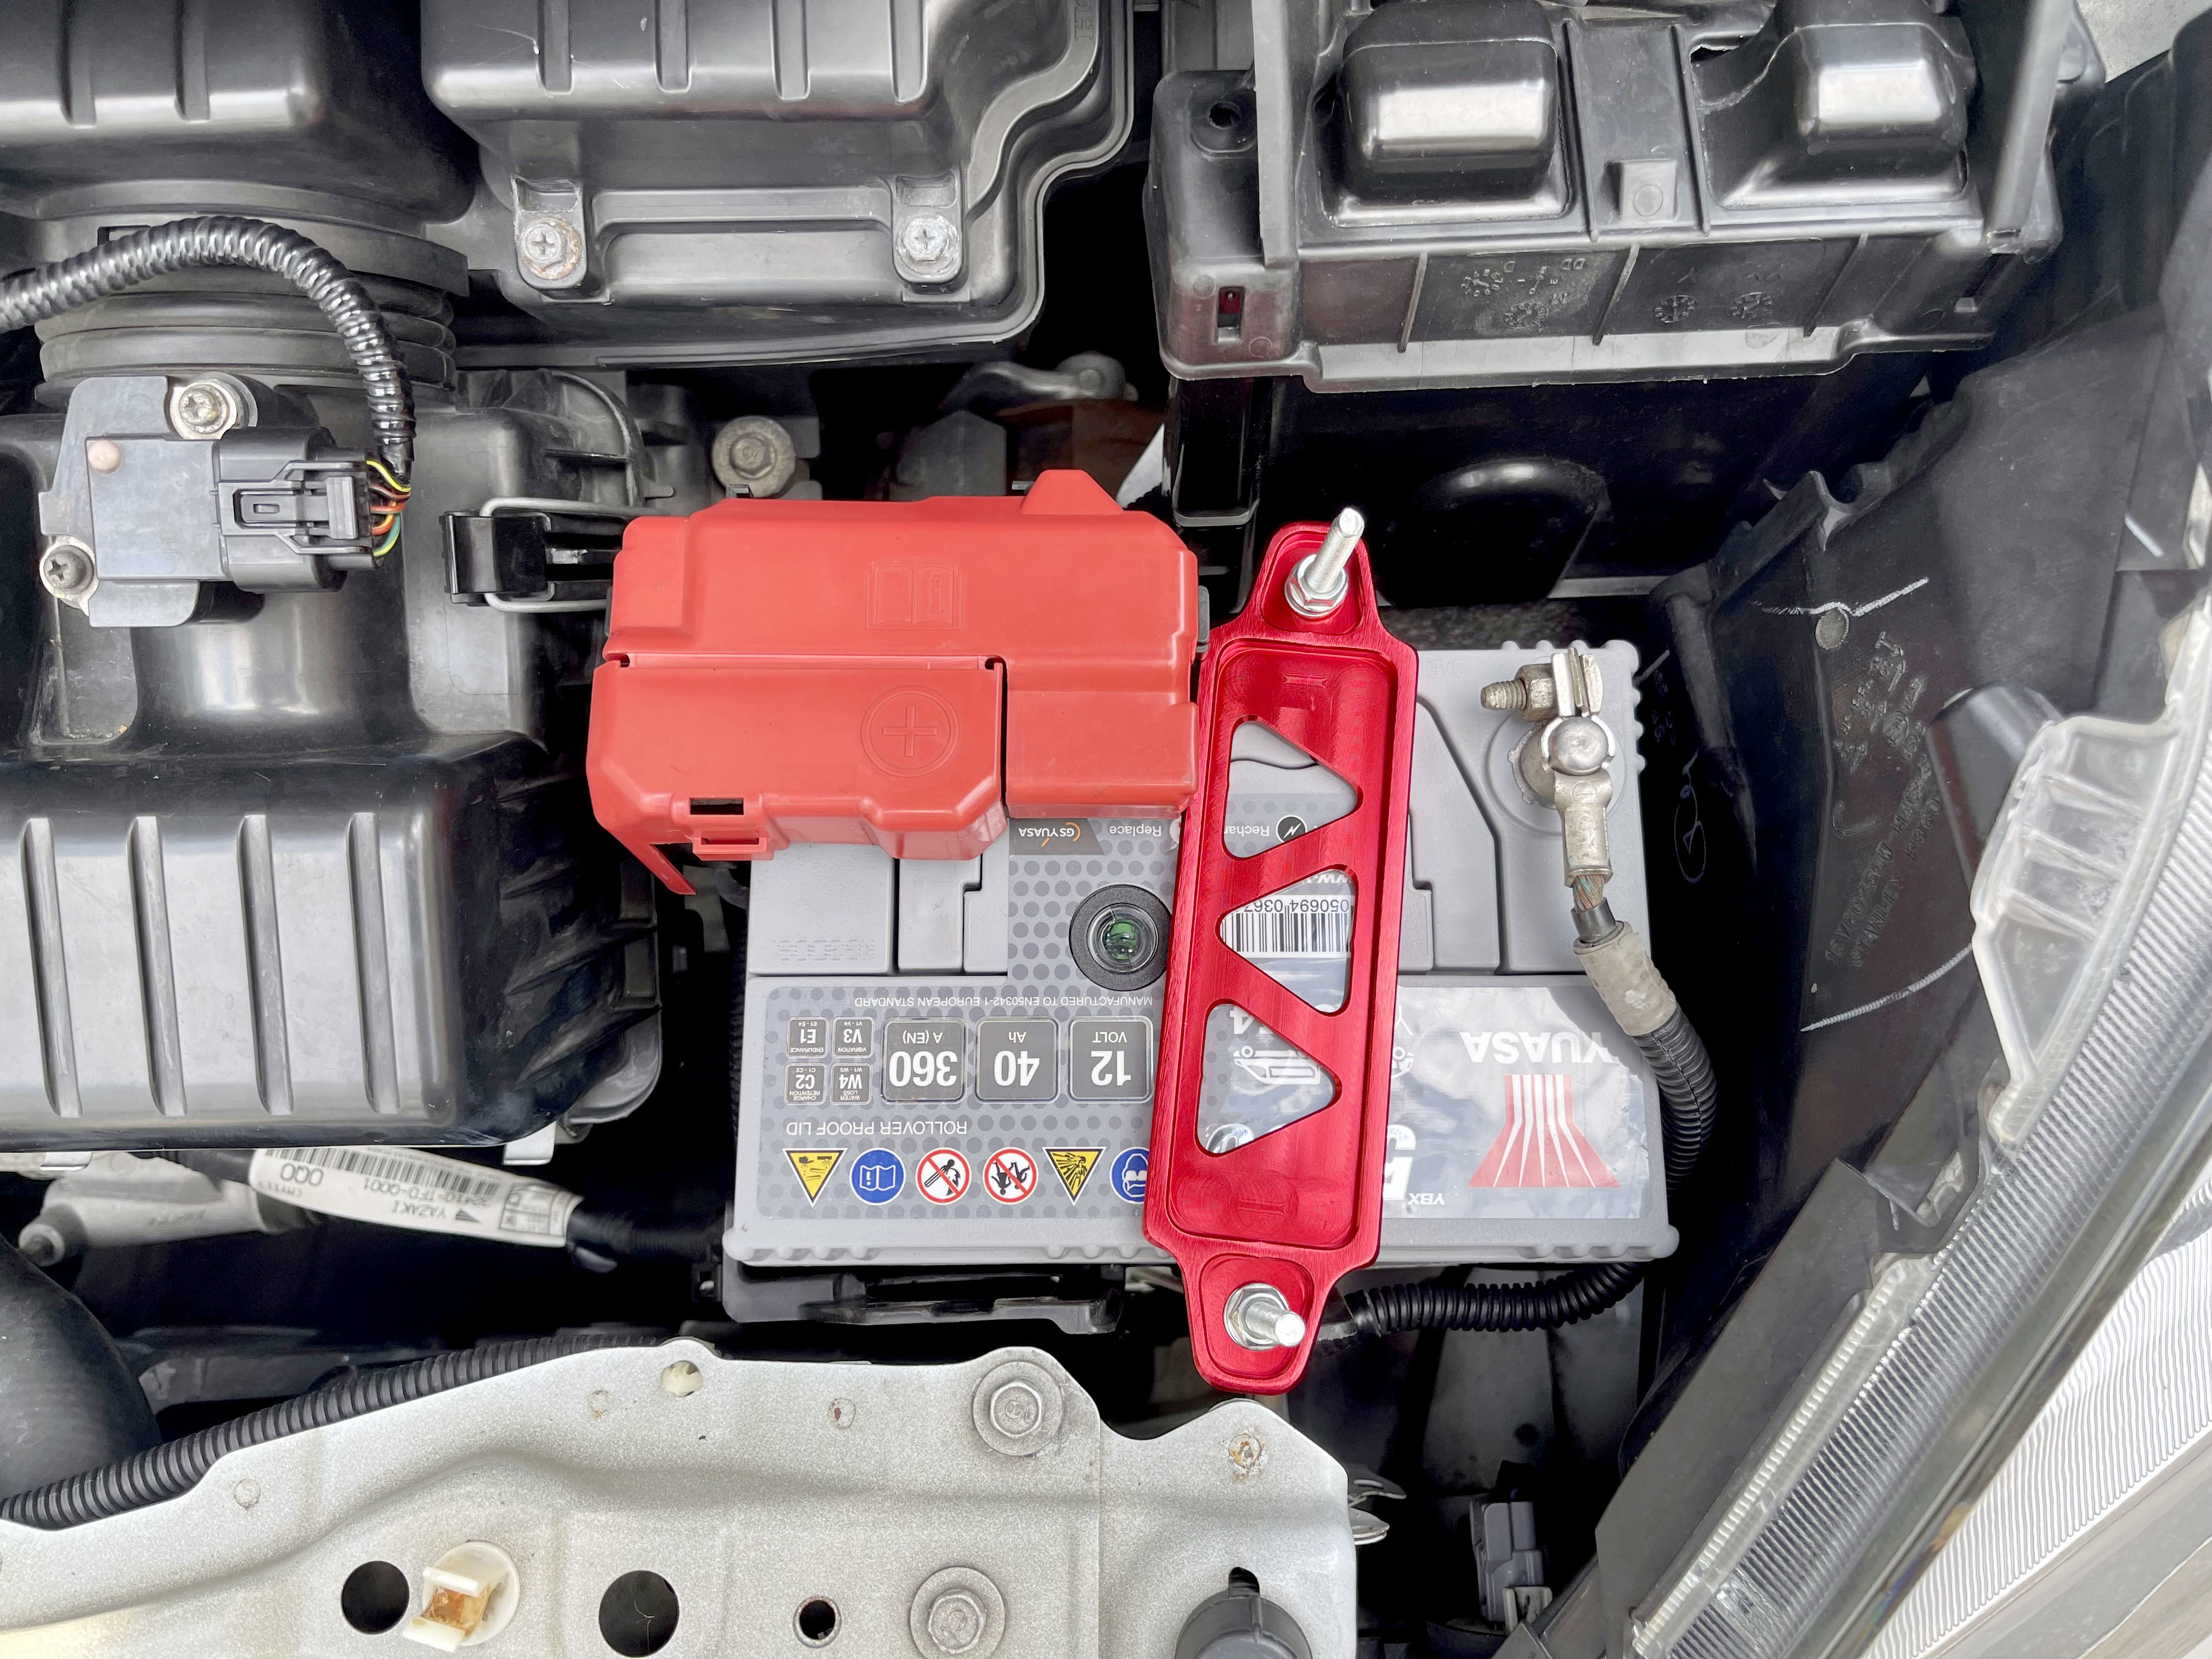
I also decided to buy a new battery bracket instead of painting the black one. I went for a red anodised bracket in keeping with the red Si theme. I got it from AliExpress for �7.38 delivered LINK.
It fits quite well considering. The bolts are a little long, but they don't touch the underside of the bonnet so it's all good. They could be cut shorter if necessary, or the original ones could be reused instead.
I'm currently on the look out for some Red Honda emblems for the front and rear, but finding the correct size and part numbers for the Jazz is turning out to be tricky.
 05-24-2019, 07:47 AM


 !
!