In This Article
Category:
Magazine
Last month we explored the virtues of the 1988-'98 General Motors GMT-400 trucks while introducing the budget-based makeover of this 1997 Chevy C1500. The GMT-400 haulers, or "OBS" (for old body style) as fans have taken to calling them, are similar in dimension to the classic Chevy pickups of 1967-'72, but benefit from more modern technology like electronic fuel injection and overdrive transmissions. Plus, they are plentiful, relatively inexpensive, and parts are easy to source.
Our project truck was purchased by friend-of-Hemmings Glen Sauer, who was looking for something to build with his young son. Glen is a longtime fan of the 1967-'72 Chevy trucks, having owned and built several, but recognized the value in the newer generation when this completely rust-free '97 C1500 short-bed was brought to Vermont from the Carolinas. The price was right, and the "new" pickup even had shiny factory paint. However, there were some things Glen wanted to improve to create a fun street truck with a modest budget.
Topping the list of trouble areas was the interior. This particular example left the factory with a blue cabin that Glen felt looked like something from an '80s Buick LeSabre. The plan to correct this involved salvaging a gray interior from a pair of parts trucks acquired for this project. Between the two, Glen managed to get an uncracked gray dashboard, a full set of gray plastic interior panels, and a 60/40 split bench seat in gray vinyl and cloth tweed that needed a little repair work. Glen also ordered a new carpet and some new door handles and switch panels to complete the refurb project.
For this installation, Glen enlisted help from friend David "Junior" Nevison, who spent lots of time in a previous life working on the interiors of these GM trucks back when they were newer. Junior's insights were really valuable in getting parts like the dashboard swapped without damage. Check out the photo captions to see how he turned a clapped-out, 200,000-mile blue interior to a fresh, sporting gray.
 1. Owner Glen Sauer didn't like the blue interior on his recently acquired '97 C1500, and it was pretty well worn anyway after nearly 200,000 miles and more than 20 years. The plan to improve it on a budget involved swapping the blue bits for a gray interior, using a combination of refurbished used pieces salvaged from parts trucks along with a few select new items.
 2. The first part of the renewal focused on swapping in a better-condition gray dashboard. This might seem intimidating, but Glen was able to enlist the help of friend David "Junior" Nevison, who has spent lots of time working on 1988-'98 GM trucks. Junior, in turn, told us it really isn't a big deal: Lower the steering column, then loosen one bolt up under each end of the dash panel, and then remove the row of fasteners along the top. The rest is electrical plugs and other connectors.
 3. Junior had the dash swapped quickly, and then proceeded to remove all the remaining pieces of the blue interior from the cab. On GM trucks of this vintage, most of the interior's plastic panels that aren't fastened with obvious Phillips-head screws are held in with clips of some kind. Most will yield to pulling by hand, but take care not to damage the panels during this process. They kept all the old pieces on hand until the project was done, then salvaged extra clips and fasteners.
 4. Though they intended to use lots of reclaimed items from two different parts trucks, a fresh carpet seemed like a good investment. They got a new gray carpet for a standard cab from Auto Custom Carpets and it dropped right into place. All of the edges come oversized and will require trimming, however.
 5. After getting the carpet positioned properly, which included cutting around the pedals up behind the dash, Junior started trimming along the back of the cab. This is the point where a commitment is made to the carpet's positioning, so the cuts need to be accurate. Junior uses a razor knife with a fresh blade.
 6. Prior to starting the interior installation, Glen had taken the factory-installed headliner to a local trim shop to be recovered in fresh gray material. The original, molded fiber backing gave up its blue material fairly easily, and was then sprayed with adhesive and covered with new material that included a thin layer of foam.
 This serves to smooth out the surface, so that when the replacement material is fully applied to the molded headliner card, it looks like new.
 7. The headliner needed to go in next, because it is partially held in place by the interior side panels, which need to go in to finish the carpet install. There are Velcro strips along the front edge of the cab roof that attach to strips on the headliner backing, and that's where Junior started. He positioned the front edge of the headliner, pressed the Velcro strips together, and then wrapped the loose material edges up and around the mounting lip, just as the factory intended. Then the rear portions of the headliner are held up by the interior side panels, which were loosely put into position first.
 8. The A-pillar covers also contribute to keeping the headliner in place and include edging that continues rearward, over the door opening, to join the rear side panels—this will completely cover the edges of the headliner. Clips fasten the covers and then the factory grab handle will be installed.
 9. With the side panels popped back into place, Junior can put the pieces back onto the rear of the cab. A piece of black sound-deadening material is rehung using the original plastic push clips, and then another gray interior panel salvaged from a parts truck is installed, covering the sound deadener's top edge and clips.
 10. With the headliner and side panels taken care of, Junior can turn back to the carpet installation. The rear edges of the carpet were cut to fit neatly under the rear side panels, and then the edges were trimmed with the razor knife to fit the door openings. This is another area where accurate cutting is key—the carpet edge will be covered with the sill plates, but there is a narrow margin between the edge of the plates and the groove they fit into.
 11. In the interest of staying on budget, Glen opted to use a set of gray seats salvaged from a parts truck rather than recovering the truck's original blue seats. Despite being really dirty, the gray seats were in good shape, save for one problem area on the driver's side where there was a sizable hole.
 12. Back at the upholstery shop, the gray driver's seat was stripped of its bottom cover so the hole could be repaired. This will be handled by replacing the entire vinyl side panel. The trimmer cut the factory stitching to remove the panel, then used that piece as a pattern to make a replacement from similar material.
 13. The new panel was sewn into the factory seat cover and then the cover was reinstalled on the seat. The reassembled seat now looks factory but will still need a thorough cleaning.
 14. After an initial attempt at installing the refurbished seats, they found that the mounting brackets were not fitting the floorpan correctly. It turned out the brackets on the gray seats, which came from an extended-cab truck, were different than the standard-cab pieces. Fortunately, they still had the old seats, and the brackets were interchangeable. Glen was able to get SEM interior paint to spray the blue brackets with gray.
 15. With the new brackets painted and installed, they could finally mount the refurbished gray seats. This is a 60/40 split bench arrangement, but that's what this truck was built with, so the original mounting holes were reused.
 16. Also taken from a parts truck were the gray seatbelts. The outer reels bolted right into the same spots as the blue originals. Glen had taken these to a local upholstery detailer to have them cleaned up along with the gray seat, and they came out looking new.
 17. The truck's factory blue door panels were in rough shape, but Glen was able to get a good pair of gray ones together from his parts trucks. After cleaning, the new panels were swapped for the old ones. Glen ordered new door latch handles to replace the commonly broken originals, and new powerwindow switch panels in gray are on order now. A little bit of remnant carpet will be used to freshen the lower sections.
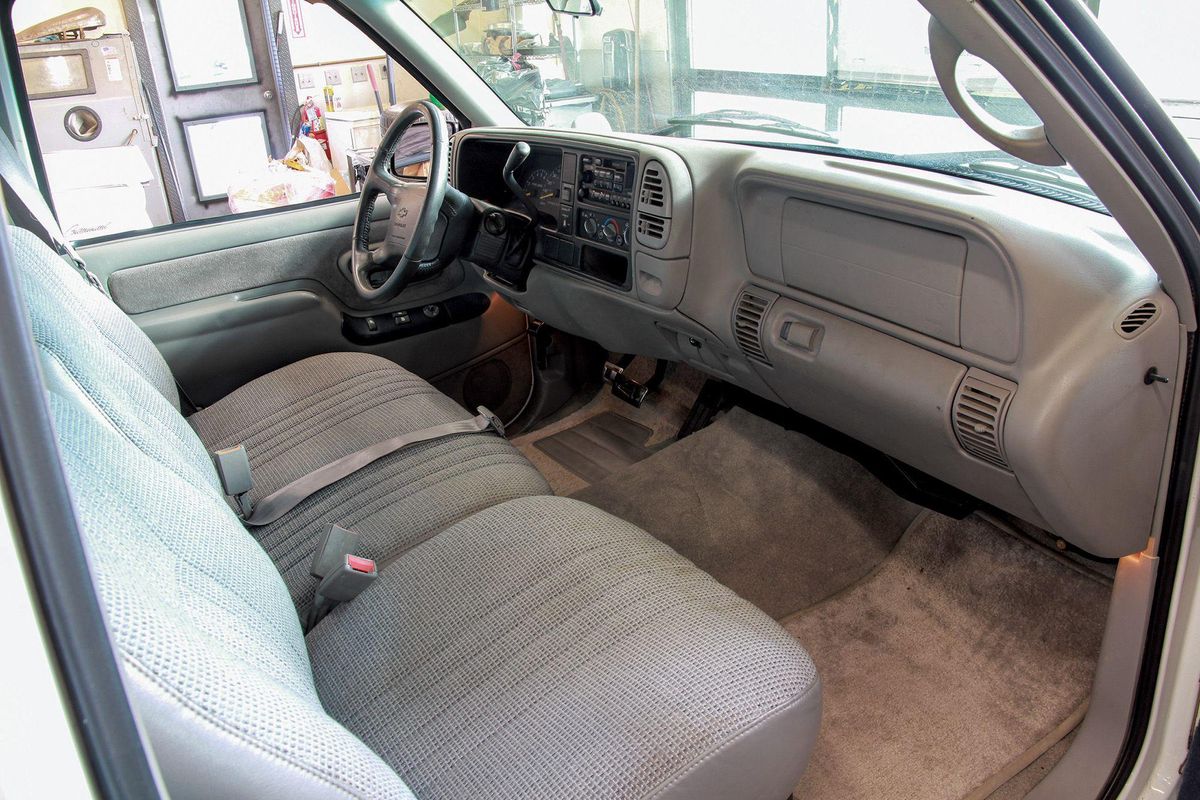
 18. Here's the completed interior rehab, looking fresh and a bit more contemporary in gray. The tweed split bench looks good and will remain for a time, until a factory power leather split seat Glen pulled from the salvage yard can be recovered in new skins. But that's another project for another day.
Recent


Earth shaking. Ground pounding. Those are a couple of choice adjectives that describe Steve Kaiser’s 1970 'Cuda as it crackled by us during Hemmings Musclepalooza at Maple Grove Raceway on the way to the staging lanes. Kaiser then took it up a notch by doing a rowdy burnout and hanging the hoops on an 8.80 pass at 151 mph. After our ears stopped ringing, we tracked him down to get the details.

If you noticed the name Kaiser in gold leaf on the door, you might be wondering who that is. Steve Kaiser’s uncle Bob Kaiser started the Twin Hills Oldsmobile dealership in 1977 in Muncy, Pennsylvania, right around the time Olds was getting into drag racing with the glorious G-body Oldsmobile Cutlass. To promote the sport, Oldsmobile gave Uncle Kaiser five Cutlasses to race in the Stock and Super Stock classes. As a young man, Steve Kaiser would vacation at drag strips and attend drag racing events with the family until the age of 16 when he pursued other interests.

During that time, Steve’s father also got into the automotive business and helped create the Kaiser Brothers dealership that expanded into a Chrysler/Dodge/Jeep/Ram dealership with a larger facility, also in Muncy.

In 2008, Steve got back into cars. He began by installing superchargers on late-model Challengers and Chargers under a license by Mr. Norm out of the Kaiser Brothers dealership. By 2011, he had started looking for a race car. He soon found a 1970 Plymouth ‘Cuda that was well known around the Kentucky area and raced by its second owner, Johnny Dotson, a Dodge dealer from Paris, Kentucky. The ‘Cuda was painted in the classic black-and-white Direct Connection colors with a 513-inch 440 under the hood, a 727 transmission, and Dana 60 rear. That combo ran 10.80s in Super Pro and had been a track car since 1978.

Steve bought the car and immediately pulled the drivetrain and sent the car out to get painted to match his uncle’s racing livery. He started running 10.80s-90s in the Pro series with a steep learning curve. “I saw red (lights) a lot,” Steve says, “it was frustrating.” To make matters worse, he broke the block and had to rebuild the engine using a Mopar Performance block and a new rotator. The combo was mostly the same with a 0.60-over block, Indy heads and intake, and a 1050 Dominator.

The second year looked a little bit better, and he started winning rounds, but not races. “I got to the finals, but didn’t win,” Steve says. “I bought back in a lot, I can tell you that, I’m not a professional.” Regardless, Steve had fun racing a serious ‘Cuda for five years. As he got more experienced, he wanted to go faster.

By 2021 he had pulled the 440 and had Brian Tilburg build a 572-inch Hemi to go in its place. The Hemi had Stage V heads and a Keith Black block, a pair of Holley 950s, and an MSD Grid system that uses a crank trigger. The new engine made 1,017 hp on 114-octane VP and the car immediately went from running 10.80s to 9.60s in the quarter mile.

Today, Steve races the ‘Cuda in Nostalgia Super Stock and Hemi Super Stock races near his home in Muncy, Pennsylvania. We found him racing at Hemmings Musclepalooza in Maple Grove.


Trending


╳