I Was There (Sort Of): An Epic Cross-Country Journey In "Lulu", My Family's 1936 Buick Special Convertible
08/07/2023

Words and Photography by Joe Hopkins
Car CultureI guess most all of us have heard our parents tell stories time and again that eventually end up becoming a big part of family lore. As I was growing up, I heard one such story quite often about a trip that took place during 1946 and, in full disclosure, it was just prior to this trip that my mother learned she was pregnant with me. In a sense, I was there.
To me, it’s worth sharing since it’s common knowledge these days that a fair number of vintage car owners are unfortunately reluctant to drive their cars too far from the barn for fear of a breakdown. My parents, Harrell and Mary, had no such fears. They were married in October of 1944. Shortly after my father was discharged from the Army in 1945, they purchased a 1936 Buick Special convertible coupe that they affectionately called Lulu. This Buick was painted black and sported dual side-mount spare tires and a Carson top. Inside were maroon leather seats. In my mind, Lulu wore an attractive color combination.
In August 1946 they decided to take an eight-week driving trip east from their home in Los Angeles, California, to see several distant sights and visit relatives along the way. Prior to the trip, my father overhauled the Buick’s straight-eight engine and had four Firestone retread tires mounted. Keep in mind that this was just after World War II when new tires were still hard to come by. As it turned out, my Aunt Sally—who also had relatives “back east”—was invited to go with my parents. If you’ve ever sat in a Thirties coupe, you know that two people fit nicely, but three is somewhat of a squeeze... especially with a floor shift in the middle. Imagine traveling like that cross-country with luggage.

They began the journey on what we now nostalgically call “old Route 66,” but back then—with nary a hint of the interstate highway system built—it was one of the main east-west ribbons of pavement through the Southwest. The trio first drove Lulu from Los Angeles to the Kingman, Arizona, area where they jumped off to see the splendor of the Grand Canyon. From there, they turned north into Utah and made stops at Zion and Bryce Canyon National Parks. Next on the sightseeing list was Yellowstone National Park in Wyoming, after which the Buick was turned east once again, this time towards my father’s roots in Southern Illinois.
After visiting relatives in Illinois, my parents and aunt headed into Indiana, where the Buick finally gave them a bit of trouble. They had just arrived in Versailles, Indiana, when my father started hearing funny noises coming from the differential. Like many other places back in 1946, Versailles was a small town with very limited services that catered to travelers, but they were able to find a hotel with rooms available. Once settled in, my father began to work on the Special. Using nothing more than the basic jack normally used to change tires, my father was able to lift Lulu onto some blocks he had found. With just enough clearance, he crawled underneath to see what the problem was, and soon determined that the carrier bearings in the differential had self-destructed.
Three years without civilian automobile production meant the number of spare parts had become depleted; car owners did what they could to keep what amounted to a nation of used cars in running order. Coupled with the unfortunate fact that there were no garages or auto parts suppliers available in Versailles, my father hatched a plan. My mother and aunt would take a Greyhound bus to Cincinnati, Ohio, and my father would take another bus in the opposite direction to North Vernon, Indiana. If either found any carrier bearings, they would buy them. As it turned out, they each found only one bearing—just enough to get the job done.

With the new bearings in hand, my father found a local blacksmith in Versailles who was able to remove the damaged parts and install the new replacements. After returning to the hotel parking lot, my father installed the repaired carrier into the Buick’s differential while lying in puddles of water—it was pouring rain. When finished, my mother washed his clothes in the hotel room’s sink (laundromats as we now know them did not yet exist) and they were finally on the road the next day, hanging a few clothes out the window to dry as they drove.
With the bad bearings in the rearview mirror, their trip continued in Lulu to Niagara Falls, New York, where my mother had been born, before they took a brief jaunt up into Ontario, Canada. Scooting back into New York, the trek east finished in Boston, Massachusetts, and—after a little sightseeing there—they turned the convertible west. The long journey home took them through New York City and eventually into Kentucky, after which they turned south and went to Chattanooga, Tennessee. Logic would have you think my parents and aunt then went west again, but they first went south to Dallas/Ft. Worth, Texas, before heading towards Las Vegas, which was then still a one-horse town. From there, it was on to Los Angeles.
In total, my parents drove Lulu the Buick 8,019 miles, all on mostly rudimentary two-lane roads, and the only trouble they ran into were failed carrier bearings. Interestingly, those recapped tires my father had mounted made the entire trip without suffering a single puncture or failure.
My parents’ journey in Lulu begs a question: If you overhauled the engine and put retread tires on your antique car from the Thirties, Forties or Fifties, would you attempt any hint of a cross-country trip with it? Even though it’s been done— and this can’t be the only such occurrence—most of us wouldn’t consider it today. But that’s what life was like just after World War II: retread tires, lack of mechanical parts, two-lane roads, and a very sparsely populated Western United States. This trip proved the reliability of these cars and the resiliency of the people who drove them. The cars were built to be driven and were easy to maintain. And I was there… sort of.

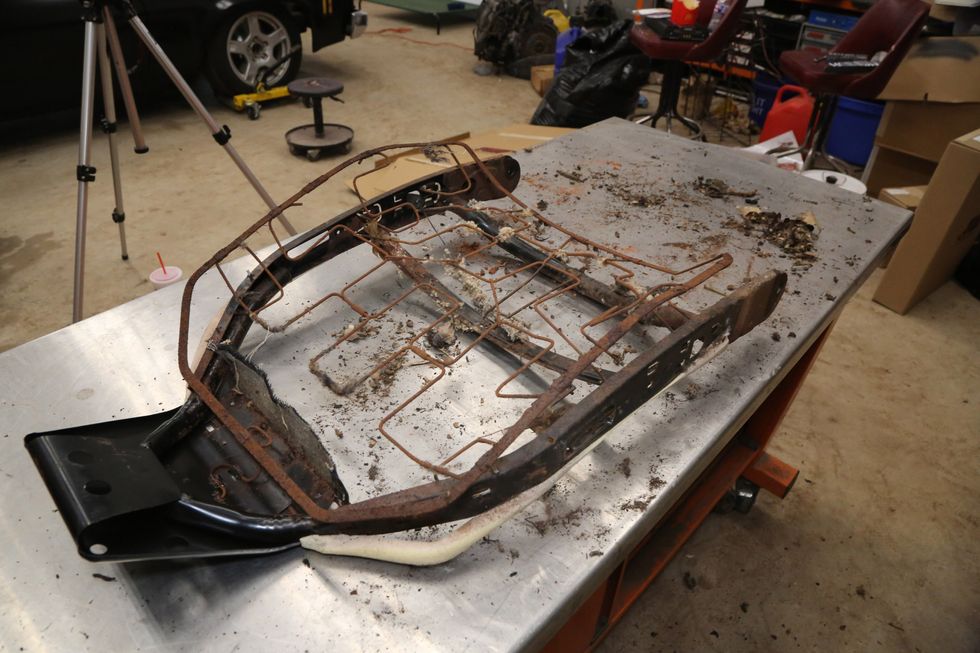
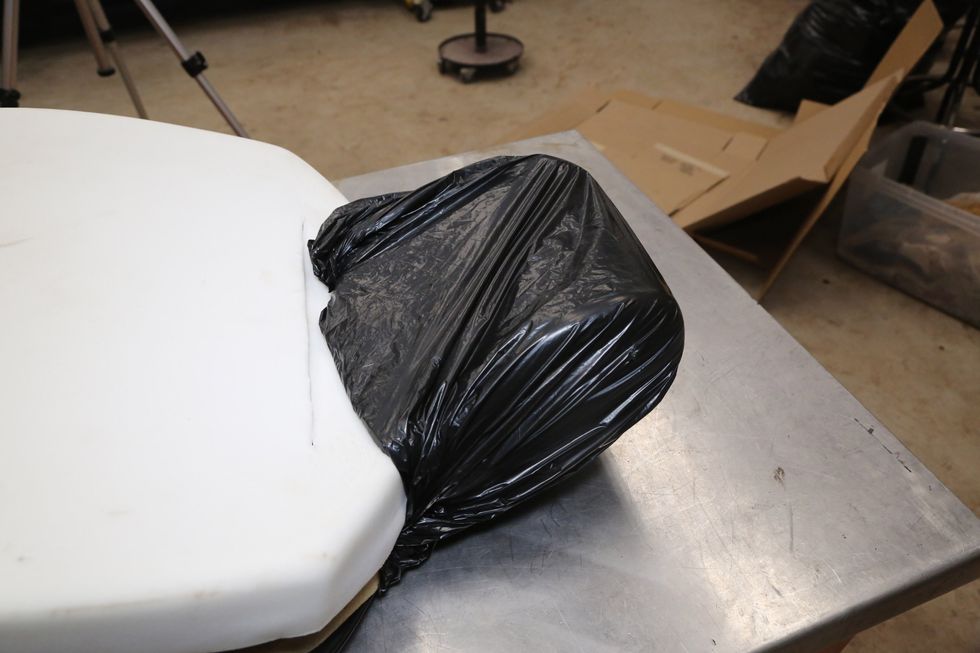
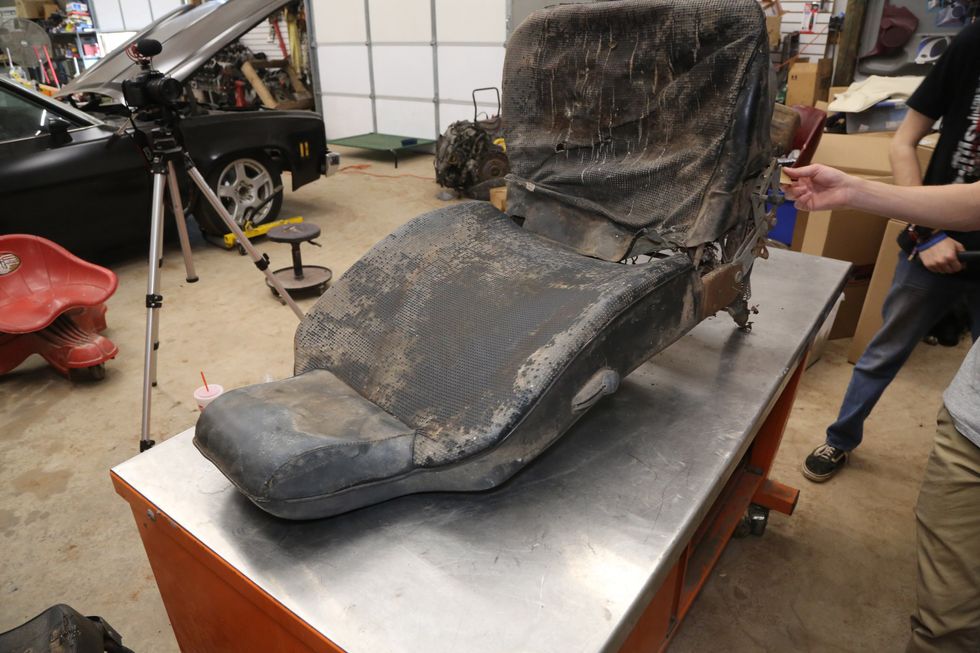 With the seats out on the bench, you can really see just how crusty they really are. These desperately need some new clothes. Photo: Jefferson Bryant
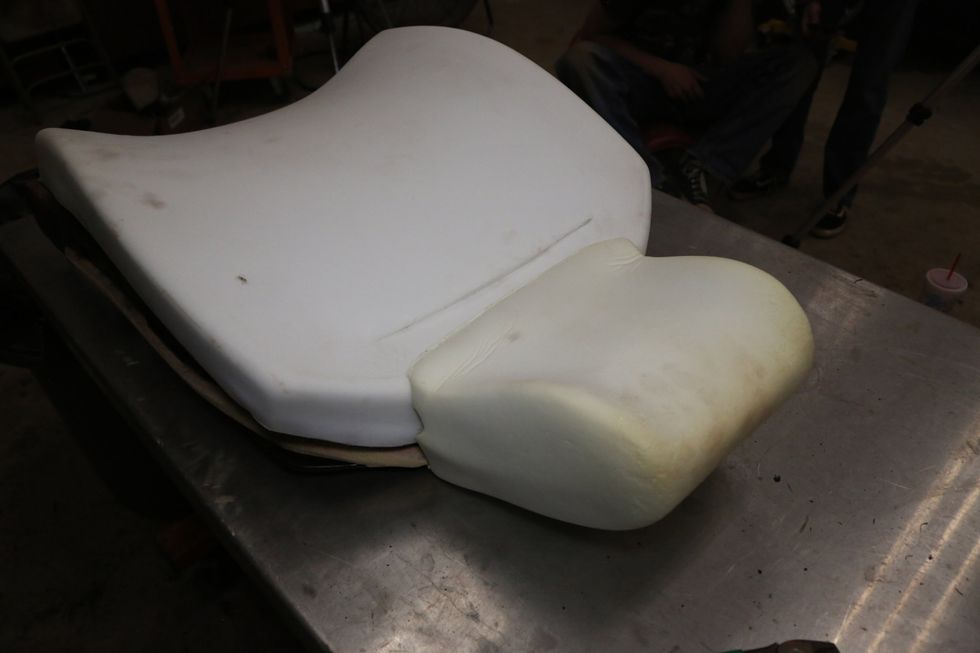
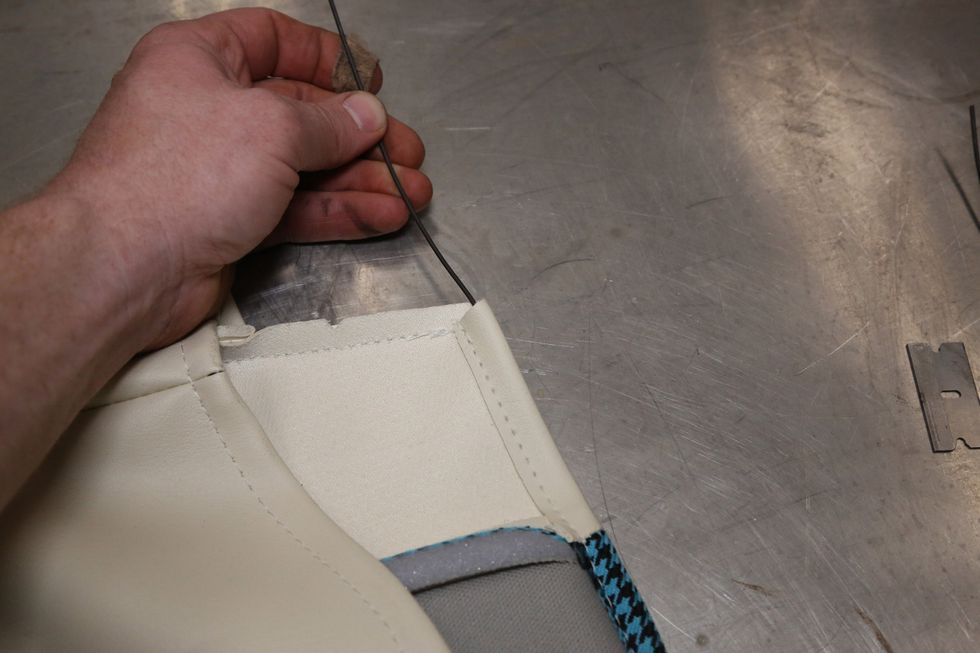
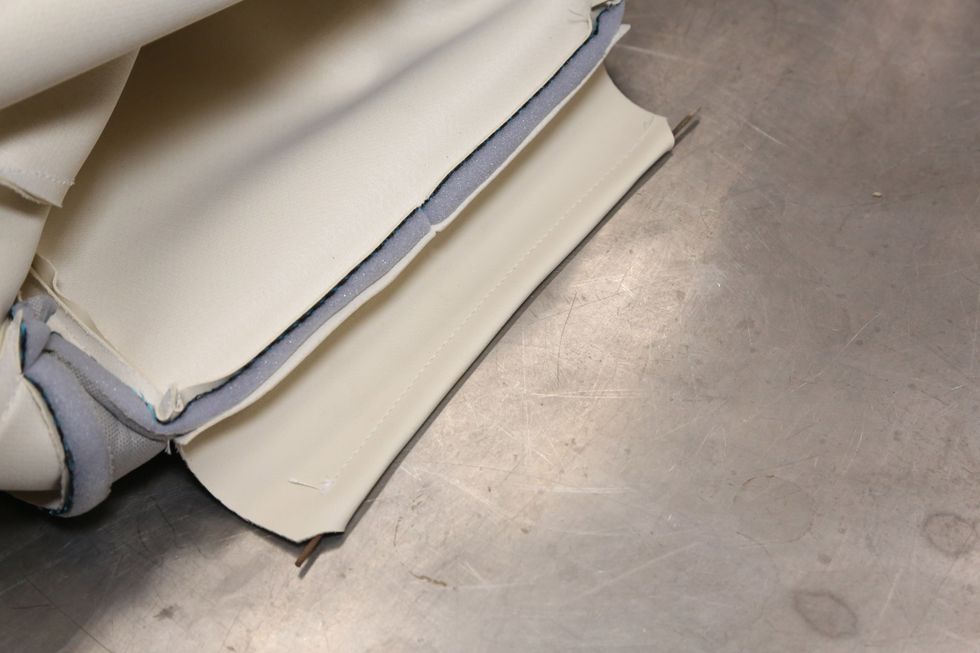
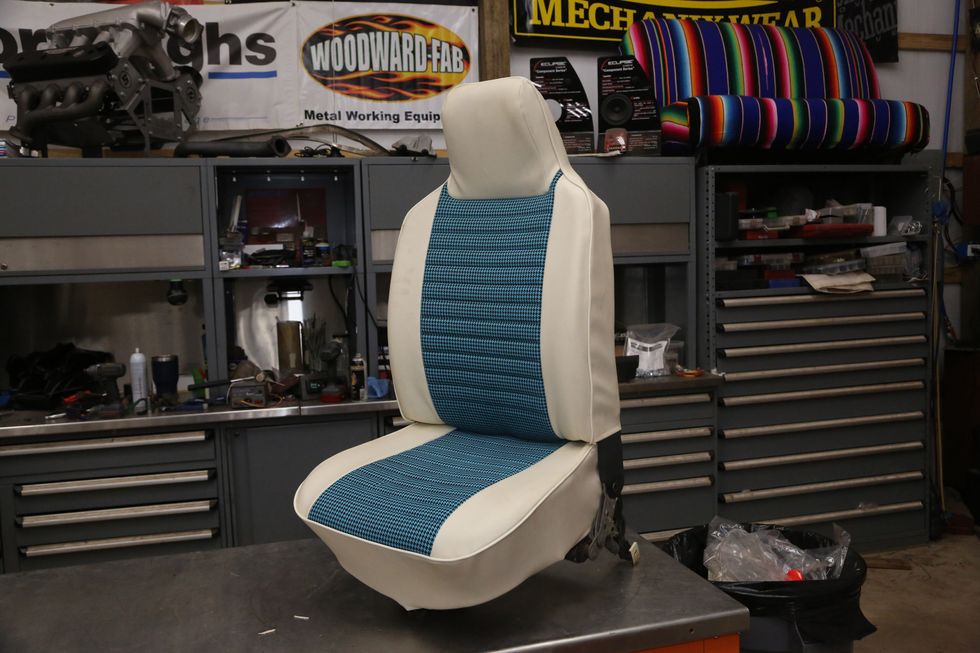
We expected a few stock patterns, and maybe a couple of ready-made custom layouts. Instead, we had a world of colors and patterns to choose from. This really opened the door to fantasy land, and in the end, we settled on a really beautiful turquoise houndstooth center fabric with a cream vinyl outer. This design was carried throughout the interior- front seats, rears, and door panels. This isn’t something TMI did special for us; this is how they operate, and it elevated the interior from stock to striking. Along with the covers, we also ordered a set of new seat foams, which allow you to ditch the stiff uncomfortable horsehair pads.
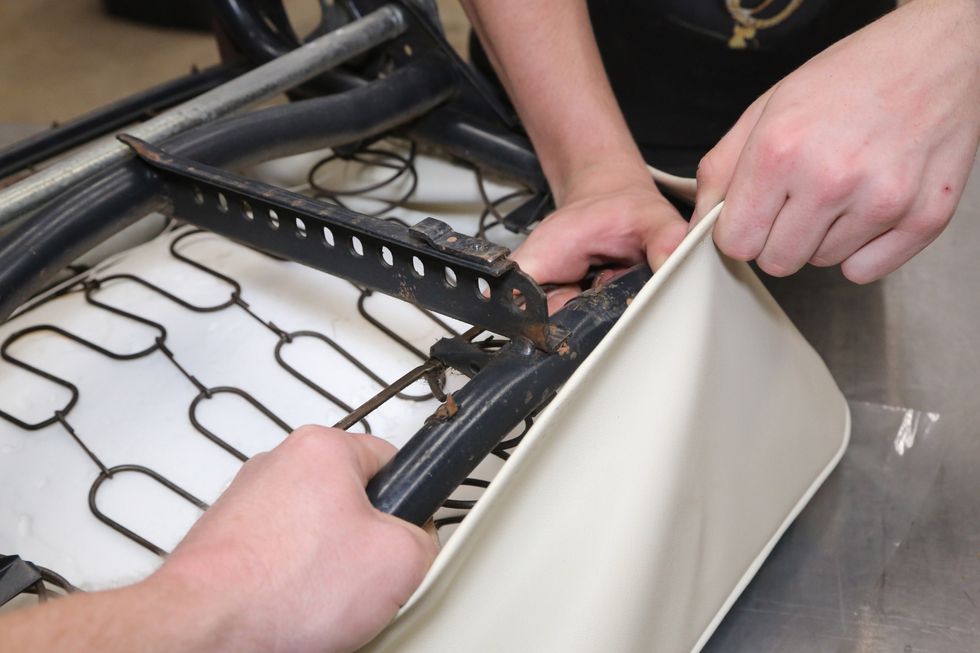
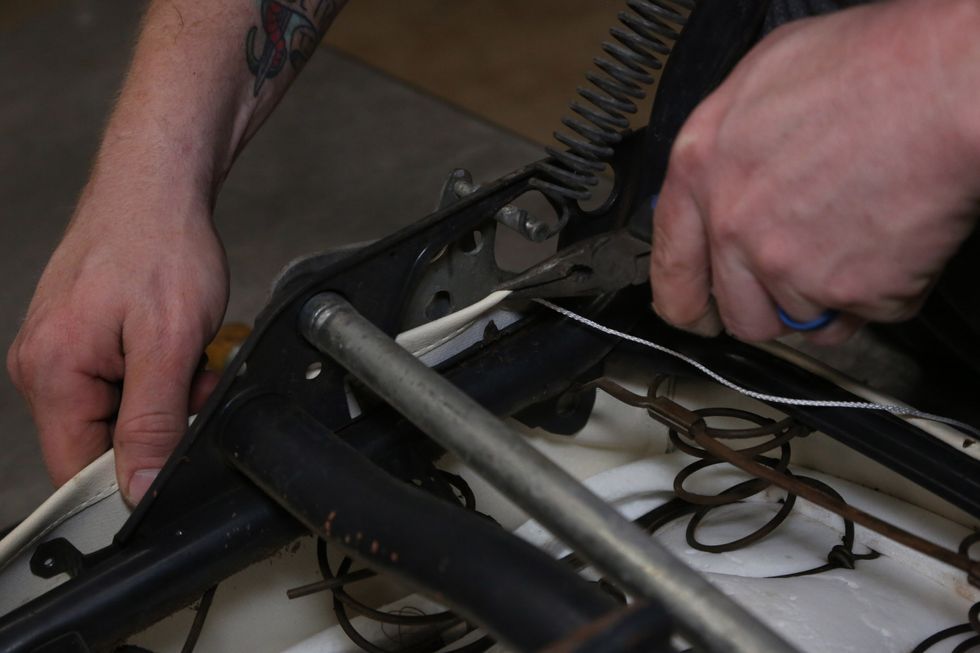
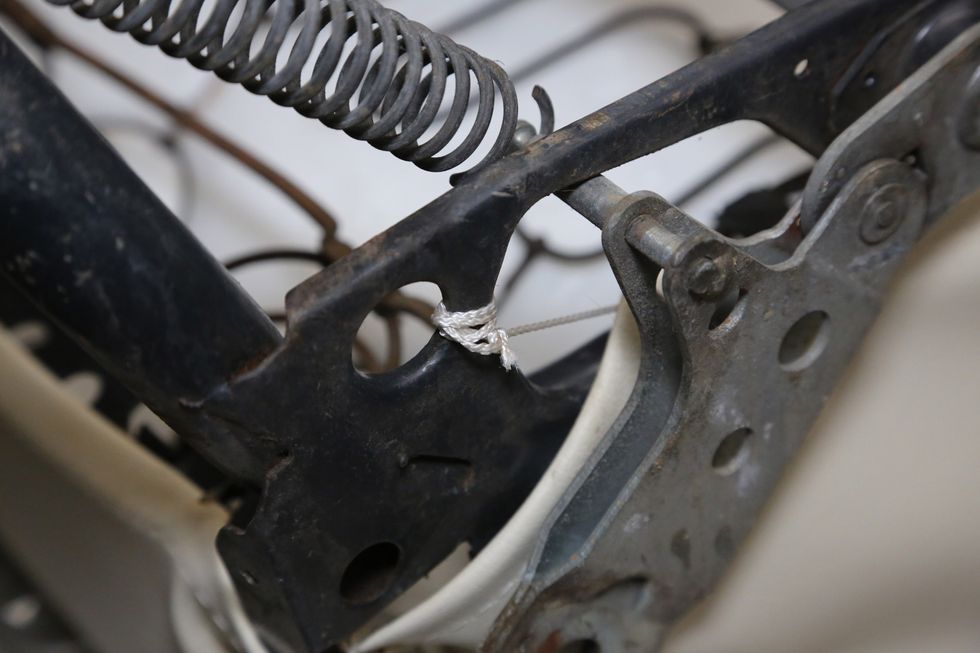
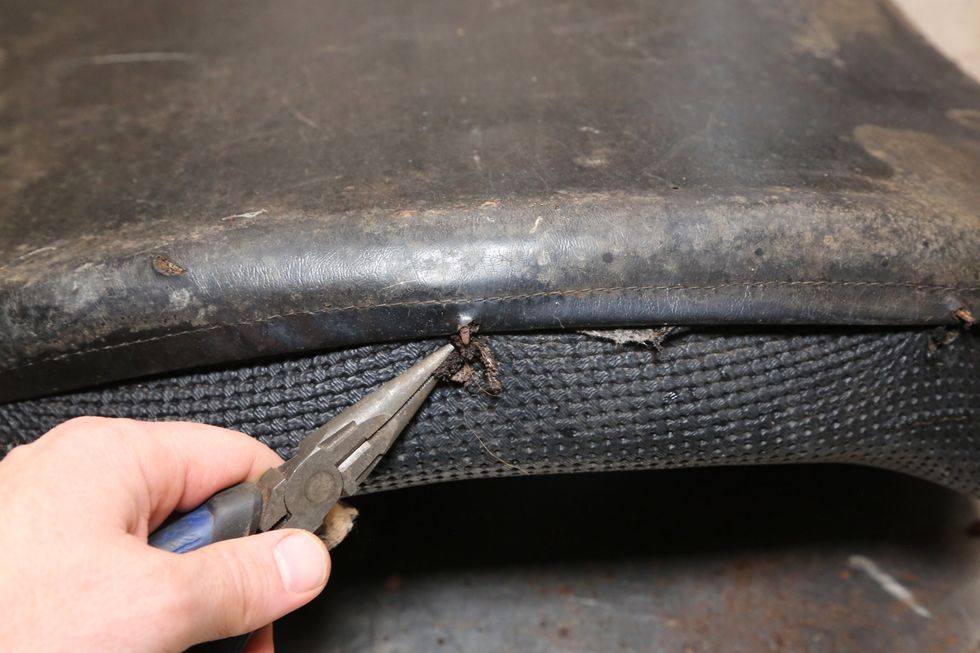
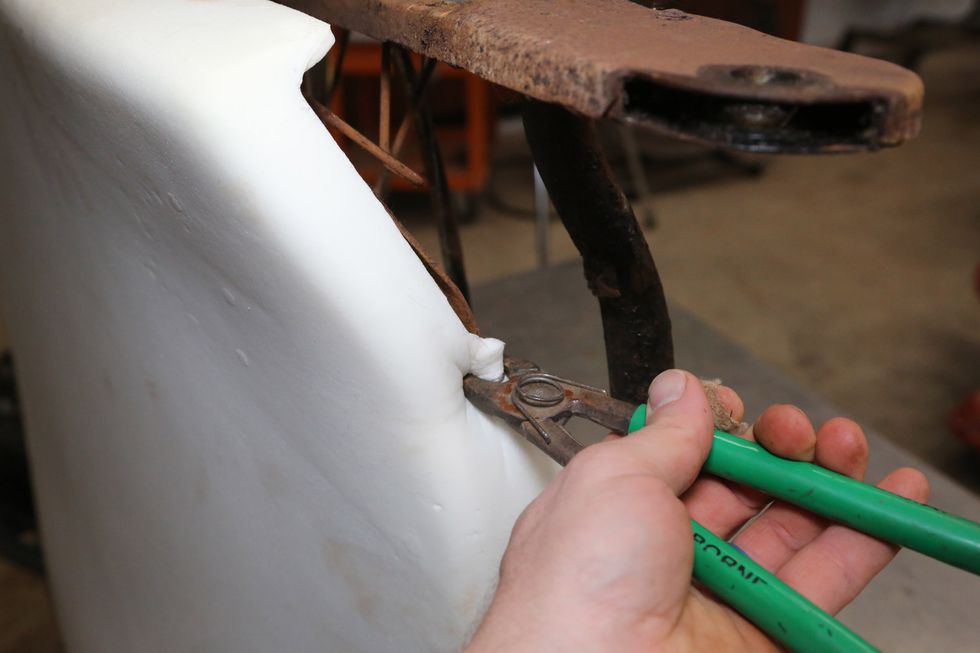
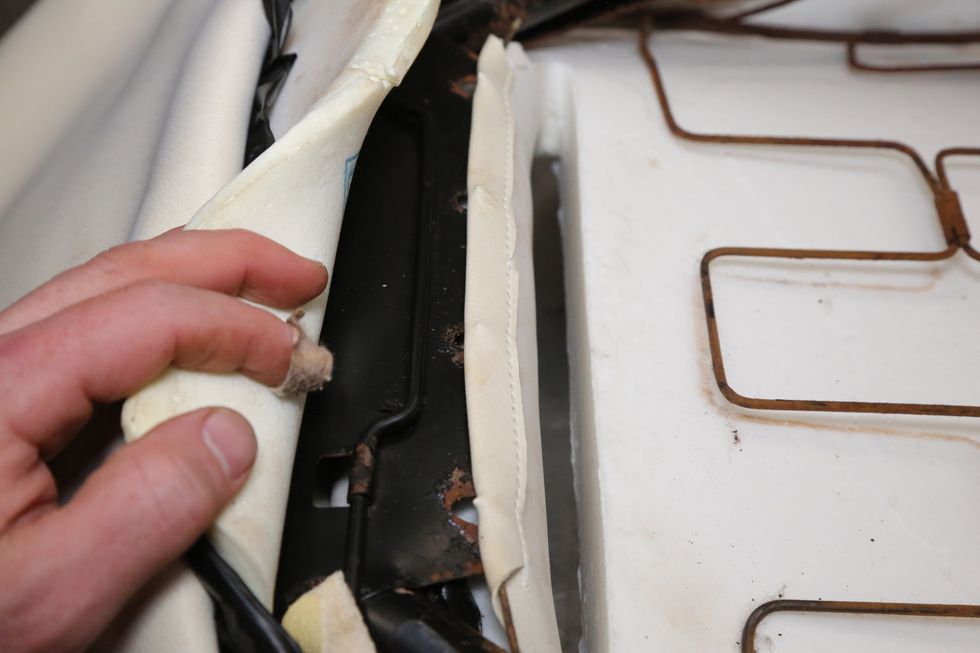
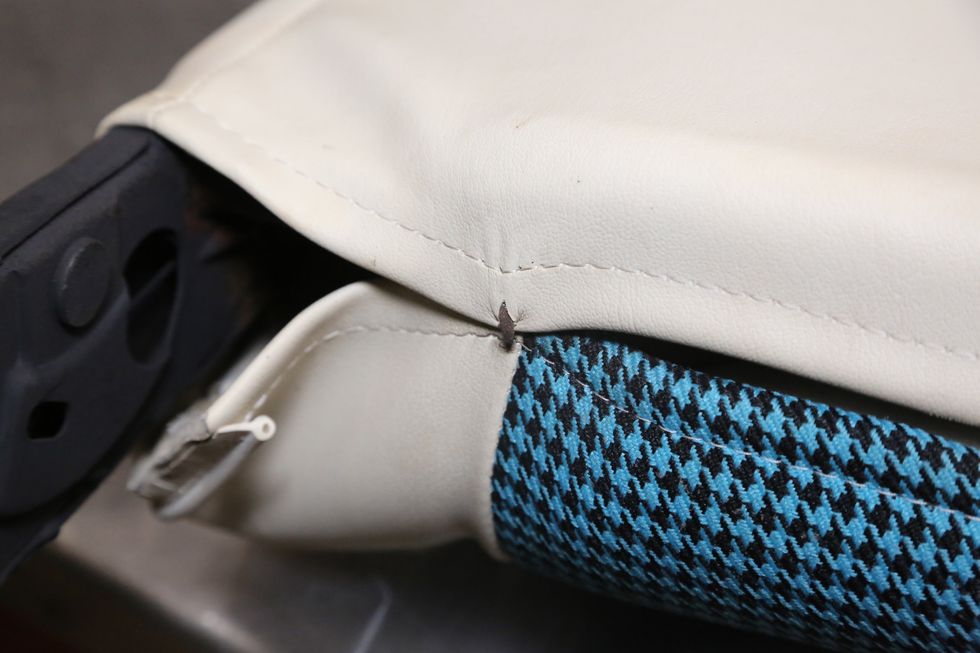
Once we had the covers off, we saw that these seats had been “customized” at some point with some cardboard over the springs to stiffen the seats. The original padding was quite stiff and had no give left. We removed all of it in favor of the new foams from TMI, which add much needed compliance to the cushions. There are a couple unique aspects of the VW seats. Instead of hog rings, the buckets use sharp metal tabs to pierce the upholstery. Because of this, you need some listing wire. The new covers do not come with this, but the original wire should be reusable if it is not badly rusted. If it is too far gone or missing, a little strip of bailing wire is a suitable replacement. The covers also use a drawstring on the bottom cushion to pull it tight. This is tied to either side of the frame.
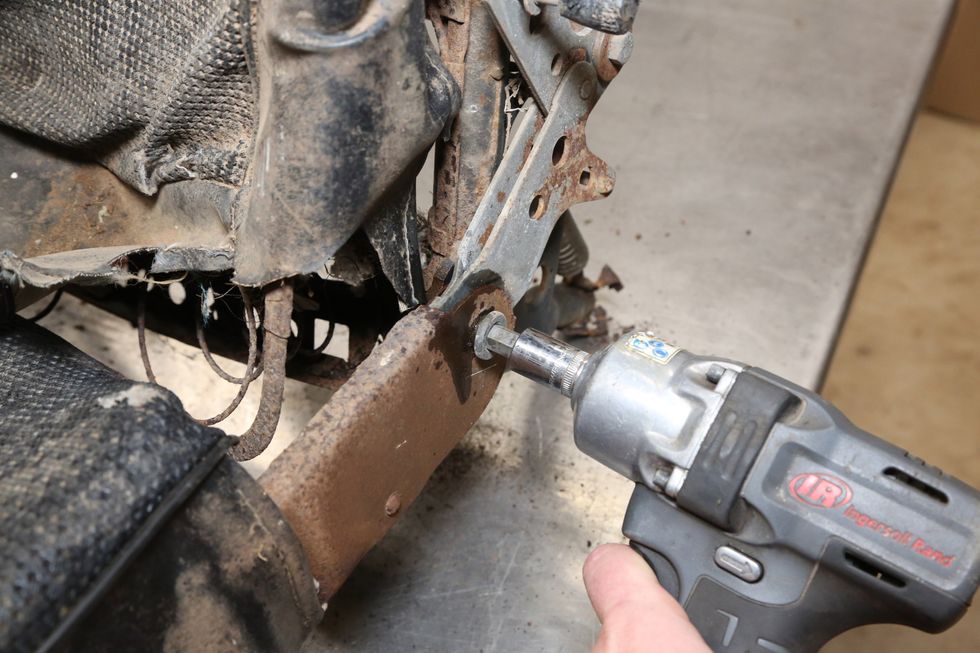 The two halves separate by removing the large shoulder bolts on the sides. The bolt is a 10mm Allen-head. Photo: Jefferson Bryant
We ran into a big problem on our seats when we took them apart, however. This being our first VW Bug, we were not aware that VW seats changed quite a bit and that they are often swapped around. We ordered covers for our '74 Beetle, and when we were ready to install the seat back covers, the new foams didn’t make any sense of how they fit. We called TMI tech support and sent some pics. Turns out we had 1973 seats; in fact, the car was a '73, but titled as a '74. The DMV must have made a typo, as the VIN matches. '73 Volkswagen seat backs are a one-year only, and we had covers for 1974-'76 seats. Luckily, we were able to find a set of '74 seat backs, which will swap over to the '73 lower frame, so crisis averted. Let this be a warning to you: before you order seat covers for a Beetle, check to make sure you have the right year. It was not something we thought to do, and was a clerical error on the vehicle’s title - even the guy we bought the car from told us it was a '74, so understand that you don’t know what you don’t know sometimes.
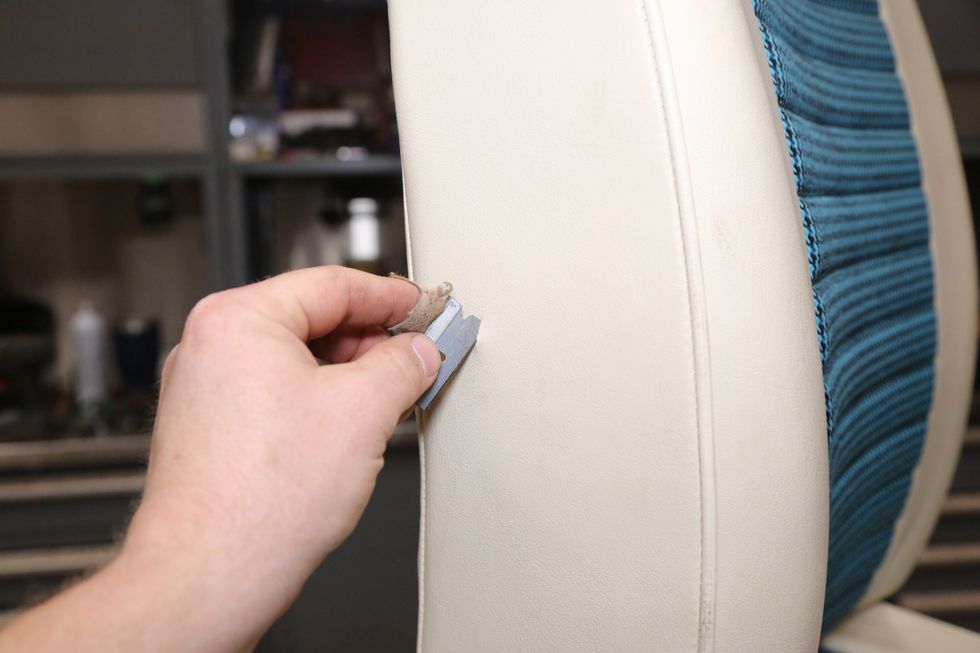
Installing the covers was a simple process. Each one takes about 20-30 minutes per section (back and lower), and we had both seats done in about 2-3 hours, all told. The finished seats shown here are without the plastic trim that they should have. One side on each of our seats had broken plastic trim, which we need to replace. That will be done later when we replace the dash and all the interior plastic trim parts at once. The new seats are much more comfortable and they look incredible inside the VW. They look great, and our backs and backsides appreciate the change.
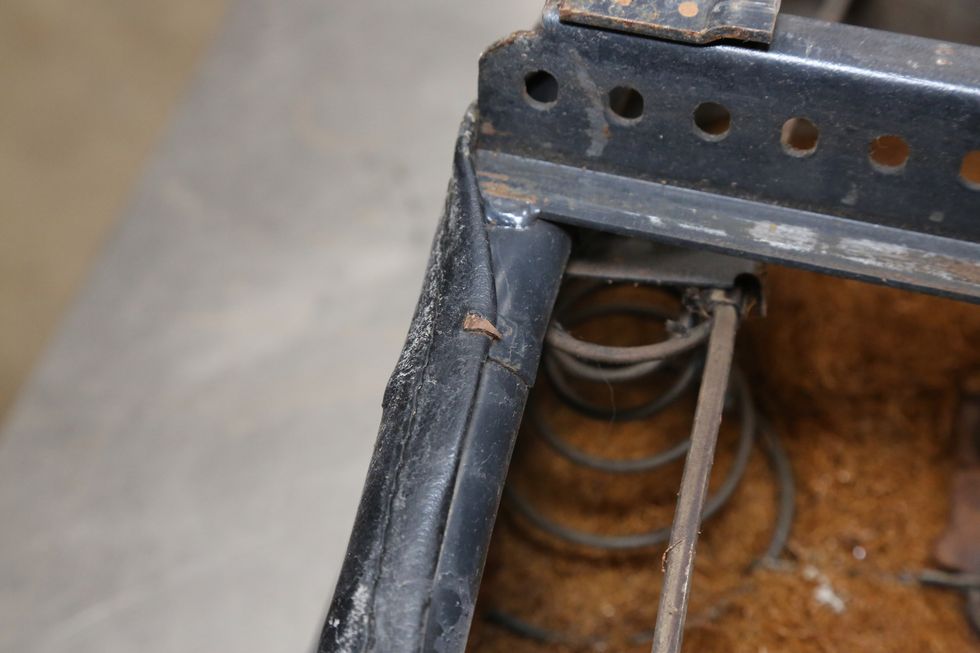
Photo: Jefferson Bryant


TMI Products •(888) 460-0640 • tmiproducts.com

But now there’s another alternative. Summit Racing recognized this shortfall and along with the BluePrint engine people stepped up for brand new tooling for a series of iron blocks. Just as importantly, the quality of the casting and machine work is impressive. The partners sought out a reputable casting facility in Germany to do the heavy lifting while the CNC machine work is finished here in the USA. So yes, the blocks originate from overseas, but these castings cross the Atlantic, not the Pacific.
 Among the many welcome upgrades to the new SPC Summit block is the addition of priority lubrication to the mains. This is evidenced by the third oil galley that plumbs oil directly from the filter to the main journals instead of first oiling the lifters as with production small-block Chevy engines. This ensures plenty of oil to the engine’s rotating assembly. Photo: Jeff Smith
Enough generalities. For small-block connoisseurs, the allure is in the details. Summit labels this new block the Street, Performance, Competition (SPC). The blocks are offered with a choice of two bore diameters of 4.00- or 4.120-inches. Plus you have the option of either a traditional two-piece rear main seal or the later one-piece version. Finally, the larger bore blocks are available in either the 350 main journal diameter or the larger 400ci version. Summit is considering also offering finished honed blocks as another option.
But this new SPC piece is not merely a duplicate of an earlier factory block. Right off, all blocks are cast using a stronger Class 35 iron alloy and employ nodular iron main caps. Like their production cousins, the center three main caps are attached with four bolts with 7/16-inch inners and smaller 3/8-inch versions for the splayed outer bolts that Summit’s Brian Nutter tells us the outer bolts are there mainly to limit lateral cap movement but also add additional bulkhead strength.
A critical point is that this block has been upgraded to priority main oiling. Production small-blocks lube the mains and rods only after first feeding the lifters. The addition of a dedicated main oil galley pushes oil directly to the mains to ensure the lower end is properly lubricated.
The deck height on these new blocks is shorter at 9.00 inches mainly because most aftermarket pistons are designed around this deck height. To improve head gasket sealing, the deck thickness is an impressive 0.600-inch and all the cylinder head bolt holes are blind. This means the head bolt holes do not intrude into the water jacket.
 The main caps for this new SPC block are of a higher strength nodular iron material. The inner main cap bolts are 7/16-inch while the outers are 3/8-inch with a lower torque value. Both are 180,000 psi fasteners that re equal to an ARP 8740 bolt. We expect that companies like ARP will soon have both main cap bolt and stud kits available. Also note the cutouts in the base of the main caps to help remove the caps from the block.Photo: Jeff Smith
Speaking of coolant flow through the block, the block designers invested significant effort into improving coolant flow. The cylinder walls are siamesed which means the cylinder walls connect at the midpoint while increasing the volume around the tops of the cylinders by pulling the lifter valley walls inboard. This can be easily spotted by the pushrod clearance radius cuts made into the lifter valley walls. There are also pipe threads cut into the all main lubrication galleys to accommodate ¼-inch NPT plugs.
The cylinder walls are also strengthened. The blocks can accommodate up to a 4.185-inch bore diameter and still maintain a minimum wall thickness of 0.220-inch especially around the thrust surfaces. The as-delivered bore size for the 4.00-inch bore versions is actually 3.995-inch while the larger bores are at 4.120-inch to allow for honing to the standard diameters for piston clearance.
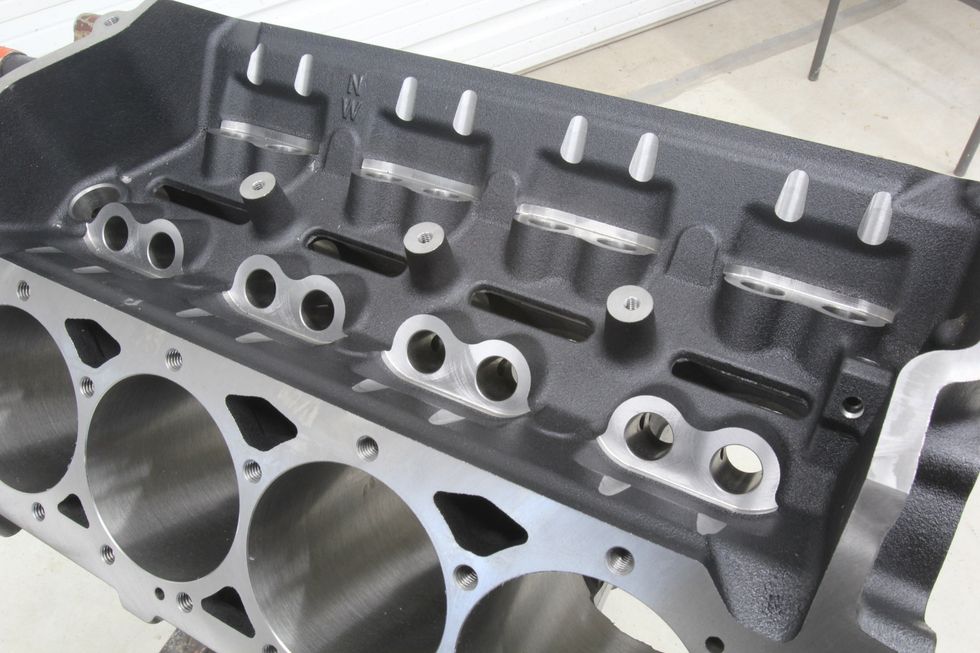 Note the machined reliefs in the lifter valley walls for pushrod clearance. This is because both inner walls have been moved inboard to create a larger water jacket area around the cylinders. This new block also accommodates a factory hydraulic roller cam configuration with the machined stands for the lifter spider as well as taller lifter bores for factory roller lifters. Photo: Jeff Smith
Another welcome addition is that all the blocks are fitted with provisions for a factory style hydraulic roller camshaft. Three pedestals are cast and threaded to attach the factory spider and the lifter bores are taller for use with factory hydraulic roller lifters. The camshaft height is also in the stock location so it will accept a standard single or double-roller small-bock cam drive.
These taller lifter bores do require a 0.300-inch taller roller lifter when using a mechanical or hydraulic roller, link-bar lifter and Summit notes that using these taller lifters means the heads must be removed to remove the lifters from the bores, much like an LS engine. This means that changing camshafts with taller lifters will demand removing the heads. Of course, this block can also be used with a flat tappet camshaft.
 The Summit SPC block is also machined for a factory cam limiter plate (shown here - purchased separately) that will require the use of a stepped nose camshaft just like 1986 and later factory roller cam blocks. Photo: Jeff Smith
Summit’s Mike Schmidt tells us that these blocks are all machined on high-speed Makino CNC machines which not only leaves a very smooth, final surface but with computer numerical control the orientation of lifter bores to the cam centerline, among other positions, should be exceptionally accurate. Accurate valve timing would also contribute to making more power. It’s a subtle point, but this is the same approach used to build competition engines where accuracy is critical.
Another nice addition is this Summit block is machined for the factory hydraulic roller cam retention plate. If this plate is used this also demands a stepped nose style camshaft which eliminates the hassle of setting camshaft endplay clearance.
 This particular block was built with a two-piece rear main seal configuration but Summit does offer versions that can use the more modern one-piece rear main seal. The one-piece adapter is purchase separately. Note the machining that leaves all the finished surfaces extremely smooth. Photo: Jeff Smith
Moving to the bottom end, the block has been factory cast with reliefs in the area just above the oil pan rail to produce clearance (depending upon connecting rod design) for up to a 3.75-inch stroke. This area is cast solid so if additional clearance is needed, there are no coolant passages in this pan rail area to worry about.
To accommodate a wide variety of production block applications, the SPC block includes the stock mechanical fuel pump mount using a stock length pushrod along with the stock spin-on oil filter location. The stock three-bolt engine mounts are logically present along with three freeze plug provisions per side with two more front and rear. Keep in mind that this block will require two more brass freeze plugs compared to a standard small-block kit. In addition, you will need nine ¼-inch NPT Allen plug for all the oil galley and water jacket plugs along with a pair of 1/8-inch NPT plugs.
 The twin 1/8-inch NPT tapped holes in this boss are there to access drilling oil passages for the front of the block to feed the lifter passages from both the front and the rear of the block. These holes must be blocked with pipe plugs during assembly.Photo: Jeff Smith
All these Summit blocks are machined for the later model, passenger side dip stick location which requires the same configuration oil pan. The engine is, of course, a wet sump design and is machined to accept the typical standard or high volume small-block or big-block Chevy oil pump.
The price of these blocks at the time of this writing is just north of $2,000, which might seem high to some. But considering that a machine shop will charge between $800 or more to clean, Magnaflux, deck the block to be parallel with the crank centerline, bore, torque plate hone, and align hone the mains. Add this to an initial used block cost of around $200 and you are halfway to the price of this brand new casting. Yes, you will still have to torque plate hone this new block but the quality of the machine work on the rest of block certainly adds significant value.
 The reliefs for up to a 3.75-inch stroke crank are cast into this new block. Additionally, the inboard pan rails are solid with no water jackets hiding beneath so if additional clearance is needed, as for a 4.00-inch stroke crank, for example, there is no danger of breaking into a water jacket.Photo: Jeff Smith
This new Summit SPC block may not be the first choice for the average basic engine rebuilder. But it does fill a need for the performance builder with aspirations of big horsepower numbers. Summit says this block is more than capable of reliably delivering 700+ horsepower and there are rumors of a 1,500-hp blown application that is putting the test to this new block.
There are other blocks out there that offer some or most of these same features but they do so with a much higher price. With all the excellent features, it is certainly worthy of consideration especially if your next project calls for a stroker crank and a roller cam. There are ways to maintain the budget and still built a quality engine. That notion just moved a little closer to reality with the Summit SPC block.
 The Summit SPC block has a shorter deck height of 9.00 inches as opposed to the OE spec of 9.025-inches. This is because most aftermarket piston compression heights use the 9.00-inch deck height figure. All the cylinder head bolt holes are blind which means no contact with coolant passages.Photo: Jeff Smith
 This new SPC block uses the 1981 and later passenger car side dip stick location which requires the use of the same era oil pan. The final choice of oil pan is determined by several factors including whether your specific block employs a one or two-piece rear main seal.Photo: Jeff Smith
 he areas just above the oil filter housing (the block is shown upside down) offers a separate drilled and tapped oil pressure outlet that could be used to feed a turbocharger or other external oil feed. The other two bolts holes are for mechanical clutch linkage. Photo: Jeff Smith
 This new Summit block is also fitted with a third freeze plug on each side of the block where production 350 small-blocks used only two freeze plugs. The BPE cast into the block stands for Blueprint Engines, which is partnered with Summit to produce blocks for complete engines. Summit is the only outlet for bare blocks. Photo: Jeff Smith
Summit tells us that by mid-summer, the company will be adding a big-block Chevrolet version of the SPC block, in the MK IV configuration. These blocks will be offered in 4.500 and 4.600-inch bore sizes with either two- or one-piece rear main seals. In addition, there will be a choice of a 9.800 or 10.200-inch deck heights. Like the small-block versions, these blocks will be cast in Germany and machined in the USA. A 4.600-inch bore with a 4.250-inch stroke on a standard-deck Rat motor would produce a 565ci Rat motor. At 1.25 horsepower per cubic inch, a normally aspirated, single four-barrel combination would produce just north of 700 horsepower.
All specs are in inches, unless otherwise noted.
Block material: Class 35 Iron Alloy
Block Weight: 181-194 lbs., depending upon bore size
Bore size: 3.996 or 4.120
Bore Spacing: 4.400
Maximum bore size: 4.185
Deck Height: 9.00” (+0.005 to -0.0003)
Deck thickness: 0.600
Cylinder head bolt holes: Blind
Main journal size: 350 style - 2.4485 / 400 style - 2.649
Main cap bolts: 7/16” Inner, 3/8” outer
Main cap material: Nodular iron
Clearance for 3.750-inch stroke: Yes
Cam location: Stock position
Min. cylinder wall thickness at 4.185”: 0.220”
Lifter bore size: 8.437 +/- 0.0003
Cam bearing bore size: 2.000 +/- 0.001
Lubrication system: Priority main
Machined for OEM hyd. roller lifters: Yes
Oil pan rails: Solid (no water jackets)
Starter motor bolt holes: Drilled and tapped for both straight and offset

When you invest this much into a very nice cylinder block, you want everyone to know where it comes from.
Photo: Jeff Smith
All parts in this list are sourced from Summit Racing.


