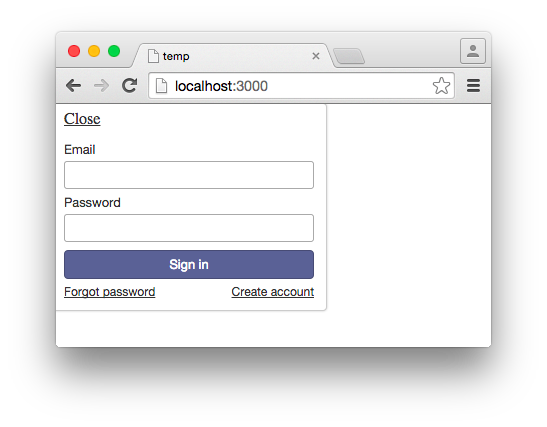
Right out of the box, one of the simplest things you can do with the Meteor JavaScript framework is to create a user accounts system. Just install a pair of packages — accounts-password and accounts-ui — and you’ll end up with the following, fully-functional interface:
 But while this simplicity is convenient, relying on this boilerplate interface doesn’t exactly allow for a lot of flexibility. So what if we want to create a custom interface for our users to register and log into our website?
Luckily, it’s not too difficult at all. In this article I’ll show you how to create a custom login and registration form with Meteor. However, this article assumes that you know how to set up a project using this framework by your own.
To play with the code developed in this article, take a look at the GitHub repository I set up.
But while this simplicity is convenient, relying on this boilerplate interface doesn’t exactly allow for a lot of flexibility. So what if we want to create a custom interface for our users to register and log into our website?
Luckily, it’s not too difficult at all. In this article I’ll show you how to create a custom login and registration form with Meteor. However, this article assumes that you know how to set up a project using this framework by your own.
To play with the code developed in this article, take a look at the GitHub repository I set up.
Basic Setup
Inside a new Meteor project, add theaccounts-password package by executing the command:
meteor add accounts-passwordMeteor.users collection will be created to store our user’s data and we won’t have to write custom logic for user-related functions.
So, although creating a custom interface means we’ll lose the convenience of the accounts-ui package, that doesn’t mean we have to lose the convenience of the back-end “magic” that Meteor can provide.
Developing the Interface
For a complete login and registration system, there are a lot of features for which we have to create interfaces for, including:- registration
- login
- forgot password
- “confirm your email” page
- “email confirmed” page
<template name="register">
    <form>
        <input type="email" name="registerEmail">
        <input type="password" name="registerPassword">
        <input type="submit" value="Register">
    </form>
</template><template name="login">
<form>
<input type="email" name="loginEmail">
<input type="password" name="loginPassword">
<input type="submit" value="Login">
</form>
</template>name attribute for the input fields and the template. (We’ll reference those values soon, so make sure they’re unique.)
We only want these templates to be shown for a not-yet-logged user. Therefore we can refer to a currentUser object between the opening and closing body tags:
<head>
    <title>Custom Registration Tutorial</title>
</head>
<body>
    {{#if currentUser}}
        <p>You're logged in.</p>
    {{else}}
        {{> register}}
        {{> login}}
    {{/if}}
</body>Creating the Events
At the moment, our forms are static. To make them do something, we need them to react to thesubmit event. Let’s demonstrate this by focusing on the “register” template.
Inside the project’s JavaScript file, write the following:
if (Meteor.isClient) {
    Template.register.events({
        'submit form': function(event) {
            event.preventDefault();
            console.log("Form submitted.");
        }
    });
}- Responds to the
submitevent - Doesn’t have any default behavior
- Outputs a confirmation message on the console
isClient conditional since we don’t want this code running on the server (as it’s only meant for the interface).
Inside the event, we’ll want to grab the values of the email and password fields, and store them in a pair of variables. So let’s modify the previous code:
Template.register.events({
    'submit form': function(event){
        event.preventDefault();
        var emailVar = event.target.registerEmail.value;
        var passwordVar = event.target.registerPassword.value;
        console.log("Form submitted.");
    }
});Template.login.events({
'submit form': function(event) {
event.preventDefault();
var emailVar = event.target.loginEmail.value;
var passwordVar = event.target.loginPassword.value;
console.log("Form submitted.");
}
});Hooking Things Together
After adding theaccounts-password package to the project, a number of methods became available to us:
Accounts.createUser()Accounts.changePassword()Accounts.forgotPassword()Accounts.resetPassword()Accounts.setPassword()Accounts.verifyEmail()
createUser method but, based on the method names, it’s not hard to figure out the purpose of the other ones.
At the bottom of the submit event for the “register” template, write:
Accounts.createUser({
    // options go here
});Accounts.createUser({
email: emailVar,
password: passwordVar
});Template.register.events({
'submit form': function(event) {
event.preventDefault();
var emailVar = event.target.registerEmail.value;
var passwordVar = event.target.registerPassword.value;
Accounts.createUser({
    email: emailVar,
    password: passwordVar
});
}
});insert function we have the advantage that passwords are automatically encrypted. Moreover, users are logged in after signing up and we don’t have to write much code.
There is also a loginWithPassword() method that we can use within the “login” event:
Meteor.loginWithPassword();Meteor.loginWithPassword(emailVar, passwordVar);Template.login.events({
'submit form': function(event){
event.preventDefault();
var emailVar = event.target.loginEmail.value;
var passwordVar = event.target.loginPassword.value;
Meteor.loginWithPassword(emailVar, passwordVar);
}
});Logging Out
Users can now register and log in but, to allow them to log out, let’s first make a new “dashboard” template that will be shown when logged in:<template name="dashboard">
<p>You're logged in.</p>
<p><a href="#" class="logout">Logout</a></p>
</template>if statement we wrote earlier in this article:
<body>
    {{#if currentUser}}
        {{> dashboard}}
    {{else}}
        {{> register}}
        {{> login}}
    {{/if}}
</body>Template.dashboard.events({
'click .logout': function(event){
event.preventDefault();
}
});logout method as such:
Template.dashboard.events({
    'click .logout': function(event){
        event.preventDefault();
        Meteor.logout();
    }
});Conclusions
We’ve made a good amount of progress with a tiny amount of code, but if we want to create a complete interface for the accounts system, there’s still a lot left to do. Here’s what I’d suggest:- Enable the verification of new user’s emails.
- Validate the creation (and logging in) of users.
- Add visual validation to the “register” and “login” forms.
- Do something when a login attempt fails.
- Allow users to change their password.
Frequently Asked Questions (FAQs) about Creating Custom Login/Registration Form with Meteor
How can I add additional fields to the registration form in Meteor?
Adding additional fields to the registration form in Meteor is quite straightforward. You can extend the user profile by adding more fields in the Accounts.createUser method. For instance, if you want to add a field for the user’s full name, you can do it like this:Accounts.createUser({
username: 'testuser',
password: 'password',
profile: {
fullName: 'Test User'
}});
In this example, ‘fullName’ is an additional field added to the user profile. You can access this field later using Meteor.user().profile.fullName.
How can I customize the appearance of the login/registration form in Meteor?
Meteor doesn’t provide a built-in way to customize the appearance of the login/registration form. However, you can use CSS to style the form according to your needs. You can assign classes to the form elements and then use these classes in your CSS file to apply styles. Alternatively, you can use a UI library like Bootstrap or Material-UI to style your form.
How can I implement email verification in Meteor?
Meteor provides built-in support for email verification. You can use the Accounts.sendVerificationEmail method to send a verification email to the user. This method takes the user’s ID as a parameter and sends an email with a link the user can click to verify their email address. You can call this method after creating a new user like this:Accounts.createUser({
email: 'test@example.com',
password: 'password'}, function(err, userId) {
if (err) {
// handle error
} else {
Accounts.sendVerificationEmail(userId);
}});
How can I handle errors during user registration in Meteor?
When creating a new user with Accounts.createUser, you can provide a callback function that will be called with an error object if an error occurs. This error object contains information about what went wrong. You can use this information to display an appropriate error message to the user. Here’s an example:Accounts.createUser({
username: 'testuser',
password: 'password'}, function(err) {
if (err) {
console.log('Error during registration:', err);
}});
How can I implement password reset functionality in Meteor?
Meteor provides built-in support for password reset functionality. You can use the Accounts.forgotPassword and Accounts.resetPassword methods to implement this. The Accounts.forgotPassword method sends an email to the user with a link they can click to reset their password. The Accounts.resetPassword method is used to actually change the user’s password. It takes the token from the reset link and the new password as parameters.
How can I add social login to my Meteor application?
Meteor supports social login with various providers like Facebook, Google, and Twitter through its accounts packages. To add social login to your application, you need to add the appropriate package (for example, accounts-facebook for Facebook login) and configure it with your app’s credentials from the social provider.
How can I restrict access to certain routes based on user authentication in Meteor?
You can use Meteor’s built-in accounts packages along with a routing package like FlowRouter or Iron Router to restrict access to certain routes based on user authentication. You can check if a user is logged in using Meteor.userId() or Meteor.user() and then redirect them to the login page if they’re not.
How can I store additional user data in Meteor?
In Meteor, you can store additional user data in the user document in the Meteor.users collection. You can add additional fields to this document when creating a new user with Accounts.createUser, or you can update an existing user document with additional data using Meteor.users.update.
How can I implement role-based access control in Meteor?
Meteor doesn’t provide built-in support for role-based access control, but you can use a package like alanning:roles to add this functionality to your application. This package allows you to assign roles to users and then check these roles when deciding whether a user is allowed to perform a certain action.
How can I log out a user in Meteor?
You can log out a user in Meteor using the Meteor.logout method. This method logs out the current user on the client and invalidates the login token on the server. It also takes a callback function that will be called with no arguments when the logout process is complete.
 David Turnbull
David Turnbull is the author of the Meteor Tips blog, a regular source of tips, tricks, and tutorials for the Meteor JavaScript framework. He's currently hard at work on a screencast series for beginning developers to get started with Meteor.